manuals.online logo
Brands
  1. Home
  2. •
  3. Brands
  4. •
  5. AGFA
  6. •
  7. Medical Equipment
  8. •
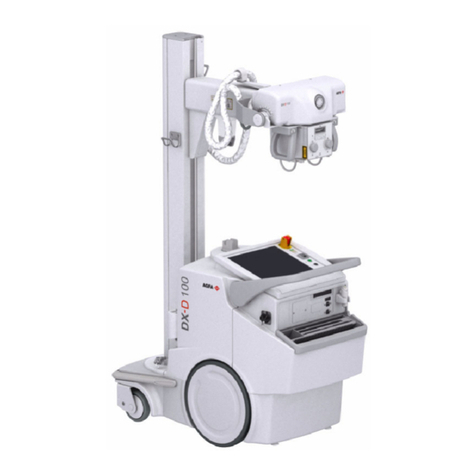
  9. AGFA DR 100e User manual

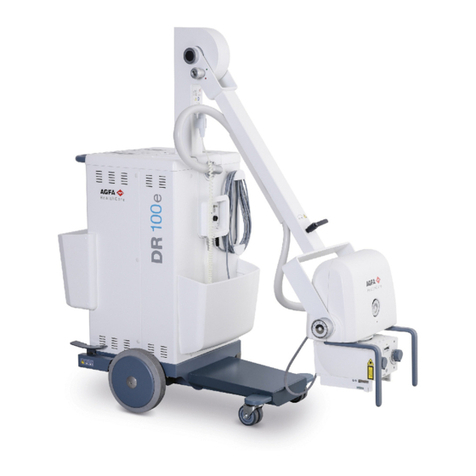
AGFA DR 100e User manual

Getting started with DR 100e - Performing an exposure
0363A EN 20161128
1 Moving the unit
CAUTION:
Do not use the unit on floors with an
Inclination higher than 5 degrees. Do not
drive the unit on ramps with an inclination
higher than 10 degrees.
CAUTION:
The equipment must be moved only after
bring it to transport position
Make sure the device is
switched off.
Power off button
Move the rotating
column in central position.
Lower the arm (A) to
locked position.
Put the X-ray tube (A) in
vertical position on both
rotation axes (B and C).
Turn the X-ray tube rotation handle (F) clockwise. The
device is now in transport position.
Release the brake.
On a system with rotating column, release the brake by
pulling the lever on the handlebar.
On a system with fixed column, release the brake pedal.
Move the unit holding the handlebar.
To overcome obstacles or
small drops, press with the
foot on the pedal for the
tilting and, at the same time,
pull the handlebar.
2 Starting the device
Unroll the mains cable from the cable reel and extend
it completely.
Plug the cable into a mains power socket.
Press the power button.
Power on button
3 Positioning
WARNING:
Monitor the patient position (hands, feet,
fingers, etc.) with special care to avoid injury
to the patient caused by unit movements.
Patient hands must be kept away from mobile
components of the unit. Intravenous tubing,
catheters and other patient connected lines
should be routed away from moving
equipment.
Pull and rotate the knob
(A) with the arrow towards
the green dot to unlock the
arm.
Lift the arm.
Position the X-ray tube relative to the region of
interest by moving the device or rotating the column.
Point the X-ray tube towards the region of interest.
The X-ray tube can be
tilted in all directions.
The collimator can be
rotated on its vertical axis.
Getting started with DR 100e - Performing an exposure
0363A EN 20161128
4 Preparing the exposure
Set the exposure parameters for an anatomic
program.
For making a free exposure, continue with the next step,
adjusting the exposure parameters.
Press the button to
open the list of
anatomic programs.
To switch to
another anatomic
group, press the F1
button on the console
repeatedly.
To scroll down the
list of anatomic
programs, press the
button to scroll pages.
Select an anatomic
program by pressing
the F2, F3 or F4
buttons, corresponding
to the line on the
display containing the
selected program.
To return to the list
of anatomic programs,
press the F2 button.
To leave the anatomic
program and make a free
exposure, press the reset
button.
Adjust the exposure parameters.
Check the position of the X-ray unit and the patient.
If a filter is used, mount the filter to the collimator.
Switch on the light localizer on the collimator. Adapt
collimation if required.
5 Executing the exposure
Activate the preferred exposure control mode.
Switch between remote control exposure button or wired
exposure button. The indicator lights up when the remote
control is enabled.
WARNING:
Excessive user or operator radiation exposure.
Always keep a distance of at least 2 meters
from the focal spot and X-ray beam, protect
body and do not expose hands, arms or other
parts of the body to the primary beam.
Execute the exposure.
WARNING:
The radiation indicator on the control console
lights up during exposure release.
Using the wired exposure button
Completely extend the cable of the exposure button
and keep as fas as possible from the radiation source.
Press and hold the exposure button down to the first
pressure point.
The X-ray tube is prepared for performing an exposure.
Press the exposure button down fully and keep it
pressed until the exposure has ended.
When the X-ray exposure is finished successfully, three
beeps are heard. The exposure time is displayed in ms.
The device prepares for a next exposure.
Using the remote control exposure button
Ensure that there is no other equipment with remote
control nearby.
Keep as fas as possible from the radiation source. The
remote control operates at a distance of maximum 11 m
from the device at any angle and within sight, through
glass or leaded glass. The remote control doesn't operate
through doors or walls.
Point the remote control towards the remote control
receiver on the device.
Press and release the exposure button on the remote
control.
The X-ray tube is prepared for performing an exposure.
Press the exposure button withing 15 seconds and
keep it pressed until the exposure has ended.
When the X-ray exposure is finished successfully, three
beeps are heard. The exposure time is displayed in ms.
The device prepares for a next exposure.
Return the remote control to its cradle.
6 Stopping the device
Bring the device to transport position.
Press the power off button.
Power off button
Unplug the power supply cable.
Wind the mains cable on the cable reel.
Move the device to a suitable place for parking.
Other manuals for DR 100e

3

Other AGFA Medical Equipment manuals

AGFA DR 600 User manual

AGFA

AGFA DR 600 User manual

AGFA Drystar 5300 User manual

AGFA

AGFA Drystar 5300 User manual

AGFA EASYLIFT User manual

AGFA

AGFA EASYLIFT User manual

AGFA 5523/100 User manual

AGFA

AGFA 5523/100 User manual

AGFA DX-D 400 User manual

AGFA

AGFA DX-D 400 User manual

AGFA DR 100s User manual

AGFA

AGFA DR 100s User manual

AGFA CR MD1.0 GENERAL SET User manual

AGFA

AGFA CR MD1.0 GENERAL SET User manual

AGFA Drystar 4500 Plug & Play User manual

AGFA

AGFA Drystar 4500 Plug & Play User manual

AGFA Auto QC2 User manual

AGFA

AGFA Auto QC2 User manual

AGFA DX-D 40C User manual

AGFA

AGFA DX-D 40C User manual

AGFA CR 85-XTM User manual

AGFA

AGFA CR 85-XTM User manual

AGFA CR 30-X User manual

AGFA

AGFA CR 30-X User manual

AGFA DR 800 User manual

AGFA

AGFA DR 800 User manual

AGFA DX-D 100 User manual

AGFA

AGFA DX-D 100 User manual

AGFA D2RS User manual

AGFA

AGFA D2RS User manual

AGFA DX-D 10C User manual

AGFA

AGFA DX-D 10C User manual

AGFA DX-D 60C User manual

AGFA

AGFA DX-D 60C User manual

AGFA DR 10s User manual

AGFA

AGFA DR 10s User manual

AGFA DX-D 600 User manual

AGFA

AGFA DX-D 600 User manual

AGFA CR 35-X User manual

AGFA

AGFA CR 35-X User manual

AGFA DX-D 45C User manual

AGFA

AGFA DX-D 45C User manual

AGFA DX-D 100 User manual

AGFA

AGFA DX-D 100 User manual

AGFA DX-D 100 User manual

AGFA

AGFA DX-D 100 User manual

AGFA DR 100e User manual

AGFA

AGFA DR 100e User manual

Popular Medical Equipment manuals by other brands

Chattanooga LEGEND Series user manual

Chattanooga

Chattanooga LEGEND Series user manual

Otto Bock 4R44-L Instructions for use

Otto Bock

Otto Bock 4R44-L Instructions for use

Welch Allyn RETeval-DR Directions for use

Welch Allyn

Welch Allyn RETeval-DR Directions for use

Labomed eVO 350 user manual

Labomed

Labomed eVO 350 user manual

Capenergy C 50 user manual

Capenergy

Capenergy C 50 user manual

Siemens MAMMOMAT 1000 Nova Maintenance Instruction

Siemens

Siemens MAMMOMAT 1000 Nova Maintenance Instruction

Integra Luxtec Operation and service manual

Integra

Integra Luxtec Operation and service manual

Joerns Oxford Presence User instruction manual

Joerns

Joerns Oxford Presence User instruction manual

Stryker FIRSTCARE 5012 Maintenance manual

Stryker

Stryker FIRSTCARE 5012 Maintenance manual

Porter NITRONOX user manual

Porter

Porter NITRONOX user manual

Prism Medical FGA-330 Assembly instructions

Prism Medical

Prism Medical FGA-330 Assembly instructions

Mangar AB0003 User instructions

Mangar

Mangar AB0003 User instructions

AKVIGO TABinTIME instruction manual

AKVIGO

AKVIGO TABinTIME instruction manual

Nasco LF03500U instruction manual

Nasco

Nasco LF03500U instruction manual

Ergosana Sana Sedeo 150 HK user guide

Ergosana

Ergosana Sana Sedeo 150 HK user guide

BEMIS HEALTH CARE 333 instructions

BEMIS

BEMIS HEALTH CARE 333 instructions

MIR Spirolab Service guide

MIR

MIR Spirolab Service guide

Orliman VALFEET 1SSD INSTRUCTIONS FOR USE AND PRESERVATION

Orliman

Orliman VALFEET 1SSD INSTRUCTIONS FOR USE AND PRESERVATION

manuals.online logo
manuals.online logoBrands
  • About & Mission
  • Contact us
  • Privacy Policy
  • Terms and Conditions

Copyright 2025 Manuals.Online. All Rights Reserved.