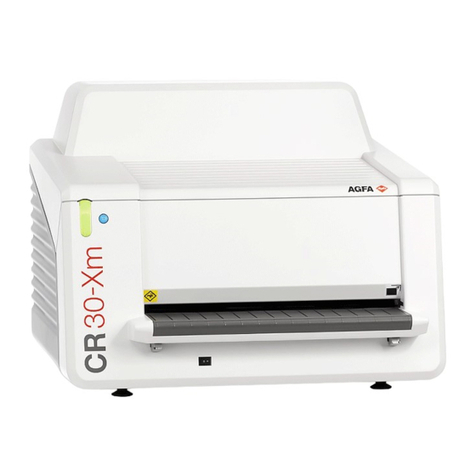
AGFA CR 30-X User manual

CR 30-X System
User Manual
2385A EN 20060630

22385A EN 20060630
CR 30-X SYSTEM
No part of this document may be reproduced, copied, adapted or transmitted in any form or by any means
without the written permission of Agfa-Gevaert N.V.
Agfa-Gevaert N.V. makes no warranties or representation, expressed or implied, with respect to the accuracy,
completeness or usefulness of the information contained in this document and specifically disclaims warran-
ties of suitability for any particular purpose. Agfa-Gevaert N.V. shall under no circumstances be liable for any
damage arising from the use or inability to use any information, apparatus, method or process disclosed in this
document. Agfa-Gevaert N.V. reserves the right to make changes to this document without prior notice.
Agfa-Gevaert N.V., Septestraat 27, B-2640 Mortsel, Belgium.
CR 30-X, NX, Agfa and Agfa-Rhombus are trademarks of Agfa-Gevaert N.V., Belgium or one of its affiliates.
For more information on Agfa products and Agfa HealthCare products, please visit www.agfa.com.
© Agfa-Gevaert N.V. 2006.
0413

3
2385A EN 20060630
CR 30-X SYSTEM
Table of Contents
Chapter 1:Introduction................................................................... 5
System Documentation ................................................................................ 6
The CR 30-X System Configuration .............................................................. 7
Main System Configuration ............................................................................. 8
Optional System Components.......................................................................... 8
Chapter 2:Getting Started with the CR 30-X System ..................... 11
Starting the CR 30-X System ...................................................................... 12
Basic Workflow .......................................................................................... 13
Stopping the CR 30-X System ..................................................................... 18
Chapter 3:Advanced Function of the CR 30-X System ................... 19
Reading an Emergency Image Plate ........................................................... 20
Reading the Initialization Data of an Image Plate...................................... 21

42385A EN 20060630
CR 30-X SYSTEM

62385A EN 20060630Introduction
CR 30-X SYSTEM
System Documentation
The documentation shall be kept with the system for easy reference. The most
extensive configuration is described within this manual, including the
maximum number of options and accessories. Not every function, option or
accessory described may have been purchased or licensed on a particular
piece of equipment.
Technical documentation is available in the product service documentation
which is available from your local support organisation.
The user documentation consists of:
"System Safety User Manual, document 3100.
"CR System User Manual, document 4400.
"CR 30-X System User Manual (this document).
"CR 30-X User Manual, document 2386.
"NX User Manual, document 4420 and NX Key User Manual, document 4421.
"CR 30-X Plates and Cassettes User Manual, document 2387.

82385A EN 20060630Introduction
CR 30-X SYSTEM
Main System Configuration
The CR 30-X System has the following configuration:
•the CR 30-X digitizer, a digitizer for image plates retaining latent X-ray
images. The CR 30-X accepts one cassette containing one image plate at a
time.
•NX 1.0 or higher. NX is a CR workstation for image acquisition,
identification, image processing and image transmission of digitized
images received from the digitizer.
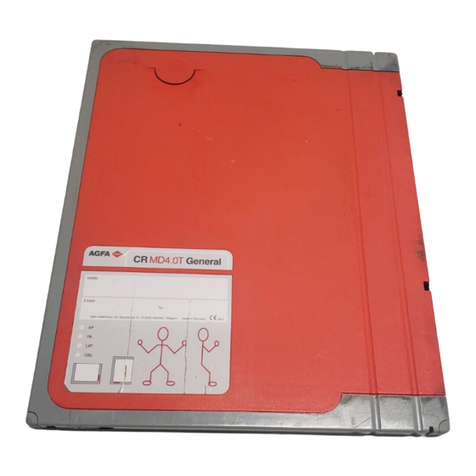
•Cassette and plate system: CR MD4.0T General Plate and Cassette.
Optional System Components
Powerware
®
5115 UPS
The main CR 30-X System can be extended with the Powerware®5115
uninterruptible power system (UPS). The UPS is available in two voltage
types:110Vand230V
The Powerware®5115 uninterruptible power system (UPS) protects the PC
when the main power supply has crashed, and avoids the loss of images. UPS
configuration requires special software. This software will be installed and
configured by an Agfa service technician.
With the Powerware®5115, you can safely eliminate the effects of power
disturbances and guard the integrity of your CR 30-X System.
Note: The application is intended to be used for Genrad only, not for
Mammography nor FLFS (Full Leg Full spine).

9
2385A EN 20060630 Introduction
CR 30-X SYSTEM
To install the Powerware®5115 UPS into the CR 30-X System, proceed as
follows:
1Plug the UPS power cord into the input connector at the UPS rear panel.
2Plug the other side of the UPS power cord into a power outlet.
3Plug the CR 30-X digitizer and the NX Workstation into the appropriate UPS
output receptacles.
In case of power failure, the batteries of the UPS supplies power to the CR 30-X and
the NX Workstation.

10 2385A EN 20060630Introduction
CR 30-X SYSTEM

12 2385A EN 20060630Getting Started with the CR 30-X System
CR 30-X SYSTEM
Starting the CR 30-X System
To start the CR 30-X System:
1Turn on the UPS (optional accessory) to supply electricity to the control PC and
the digitizer CR 30-X.
Check whether the UPS is connected to a power outlet.
Press and hold the On button approximately one second until you hear the UPS beep.
2Start NX.
The NX application is available on the control PC.
For detailed information about starting up NX, refer to the NX User Manual,
document 4420.
3Switch on the CR 30-X by pressing the main switch.
For detailed information, refer to the CR 30-X User Manual, document 2386.
Note: Step 1 is only applicable if your CR 30-X System is extended with an
uninterruptible power supply (UPS).

13
2385A EN 20060630 Getting Started with the CR 30-X System
CR 30-X SYSTEM
Basic Workflow
The main functions of the CR 30-X System are digitizing image plates and
transmitting the digital image data to the image processing station, where you
can perform an image quality control.
The workflow consists of the following successive steps:
"Step 1: Select a patient and start the exam.
"Step 2: Digitize the image.
"Step 3: Perform a quality control.
"Step 4: Remove the cassette and insert the next one.
Step 1: Select a patient and start the exam
At the NX Station:
1Open the Worklist window of NX.
In the Worklist window, you can view and manage the exams that are scheduled via
the Worklist pane.
Note: When starting the NX Software, the Worklist window is the first
window that appears after the NX Splash screen.
Note: ... Start the NX Software on the NX Station.
Refer to the NX User Manual, document 4420.

14 2385A EN 20060630Getting Started with the CR 30-X System
CR 30-X SYSTEM
2In the Worklist window, open a patient from the RIS or enter patient data
manually.
•To open a patient from the RIS, select an Exam from the list (1) and click on Start
Exam (2).
•To enter patient data manually, click New Exam (3) and enter patient data and
image data manually.
For more information, refer to the NX User Manual, document 4420.
1
2
3

15
2385A EN 20060630 Getting Started with the CR 30-X System
CR 30-X SYSTEM
Step 2: Digitize the image
At the CR 30-X digitizer:
1Check that the CR 30-X digitizer is ready for operation:
The status indicator on the CR 30-X digitizer constantly lights up in green.
2Insert the exposed cassette containing the image plate into the cassette slot [1]
of the CR 30-X Digitizer.
Make sure to insert the cassette with the black side to the top and with the shutter
opening mechanism and the locking mechanism inside the digitizer.
Make sure that the cassette is firmly pushed to the right side of the slot [2]. Otherwise,
the CR 30-X cannot read the image plate.
3The CR 30-X sends a request to the NX Station.
Note: The cassette is unidentified, so the CR 30-X will send a request to the
NX Station. The NX Software must be operational, otherwise the CR 30-X is
locked and the status indicator is flashing red.
2
1

16 2385A EN 20060630Getting Started with the CR 30-X System
CR 30-X SYSTEM
At the NX Station:
1Click ID in the examination window of NX.
In the Examination window, select the thumbnail in the Image overview pane and
click on ID to send the data to the digitizer.
2As soon as the CR 30-X digitizer has received the complete identification data
from the NX Station (via FireWire) it will start digitizing the image plate.
The CR 30-X converts the information of the latent image to digital data.
3After digitizing, the CR 30-X digitizer:
•Transmits the digital image data to the image processing station (‘destination’).
•Erases the image plate and re-inserts it into the cassette.
•Gives the cassette ID data the status 'erased'.
•Unlocks the cassette.

17
2385A EN 20060630 Getting Started with the CR 30-X System
CR 30-X SYSTEM
Step 3: Perform a quality control
At the NX Station:
1Select the image on which quality control is to be performed.
2Prepare the image for diagnosis by using e.g. L/R markers or annotations.
3If the image is OK, send the image to a hardcopy printer and/or PACS (Picture
Archiving and Communication System).
Step 4: Remove the cassette and insert the next one
At the CR 30-X digitizer:
1When the CR 30-X has finished treating the cassette, the status indicator
constantly lights up in green.
2Remove the cassette from the cassette slot.
Note: When the CR 30-X unlock the cassette, it is ready to be re-used
immediately. However, if you leave it for more than 3 days before re-using it,
you must re-erase it first. The procedure how to re-erase an image plate is
described in the e CR 30-X User Manual, document 2386.
WARNING: When you change the X-ray exposure settings, you must
adapt the erasure level for the image plate accordingly.

18 2385A EN 20060630Getting Started with the CR 30-X System
CR 30-X SYSTEM
Stopping the CR 30-X System
To stop the CR 30-X System:
1Switch off the CR 30-X by pressing the main switch.
For detailed information, refer to the CR 30-X User Manual, document 2386.
2Stop NX.
NX can be stopped in two ways:, either by logging out of Windows or by using the Exit
NX action button.
For detailed information about stopping NX, refer to the NX User Manual, document
4420.
3Turn off the UPS (optional accessory) to disconnect the control PC and the
CR 30-X.
Press and hold the Off button until the long beep ceases (approximately five seconds).
Note: Step 3 is only applicable if your CR 30-X System is extended with an
uninterruptible power supply (UPS).

Advanced Function of the
CR 30-X System
This chapter provides basic information on how to digitize
image plates in emergency situations and how to read the
initialization data stored in the memory chip of the cassette
tray.
!Reading an Emergency Image Plate
!Reading the Initialization Data of an Image Plate
Chapter 3

20 2385A EN 20060630Advanced Function of the CR 30-X System
CR 30-X SYSTEM
Reading an Emergency Image Plate
In emergency situations, it is possible to open an emergency exam at the
NX Station without patient details and to digitize the image plate without
having identified the cassette.
For detailed information about the emergency license, refer to the NX
manuals.
Note: Reading an emergency image plate is a licensed functionality,
necessary to facilitate the emergency cases and to improve the workflow.
Other manuals for CR 30-X
4
Table of contents
Other AGFA Medical Equipment manuals

AGFA
AGFA Drystar 5302 Technical manual

AGFA
AGFA DR 10e User manual

AGFA
AGFA Auto QC2 User manual

AGFA
AGFA CR 85-XTM User manual

AGFA
AGFA DX-D 300 User manual

AGFA
AGFA DX-D 100 User manual
AGFA
AGFA CR Reader User manual

AGFA
AGFA DX-D 100 User manual

AGFA
AGFA Drystar 4500 Plug & Play User manual

AGFA
AGFA DX-D 400 User manual
Popular Medical Equipment manuals by other brands

Chison
Chison SonoBook 8 Quick reference guide

Brainlab
Brainlab ROBOTICS VERO Hardware user's guide

Optopol
Optopol SOCT Copernicus user manual

Vaunn Medical
Vaunn Medical M880N-IVGY-YYVM quick start guide

Accora
Accora FloorBed 2 Siderails instruction manual

Buffalo filter
Buffalo filter ViroVac Operator's manual