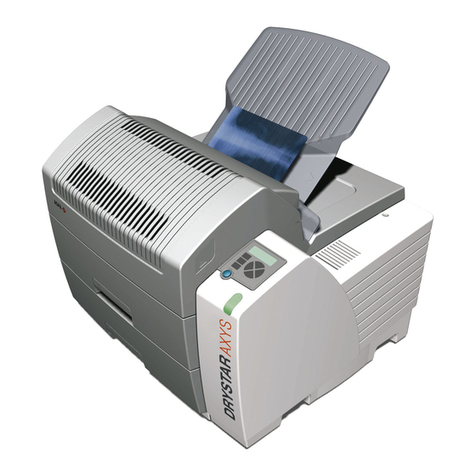
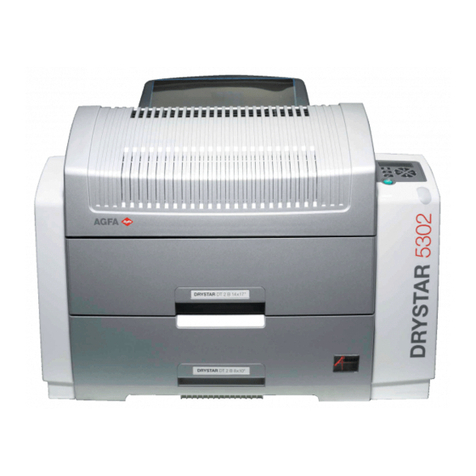
AGFA Drystar AXYS XL User manual

Drystar AXYS XL
5367/400
Reference Manual
3753B EN 20210520 0952

Contents
Legal Notice ..........................................................................5
About the safety notices in this document .............................. 6
Scope .....................................................................................7
Advanced Operation (key-operator mode) .............................8
The menu structure ................................................... 9
Accessing the Key-operator menus ........................... 10
Data entry ................................................................12
Viewing printer information .................................... 13
Accessing the Show settings menu ................14
Viewing general information ........................15
Viewing input tray information .................... 16
Viewing network (DICOM) information ....... 17
Viewing general image quality information ....
18
Viewing image quality information for a modality
..........................................................................19
Viewing the logical printers configuration ... 20
Viewing installed datasets information ........ 21
Changing the configuration settings ........................ 22
Accessing the Change settings menu ............ 23
Changing the General settings ..................... 25
Changing the input tray settings ...................28
Changing Network (DICOM) configuration ....
29
Changing the image quality settings .............38
Printing images ........................................................46
Accessing the print images menu ................. 47
Printing test images ..................................... 48
Saving the configuration settings ............................. 49
Accessing the save configuration menu ........ 50
General save configuration procedure ..........51
Network only save configuration procedure ....
53
Restoring the configuration settings .........................55
Accessing the restore configuration menu .... 56
Restoring the printer settings ....................... 57
Restoring the network settings .....................60
Performing the calibration procedures .....................62
Accessing the Calibration menu ................... 63
Film calibration ........................................... 64
Service actions .........................................................67
Overview of service actions ..........................68
Accessing the Service actions menu ............. 69
Installation .............................................................. 70
ii | Drystar AXYS XL | Contents
3753B EN 20210520 0952

Installing new or upgrading existing software ..
71
Using the installation wizard ....................... 73
Controlling the printer via a remote PC (with browser) ........82
Features ...................................................................83
Setup .......................................................................84
Configuration with direct network cable ...... 85
Configuration over a network ...................... 86
Setting up the connection ........................................ 87
Setting up a direct link ................................. 88
Setting up a link through a network ............. 91
Starting the remote session ......................................92
Starting the remote session .......................... 93
Entering the operator level ...........................94
Entering the Key-operator level ....................95
System Description .............................................................. 97
Main components .................................................... 98
Front view ................................................... 99
Rear panel ................................................. 100
Functional description ........................................... 101
Network configuration ........................................... 102
Problem solving ................................................................. 103
Checking the status indicator LED ..........................104
The printer does not print ...................................... 105
Reset of the printer .................................... 106
Checking the connections .......................... 107
Checking error messages ............................108
Checking USB flash drive error messages ... 109
Checking the print queue ........................... 110
Clearing of film jams .............................................. 111
Film input tray jams ................................... 112
Film transport jams (clearing from the top) ....
114
Unauthorized opening of the printer .......... 117
Film identification problems .................................. 118
No identification code detected .................. 119
Invalid content of Film Identification tag ... 121
Film overrun from current pack ................. 122
Start-up errors ....................................................... 123
Error messages while the printer starts up ..124
Display self test failed ................................ 125
System self test failed .................................126
Software self test failed .............................. 127
Maintaining image quality and resolving image quality
problems ............................................................... 128
Maintaining optimal Image Quality ............129
Persistent white dots or lines appear in the
transport direction .....................................130
Warning messages ..................................................131
Maintenance messages ...........................................132
Drystar AXYS XL | Contents | iii
3753B EN 20210520 0952
Key-operator user name and password ...............................133
Film density response data .................................................134
Blue transparant (original Agfa branded Drystar film) .
135
Clear transparant (original Agfa branded Drystar film)
136
Mammography film (original Agfa branded Drystar film
for mammography) ................................................137
iv | Drystar AXYS XL | Contents
3753B EN 20210520 0952
Legal Notice
Agfa NV, Septestraat 27, B-2640 Mortsel - Belgium
For more information on Agfa products, please visit www.agfa.com.
Agfa and the Agfa rhombus are trademarks of Agfa-Gevaert N.V., Belgium or
its affiliates. Drystar is a trademark of Agfa NV, Belgium or one of its affiliates.
All other trademarks are held by their respective owners and are used in an
editorial fashion with no intention of infringement.
Agfa NV makes no warranties or representation, expressed or implied, with
respect to the accuracy, completeness or usefulness of the information
contained in this document and specifically disclaims warranties of suitability
for any particular purpose. Products and services may not be available for
your local area. Please contact your local sales representative for availability
information. Agfa NV diligently strives to provide as accurate information as
possible, but shall not be responsible for any typographical error. Agfa NV
shall under no circumstances be liable for any damage arising from the use or
inability to use any information, apparatus, method or process disclosed in
this document. Agfa NV reserves the right to make changes to this document
without prior notice. The original version of this document is in English.
Copyright 2021 Agfa NV
All rights reserved.
Published by Agfa NV
B-2640 Mortsel - Belgium.
No part of this document may be reproduced, copied, adapted or transmitted
in any form or by any means without the written permission of Agfa NV
Drystar AXYS XL | Legal Notice | 5
3753B EN 20210520 0952
About the safety notices in this document
The following samples show how warnings, cautions, instructions and notes
appear in this document. The text explains their intended use.
DANGER:
A danger safety notice indicates a hazardous situation of direct,
immediate danger for a potential serious injury to a user,
engineer, patient or any other person.
WARNING:
A warning safety notice indicates a hazardous situation which
can lead to a potential serious injury to a user, engineer, patient
or any other person.
CAUTION:
A caution safety notice indicates a hazardous situation which
can lead to a potential minor injury to a user, engineer, patient
or any other person.
An instruction is a direction which, if it is not followed, can
cause damage to the equipment described in this manual or any
other equipment or goods and can cause environmental
pollution.
A prohibition is a direction which, if it is not followed, can cause
damage to the equipment described in this manual or any other
equipment or goods and can cause environmental pollution.
Note: Notes provide advice and highlight unusual points. A note is
not intended as an instruction.
6 | Drystar AXYS XL | About the safety notices in this document
3753B EN 20210520 0952

Scope
The reference manual contains information for the advanced operation of the
printer and is available in English only. Refer to the user manual of the printer
for general safety instructions, system information and instructions for
performing a basic workflow.
Drystar AXYS XL | Scope | 7
3753B EN 20210520 0952
Advanced Operation (key-operator mode)
The printer features the following functions on the main menu level of the
Key-operator mode:
Menu item Function
Show settings To consult the current settings of the printer.
Change settings To change the current settings of the printer.
Print image To print one of the standard test images. To load
and print images from a USB flash drive.
Save configuration To make a back-up of the printer settings.
Restore configuration To restore the back-up of the printer settings.
Calibration To calibrate the printer.
Service actions To view error and maintenance data.
Quality Control To perform the QC procedure.
Installation To install or update the printer software.
Note: These functions are described in detail in the Reference
manual.
Topics:
•The menu structure
•Accessing the Key-operator menus
•Data entry
•Viewing printer information
•Changing the configuration settings
•Printing images
•Saving the configuration settings
•Restoring the configuration settings
•Performing the calibration procedures
•Service actions
•Installation
8 | Drystar AXYS XL | Advanced Operation (key-operator mode)
3753B EN 20210520 0952

The menu structure
General
Upper Input tray
Network(DICOM)
Image quality
General
Upper input tray
Lower input tray
Network(DICOM)
Image quality
Logical printers
Installed datasets
Test image
Time and date
Printer AE-title
Hostname
Domain name
Printer IP-address
Netmask
Router IP-address
Remove modality
Add modality
General
Film calibration
Warning messages
Clean therm. head
Language
Beep on empty tray
General setting
Service actions
Quality Control
Installation
Printer installation
Calibration
Restore configuration
Save configuration
Change settings
NETWORK only
SMPTE
Etc...
Show open and update
Show closed items
=
=
Show settings
Print image
General
NETWORK only
General
Other...
Per modality setting
Film type
Film format
Film view
Lower Input tray
Film type
Film format
Film view
From USB
Error messages
Maintenance
Drystar AXYS XL | Advanced Operation (key-operator mode) | 9
3753B EN 20210520 0952
Accessing the Key-operator menus
The Key-operator mode functions (i.e. the main menu level) can be accessed
by pressing the Key-operator key on the front panel.
After pressing the Key-operator key the main menu is displayed:
Note: The two characters displayed in inverse video in the upper
right corner indicate the current menu item (e.g. ‘KO’ for main
Key-operator menu, ‘QC’ for Quality Control, etc.).
5 Restore config.
6 Calibration
7 Service Actions
8 Quality Control
9 Installation
Reachable with Up/Down arrow keys
Visible
Note: When you try to enter the Key-operator mode during
printing, it will first finish the active print job(s):
Note: If certain mandatory site-specific data has not yet been
entered, the following screen is displayed when entering the
Key-operator mode.
You can scroll through the menu items by pressing the Down and Up keys and
select a menu item by pressing the Confirm key. The active keys are indicated
by their respective LEDs.
At any moment you can press the Escape key on the main menu level to exit
the Key-operator mode. If you press this key on a lower level menu you are
10 | Drystar AXYS XL | Advanced Operation (key-operator mode)
3753B EN 20210520 0952

returned to the higher level menu. If you press this key on a data screen after
entering information, all changes on that screen are lost.
If the Key-operator does not interact with the menu for a longer period (ten
minutes or more), the menu will time-out and revert back to the ready state.
The Key-operator will receive a warning that the time-out is about to expire:
Press the Confirm key to return to the Key-operator menu. Otherwise, the
Keyoperator menu will be closed.
Note: The printer will sound a long beep if you press a key that is
not to be used at that moment.
Related Links
Changing the site-specific data (via remote browser only) on page 27
Drystar AXYS XL | Advanced Operation (key-operator mode) | 11
3753B EN 20210520 0952

Data entry
When entering numerical or alphanumerical data, always adhere to the
following principles:
• Only (alpha) numerical data can be entered.
• During data entry, the field is displayed in reverse mode.
• Increment the number in a(n) (alpha) numerical entry field by pressing
the Up key. Transition from 9 to 0 of one figure will also increment the
next figure to the left, respecting the valid limits of the range.
• Decrement the number in a(n) (alpha) numerical entry field by pressing
the Down key. Transition from 0 to 9 of one figure will also decrement the
next figure to the left, respecting the valid limits of the range.
• Move the entry position in a(n) (alpha) numerical entry field from right to
left by pressing the Left key.
• Move the entry position in a(n) (alpha) numerical entry field from left to
right by pressing the Right key.
• Press and hold down a key to repeat arrow key actions.
• To accept an entry in a menu, press the Confirm key.
• A short beep acknowledges and terminates the entry.
• The printer will sound a long beep if you press a key that is not to be used
at that moment.
12 | Drystar AXYS XL | Advanced Operation (key-operator mode)
3753B EN 20210520 0952
Viewing printer information
A number of data and parameter settings of the printer can be viewed by using
the ‘Show settings’ function:
Topics:
•Accessing the Show settings menu
•Viewing general information
•Viewing input tray information
•Viewing network (DICOM) information
•Viewing general image quality information
•Viewing image quality information for a modality
•Viewing the logical printers configuration
•Viewing installed datasets information
Drystar AXYS XL | Advanced Operation (key-operator mode) | 13
3753B EN 20210520 0952

Accessing the Show settings menu
1. Press the Key-operator key to enter the Key-operator mode.
2. On the Key-operator main menu, press the Confirm key to select ‘Show
settings’.
The Show settings menu is displayed:
5 Restore config.
6 Calibration
7 Service Actions
8 Quality Control
9 Installation
Reachable with Up/Down arrow keys
Visible
Note: This menu is the starting point for viewing printer
information (see next pages).
3. Press the Escape key to return to the Key-operator main menu.
4. Press the Escape key again to quit the Key-operator mode.
14 | Drystar AXYS XL | Advanced Operation (key-operator mode)
3753B EN 20210520 0952

Viewing general information
1. On the Show settings menu, press the Confirm key to select ‘General’.
The ‘General’ info screen is displayed (example):
On the ‘General’ info screen you can see:
• the serial number of the printer,
• the language,
• the current time,
• the current date,
• the installation date,
• the number of films printed after the last print head cleaning,
• the number of films printed before the last print head cleaning,
• the total number of films printed,
• the currently installed software version,
• whether the printer should beep when an input tray is empty (No beep,
5 times, many).
Note: More information, such as site-specific data, can be
viewed via the browser only.
2. Press the Confirm key to return to the Show settings menu.
Related Links
Accessing the Show settings menu on page 14
Controlling the printer via a remote PC (with browser) on page 82
Drystar AXYS XL | Advanced Operation (key-operator mode) | 15
3753B EN 20210520 0952

Viewing input tray information
Note:
In this manual, we always will elaborate a case for the lower
tray. The procedures of showing the settings are identical for the
upper tray.
On the Show settings menu, press the Down key once to see the
upper tray settings, twice to see the lower tray settings.
1. On the Show settings menu, press the Down key once to see the upper tray
settings, twice to see the lower tray settings, followed by the Confirm key’.
The ‘Input tray’ screen is displayed (example):
The following information is displayed for the input tray:
• the status of the Film Identification tag (OK, disabled, overruled),
• the actual film data, as it has been modified by the Key-operator:
• film type,
• film format.
• the film view (normal, back),
• the number of prints for this film pack,
• the total number of prints for the input tray,
• the film data read from the film identification tag:
• film type,
• film format,
• brand (ABC code),
• order number,
• pack number.
2. Press the Confirm key to return to the Show settings menu.
Related Links
Accessing the Show settings menu on page 14
16 | Drystar AXYS XL | Advanced Operation (key-operator mode)
3753B EN 20210520 0952

Viewing network (DICOM) information
1. On the Show settings menu, press the Down key three times, followed by
the Confirm key to select ‘Network (DICOM)’.
The ‘Network (DICOM)’ screen is displayed (example):
The following information on the current network settings is displayed:
• the AE-title of the printer,
• the hostname of the printer,
• the domain name,
• the IP address of the printer,
• the netmask used for the printer,
• the IP address of the router,
• the MAC address of the printer.
2. Press the Confirm key to return to the Show settings menu.
Related Links
Accessing the Show settings menu on page 14
Drystar AXYS XL | Advanced Operation (key-operator mode) | 17
3753B EN 20210520 0952

Viewing general image quality information
1. On the Show settings menu, press the Down key four times, followed by
the Confirm key to select ‘Image quality’.
The following screen will appear:
2 <Modality name>
3 <Modality name>
2. Press the Confirm key to select ‘General settings’.
The following screen appears:
3. Do one of the following:
• If you select ‘Def.film calib.’ the general image quality settings are
displayed. Proceed with step 4.
• If you select ‘Def. densitometer’, the default densitometer type is
displayed. Proceed with step 5.
4. The general image quality settings are displayed:
The following information is displayed:
• whether the automatic film calibration setting is set to OFF or ON,
• the number of film packs determining the automatic film calibration
interval (e.g. every ‘05’ film packs) (only if film calibration setting is
set to ON),
• the maximum density result value (e.g. ‘3.20’) of the last successful
film calibration for the upper and lower input tray.
Proceed with step 6.
5. The default densitometer type is displayed:
6. Press the Confirm key to return to step 2, then press the Escape key to
return to the Image quality menu (see step 1).
7. In the Image quality menu, press the Escape key to return to the Show
settings menu.
Related Links
Accessing the Show settings menu on page 14
18 | Drystar AXYS XL | Advanced Operation (key-operator mode)
3753B EN 20210520 0952

Viewing image quality information for a modality
1. On the Show settings menu, press the Down key four times, followed by
the Confirm key to select ‘Image quality’.
The following screen will appear:
2 <Modality name>
3 <Modality name>
2. Press the Up/Down arrow keys, followed by the Confirm key to select the
desired modality.
The Image quality settings for the selected modality are displayed (e.g.):
3. Press the Confirm key to return to the Image quality menu.
4. In the Image quality menu, press the Escape key to return to the Show
settings menu.
Related Links
Accessing the Show settings menu on page 14
Drystar AXYS XL | Advanced Operation (key-operator mode) | 19
3753B EN 20210520 0952

Viewing the logical printers configuration
1. On the Show settings menu, press the Down key five times, followed by
the Confirm key to select ‘Logical printers’.
The ‘Logical printers’ screen is displayed (example):
This screen gives an overview of the logical printers defined in the printer.
Note: The logical printers information can be helpful when
assigning a modality output to a particular printer profile.
Configuring logical printers can be done via the remote
webpages. Contact your local service organization for more
information.
2. Press the Confirm key to return to the show settings menu.
Related Links
Accessing the Show settings menu on page 14
20 | Drystar AXYS XL | Advanced Operation (key-operator mode)
3753B EN 20210520 0952
Other manuals for Drystar AXYS XL
1
This manual suits for next models
1
Table of contents
Other AGFA Printer manuals

AGFA
AGFA Drystar 5302 User manual

AGFA
AGFA DRYSTAR AXYS User manual

AGFA
AGFA JETSPEED RTR JETI 5024 User manual

AGFA
AGFA Drystar 5500 User manual

AGFA
AGFA 1 User manual

AGFA
AGFA Ovation! User manual

AGFA
AGFA DRYSTAR AXYS User manual

AGFA
AGFA Drystar 5302 User manual

AGFA
AGFA W Class User manual

AGFA
AGFA Printer User manual

AGFA
AGFA MSC 100 Guide

AGFA
AGFA d-lab.3 Guide

AGFA
AGFA Drystar AXYS XL User manual

AGFA
AGFA ANAPURNA MV User manual

AGFA
AGFA DRY 1.4 User manual

AGFA
AGFA ANAPURNA M4F User manual

AGFA
AGFA Drystar 5301 XL User manual

AGFA
AGFA CG Triumvirate 3R20P User manual

AGFA
AGFA AP1100 User manual

AGFA
AGFA Drystar 5302 Guide