8
USING YOUR APPLIANCE
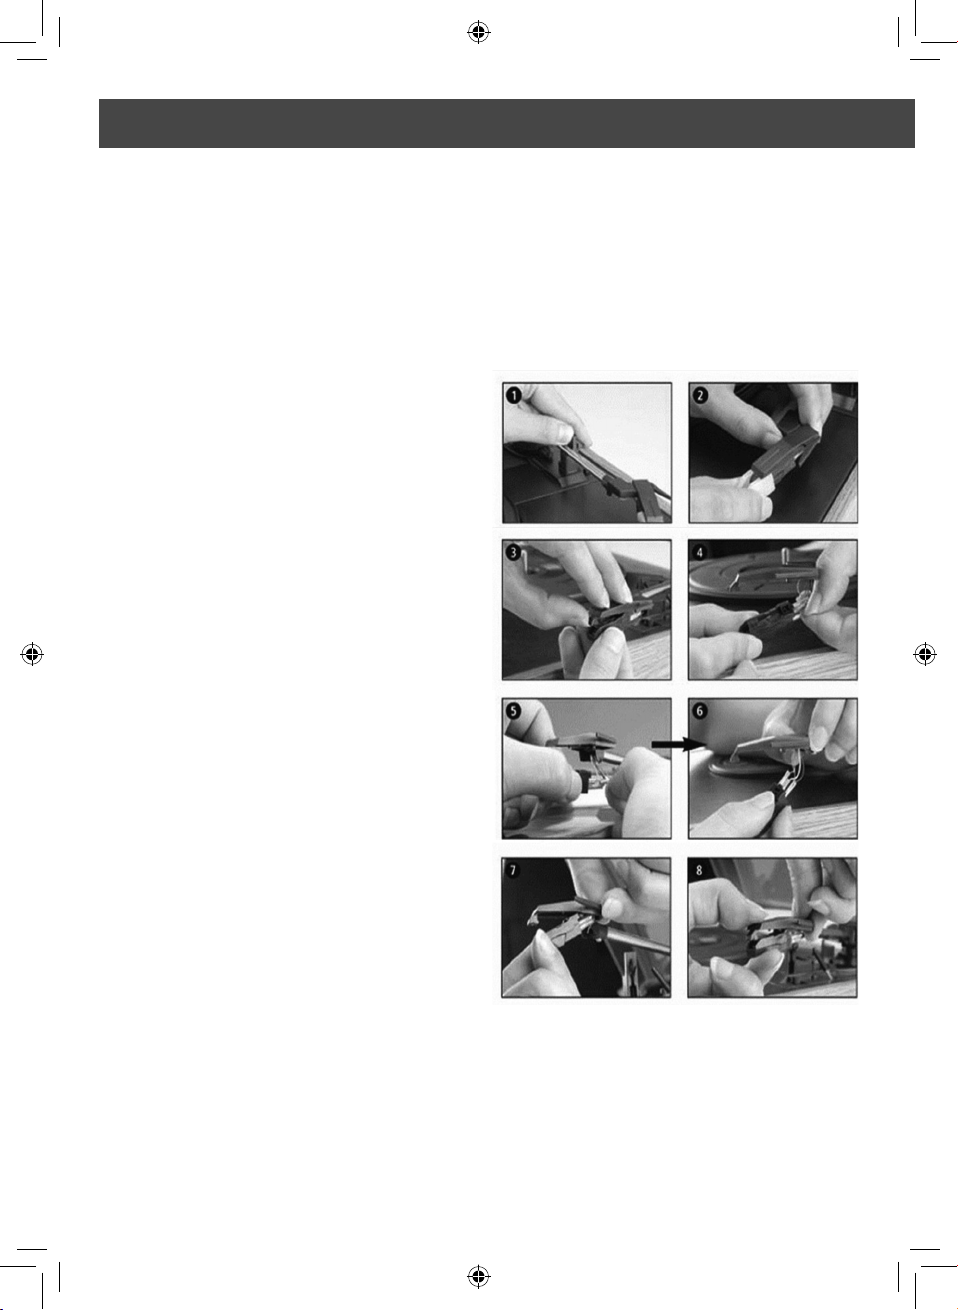
BEFORE FIRST USE
Remove the stylus protector.
Ensure the tone arm is free to move.
CHARGING
1. Insert the DC plug of the included AC-
DC adaptor into the DC socket on the
back of the record player.
2. Plug the adaptor’s AC plug into a power
outlet, and turn it on.
3. Rotate the Power/Volume On/Off switch
clockwise to turn on the record player.
4. The power indicator will light up.
A full charge will take around 3 hours.
5. When charging, the built-in battery
indicator light will be red. When the
battery is fully charged, the indicator
light will turn off.
6. The unit has a run time of up to 3 hours.
MAINS CONNECTION
Ensure the voltage of the mains outlet
corresponds to the operating voltage of
the unit. Your unit is equipped with a 5V AC
adaptor.
AUX-IN
1. Turn the function button to the line-in
position.
2. Plug one end of the included AUX cable
into the unit’s line-in jack.
3. Plug the other end into the line-out
jack or headphone jack of your external
audio device. This enables you to listen
to music from your phone or tablet
through the speakers on the record
player.
You can now control the volume using your
record player.
All other functions are controlled using your
external audio device as usual.
NOTE: If you have connected the AUX cable
into a headphone jack you may need to
adjust the volume control on both the record
player and your audio device. When the AUX
cable is connected to a line-out jack you
only need to adjust the volume on the record
player.
AMPLIFIER CONNECTION (IF REQUIRED)
Whilst you can listen to your new turntable
using the built-in speakers, you may also
wish to connect it to your Hi-Fi system. To do
so, connect the audio plugs to the Line input
on your mixer or amplifier using an RCA
cable (not supplied)
• Connect the red plug into the R/H
channel input.
• Connect the white plug into the L/H
channel input.
PLAYING A RECORD
1. Place the record of your choice on the
turntable. If required, do not forget to
place the centre piece on the record
spindle.
2. Use the speed selection switch to
choose your desired playing speed,
between 33, 45 and 78RPM.
3. Turn on the Rotary Power switch (this
switch also controls volume).
4. Release the tone arm lock.
5. Lightly raise the arm with your hand.