Amibot Swip AS70 User manual

EN
Floor cleaning robot
User Manual
AS70

EN
User Manual
Thank you for choosing AMIBOT! We hope you are fully satised
using your robot as part of your cleaning routine.
If you should encounter situations that have not been properly
addressed in this User Manual or were to have any queries, do not
hesitate to contact us and a member of our Technical Customer
Service Department will be more than happy to answer your
questions.
For more information, you can visit the ocial AMIBOT website:
www.amibot.tech
We reserve the right to make technical alterations to the appliance
without prior notice with the objective of continually improving our
products and customer satisfaction.
Please carefully read all instructions in this manual before using this
appliance. AMIBOT will not be liable for damage due to incorrect use.

1
Contents
EN
Recommendations ............................................................. 2
Product overview................................................................ 3
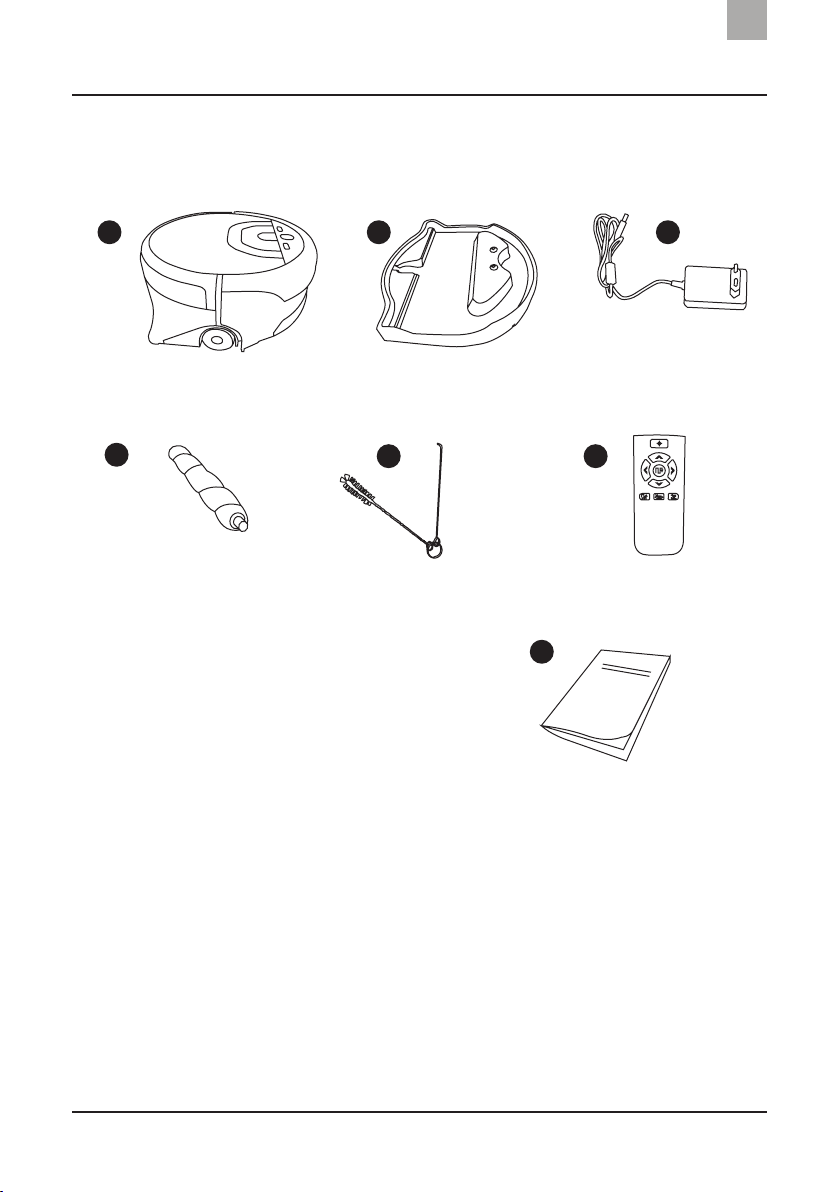
Product contents..................................................................................... 3
Product diagram ..................................................................................... 4
Operating the robot........................................................... 9
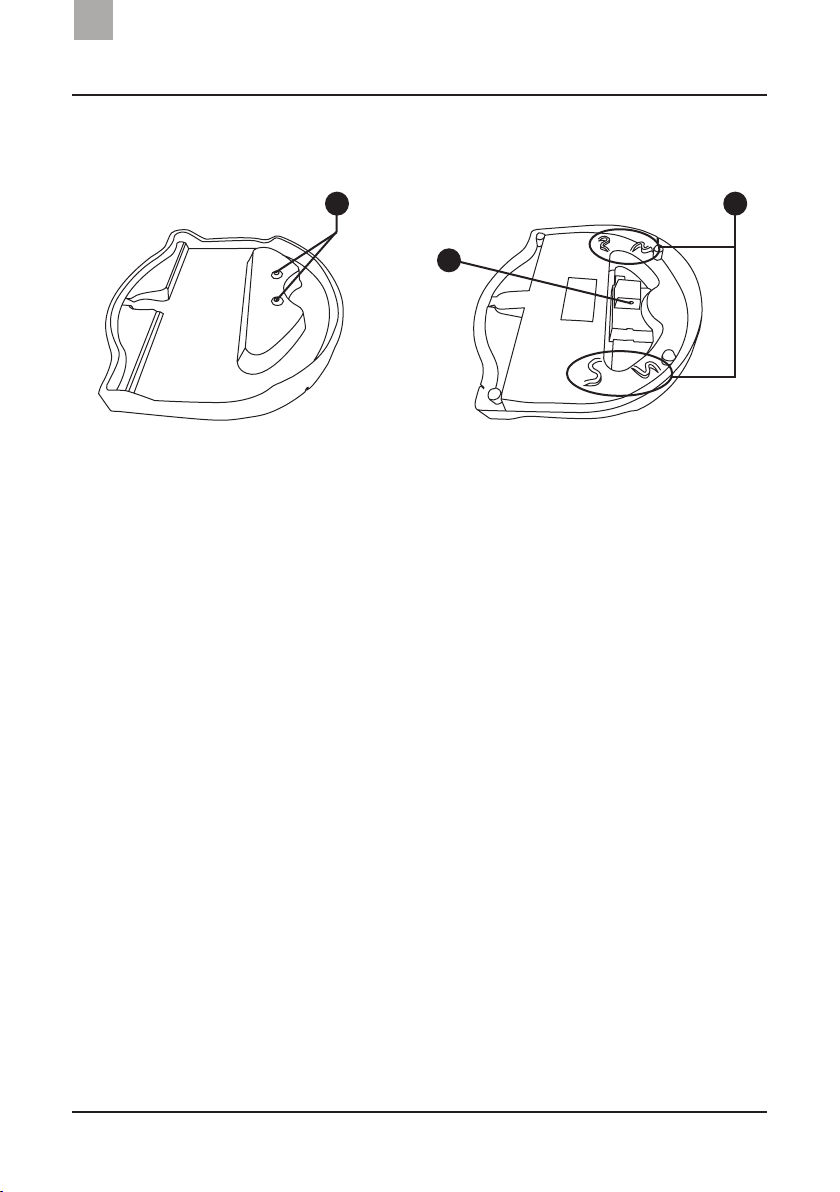
Charging the robot ................................................................................. 9
Preparing the robot.............................................................................. 10
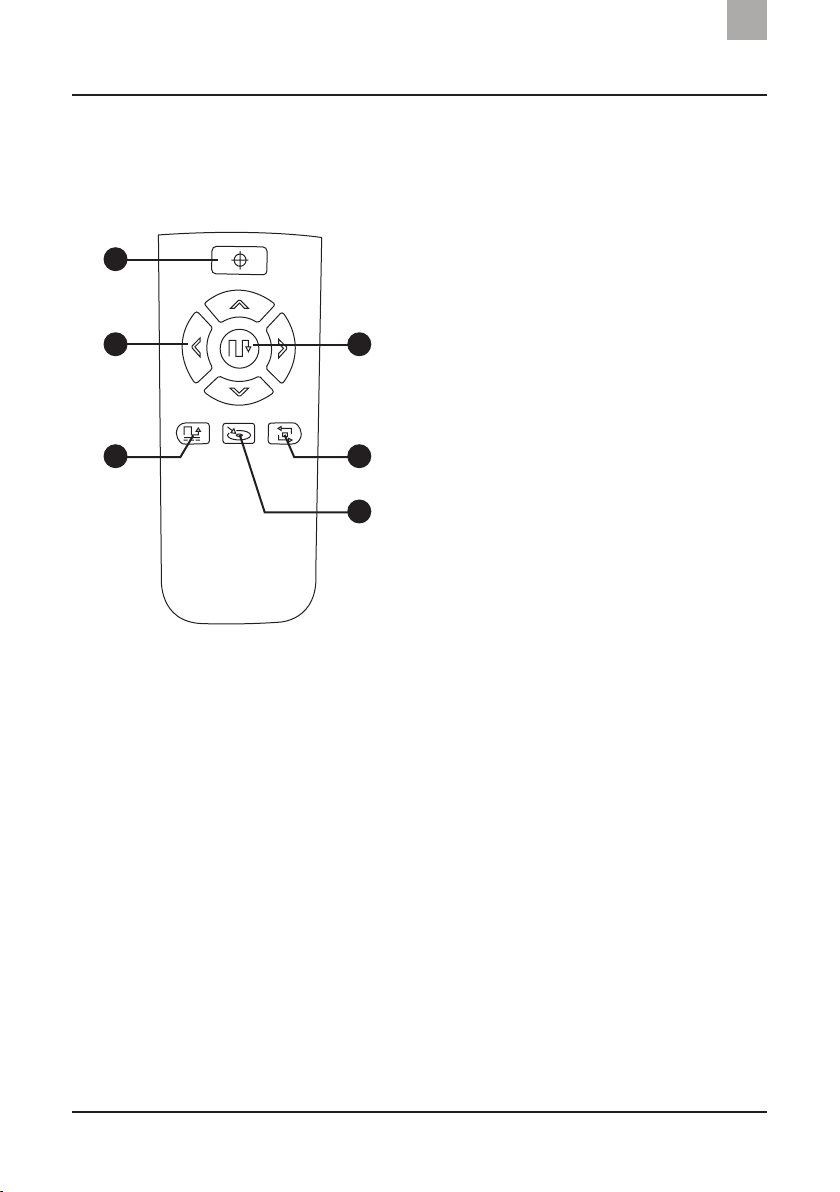
Starting the robot ................................................................................. 12
Cleaning modes .................................................................................... 12
Pausing the robot ................................................................................. 15
Switching o the robot......................................................................... 15
Maintenance......................................................................16
Side wheels and front castor............................................................... 16
Water tanks, caps and lter................................................................. 16
Gap and power sensors ....................................................................... 18
Main brush and squeegee................................................................... 18
Troubleshooting................................................................ 19
Warranty and after-sales service.................................. 21
Technical specications .................................................. 22
Safety instructions and precautions............................23
Operating conditions............................................................................ 23
Recycling instructions .....................................................25

2
Recommendations
EN
• AMIBOT Swip AS70 is intended for indoor use.
• AMIBOT Swip AS70 is designed for a maximum surface area of
23m2.
• AMIBOT Swip AS70 is designed for routine oor cleaning. It is not
intended to replace heavy-duty cleaning.
• AMIBOT Swip AS70 needs a headway of at least 13cm so that it
can go under furniture or any other obstacle.
• AMIBOT Swip AS70 cannot go over thresholds over 0.5cm thick,
otherwise it automatically stops or reverses.
• AMIBOT Swip AS70 is not designed to be used on carpets; it only
cleans hard oors.
• AMIBOT Swip AS70 must be used on at surfaces.
• If the robot could come across a gap while cleaning, please check
that the gap sensors are clean.
• AMIBOT Swip AS70 is not a vacuum cleaner; it is not designed to
vacuum dirt.
• The appliance must not be used to clean ashes, large amounts of
debris or chemical products.
• Do not use the appliance on wet oors as it may not attach to the
oor correctly.
• Please switch o the appliance before handling it (manually mov-
ing it, maintenance, cleaning).
• The remote control requires 2 x LR03-type batteries (AAA), which
are not included.

3
Product overview
EN
Product contents
1
4
1. AMIBOT Swip AS70 robot
2. Home base
3. Power adapter
4. Cleaning brush
5. Cleaning tool
6. Remote control (batteries
not included)
7. User manual
2 3
5 6
7

4
Product overview
EN
Product diagram
Robot top view
1. Used water tank drain cap
2. Carry handle
3. MODE button
4. CLEAN button
1. Cleaning mode indicator
lights
2. Cleaning mode button
3. CLEAN button
1
2
3
5
4
6
5. Water tank cover release
button
6. Bumper
7. Right/left wheel
7
4. Indicator lights
5. Battery and water tank
indicator lights
1
2 3 4
5

5
Product overview
EN
1. Robot front
2. Robot rear
3. Water tank unit: clean water
tank and used water tank
4. Cleaning brush holder
1
2
3
4
5
6 7
8
5. Air outlet
6. Used water detector
7. Cleaning brush
8. Cleaning brush rubber tip
1
2
3
1. Clean water tank
2. Used water tank
3. Used water tank valves

6
Product overview
EN
Robot bottom view
1. Drip nozzles
2. Gap sensors
3. Power sensors
4. Front castor
5. Battery cover
1
2
3
4
5
1. Used water tank valve
release button
2. Air outlet
3. Rear castor
4. Used water suction nozzle
5. Used water discharge nozzle
6. Squeegee
7. Clean water tank cap
1
2
3
4
5
6
7

7
Product overview
EN
Remote control
When the robot is completing its cleaning cycle, you cannot control
its direction using the arrows on the remote control.
When the robot is on, you can move it using the arrows on the
remote control. When the you manually control the robot, it's
cleaning system and main brush start. If you stop moving the robot,
it naturally comes to a standstill but its cleaning system and main
brush continue to function.
NOTE: The robot switches to standby after a few minutes of inactivity. The remote
control can only be used to control the robot if it is no longer on standby.
1. SPOT mode
2. Directional arrows
3. ZONE mode
4. AUTO mode
5. EDGE mode
6. HOME mode
1
2
3
4
5
6

8
Product overview
EN
Home base
1. Charging contacts 2. Power cable feedthrough
3. Power plug
1 2
3

9
Operating the robot
EN
Charging the robot
Assembling the home base and charging the robot
Plug in the home base using the power cable.
NOTE: AMIBOT Swip AS70 does not recharge automatically. You need to manually
position the robot on its home base so that it will start charging.
Place the robot on its home
base. The battery indicator
light is red when the battery
needs charging. The indicator
light turns o when the robot's
battery is fully charged.
NOTES:
• Before using the robot for the rst time, you must charge it for at least 12 hours.
It will need to be charged for around 300minutes thereafter.
• If the robot is not used for a long period of time, you are recommended to fully
charge the battery, switch o the robot and store it in a cool, dry place.

10
Operating the robot
EN
Preparing the robot
Preparing the clean water tank
Press the tank release button. The front and rear parts of the robot
detach from each other.
Ensure you keep the rear part
of the robot where the clean
water and used water tank unit
is located. Open the clean water
tank's cap and pour in clean
water with some oor cleaner.
NOTES:
• The clean water tank has a maximum capacity of 850ml and the used water
tank has a maximum capacity of 900ml.
• For optimum cleaning, check the dilution ratio indicated on the detergent
bottle.
• Only use oor cleaner. Prolonged use of any other product, such as white
vinegar or bleach, could damage the water tank.

11
Operating the robot
EN
Installing the cleaning brush and squeegee
To attach the cleaning brush, start by clipping the left part of the
brush into the robot chassis, then the right part, which has a rubber
tip.
Then attach the squeegee using the magnets.
Installing the water tank
To assemble the rear part of the robot, please refer to the gure
above. Clip (1) the tank in before closing (2) it.
1
2

12
Operating the robot
EN
Starting the robot
The robot is ready to use when it is fully charged. Remove it from
its home base and place it on the oor. Press the CLEAN button on
the top of the robot to turn it on. Press the CLEAN button again and
the robot starts its cleaning cycle in AUTO mode or you can choose
a cleaning mode as shown below.
NOTE: You cannot switch the robot on using the remote control.
Cleaning modes
The robot has four cleaning modes. These modes can be selected
using the remote control or by pressing the MODE button on the
robot. The selected mode is green on the robot display screen. Then
press the CLEAN button on the robot or select the mode you wish
to use via the remote control. The robot will then start its cleaning
cycle. Once the area is clean, the robot returns to its starting point
and stops its cycle.
NOTE: Before the robot starts its cleaning cycle, make sure there is a space of at
least 50cm to the sides and rear of the robot.

13
Operating the robot
EN
This mode is used to clean specic 5mby5m areas. Press the MODE
button on the robot and select the ZONE mode. The ZONE mode
indicator light is green on the robot display screen. Then press the
CLEAN button on the robot and the cleaning cycle will start. The ZONE
mode can also be activated using the remote control. Once the area
is clean, the robot returns to its starting point and stops its cycle.
AUTO mode
ZONE mode
This mode is perfect for cleaning large surfaces. When the robot is
switched on, the AUTO mode indicator light is green on the robot
display screen. Then press the CLEAN button on the robot and the
cleaning cycle will start. The AUTO mode can also be activated using
the remote control. After the robot has completed its cleaning cycle
using zig-zag movements, it returns to its starting point before it
stops its cycle.
5m
5m

14
Operating the robot
EN
This mode is the most eective when cleaning a specic area. Press
the MODE button on the robot and select the SPOT mode. The SPOT
mode indicator light is green on the robot display screen. Then press
the CLEAN button on the robot and the cleaning cycle will start. The
SPOT mode can also be activated using the remote control. Once
the area is clean, the robot returns to its starting point and stops its
cycle.
EDGE mode
SPOT mode
The EDGE mode is ideal for cleaning along walls and in corners.
Press the MODE button on the robot and select the EDGE mode.
The EDGE mode indicator light is green on the robot display screen.
Then press the CLEAN button on the robot and the cleaning cycle
will start. The EDGE mode can also be activated using the remote
control. The robot moves in straight lines, along walls and furniture
in the room. When the robot has cleaned along all of the walls in the
room, it stops its cycle.
NOTES: Before the robot starts its EDGE cleaning cycle, place the robot facing the
wall and remove any obstacles along the wall.
0.8m
0.8m

15
Operating the robot
EN
Pausing the robot
To stop or pause the robot, press the CLEAN button on the robot or
any button on the remote control.
NOTES:
• The robot returns to its starting point in the following cases: if the clean water
tank is empty, the used water tank is full or the battery is low.
• When the robot is switched back on, it restarts the cleaning cycle it was in when
it was last used.
Switching o the robot
To switch the robot o, press the CLEAN button on the robot for 3
seconds . When the robot beeps, release the button and the robot
switches o.
NOTE: When the robot is not active for some minutes, it automatically switches o.

16
Maintenance
EN
Side wheels and front castor
Wipe the side wheels with a dry cloth to remove built up dust.
Pull rmly on the castor to remove it. Then clean out all the dirt from
inside the cavity. Use a slotted screwdriver to remove the castor
from its frame and wipe it clean. Remove all debris caught around
its axle.
Water tanks, caps and lter
Used water tank
The used water tank must be emptied and cleaned after every
cleaning cycle.

17
Maintenance
EN
Clean water tank
You are recommended to
regularly clean the clean water
tank. To do so, you should ll it
with clean water, shake it and
then empty it.
Tank caps
Regularly clean the used and
clean water tank caps using a
damp cloth.
Air lter
To access the lter, remove the
rear part from the front part of
the robot.
The protection lter must be
cleaned with clean water to
remove all the built up dust. Wait
until it is fully dry before putting
it back.

18
Maintenance
EN
Gap and power sensors
The gap and power sensors on the bottom of the robot and on the
home base must be regularly cleaned with a soft cloth. Never let the
sensors get wet.
Main brush and squeegee
Unclip the main brush from its unit. Clean the cavity using a soft
cloth and run the main brush under clean water. Wait until it is fully
dry before putting it back.
You can also run the squeegee
under clean water. Make sure it
is dry before putting it back.
NOTE: The main cleaning brush can be
hand-washed for better results.
Table of contents
Languages:
Other Amibot Vacuum Cleaner manuals

Amibot
Amibot Spirit LASER User manual

Amibot
Amibot AG30 User manual

Amibot
Amibot Swift User manual

Amibot
Amibot Pulse User manual

Amibot
Amibot signature JUNGLE User manual

Amibot
Amibot Spirit MOTION User manual

Amibot
Amibot PURE LASER User manual

Amibot
Amibot Spirit PREMIUM User manual

Amibot
Amibot flex Laser User manual

Amibot
Amibot vision User manual

Amibot
Amibot Animal XL User manual

Amibot
Amibot Spirit LASER User manual

Amibot
Amibot Spirit ICE User manual

Amibot
Amibot Prime User manual

Amibot
Amibot Prime 2 User manual

Amibot
Amibot Animal User manual

Amibot
Amibot Animal Motion User manual

Amibot
Amibot Animal Premium User manual

Amibot
Amibot Swift User manual

Amibot
Amibot glass AG31 User manual