manuals.online logo
Brands
  1. Home
  2. •
  3. Brands
  4. •
  5. &Tradition
  6. •
  7. Indoor Furnishing
  8. •
  9. &Tradition In Between Round and square top with wooden legs by Sami... User manual

&Tradition In Between Round and square top with wooden legs by Sami... User manual

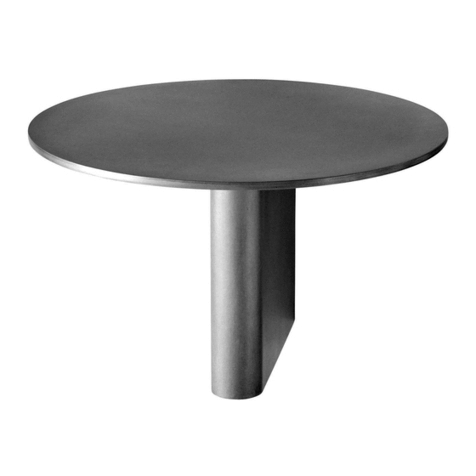
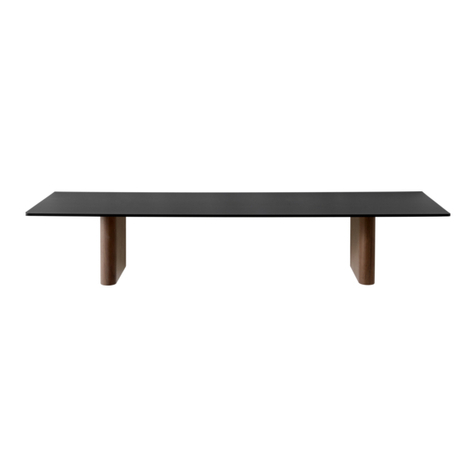
In Between Tables
by Sami Kallio
2014/2018
Congratulations on choosing this original In Between table,
designed in 2014/2018 by Sami Kallio. We hope you will
enjoy using this product and follow these instructions
to ensure correct assembly. If you have any questions or
comments, please do not hesitate to contact us by mail on:
in[email protected]
Instructions
Contents
ATable top / round or square
BTable leg×3 (up to Ø 90) / × 4 (Ø 91 to Ø 150 cm)
CScrew× 12 (up to Ø 90) /×16(Ø 91 to Ø 150 cm)
DAllen Key
Unpack the table and ensure all parts pictured are included.
Please read these instructions carefully and retain them for future
reference to ensure that the table is used correctly. For your own safety,
please study each step of this instruction manual. &tradition is not
responsible for any faults or damages caused by not following these
instructions correctly.
Safety precautions
- Dispose of plastic bag from packaging and do not allow children to play
with it.
- The table is only intended for interior use.
- Handle table tops with care in order not to scratch surfaces.
- Power tools can be used to assemble the table. Be careful not to
overtighten or damage screw or thread.
- Two or more persons are needed to turn table around once assembled.
- Spilled liquids of any kind should be removed immediately from the table
top as it may penetrate the surface treatment and cause damage to it.
Cleaning instructions
- Solid wood table top
For daily care, dust oiled furniture with a soft dry cloth. Cleaning can
be done using a soft cloth wrung in lukewarm water following the wood
grains and dried immediately with a dry cloth following the wood grains.
For more severe cleaning a soap specifically developed for oiled wood can
be used. Follow the instructions on the packaging of the cleaning product.
To maintain the look and silky feeling of oiled wood, regular re-oiling is
recommended. Re-oiling should be done when the wood starts to appear
dry or faded. Usually, reoiling four times every year is sucient.
- Veneer table top: Avoid using cleaning detergents and abrasive cleaning
agents, as they may damage the surface of the wood. Avoid placing
wooden furniture in direct sunlight, excessive heat or humidity.
-Laminate table top: Laminate is a hard-wearing and maintenance free
material used for table tops in the &tradition collection. Laminate can be
cleaned with a soft cloth wrung in a mild solution of lukewarm water and a
universal cleaning detergent. Always wipe over with a dry soft cloth after
cleaning. For dicult stains such as coee or tea use a nylon bristle brush
with mild household cleaner or detergent, rinsing with clean water and
repeating as necessary. Rinse thoroughly with water.
- Linoleum table top: Table tops with linoleum oers a soft touch surface
that does not feel as cold and hard as laminate. Regular cleaning is done
with a soft cloth wrung in a mild solution of lukewarm water and a universal
cleaning detergent. Avoid placing sharp objects on the surface as this may
scratch the surface. It is recommended to use trivets or coasters under
flowerpots, vases, cups etc.
- Metal base: It is recommended only to use a soft dry cloth to clean plated
and powder coated surfaces but in case more severe cleaning is necessary,
a soft cloth wrung in lukewarm water can be carefully applied. Always dry
immediately after cleaning with a soft dry cloth.
In Between
Round and square top
with wooden legs
B
B
A
A
D
C
C
Step 1
Place table top (A) upside down. Please make sure to place table top on soft
surface, so that table top will not be damaged during assembly.
Place legs (B) on table top, aligning each leg with all four holes as illustrated.
Step 2
Place the screws (C) in the appointed holes and fasten with Allen Key (D)
Repeat the task for the remaining legs.
G H
Contents
ATable top / with 1 or 2 crossbeams*
BTrestle × 2
CBarrel nut ×8 (up to 200cm) /
×16 (from 200cm)
DMetal dowel ×4 (up to 200cm) /
×8 (from 200cm)
ESet screw× 8 (up to 200cm) /
× 16 (from 200cm)
FScrews× 20
GSmall Allen key
HLarge Allen key
A
B
C D E
F
Unpack the table and ensure all parts pictured are included.
*Please note that tables up to 200 cm in length have a single crossbeam,
while tables of more than 200 cm have two crossbeams beneath the
table top.
In Between
Rectangular top
with wooden legs
Step 1
Place the table top (A) upside down on a soft, flat surface.
Turn the trestle (B) upside down and align holes with the corresponding
holes in crossbeam.
Step 2
Insert barrel nuts (C) (thread side upwards) into the holes in
crossbeam and trestle.
Insert metal dowels (D) (coned hole facing up) into corresponding holes.
Step 3
Insert set screws (E) into barrel nuts and fasten loosely with large Allen Key
(H) so that all parts are held in position but not yet fully tightened.
Step 4
Place screws (F) into the appointed holes on the trestle and fasten with
small Allen Key (G).
Tighten set screws with large Allen Key.
Repeat step 1-4 in opposite end of table.
A
B
C
C
E
E
D
F
Contents
ATable top
BTop support
C Column
DBase
E Large bolts ×3
F Large counter sunk bolts ×3
G Flanged button head screws ×6
H Large Allen key
I Small Allen key
J Self-adhesive felt pads ×8
*Please note that rectangular tables come with two sets of support/
column/base
E
F
G
H
I
B
D
C
J
Step 3
Place the base (D) on the column and align the holes with the corresponding
holes in the column. Place the large counter sunk bolts (F) in the appointed
holes and fasten them clockwise with the large Allen key.
Step 4
Place the self-adhesive felt pads (J) on the bottom of the base, with equal
spacing and 1 cm distance from the edge as illustrated.
Step 5
Turn the base upside down.
In Between
Round, square and rectangular
top with round base
Step 1
Place the column (C) on the floor. Place the top support (B) on the column
and align the holes with the corresponding holes in the column. Place the
large bolts (E) in the appointed holes and fasten them clockwise with the
large Allen key (H).
Step 2
Turn the top support upside down on a soft, flat surface.
1cm
A
Step 6
Place the table top (A) on top of the top support. Align the holes
with the corresponding holes in the table top. Place the flanged
button head screws (G) in the appointed holes and fasten them
clockwise with the small Allen key (I).
Rectangular tables
Rectangular tables need two bases. Please follow the previous
instruction steps 1-6 on how to assemble each of the bases.

This manual suits for next models

4

Other &Tradition Indoor Furnishing manuals

&Tradition SHUFFLE TABLE MH1 User manual

&Tradition

&Tradition SHUFFLE TABLE MH1 User manual

&Tradition Alima NDS1 User manual

&Tradition

&Tradition Alima NDS1 User manual

&Tradition LATO LN8 User manual

&Tradition

&Tradition LATO LN8 User manual

&Tradition Betty TK2 User manual

&Tradition

&Tradition Betty TK2 User manual

&Tradition Column JA1 User manual

&Tradition

&Tradition Column JA1 User manual

&Tradition Pavilion AV18 User manual

&Tradition

&Tradition Pavilion AV18 User manual

&Tradition PALETTE DESK JH9 User manual

&Tradition

&Tradition PALETTE DESK JH9 User manual

&Tradition Pavilion AV16 User manual

&Tradition

&Tradition Pavilion AV16 User manual

&Tradition Rely Chair User manual

&Tradition

&Tradition Rely Chair User manual

&Tradition Collect Hook SC46 User manual

&Tradition

&Tradition Collect Hook SC46 User manual

&Tradition Drop Leaf HM5 User manual

&Tradition

&Tradition Drop Leaf HM5 User manual

&Tradition Sami Kallio In Between SK3 User manual

&Tradition

&Tradition Sami Kallio In Between SK3 User manual

&Tradition Column JA1 User manual

&Tradition

&Tradition Column JA1 User manual

&Tradition Collect Hanger SC47 User manual

&Tradition

&Tradition Collect Hanger SC47 User manual

&Tradition Drip HW58 User manual

&Tradition

&Tradition Drip HW58 User manual

&Tradition Hee Welling Drip HW61 User manual

&Tradition

&Tradition Hee Welling Drip HW61 User manual

&Tradition Capture SC76 User manual

&Tradition

&Tradition Capture SC76 User manual

&Tradition Column JA2 User manual

&Tradition

&Tradition Column JA2 User manual

&Tradition Betty TK7 User manual

&Tradition

&Tradition Betty TK7 User manual

&Tradition JH6 User manual

&Tradition

&Tradition JH6 User manual

&Tradition Drip MTO Manual

&Tradition

&Tradition Drip MTO Manual

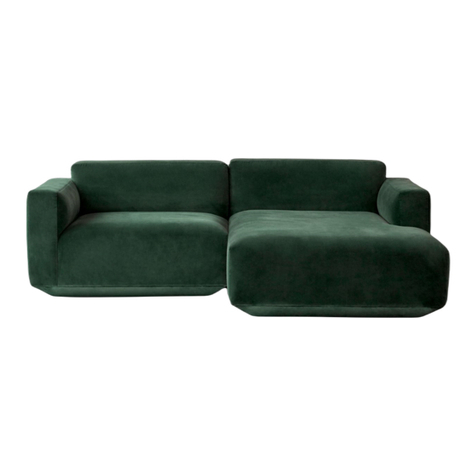
&Tradition DEVELIUS EV1 User manual

&Tradition

&Tradition DEVELIUS EV1 User manual

&Tradition Shuffle table User manual

&Tradition

&Tradition Shuffle table User manual

&Tradition Pinwheel HM7 User manual

&Tradition

&Tradition Pinwheel HM7 User manual

Popular Indoor Furnishing manuals by other brands

FourStarGroup 11225005B quick start guide

FourStarGroup

FourStarGroup 11225005B quick start guide

Smith & Noble Metro Track Flat Wood Hardware Step by step installation instructions

Smith & Noble

Smith & Noble Metro Track Flat Wood Hardware Step by step installation instructions

Simmons SOHO manual

Simmons

Simmons SOHO manual

Philips Elite MHC-08100 datasheet

Philips

Philips Elite MHC-08100 datasheet

HEXA senses akustik plus installation manual

HEXA

HEXA senses akustik plus installation manual

Woood KAYAZ Mounting instructions

Woood

Woood KAYAZ Mounting instructions

milliard Changing Table manual

milliard

milliard Changing Table manual

Balt 89833 Assembly instructions

Balt

Balt 89833 Assembly instructions

Poliman A3700 Assembly instructions

Poliman

Poliman A3700 Assembly instructions

Living Spaces ESME C/E King Assembly instructions

Living Spaces

Living Spaces ESME C/E King Assembly instructions

Unfinished Furniture of Wilmington T-4464XB Assembly instructions

Unfinished Furniture of Wilmington

Unfinished Furniture of Wilmington T-4464XB Assembly instructions

Lightolier Lytespan MHT4RNF specification

Lightolier

Lightolier Lytespan MHT4RNF specification

Songmics LWS97 quick start guide

Songmics

Songmics LWS97 quick start guide

Unfinished Furniture of Wilmington MISSION BJ6S Assembly instructions

Unfinished Furniture of Wilmington

Unfinished Furniture of Wilmington MISSION BJ6S Assembly instructions

Minwax COLLECTIBLES SHELF quick start guide

Minwax

Minwax COLLECTIBLES SHELF quick start guide

J.Burrows JB5TWIRESH Assembly instructions

J.Burrows

J.Burrows JB5TWIRESH Assembly instructions

Freedom Cancun 22920263 manual

Freedom

Freedom Cancun 22920263 manual

Argos HOME Mia 8459866 Assembly instructions

Argos

Argos HOME Mia 8459866 Assembly instructions

manuals.online logo
manuals.online logoBrands
  • About & Mission
  • Contact us
  • Privacy Policy
  • Terms and Conditions

Copyright 2025 Manuals.Online. All Rights Reserved.