ARB LINX LX100 User manual

OPERATION GUIDE
LX100 Vehicle Accessory Interface Kit | 22.01.18
LIN
VEHICLE ACCESSORY INTERFACE

PAGE 2
| LX100 VEHICLE ACCESSORY INTERFACE KITOPERATION GUIDE
WHAT IS
LINX?

PAGE 3
WHAT IS
LINX?
INTRODUCING TOTAL CONTROL
LINX is a unique modern controller that declutters the dashboard and centralises the command of vehicle accessories by
replacing classic switches, gauges and monitors with one sleek and smart driver interface. Built on an expandable platform,
LINX will continue to evolve your on and off road driving experience both now and into the future.
The mobile touchscreen display integrates seamlessly into the vehicle cabin and mounts to a magnetic gimbal that’s
installed within easy reach of the driver. This connects to the LINX Controller which is the brains behind the system, and is
conveniently installed out-of-sight either underneath the dash or the seat.
STAY IN THE LOOP
For the latest details, updates and list of accessories, head over to:
www.linx.arb.com.au
LINX is a sleek touchscreen interface that enables total control of
both new and existing 4X4 Accessories. Gone are the days where
the only option for installing aftermarket switches meant drilling
multiple holes into the dashboard.

| LX100 VEHICLE ACCESSORY INTERFACE KITOPERATION GUIDE
PAGE 4
TABLE OF
CONTENTS
Get to know the basic in’s and out’s of your brand new LINX -
the next generation of 4x4 Accessories.
KIT CONTENTS
WHAT’S IN THE BOX? .................................................................
OVERVIEW
COMPATIBLE ARB ACCESSORIES ................................................
OPTIONAL ACCESSORIES ...........................................................
INITIAL SETUP
SETTING UP YOUR LINX ..............................................................
GETTING STARTED ....................................................................
CONNECTING THE USB CABLE ....................................................
SWITCHING ON/OFF ..................................................................
BLUETOOTH PAIRING DISPLAY WITH CONTROLLER .........................
OPERATING LINX
LINX DISPLAY ...........................................................................
HOME SCREEN .........................................................................
MAIN MENU ..............................................................................
ACCESSING EACH MODULE ........................................................
RETURNING TO MAIN ICON SCREEN ............................................
SETTINGS MENU .......................................................................
QUICK SETTINGS MENU .............................................................
MAIN SETTINGS ........................................................................
LINX SETTINGS SCREEN ............................................................
LINX INTERFACE & MENU NAVIGATION .........................................
UPDATING LINX .........................................................................
MODULES OVERVIEW
FRONT & REAR TRACTION MODULES ...........................................
ACTIVATING REAR TRACTION ......................................................
ACTIVATING FRONT TRACTION ...................................................
FRONT & REAR TRACTION MENU: AIR LOCKER SETUP ....................
COMPRESSOR & PRESSURE MODULE ..........................................
01.
p. 9
p. 11
p. 13
p. 14
p. 15
p. 16
p. 17
p. 19
p. 20
p. 22
p. 23
p. 23
p. 24
p. 24
p. 24
p. 25
p. 26
p. 28
p. 30
p. 30
p. 31
p. 32
p. 34
02.
03.
04.
05.
06.
07.
08.
0 9 .
10.
11.
12.
13.
p. 7

PAGE 5
CONFIGURING PRESSURE CONTROL ...........................................
PRESSURE CONTROL MODE LIST .................................................
SWITCHBOARD MODULE ............................................................
RENAMING ACCESSORIES ..........................................................
SYNCHRONISING ACCESSORIES ..................................................
LOW BATTERY PROTECTION ........................................................
BATTERY MODULE .....................................................................
RENAMING BATTERIES ...............................................................
LOW VOLTAGE ALARM LEVEL .......................................................
LOW VOLTAGE ALARM ................................................................
SPEEDOMETER MONITOR MODULE ..............................................
SETTING SPEED LIMIT ...............................................................
SPEED LIMIT WARNING ..............................................................
AIR SUSPENSION MODULE .........................................................
AIRBAG OPTIONS ......................................................................
RENAMING SETTINGS ................................................................
RETURN TO AIR SUSPENSION MENU ............................................
ADJUSTING AIR PRESSURE .........................................................
COMPLIANCE INFORMATION
EUROPE - EU DECLARATION OF CONFORMITY ...............................
USA - FCC STATEMENT ..............................................................
ENVIRONMENTAL PROTECTION ...................................................
p. 34
p. 35
p. 39
p. 40
p. 40
p. 41
p. 42
p. 43
p. 43
p. 44
p. 46
p. 47
p. 47
p. 49
p. 49
p. 50
p. 50
p. 51
p. 53
p. 54
p. 54
14.
15.
16.
17.
18.

PAGE 6
| LX100 VEHICLE ACCESSORY INTERFACE KITOPERATION GUIDE
KIT CONTENTS
Each and every component to get your new LINX up and
running.
BACK TO TABLE OF CONTENTS

PAGE 7
01.
WHAT’S IN
THE BOX?
Congratulations on the purchase of your brand new LINX. Inside
the box, you’ll nd each of the components required to get the
system up and running for your next 4x4 adventure.
NOTES
• The LINX DISPLAY 02 was specically designed to withstand the extremes of heat and cold. It has a metal coupling on the
back to connect it to the magnets on the Display Gimbal Mount .
• The LINX CONTROLLER 01 and WIRING LOOMS 05 are normally mounted under the dash, however this may vary
depending on the vehicle.
• The DIN RAIL 06 comes assembled to the back of the LINX CONTROLLER 01 and is used for securing the unit.
• The USB connection can be used to power and charge the LINX Display, and provide the communications channel between the
LINX Controller and LINX Display.
LINX CONTROLLER
LINX DISPLAY
LINX DISPLAY
GIMBAL MOUNT
USB CABLE
WIRING LOOMS (x3)
DIN RAIL 180MM
01
02
03
04
06
05
03

PAGE 8
| LX100 VEHICLE ACCESSORY INTERFACE KITOPERATION GUIDE
OVERVIEW
Out of the box, LINX offers total control of six pre-installed
modules: Front & Rear Traction, Compressor & Pressure
Control, Battery Monitoring, Speedometer, Air Suspension
Control and an Accessory Switchboard.
BACK TO TABLE OF CONTENTS

PAGE 9
There’s a range of ARB accessories that can be controlled
and monitored by LINX.
ARB DRIVING LIGHTS
ARB offers a large range of LED, HID and Halogen driving
lights and light bars to suit your every driving need.
Designed to perform in the most extreme conditions,
they’ll keep the road ahead brightly lit and the rear visible
wherever you go.
AIR LOCKERS
Designed and manufactured in Australia, ARB Air
Lockers will enhance the traction of your 4×4 in just
about any terrain, whether it’s rock, clay, gravel, sand,
snow or mud.
ARB DUAL BATTERY SYSTEMS
Allowing you to power additional accessories without the
risk of attening the main battery, a Dual Battery System
also provides peace of mind in the event of a main battery
failure.
ARB AIR COMPRESSORS
ARB Air Compressors provide many advantages;
including inating tyres and camping accessories,
running air tools, activating Air Lockers and even re-
seating a tyre onto a wheel.
0 2.
COMPATIBLE ARB
ACCESSORIES

| LX100 VEHICLE ACCESSORY INTERFACE KITOPERATION GUIDE
PAGE 10
03.
OPTIONAL
ACCESSORIES
A range of products are available to complement the
LINX Vehicle Accessory Interface.
Please refer to the Installation Guide or your nearest
ARB Store or Stockist for further information.
A-PILLAR BRACKET
LINX A-Pillar brackets are available for a wide range of
vehicles and models.
FIND YOUR NEAREST STORE
VEHICLE SPECIFIC MOUNTS

PAGE 11
AIR SUSPENSION ISOLATION KIT
Adding an Air Suspension Isolation Kit allows owners with
air suspension to take full advantage of LINX’s Air Suspen-
sion Module, providing the ability to independently adjust
the pressure and ride height in each air bag.
TERMINAL KIT
Used for connecting LINX wiring harnesses.
PRESSURE CONTROL KIT
Offering ‘set & forget’ simplicity to tyre ination as
well as remote control over your airbag suspension,
the optional LINX Pressure Control Kit (coupled
with an ARB air compressor) allows you to take full
advantage of LINX’s Pressure Control Module.
RELAY KIT
Used for connecting LINX wiring harnesses.
0 3.
OPTIONAL
ACCESSORIES

PAGE 12
| LX100 VEHICLE ACCESSORY INTERFACE KITOPERATION GUIDE
INITIAL
SETUP
BACK TO TABLE OF CONTENTS
It’s time to get your LINX device up and running!

PAGE 13
The time taken to connect and congure accessories such as compressor, Air
Lockers and driving lights will vary depending on whether the accessory was
tted before or after your next LINX installation. LINX is fully customisable to suit
your vehicle, please contact your local ARB distributor to discuss your individual
requirements and provide a quote for your installation.
Depending on the vehicle and accessories to be installed, the
tting process can take a few hours and is best performed by a
trained ARB Technician.
LINX SETUP PROCESS
• Mounting of the LINX CONTROLLER.
• Connection of the 4 input wires from ignition, high and low beam headlamps and reverse lamp to the LINX
CONTROLLER.
• Connection of the power loom to the LINX CONTROLLER.
• Installation of the LINX DISPLAY GIMBAL MOUNT and/or optional vehicle specic mount bracket.
• Connection of the USB CABLE from the LINX DISPLAY to optional USB power source or the LINX CONTROLLER .
• Checking and downloading any available modules and latest software updates.
0 4.
SETTING UP
YOUR LINX

| LX100 VEHICLE ACCESSORY INTERFACE KITOPERATION GUIDE
PAGE 14
0 5.
GETTING
STARTED
The LINX Display receives power from the Controller via the USB
Charge Cable provided.
The Display’s on-board battery will take around 1 hour to fully charge from at
condition and provide approximately 4 hours of non-connected run time. It is
normal practice to leave the Display on all the time and connected when in the
vehicle. When outside the vehicle,the Display communicates with the Controller
via a Bluetooth connection up to 10m away.
USB CABLE
04
LINX CONTROLLER
COVER LATCH DISPLAY
MOUNT
LINX DISPLAY
03
05 02
01
POWER BUTTON
06
VOLUME
07

PAGE 15
CONNECTING THE USB CABLE
The USB connection can be used to power and charge the LINX
Display, and provide the communications channel between the
LINX Controller and LINX Display.
The provided USB cable, 7450104,has a USB A connector at one end for
connection to the LINX Controller, and a USB micro B (back angled) connector at
the other end for connection to the LINX Display.
The USB cable should be secured to the LINX Controller using a cable tie as
shown below. This prevents vibration or cable strain from damaging the USB
connection.
NOTE:
The LINX Display can also be connected to an alternate USB power socket. In this
case, the communications channel will be via Bluetooth only.
• USB cable
• Alternative USB power socket.
USB CABLE

| LX100 VEHICLE ACCESSORY INTERFACE KITOPERATION GUIDE
PAGE 16
The USB A Port is located inside the Controller and is accessed by pressing and
lifting the latched cover 05 at the front of the controller.
Note: If the LINX System has already been installed in your vehicle, simply connect
the USB micro B connector on the cable to the Display.
SWITCHING ON/OFF
To switch on the Display, press & hold the Power button for approximately two
(2) seconds.
With the unit powered on, you can increase or decrease the volume by pressing the
Volume buttons 07
To switch off the Display, press & hold the Power button then select “Power Off”
then “OK”.
POWER BUTTON06VOLUME07
For more information on installing the LINX system and associated equipment on
your vehicle, please refer to the “LINX Installation Guide” and your nearest ARB
outlet.
06

PAGE 17
BLUETOOTH PAIRING THE DISPLAY WITH CONTROLLER
Access the BLUETOOTH SETTINGS by:
2. Tap SETTINGS and
select BLUETOOTH
1. Open up the APP DRAWER
2. Once paired, the LINX Display screen
should change to the main split screen
view, and be displaying the vehicle’s
battery voltage
1. Tap ‘ARB LINX’ from the available
devices.
To pair with LINX:
NOTE:
Once the Display and Controller have been Bluetooth paired,
the LINX Controller will become invisible to all other devices.

PAGE 18
| LX100 VEHICLE ACCESSORY INTERFACE KITOPERATION GUIDE
OPERATING
LINX
Learn how to navigate your LINX device.
BACK TO TABLE OF CONTENTS

PAGE 19
The LINX Display is the user interface that enables the driver
to access and customise the settings that control the 4X4
equipment installed on the vehicle and connected to the LINX
Controller.
It uses a capacitive touch screen and is based on the Android 6.0 operating
system. It has been designed to withstand the rigor of 4x4 driving including
operating temperatures from -20°C to 80°C.
The Display supports USB, Bluetooth, WiFi and GPS connectivity and complies
with FCC, CE and RCM certications.
MICROPHONE
DISPLAY SCREEN
08
01
CAMERA
05
MICRO USB
PORT
04
AUDIO JACK
03
LIGHT SENSOR
02
VOLUME
06
POWER
07
SPEAKER
09
0 6.
LINX
DISPLAY

| LX100 VEHICLE ACCESSORY INTERFACE KITOPERATION GUIDE
PAGE 20
0 7.
HOME
SCREEN
Upon start-up, the Display shows the ARB LINX Home Screen and
then enters splt screen display mode.
The Status Bar contains several icons positioned across the top of the display
which indicate the status of the unit. Items which are active/on are bright.Items
which are inactive/off are greyed out.
Settings that should remain on all the time include GPS (for Speedometer
function to operate), Bluetooth (for Controller communications when the Display
device is disconnected from the USB cable and is outside the vehicle) and WiFi
as this is used by the Display to communicate with the internet during LINX
updates.
GPS
01 (on)
BLUETOOTH
02 (on)
WIFI
03
(on)
SD CARD
(none)
04
BATTERY
(full)
05
TIME 06
Other manuals for LINX LX100
1
This manual suits for next models
1
Table of contents
Other ARB Automobile Accessories manuals
ARB
ARB Airlocker RD167 User manual
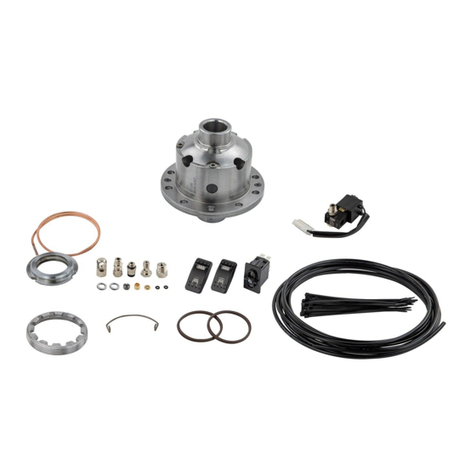
ARB
ARB AIRLOCKER RD208 User manual
ARB
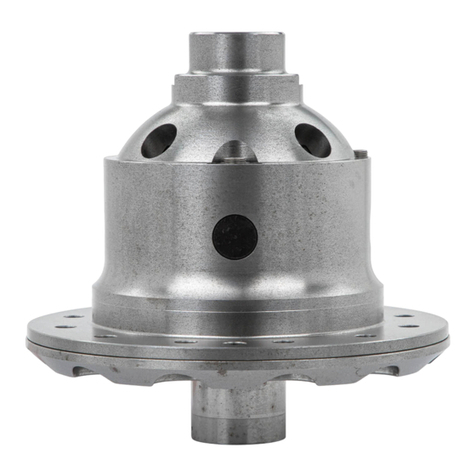
ARB AIRLOCKER RD216 User manual
ARB
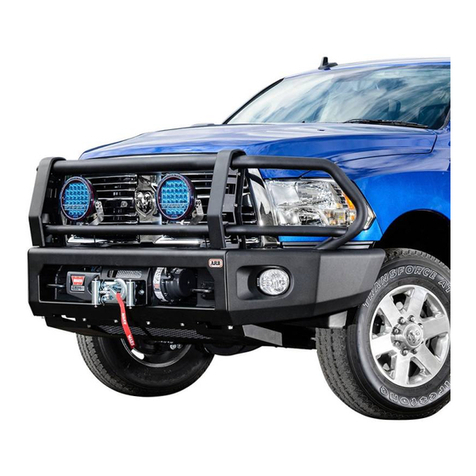
ARB 2237010 User manual
ARB
ARB RD101 User manual

ARB
ARB 3500720 User manual
ARB
ARB Airlocker RD137 User manual
ARB
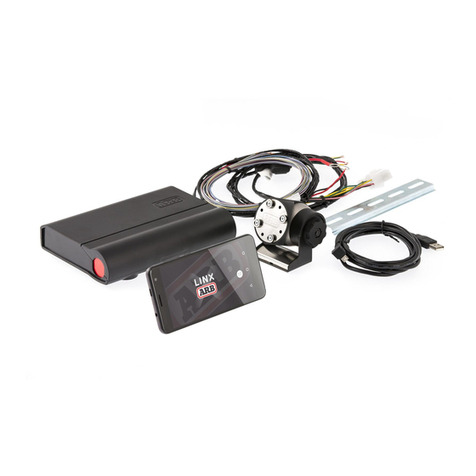
ARB LINX LX100 User manual
ARB
ARB AIRLOCKER RD189 User manual
ARB
ARB Airlocker RD158 User manual
