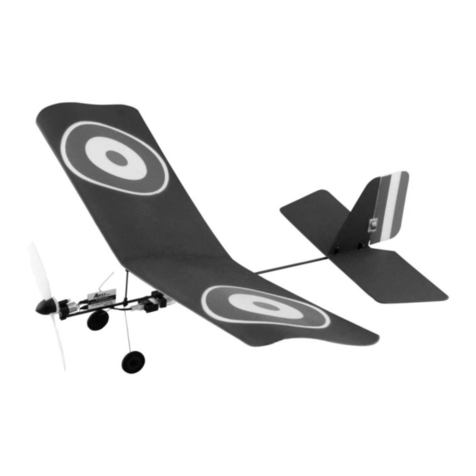
Ares sopwith pup Manual

Owner’s Manual &
Technical Information (PTF)

2
Specication
Wingspan:..................... 352mm (13.87”)
Wing chord:................... 70mm (2.75”)
Wing area:..................... 71sq. in.
Length:.......................... 255mm (10”)
Flying weight:................ 20g (0.7oz)
Battery: ......................... 1S 70mAh LiPo
Motor:............................ Brushed geared
Propeller:....................... 4.7 x 2.75”
3-in-1 control unit:........ Hitec Red receiver; two servos; ESC
No. of channels: ........... 3 (rudder, elevator, throttle)

3
Contents
Introduction ................................................................................ 4
Contents ..................................................................................... 4
Required to complete................................................................. 5
FCC Information ......................................................................... 5
Safety precautions ..................................................................... 5
LiPo battery warnings ................................................................ 6
Preparing for ight...................................................................... 7
Flying.........................................................................................11
Propeller replacement .............................................................12
Replacement Parts ..................................................................12
Warranty, support and service ................................................13
IMPORTANT! This radio control model is not a toy. It must be operated and
own according to these instructions and may cause serious injury to persons
or damage to property if not used responsibly or if operated without due
caution. Unsuitable for children under 14 years of age.

4
Introduction
With sensitive controls and the ability to remain fully aerobatic at up to
15,000 feet, the World War I-era Sopwith Pup was so light and maneuverable
that it became the rst aircraft to land on a moving ship in 1917. Nearly
1,800 Pups were built by Sopwith and its sub-contractors between the years
1916 and 1917 when it was at the peak of its operational development.
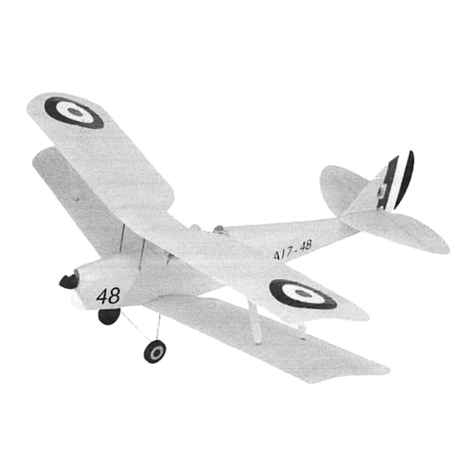
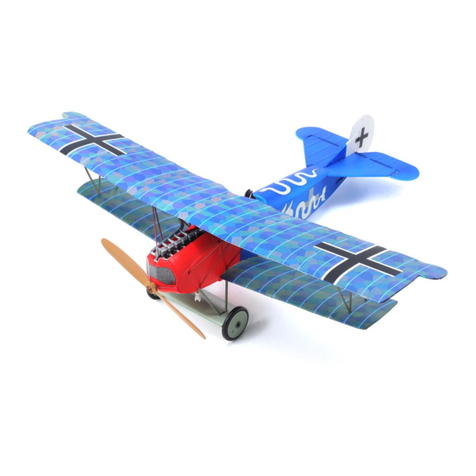
The Ares [air-eez] Sopwith Pup is a lightweight, three-channel ultra-micro
semi-scale model of the original. It features durable foam construction
and numerous scale touches such as molded wing rib detail, an authentic
trim scheme, plus a wood texture and color propeller and interplane struts.
Technically advanced the Sopwith Pup incorporates a Hitec Red 2.4GHz
receiver that’s compatible with all current Hitec 2.4GHz aircraft transmitters.
For convenience, two versions of this model are available both supplied with
Hitec Red protocol: choose either Ready-To-Fly (including a Hitec Red-enabled
transmitter and receiver) or Pair-To-Fly (supplied with a Hitec Red receiver
that’s compatible with your existing Hitec air transmitter). Weighing less than
an ounce, the Sopwith Pup is ideal for indoor ight or outdoor ight in calm
conditions.
• Semi-scale appearance with molded wing rib detail
• The model’s micro size and light weight make it ideal for indoor spaces
• Fully proportional throttle, elevator and rudder control for exceptional
maneuverability
• The lightweight 1S LiPo ight battery attaches with magnets
• Slow ying characteristics mean the Pup is ideal for the less experienced
pilot
• Intermediate and expert pilots will enjoy the Pup’s exciting performance
Contents
1 x 100% factory assembled Sopwith Pup.
1 x 70mAh 3.7V 1S LiPo battery.
1 x 0.1A DC USB charger for 1S 3.7V LiPo.

5
Required To Complete
• 4 x AA alkaline cells
• 1 x 4-channel Hitec Red-enabled transmitter.
FCC Information
This device complies with part 15 of the FCC rules. Operation is subject to the
following two conditions: (1) This device may not cause harmful interference,
and (2) this device must accept any interference received, including
interference that may cause undesired operation.
Caution: Changes or modications not expressly approved by the party
responsible for compliance could void the user’s authority to operate the
equipment.
This product contains a radio transmitter with wireless technology which
has been tested and found to be compliant with the applicable regulations
governing a radio transmitter in the 2.400GHz to 2.4835GHz frequency
range.
The associated regulatory agencies of the following countries recognize the
noted certications for this product as authorized for sale and use: USA
Safety Precautions
Failure to use this product in the intended manner as described in the
following instructions can result in damage and / or personal injury. A Radio
Controlled (RC) airplane is not a toy! If misused it can cause serious bodily
harm and damage to property.
Keep items that could become entangled in the propeller away from the
propeller, including loose clothing, tools, etc. Be especially sure to keep your
hands, face and other parts of your body away from the propeller.
As the user of this product you are solely and wholly responsible for operating
it in a manner that does not endanger yourself and others or result in
damage to the product or the property of others.
This model is controlled by a radio signal that is subject to possible
interference from a variety of sources outside your control. This interference
can cause momentary loss of control so it’s advisable to always keep a safe
distance from objects and people in all directions around your model as this
will help to avoid collisions and / or injury.
• Never operate your model if the voltage of the batteries in the transmitter
is too low.
• Always operate your model in an open area away from obstacles, people,
vehicles, buildings, etc.
• Carefully follow the directions and warnings for this and any optional
support equipment (chargers, rechargeable batteries, etc.).

6
• Keep all chemicals, small parts and all electronic components out of the
reach of children.
• Moisture causes damage to electronic components. Avoid water exposure
to all electronic components, parts, etc. that are not specically designed
and protected for use in water.
• Never lick or place any portion of your model in your mouth as it could
cause serious injury.
LiPo Battery Warning
IMPORTANT NOTE: Lithium Polymer batteries are signicantly more volatile
than the alkaline, NiCd or NiMH batteries also used in RC applications.
All instructions and warnings must be followed exactly to prevent property
damage and / or personal injury as the mishandling of LiPo batteries can
result in re. By handling, charging or using the included LiPo battery you
assume all risks associated with LiPo batteries. If you do not agree with these
conditions please return the complete product in new, unused condition to
the place of purchase immediately.
• You MUST charge the LiPo battery in a safe area away from ammable
materials.
• NEVER, at any time, leave the LiPo battery unattended when it’s being
charged.
• When charging the battery you should ALWAYS remain in constant
observation to monitor the charging process and react immediately to
any potential problems that may occur.
• After ying / discharging the battery you must allow it to cool to ambient/
room temperature before recharging.
• To charge the LiPo battery you MUST use only the included charger in the
transmitter. Failure to do so may result in a re causing property damage
and/or personal injury. DO NOT use a NiCd or NiMH charger.
If at any time during the charge or discharge process the battery begins to
balloon or swell, discontinue charging or discharging immediately. Quickly
and safely disconnect the battery, then place it in a safe, open area away
from ammable materials to observe for at least 15 minutes. Continuing to
charge or discharge a battery that has begun to balloon or swell can result in
a re. A battery that has ballooned or swollen, even a small amount, must be
removed from service completely.
For best results, store the battery at room temperature – approximately
68 – 77°Fahrenheit (F) – and in a dry area.
•
7
Preparing for Flight
1. Charging the ight battery. You must charge the included 70mAh
1-cell/1S 3.7V 15C LiPo battery (AZSB????) using the USB battery
charger (AZS????) supplied, or by using a suitably compatible LiPo
battery charger. Charging the LiPo battery using an incompatible LiPo
battery charger (such as a NiCd or NiMH battery charger), or even a
different LiPo battery charger with the incorrect settings, may result in
damage to the battery or even re, resulting in property damage and/or
personal injury.
Please follow these steps to charge the LiPo ight battery with the
supplied 104C USB charger:
• Connect the 104C charger to a suitable 5V USB connection/port
on a computer or other device. An alternative is to plug the optional
100 – 240V AC to 5V DC USB, 0.5-amp Power Supply/AC adapter
(AZSC5005PS) into a compatible 100 – 240V AC outlet, then connect
the 104C charger to the power supply/AC adapter. The power supply/AC
adapter is powered ON when the LED indicator glows solid green.
• When the 104C charger is connected to a power source the LED indicator
will blink/ash red. Attach the battery to the connector at the end of
the charge lead extending from the transmitter. YOU MUST BE CAREFUL
TO ENSURE PROPER POLARITY BEFORE MAKING THE CONNECTION by
aligning the small red circle marking on the housing of the battery with
the small red circle marking on the charge lead connector.
• While these ultra-micro connectors are keyed to minimize the risk of
a reverse polarity connection, if you force them it is possible to make
connection with the incorrect polarity, potentially causing damage to
the battery and / or charger (transmitter). When the red circle markings
are properly aligned for correct polarity joining the connectors should
require only a minimal amount of pressure to achieve the light ‘click’ that

8
indicates a secure connection.
• When the battery is connected to the charge lead securely, and with the
proper polarity, the LED indicator on the charger will glow solid bright red.
The battery will be charging anytime the LED indicator is glowing solid bright
red.
• It will take approximately 30 -– 50 minutes to charge a mostly or fully
discharged (not over-discharged) battery. When the battery is fully charged
the LED indicator will dim signicantly. When the LED indicator is dim you
can disconnect the battery from the charger’s connector / wire lead as it is
now fully charged and ready for use.
NOTE: The LiPo battery included with each new model will arrive partially
charged. For this reason the initial charge may only take 15 – 25 minutes.
When the LED indicator is blinking / ashing red, the 104C charger is
powered ON and ready to begin charging the next LiPo battery that’s
connected to it.
2. Pair your chosen Hitec air transmitter to the Sopwith’s 3-in-1 control unit.
Start by following the pair / binding instructions supplied with your Hitec
air transmitter making sure to select the Minima receiver option when
prompted.
Having put your transmitter into pair / bind mode, pull the throttle stick
back to its lowest position. Install the fully charged 70mAh LiPo battery in
your Sopwith Pup by plugging the ultra-micro connector on the battery to
the lead extending from the bottom of the aircraft. Make sure, once again,
to match the red dots on the connectors to assure correct polarity. The
battery attaches to the airplane with a magnet. So, simply place the battery
in position with the plug end facing the tail. Slide the front of the battery
into the notch to ensure that the airplane’s Centre of Gravity is correct..
Pairing will commence as soon as the battery is connected.
Your Sopwith Pup is equipped with a compact and advanced 3-in-1 control
unit. This control unit is a lightweight combination of a 2.4GHz receiver,

9
two servos, and an electronic speed control (ESC). When the transmitter
nds this unit and pairs with it, the unit will instruct the elevator and
rudder control surfaces to move to indicate that the pairing process is
complete and that the motor is now armed. When this happens, follow your
transmitter’s instruction manual for guidance on exiting the pairing process.
Having paired your transmitter the Sopwith’s 3-in-1 control unit will now
recognise the Globally Unique Identier (GUID) code of your transmitter and
will automatically pair with it whenever you switch on and connect the ight
battery.
Note: If you have servo movement but the motor is not working, unplug
the ight battery, check that the throttle stick is at its lowest position, then
re-plug in the ight battery. This should re-initialize and arm the electronic
speed control.
3. Flight controls. Check the control surfaces, as below, noting that
instructions for servo reversing are given on page ?? of this manual. Note,
also, that on this 3-channel airplane the rudder function is controlled by the
aileron stick on the transmitter. The pushrod for the elevator should be in
the outermost hole on the control horn while the rudder pushrod should be
in the hole before the outermost hole.
With the model in front of you, facing away, move the rudder stick to the
right and check that the rudder moves right in response. Left rudder stick
will move the rudder to the left.
Pull the elevator stick back and check that the elevator moves in an upward
direction. Push the elevator stick forward and check that the elevator moves
in a downward direction.
With the propeller clear of obstructions and the model restrained, open the
throttle slowly and check that it turns in an anticlockwise direction, when
viewed from the front.

10
Check to see that the elevator and rudder are centered when the
transmitter is on and the airplane is powered up. Adjust as necessary
with the digital trim buttons adjacent to the control stick. For example, if
the elevator is raised above neutral, push the upper elevator trim button
several times until the surface is centered.
Your Sopwith Pup is now ready to y. Choose a at-calm day for the rst
ight or use a suitable indoor venue (a sports hall is ideal) that’s free of
obstructions.

11
Flying
The Sopwith Pup is designed primarily as an indoor model suitable for ying in
a space at least the size of a basketball court. The airplane can, of course, be
own outside when there is little to no wind. Early morningDawn Patrols and
sorties own near dusk are best.
Due to its light weight the Sopwith Pup ies easily and, as such, it is not
necessary to y at full throttle. Its light weight also keeps the model from
incurring much damage in a crash. The airplane will y at ½ throttle and below
and at these settings ights of seven or more minutes are common.
Initial ights can be made by rising off the ground or by hand launch however
before your rst ight double check that the ying surfaces are in neutral
when the airplane is powered up and the transmitter is on. If not, trim them as
described above. Once trimmed you are ready for ight. Smoothly advance the
throttle to about 1/2 to ¾ and the model will roll a few feet and take off without
the addition of any elevator.
The Sopwith Pup is a very responsive airplane, so you need use only small
movements of the control sticks. If additional trim is necessary for level ight,
make those adjustments now. With a little practice you will be ying smoothly in
no time. Remember, the Pup ies best with minimal interference from the pilot
and tiny control movements only when necessary.
Landings are best performed by reducing the power to a level where the
airplane is descending, whereupon touch-down can be made by gently
increasing the power a little.
We’re sure you’ll love your Sopwith Pup and hope you have many enjoyable
ights.

12
Propeller Replacement
Should the propeller need replacing, you will need to hold the prop shaft with
a pair of needle nose pliers while you screw the propeller on in a clockwise
direction. Screw the prop onto the shaft until the shaft is ush with the front
of the propeller hub. The propeller should rotate without touching the cowl.
Replacement Parts
AZSB1803 .............70mAh 1-cell/1S 3.7V 10C LiPo with ultra-micro connector
AZSA1806..............3-channel, 3-in-1 control unit – receiver / 2 servos / ESC
AZS1509................Motor with pinion gear
AZS1511 ................Gearbox with shaft
AZS1512................Propeller shaft with gear
AZS1513................Wing set with decals
AZS1514 ................Tail set with decals
AZS1515................Fuselage with decals
AZS1516 ................Main landing gear set
AZS1517 ................Pushrod set
AZS1518................Wing strut set
AZS1520................Decal set
AZSP1522 .............4.7 x 2.75 micro scale propeller
AZSA1838M1........Micro 4-channel airplane Tx with 100mA charger (Mode 1)
AZSA1838..............Micro 4-channel airplane Tx with 100mA charger (Mode 2)
AZS1107 ................Replacement rotary servo mechanics

13
Warranty, support and service
30-Day Limited Warranty Term Period:
We warranty that the Product(s) purchased (the ‘Product’) will be free from
defects in materials and workmanship when the product is new (before
being used) for the limited warranty term period, 30 days, from the date of
purchase by the Purchaser.
If you believe a defect in material, workmanship, etc. was not apparent when
the Product was new and only became evident after the Product was used,
take the following steps:
If you purchased the Product at a HobbyTown store, please contact your local
HobbyTown store for warranty support and/or service.
If you purchased the Product from the Firelands website, use the contact
information found under the Support heading to contact Firelands directly.
If you contact Firelands, you may be asked to send the product to Firelands,
at your cost, for inspection. Provided the warranty conditions have been
met within the warranty term period, the components that are found to
be defective, incorrectly manufactured or assembled may be repaired or
replaced, at the sole discretion of Firelands. Your warranty item will be
returned to you at Firelands’ expense. In the event your product needs
repair or a replacement part that is not covered by this warranty, your local
HobbyTown store or Firelands can assist you with support and in obtaining
the genuine replacement parts to repair your Product. Firelands will charge
$40.00 per hour plus the cost of replacement parts to service your vehicle
if after contacting you, you so authorize such repairs. Your product will be
returned to you at your expense.
If you purchased your Product from a HobbyTown Internet site not afliated
with a local store, please consult that site for its support and service policies.
You can also nd more information at:
www.Hobbytown.com
by emailing customerservice@relandsgroup.com
or by calling 800-205-6773

www. Ares-RC.com
Other manuals for sopwith pup
1
Table of contents
Other Ares Toy manuals

Ares
Ares sopwith pup User manual

Ares
Ares Ethos FPV User manual

Ares
Ares Gamma 370 Pro User manual

Ares
Ares ultra-micro trainer 100 User manual

Ares
Ares CRUSADER II User manual

Ares
Ares Chronos CX 100 User manual

Ares
Ares Alpine 1200 Operator's manual

Ares
Ares Gamma Pro V2 User manual

Ares
Ares Gamma V2 User manual

Ares
Ares Optim 80 CP User manual

Ares
Ares OPTIM 300 CP User manual

Ares
Ares Chronos FP 110 User manual

Ares
Ares CHRONOS CX 75 User manual

Ares
Ares Taylorcraft 130 User manual

Ares
Ares Decathlon User manual

Ares
Ares V-Hawk X4 Manual

Ares
Ares AZSA1700 User manual

Ares
Ares Nano-Micro Stick 75 User manual

Ares
Ares Chronos FP 110 User manual

Ares
Ares Gamma 370 Pro User manual