manuals.online logo
Brands
  1. Home
  2. •
  3. Brands
  4. •
  5. Argos
  6. •
  7. Indoor Furnishing
  8. •
  9. Argos Woburn 186/2807 User manual

Argos Woburn 186/2807 User manual

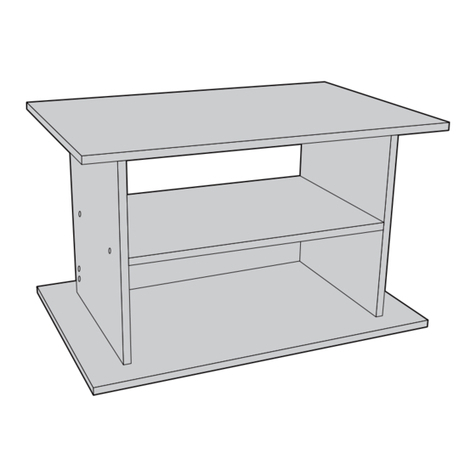
Woburn Entertainment Unit
Assembly Instructions - Please keep for future reference 186/2807
Dimensions
Length - 110cm
Width - 45cm
Height - 55cm
Important – Please read these instructions fully before starting assembly
If you need help or have damaged or missing parts, call the Customer Helpline: 0845 640 0800
Issue 2 - 15/05/08
Safety and Care Advice
Important – Please read these instructions fully before starting assembly
t$IFDLZPVIBWFBMMUIFcomponents and tools listed on
pages 2 and 3.
t3FNPWFBMMmUUJOHTGSPNUIFplastic bags and separate them
into their groups.
t,FFQDIJMESFOBOEBOJNBMTBXBZGSPNUIFXPSLBSFBTNBMMQBSUTDPVMEDIPLFJGTXBMMPXFEt.BLFTVSFZPVIBWFFOPVHIspace to layout the parts before
starting. t%POPUTUBOEPSQVUXFJHIUPOUIFQSPEVDUEVSJOHBTTFNCMZthis could cause damage.
t"TTFNCMFUIFJUFNBTDMPTFUPJUTmOBMQPTJUJPOJOUIFTBNFroom) as possible.
t"TTFNCMFPOBTPGUMFWFMsurface to avoid damaging the
unit or your floor.
t1BSUTPGUIFBTTFNCMZXJMMCFeasier with 2 people. t%POPUVTFUIJTJUFNJGBOZcomponents are missing or
damaged.
t3FUBJOUIFTFJOTUSVDUJPOTGPSfuture reference. t8FEPOPUrecommend the
use of power
drill/drivers for
inserting screws ,
as this could damage the unit.
Only use hand screwdrivers.
t%JTQPTFPGBMMQBDLBHJOHcarefully and responsibly.
1
Care and maintenance
t0OMZDMFBOVTJOHBEBNQDMPUIBOENJMEEFUFSHFOUEPOPUVTFbleach or abrasive cleaners. t'SPNUJNFUPUJNFDIFDLUIBUthere are no loose screws on
this unit. t5IJTQSPEVDUTIPVMEOPUCFdiscarded with household
XBTUF5BLFUPZPVSMPDBMauthority waste disposal centre.
Note: if required the next
page can be cut out and used
as reference throughout the
BTTFNCMZ,FFQUIJTQBHFXJUIthese instructions for future
reference.
Components - Panels
Please check you have all the panels listed below
2
2Right side (55 x 45cm)
Drawer bottom
x 2 (44.1 x 39cm)
11
Drawer front x 2 (47.5 x 18.5cm)
9
Drawer back x 2
(43.1 x 15cm)
10 Left & right drawer side
x 2 (39.7 x 15cm)
R
L
12
Top (110 x 45cm)
4
Back x 2 (101 x 27cm)
(101 x 21.7cm)
5
6
Left shelf (48.1 x 44.5cm)
7
Front and back rail (98 x 6cm)
3Divider (46 x 44.6cm)
1Left side (55 x 45cm)
underside
Right shelf (48.1 x 44.5cm)
8
3
0 5 10 15 20 25 30 35 40 45 50 55 60 65 70 75 80 85 90 95 100 105 110 115 120 125 130 135 140 145 150 155 160 165 170
Ruler - Use this ruler to help correctly identify the screws
Components - Fittings If you have damaged or missing components,
call the Customer Helpline: 0845 640 0800
3OHDVHFKHFN\RXKDYHDOOWKH¿WWLQJVOLVWHGEHORZ
Note:7KHTXDQWLWLHVEHORZDUHWKHFRUUHFWDPRXQWWR FRPSOHWHWKHDVVHPEO\,QVRPHFDVHVPRUH
¿WWLQJVPD\EHVXSSOLHGWKDQDUHUHTXLUHG
A
D E
B C
Metal dowel x 28 Wood dowel x 19
Locking nut x 28 [PPVFrew x 20
0 10 20 30 40 50 60 70 80 90 100 110 120 130 140 150
0 1 2 3 4 5 6 measure
H
G
F
I
25mm Screw x 4
30mm Screw x 8 Handle x 2
Tools required
Phillips screwdriver
(medium)
Small
hammer
FlatElade screwdriver
(medium)
0 10 20 30 40 50 60 70 80 90 100 110 120 130 140 150
0 1 2 3 4 5 6
Ruler/tape
measure
[PPVFrew x 22
Runner x 4
Assembly Instructions
Step 1
Attaching runners
4
a: Pull out the runner
into two parts.
C
3
E
C
E E
Finished front edge
a:
b:
C
C
C
C
Pull out
C
C
C
C
Pull out
E
C
E E
)URQW
E
C
E E
b: Position runners to
the divider .
Fix through holes shown
using screws .
3
E
E
C
E
E
E
Assembly Instructions
Step 1 - continued
Attaching runners
5
E
C
E E
E
C
E E
)URQW
E
C
E E
c: Position runners to
the front edge of the left
side , right side .
C
12
Fix through holes shown
using screws .
E
E
E
Finished front edge
2
1
Finished front edge
Finished front edge
Finished front edge
c:
Assembly Instructions
Step 2
6
Fitting dowels
Screw metal dowels
into left side , right side
, divider , top ,
front and back rail .
Insert wood dowels
into left side , right side
, divider , front and
back rail , left shelf
and right shelf .
A
B
1
1
2
8
2
7
3
3
6
6
4
A
B
B
B
B
B
B
B
B
B
B
B
B
B
B
Do not over tighten.
Note:
2
1
3
4
7
8
A
6
6
A
A
A
A
A
A
AA
A
A
A
A
A
A
A
A
A
A
A
A
Insert metal dowels
as far as shown.
Assembly Instructions
Step 4
7
Step 3
Attaching shelf
Step 4Step 4
Connect left shelf and
right shelf to the divider
by locking nuts .
Use a screwdriver to
turn the locking nuts
clockwise to lock.
8
3
7
8
3
7
Attaching front and
back rail
D
Attach front and back rail
to the divider by
locking nuts .
Use a screwdriver to
turn the locking nuts
clockwise to lock.
6 3
D
D
D
D
D
D
6
6
back edge
7
3
8
back edge
D
D
D
D
Assembly Instructions
Step 5
8
Attaching side
Attach left side and
right side to the frame
by locking nuts .
Use a screwdriver to
turn the locking nuts
clockwise to lock.
1
2
4
Step 6
Attaching top panel
Attach top to the frame
by locking nut .
Use a screwdriver to
turn the locking nuts
clockwise to lock.
8
8
7
7
1
1
4
D
D
D
D
D
D
2
2
back edge
D
Assembly Instructions
Step 4
Step 7
Attaching back
Attach back to the
frame .
5
F
5
5
90°
90°
90°
90°
90°
5
XX=YY
XX
XX
YY
YY
YY
Note: Measure the
distance bewteen point
Y and Y and X and X,
and adjust, so the
measurements are the
same XX=YY.
Note:
corners XX and YY to
make XX=YY.
5
5
5
5
9
Attach back to the
frame using screws .
5
F
4
D
D
c:
12
9
c: Connect left and right
drawer side to the
drawer front using
locking nuts .
Turn locking nuts
clockwise to lock.
D
D
Assembly Instructions
10
12
12
9
Step 4
Step 4Step 8
12
12
9
A
BB
A
A
A
Drawer assembly
a: Attach wood dowels
to the left & right
drawer side .
B
12
a:
b:
b: Screw metal dowels
into holes shown on
drawer front .
A
9
ANote: Insert metal dowels
as far as shown.
Do not over tighten.
Assembly Instructions
11
H
I
I
f:
d: Slide drawer bottom
into the grooves.
11
d:
e:
10
G
G
G
G
e: Connect left and right
drawer side to the
drawer back using
screw .
12
10
G
11
Step 4Step 8 - continued
f: Fix drawer handle
using screws .
I
H
Drawer assembly
12
Assembly Instructions
12
C
C
g: Fix the runners to
the shown position using
screws .
C
E
g:
Repeat with remaining
drawer.
E
E
E
E
C
EE
Front
Step 8 - continued
Drawer assembly
Assembly Instructions
13
Step 9
Inserting drawers
Warning:
The cabinet
is heavy.
Lift with care.
Slide the ball bearing to
the front runner, then
insert drawers onto
runners.
Adjustment drawers
a: Loosen screws shown.
b: Move drawers to suit.
c: Re-tighten screws.
a b c
Assembly Instructions
14
Step 10
C
EE
Front
Secure the drawers
Fix position of the runners
using screws .
CE
Note: There are no
per-drilled holes for
these screws.
EE
Assembly Instructions
15
Step 11
If you need help or have damaged or missing parts, call the Customer Helpline: 0845 640 0800
Argos Ltd MK9 2NW
Assembly is complete.

Other Argos Indoor Furnishing manuals

Argos Nordic 1709771 User manual

Argos

Argos Nordic 1709771 User manual

Argos Sywell 643/8047 User manual

Argos

Argos Sywell 643/8047 User manual

Argos Hallingford 305/2811 User manual

Argos

Argos Hallingford 305/2811 User manual

Argos WILLOW 4814443 User manual

Argos

Argos WILLOW 4814443 User manual

Argos Scandinavia 4 door robe w/ 2+4 drws. User manual

Argos

Argos Scandinavia 4 door robe w/ 2+4 drws. User manual

Argos Chequer 399/901 User manual

Argos

Argos Chequer 399/901 User manual

Argos Vancouver II 643/8133 User manual

Argos

Argos Vancouver II 643/8133 User manual

Argos Amalfi 1455056 User manual

Argos

Argos Amalfi 1455056 User manual

Argos Home Jenson Gloss User manual

Argos

Argos Home Jenson Gloss User manual

Argos Misaki 632/4546 User manual

Argos

Argos Misaki 632/4546 User manual

Argos Amersham 724/7196 User manual

Argos

Argos Amersham 724/7196 User manual

Argos Dutch Glam Boutique Coffee Table User manual

Argos

Argos Dutch Glam Boutique Coffee Table User manual

Argos 365/9654 User manual

Argos

Argos 365/9654 User manual

Argos Contempo 227/6887 User manual

Argos

Argos Contempo 227/6887 User manual

Argos 365/9654 User manual

Argos

Argos 365/9654 User manual

Argos New Penton 246/4943 User manual

Argos

Argos New Penton 246/4943 User manual

Argos Linear 247/6216 User manual

Argos

Argos Linear 247/6216 User manual

Argos Foley 358/8914 Datasheet

Argos

Argos Foley 358/8914 Datasheet

Argos 496/1932 User manual

Argos

Argos 496/1932 User manual

Argos 837/9221 User manual

Argos

Argos 837/9221 User manual

Argos Malibu 282/2736 User manual

Argos

Argos Malibu 282/2736 User manual

Argos EMPEROR 6031561 User manual

Argos

Argos EMPEROR 6031561 User manual

Argos Camden 305/0710 User manual

Argos

Argos Camden 305/0710 User manual

Argos Modular User manual

Argos

Argos Modular User manual

Popular Indoor Furnishing manuals by other brands

West Elm Upholstered Hairpin Leg Dining Chair 5371372 Assembly instructions

West Elm

West Elm Upholstered Hairpin Leg Dining Chair 5371372 Assembly instructions

HOMEDEPOT WF287561 Assembly instructions

HOMEDEPOT

HOMEDEPOT WF287561 Assembly instructions

Herman Miller Exclave Meeting Table Installation and Disassembly

Herman Miller

Herman Miller Exclave Meeting Table Installation and Disassembly

ID USA 151283 Assembly instructions

ID USA

ID USA 151283 Assembly instructions

System Build 7466056COM Assebly instructions

System Build

System Build 7466056COM Assebly instructions

Home Styles 88 5053 103 quick start guide

Home Styles

Home Styles 88 5053 103 quick start guide

FLORABEST DL-2016 Instructions for use

FLORABEST

FLORABEST DL-2016 Instructions for use

Happy Beds Marvel Computer Gaming Chair Assembly instructions

Happy Beds

Happy Beds Marvel Computer Gaming Chair Assembly instructions

System Build 6451335COM manual

System Build

System Build 6451335COM manual

A/DA Walost quick start guide

A/DA

A/DA Walost quick start guide

Black Box RM047-R2 user manual

Black Box

Black Box RM047-R2 user manual

Easy@Home 43073 Assembly instructions

Easy@Home

Easy@Home 43073 Assembly instructions

Simpli Home AXWELL3-005-60 Instruction booklet

Simpli Home

Simpli Home AXWELL3-005-60 Instruction booklet

Polywood GNB60 Assembly instructions

Polywood

Polywood GNB60 Assembly instructions

Jason.L Uniform Reception Assembly instructions

Jason.L

Jason.L Uniform Reception Assembly instructions

Royal Catering RC-FT 3 user manual

Royal Catering

Royal Catering RC-FT 3 user manual

West Elm Axel Sofa 3 Seater 8798618 Assembly instructions

West Elm

West Elm Axel Sofa 3 Seater 8798618 Assembly instructions

RIGHT ANGLE R-Style Modesty Panel instructions

RIGHT ANGLE

RIGHT ANGLE R-Style Modesty Panel instructions

manuals.online logo
manuals.online logoBrands
  • About & Mission
  • Contact us
  • Privacy Policy
  • Terms and Conditions

Copyright 2025 Manuals.Online. All Rights Reserved.