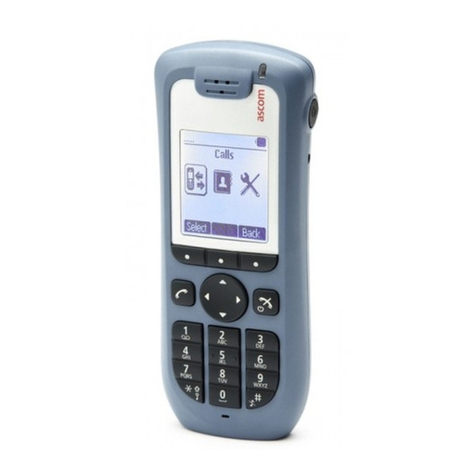
ASCOM d83 User manual

CONFIGURATION MANUAL
Ascom d83 DECT Handset

CONFIGURATION MANUAL
Ascom d83 DECT Handset
Abbreviations and Glossary
Abbrevations and Glossary
ALS Acoustic Location Signal
A loud audio signal used for localizing the handset.
BLE Bluetooth Low Energy
Wireless technology that uses the same 2.4 GHz radio frequencies as classic
Bluetooth, with low bandwidth. For example, used for location with BLE
beacons.
CLIP Calling Line Identity Presentation
CNIP Calling Name Identity Presentation
DECT Digital Enhanced Cordless Telecommunications
Global standard for cordless telephony.
Device Manager Application for management of handsets, charging racks, etc.
IM Interactive Messaging
Makes it possible to access information from an application and control the
information by selecting an option received in a message.
IPDI International Portable DAM (DECT Authentication Module) Identity. See IPEI for
more information.
IPEI International Portable Equipment Identity
IPEI/IPDI is needed to enable network subscription of the handset. At delivery
of the handset, IPEI and IPDI are the same and either can be used for network
subscription. If one handset is replaced with another using the Easy
replacement procedure the IPDI is exchanged and IPEI and IPDI are no longer
the same. If the IPEI and the IPDI differ, the IPDI is used for network
subscription.
IR A location system based on infrared light transmitters used to determine the
location of a handset.
LF A location system based on low frequency magnetic field used to determine
the location of a handset.
OTA Over-the-Air
PBX Private Branch Exchange
A telephone system within an enterprise that switches calls between local
lines, and allows all users to share a certain number of external lines.
Also referred to as Call Manager.
WinPDM Windows Portable Device Manager
An application, running on a PC under Windows, for managing portable
devices, charging racks, etc.
TD 93426EN / 28 January 2022 / Ver. C

CONFIGURATION MANUAL
Ascom d83 DECT Handset
Unite Module Common name for Integrated Message Server (IMS3), Unite Connectivity
Manager (Unite CM) and Unite Communication Server (Unite CS).
User ID User ID identifies a set of user parameters that can be saved and managed. It
can be moved together with user parameters between handsets. It is normally
set automatically at DECT subscription to be equal to call number.
TD 93426EN / 28 January 2022 / Ver. C

CONFIGURATION MANUAL
Ascom d83 DECT Handset
Contents
1 Introduction.................................................................................................................................... 1
1.1 Functionality Matrix ............................................................................................................. 1
2 Getting tarted ..............................................................................................................................4
2.1 WinPDM.............................................................................................................................4
2.2 Device Manager..................................................................................................................4
2.2.1 Via Chargers .........................................................................................................4
2.2.2 Over-the-Air via IP-DECT ........................................................................................5
2.3 Device Management in Multiple Systems...............................................................................6
3 Handset Installation and Configuration............................................................................................7
3.1 Preparing WinPDM or Device Manager for Handset Handling..................................................7
3.2 Installing a New Handset .....................................................................................................7
3.2.1 Handset Installation in IP-DECT System using Easy Registration .................................7
3.2.2 Manual Handset Installation in DECT System............................................................8
4 Maintenance................................................................................................................................. 9
4.1 Definitions..........................................................................................................................9
4.2 Upgrade Handset Software..................................................................................................9
4.3 Perform a Factory Reset.......................................................................................................9
4.4 Replacement Procedure Choice Guide................................................................................ 10
4.5 Replacement of Handset with the Device Manager .............................................................. 10
4.5.1 Data Included in a Replacement Transfer ............................................................... 10
4.5.2 Handset Replacement with Device Manager in DECT System ................................... 11
4.6 Handset Replacement with WinPDM.................................................................................... 11
4.6.1 Handset Replacement with WinPDM in DECT System.............................................. 12
4.7 Parameter Migration.......................................................................................................... 12
4.8 DECT Frequency Band Configuration...................................................................................13
4.8.1 Multiple Frequency Support...................................................................................13
5 Handset Configuration ................................................................................................................. 14
5.1 Configure a Handset Using a Template ................................................................................14
5.1.1 Create a Template ................................................................................................14
5.1.2 Apply a Template..................................................................................................14
5.1.3 Save a Handset Configuration as a Template ......................................................... 15
5.1.4 Synchronizing a Handset with WinPDM/Device Manager ......................................... 15
5.2 Voicemail ......................................................................................................................... 15
5.2.1 Wildcard Characters in Voicemail Number.............................................................. 15
5.3 Central Phonebook ........................................................................................................... 16
5.4 Company Phonebook........................................................................................................ 16
5.4.1 Create a Company Phonebook File ....................................................................... 16
5.4.2 Upload a Phonebook File ..................................................................................... 16
5.4.3 Delete Company Phonebook Entries ..................................................................... 16
5.5 Import Contacts ................................................................................................................ 16
5.5.1 Create Local Phonebook File................................................................................ 16
5.5.2 Upload a Local Phonebook File..............................................................................17
5.6 Call Services......................................................................................................................17
5.6.1 Activate or Deactivate Call Services when Changing Profile......................................17
5.7 Call Diversion ................................................................................................................... 18
5.7.1 Call Diversion in Profiles....................................................................................... 18
5.8 Absence Handling............................................................................................................. 18
5.9 In Call Menu ..................................................................................................................... 19
TD 93426EN / 28 January 2022 / Ver. C

CONFIGURATION MANUAL
Ascom d83 DECT Handset
5.9.1 Always Displayed................................................................................................. 19
5.9.2 Predefined and Configurable Functions ................................................................. 19
5.9.3 Advanced Functions ............................................................................................20
5.9.4 Custom In Call Functions ......................................................................................20
5.9.5 Creating and Hiding a Soft Key to an In Call Function .............................................. 21
5.10 Own Line Settings.............................................................................................................22
5.11 Configure DTMF................................................................................................................22
5.11.1 Send DTMF Tone when Pressing On-Hook key ......................................................22
5.11.2 Send DTMF Tones when Pressing or Releasing the PTT Button ...............................22
5.12 Uploadable Language .......................................................................................................22
5.13 Customize the Menu..........................................................................................................23
5.14 Hide Missed Call Window ..................................................................................................23
5.15 Configure Handset Restrictions ..........................................................................................23
5.15.1 Enable or Disable Mute Function ...........................................................................23
5.15.2 Enable or Disable Switch Off Function ...................................................................24
5.15.3 Enable or Disable Call List ....................................................................................24
5.15.4 Enable or Disable Handset Keys............................................................................24
5.15.5 Allow or Disallow Advanced Call Functions ............................................................24
5.15.6 Allow or Disallow Incoming Messages ...................................................................25
5.15.7 Allow or Disallow Showing Number on Idle Screen .................................................25
5.15.8 Allow or Disallow Connection to WinPDM...............................................................25
5.15.9 Enable or Disable LED blinking in idle mode...........................................................25
5.16 Action when Handset is Placed In Charger ..........................................................................26
5.16.1 In Charger Action when not in Call.........................................................................26
5.16.2 In Charger Action when in Call ..............................................................................26
5.16.3 Clear Lists when Inserted in Charger .....................................................................27
5.17 Disable Homebase GAP Registration ..................................................................................27
5.18 Early Encryption ................................................................................................................27
5.19 Base Station Positioning ....................................................................................................27
5.20 BLE Location.....................................................................................................................28
5.21 DECT Location..................................................................................................................30
5.21.1 Handset Users......................................................................................................31
5.21.2 System Administrators and Installers.......................................................................31
5.22 IR Location .......................................................................................................................32
5.22.1 Handset Users.....................................................................................................32
5.22.2 System Administrators and Installers......................................................................32
5.23 LF Location.......................................................................................................................35
5.23.1 Handset Users.....................................................................................................35
5.23.2 System Administrators and Installers......................................................................35
5.24 Special Location................................................................................................................36
5.25 All Location Data...............................................................................................................36
5.26 Poll Location.....................................................................................................................37
5.27 Common Alarm Settings ....................................................................................................37
5.28 Push Button Alarm.............................................................................................................38
5.28.1 Call Predefined Number without Sending Alarm .....................................................39
5.29 Pull-Cord Alarm.................................................................................................................40
5.30 Man-Down Alarm and No-Movement Alarm .........................................................................40
5.31 Use Multifunction Button as PTT Button................................................................................41
5.32 Answering Settings ............................................................................................................41
5.33 Messaging Settings...........................................................................................................42
5.33.1 Configure Message Alerts with Beep Codes...........................................................45
TD 93426EN / 28 January 2022 / Ver. C
CONFIGURATION MANUAL
Ascom d83 DECT Handset
5.33.2 Examples of TTR and TTP Settings ........................................................................ 47
5.33.3 Broadcast and Multicast Messaging...................................................................... 50
5.34 Message Templates ......................................................................................................... 50
5.34.1 Configure the Handset for Message Templates ..................................................... 50
5.34.2 Create Message Template Texts .......................................................................... 50
5.35 Name Presentation............................................................................................................ 51
5.35.1 Name Resolution Priorities.................................................................................... 51
5.35.2 Display Management Parameters .......................................................................... 51
5.36 Services ...........................................................................................................................52
5.36.1 Add Service.........................................................................................................52
5.36.2 Delete Service.....................................................................................................52
5.37 Protect Registration from User Deletion...............................................................................52
5.38 Emergency Call Numbers...................................................................................................53
5.39 Audio Adjustment..............................................................................................................53
5.40 Headset Configuration.......................................................................................................53
5.40.1 Selection of Corded Headset Type........................................................................53
5.40.2 Configuration of Headset Button ...........................................................................54
5.41 Display New Messages and Call Information Upside Down ...................................................55
5.42 Display Management Layout ..............................................................................................55
5.43 Owner identification in the Idle Display................................................................................55
5.44 Screen Saver....................................................................................................................55
5.45 Profiles.............................................................................................................................56
5.45.1 User Profiles........................................................................................................56
5.45.2 System Profiles....................................................................................................56
5.46 Shortcuts..........................................................................................................................59
5.46.1 Restricting Access to Shortcuts .............................................................................59
5.47 Shared Phone.................................................................................................................. 60
5.47.1 Shared Phone Takeover....................................................................................... 61
5.48 Push-to-Talk (PTT) Group Call.............................................................................................62
5.49 Handset Locks..................................................................................................................62
6 Administration .............................................................................................................................64
6.1 Admin Menu Tree .............................................................................................................64
6.1.1 Activating the Admin Menu...................................................................................64
6.2 Quick Access to the Handset Device Information .................................................................64
7 Troubleshooting.......................................................................................................................... 65
7.1 Fault Symptoms ................................................................................................................65
7.2 Display Information ...........................................................................................................66
7.3 Error Messages in WinPDM ................................................................................................67
8 Related Documents......................................................................................................................68
9 Document History....................................................................................................................... 69
Appendix A Configure Custom ounds ............................................................................................70
A.1 Customize the Default Handset Beeps ................................................................................ 72
Appendix B Handset Message Handling Capacity.............................................................................73
TD 93426EN / 28 January 2022 / Ver. C

CONFIGURATION MANUAL
Ascom d83 DECT Handset Introduction
1 Introduction
This document is a guide for installing, configuring and maintaining Ascom d83 DECT handsets.
The handset can be used immediately, but it is highly recommended to install the Windows Portable Device
Manager (WinPDM) or use the centralized Device Manager available in the Unite module. This enables
customization of the behavior of the handset to suite each user profile and the specific PBX used in the
system.
WinPDM is aimed for smaller sites where the handsets are near to hand. The Device Manager allows
handsets to be managed centrally via a web interface without needing to collect the handsets beforehand.
The reader is recommended to have a basic knowledge of the system and how handsets are subscribed to
the PBX.
For information about WinPDM, Device Manager and related systems, refer to Related Documents.
1.1 Functionality Matrix
The following matrix shows the functions that are available for the handset. Available functions require
settings to be made using WinPDM/Device Manager.
Functions d83 Talker d83 Messenger d83 Protector d83 Protector Lite
General
Easy registration x x x x
Enhanced DECT Security x x x x
Vibrator x x x x
Headset connector x x x x
Loudspeaking function x x x x
3 Programmable Soft keys x x x x
9 Programmable Hot keys x x x x
Profiles x x x x
System profiles - x x x
Shared phone x x x x
Contacts
(250 contacts)
x x x x
Central phonebook x x x x
Company phonebook
(1000 contacts)
x x x x
Downloadable languages x x x x
Multifunction buttons x x x x
Programmable Navigation key x x x x
TD 93426EN / 28 January 2022 / Ver. C 1
Introduction
CONFIGURATION MANUAL
Ascom d83 DECT Handset
Centralized management x x x x
Personalized menus x x x x
Easy replaceable battery x x x x
Easy replacement of handset x x x x
Handset restrictions x x x x
Bluetooth x x x -
Telephony
Push to Talk (PTT) - x x x
Procedure call x x x x
Voicemail access x x x x
Microphone on/off during call x x x x
Five predefined emergency
numbers
x x x x
Messaging
Mini messaging
(12 characters)
x - - -
Mobile data - x x x
Colored messaging - x x x
Interactive messaging - x x x
Patient ECG Waveform Monitoring - x x x
Data with prefix - x x x
Message template - x x x
Alarm
Push button alarm - - x x
Pull-cord alarm - - x x
Man-down and No-movement
alarm
- - x x
Acoustic Location Signal (ALS) - - x x
Alarm with data - - x x
Automatic call after alarm - - x x
Location
IR Location - x x x
LF Location - x x x
2TD 93426EN / 28 January 2022 / Ver. C
CONFIGURATION MANUAL
Ascom d83 DECT Handset Introduction
BLE location - x x -
Location, base stations1x x x x
DECT Location - x x x
LED
Basic LED (Red/Green/Orange) x - - -
Multicolor LED - x x x
1. For Talker, it can deliver a rough location of the handset in response to a 'Poll location' request from an external system.
TD 93426EN / 28 January 2022 / Ver. C 3
Getting Started
CONFIGURATION MANUAL
Ascom d83 DECT Handset
2 Getting tarted
The handset can be configured by inserting it into a DP1 desktop programmer or a CR3 Advanced Charging
Rack. The charger is connected via USB or ethernet to the WinPDM/Device Manager. For IP-DECT systems,
the handset can be configured over-the-air.
This chapter describes how to configure handsets in three different system setups:
• with WinPDM
• with Device Manager via chargers
• with Device Manager over-the air
2.1 WinPDM
WinPDM is run on a PC. The handset is configured as follows:
1. Connect a DP1 desktop charger or a CR3 rack charger via USB to the computer running WinPDM.
2. Start WinPDM.
3. Place the handset in this charger connected to WinPDM. A handset that is turned off starts up automati-
cally and the battery charging symbol is displayed.
For instructions on how to use WinPDM, refer to the Installation and Operation Manual, Portable Device
Manager (WinPDM), Windows Version, TD 92325EN.
Figure 1. Configuration of handsets via WinPDM
WinPDM
DEF
MNO
WXYZ
ABC
JKL
TUV
PQRS
GHI
2.2 Device Manager
For instructions on how to use the Device Manager, refer to the applicable User Manual.
2.2.1 Via Chargers
1. Connect a CR3 rack charger via the Ethernet port to the network.
2. The charger is by default configured to connect to the network using DHCP. If DHCP is not used in the
network, connect each charger via USB to WinPDM and configure a static IP address.
3. Open the Device Manager.
4. Place the handset in a charger that is connected to the Device Manager. The handset can either be
turned off or turned on when placing it in the charger. A handset that is turned off starts up automati-
cally and the battery charging symbol is displayed.
4TD 93426EN / 28 January 2022 / Ver. C
CONFIGURATION MANUAL
Ascom d83 DECT Handset Getting Started
Figure 2. Configuration of handsets via Device Manager and chargers
Client
IP
Device Manager
DEF
MNO
WXYZ
ABC
JKL
TUV
PQRS
GHI
2.2.2 Over-the-Air via IP-DECT
There is no external equipment needed besides Device Manager and IP-DECT. Please proceed to chapter
3 Handset Installation and Configuration, page 7.
Figure 3. Configuration of handsets via the Device Manager and over-the-air
Client
IPBS
IP-DECT
System
Device Manager
IP
DEF
MNO
WXYZ
ABC
JKL
TUV
PQRS
GHI
TD 93426EN / 28 January 2022 / Ver. C 5
Getting Started
CONFIGURATION MANUAL
Ascom d83 DECT Handset
2.3 Device Management in Multiple ystems
When changing the Device Management system parameter to another system, the handset loses
the connection to the IP-DECT system for a few seconds.
1. In WinPDM/Device Manager, select the Number tab.
2. Select the handset to be configured.
3. In the Number menu, select Edit parameters. A dialog window opens.
4. Select Systems.
5. In the Device Management System drop-down list, select the system to be used for device
management.
6TD 93426EN / 28 January 2022 / Ver. C
CONFIGURATION MANUAL
Ascom d83 DECT Handset Handset Installation and Configuration
3 Handset Installation and Configuration
This section describes the recommended procedure for installing and configuring handsets. There are
several ways to install a handset, but the procedures described here ensure simple maintenance of the
system.
The Device Manager is the recommended method for installing, upgrading and configuring handsets in a
large system because it allows large numbers of handsets to be maintained simultaneously. Another benefit
is that the recall and collection of handsets from users is not required. Handsets can be maintained while
placed in desktop chargers or rack chargers connected to a network, or an IP-DECT over-the-air connection.
WinPDM is suitable for smaller systems where a handset is managed by inserting it in a desktop charger or
charging rack connected to a computer over USB.
For WinPDM, refer to the Installation and Operation Manual, Portable Device Manager (WinPDM), Windows
Version, TD 92325EN.
3.1 Preparing WinPDM or Device Manager for Handset Handling
If the parameter definition file (“.def” file) for the handset is not present in WinPDM/Device Manager, it can
be added by following the procedure below. The parameter definition file and software files are delivered
as a package file with the extension “.pkg”.
Template files (“.tpl”) may also be included in a package file.
1. Open WinPDM/Device Manager.
2. In the File menu, select Import → Packages.
3. Select the package and click OK.
The package is imported and the files are created: one definition file with the extension “.def” and one
software file with the extension “.bin”. Template files may also be created.
3.2 Installing a New Handset
The installation basically contains three steps:
• Subscribing to the DECT system – needed to be able to make calls and send messages (Mandatory).
• Creating an identity for the handset in WinPDM/Device Manager– needed to be able to configure the
behavior of the handset and take backups of the handset configuration (Recommended).
• Configuring the handset using WinPDM/Device Manager – customizing the behavior of the handset to
suite each user profile and the specific PBX used in the system (Recommended).
The installation is described in two different scenarios, see below. Before starting, check which scenario
suits best.
•3.2.1 Handset Installation in IP-DECT System using Easy Registration, page 7.
•3.2.2 Manual Handset Installation in DECT System, page 8.
3.2.1 Handset Installation in IP-DECT ystem using Easy Registration
A handset can subscribe to an IP-DECT system automatically if the following are fulfilled:
• The IP-DECT system is configured for Easy Registration. Refer to the Installation and Operational Manual
for your IP-DECT system.
TD 93426EN / 28 January 2022 / Ver. C 7
Handset Installation and Configuration
CONFIGURATION MANUAL
Ascom d83 DECT Handset
• The handset’s extension number and IPEI are registered in the IP-DECT system. Refer to the Installation
and Operational Manual for your IP-DECT system.
• The handset is not subscribed to any systems.
The easy registration procedure is described in the handset user manual.
During the easy registration procedure, the handset User ID is set automatically to the same as the
extension number. The User ID is used to identify the handset when it is connected to WinPDM/Device
Manager and is visible in the Number column.
The User ID can be viewed in the handset by navigating to the menu: Admin menu → Device info → User ID.
See also examples of handset configurations that can be made in 5 Handset Configuration, page 14.
3.2.2 Manual Handset Installation in DECT ystem
The handset to be installed must not have any previous valid registrations. If it has a valid registra-
tion, unsubscribe the handset.
ubscribe
1. Assign an extension number for the handset in the IP-DECT system. Refer to the corresponding manual
for the IP-DECT system.
2. Subscribe the handset to the IP-DECT system. For information about the subscription procedure, refer
to the User Manual, Ascom d83 DECT Handset, TD 93434EN.
During the subscription procedure, the handset User ID is automatically set to the same as the extension
number. The User ID is used to identify the handset when it is connected to WinPDM/Device Manager and
is visible in the Number column.
The User ID can be viewed in the handset by navigating to the menu: Admin menu → Device info
→ User ID.
See also examples of handset configurations that can be made in 5 Handset Configuration, page 14.
8TD 93426EN / 28 January 2022 / Ver. C
CONFIGURATION MANUAL
Ascom d83 DECT Handset Maintenance
4 Maintenance
4.1 Definitions
In the replacement descriptions, the handsets are defined as:
•Old handset: the handset to be replaced, possibly damaged but still working.
•New handset: the replacement handset that uses the settings downloaded from the old handset.
4.2 Upgrade Handset oftware
The software on a handset can be upgraded or reinstalled. When upgrading the software of the handset,
any data (for example, messages) may be deleted.
1. Open WinPDM/Device Manager.
2. In the Devices tab, right-click the handset to be upgraded/reinstalled and select Upgrade software....
3. If needed, import the software file to be used by clicking Import. Locate the software file (“.bin”, “.pkg”)
and click Open.
4. In the Available software drop-down list, select the desired software file (“.bin”) and click OK.
The software is now downloaded to the handset. The following table shows the approximately download
times when done over-the-air (OTA) in an IP-DECT system, or via charger in a DECT system.
OTA via IPBS CR3 Charger connected
to WinPDM via Ethernet
OTA via IPBL DP1 Charger connected to
WinPDM via USB
Approx. 1h 10 min. Approx. 15 min. Approx. 6h. Approx. 2 min. 30 s
The software download capacity depends on call traffic stated below. The table below is not applicable for
DP1 chargers connected to WinPDM since IPBS, IPBL or Device Manager is not needed.
IPBS/IPBL 0-4 simultaneous downloads depending on call traffic as follows:
No. of calls No. of possible simultaneous downloads
0 4
1 3
2 2
3 1
4 > 0
Device Manager Max. 10 simultaneous downloads (max. 20 when using an external web server).
Several handsets of the same device type can be updated simultaneously using the Baseline
function in the Device Manager.
4.3 Perform a Factory Reset
When a factory reset is performed on a handset, all configuration settings are restored to their default
values and PBX subscriptions and all data are removed. This includes contacts, messages, etc. The
software is left intact.
TD 93426EN / 28 January 2022 / Ver. C 9
Maintenance
CONFIGURATION MANUAL
Ascom d83 DECT Handset
Factory Reset using WinPDM/Device Manager
1. In WinPDM/Device Manager, click the Devices tab and mark the handset to be factory reset. Note that
the handset must be online.
2. In the Device menu, select Factory reset. Alternatively, right-click the handset and select Factory reset.
3. A Reset devices dialogue appears, click Yes. The handset restarts.
Factory Reset using Handset
A handset can be factory reset from the Admin menu:
1. To activate the Admin Menu, enter the Call time screen and press > * < < * <.
2. Select Factory Reset.
3. A Reset portable? dialogue appears, press Yes. The handset is restarted.
4.4 Replacement Procedure Choice Guide
Depending on situation, different replacement procedures can be chosen; replacement via WinPDM/Device
Manager, Parameter Migration or Easy Replacement. Use the following list as a guide to choose which
procedure to use.
• If a handset needs to be replaced due to a broken display for example, refer to the User Manual, Ascom
d83 DECT Handset, TD 93434EN.
• If the electrical connection is damaged, the Easy Replacement procedure may not work. Depending on
fault, a replacement might work via WinPDM/Device Manager, see 4.5 Replacement of Handset with the
Device Manager, page 10 or 4.6 Handset Replacement with WinPDM, page 11.
• If two handsets and their settings are to be switched between two users, follow 4.5 Replacement of
Handset with the Device Manager, page 10 or 4.6 Handset Replacement with WinPDM, page 11.
• If old d81 DECT handsets need to be replaced with new d83 DECT handsets, follow 4.7 Parameter
Migration, page 12.
4.5 Replacement of Handset with the Device Manager
Both the old handset and the new handset must be of the same device type. The same extension number is
assigned to the new handset.
Make sure that the old handset is saved in the Device Manager. Start the Device Manager and navigate to
the Numbers tab. There shall be a tick in the Saved column for the old handset.
If the handset is not saved, insert it into a desktop charger or rack charger connected to Device Manager
and perform a save.
If the old handset settings cannot be saved, stop this replacement procedure. Instead unsubscribe the old
handset from the PBX, register the new handset and follow the instructions for installing a handset, see 3.2
Installing a New Handset, page 7.
When the handset is saved, unsubscribe the old handset from the PBX.
The following steps are described in two different scenarios, check which one suits the best before
proceeding.
4.5.1 Data Included in a Replacement Transfer
The following data is replaced during a replacement with Device Manager:
10 TD 93426EN / 28 January 2022 / Ver. C
CONFIGURATION MANUAL
Ascom d83 DECT Handset Maintenance
• User parameters (including User ID)
• Contacts (entered by the user)
The following data is not replaced:
• DECT registration
• Call list
• Company phonebook
• Downloaded Language
4.5.2 Handset Replacement with Device Manager in DECT ystem
The handset to be installed must not have any previous valid registrations. If it has a valid registra-
tion, unsubscribe the handset.
1. Unsubscribe the old handset. If it cannot be performed in the handset, unsubscribe the handset via the
DECT interface.
2. Subscribe the new handset with the same extension number as the old handset. The subscription
procedure is described in the User Manual, Ascom d83 DECT Handset, TD 93434EN. During the
subscription procedure, the handset User ID is automatically set to be the same as the extension
number.
The User ID can be viewed in the handset by navigating to the menu: Admin menu → Device info →
User ID.
3. Insert the handset into a desktop charger or rack charger connected to Device Manager or use an IP-
DECT over-the-air connection.
4. Navigate to the Numbers tab in the Device Manager.
The new handset now has the same User ID as the old handset. The new handset is automatically
synchronized and data and parameter settings are transferred to the new handset.
The synchronization can take a while if Contacts in the original handset contains a large number of
entries.
4.6 Handset Replacement with WinPDM
To see which data is replaced during this process, see 4.5.1 Data Included in a Replacement Transfer, page
10.
Both the old handset and the new handset must be of the same device type. The same extension number is
assigned to the new handset.
The new handset should not be subscribed to the PBX yet.
1. Perform a factory reset if the new handset has been previously used. See 4.3 Perform a Factory Reset,
page 9.
2. Make sure that the handset is saved in WinPDM. In the Numbers tab, a saved handset has the Checked
symbol in the Saved column. If not, right-click the handset and select Save to transfer the settings to
the new handset later on.
If the old handset settings cannot be saved, stop the replacement procedure. Instead register the
new handset and follow the instructions for installing a handset, see 3.2 Installing a New Handset,
page 7.
TD 93426EN / 28 January 2022 / Ver. C 11
Maintenance
CONFIGURATION MANUAL
Ascom d83 DECT Handset
4.6.1 Handset Replacement with WinPDM in DECT ystem
The handset to be installed must not have any previous valid registrations. If it has a valid registra-
tion, unsubscribe the handset.
1. Unsubscribe the old handset. If it cannot be performed in the handset, unsubscribe the handset via the
DECT interface.
2. Subscribe the new handset with the same extension number as the old handset. The subscription
procedure is described in the User Manual, Ascom d83 DECT Handset, TD 93434EN. During the
subscription procedure, the handset User ID is automatically set to be the same as the extension
number.
The User ID is used to identify the handset when it is connected to WinPDM and is visible in the
Number column.
The User ID can be viewed in the handset by navigating to the menu: Admin menu → Device info →
User ID.
3. Insert the new handset into a desktop charger or rack charger connected to the WinPDM.
4. A dialogue window appears, asking the user to decide whether to use the Number settings in WinPDM
or the Number settings in the device. Select WinPDM.
The handset is automatically synchronized and all data and parameter settings are transferred to the
new handset. The synchronization can take a while if Contacts in the original handset contain a large
number of entries.
4.7 Parameter Migration
The parameter migration feature allows parameters of a certain handset variant to be applied to any
compatible handset. For example, Ascom d81 template can be used for Ascom d83 handsets. When
migrating, the parameters must be first saved in a template.
The same template can be also used for different handset variants, for example for Talker and Protector.
Protector specific parameters are ignored by the Talker.
Though the same template can be also used for different handset variants, for example for Talker
and Protector, there is no guarantee that all parameters will be configured as expected. Therefore
it is recommended to use a template specifically for each device type. Otherwise, you need to
check the handset after parameter migration and make sure that the configuration is correct.
The example below shows how to migrate parameters from Ascom d81 to Ascom d83 handset:
1. If WinPDM is used, place d83 handset into the DP1 Desktop Programmer.
2. In the Templates tab, select the template used for Ascom d81 handset that you want to use for
parameter migration.
3. In the Template menu (or right-click the template), select Apply to….
4. In the opened window, select the Ascom d83 handset that shall receive new parameters and click OK.
5. The handset receives the template and might restart.
6. To verify that the handset has received the template with the new parameters, in the Numbers tab,
check the Last run template column.
12 TD 93426EN / 28 January 2022 / Ver. C
CONFIGURATION MANUAL
Ascom d83 DECT Handset Maintenance
4.8 DECT Frequency Band Configuration
The Frequency Band Configuration is normally done during the first deployment of the device. It
can be changed only after a factory reset.
To change the operating frequency band, the following preconditions must be fulfilled:
• The frequency is set to Not initiated. This can be checked by entering the Admin menu, see 6 Administra-
tion, page 64, follow the path: Admin menu → Device info → Hardware. Scroll down to Frequency band.
• The handset must not have a DECT registration. If it already has, perform a Factory reset, see 4.3
Perform a Factory Reset, page 9.
To change the operating frequency band, perform the following procedure:
1. Enter the Admin Menu, see 6 Administration, page 64
2. Select Frequency band and select the desired band:
− EU US (default)
− LA (Latin America)
− Brazil
− 1900 - 1920 MHz
− Multifrequency (see also 4.8.1 Multiple Frequency Support, page 13)
− Taiwan
− Thailand
3. Restart the handset.
4. Register the handset.
The frequency band option is no longer available.
4.8.1 Multiple Frequency upport
The handset can be used in a system that changes frequency by selecting Multifrequency as frequency
band in the handset. See 4.8 DECT Frequency Band Configuration, page 13. This setting is applicable when
handsets are used in different geographical locations. For example, users working on ships that visit
different countries.
When the frequency band is set to Multifrequency and the handset is restarted, it adopts the frequency
band used in that particular region.
The handset adopts the frequency band configured in the DECT system.
The recommended procedure when changing frequency band is as follows:
1. The site administrator transmits a broadcast message to all handsets informing them that they need to
be restarted at a specific time.
2. The site administrator enters IP-DECT master and changes the frequency setting and carriers just
before the specified time.
3. All handset users restart their handsets.
After restart, the handsets will have the applicable frequency band.
TD 93426EN / 28 January 2022 / Ver. C 13

Handset Configuration
CONFIGURATION MANUAL
Ascom d83 DECT Handset
5 Handset Configuration
This chapter describes settings in parameter definition files (.def). These files are regularly updated and
settings may change slightly. For example "On" to "Enable", or a parameter can be moved to another
directory.
In order to meet GDPR requirements for unauthorized use, we recommend that the Phone lock
feature is activated on the handsets. See 5.49 Handset Locks, page 62.
It is also recommended to clear message and call lists when put in a charger. See 5.16.3 Clear Lists
when Inserted in Charger, page 27.
5.1 Configure a Handset Using a Template
A handset can be selected in the WinPDM and changes can be made directly to one or more configuration
parameters. By using a template, the same configuration can easily be applied to many handsets simultane-
ously. Templates are also an efficient way to give good control over which changes are applied to each
handset.
Templates enable the configuration of all aspects of a handset from sound volume to keypad shortcuts.
Your supplier can provide example templates for different PBXs. The handset has full functionality to the
PBX even without such a template. However, by using a template, the handset is customized for that PBX
with menu options for PBX specific functions such as Callback.
5.1.1 Create a Template
1. Open the WinPDM/Device Manager.
2. Select the Templates tab and open the menu Template → New.... The New template window opens.
3. Select the device and parameter version that matches the software version installed on the handset.
Give the template a descriptive name.
The parameters that are not part of the template are left unchanged on the handset.
The parameter version of an installed handset is visible under the Numbers tab or the Devices tab.
4. Select the checkbox of each parameter that you want to be part of this template and enter the proper
value.
5. Click OK to save your template.
5.1.2 Apply a Template
1. Open the WinPDM/Device Manager.
2. Open the Numbers tab and select the handsets you want to apply the template to.
3. Make a right-click and select Apply template....
Only templates with a parameter version matching the selected handsets are shown. Select the
template you want to apply and click OK.
4. The template is applied. The number of parameters in the template affects the time it takes to apply the
template to the selected handsets.
Under the Numbers tab, the column “Last run template“ shows the name of the most recently applied
template.
A template can be applied to several handsets of the same device type simultaneously using the
Baseline function in the Device Manager.
14 TD 93426EN / 28 January 2022 / Ver. C
Other manuals for d83
1
Table of contents
Other ASCOM Handset manuals

ASCOM
ASCOM I62 - User manual

ASCOM
ASCOM I62 - User manual

ASCOM
ASCOM d63 User manual

ASCOM
ASCOM d62 Talker User manual

ASCOM
ASCOM d62 Talker User manual

ASCOM
ASCOM d81 Messenger User manual

ASCOM
ASCOM I75 Instruction sheet

ASCOM
ASCOM I62 - Instruction sheet

ASCOM
ASCOM d43 User manual

ASCOM
ASCOM d62 Talker User manual

ASCOM
ASCOM d62 Talker Instruction sheet

ASCOM
ASCOM i63 User manual

ASCOM
ASCOM D42 Instruction sheet

ASCOM
ASCOM I62 - User manual

ASCOM
ASCOM I75 User manual

ASCOM
ASCOM OFFICE 155PRO User manual

ASCOM
ASCOM d41 DECT User manual

ASCOM
ASCOM i63 User manual

ASCOM
ASCOM d41 DECT User manual

ASCOM
ASCOM d41 DECT User manual