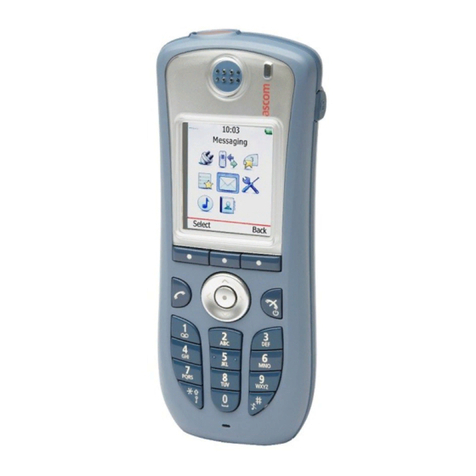
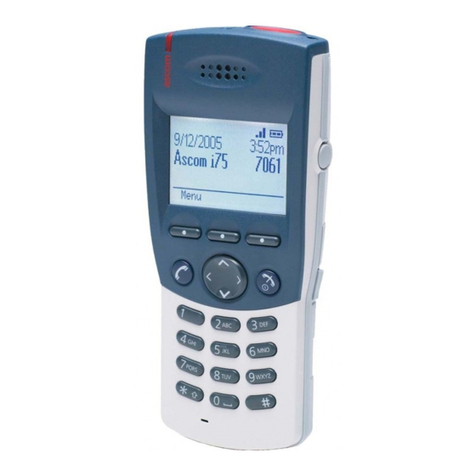
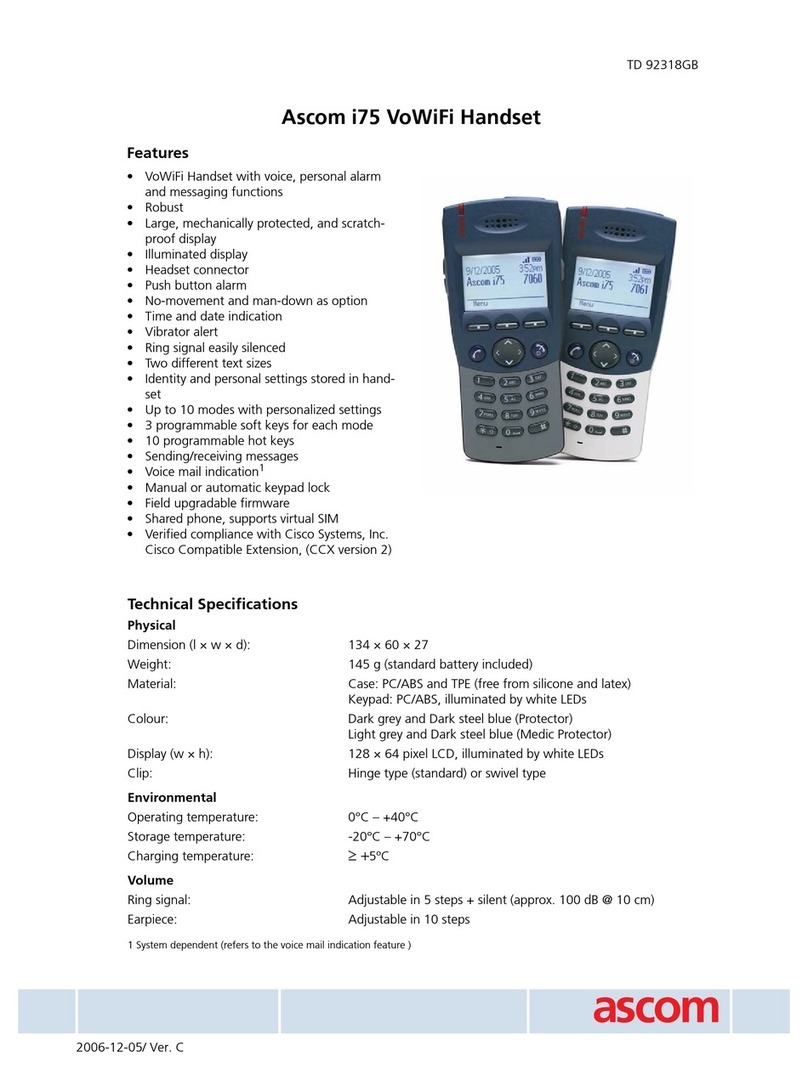
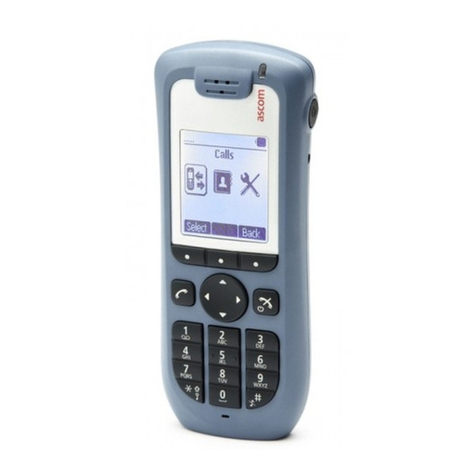
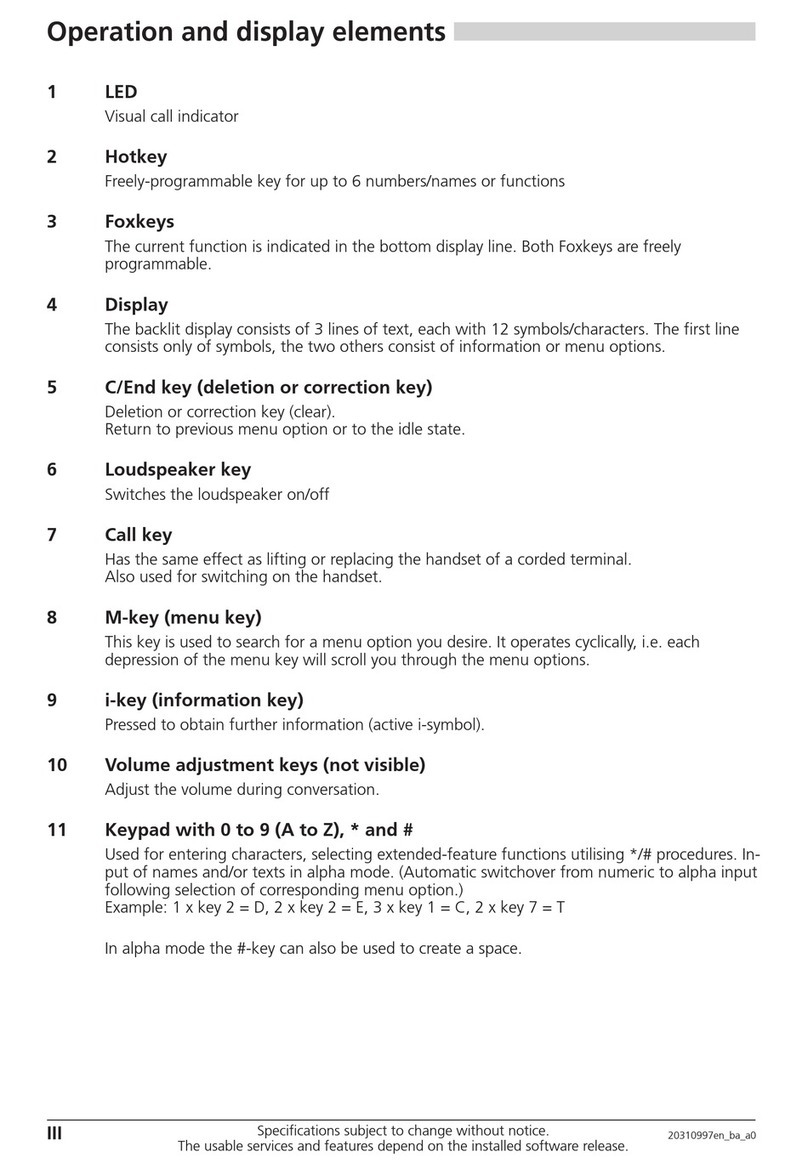
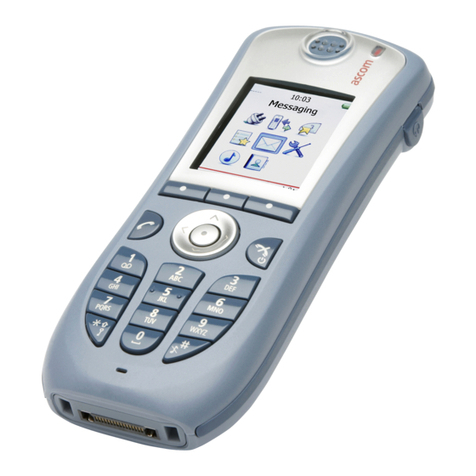
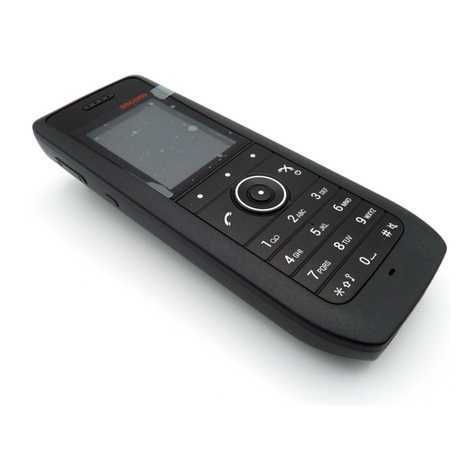
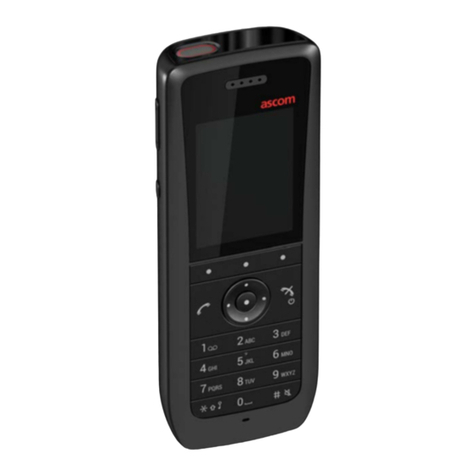
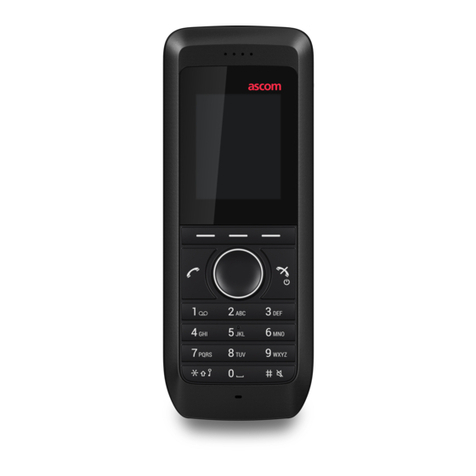
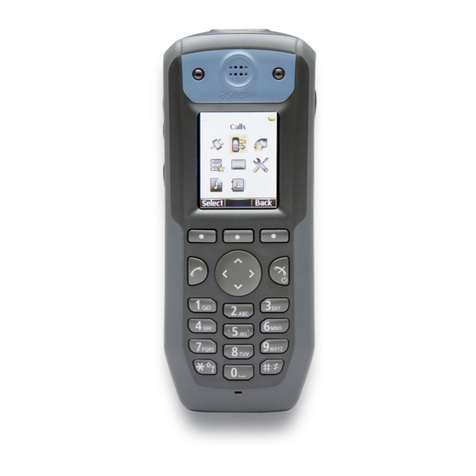
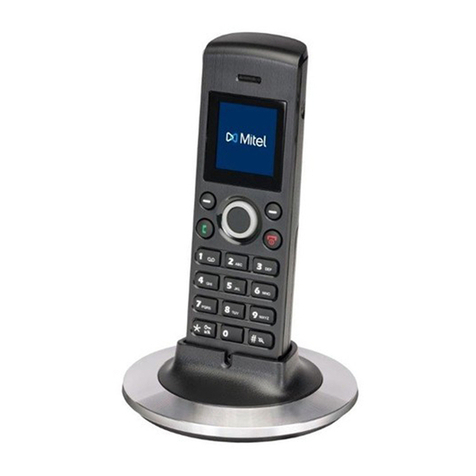
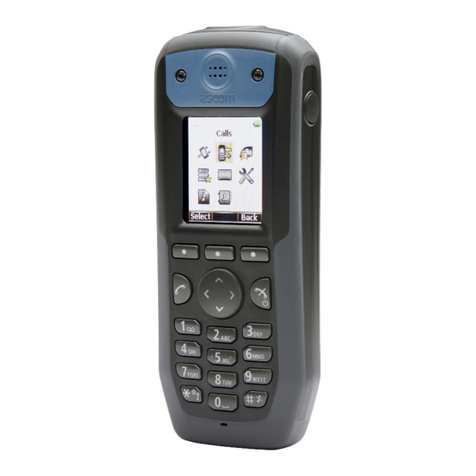
ASCOM i75 VoWiFi User manual

TD 92319GB
2008-11-10/ Ver. D
User Manual
Ascom i75 VoWiFi Handset

TD 92319GB
2008-11-10/ Ver. D
User Manual
Ascom i75 VoWiFi Handset
Contents
1 Introduction............................................................................................................. 1
1.1 Abbreviations and Glossary ................................................................................ 1
1.2 Versions ............................................................................................................. 1
1.3 Functions ........................................................................................................... 2
1.4 Accessories ........................................................................................................ 2
2 Guideline for Safety and Efficiency for the i75 VoWiFi Handsets ....................... 3
2.1 Precautions ........................................................................................................ 3
2.2 Environmental Requirements .............................................................................. 4
2.3 Frequency Range ............................................................................................... 4
2.4 Warranty Notification ......................................................................................... 5
2.5 Potentially Explosive Atmospheres ...................................................................... 5
2.6 Regulatory Compliance Statements (EU/EFTA only) ............................................. 5
2.7 Regulatory Compliance Statements (USA and Canada only) ............................... 5
3 Description of the Handset .................................................................................... 7
3.1 Handset Overview .............................................................................................. 7
3.2 Keys and Buttons ............................................................................................... 8
3.2.1 Navigation key ........................................................................................... 8
3.2.2 Off-hook Key ............................................................................................. 8
3.2.3 Volume Button .......................................................................................... 9
3.2.4 Alarm Button ............................................................................................. 9
3.2.5 Mute Button .............................................................................................. 9
3.2.6 Soft Keys ................................................................................................... 9
3.2.7 On/Off and On-hook Key ......................................................................... 10
3.2.8 Alpha Numeric Keys ................................................................................. 10
3.2.9 Hot Keys .................................................................................................. 11
3.3 Icons and Text in the Display ............................................................................ 11
3.4 Handset Memory ............................................................................................. 13
4 Accessories............................................................................................................. 14
4.1 Belt Clip, Swivel-type ....................................................................................... 14
4.2 Leather Casing ................................................................................................. 14
4.3 Headset ........................................................................................................... 14
4.4 Security String .................................................................................................. 14
4.5 USB Programming Device ................................................................................. 14
5 Chargers................................................................................................................. 15
5.1 Desktop Charger .............................................................................................. 15
5.2 Wall Mounted Charging Racks ......................................................................... 15
6 Navigate the Menu ............................................................................................... 16

TD 92319GB
2008-11-10/ Ver. D
User Manual
Ascom i75 VoWiFi Handset
6.1 Enter/Exit the Menu Mode ............................................................................... 16
7 Menu Tree Structure ............................................................................................. 17
7.1 Contacts .......................................................................................................... 17
7.2 Messages ......................................................................................................... 17
7.3 Call List ............................................................................................................ 17
7.4 Services ............................................................................................................ 17
7.5 Settings ........................................................................................................... 18
7.6 Profiles ............................................................................................................ 19
7.7 Customize the Menu Tree ................................................................................ 19
7.8 In Call Menu .................................................................................................... 20
8 Basic Operation ..................................................................................................... 21
8.1 Switch the Handset On/Off .............................................................................. 21
8.2 Log a Shared Phone On/Off .............................................................................. 21
8.3 Turn Audible Signals On/Off ............................................................................. 21
8.4 Lock/Unlock the Keypad ................................................................................... 21
8.5 Lock/Unlock the Handset ................................................................................. 22
9 Calling .................................................................................................................... 23
9.1 Open the Call List ............................................................................................ 23
9.2 Incoming Call ................................................................................................... 23
9.2.1 Turn Off Alert Signals at an Incoming Call ................................................ 23
9.2.2 End a Call ................................................................................................ 23
9.3 Outgoing Call .................................................................................................. 23
9.3.1 Pre-dial .................................................................................................... 23
9.3.2 Post-dial .................................................................................................. 24
9.3.3 Dial Using a Pre-programmed Hot key or Soft key .................................... 24
9.3.4 Dial a Number from the Call list ............................................................... 24
9.3.5 Dial a Number from a Message ................................................................ 24
9.3.6 Dial a Number from the Local Phonebook ................................................ 24
9.3.7 Dial a Number from the Central Phonebook ............................................. 24
9.4 During a Call .................................................................................................... 24
9.4.1 Start a New Call during Conversation ....................................................... 24
9.4.2 Transfer/Retrieve a Call ............................................................................. 24
9.4.3 “Blind” Transfer ....................................................................................... 24
9.4.4 Put a Call on Hold/Retrieve the Call .......................................................... 25
9.4.5 Turn the Mute Mode On/Off .................................................................... 25
9.4.6 Increase/Decrease the Speaker Volume ..................................................... 25
9.5 Loudspeaking Function .................................................................................... 25
10 Call Diversion....................................................................................................... 26
10.1 Preset the Telephone Numbers ....................................................................... 26
10.2 Divert Calls .................................................................................................... 26

TD 92319GB
2008-11-10/ Ver. D
User Manual
Ascom i75 VoWiFi Handset
11 Push-to-Talk Conference Call.............................................................................. 27
11.1 Send an Invitation to a PTT Group .................................................................. 27
11.2 Accept a PTT Conference Call ........................................................................ 27
11.3 Reject a PTT Conference Call .......................................................................... 27
12 Messaging............................................................................................................ 28
12.1 Message List .................................................................................................. 28
12.1.1 Display and Scroll between Messages ..................................................... 28
12.1.2 Read Stored Messages ........................................................................... 29
12.1.3 Message Queuing and Message Priority ................................................. 30
12.2 Basic Message Handling ................................................................................. 32
12.2.1 Receive a Message ................................................................................. 32
12.2.2 Receive a Message during a Call ............................................................ 32
12.2.3 Receive a Message with Request for Answer .......................................... 32
12.2.4 Delete a Message ................................................................................... 32
12.3 Messaging between Handsets ........................................................................ 33
12.3.1 Send a Message to another Handset ...................................................... 33
12.4 Send a Message to a predefined Destination Address ..................................... 33
12.5 Interactive Messaging .................................................................................... 33
12.5.1 Interactive Messages with Function Keys ................................................ 34
12.5.2 Interactive Messages without Function Keys ........................................... 34
12.5.3 Multilayer Interactive Messaging ............................................................ 34
12.6 Voice Mail ...................................................................................................... 34
12.6.1 Receive a Voice Mail ............................................................................... 34
12.7 Send Data from the Handset .......................................................................... 34
12.7.1 Data Send .............................................................................................. 34
12.7.2 Send Data with a Prefix .......................................................................... 34
13 Presence Management ....................................................................................... 35
13.1 Select Presence Activity .................................................................................. 35
14 Alarm Operation ................................................................................................. 36
14.1 Acoustic Localisation Signal ............................................................................ 36
14.2 Push-button Alarm ......................................................................................... 36
14.3 Test Alarm ...................................................................................................... 36
14.4 No-movement Alarm ..................................................................................... 36
14.5 Man-down Alarm .......................................................................................... 37
14.5.1 Delay Time for No-movement and Man-down Alarms Warning Signal .... 37
14.6 Alarm with Data ............................................................................................ 37
14.7 Automatic Call after an Alarm ........................................................................ 37
14.8 Automatic Alarm after an Emergency Call ...................................................... 38
15 Menu Operation.................................................................................................. 39
15.1 Contacts ........................................................................................................ 39

TD 92319GB
2008-11-10/ Ver. D
User Manual
Ascom i75 VoWiFi Handset
15.1.1 Find an Entry in the Local Phonebook ..................................................... 39
15.1.2 View an Entry in the Local Phonebook ................................................... 39
15.1.3 Add an Entry to the Local Phonebook .................................................... 39
15.1.4 Delete an Entry in the Local Phonebook ................................................. 40
15.1.5 Edit an Entry in the Local Phonebook ..................................................... 40
15.1.6 Find an Entry in the Central Phonebook ................................................. 41
15.1.7 Delete the Central Phonebook Search Result .......................................... 41
15.1.8 Add an Entry from the Search Result to the Local Phonebook ................ 41
15.1.9 Send a Message to an Entry in Contacts ................................................. 41
15.2 Messages ....................................................................................................... 41
15.2.1 Message List .......................................................................................... 42
15.3 Call List .......................................................................................................... 43
15.3.1 Save a Number from the Call List to the Local Phonebook ...................... 43
15.3.2 Delete a Number in the Call List ............................................................. 43
15.3.3 Delete All Numbers in the Call List ......................................................... 43
15.4 Services .......................................................................................................... 43
15.4.1 Activate a Service ................................................................................... 44
15.4.2 Create a new Service ............................................................................. 44
15.4.3 Edit a Service ......................................................................................... 44
15.4.4 Delete a Service ..................................................................................... 45
15.5 Settings ......................................................................................................... 45
15.5.1 Change the Ring Volume ....................................................................... 45
15.5.2 Change the Ring Signal .......................................................................... 46
15.5.3 Change the Speaker, Loudspeaker or Headset Volume ........................... 46
15.5.4 Vibrator On/Off ...................................................................................... 46
15.5.5 Key Beep On/Off .................................................................................... 46
15.5.6 Deactivate/Activate No-movement alarm ................................................ 46
15.5.7 Deactivate/Activate Man-down alarm1 ................................................................. 46
15.5.8 Edit a Soft key ........................................................................................ 47
15.5.9 Edit a Hot key ........................................................................................ 48
15.5.10 Select Language ................................................................................... 48
15.5.11 Change Text Size in Messages .............................................................. 49
15.5.12 Lock the Handset Manually .................................................................. 49
15.5.13 Change the Lock Code1 .......................................................................................... 49
15.5.14 Time and Date Settings ........................................................................ 49
15.5.15 Turn On/Off Automatic Keypad Lock .................................................... 49
15.5.16 Enable/Disable Quick Answer ............................................................... 50
15.5.17 Display New Messages 180º Rotated (upside down) ............................. 50
15.5.18 Set Owner ID ....................................................................................... 50
15.5.19 Change Display Contrast ...................................................................... 50
15.5.20 Select System ....................................................................................... 50
TD 92319GB
2008-11-10/ Ver. D
User Manual
Ascom i75 VoWiFi Handset
15.5.21 System Information .............................................................................. 51
15.6 Profiles ........................................................................................................... 51
15.6.1 Change between the Profiles ................................................................. 52
15.6.2 Change Profile Settings .......................................................................... 52
15.6.3 Set the Profile to Absent On/Off ............................................................. 52
15.6.4 Choose the Profile’s Answering method ................................................. 52
15.6.5 Set the Profile to Divert incoming Calls ................................................... 52
15.6.6 Preset Phone Numbers for the Diversions alternatives ............................. 53
15.6.7 Customizing the Profiles Menu .............................................................. 53
16 System Handling ................................................................................................. 54
16.1 Register a New VoWiFi System ....................................................................... 54
16.2 Field Upgrade ................................................................................................ 54
17 Status text in Display.......................................................................................... 55
17.1 Accessibility and Voice Quality ........................................................................ 55
17.2 Error Codes .................................................................................................... 55
17.3 Environmental Requirements .......................................................................... 56
18 Maintenance........................................................................................................ 57
18.1 Charge the Battery ......................................................................................... 57
18.1.1 Charging Spare Batteries ........................................................................ 57
18.2 Remove the Battery ........................................................................................ 57
18.3 Change the Clip ............................................................................................. 58
19 Related Documents ............................................................................................. 59
20 Document History ................................................................................................ 60
Index ....................................................................................................................... 61

TD 92319GB
2008-11-10/ Ver. D
User Manual
Ascom i75 VoWiFi Handset
1
1 Introduction
The Ascom i75 VoWiFi Handset is part of the Ascom VoWiFi system. With the i75 VoWiFi
handset you can maintain connectivity to traditional telephone services while remaining
mobile around the work environment.
This document describes the features and settings available for the i75 VoWiFi Handset.
All procedures in this document are according to default programmed versions, but
additional functions and factory settings are also included as an attempt to cover all
functionality.
Note: 1) Some functions are PBX and protocol (H.323/SIP) dependent and your system
may not supply all functions described in this document. For more information about your
system please contact the person (or department) responsible for the system in your
organization, or contact your supplier.
2) This document includes important safety information and operating instructions, see
chapter 2 Guideline for Safety and Efficiency for the i75 VoWiFi Handsets on page 3.
Please read this information before using your i75 VoWiFi handset and save this manual
with all instructions for future reference.
1.1 Abbreviations and Glossary
1.2 Versions
The Ascom i75 VoWiFi Handset is a robust handset designed for people working in tough
environments. It is suitable for users dependent of being reachable and/or having a need
for advanced mobile messaging functions. The handset comes in three versions;
i75 Messenger, i75 Protector and i75 Medic Protector.
ESSID Extended Service Set Identifier: Identifier for the mobile devices
attempting to connect to the VoWiFi system.
IMS/IP Integrated Message Server for the VoWiFi system.
IP Internet Protocol: Global standard that specifies the format of
datagrams and the addressing scheme.
PDM Portable Device Manager: Used for management of portables,
editing of parameters and updating the portables with new
software.
VoIP Voice over Internet Protocol
VoWiFi Voice over Wireless Fidelity: Is a wireless version of VoIP and
reefers to IEEE 802.11a, 802.11b or 802.11g network.
WiFi Wireless Fidelity: Is used generically when referring of any type
of 802.11 network.

TD 92319GB
2008-11-10/ Ver. D
User Manual
Ascom i75 VoWiFi Handset
2
1.3 Functions
• Local phonebook
• Central phonebook
•Vibrator
• Headset connector
• Loudspeaking
• Microphone on/off during call
•Presence*
• Push-To-Talk (PTT)*
•Messaging*
•Acknowledge*
• Interactive messaging*
• Group messaging*
• Voice mail*
• Data send*
• Data with prefix*
• Personal alarm (Protector versions only)
• Alarm with data (Protector versions only)
• Location
• Ekahau RTLS
• Man-down & No-movement alarm (Protector versions only)
• Field upgradable software
* System dependent feature
1.4 Accessories
• Headset
- with mic (2 types)
- with hearing protection
• Belt clip
-hinge-type
-swivel-type
•Leathercasing
•Securitystring
• Desktop charger
• Charging rack
• Battery pack charger (each module supports eight batteries)
• Spare battery
• USB programming device

TD 92319GB
2008-11-10/ Ver. D
User Manual
Ascom i75 VoWiFi Handset
3
2 Guideline for Safety and Efficiency for the i75 VoWiFi Handsets
Read this chapter before using the i75 VoWiFi Handset.
For safe and efficient operation of the handset, observe the guidelines given in this
manual and all necessary safety precautions when using the handset. Follow the operating
instructions and adhere to all warnings and safety precautions located on the product, the
Quick Reference Guide and this User Manual.
This product shall only be used with the following batteries:
• Art.No: 660105 Battery Standard
• Art.No: 660106 Battery Extended
• Art.No: 660107 Battery Medic Standard
• Art.No: 660108 Battery Medic Extended
Desktop chargers shall only be connected with power adapters supplied by the
manufacturer.
Available power adapters are:
Art.No: FW7650 Power supply univ. AC/5V DC/1A
2.1 Precautions
•Save this manual. It includes important safety information and operating instructions.
Save all instructions for future reference.
• Connect AC (power supply) to the desktop battery charger only to designated power
sources as marked on the product.
Danger: Never alter the AC cord or plug. If the plug will not fit into the outlet, have a
proper outlet installed by a qualified electrician. Improper connection increases the risk
of electric shock.
• Position the electrical cord to the AC power supply where it is least likely to be
subjected to damage or stress.
• Remove the electrical cord from an outlet by pulling gently on the AC adapter, not by
pulling the cord.
• Remove the battery before cleaning the telephone to reduce risk of electric shock.
• Unplug the battery charger from a power source before cleaning the handset to reduce
risk of electric shock.
• Do not use auxiliary equipment with the handset which is not exclusively
recommended by the manufacturer, see 1.4 Accessories on page 2. The use of any
auxiliary equipment not recommended by the manufacturer may result in fire, electric
shock, or injury, and will void the warranty.
• Do not expose the handset to open flame.
• Do not expose the handset and the charger to direct sunlight for long periods. Keep
the handset and charger away from excessive heat and moisture.
• Protect your handset from aggressive liquids and vapours.
• Keep the handset away from strong electromagnetic fields.
• Do not allow heavy objects to fall on the handset.
• Do not allow children to play with the product packaging material. Product packaging
material is often small and may present a choking hazard.
• Do not allow children to play with the handset. It is not a toy. Children could hurt
themselves or others. Children could also damage the handset.
• Do not expose to prolong light

TD 92319GB
2008-11-10/ Ver. D
User Manual
Ascom i75 VoWiFi Handset
4
Battery
• Do not immerse the battery into water. This could short-circuit and damage the
battery.
• Do not expose a battery to an open flame. This could cause the battery to explode.
• Do not allow the metal contacts on the battery to touch another metal object. This
could short-circuit and damage the battery.
• Do not leave a battery where it could be subjected to extremely high temperatures,
such as inside a car on a hot day.
• Use the Desktop Charger or the wall mounted Charging Rack for charging. Charge the
battery for at least one hour the first time you use the battery. Note that the wall
mounted charger with a battery pack adapter has to be used if the battery alone is to
be charged.
• Do not attempt to take a battery apart.
• Do not disconnect the battery unless it needs to be replaced.
• Do power the handset off before removing the battery.
2.2 Environmental Requirements
Cordless Handset
• Only use the handset in temperatures between 0 oC to +40 oC (32o F to 140oF).
Battery
• Do not charge a battery when the ambient room temperature is above 40 ºC or below
5 ºC (above 104º F or below 41 ºF).
Battery disposal
Defective batteries must be returned to a collection point for chemical waste disposal.
Chemical Resistance
The alpha and numeric characters printed on the exterior of the handset have been tested
and found resistant to chipping, fading or wearing off when the handset is treated with
common cleaners and disinfectants or perspiration. The following chemicals have shown
no harmful effect:
• 3% Hydrochloric Acid
• M-alcohol (70% Methylated Ethanol)
• 60% Chlorhexidin 0.5mg/ml
Acetone can be damaging to the plastic casing of the handset and should not be used.
2.3 Frequency Range
The handset is a radio transmitter and receiver. When it is on, it receives and sends out
radio frequency (RF) energy. The handset operates on different frequency ranges
depending on market and employs commonly used modulation techniques:
EU 2412- 2472 MHz
USA/
Canada 2412- 2462 MHz

TD 92319GB
2008-11-10/ Ver. D
User Manual
Ascom i75 VoWiFi Handset
5
2.4 Warranty Notification
Do not disassemble the handset. Disassembling the handset voids the warranty. The
handset consists of no consumer serviceable components. Service should be performed by
Authorized Service centre only.
2.5 Potentially Explosive Atmospheres
Turn the handset off when in an area with a potentially explosive atmosphere. It is rare,
but the telephone or its accessories could generate sparks. Sparks in such areas could
cause an explosion or fire resulting in bodily injury or even death.
Areas with a potentially explosive atmosphere are often, but not always, clearly marked.
They include fuelling areas, (such as gas stations), below deck on boats, fuel or chemical
transfer or storage facilities, and areas where the air contains chemicals or particles (such
as grain, dust, or metal powders).
Do not transport or store flammable gas, liquid, or explosives in any compartment of a
vehicle which also contains the telephone and accessories.
In the U.S., vehicles powered by liquid petroleum gas (such as propane or butane) must
comply with the National Fire Protection Standard (NFPA-58). For a copy of this standard,
contact the National Fire Protection Association, One Battery march Park, Quince,
Massachusetts 02269, Attention: Publication Sales Division.
2.6 Regulatory Compliance Statements (EU/EFTA only)
This equipment is intended to be used in the whole EU & EFTA.
This equipment is in compliance with the essential requirements and other relevant
provisions of R&TTE Directive 1999/51/EC. The Declaration of Conformity may be
consulted at:
http://www.ascom.com/ws/products_ws.htm
The handset is marked with the label
2.7 Regulatory Compliance Statements (USA and Canada only)
FCC compliance statements
This equipment has been tested and found to comply with the limits for a Class B digital
device, pursuant to part 15 of the FCC Rules. These limits are designed to provide
reasonable protection against harmful interference in a residential installation. This
equipment generates, uses and can radiate radio frequency energy and, if not installed
and used in accordance with the instructions, may cause harmful interference to radio
communications. However, there is no guarantee that interference will not occur in a
particular installation. If this equipment does cause harmful interference to radio or
television reception, which can be determined by turning the equipment off and on, the
user is encouraged to try to correct the interference by one or more of the following
measures:
• Reorient or relocate the receiving antenna.
FCC ID: BXZKATY
IC:
3724B-
KATY

TD 92319GB
2008-11-10/ Ver. D
User Manual
Ascom i75 VoWiFi Handset
6
• Increase the separation between the equipment and receiver.
• Connect the equipment into an outlet on a circuit different from that to which the
receiver is connected.
• Consult the dealer or an experienced radio/TV technician for help.
Privacy of communications may not be ensured when using this handset.
Exposure to Radio Frequency Signals
This equipment complies with FCC radiation exposure limits set forth in CFR47 Section
2.1093 and Industry Canada Rss102 Issue 2 for an uncontrolled environment. This device
complies with FCC SAR limit of 1.6 W/kg. The maximum SAR value measured when used
at the ear is 0.0036 W/kg. The telephone has also been tested when worn on the body
using belt clip, maximum measured SAR value in this configuration is 0.117 W/kg. This
device must not be co-located or operating in conjunction with any other antenna or
transmitter.
The FCC has granted an equipment authorization for the i75 VoWiFi handset with all
reported SAR levels evaluated as in compliance with the FCC RF emissions guidelines. SAR
information for the i75 VoWiFi handset is on file at FCC and can be found under the
Display Grant section of https://gullfoss2.fcc.gov/prod/oet/cf/eas/reports/
GenericSearch.cfm after searching on FCC ID BXZKATY.
Use of non-Ascom approved accessories may violate the FCC and IC guidelines for RF
exposure and should be avoided.
Information to user
This device complies with Part 15 of the FCC Rules. Operation is subject to the following
two conditions:
(1) this device may not cause harmful interference, and
(2) this device must accept any interference received, including interference that may
cause undesired operation.
• Do not use in areas where there are explosive hazards.
• Do not use this handset in environments where there is a degree of ignition of
flammable gases.
Modifications
Changes or modifications to the equipment not expressly approved by the party
responsible for compliance could void the user’s authority to operate the equipment.
IC Requirements for Canada
This Class B digital apparatus complies with
Canadian ICES-003.
Cet appareil numérique de la Classe B conforme á la
norme NMB-003 du Canada.

TD 92319GB
2008-11-10/ Ver. D
User Manual
Ascom i75 VoWiFi Handset
7
3 Description of the Handset
3.1 Handset Overview
Figure 1. The i75 VoWiFi handset
Figure 2.
Case
The case is made of durable PC/ABS plastic.
The i75 Handset has the enclosure protection IP40 and it also fulfils IEC 68-2-32 procedure
1, which makes it drop proof from 1.5 meters onto concrete.
Antenna
The antenna is integrated inside the handset.
Figure 1.
1 Microphone
2Display
3LED
4 Loudspeaker
5 Navigation key
6 Off-hook Key
7 Volume Button
8 Alarm Button
9 Mute Button
10 Soft Keys
11 On/Off and On-hook Key
12 Alpha Numeric Keys
001
12
11
9
7
5
6
8
10
1
3
6
5
4
7
8
9
0
2
D
E
F
M
N
O
J
K
L
G
H
I
P
Q
R
S
T
U
V
W
X
Y
Z
A
B
C
1
3
6
5
4
7
8
9
0
2
D
E
F
M
N
O
J
K
L
G
H
I
P
Q
R
S
T
U
V
W
X
Y
Z
A
B
C
1
3
2
4
Keys and buttons
Visual- and audio parts

TD 92319GB
2008-11-10/ Ver. D
User Manual
Ascom i75 VoWiFi Handset
8
Display
The display is an illuminated 128 x 64 pixels LCD, covered by anti-reflex treated plastic
glass for maximum readability.
Keypad
The keypad is illuminated, which makes it possible to operate the handset in dark
environments. While not in use, the keypad should be locked to prevent pressing a key
accidentally.
Clip, Hinge-type
The clip on the back of the handset helps you fasten the handset to a belt or similar. It is
also possible to change the clip to a swivel-type or, if no clip is needed, to replace it with a
covering plate.
Battery
The battery is a rechargeable Li-lon battery placed on the back of the handset.
3.2 Keys and Buttons
3.2.1 Navigation key
The Navigation key controls the movement of the cursor in the display.
In stand-by mode the Navigation key is used for entering the Call list, the Navigation
key for entering the Message list, and the Navigation key for entering the menu.
In menu mode, the Navigation key (all directions) is used for scrolling, in the submenus the
Navigation key is used for scrolling through the entries.
Note: These are the default settings for the Navigation key. They can be changed using
the Portable Device Manager.
3.2.2 Off-hook Key
The Off-hook key is used for connecting calls.
Figure 3.
Figure 4.
right (menu)
(menu) left
down
(call list)
(message list)
up
005
036

TD 92319GB
2008-11-10/ Ver. D
User Manual
Ascom i75 VoWiFi Handset
9
3.2.3 Volume Button
The Volume button is used for increasing/decreasing the volume. The adjusted volume is
saved in the handset.
3.2.4 Alarm Button
The red Alarm button is used for sending alarms and testing the alarm function (test
alarm). If programmed the handset can automatically dial a predefined telephone number
directly after an alarm is sent.
3.2.5 Mute Button
The Mute button is used for silencing the audible signals in stand-by mode, silencing the
ring signal at an incoming call, and also to turn off/on the microphone during a call.
3.2.6 Soft Keys
Figure 2. Navigation key functions in stand-by mode (default).
The three Soft keys are located just beneath the display and the function of each Soft key
is indicated by text in the display just above the keys.
In stand-by mode the Soft keys can be used for specific functions defined by the user of
the handset. The function can be to dial a specific telephone number, sending data, a
short-cut to the Menu, or sending a message.
When navigating in menu mode the Soft keys are used for menu choices.
Note: The Soft key Menu is a default setting but all Soft key settings can be changed by
the user or the system administrator.
Figure 5.
Figure 6.
Figure 7.
Figure 8.
decrease
increase
033
034
Soft keys
Optional Soft keys defined by
the user.
Max. seven characters can be
used for naming aSoft key
006
Default setting

TD 92319GB
2008-11-10/ Ver. D
User Manual
Ascom i75 VoWiFi Handset
10
3.2.7 On/Off and On-hook Key
The On/off and On-hook key is used for disconnecting calls and for switching the handset
on and off.
3.2.8 Alpha Numeric Keys
In some applications you have the possibility to write letters as well as numbers, which is
indicated by the ABC icon. Pressing the numerical keys will now give you access to the
alphabet plus some special characters according to the picture.
In Stand-by Mode
In stand-by mode short presses on the keys enter the digits, and the characters * and #.
A long press on a key “0” - “9” activates the programmed Hot key function.
In Text Input Mode
In text input mode a press on a key displays the first available character on that specific
key. Press the key repeatedly to view the characters following the first. The marked
character is selected after a time out or when another key is pressed. Press the *-key to
switch between upper case and lower case. Press and hold a key to enter a number in text
input mode, or press repeatedly until the number is shown.
Press and hold the #-key in order to switch between text and number input mode.
In Dialling mode
If a pause is required in a phone number, it is added by making a long press on the *-key.
The pause is indicated with a “P” in the number.
Figure 9.
Figure 10.
037
A B C
Å
Ä Æ À Á Â Ã Ç 2
D E F È É Ê Ë 3
G H I Ï Ì Î Í 4 J K L 5
M N O N Ö Ø Ò Ó Ô Õ 6
P Q R S ß 7
T U V Ü Ù Ú Û 8
W X Y Z Ý 9
Space %$ £ ± + =
¿ < > # ½ µ § ° ¦ 0
Switch between upper
and lower case.
Add pause “P”in
phone numbers.
. , - ? ! & @ " ' : ; ( ) / \ _ ^ 1
Switch between text
and number input mode.
Hold
1
3
6
5
4
7
8
9
0
2
D
E
F
M
N
O
J
K
L
G
H
I
P
Q
R
S
T
U
V
W
X
Y
Z
A
B
C
007

TD 92319GB
2008-11-10/ Ver. D
User Manual
Ascom i75 VoWiFi Handset
11
3.2.9 Hot Keys
Any key “0”–“9” can be set to a Hot key. A Hot key can be programmed to give access to
frequently used functions such as dialling a specific handset number, sending data, a
short-cut to the menu, or sending a message. Note that the possibility to define a Hot key
can be locked by the system administrator.
3.3 Icons and Text in the Display
The icons and text in the display indicate functions and settings to which you have access.
The display normally shows date and time, the owner ID and telephone number. The
owner ID can manually be set by the user.
Figure 3. Example of a display configuration in stand-by mode.
In stand-by mode the upper row is used for icons. Three rows are used for information.
The first row shows the date and time and the second row is used for user information.
The user information in stand-by mode can be set by the user. The third information row is
used for showing the alarm icons and status of the handset. Examples of status
information are; muted, in charger etc. When there is no status to show the row is empty.
The bottom row (under the line) is the Soft key field. In stand-by mode it shows the user
defined names of the three Soft keys beneath the display. In menu mode where the Soft
keys are used for different choices, it gives you the function of each Soft key. Examples of
functions are; Select, Back, Option, Save etc.
Figure 11.
The “Off-hook” icon indicates that your handset is off-hook.
The “Audio signals” off icon is shown when all alert signals,
including ring signal, message tone, key beep etc. are turned off.
High priority messages will however override this setting.
The “Signal strength” icon is always shown in the display in stand-
by mode. The level indicators decreases when the signal strength
becomes weaker.
The “Battery” icon is always shown in the display in stand-by mode.
When the level is low it is time to charge the battery.
The “Loudspeaking on” icon is shown when it is possible to use the
loudspeaking function.
The “Loudspeaking off” icon is shown when the loudspeaker is
activated.
Icons
User identity
Menu Assist Doctor Shows the function of the Soft keys
(user defined in stand-by mode)
Alarm icons and information of
current mode, for example “Silent”
Apr 30 10:36am
Elisabeth 23654
}
}
}
}
Silent
}
Time and date
004

TD 92319GB
2008-11-10/ Ver. D
User Manual
Ascom i75 VoWiFi Handset
12
The “New voice mail” icon appears when a new voice mail exists.
The symbol will remain until all voice mails has been listened to and/
or removed. (Note: This is dependent on voice mail system.)
The “Key lock” icon indicates when your keypad is locked.
The “Padlock” icon indicates that the IP handset has been locked,
and has to be unlocked with a code before it can be used.
The “Headset” icon indicates that a headset is connected to the
handset.
The “No-movement” alarm on icon indicates that the no-
movement alarm is activated.
The “Man-down alarm on” icon indicates that the man-down alarm
is activated.
“ABC” indicates that you can type upper case letters and numbers
in text input mode.
“abc” indicates that you can type lower case letters and numbers in
text input mode.
“123” indicates that you can type numbers in text input mode.
The “Incoming call” icon is added in front of incoming calls in the
call list.
The “Outgoing call” icon is added in front of outgoing calls in the
call list.
The “Missed call” icon is added in front of unanswered calls in the
call list
The “Diverted” icon is added in front of the number that the calls
are diverted to.
The “Unread message” icon is added in front of not read messages
in the message list.
The “Read message” icon is added in front of read messages in the
message list.
A “Message continue” icon is shown when the message text
continues above or below the current screen.
The “Interactive message” icon is added in front of not read
interactive messages in the message list.

TD 92319GB
2008-11-10/ Ver. D
User Manual
Ascom i75 VoWiFi Handset
13
3.4 Handset Memory
The handset memory contains all personal settings such as phonebook, identity, alert
signal and your defined functions of the Soft keys and Hot keys. All personal settings are
downloaded to the memory when the user logs into the WLAN network. In addition, the
memory holds up to two versions of the firmware.
The “Read interactive message” icon is added in front of read
interactive messages in the message list.
The “Action required” icon is added in front of messages where an
action is required.
The “New message” icon appears when a new message is received.
The number on the right side of the icon shows the total number of
unread messages. The symbol will remain until the message is
marked as read.
The “Add contact” icon appears on a Soft key when a phone
number is marked in the call list. It indicates that it is possible to add
the phone number to the local phonebook.
The “Get contact from phonebook” icon is visible when it is
possible to get a phone number from the local phonebook, for
example to add it to a function.
Menu Icons: Icons displayed in Menu mode
Under the icon “Contacts” in the menu mode, you can find the
local and central phone books. See 15.1 Contacts on page 39.
Under the icon “Messages” in the menu mode, you can find the
message list and the menu entry for sending messages.
See 15.2 Messages on page 41.
Under the icon “Call list” in the menu mode, you can find the call
list. See 15.3 Call List on page 43.
Under the icon “Services” in the menu mode, you can select, add,
delete, or change a service function. See 15.4 Services on page 43.
Under the icon “Settings” in the menu mode, you do your handset
settings. See 15.5 Settings on page 45.
Under the icon “Profiles” in the menu mode, you can select a
profile and edit profiles. See 15.6 Profiles on page 51.

TD 92319GB
2008-11-10/ Ver. D
User Manual
Ascom i75 VoWiFi Handset
14
4 Accessories
4.1 Belt Clip, Swivel-type
The ordinary belt clip can be replaced with a special swivel-type belt clip adapted to firmly
place your handset onto your belt.
4.2 Leather Casing
The leather casing is especially designed for the handset. The casing comes with a swivel-
type belt clip and the handset is fully operational while placed in the casing.
4.3 Headset
A headset is recommended if you frequently use the phone, and/or want to have both
hands free. The handset has a special headset connector that is waterproof. The headset
comes in three versions; with microphone integrated in the cable, with microphone on a
boom, and with hearing protection (Peltor). An adapter, that makes it possible to connect
other standard types of Peltor headsets, is also available.
4.4 Security String
The security string is 800 mm long. Fasten one end to the hinge-type belt clip and the
other end to, for example, your pocket.
4.5 USB Programming Device
Similar to the Desktop charger in design, the USB programming device is used to connect
your handset to a computer in order to upgrade the firmware and edit parameters.
Table of contents
Other ASCOM Handset manuals

ASCOM
ASCOM d62 Talker Instruction sheet

ASCOM
ASCOM I75 User manual

ASCOM
ASCOM OFFICE 155PRO User manual

ASCOM
ASCOM d81 Messenger User manual

ASCOM
ASCOM d63 User manual

ASCOM
ASCOM d62 Talker User manual

ASCOM
ASCOM I62 - User manual

ASCOM
ASCOM I75 User manual

ASCOM
ASCOM d81 Messenger User manual

ASCOM
ASCOM d62 Talker User manual

ASCOM
ASCOM I62 - User manual

ASCOM
ASCOM I62 - User manual

ASCOM
ASCOM d43 Installation instructions

ASCOM
ASCOM d81 Messenger User manual

ASCOM
ASCOM I62 - User manual

ASCOM
ASCOM d62 Talker User manual

ASCOM
ASCOM d63 User manual

ASCOM
ASCOM d81 Messenger User manual

ASCOM
ASCOM d81 Messenger User manual

ASCOM
ASCOM d41 DECT Instruction sheet