AU A5505SA Installation guide

Basic Manual/A5505SA
April 2004 Edition
Sales
:
KDDI CORPORATION•
OKINAWA CELLULAR TELEPHONE COMPANY
Manufactured by
:
SANYO Electric Co., Ltd.
From regular phones:
0077-7-111
(toll free)
From au cellphones
157 area code not required
(toll free)
For inquiries, call:
au Customer Service Center (General Information)
Cellphone and PHS operators collect and recycle unused
telephones, batteries and battery chargers at stores bearing the
logo regardless of brand and manufacturer to protect the
environment and reuse valuable resources.
Pressing "zero" will connect you
to an operator, after calling "157"
on your au cellphone.
Before use
How to use
the Phone
Using
Overseas
How to use the
Address Book
How to
use Mail
What You Can Do
with the Camera
How to use the Camera
How to use
EZweb(Internet)
How to use
FM Radio
How to use miniSD
Memory Card
Inputting Text
What You Can Do
with EZnaviWalk
How to use EZnaviWalk
Troubleshooting
Other Features •
Index

基本操作ガイド/A5505SA
準備する
電話を
かける/受ける
海外で使う
アドレス帳を使う
メールを使う
カメラでできること
カメラを使う
EZweb(インターネット)
を使う
EZナビウォークでできること
EZナビウォークを使う
FMラジオ
で楽しむ
文字を
入力する
miniSDメモリ
カードを使う
故障とお考えに
なる前に
その他の機能
・索引
IncludingEnglishSimpleManual
Preface
Thank you very much for purchasing the A5505SA.
Carefully read the Manual and Basic Manual to ensure proper operation before using the
A5505SA. Keep these manuals handy so that you can refer to them at any time after
reading.
Contact au Customer Service Center or au shop nearest you when you lose any of these
manuals.
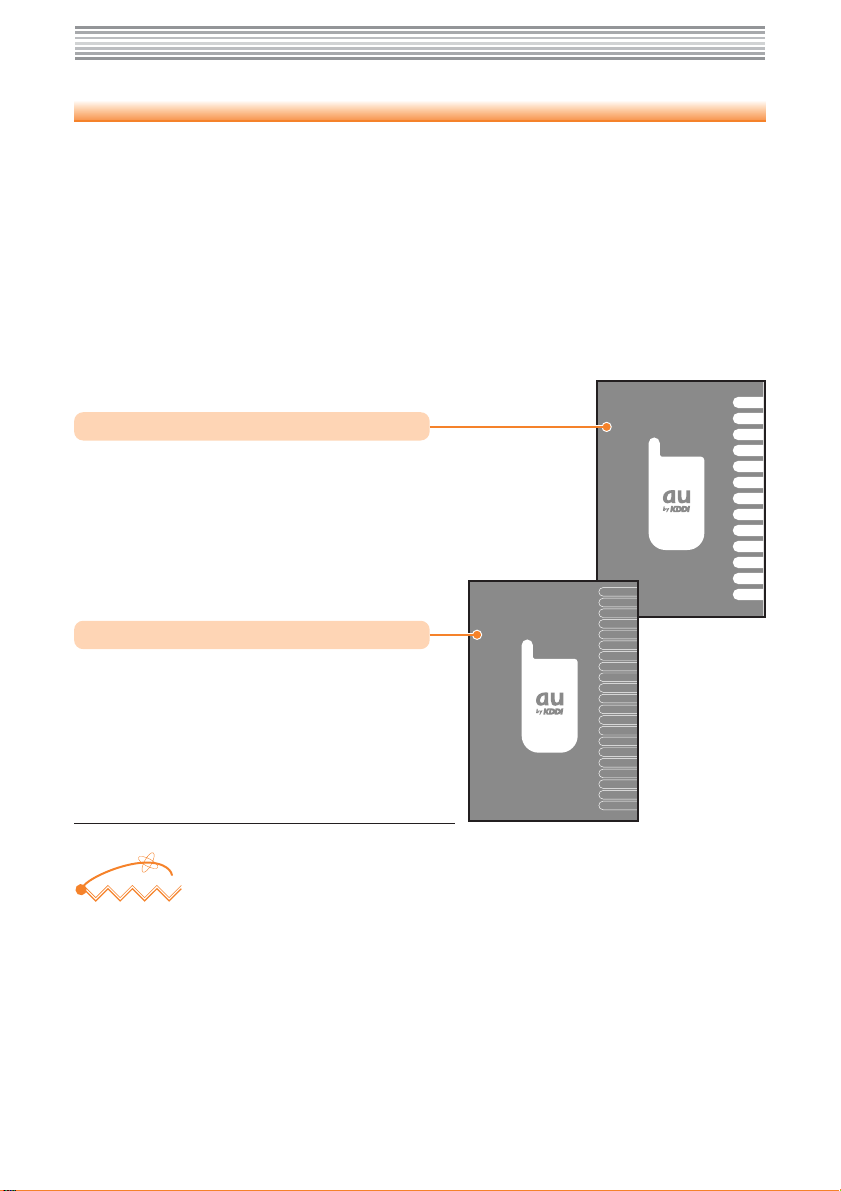
A5505SA Basic Manual
Equivalent to this English PDF manual.
A5505SA Manual
English version is not available.
■Printed Manuals for A5505SA (Japanese)
The A5505SA comes with the Basic Manual and the Manual.
Information
Upper and lower part of screen indication may be omitted in this manual. Also, font or
indication may be different from that on the actual screen or may be partly omitted.
取扱説明書/A5505SA
ご利用いただく前に
目 次
電話を使う
海外で使う
アドレス帳を使う
メールを使う
カメラでできること
カメラを使う
EZwebを使う
データフォルダを使う
miniSD
メモリカードを使う
EZナビウォークでできること
EZナビウォークを使う
FMラジオで楽しむ
EZアプリ
(BREW
TM
)を使う
文字を入力する
画面/表示
着信音/バイブ
目覚まし/予定管理
セキュリティ
その他便利な
機能を使う
auのネット
ワークサービス
その他・索引
GLOBAL PASSPORT(Owner's sManual)
English version is available at the au web site.
The URL is:
http://www.au.kddi.com/kaigai/goriyo/english.html

1
●There are places where the use
of mobile phones is prohibited.
•Do not use mobile phones while
you are driving. Doing so is
dangerous and also forbidden by law.
•Electric waves may interfere with
airplane operation. Be sure to turn
your mobile phone OFF before you
board airplanes.
●Electric waves from mobile
phones may adversely influence
medical apparatus and
equipment.
•There may be some people with a
pacemaker, who are close to you in
busy places such as crowed trains.
Turn your mobile phone OFF in
such places.
•Abide by the instructions of
hospitals and other medical
institutions where it is forbidden to
use or carry mobile phone.
●Consider where to use your
mobile phone and be careful of
how loudly you talk.
•
Do not make calls from cinemas,
theaters, museums, libraries and other
similar places. Turn your mobile phone
OFF or set it to the Manner Mode to
prevent others around you from being
inconvenienced by ring tones for
incoming calls or mails.
•Use your mobile phone in places
where you will not prevent others
from passing through on a crowded
street.
•Move to areas where you will not
bother others around you on
Shinkansen (bullet train) or in hotel
lobbies.
•Take care not to talk too loudly
during conversations.
•Get their permission before you take
photographs or movies of others with
your mobile phone.
Manners for Using Mobile Phones
■A mobile phone always generates weak electric waves while its power
is ON.
■Be considerate of others and environment around you, and have fun
using your mobile phone safely.

2
Basics of the Mobile Phone
What You Can Do with the A5505SA
Camera
You can take
photographs and easily
send them by
E-Mail.
Mail
You can send mails to
other mobile phones or
personal computers.
Overseas
You can make or
answer calls while
overseas the same
way as in Japan.
FM Radio
You can readily
enjoy FM Radio.
EZweb(Internet)
You can access the
Internet to check the
news or download
the Ringers and Wall
Paper.
EZnaviWalk
You can identify
where you are and
follow vocal
navigation aids up
to your destination.
→Page 67 →Page 74 →Page 78
→Page 58
→Page 41 →Page 31

3
■Answer Phone
- When you cannot
answer the call
The caller can leave a message
when you cannot answer the
phone.
Press and hold for more
than one second in the Standby
Screen.
Useful Manner Mode and Answer Phone
→Page 28
→Page 29
■
Manner Mode
- For turning sound OFF
Use this mode to turn the Ringer
off to avoid annoying people
around you.
Press and hold for more than
one second in the Standby
Screen.

4
■You cannot talk on the
phone if the "electric
waves" are too weak.
It is sometimes difficult to
receive electric waves in some
places even in the service areas.
indicates the reception state.
Check the Power, Reception and Battery
■Pay attention to the
remaining "battery"
power.
If the remaining battery power
is too low, you may not be able
to use the phone properly.
indicates the remaining
battery power.
→Page 13
→Page 13
→Page 13
■Keep the "power" ON
for usual use.
Keep the power ON to make or
answer calls.
Press and hold for more
than one second.
12月12日
(
金
)
12
:
12
12:12
12月12日
(
金
)
12
:
12
12:12

5
■If you receive a call
from an unknown
number...
The call leads you to call back
and access vicious toll
programs that may be "One
Ring Call".
If any one-ring call has been
received, with a red arrow is
displayed in the received record.
Beware of Malicious Mails and One Ring Calls!
→Page 52
→Page 23
■If you receive
malicious mails...
Using the mail filter function,
reject particular mails or mails
under the title of "未承諾広告※
(Unsolicited Ad mail)" in the
title, which is mostly malicious
mail.
The following mail functions are
available for preventing arrival of
malicious mails:
• "未承諾広告フィルター":Rejects 未承諾広告 (unsolicited Ad) mails
• "アドレ スフィル タ ー ": Rejects specified address
• "指定受信設定" Accepts only specified mails
• "指定拒否設定" Rejects specified mails
02 10/ 1 1:01
0300001XXXX
0900001XXXX
01 10/10 15:15
12:12
O.CIncoming Calls

6
What You Can Do with the A5505SA .................................. 2
Useful Manner Mode and Answer Phone ............................ 3
Check the Power, Reception and Battery ............................ 4
Beware of Malicious Mails and One Ring Calls! .................. 5
Contents
Manners for Using Mobile Phones ...................................... 1
Basics of the
Mobile Phone
Contents 6
Confirming the Packed Contents ........................................ 8
Names of Each Part ........................................................... 9
Charging the Battery Pack ................................................ 10
Extending the Antenna ...................................................... 11
Connecting SANYO Flat-type Stereo Earphone 01 ........... 11
Inserting/Removing the miniSD Memory Card .................. 12
Connecting the SANYO USB Cable 01 ............................. 12
Turning the Power ON ...................................................... 13
Turning the Power OFF .................................................... 13
About Default Settings ...................................................... 13
Switching the Screen Display to English ........................... 14
Understanding Basic Usage of the Phone ......................... 16
Icon Display ...................................................................... 19
Setting the E-mail and EZweb default settings .................. 20
Confirming Your Phone Number and E-Mail Address ........ 21
Before use
Making a Call .................................................................... 22
Answering a Call ............................................................... 22
Calling Back (Outgoing Calls/Incoming Calls) ................... 23
Countermeasure for One Ring Calls ................................. 23
Changing Ringer Type ...................................................... 24
Adjusting Ringer Volume .................................................. 26
Adjusting the Other Party's Voice Volume ......................... 27
Setting the Manner Mode ................................................. 28
Recording Messages When You Are Unable to Answer a Call ...
28
Playing Back/Erasing Recorded Messages ....................... 30
How to use the
Phone
Setting Area ...................................................................... 31
Calling Japan from Overseas ............................................ 32
Calling Overseas from Japan ............................................ 33
Using Overseas
Storing date in the Address book ...................................... 34
Making a Call to a Saved Phone Number .......................... 37
Editing the Address Book Data ......................................... 38
Registering Data from the Outgoing/Incoming Calls .......... 40
How to use the
Address Book

7
Using E-Mail Features ...................................................... 41
Changing Your E-Mail Address ......................................... 42
Creating and Sending E-Mail ............................................ 44
Reading Received E-Mail ................................................. 47
Reading E-Mail from the Inbox .......................................... 49
Replying to Received E-Mail ............................................. 50
Blocking Malicious Mail ..................................................... 52
Using C-Mail Features ...................................................... 53
Creating and Sending C-Mail ............................................ 54
Reading Received C-Mail ................................................. 56
Reading C-Mail from the Inbox ......................................... 57
How to use Mail
What You Can Do with the Camera 58
Taking a Still Image (Photo) .............................................. 62
Recording a Moving Image (Movie) .................................. 63
Viewing Taken/Recorded Images ...................................... 65
Attaching a Photo or Movie to an E-Mail Message ............ 66
Photo Mail ........................................................................ 66
How to use the
Camera
EZweb (Internet) ............................................................... 67
Understanding Basic Operations ...................................... 68
Viewing an Informational Site ............................................ 69
Downloading Ringers ....................................................... 70
Registering Frequently-Accessed Sites ............................. 72
Accessing Sites registered as Bookmarks ........................ 72
Confirming Charges .......................................................... 73
How to use
EZweb
(Internet)
What You Can Do with EZnaviWalk 74
Registering Your Home as the Place Where You Are ........ 76
Check the routes to return to home ................................... 77
How to use
EZnaviWalk
Listening to FM Radio ....................................................... 78
How to use FM
Radio
Backing Up in the miniSD Memory Card ........................... 80
How to use
miniSD Memory
Card
Switching Over the Input Mode ......................................... 82
Entering Kana ................................................................... 82
Entering Kanji ................................................................... 84
Entering E-Mail Addresses ................................................ 85
Entering Pictographs ........................................................ 87
Inputting Fixed Expressions .............................................. 88
Inputting Text
Other Features 90
Troubleshooting 89
INDEX 92

8
Before use
Before use
Confirming the Packed Contents
The A5505SA Main Unit and accessories are included in the package.
Basic Manual (Japanese)
miniSD
Memory Card
(Sample)
Battery PackA5505SA Main Unit
SANYO AC Adapter 02
Desktop Holder SANYO Flat-type
Stereo Earphone 01
Warranty
Manual (Japanese)
取扱説明書/A5505SA
ご利用いただく前に
目 次
電話を使う
海外で使う
アドレス帳を使う
メールを使う
カメラでできること
カメラを使う
EZwebを使う
データフォルダを使う
miniSD
メモリカードを使う
EZナビウォークでできること
EZナビウォークを使う
FMラジオで楽しむ
EZアプリ
(BREW
TM
)を使う
文字を入力する
画面/表示
着信音/バイブ
目覚まし/予定管理
セキュリティ
その他便利な
機能を使う
auのネット
ワークサービス
その他・索引
miniSD
Adapter
(Sample)
With Soft Case
SANYO USB Cable 01
基本操作ガイド/A5505SA
準備する
電話を
かける/受ける
海外で使う
アドレス帳を使う
メールを使う
カメラでできること
カメラを使う
EZweb(インターネット)
を使う
EZナビウォークでできること
EZナビウォークを使う
FMラジオ
で楽しむ
文字を
入力する
miniSDメモリ
カードを使う
故障とお考えに
なる前に
その他の機能
・索引
IncludingEnglishSimpleManual
Precautions on Use (Japanese)

9
Before use
Names of Each Part
Start Key
Receiver (Earpiece)
Flexible Key
Cursor Key
Center Key
Mail Key
Clear/Manner Key
Sub Menu/Appli Key
Dial Key
Microphone
Power/En Key
Main Display
EZ Key
External Connector
Close-up
Switch
Incoming Illuminator
Built-in Camera
Flash
Sub Display
(Back-panel)
Flat-type Earphone-
Microphone Jack
Antenna
Battery PackSpeaker
Backside Cursor Key
Backside Flexible Key
Backside Center Key
Side Key
( )
miniSD Memory
Card Slot
USB Terminal

10
Before use
Charging the Battery Pack
The Battery Pack is not fully charged at the time of purchase.
Be sure to charge the Battery Pack with the exclusive charger when you use the
A5505SA for the first time or after a long break.
■How to charge the Battery Pack
• Incoming Illuminator red light stays lit →charge in progress
• The light goes off →charge completed
①
③
Desktop Holder
SANYO AC Adapter 02
The A5505SA Main Unit
with Battery Pack attached
AC outlet
Incoming Illuminator
(light is red)
Connect the SANYO AC Adapter 02 to the Desktop Holder.
1
Plug the power plug of the SANYO AC Adapter 02 into an AC outlet.
2
Attach the A5505SA on which the Battery Pack is installed to
the Desktop Holder.
To detach, hold down the Desktop Holder and detach it.
3
The battery charger can also be charged by directly inserting the
SANYO AC Adapter 02 connector into the external connection
terminal on the A5505SA Main Unit.
Information
1
2

11
Before use
Extending the Antenna
Hold the tip of the antenna and pull out until it stops.
●Extending the antenna ●Retracting the antenna
Hold the lower part of the antenna
and push straight down (①), then
hold the upper part of the antenna
and push straight down (②).
Attempting to retract by force while
holding the upper part, it may result
in damage.
1
2
1
2
Connecting SANYO Flat-type Stereo Earphone 01
Turn the cover of the flat-type earphone-microphone
jack ( ①), and then connect the accompanying SANYO
Flat-type Stereo Earphone 01 to the jack ( ②). An
attempt to force connection without turning the cover
may lead to breakage. Insert the earphone-microphone
correctly, orienting it as shown in the figure.
Do not touch the antenna or entangle it in the metal strap, as
these actions may result in weak electric waves.
Information
If the antenna is not extended far
enough, it loses sensitivity and may
fail to pick up a sufficient signal.

12
Before use
Inserting/Removing the miniSD Memory Card
■Inserting the miniSD Memory Card
Open the miniSD Memory Card slot cover ( ①),
insert the attached miniSD Memory Card ( ②) until it
is locked, then close the cover.
■Removing the miniSD Memory Card
Open the miniSD Memory Card slot cover ( ①),
slightly push the miniSD Memory Card ( ②) and
release it. The miniSD Memory Card will come out.
Pull it out slowly ( ③) and close the cover.
Information
•If you flip the miniSD Memory Card with your nail, the miniSD Memory Card may jump
out. Be careful not to direct it to someone's face.
•Insert the miniSD Memory Card properly. Otherwise, you cannot use the miniSD
Memory Card.
•When inserting or removing the miniSD Memory Card, do not do so forcibly.
•When carrying or storing the miniSD Memory Card, put the miniSD Memory Card in the
attached soft case.
Connecting the SANYO USB Cable 01
Open the USB terminal cover ( ①) and connect the
SANYO USB Cable 01 attached (②).
Connect the other terminal of the cable to a printer
or a personal computer.
Information
•With a personal computer, the cable can be used only by connecting.
•To detach the SANYO USB Cable 01 from the personal computer, do so after finishing
the personal computer operations.
1
2
2
3
1
1
2

13
Before use
Tur ning the Power ON
To use the phone and mail functions, turn the power ON to display the Standby Screen.
Press and hold for more than
one second.
When the power is turned ON, the
specified country name is displayed
and the Standby Screen appears.
Check the battery level.
Check the electric wave reception.
•When " " or " " is displayed, you cannot use the functions with the electric
wave reception.
•When " " is displayed, you may not be able to use the functions with the
electric wave reception.
1
Sun
Dec
Dec
12
12
Sun
Dec
12
12
12
:
12
12
12
:
12
MainMenu
12:12
12:12
Tur ning the Power OFF
Press and hold for more
than one second.
Keep the power ON to answer calls.
1
<Standby Screen>
LockNo.
Font Size
Number Notice
Call Notice
Entry Size
Mail Display
EZweb Display
AddressBookList
Phone Number Entry
About Default Settings
When purchased, A5505SA is configured with the following default settings.
1234
Large
Large
Small
Large
Large
ON
Call Ringer: Liebestraum
Call Image: Geometry
Strong Mid Weak
Very weak
Out of service
area
Electric wave
OFF
High Medium Low Zero
Vibrator: OFF
Lamp: Prior Data (Color3)
When the battery level
is getting low, charge
the battery.
Roaming Area
Chang Area −
Japan
Go to GlobalFunc./
Roam.Area Setup

14
Before use
Switching the Screen Display to English
Menus, messages and other screen displays can be switched to either Japanese or
English.
Press (
メインメニュー
) in the Standby
Screen.
The メインメニュー (Main Menu)
appears.
1
Use to select " 基本設定
(Basic Settings)" and press
(
選択
).
The 基本設定(Basic Settings) screen
appears.
2
3
Use to select " 画面表示
(Screen)" and press (
選択
).
The 画面表示 (Screen) screen
appears.
選択
ジャンプ 切替
12:12
SUB
Select
選択
基本設定
通話
/
料金
音
/ハ゛イフ゛
画面表示
フ゜ライハ゛シー
ユーサ゛ー
補助
留守
メモ/マナー
時計
フ゜ロフィール
12:12
選択
Select
選択
画面表示
サフ゛テ゛ィスフ゜レイ
照明
文字切替
Set Language
配色
ハ゜ターン
イルミネーション
キー
照明節電
メインテ゛ィスフ゜レイ
12:12
選択
M3_

15
Before use
4
Use to select "Set
Language" and press
(
選択
).
The Set Language settings screen
appears.
5
Use to select "English" and
press (
Set
).
The screen display is set to English.
Set
Set Language
日本語
○
English
M35
12:12

16
Before use
Understanding Basic Usage of the Phone
■Basic operation
Various functions and settings for A5505SA can be operated by selecting a desired item
with the Cursor Key ( ) and pressing the Center Key ( ).
In this Basic Manual, the usage of the Cursor and Center Keys is indicated as follows.
(Example) Press the Up or Down Key →
Press the Left or Right Key →
Pressing the Center Key →
■Flexible key
Use for operate items indicated in the lower part of the Main Display.
The items displayed may differ depending on the screen.
In the case shown in the figure on the left:
Press the corresponding key for the
following function, in the figure below:
→
MainMenu
→
→
SUB
→
SUB
MainMenu
Adrs.BK
■How to use the keys
1Increasing the Volume/
Displaying the Calendar
2Taking a Photo/
Recording a Movie
3
Loading the Incoming
Calls/Received Records
4
Erasing characters or
cancelling operations
Setting or releasing
the Manner Mode
5Decreasing the Volume/
Displaying the Calendar
6
Making/Answering a
Call
7Sending and Receiving
E-Mails/C-Mails
8Loading the Address Book /
Register New
9
Loading the Outgoing
Calls/Sent Records
!
Loading the EZappli
(BREWTM) or the Sub Menu
"
Connecting to the
EZweb (Internet)
#
Powering ON/OFF or
finishing a call
$
Entering phone
numbers or characters
Setting or canceling the Answer Phone.
Turning on the Pocket Light,
Notifying the Current Time by Voice

17
Before use
MainMenu
Sun
Dec
12
Sun
Dec
12
12
:
1212
:
12
12:12
12:12
Use for item
selection, and
(
Select
) for
setting it.
<Standby Screen> <Main Menu>
Select
Basic Settings
Call/Toll
Sounds/Vibes
Screen
Privacy
User Support
Ans.Ph./Manner
Clock
Profile
12:12
12:12
12:12
Select
Jump
Switch
SUB
!
(
MainMenu
)
■Using Main menu
Pressing (
MainMenu
) in Standby displays the Main menu.
Use the Cursor Key ( ) on the Main Menu to select on item, then press the Center
Key ( ) to determine and access the selected function.
■Using the Sub-Menu
While
SUB
is displayed on a function setup screen or character entry screen, pressing
displays the Sub Menu for the relevant function, allowing various operations
associated with that function.
Close Sub Menu
SUB
Detail
MailRec.
Add
I.C Outgoing Calls
02 13:00 12/11
Robin Smith
Cathy Johnes
01 13:32 12/11
03 20:15 12/10
0900001XXXX
04 20:00 12/10
0900002XXXX
12:12
Dial
Reg.to Adrs.Bk.
Reject Calls
Create E−Mail
Create C−Mail
Copy Phone #
Press to return to the previous screen when you get confused or make a wrong
operation. Press to return to the Standby Screen.
Information
Select
Jump
Switch
12:12
12:12
SUB

18
Before use
Camera
Data Folder
Private Info
Back Select
Useful Tools
FM Radio
■Operations With the Main Body Folded
Pressing the Backside Center Key (
MainMenu
) enables you to work with the Main
Menu on the Sub Display. Use the Backside Cursor Key ( ) to select an item, and
the Backside Center Key ( ) to set it.
Press to select
the item and press
(
Selec
t
)
(
MainMenu
)
(Back
)
(Back
)
<Standby Screen> <Main Menu>
The current time can be heard through voice announce by pressing the Side Key in
Standby.
Press ( ) in the Standby Screen launches E-Mail Menu on the Sub Display
Press ( ) in the Standby Screen launches EZ Menu on the Sub Display
When you are lost in operation or have made mistakes, press the left of the Backside
Flexible Key ( ) or the Backside Cursor Key ( ) to return to the previous
screen.
Information
12/12(
金
)
MainManu
Back Select
Private
Calendar
Memo
Sent/Rcvd Rec
Calls
Back Select
Table of contents
Other AU Cell Phone manuals

AU
AU INFOBAR A03 Installation guide

AU
AU Basio 2 Installation guide

AU
AU K002 User manual

AU
AU pt003 Installation guide

AU
AU IS03 Installation guide

AU
AU AQUOS PHONE IS12SH Installation guide

AU
AU Urbano L02 Installation guide

AU
AU Infobar C01 Installation guide

AU
AU AQUOS SHV32 Installation guide

AU
AU basio Installation guide

AU
AU SHL21 Installation guide

AU
AU W32T Specification sheet

AU
AU Qua phone PX Installation guide

AU
AU Urbano V02 User manual

AU
AU Torque G03 Installation guide

AU
AU AQUOS SHV32 User manual

AU
AU GzOne 4G LTE Installation guide

AU
AU INFOBAR A02 Installation guide

AU
AU Aquos Series Installation guide

AU
AU AQUOS SHV31 Installation guide