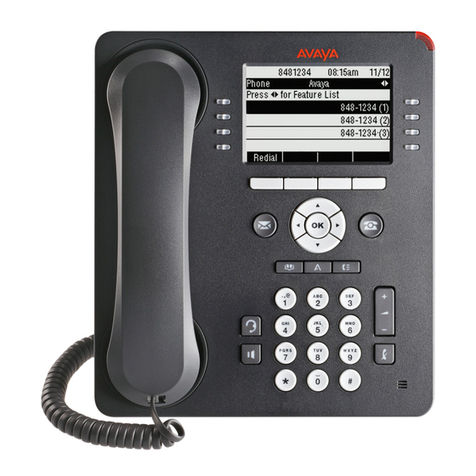
Avaya IP Office 9608 User manual

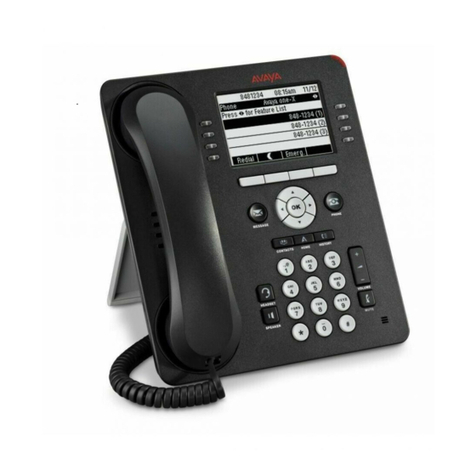
Avaya 9608 IP Phone – Quick Reference User Guide
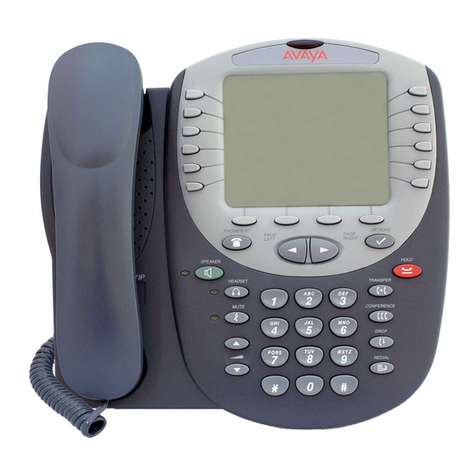
The phone supports 24 programmable call appearance/feature buttons. The labels for these are displayed in the
main display and can be controlled by the adjacent buttons. You can use the up and down arrow keys to scroll the
displayed button labels. You can also use the left and right arrow keys to move through the button features in pages
of 8.
Functions can be assigned to the phone's call appearance/feature buttons by your system administrator or by yourself using self-
administration. Note that you cannot replace call-appearance buttons assigned by your system administrator. Not all functions and
features described in this user guide may be programmed to, or available, on your telephone.

Page 2 of 6
Basic Call Handling Features
Making a Call using Call
Appearance Buttons
These buttons, labeled a=,b=, c=, etc
on your display screen, represent ordinary
phone calls coming in or out of your
extension. Each call appearance that you
have can be used to make and/or receive
calls, either to/from internal extensions, or
contacts outside the office.
1. Lift the handset, press the
Speaker button, press the Headset
button, or press the button if an idle
call appearance is available.
2. The first available call appearance
button will be seized. The red LED will light
up. By default, your dialtone will be for
internal calls to other extensions when you
go off-hook.
If the call is to a user, and they do not
answer, you can set and callback by
pressing CallBack soft key, and
then ending the call by pressing
Drop. When a callback is set, the system
will call you when the user is off their call
or available. When you answer, it will
automatically redial the user.
3. If you wish to make a call to an outside
destination press 9after going off-hook,
and the number you wish to call.
Redialing a Number
1. Press the Redial soft key.
2. The last number will be re dialed, or you
will see a list of the 10 most recent
numbers that you have called, from which
you can then select one to redial by
scrolling using the / up/down arrow
keys.
3. Press Call to call the number
displayed in the call record.
Calling a Person from the Call Log
1. Pressing the Call Log or Call History
button the call log will open showing your
missed calls.
NOTE: The CALL LOG button lamp is
illuminated if you have any new missed
calls; also, a icon will show at the
upper left hand corner of the screen. It is
pre-fixed with the number of missed calls.
2. Scroll to the left or right to view a type
of call log record you want displayed: all,
missed, answered, or outgoing calls.
3. Use the up and down arrow keys to
scroll through the records.
4. Press the button or the Call
soft key.
Intercom Call
1. Lift the handset, press the
programmed “Intercom” button
on your display, if programmed to your
phone, and dial the person’s extension.
2. After 3 beeps, your call will be
answered by the destination party’s
speaker phone. Start talking.
If their extension is busy, your call will
convert to a standard phone call, and
cover to voicemail if your target party does
not answer.
Answering a Call
When you receive an incoming call, the
green LED associated with the call
appearance button will flash, typically
accompanied by ringing (one cadence for
internal, two for external) when the phone
is idle.
If you are not on another call:
•lift the handset, or press the
Speaker button, or press the Answer
soft key if one appears,
If you’re already on a call:
•press the flashing call appearance
button of the new call; your first calls
goes on auto-hold.

Page 3 of 6
Sending an Incoming Call Directly
to Voice Mail
While you are being alerted to an incoming
call, Press the displaying To VM
soft key to send an incoming call directly
to voice mail without answering,.
Ignore an Incoming Call
Press the Ignore soft key to stop
the ringer for an incoming call.
Putting a Call on Hold
1. Press the HOLD soft key to put
your active call on hold. The fast
blinking green LED next to the call
appearance button indicates the call is
on hold. The fast blinking green LED
next to the call appearance button
indicates the call is on hold. If you can
scroll the display using the up and
down arrow keys, the held call will
appear with a icon.
NOTE: If you want to put an active call
on hold to answer a new one coming in,
press the slow-flashing appearance
button of the new incoming call. Your
current call is place on auto-hold.
2. To resume the call, press the call
appearance button on which the call was
held.
NOTE: Held calls can’t be claimed
anywhere else except at your phone. If
you want the call to be claimed at another
extension, you must use the PARK
buttons. The exception to this would be
those extensions that have bridged call
appearances.
Call Park
Parking a call is similar to holding a call.
However, parked calls can be retrieved by
other users on the telephone system.
1. While on your call, press an idle
Park button (labeled Park with a
1, 2, etc). The green LED of the
button adjacent to Park slot label will
go on. To reclaim the call, just press
the same Park button again. Pressing
the button also shows the parked call
details.
2. To claim a call parked by another
extension: identify the corresponding
numbered Park slot button, as you
were told by the parking user; the
associated button’s red led will be lit.
Lift the handset and press the
appropriate Park slot button (labeled
Park with a 1, 2, etc) once for
information about the parked call, then
again to retrieve the call.
NOTE: Calls that you have parked will
return to your extension if they remain
parked for too long. The return delay is set
to a default of 5 minutes. The phone will
ring back to indicate the call remains
unclaimed.
Transferring a Call
IMPORTANT! To transfer a call, you must
have an available call appearance button.
1. Press the Transfer soft key. The
call is automatically placed on hold,
indicated by the blinking green LED of the
adjacent call appearance button.
2. Dial the extension number. You can
announce the call to the target destination
when they pick up,
or…
3. Press the Complete soft key,
to blind transfer the call.
4. To pull back a transfer, press the
Cancel soft key.
Transferring a call Direct to Voice
mail
1. Press the Transfer soft key. The
call is automatically placed on hold,
indicated by the blinking green LED next to
the call appearance button.
2. Dial # then Dial the extension number.
Then Press the Transfer soft key,
or the Complete soft key, to finish the
transfer.
Muting a Call
1. During a call, press the Mute
button; The button lamp will light up. The
other person cannot hear you.
2. Press the Mute button again to unmute
the call.
NOTE: If a call is on mute and you switch
between the handset, headset, or
speakerphone, the mute will be turned off.
Conference Calling
1. Make a call to the first party, or answer
a call.
Page 4 of 6
2. Press the Conf soft key. The
current call is automatically put on hold.
3. Dial the 2nd party that you want to add
to the conference.
4. If they answer and want to join the call,
press the Conf soft key again
5. If they do not want to join the call, or
do not answer, press the DROP
soft key and then press the call appearance
key of the held call (will have a flashing
LED).
To add additional parties to an
existing conference:
1. Press the HOLD soft key to put
the conference on hold. This does not
affect the other conference parties who can
continue talking to each other.
2. Press an available appearance key on
which to make a call.
3. Dial the party that you want to add to
the conference.
4. If they answer and want to join the call,
press Conf soft key again or.
5. If they do not want to join the call or do
not answer, press DROP soft key and then
press the call appearance key of the held
call (fast green flash).
TIP: Dialing the short code *47 starts a
conference call between yourself and any
calls that you have on hold.
Other features for conferencing:
• To mute a caller, highlight them on your
display screen, and press Mute. Repeat
this to unmute them.
• To return to the call display, press the
Back soft key.
Do Not Disturb
In 'do not disturb' mode, your callers are
redirected to voicemail (if available) or
otherwise hear busy tone.
1. If programmed to your phone, press
the feature button labeled
“DND”. An N(= No Calls) is shown on
your phone's display when you have do
not disturb enabled. The green LED will
remain on.
2. You can still use the phone to make
outgoing calls; when you go off-hook
you will hear broken dial tone.
3. To deactivate, press the DND button
again. The LED will shut off.
NOTE: Enabling do not disturb won’t affect
current incoming calls. Press the Ignore or
To VM soft keys to defer the call.
Forward Calls
A button with this action can be used to
switch forwarding unconditional on/off.
1. If programmed to your phone, press
the feature button labeled
“Forward Calls”. If setup with a pre-
set phone number or user extension,
that number is used as the forwarding
destination.
2. If setup without a number, when the
button is pressed you will be asked to
confirm your existing forward
unconditional destination number, or to
enter a new number.
3. When the forwarding feature is enabled,
the button's green LED is lit, and a “D”
(= Diverting) is shown after your
extension name on the phone's idle
display.
4. To disable the forwarding feature, the
button can be pressed again to switch
forward unconditional off. The LED’s
returns to idle status.
(NOTE: If you are forwarding to an outside
number, you must set it up using the
PBX code of “9” at the beginning so the
system knows it’s dialing outside. Also,
caller ID will come up as the business’s
main # or your extension’s DID.)
Accessing Your Voicemail
Option 1
Press the Messages key on the
telephone. If the key is configured for
“Visual Voice,” you will be taken into an
on-screen menu of prompts to manage
your mailbox.
Option 2
If your Messages key was
configured for “Visual Voice” and you
prefer to use the voice-guided voicemail
menu, just press the programmed
“Voicemail” feature button, or dial code
*17. You will be taken to the voice-guided
mailbox menu prompts.
*For further Voicemail instruction, refer to
the provided IP Office Intuity VM Quick
Reference Guides, or the full Avaya
manual.

Page 5 of 6
Personal Contacts/Directory
The following covers use of the
CONTACTS menu of your phone. All
functions are preceded by pressing this
button.
Adding Entries
1. Access your personal directory contacts:
a. Press the CONTACTS key. The
directory menu is displayed.
b. Use the left and right arrow keys to
select your Personal directory.
2. Press the New soft key. The menu now
allows editing of the name and number.
• Use the up and down arrow keys to
switch between number and name entry.
• When the name and number have been
entered as required, press the Save soft
key.
• To exit without making any changes,
press the Cancel soft key.
You can add up to 100 personal directory
entries.
Editing Entries
1. Use the left and right arrow keys to
select your Personal directory and locate
the desired entry. Press the Details soft
key.
2. Press the More soft key and then the
Edit soft key.
• Use the up and down arrow keys to
switch between number and name entry.
• When the name and number have
been entered as required, press the Save
soft key.
• To exit without making any changes,
press the Cancel soft key.
Deleting Entries
1. Locate the entry in your Personal
directory.
2. Press the More soft key and then the
Delete soft key
Calling a Person from the Contacts
List
1. Use the left and right arrow keys to
select which type of directory entries
you want displayed.
All
All directory entries.
External
Directory entries stored by the
telephone system for all users to use.
Groups
The names and numbers of
Departments/Groups on the system
network.
Users
The names and numbers of other
users on the system network.
Personal
Your own personal directory entries.
2. Either press the List soft key to
display all the directory entries, or
start spelling out the name using the
dialpad to display only matching
entries.
3. Use the up and down arrow keys to
scroll through the matching entries.
To return to the start to match a
different directory selection, press the
Clear soft key.
When the required entry is displayed,
press Call soft key.

Page 6 of 6
Self Administration:
External Speed Dial Buttons
The following instructions are for
programming speed dial buttons to outside
parties, however they can also be applied
to assign other features to empty
buttons on the 2nd, 3rd and 4th pages on
your phone. Refer to the full Avaya 9600
User Guide for explanation of available
button features.
All administration is done by following
along on the display screen.
1. Press the Features soft key, if
shown on your display screen. To do this
during a call, press the PHONE key
and then press the Features soft key.
2. Use the up and down arrow keys to
highlight Phone User. Press Select.
3. Use the up and down keys to highlight
Self-Administer. Press Select.
4. Enter your security PIN (default is your
extension number) and press Done.
5. Use the up and down keys to scroll
through the list of current functions
assigned to each button.
· To remove the existing function from
a button (except call appearance), press
Erase. You can also press More and use
the Copy and Paste options to copy the
settings of an existing button onto
another.
· To assign a function to the highlighted
button press Replace.
· Select the required function from the
list (“Abbreviated Dial”), and press
Select.
· Enter the full outside number, including
the outside access code (9).
· The button will be given a default label.
To change the label, press More and then
select Label. Use the
“keyboard” to enter the text you want to
display for the button label. Note that the
label is only shown while
editing the label, and after you exit the
administration menu.
6. When completed press Back.
*To learn more about features you may
program to your phone, refer to Chapter
16 (page 89) in the Avaya 9600 User
Manual.
Other manuals for IP Office 9608
38
Table of contents
Other Avaya IP Phone manuals

Avaya
Avaya 9630 IP User manual

Avaya
Avaya one-X 9640 User manual

Avaya
Avaya 7316 User manual

Avaya
Avaya 4630 User manual

Avaya
Avaya J169 User manual

Avaya
Avaya IP OFFICE 2420 User manual

Avaya
Avaya J100 Series Instruction Manual

Avaya
Avaya J159 Guide

Avaya
Avaya 9601 User manual

Avaya
Avaya 9620 Deskphone Edition User manual

Avaya
Avaya DEFINITY 4612SW User manual

Avaya
Avaya 3616 Series Operator's manual

Avaya
Avaya J169 User manual

Avaya
Avaya 3641 Quick guide

Avaya
Avaya IP Office 4602 User manual

Avaya
Avaya 3701 User manual

Avaya
Avaya one-X Quick Edition User manual

Avaya
Avaya E129 User manual

Avaya
Avaya 9620 Deskphone Edition User manual

Avaya
Avaya 9500 User manual