manuals.online logo
Brands
  1. Home
  2. •
  3. Brands
  4. •
  5. Avaya
  6. •
  7. IP Phone
  8. •
  9. Avaya one-X Quick Edition User manual

Avaya one-X Quick Edition User manual

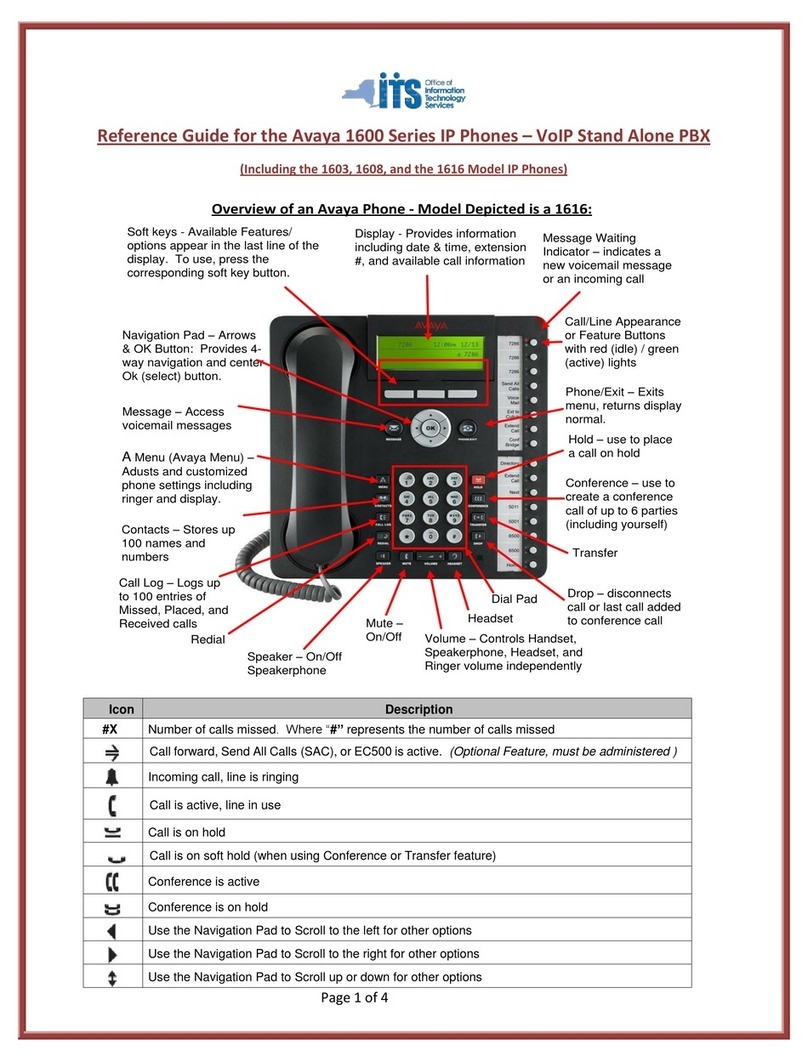
Status alerting and Call Center work icons
Status alerting
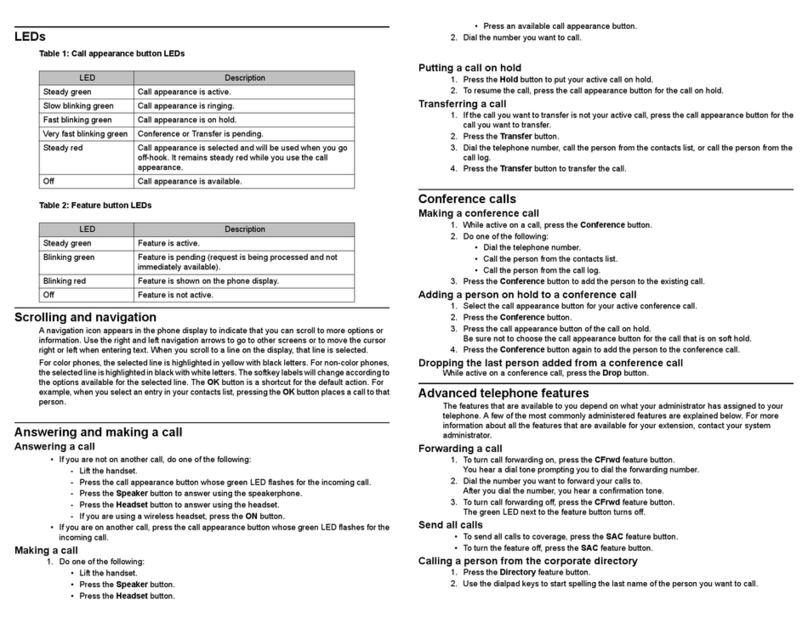
Table 1: Call appearance button LEDs/line colors
LED or line color Description
Steady green LED Call appearance or Feature is active.Applicable to the 9608
and 9611G deskphones only.
Steady yellow highlight
on line Call appearance is active. Applicable to the 9611G
deskphones only.
Slow blinking green LED Callappearanceisringing.Applicabletothe9608and9611G
deskphones only.
Steady green highlight
on line Call appearance is ringing. Applicable to the 9621G and
9641G deskphones only.
Steady red LED Call appearance is selected and will be used when you go
off-hook. It remains steady red while you use the call
appearance.Applicable to the 9608 and 9611G deskphones
only.
Flashing line LED Call put on hold using the hold soft key
Fluttering or unsteadily
flashing line LED Call put on hold as part of conference or transfer procedure
state.
Off Call appearance is available.
Call Center work icons
The icons in the following table indicate the state of a call, navigation choices, or the status of a call
center feature or activity. Depending on the action they depict, these icons can appear on the agent
status line, the Information line, a call appearance line, or in the general application area of the
display screen. If you have a 9608 monochrome deskphone, the icons show in black and white. If
you have a color display deskphone such as the 9611G, 9621G, or 9641G, the icons display in
color or gray shades or both.
Icon Description
Missed calls. A call was not answered or was
forwarded to voice mail. The total number of missed
calls displays next to this icon.
This call appearance line is idle and not in use.
An incoming call is alerting on this call appearance
line.
A call is active on this line.
A call is on Hold on this line.
Your calls are being forwarded.
A Conference is active on this line.
A Conference is on hold on this line.
Icon Description
A Bridged Call is in progress on this line.
On the Phone screen display, use the right
arrowhead icon to access the Features screen. On
the Features screen display, use the right arrowhead
icon to access your calls on the Phone screen.
Scroll up or down when there is more information
than can display in the application area.
(9608)
(9611G)
(9621G, 9641G))
Indicates a Forced Logout Override is in effect.
Depending on how your call center system is
administered, a system-generated forced logout
might occur. For example, based on the time of day.
This icon indicates an override is active.
(9608)
(9611G, 9621G, 9641G)
Notifies you that your Agent Greeting has been
recorded and is available.
(9608)
(9611G, 9621G, 9641G)
Notifiesyou that yourAgentGreeting is being played.
(9608, 9611G)
(9621G, 9641G)
Indicates the Queued Calls feature is active and you
have calls in the queue.
(9608)
(9611G)
(9621G, 9641G)
Indicates that the VU Stats feature is active.
(9608, 9611G)
(9621G, 9641G)
Use the feature arrows to move left or right between
feature settings, for example, to select a Greeting
type when establishing an Agent Greeting.
Note:
Somescreens, for example, theContacts main screen, donot display these iconsto make room
for other controls and indicators that apply to that specific screen.
About Agent status information
About agent work modes and states
When you are logged in as an agent, icons on the top two display lines and the Feature buttons
show your current work mode and state. Agent work modes are Auto-In and Manual-In.An agent
will usually have only one work mode which is either Auto-In or Manual-In as administered for the
agent. Agent states are:
Pending YouareintheAvailable state, but havepressedanAuxorACWbutton.The Pending
state reminds you that when the call is completed, you will be placed in the Aux or
ACW state as applicable.
Aux You are placed in theAuxiliary state after agent login. You must change toAuto-In
or Manual-In work mode to become available to receive incoming call center calls.
You can change back toAux to indicate you are not available to receive call center
calls, for example, when you want to take a break. You must enter a Reason Code
when changing toAux. This feature might be optional or compulsory depending on
how your system is administered.
ACW Thedeskphone may automatically put you into anAfterCall Work(ACW ) state after
you complete each call. If you were in Manual-In mode before the call, you must re-
enter a Manual-In mode to accept another call. Switch toACW to perform after call
work, such as completing a call-related form.
Available You have to move to Available state through Auto-In and Manual-in feature button
when you want to handle calls.
LoggedOut This state is automatically assigned when the deskphone is administered as a call
center phone but no agent sign-in has occurred. If you sign out as an agent but do
not log off the deskphone, this status is also assigned.
About status line information and icons
Icon and text Indicated Status
for monochrome displays, or
for color displays, and the
word Available
Signed in, in Available mode, and with no Aux Work
pending.
for monochrome displays, or
for color displays and the
word Pending
Signed in, in Available mode, and with Aux Work or
After Call Work pending.
for monochrome displays, or
for color displays, and the
words Aux Work
Signed in and in Aux Work mode.
for monochrome displays, or
for color displays, and the
words After Call
Signed in and in After Call Work mode.
for monochrome displays, or
for color displays, and the
words Logged Out
Signed out as an agent.
Icon and text Indicated Status
for monochrome displays, or
for the 9611G color
display, or for the 9621G
and 9641G color displays.
The VU Stats feature is active.
for monochrome displays or
for the 9611G color
display or for the 9621G
and 9641G color displays.
Incoming calls are queued up and waiting.
for monochrome displays, or
for the 9611G color display,
or for the 9621G and
9641G color displays.
Forced logout override is in effect.
Changing agent work mode or status
Press or touch the line or feature button assigned to the work mode or work state to which you want
to change.Alternately, access the Features menu screen and select the desired work mode/state.
Theassociated LED flashes to indicate you are transitioning into the work mode or state you chose,
and then remains lit steadily when the selected work mode or status is active.
Answering a call
Answering a call if you are signed in as an agent
Several variables such as your call center system configuration, call delivery mode, agent status,
the number of greetings recorded determine how you answer a call.
In all cases, you are alerted to incoming calls by a special tone, the call appearance line button
flashinggreenincase of button-based models, or the callappearanceline itself highlighted in green
for touch-based phones, and the ringing icon displayed on the incoming call's line.
Note:
If you have a touch-based deskphone (9621G or 9641G), touch the desired softkey. If you have
a button-based deskphone (9608 or 9611G), press the desired softkey.Alternate ways to using
the Answersoftkey to answer a call are to press the flashing line button for the incoming call
(button-basedmodels)ortouchingthecall appearance line itself (for touch-based models).Your
supervisor will advise you as to how incoming calls to the call center appear and provide any
details not covered below.
1. If you are in either Manual-In or Auto-In mode, you must always wait for an alerting signal
such as a ring or tone. Then touch or press the Answersoftkey. If Auto-Answer is enabled,
the phone generates a zip tone to alert you, and then activates the call. In either case, the
tablebelow identifies how toanswer the call depending on the typeof greetings you recorded:
Recorded greeting Response to the greeting
No greeting is recorded. Start speaking to the caller.
A non-Manual greeting is recorded that
matches the Type, Match Criterion, and
String to Match for the incoming call.
Listen to the greeting, and then
start speaking to the caller.
No non-Manual greeting is recorded that
matches the Type, Match Criterion, and
String to Match for the incoming call, but
one Manual greeting has been recorded.
Touch or press the Greeting
softkey, listen to the greeting,
and then start speaking to the
caller.
Recorded greeting Response to the greeting
No non-Manual greeting is recorded that
matches the Type, Match Criterion, and
String to Match for the incoming call, but
more than one Manual greeting has been
recorded.
Touch or press the Greeting
softkey, select the appropriate
greeting to return to the Phone
screen,listentothegreeting,and
then start speaking to the caller.
No non-Manual greeting is recorded that
matches the Type, Match Criterion, and
String to Match for the incoming call, and
no Manual greeting has been recorded.
Start speaking to the caller.
2. Press or touch Release to end a call, unless you are instructed otherwise by your supervisor.
Adding and changing Agent greetings
Adding an agent greeting using a button-based deskphone
You can add up to six different greetings and set them to play automatically or manually when you
have an incoming call. The default greeting type Auto Answer with a Match Criterion of All Calls
means that this greeting plays automatically when you answer an incoming call. Other types are
Manual, VDN, ANI and Prompted Digits. Other than Manual, all types require that you also select
match criteria such as when to invoke this greeting, or where to find the data to trigger the greeting.
You must also select additional data such as a telephone number sequence or string, with which
the system can match the display message to a specific greeting. This feature is useful when you
deal with different groups of customers and want a customer-specific greeting to play based, for
example, on the number the caller has dialed. For more information about Greeting Types and their
applicable match criteria, see .
1. Press Home.
2. Select Greetings.
3. Press New or press the line button for any numbered blank greeting line.
4. Use the dialpad to enter a label that distinguishes this greeting from other greetings you may
already have or will be adding. The Greeting Label can be up to 15 characters.
5. Press Record.
6. Speak your greeting for up to ten seconds into the headset or speaker, whichever device is
active, and then press Stop.
7. Choose one of the following options:
• To listen to the greeting, press Play.
• To replace the greeting, press Restart and repeat the previous step.
• To save the greeting, press Done and proceed to the next step.
• To delete the greeting without saving the greeting, press Cancel.
8. If the default greeting type shown isAutoAnswer with a Match Criterion of All Calls is correct,
proceed to the step 12. To change the greeting type, press the line button for the line on which
Type appears to display the Greetings Type Selection screen and proceed to the step 9.
9. Use the Right Arrow to cycle consecutively through the available types or the Left Arrow to
cycle back through the types. Notice that the Match Criteria value below the type may change
to correspond with the type currently displayed.
10. Tochangethematchcriteriaforthegreetingtype,pressthelinebutton onwhich MatchCriteria
appears, then use the RightArrow to cycle consecutively through the available criteria or the
Left Arrow to cycle back through the types.
11. Press the line button on which String to match appears and then, press More. Use the
dialpad to enter a number sequence that should be matched. For example, if you serve two
customers with the telephone numbers 732-842-1111 and 732-842-2222, you can enter just
the last four digits of those numbers as the string to match for their respective greetings.After
entering the string, press More again to return to the Type Selection screen.
12. Press Done, and then press Save on the Greetings Summary screen.
Adding an agent greeting using a touch-based deskphone
You can add up to six different greetings and set them to play automatically or manually when you
have an incoming call.
1. Press Home.
2. Touch Greetings.
3. Touch New or any numbered blank greeting line.
The phone displays the on-screen keyboard displays so that you can enter the new greeting
label.
4. Use the on-screen keyboard to enter a label that distinguishes this greeting from other
greetings you may already have or will be adding. The Greeting Label can be up to 15
characters. For details on entering text using the keyboard .
5. Touch the Next keyboard button.
6. Touch Record.
7. Speak your greeting (up to ten seconds) into the headset, and then press Stop.
8. Choose one of the following options:
• To listen to the greeting, touch Play.
• To replace the greeting, touch Restart and repeat the previous step.
• To save the recording, touch Done and proceed to the next step.
• To delete the recording you just made, touch Cancel.
If the default greeting type shown is correct, touch Saveto save the Greeting, its label, and the
Greeting type.
Changing existing greetings
You can change an existing greeting in any or all of the following ways:
• You can edit the label of a greeting.
• You can re-record a greeting without changing any other part.
• You can edit the greeting Type, Match Criteria, or String to Match or both.
• You can delete the entire greeting and any associated data.
You can then make a change as indicated in those procedures, and select Save to store the
changes.
Accessing the Features menu
1. If you have a touch-based deskphone model such as 9621G or 9641G, from the Calls screen,
touch the Features button in the upper right corner to view the Features menu. If you have a
button-based deskphone model such as the 9608 or the 9611G, use the Right navigation
arrow from the Phone screen to access the Features menu.
On a touch-based model, the icon next to a feature indicates the feature status; for a
button-based model, the feature line button indicates its status. If shown in green on color
phone models, the feature is active; if the icon is gray-shaded the feature is available but not
active. For models with LEDs such as 9608 and, 9611G, the LED next to the feature name
indicates if the feature is currently on or off. If the light is on, the feature is on.
2. Scroll down to see the features that have been administered for your extension.
Accessing features using a button module
If you have a button module attached to your agent deskphone, the button module might have
feature buttons for call center features, additional call appearances, and standard deskphone
features like Call Forwarding, Call Pickup, Go to Coverage, or Auto Callback.
Note:
The 9621G deskphone does not support button modules.
Touse a feature button onabuttonmodule,pressthe button next to thefeatureyouwanttoactivate.
Depending on your button module model, the LED associated with the feature you select lights up
to indicate that the feature is active.
February 2012
Avaya one-X®Deskphone H.323 9608, 9611G,
9621G, and 9641G Call Center Quick
Reference Guide

Other manuals for one-X Quick Edition

19

This manual suits for next models

1

Other Avaya IP Phone manuals

Avaya 9601 User manual

Avaya

Avaya 9601 User manual

Avaya 1165E User manual

Avaya

Avaya 1165E User manual

Avaya IP Office 4600 Series User manual

Avaya

Avaya IP Office 4600 Series User manual

Avaya IP Office 8.1 Technical specifications

Avaya

Avaya IP Office 8.1 Technical specifications

Avaya J129 User manual

Avaya

Avaya J129 User manual

Avaya IP Office 1416 User manual

Avaya

Avaya IP Office 1416 User manual

Avaya IP Office 4601 User manual

Avaya

Avaya IP Office 4601 User manual

Avaya one-X 9608 User manual

Avaya

Avaya one-X 9608 User manual

Avaya IP Office 9608 User manual

Avaya

Avaya IP Office 9608 User manual

Avaya 9650 Deskphone Edition User manual

Avaya

Avaya 9650 Deskphone Edition User manual

Avaya 1110 User manual

Avaya

Avaya 1110 User manual

Avaya one-X 9600 Series User manual

Avaya

Avaya one-X 9600 Series User manual

Avaya IP Office 4602 User manual

Avaya

Avaya IP Office 4602 User manual

Avaya IP Office 9508 User manual

Avaya

Avaya IP Office 9508 User manual

Avaya 4600 Series Quick start guide

Avaya

Avaya 4600 Series Quick start guide

Avaya ONE-X 1608 User manual

Avaya

Avaya ONE-X 1608 User manual

Avaya IP Office 2402 User manual

Avaya

Avaya IP Office 2402 User manual

Avaya E129 User manual

Avaya

Avaya E129 User manual

Avaya ETR 34D User manual

Avaya

Avaya ETR 34D User manual

Avaya B189 User manual

Avaya

Avaya B189 User manual

Avaya 4600 Series User manual

Avaya

Avaya 4600 Series User manual

Avaya one-X 9630 User manual

Avaya

Avaya one-X 9630 User manual

Avaya 4602SW User manual

Avaya

Avaya 4602SW User manual

Avaya IP Office Basic 1400 Series User manual

Avaya

Avaya IP Office Basic 1400 Series User manual

Popular IP Phone manuals by other brands

Splicecom PCS 582GX Quick reference guide

Splicecom

Splicecom PCS 582GX Quick reference guide

Cisco 7945 Series quick start guide

Cisco

Cisco 7945 Series quick start guide

Yealink SIP-T32G Quick user guide

Yealink

Yealink SIP-T32G Quick user guide

Win IP580 user guide

Win

Win IP580 user guide

Mitel MiVoice 5360 user guide

Mitel

Mitel MiVoice 5360 user guide

Astra Dialog 4223 user guide

Astra

Astra Dialog 4223 user guide

Polycom VVX 401 user guide

Polycom

Polycom VVX 401 user guide

PSC Falcon 510 installation guide

PSC

PSC Falcon 510 installation guide

AEI SSP9210-SM Administrator's guide

AEI

AEI SSP9210-SM Administrator's guide

Grandstream Networks GXP-1100 user manual

Grandstream Networks

Grandstream Networks GXP-1100 user manual

Cisco 7821 quick start guide

Cisco

Cisco 7821 quick start guide

Philips VOIP841 owner's manual

Philips

Philips VOIP841 owner's manual

Kasda KT101 user manual

Kasda

Kasda KT101 user manual

Gigaset N670 IP PRO Installation, configuration and operation

Gigaset

Gigaset N670 IP PRO Installation, configuration and operation

Linksys SPA942 - Cisco - IP Phone user guide

Linksys

Linksys SPA942 - Cisco - IP Phone user guide

Aastra 6753I Quick reference guide

Aastra

Aastra 6753I Quick reference guide

Innovaphone IP Phone Product catalogue

Innovaphone

Innovaphone IP Phone Product catalogue

E-MetroTel Infinity 5006 manual

E-MetroTel

E-MetroTel Infinity 5006 manual

manuals.online logo
manuals.online logoBrands
  • About & Mission
  • Contact us
  • Privacy Policy
  • Terms and Conditions

Copyright 2025 Manuals.Online. All Rights Reserved.