Axicon PV-1072 User manual

THE BARCODE EXPERTS
Church Road, Weston on the Green, Oxfordshire, OX25 3QP, UK
Web: www.axicon.com
operating manual
Axicon PV-1072
Industry
Partner

Contents
Important Information 4
Introduction 5
Getting started 6
Calibration 7
Using the PV-1072 8
11
ISO/IEC or ANSI grades 13
Menu screen formats 14
Frequently asked questions 15
17
Software licence agreement 18
Axicon warranty 20
Declaration of ISO/IEC 21
Factory re-calibration 22
Declaration of CE 23
Contact us 24
Page 2 of 24 Page 3 of 24
Axicon Auto ID Limited | PV-1072 operating manual | March 2016Axicon Auto ID Limited | PV-1072 operating manual | March 2016
www.axicon.comwww.axicon.com

IntroductionImportant information
handled with care.
Only use accessories supplied or approved by Axicon. Use of non-approved
accessories will invalidate the warranty.
the results may be affected. The unit should be returned to Axicon immediately for
servicing.
returned every year to Axicon or an approved reseller to be factory recalibrated.
immediately invalidate the warranty. This equipment contains no user-serviceable
parts.
What is in the case.
The PV-1072 ISO/ANSI portable display unit
Documentation wallet containing the operating manual and the calibration card
Belt-bag to enable the unit to be carried easily around a factory or warehouse (Not
supplied as standard in the U.S.)
A set of four AA-sized alkaline batteries (supplied in Europe only).
Page 4 of 24 Page 5 of 24
Axicon Auto ID Limited | PV-1072 operating manual | March 2016Axicon Auto ID Limited | PV-1072 operating manual | March 2016
www.axicon.comwww.axicon.com

Getting started
Open the battery housing cover to check if the four AA-sized batteries have been
output is at least 2500 mAh.
Plug in the P-72 read-head to the USB port on the base of the PV-1072.
A light will come on but nothing will be displayed on the screen for about 15
seconds. This is the power-up and initialisation phase.
The PV-1072 will show an initialising message before showing the message:
Ready to Scan !
If the PV-1072 is left for some time the screen will go blank to conserve battery
power, but can quickly be restarted by pressing the on/off button again. The time-
– see page 12.
previously been calibrated.
The calibration card is supplied with the PV-1072 and is kept in the wallet.
With the Ready to Scan message showing on the screen,
Press the Menu/select key.
And the screen will show ► Information
Press the Scroll down button until the screen displays
► Calibrate
Press the Menu/Select Button
There will be a ♦ Set RMin message with a 5below. Look at your calibration card to
Press Menu/Select
Scroll up and Scroll down buttons. When the numbers match, press Menu/Select to
Scroll down button again and the screen will display
♦Set RMax message with a 85 below.
Menu/Select and
you can change the value by using the Scroll up and Scroll down buttons until it
matches the value shown on the calibration card. Press Menu/Select
setting. Press the Scroll down button and the message will be displayed ♦Calibrate
Press the Menu/ Select button.
The message will be displayed
Calibrate
Cal. Scan (0/3)
such a way that all four corners of the read-head are touching the card and then
press the trigger on the read-head. The message will change to read Cal. Scan
(1/3)Cal. Scan
(2/3) and then Calibration Successful !
Press the Clear/Back button twice to see the message
Ready to scan
Calibration
Page 6 of 24 Page 7 of 24
Axicon Auto ID Limited | PV-1072 operating manual | March 2016Axicon Auto ID Limited | PV-1072 operating manual | March 2016
www.axicon.comwww.axicon.com

and then press the trigger on the read-head.
The initial screen will show the decoded number followed by the overall print
quality grade and a detail of the scan number in the format:
5012345678900
4.0/06/660 Scan 1/3
Using the Scroll down button the user can look at further information regarding
Using the Scroll up button reviews the data.
Use the Clear/Back button to get ready to scan the next barcode.
Multi-scan averaging
The PV-1072 allows the user to take up to 10 scans of a barcode at different points
throughout the height of the barcode which will be averaged automatically to grade
Menu/Select button and you will see the message ►Information
Use the Scroll Down button until you see the message ►Setup
Press the Menu/Select button and you will see:
♦Average No 3
Press the Menu/Select button and then use the Scroll up and Scroll down buttons
until you reach the desired number.
Press the Menu/Select button to store this scan number.
Press the Clear/Back button twice to return to the main menu.
When multiple scans of a barcode have been taken then the Previous Scan button
allows the user to review all of the previous scans for that barcode.
Print / Save Facilities
subsequent printing. Automatic saving facilities are also included as an option, and
Direct Printing
Attach a suitable printer to the
optional Axicon printer lead. Verify
the barcode.
Press the Print button – the screen
will show ♦Print
Press the Menu/Select button – The
screen will display the message
Printing and shortly afterwards the
message Done
Press the Clear/Back button to return
to the main screen.
Please note that this is a
unidirectional signal transfer – if the
printer is not connected properly or
not switched on then the PV-1072 is
not aware of this.
Verify the barcode.
Press the Print button – the screen will show ♦Print
Press the Scroll down button and the screen will show ♦Save
Press the Menu/Select button – The screen will display the message Successful!
Press the Clear/Back button to return to the main screen.
Using the PV-1072
Page 8 of 24 Page 9 of 24
Axicon Auto ID Limited | PV-1072 operating manual | March 2016Axicon Auto ID Limited | PV-1072 operating manual | March 2016
www.axicon.comwww.axicon.com

From the main screen press the Menu/Select button and you will see the message
►Information
Use the Scroll Down button until ► Setup is displayed.
Press Menu/Select
Press the Scroll Down button until the screen displays the message
►Autosave is displayed with an OFF message
Press the Menu/Select button.
Use the Scroll up and Scroll Down buttons until the desired On or Off is displayed.
Press Menu/Select
Press Clear/Back twice to move back to the main screen.
From the main screen press the Menu/Select button and you will see the message
►Information
Press Menu/Select and the screen will display ♦Show Code
Press Scroll down until the message ♦Transfer is displayed.
Press Menu/Select
The message ♦Transferring will be displayed followed by the message ♦Transfer
Successful.
Scans on the memory device.
Windows Notepad for subsequent printing.
The PV-1072 has its own clock, so the user scan set the date and time which will be
recorded with each record.
To set the date and time, press the Menu/Select button to see the message
►Information
Use the Scroll Down button until ► Setup is displayed.
Press Menu/Select
Press the Scroll Down button until ► Time is displayed
Press Menu/Select
♦Time Zone
If the Time Zone is to be changed then press Menu/Select and use the Scroll up
and Scroll Down buttons until the correct time zone is shown and then press Menu/
Select to lock the data.
Use the Scroll Down button and ♦ Time will be displayed.
Press Menu/Select
Use the Scroll up and Scroll Down buttons until the correct time is shown and then
press Menu/Select to lock the data.
Use the Scroll Down button and ♦ Date will be displayed.
Press Menu/Select
Use the Scroll up and Scroll Down buttons until the correct time is shown and then
press Menu/Select to lock the data.
Press Clear/Back until the Ready to Scan ! message is shown
Please note that the date and time are maintained by a built-in battery that has
an estimated life span of four years. It is not possible for the user to change the
battery, so the PV-1072 should be returned to Axicon for servicing when this fails.
Using the PV-1072
Page 10 of 24 Page 11 of 24
Axicon Auto ID Limited | PV-1072 operating manual | March 2016Axicon Auto ID Limited | PV-1072 operating manual | March 2016
www.axicon.comwww.axicon.com

Power Management
The PV-1072 has facilities for the user to control the elapsed time before Sleep
Mode and Power Off are enabled.
To set the
On the main screen press the Menu/Select button to see the message
►Information
Use the Scroll Down button until ► Setup is displayed.
Press Menu/Select
Press the Scroll Down button until the screen displays the message
►Power is displayed.
Press Menu/Select The screen will display ♦ Sleep (m)
Press the Menu/Select button.
Use the Scroll up and Scroll Down buttons until the desired number of minutes
before sleep mode takes effect is displayed.
Remember that if the number of minutes before Sleep mode is enabled is higher
than the number of minutes before Power Down mode then Power Down will occur
0(Zero minutes) means that the sleep mode will be disabled. Press
Clear/Back twice to move back to the main screen.
On the main screen press the Menu/Select button to see the message
►Information
Use the Scroll Down button until ► Setup is displayed.
Press Menu/Select
Press the Scroll Down button until the screen displays the message
►Power is displayed.
Press Menu/Select
The screen will display ♦ Sleep (m)
Press the Scroll down button and the screen will display ♦ Power Off (m)
Press the Menu/Select button.
Use the Scroll up and Scroll Down buttons until the desired number of minutes
before Power Off takes effect is displayed. If 0is selected the automatic Power Off
mode will be disabled. Press Clear/Back twice to move back to the main screen.
format such as 2.0/06/660 where the 2.0 is the print quality grade, 06 the aperture
reference number and 660 is the wavelength of light used expressed in µm.
If users prefer to see the grades expressed as the letters A,B,C,D or F (the ANSI
approach), the format can be changed as explained below.
On the main screen press the Menu/Select button to see the message
► Information
Use the Scroll Down button until ► Setup is displayed.
Press Menu/Select
Press the Scroll Down button until the screen displays the message
♦Show ANSI is displayed.
Press Menu/Select
The screen will display ↕ Show ANSI
Use the Scroll up and Scroll Down buttons until the desired display format is shown.
Press Menu/Select
Press Clear/Back twice to move back to the main screen.
ISO/IEC or ANSI grades
Page 12 of 24 Page 13 of 24
Axicon Auto ID Limited | PV-1072 operating manual | March 2016Axicon Auto ID Limited | PV-1072 operating manual | March 2016
www.axicon.comwww.axicon.com

Menu screen formats
Menu level 1 Menu level 2 Menu level 3
Information Show code
Encodation
Transfer
Calibrate Set Rmin
Set Rmax
Calibrate
Setup Average No
Pass grade
Units
Language
Autosave
Show ANSI
Time Time zone
Time
Date
Power Sleep
Power off
Printer Trailing LF
I am verifying barcodes with a lot of data – why can’t I see the full decoded
number?
To see all the data encoded in the symbol press Menu/Select and the display will
change to ►Information. Now press Menu/Select again and you will see the
message ♦Show Code. Press Menu/Select again and the full decoded number will be
displayed. To return to the original display press Clear/Back three times.
Why do I have to wait for my PV-1072 to get to the message Ready to Scan?
The PV-1072 incorporates a Linux computer in order to facilitate upgrades and
product enhancements, and this has to go through a power-up cycle before it is
ready to use.
The power management options (Sleep and Power Off
explained on page 12 to meet your requirements. If both of these are set to ‘0’, the
PV-1072 will stay on continuously.
The P-72 read-head can only be used with the PV-1072 display unit.
How long will a set of batteries last?
In tests with the PV-1072 remaining continuously on, a set of 2700 mAh NiMH
batteries (the type supplied by Axicon as an optional extra) lasts at least ten hours
on a single charge.
What sort of batteries should I use in my PV-1072?
Whether using alkaline or rechargeable batteries, make sure they have a rating of
at least 2500 mAh (one that is suitable for powering a motor or similar device).
How many scans can I store in my PV-1072 before I have to transfer them to a
before they need to be transferred.
Frequently asked questions
Page 14 of 24 Page 15 of 24
Axicon Auto ID Limited | PV-1072 operating manual | March 2016Axicon Auto ID Limited | PV-1072 operating manual | March 2016
www.axicon.comwww.axicon.com

do?
This happens when the batteries have run low. Remove the batteries and either
replace or recharge them (if rechargeable).
How do I change the language used by the PV-1072?
Press Menu/Select once
Press Scroll down twice
Press Menu/Select once (you will see a number on the second line of the display
which is the averaging number)
Press Scroll down three times
Press Menu/Select once
Use the Scroll up and scroll down buttons until the chosen language is shown on the
second line of the display
Press Menu/Select
Press Clear/Back twice to return to the Ready to scan Message.
Barcode symbologies checked:
EAN-8, EAN-13, EAN-13+2, EAN13+5, UPC-A, UPC-E, Code 39, Code 93, Code 128,
GS1-128, GS1 DataBar (both linear and stacked).
Frequently asked questions
Power Four AA-sized batteries, of at least
2500 mAh output – Alkaline or re-
chargeable (rechargeable batteries
must be charged externally)
Size Display Box: 180 x 95 x 40mm
(7.2” x 3.8” x 1.6”)
Weight 650 gms (23oz) incl. batteries
Operating temperature 0ºC to 50ºC
Storage temperature -20ºC to 70ºC
Humidity 5% to 95% RH non condensing
Regulatory approvals
© Copyright information
The Axicon software embedded in the PV-1072 together with any accompanying
licence described below.
This manual is copyright to Axicon Auto ID Ltd and may not be reproduced in whole
or in part, nor may it be stored in any electronic storage or retrieval system without
the express permission in writing from a director of Axicon Auto ID Ltd.
Acknowledgement is made of the relevant copyrights of Microsoft, Word, and
Notepad referenced in this document.
Page 16 of 24 Page 17 of 24
Axicon Auto ID Limited | PV-1072 operating manual | March 2016Axicon Auto ID Limited | PV-1072 operating manual | March 2016
www.axicon.comwww.axicon.com

Software licence agreement
This software is Copyright © 2008-2016 Axicon Auto ID Limited.
set forth below. Using the software indicates your acceptance of these licence
terms. If you do not accept these licence terms within 14 days, you may return the
entire unused product for a full refund.
Axicon software licence terms - licence grant
with the Axicon hardware product that accompanied the software. Use means
storing, loading, installing, executing or displaying the software. You may not
modify the software or disable any licensing or control features of the software.
The software is owned and copyrighted by Axicon Auto ID Limited. Your licence
confers no title or ownership in the software and is not a sale of rights in the
software.
You may not make copies of the software for any purpose whatsoever.
You may not copy the software onto a bulletin board or similar publicly accessible
system.
You may not disassemble or decompile the software without prior written consent
from Axicon.
Transfer
Your licence will automatically terminate upon any transfer of the equipment/
software. Upon transfer, you must deliver the software, including any copies and
related documentation, to the transferee.
The transferee must accept these licence terms as a condition of the transfer.
Termination
Axicon may terminate your licence upon notice of failure to comply with any of
these licence terms. Upon termination, you must immediately destroy the software,
together with all copies, adaptations and merged portions in any form.
You may not export or re-export the software in contravention of any applicable
laws or regulations.
This agreement should be construed in accordance with the laws of England.
Disclaimer
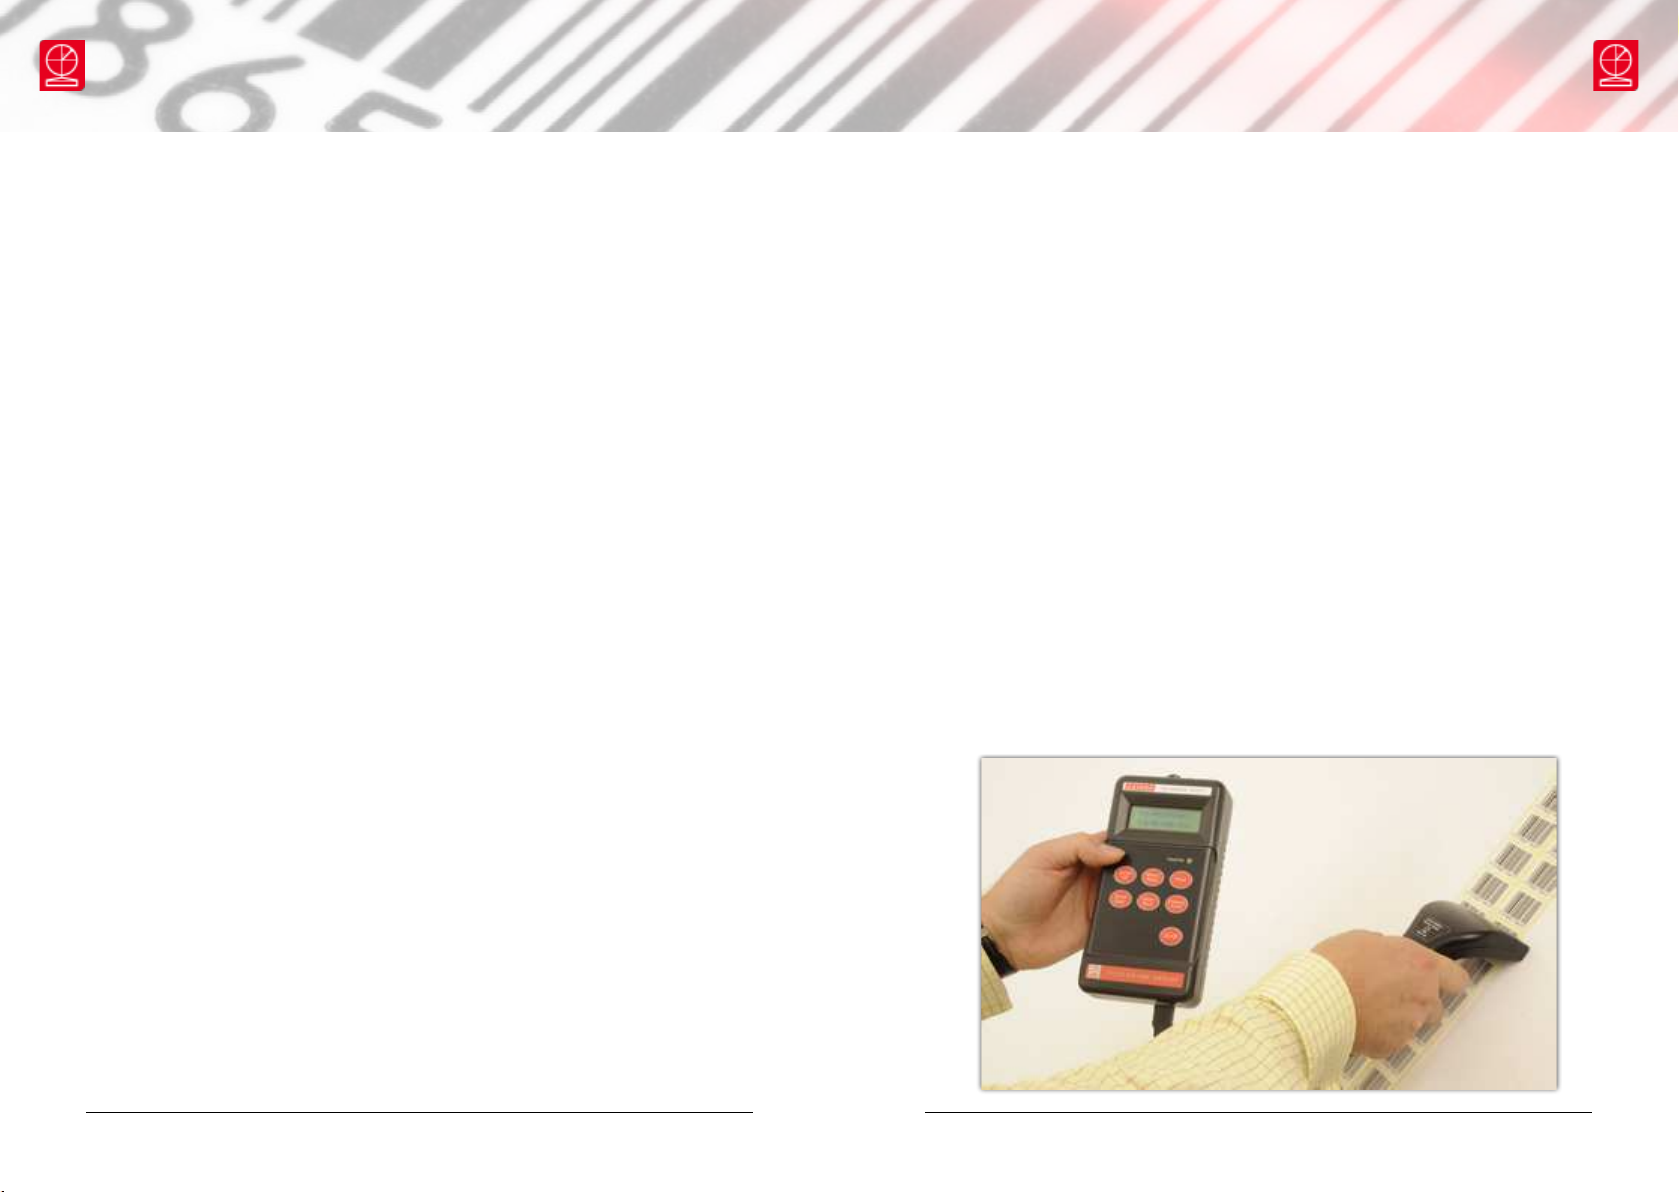
In the following the expression equipment means the P-72 and PV-1072 hardware
and the associated software. We have taken care to ensure that this equipment
is free from defects. However since we have no control over the circumstances in
which you might use the equipment, you must satisfy yourself that its performance
is suitable for your needs. Neither Axicon Auto ID Limited nor the vendor of this
display unit can accept any liability for any loss or damage (consequential or
otherwise) which may be caused by its use. If the equipment or any part of it is
defective in any way, or in some other way does not meet your expectations, the
liability of Axicon Auto ID Limited is limited to the cost of the product. You should
bear this limitation in mind if you use this equipment in any situations where the
the quality of a barcode.
Under no circumstances is this equipment licensed or authorised for use in any
situation whatsoever where the health or safety of humans or animals might be put
at risk.
Page 18 of 24 Page 19 of 24
Axicon Auto ID Limited | PV-1072 operating manual | March 2016Axicon Auto ID Limited | PV-1072 operating manual | March 2016
www.axicon.comwww.axicon.com

Axicon warranty
The Axicon PV-1072 is sold with a one year parts and labour warranty against
manufacturing defects. This is a Return to Bench warranty with shipping costs in
one direction being borne by the customer/distributor.
Should you need to return the unit to Axicon the original case (plus appropriate
packaging) must be used. If the equipment is returned without the original case,
Axicon will automatically charge an additional sum for the replacement of this
packaging.
Axicon reserves the right to charge an inspection fee for any equipment returned
under warranty for which no fault is found.
Please contact Axicon to obtain an RMA (return to manufacturer authorisation)
number before returning any equipment. This number must be quoted on all
documentation. Axicon cannot accept responsibility for equipment returned without
a RMA number.
Page 20 of 24 Page 21 of 24
Axicon Auto ID Limited | PV-1072 operating manual | March 2016Axicon Auto ID Limited | PV-1072 operating manual | March 2016
www.axicon.com
conformance
We, Axicon Auto ID Limited, of Church Road, Weston on the Green, Oxfordshire,
Model number(s)
Serial number(s)
has been designed and manufactured at our address in the UK to verify barcode
The equipment has been tested and calibrated using primary reference test
symbols traceable to the USA’s National Institute of Standards and Technology’s
the requirements of the United States Food and Drug Administration regulation,
Title 21 CFR Part 11.
ISO/IEC standard. This declaration of conformity is valid for a year.
Issue date
Expiry date
Authorised signatory
Signatory Name
15426-1 for another year.
Church Road, Weston on the Green,
Oxfordshire, OX25 3QP, UK

Product: Axicon Model PV-1072 portable display unit
We Axicon Auto ID Ltd
of Church Road, Weston on the Green, Oxfordshire, OX25 3QP, UK
declare under our sole responsibility that the product manufactured
at our above address to which this declaration relates is in conformity
with the following standards:
Barcoding ISO/IEC 15426
European Safety EN 60950
Electromagnetic Compatibility EN 55022, EN 55024
We also certify that the standard EN 60825 is not applicable to the
product.
This equipment meets the requirements of the directives 2004/108/EC
(Electromagnetic Compatibility), 2006/95/EC (Low Voltage), based on
our own relevant test reports.
Martin Morrison
Managing Director
Church Road, Weston on the Green,
Oxfordshire, OX25 3QP, UK
Page 22 of 24 Page 23 of 24
Axicon Auto ID Limited | PV-1072 operating manual | March 2016Axicon Auto ID Limited | PV-1072 operating manual | March 2016
www.axicon.com
Factory re-calibration
that it is focused correctly, and re-calibrates the hardware to account for any
change in the brightness of the LEDs used to illuminate the barcodes.
This factory re-calibration is not the same as user calibration, as it looks at the
output of the LEDs and corrects for any variance in their evenness of illumination
illumination.
the software on CD together with a new calibration card, and a new user guide that
always be downloaded free of charge from our website, www.axicon.com.
1. Contact us on
Telephone: +44 (0) 1869 351155 | Fax +44 (0) 1869 352404
2. We will provide you with an RMA number (Return to Manufacturer Authority)
and an RMA form.
3.
4.
RMA form, purchase order and your payment details to us at Axicon Auto ID
Ltd, Church Road, Weston on the Green, Oxfordshire OX25 3QP. We cannot take
responsibility for units returned in alternative packaging.
5.
7-10 days.

Contact us
Church Road
Weston on the Green
Oxfordshire
OX25 3QP
UK
Tel: +44 (0) 1869 351 155
Fax: +44 (0) 1869 351 205
Email: [email protected]
Website: www.axicon.com
their respective companies.
Other manuals for PV-1072
2
Table of contents
Other Axicon Barcode Reader manuals

Axicon
Axicon 12600 Operator's manual

Axicon
Axicon 12000 Operator's manual

Axicon
Axicon 15000 series User manual

Axicon
Axicon 6000 series User manual

Axicon
Axicon 6015 Operator's manual

Axicon
Axicon 6000 series User manual

Axicon
Axicon PV-1000 User manual

Axicon
Axicon 15000 series User manual

Axicon
Axicon 15000 series User manual

Axicon
Axicon PV-1072 User manual