Operating and mounting instruction B.E.G.
occupancy detector Indoor 180-SC
Thank you for purchasing the presence detector.
You have opted for a quality product from the
B.E.G.
range and for one which has been manufactured,
tested, packaged and despatched with the utmost
care.
Please read the information contained in these
directions before commencing assembly.
We reserve the right to make any technical
adjustments which are in the interests of product-
improvement.
CAUTION: have all work involving the 230 V mains
supply carried out by a qualied electrician! Before
starting disconnect the mains!
Type Part-No.
Indoor 180-SC, fully tted,
pure white 92650
Sensorinsert for Indoor 180-SC 92668
Covering IP20, pure white 92630
Covering IP20, trafc white 92631
Covering IP20, cream 92632
Covering IP20, silver 92633
Covering IP20, anthracite 92634
Covering IP54, pure white 92139
1. Function
With the LUXOMAT®Indoor 180 you acquired a
B.E.G. -occupancy detector for ush mounting in
indoor and outdoor applications.
LUXOMAT®
Indoor 180-SC was specically
conceived for use with automatic stairway lighting
devices (e.g., HAGER 45401).
The
LUXOMAT®
Indoor 180-SC is used to replace
standard light-contact push buttons. You can do this
in both 3-wire as well as with 4-wire circuits.
It is not necessary to rewire.
LUXOMAT
®
Indoor 180-SC needs only two wires and
takes the power it needs to operate from the stairwell
lighting-timer switch-off-device (ca. 4 mA/230 VAC).
Detecting movement
The LUXOMAT®Indoor 180-SC’s motion detection
corresponds to the functioning of typical motion
sensors, i.e., thermal radiation of persons and
other heat sources (e.g. animals) moving within the
sensing area are measured and the ambient lumi-
nosity is compared with a twilight threshold value.
Ambient luminosity
Set the twilight threshold value on the “LUX” rotary
control. The LED (behind the Fresnel lens) ashes
quickly if the ambient luminosity is set higher than
the adjusted twilight threshold. The LED is extin-
guished as soon as the ambient luminosity is less
than the adjusted twilight threshold.
Triggering the stairwell lighting-timer
If the ambient luminosity sinks below the twilight
threshold value and a movement is detected, the
LUXOMAT®Indoor 180-SC closes the supply feed
through a high-performance FET for ca. 100msec.
(this corresponds to briey pushing the button).
This short impulse actuates the stairwell lighting-
timer and the connected lighting is switched on
for the switch-off delay time set on the stairwell
lighting-timer.
Post-triggering the stairwell lighting-timer
A new impulse can be triggered only after ca.
10 seconds. This delay is necessary to ensure the
LUXOMAT®Indoor 180-SC has sufcient power.
As it is possible to connect several detectors (up to
ten detectors) in parallel to one stairwell lighting-
timer, each detector is capable of detecting the
impulse from one connected detector and, if
applicable, to generate a new impulse delayed
correspondingly.
Suppressing the twilight threshold-value query
Each impulse leads to the stairwell lighting-timer
being switched on or post-triggered. That means
all the detectors in the stairwell area “see” the
switched-on connected lighting so that the evalua-
tion of the twilight threshold value becomes difcult
or even impossible. Therefore, upon detection
of an impulse, all detectors suppress the twilight
threshold-value query for the time set on the “MIN”
rotary control.
Every detected motion leads to a post-triggering
impulse, independent of the ambient luminosity.
We recommend setting the time set on the “MIN”
rotary control either the same or a bit higher
than the switch-off delay time set on the stairway
lighting-timer.
The LED displays as follows during the suppression
phase of the current ambient luminosity:
--> bright: the LED ashes very quickly:
--> dark: LED off
Detection area
The LUXOMAT®Indoor 180-SC is equipped with a
hemispherical Fresnel lens, which produces a semi-
circular sensing area (horizontal 180°, vertical ca.
60°) in wall installations. The size of the monitored
area is 8m from the front and side for the recom-
mended installation height of
1.10 - 2.20m
during
movements that are crossways to the line of the lens
segments.
The number of parallel connected LUXOMAT®
Indoor 180-SC’s
Do not connect more than ten LUXOMAT®Indoor
180-SC’s in parallel in order to prevent possible
spurious triggering.
The max. possible quantity is also restricted
through the type of stairway lighting-timer used:
Caution – if not enough power can be drawn from
the stairway lighting-timer, the supply voltage for
the motion sensors sinks and malfunctions occur
in the motion sensor. Furthermore, the stairway
lighting-timer switch might be permanently
switched on.
Wiring/connection
It is necessary to pay attention to the polarity of the
two wires.
Make sure you observe the following points prior to
installation:
•
The LUXOMAT
®
Indoor 180-SC is intended for
installation in standard size-I inlet-sockets. We
recommend installing at a height of 1.10 to 2.20m.
• Ensure the view is clear as the infrared rays
cannot penetrate through solid objects.
• If you do not want movement underneath the
sensor to be detected, you can clip the enclosed
covering cap (A) onto the mask cover (B)
*If the sensor covers zones that should not be
monitored, the corresponding lens segments
must be masked off, for instance with transparent
tape, which can be determined by testing.
•
Frontal approach
Motion sensors are most sensitive if the move-
ment
is crossways to the line of the lens seg-
ments. When being approached from the front
the sensitivity and thus the effective range is
significantly reduced.
3. Installation
The detector can be installed in conventional instal-
lation sockets. Installation should be made to a
wall with a height of
1.10 to 2.20m
.
For the combination with switches of leading
manufacturers the enclosed additional blinds can
be used.
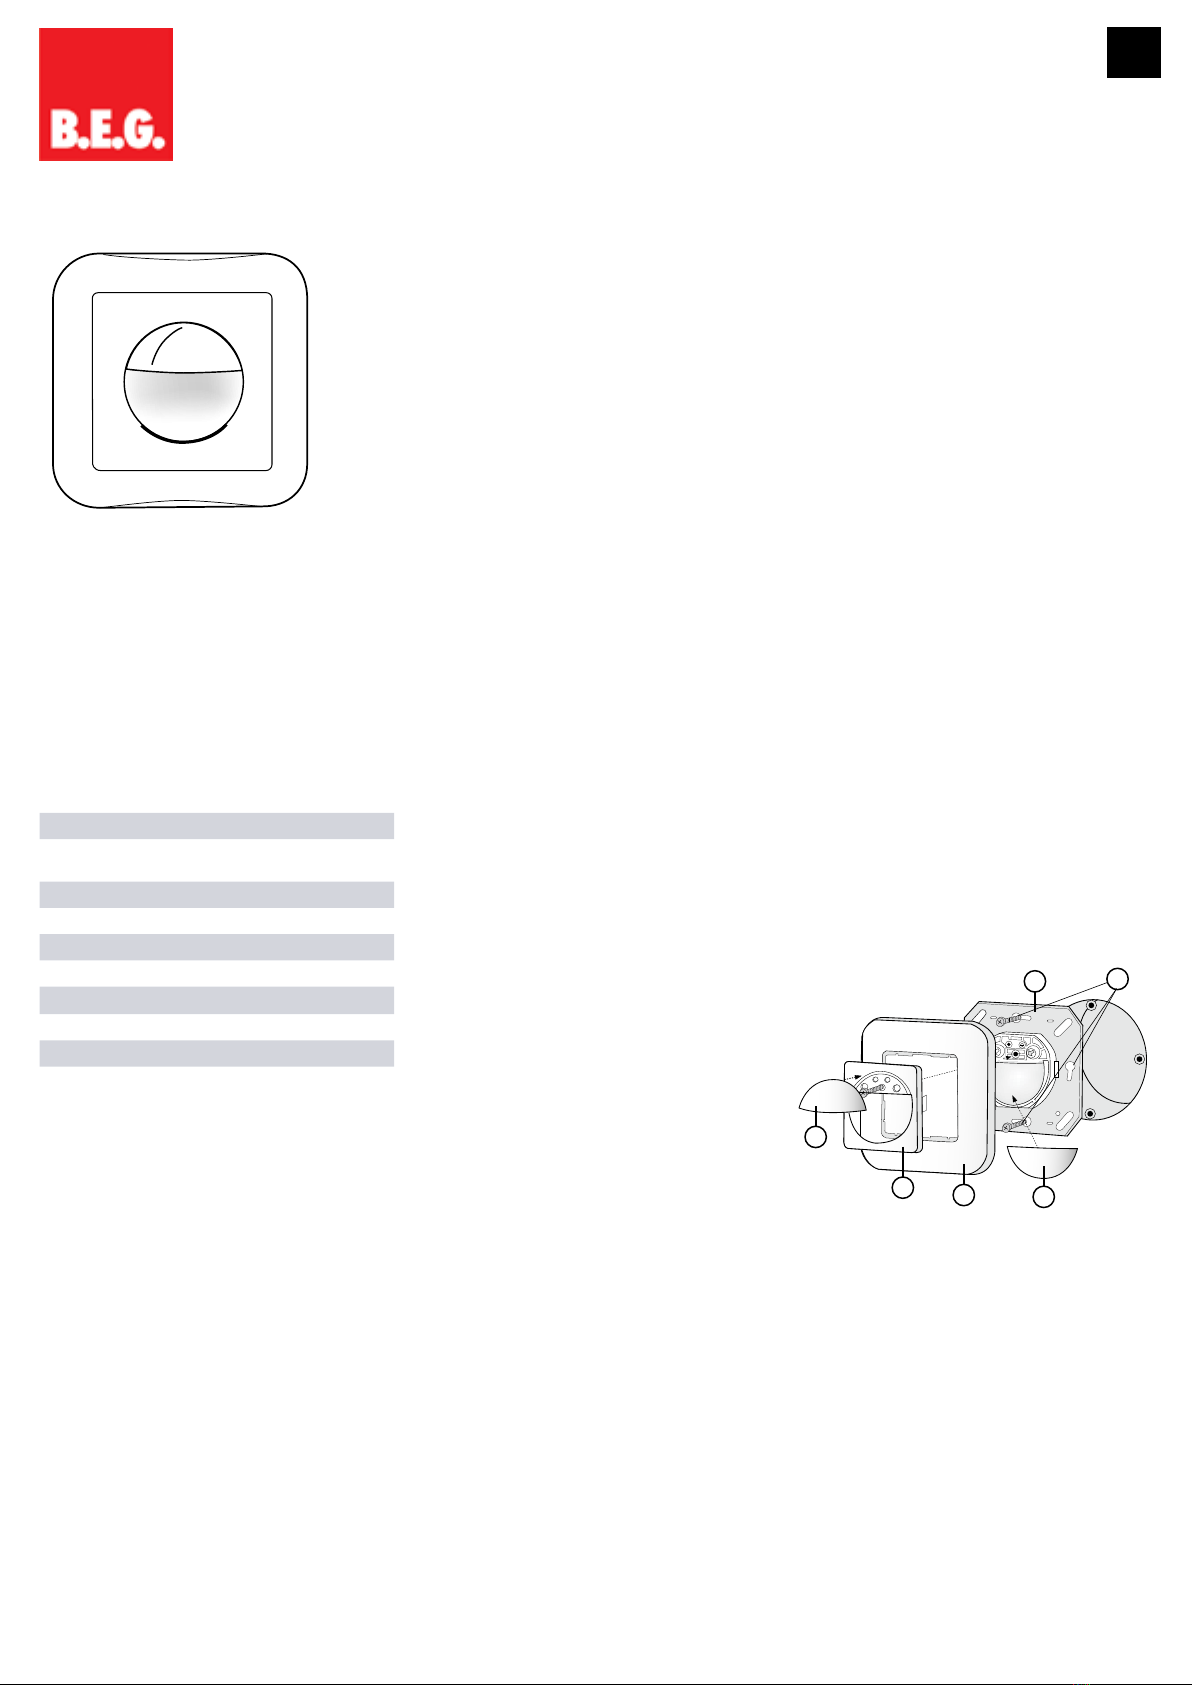
Mounting diagram
• Clear mains’ voltage!
•
Connect sensor part (A) according to the regula-
tions and as shown in the wiring diagrams (pt. 5).
• Depending upon the concealed housing, fasten
at the top and the bottom or left and right using
the enclosed screws (B).
• Additionally to the horizontal detection plane the
Indoor 180 has a vertical detection plane which
detects also movements underneath the motion-
detector. In order to prevent detection within the
vertical range of coverage, apply cover (C).
• Next introduce and fasten the blinds (D) and the
covering-cap (E).
• Switch on mains‘ voltage. The LUXOMAT®
Indoor 180 is ready for use after having com-
pleted a self-checking cycle of about 60 seconds.
LUXOMAT®
A
C
D
E
F
B
GB


