BabyGo FIXLEG 360 User manual

Basket Kinderwaagen
MONTAGEANLEITUNG
Basket stroller
ASSEMBLY INSTRUCTIONS
Basket poussette
MANUEL D‘INSTRUCTIONS
FIXLEG 360
BabyGo Baby Products GmbH
Am Bahndamm 1-3
33378 Rheda-Wiedenbrück
Germany
0049-5242-4188681
BabyGo Baby Products GmbH
Am Bahndamm 1-3
33378 Rheda-Wiedenbrück
Germany
0049-5242-4188681
www.babygo.eu
WICHTIG:
FÜR SPÄTEREN GEBRAUCH AUFBEWAHREN.
SORGFÄLTIG LESEN.
IMPORTANT:
RETAIN FOR FUTURE REFERENCE.
READ CAREFULLY.
DE
EN
FR

DE
EN
FR
2 3
FIXLEG 360
Sehr geehrte Eltern:
Vielen Dank für den Kauf dieses Autositzses. Bitte lesen und beachten Sie
die gesamte Bedienungsanleitung vor und während des Gebrauchs.
WARNUNG! Lesen Sie die Bedienungsanleitung vor dem Gebrauch
sorgfältig durch und bewahren Sie sie für ein zukünftiges Nach-
schlagen gut auf.
DE BEDIENUNGSANLEITUNG
TEILE
- 07 - - 08 -
B1,EB1,E
11
12
13
15 14
16
17 18
19
20
21
22
23
24
25
26
27
28
29
30
31
32
33
1. Belt hook
2. Seat shell
3. Reinforcement
4. Back guard
5. Belt guide
6. ISOFIX indicator
7. ISOFIX release button
8. Fixing sleeve
9. ISOFIX connector
10. ISOFIX SYSTEM
11. Handle for adjusting the height of headrest
12. Headrest
13. Head pillow
14. Holes for belts
15. Shoulder belts
16. Seat cover
17. Crotch pad
18. Center adjuster
19. Center adjuster belt
20. Handle to adjust the reclining positions
21. Base
22. Support Leg Fold switch
23. Support leg adjustment button..
24. Indicator
25. Adult seat belts
26. Vehicle metal tongue
27. Vehicle Buckle
28. Shoulder pads
29. Shoulder belts
30. Metal tongue on child seat
31. Red release button
32. Buckle body on child seat
PRESS
33. Pedal
1. Gurthaken
2. Sitzschale
3. Verstärkung
4. Rückenschutz
5. Gurtführung
6. ISOFIX-Anzeige
7. ISOFIX-Freigabetaste
8. Fixierhülse
9. ISOFIX-Anschluss
10. ISOFIX-SYSTEM
11.
Höhe der Kopfstütze
12. Kopfstütze
13. Kopfpolster
14. Löcher für Gurte
15. Schultergurte
16. Sitzbezug
17. Schrittpolster
18. Mittlere Einstellvor-
richtung
19. Mittlerer Einstellgurt
20.
Liegepositionen
21. Sockel
22. Klappschaltung Stand-
fuß
23. Einstelltaste Standfuß
24. Anzeige
25. Sitzgurte für Erwach-
sene
26. Metalllasche Fahrzeug-
gurt
27. Schnalle Fahrzeuggurt
28. Schulterpolster
29. Schultergurte
30. Metalllasche Sitzgurt
31. Rote Freigabetaste
32. Schnalle Sitzgurt
33. Pedal
ECE R44/04 GROUP0+I/II(0-25KG)
说明书尺寸为:成品(95X140MM)/纸质:128g铜版纸/装订方式:骑马装

DE
EN
FR
4 5
FIXLEG 360
INSTALLATION
- 09 - - 10 -
E
B1,E
B1,E
E
B1,E
INSTALLATION IN GROUP0+ REAR FACING
Fastened by ISOFIX+SUPPORT LEG
(Approx for baby from birth-13kgs)
The ISOFIX anchors are behind the vehicle seat where are
always marked with "isofix”(A-1)
Put the child seat on the vehicle seat and adjust it in the
maximal positions(A-2)
One hand pulls the button on the base and turn the seat
aound (it will be locked in 180 degress) with the other
hand(A-3, A-4)
Pull the ISOFIX connectors out at the both side of the seat
and aim at the low anchors at the bottom of the seat(A-5).
Push the seat untill they are locked, you'll hear "click"
"click"(A-6)
One hand press the button on the loading leg, the other
hand stretch it and make it touch the ground(A-7)
The indicator will turn in green (A-8)
A-1
ISOFIX ISOFIX
4
4
A-5
A-3 A-4
A-6
BB--11
CC--33
A-2
A-8
BB--11
CC--33
B-4
- 11 - - 12 -
E
B1,E
B1,E
E
B1,E
INSTALLATION IN GROUP I /FORWARD FACING
Fastened by ISOFIX+SUPPORT LEG
Suitable for baby from 9-18kgs . Approx 9 months to 4 years old)
The ISOFIX anchors are behind the vehicle seat where are always
marked with "isofix"(A-1)
Put the child seat on the vehicle seat in forward facing.
Pull the ISOFIX connectors out at the both side of the seat, if it is
in the locked condition, unlock it and the indicators show in
green. Aim at the low anchors at the bottom of the seat.(B-1)(B-
2)(B-3)
Push the seat back until they are locked, you'll hear "click"
"click” (B-4)
One hand press the red button, the other hand pull the
extension tube down and make sure it touch the ground
and trun in green. (B-5)
A-1
ISOFIX ISOFIX
B-3
B-1
B-2
B-5
- 09 - - 10 -
E
B1,E
B1,E
E
B1,E
INSTALLATION IN GROUP0+ REAR FACING
Fastened by ISOFIX+SUPPORT LEG
(Approx for baby from birth-13kgs)
The ISOFIX anchors are behind the vehicle seat where are
always marked with "isofix”(A-1)
Put the child seat on the vehicle seat and adjust it in the
maximal positions(A-2)
One hand pulls the button on the base and turn the seat
aound (it will be locked in 180 degress) with the other
hand(A-3, A-4)
Pull the ISOFIX connectors out at the both side of the seat
and aim at the low anchors at the bottom of the seat(A-5).
Push the seat untill they are locked, you'll hear "click"
"click"(A-6)
One hand press the button on the loading leg, the other
hand stretch it and make it touch the ground(A-7)
The indicator will turn in green (A-8)
A-1
ISOFIX ISOFIX
44
A-5
A-3
A-4
A-6
BB--11
CC--33
A-2
A-8
BB--11
CC--33
B-4
- 11 - - 12 -
E
B1,E
B1,E
E
B1,E
INSTALLATION IN GROUP I /FORWARD FACING
Fastened by ISOFIX+SUPPORT LEG
Suitable for baby from 9-18kgs . Approx 9 months to 4 years old)
The ISOFIX anchors are behind the vehicle seat where are always
marked with "isofix"(A-1)
Put the child seat on the vehicle seat in forward facing.
Pull the ISOFIX connectors out at the both side of the seat, if it is
in the locked condition, unlock it and the indicators show in
green. Aim at the low anchors at the bottom of the seat.(B-1)(B-
2)(B-3)
Push the seat back until they are locked, you'll hear "click"
"click” (B-4)
One hand press the red button, the other hand pull the
extension tube down and make sure it touch the ground
and trun in green. (B-5)
A-1
ISOFIX ISOFIX
B-3
B-1
B-2
B-5
- 09 - - 10 -
E
B1,E
B1,E
E
B1,E
INSTALLATION IN GROUP0+ REAR FACING
Fastened by ISOFIX+SUPPORT LEG
(Approx for baby from birth-13kgs)
The ISOFIX anchors are behind the vehicle seat where are
always marked with "isofix”(A-1)
Put the child seat on the vehicle seat and adjust it in the
maximal positions(A-2)
One hand pulls the button on the base and turn the seat
aound (it will be locked in 180 degress) with the other
hand(A-3, A-4)
Pull the ISOFIX connectors out at the both side of the seat
and aim at the low anchors at the bottom of the seat(A-5).
Push the seat untill they are locked, you'll hear "click"
"click"(A-6)
One hand press the button on the loading leg, the other
hand stretch it and make it touch the ground(A-7)
The indicator will turn in green (A-8)
A-1
ISOFIX ISOFIX
44
A-5
A-3 A-4
A-6
BB--11
CC--33
A-2
A-8
B
B
-
-
1
1
C
C
-
-
3
3
B-4
- 11 - - 12 -
E
B1,E
B1,E
E
B1,E
INSTALLATION IN GROUP I /FORWARD FACING
Fastened by ISOFIX+SUPPORT LEG
Suitable for baby from 9-18kgs . Approx 9 months to 4 years old)
The ISOFIX anchors are behind the vehicle seat where are always
marked with "isofix"(A-1)
Put the child seat on the vehicle seat in forward facing.
Pull the ISOFIX connectors out at the both side of the seat, if it is
in the locked condition, unlock it and the indicators show in
green. Aim at the low anchors at the bottom of the seat.(B-1)(B-
2)(B-3)
Push the seat back until they are locked, you'll hear "click"
"click” (B-4)
One hand press the red button, the other hand pull the
extension tube down and make sure it touch the ground
and trun in green. (B-5)
A-1
ISOFIX ISOFIX
B-3
B-1
B-2
B-5
- 09 - - 10 -
E
B1,E
B1,E
E
B1,E
INSTALLATION IN GROUP0+ REAR FACING
Fastened by ISOFIX+SUPPORT LEG
(Approx for baby from birth-13kgs)
The ISOFIX anchors are behind the vehicle seat where are
always marked with "isofix”(A-1)
Put the child seat on the vehicle seat and adjust it in the
maximal positions(A-2)
One hand pulls the button on the base and turn the seat
aound (it will be locked in 180 degress) with the other
hand(A-3, A-4)
Pull the ISOFIX connectors out at the both side of the seat
and aim at the low anchors at the bottom of the seat(A-5).
Push the seat untill they are locked, you'll hear "click"
"click"(A-6)
One hand press the button on the loading leg, the other
hand stretch it and make it touch the ground(A-7)
The indicator will turn in green (A-8)
A-1
ISOFIX ISOFIX
44
A-5
A-3 A-4
A-6
BB--11
CC--33
A-2
A-8
- 09 - - 10 -
E
B1,E
B1,E
E
B1,E
INSTALLATION IN GROUP0+ REAR FACING
Fastened by ISOFIX+SUPPORT LEG
(Approx for baby from birth-13kgs)
The ISOFIX anchors are behind the vehicle seat where are
always marked with "isofix”(A-1)
Put the child seat on the vehicle seat and adjust it in the
maximal positions(A-2)
One hand pulls the button on the base and turn the seat
aound (it will be locked in 180 degress) with the other
hand(A-3, A-4)
Pull the ISOFIX connectors out at the both side of the seat
and aim at the low anchors at the bottom of the seat(A-5).
Push the seat untill they are locked, you'll hear "click"
"click"(A-6)
One hand press the button on the loading leg, the other
hand stretch it and make it touch the ground(A-7)
The indicator will turn in green (A-8)
A-1
ISOFIX ISOFIX
44
A-5
A-3
A-4
A-6
BB--11
CC--33
A-2
A-8
BB--11
CC--33
B-4
- 11 - - 12 -
E
B1,E
B1,E
E
B1,E
INSTALLATION IN GROUP I /FORWARD FACING
Fastened by ISOFIX+SUPPORT LEG
Suitable for baby from 9-18kgs . Approx 9 months to 4 years old)
The ISOFIX anchors are behind the vehicle seat where are always
marked with "isofix"(A-1)
Put the child seat on the vehicle seat in forward facing.
Pull the ISOFIX connectors out at the both side of the seat, if it is
in the locked condition, unlock it and the indicators show in
green. Aim at the low anchors at the bottom of the seat.(B-1)(B-
2)(B-3)
Push the seat back until they are locked, you'll hear "click"
"click” (B-4)
One hand press the red button, the other hand pull the
extension tube down and make sure it touch the ground
and trun in green. (B-5)
A-1
ISOFIX ISOFIX
B-3
B-1
B-2
B-5
- 09 - - 10 -
E
B1,E
B1,E
E
B1,E
INSTALLATION IN GROUP0+ REAR FACING
Fastened by ISOFIX+SUPPORT LEG
(Approx for baby from birth-13kgs)
The ISOFIX anchors are behind the vehicle seat where are
always marked with "isofix”(A-1)
Put the child seat on the vehicle seat and adjust it in the
maximal positions(A-2)
One hand pulls the button on the base and turn the seat
aound (it will be locked in 180 degress) with the other
hand(A-3, A-4)
Pull the ISOFIX connectors out at the both side of the seat
and aim at the low anchors at the bottom of the seat(A-5).
Push the seat untill they are locked, you'll hear "click"
"click"(A-6)
One hand press the button on the loading leg, the other
hand stretch it and make it touch the ground(A-7)
The indicator will turn in green (A-8)
A-1
ISOFIX ISOFIX
44
A-5
A-3 A-4
A-6
B
B
-
-
1
1
C
C
-
-
3
3
A-2
A-8
BB--11
CC--33
B-4
- 11 - - 12 -
E
B1,E
B1,E
E
B1,E
INSTALLATION IN GROUP I /FORWARD FACING
Fastened by ISOFIX+SUPPORT LEG
Suitable for baby from 9-18kgs . Approx 9 months to 4 years old)
The ISOFIX anchors are behind the vehicle seat where are always
marked with "isofix"(A-1)
Put the child seat on the vehicle seat in forward facing.
Pull the ISOFIX connectors out at the both side of the seat, if it is
in the locked condition, unlock it and the indicators show in
green. Aim at the low anchors at the bottom of the seat.(B-1)(B-
2)(B-3)
Push the seat back until they are locked, you'll hear "click"
"click” (B-4)
One hand press the red button, the other hand pull the
extension tube down and make sure it touch the ground
and trun in green. (B-5)
A-1
ISOFIX ISOFIX
B-3
B-1
B-2
B-5
- 09 - - 10 -
E
B1,E
B1,E
E
B1,E
INSTALLATION IN GROUP0+ REAR FACING
Fastened by ISOFIX+SUPPORT LEG
(Approx for baby from birth-13kgs)
The ISOFIX anchors are behind the vehicle seat where are
always marked with "isofix”(A-1)
Put the child seat on the vehicle seat and adjust it in the
maximal positions(A-2)
One hand pulls the button on the base and turn the seat
aound (it will be locked in 180 degress) with the other
hand(A-3, A-4)
Pull the ISOFIX connectors out at the both side of the seat
and aim at the low anchors at the bottom of the seat(A-5).
Push the seat untill they are locked, you'll hear "click"
"click"(A-6)
One hand press the button on the loading leg, the other
hand stretch it and make it touch the ground(A-7)
The indicator will turn in green (A-8)
A-1
ISOFIX ISOFIX
44
A-5
A-3 A-4
A-6
BB--11
CC--33
A-2
A-8
Die ISOFIX-Verankerungen
-
kennzeichnet .
Setzen Sie den Kindersitz auf
den Autositz und stellen Sie
Die ISOFIX-Verankerungen
-
kennzeichnet.
Setzen Sie den
Kindersitz vorwärts
gerichtet auf den Autositz. Ziehen
Sie die ISOFIX-Anschlüsse an bei-
den Seiten des Sitzes heraus. Falls
sie verriegelt sind, entsperren Sie
diese und die Anzeigen leuchten
grün. Richten Sie die Anschlüsse
an der Unterseite des Sitzes aus.
180 Grad ein) .
Ziehen Sie die ISOFIX-An-
schlüsse an beiden Seiten des
Sitzes heraus und richten Sie diese
an der Unterseite des Sitzes aus .
Verschieben Sie den Sitz,
einrasten .
Schieben Sie den Sitz zurück,
die rote Taste und ziehen
anderen Hand heraus, bis es den
Boden berührt und die Anzeige
grün leuchtet.
anderen Hand heraus, bis er den
Boden berührt .
Die Anzeige leuchtet dann
grün .
GRUPPE 0+ / NACH HINTEN GERICHTET
Sicherung mit ISOFIX+STANDFUSS (Für Babys ab Geburt-13kg) GRUPPE I / NACH VORN GERICHTET
Sicherung mit ISOFIX+STANDFUSS (Für Kinder von 9-18kg )
B-1
B-3
B-5
B-2
B-4
B-6

DE
EN
FR
6 7
FIXLEG 360
EINSTELLUNGEN
- 13 - - 14 -
E
B1,E
B1,E
E
B1,E
HOW TO RESTRAIN YOUR BABY ON THE
SEAT IN GROUP0+/1
reclining positions:
By pull the red reclining adjusting
device up, you will get the right
and suitable positions for your child.
1.sitting position
3. sleeping position
◆
◆
RECLINING POSITIONS(C)
Open the buckle by pressing the red button(C-5)
Make sure the baby's head won't exceed the heardrest (C-7)
Put the metal tongues together and lock the buckle(C-8)
Pull the central adjuster belt(C-9)
Test the gab between baby's shoulder and shoulder pad(1
finger gab is okay, don't too tight and too loose)
Also check if all belts are straight, as the twisted belts are
dangerous(C-10)
One hand press the central adjuster button, the other hand
pull the seat belts out(C-1)(C-2)
Adjust the height of the headrest by pulling "Height adjuster"
There are 7 positions to adjust the height of the headrest.(C-3)(C-4)
C
1
1
2
2
3
3
C-1
2
C-2
C-3
C-5 C-6
C-4
- 13 - - 14 -
E
B1,E
B1,E
E
B1,E
HOW TO RESTRAIN YOUR BABY ON THE
SEAT IN GROUP0+/1
reclining positions:
By pull the red reclining adjusting
device up, you will get the right
and suitable positions for your child.
1.sitting position
3. sleeping position
◆
◆
RECLINING POSITIONS(C)
Open the buckle by pressing the red button(C-5)
Make sure the baby's head won't exceed the heardrest (C-7)
Put the metal tongues together and lock the buckle(C-8)
Pull the central adjuster belt(C-9)
Test the gab between baby's shoulder and shoulder pad(1
finger gab is okay, don't too tight and too loose)
Also check if all belts are straight, as the twisted belts are
dangerous(C-10)
One hand press the central adjuster button, the other hand
pull the seat belts out(C-1)(C-2)
Adjust the height of the headrest by pulling "Height adjuster"
There are 7 positions to adjust the height of the headrest.(C-3)(C-4)
C
11
22
33
C-1
2
C-2
C-3
C-5
C-6
C-4
C-10
- 15 - - 16 -
E
B1,E
B1,E
E
B1,E
C-8
D-8
C-9
C-7
HOW TO INSTALL THE CHILD SEAT IN
GROUP II
FORWARD FACING
Attention:
Please remove 5 points harness system in Group II (15-25KGS)
15-25
C-10
- 15 - - 16 -
E
B1,E
B1,E
E
B1,E
C-8
D-8
C-9
C-7
HOW TO INSTALL THE CHILD SEAT IN
GROUP II
FORWARD FACING
Attention:
Please remove 5 points harness system in Group II (15-25KGS)
15-25
- 13 - - 14 -
E
B1,E
B1,E
E
B1,E
HOW TO RESTRAIN YOUR BABY ON THE
SEAT IN GROUP0+/1
reclining positions:
By pull the red reclining adjusting
device up, you will get the right
and suitable positions for your child.
1.sitting position
3. sleeping position
◆
◆
RECLINING POSITIONS(C)
Open the buckle by pressing the red button(C-5)
Make sure the baby's head won't exceed the heardrest (C-7)
Put the metal tongues together and lock the buckle(C-8)
Pull the central adjuster belt(C-9)
Test the gab between baby's shoulder and shoulder pad(1
finger gab is okay, don't too tight and too loose)
Also check if all belts are straight, as the twisted belts are
dangerous(C-10)
One hand press the central adjuster button, the other hand
pull the seat belts out(C-1)(C-2)
Adjust the height of the headrest by pulling "Height adjuster"
There are 7 positions to adjust the height of the headrest.(C-3)(C-4)
C
11
22
33
C-1
2
C-2
C-3
C-5 C-6
C-4
- 13 - - 14 -
E
B1,E
B1,E
E
B1,E
HOW TO RESTRAIN YOUR BABY ON THE
SEAT IN GROUP0+/1
reclining positions:
By pull the red reclining adjusting
device up, you will get the right
and suitable positions for your child.
1.sitting position
3. sleeping position
◆
◆
RECLINING POSITIONS(C)
Open the buckle by pressing the red button(C-5)
Make sure the baby's head won't exceed the heardrest (C-7)
Put the metal tongues together and lock the buckle(C-8)
Pull the central adjuster belt(C-9)
Test the gab between baby's shoulder and shoulder pad(1
finger gab is okay, don't too tight and too loose)
Also check if all belts are straight, as the twisted belts are
dangerous(C-10)
One hand press the central adjuster button, the other hand
pull the seat belts out(C-1)(C-2)
Adjust the height of the headrest by pulling "Height adjuster"
There are 7 positions to adjust the height of the headrest.(C-3)(C-4)
C
11
22
33
C-1
2
C-2
C-3
C-5
C-6
C-4
C-10
- 15 - - 16 -
E
B1,E
B1,E
E
B1,E
C-8
D-8
C-9
C-7
HOW TO INSTALL THE CHILD SEAT IN
GROUP II
FORWARD FACING
Attention:
Please remove 5 points harness system in Group II (15-25KGS)
15-25
C-10
- 15 - - 16 -
E
B1,E
B1,E
E
B1,E
C-8
D-8
C-9
C-7
HOW TO INSTALL THE CHILD SEAT IN
GROUP II
FORWARD FACING
Attention:
Please remove 5 points harness system in Group II (15-25KGS)
15-25
- 13 - - 14 -
E
B1,E
B1,E
E
B1,E
HOW TO RESTRAIN YOUR BABY ON THE
SEAT IN GROUP0+/1
reclining positions:
By pull the red reclining adjusting
device up, you will get the right
and suitable positions for your child.
1.sitting position
3. sleeping position
◆
◆
RECLINING POSITIONS(C)
Open the buckle by pressing the red button(C-5)
Make sure the baby's head won't exceed the heardrest (C-7)
Put the metal tongues together and lock the buckle(C-8)
Pull the central adjuster belt(C-9)
Test the gab between baby's shoulder and shoulder pad(1
finger gab is okay, don't too tight and too loose)
Also check if all belts are straight, as the twisted belts are
dangerous(C-10)
One hand press the central adjuster button, the other hand
pull the seat belts out(C-1)(C-2)
Adjust the height of the headrest by pulling "Height adjuster"
There are 7 positions to adjust the height of the headrest.(C-3)(C-4)
C
11
22
33
C-1
2
C-2
C-3
C-5 C-6
C-4
LIEGEPOSITIONEN
Liegepositionen:
Kind die richtige Position einzustellen.
1. Sitzposition
3. Schlafposition
SICHERUNG DES KINDES
drücken.
Achten Sie darauf, dass der
Kopf des Kindes nicht über
die Kopfstütze heraus ragt.
Drücken Sie die Metalllaschen
die Schnalle .
-
stellgurt.
Überprüfen Sie den
Abstand zwischen den
oder zu locker sitzen). Stellen Sie
sicher, dass alle Gurte gerade und
-
einer Hand auf die
-
gurte heraus.
Stellen Sie die Höhe
der Kopfstütze ein,
-
-
ze verfügt über 7 Positionen .

DE
EN
FR
8 9
FIXLEG 360
INSTALLATION
GRUPPE II / NACH VORN GERICHTET
Sicherung mit ISOFIX+STANDFUSS (Für Kinder von 15-25kg )
- 17 - - 18 -
E
B1,E
B1,E
E
B1,E
1. USE ADULT SEAT BELTS TO FASTEN
THE SEAT IN GROUP II (15-25KGS)
Suitable for kids approx 3 to 7 years old.
If your child is bigger enough and can not fit the shoulder belts, you should
adjust it or take it off.
Pressing the button on the central adjuster and pull the shoulder belts out(D-1)
Push the Red button of buckle, Open the buckle and let two belt hang on the
Harness B
Pull belts out from the slots (D-4)
Harness belt and shoulder belts hiding.
Open six buttons on the seat cover inside (D-6)
uckle body removal (D-5)
Locate the metal buckle strap retainer on bottom of the shell.
Pull retainer away from child restraint to loosen.
Turn the retainer so that the short side will go through the slot in the restraint
shell.
Push the retainer through slots in the shell and cover to the top of the restraint.
D-1
D-5
D-3
D-2
both side of car seat. (D-2)
D-4
Take the pillow,cushion and buckle crotch pad away accordingly. (D-3)
Put the Harness belt and two shoulder belt hide at behind of the seat over.(D-7)
PULL PULL
PULLPULL
PULL PULL
D-6 D-7
Pull the adult seat belts out and feed the diagonal section of the vehicle belt
Fasten the seat belt across your child. The lap section should rest on the lap
belt guides on seat. Make sure the seat belt is not twisted.each side of the child
(E-4,E-5)
Buckle the adult seat belts to the anchorage of the vehicle seat
Check the position of vehicle buckle, ensuring it is not being pulled around
child seat onto the red belt guide.the
Feed the diagonal section of the adult belt through the upper belt guide on
the opposite side to the buckle.(E-6)
- 19 - - 20 -
E
B1,E
B1,E
E
B1,E
E-1
E-2
E-3
E-4
E-5
through the upper belt guide,(E-1,E-2)
E-4
E-5
E-6
- 21 - - 22 -
B1,E
E
B1,E
E-3
ATTENTION:
make the belt goes through the belt guides on the
headrest(1) and the seat(2) (E-3)
1
2
- 17 - - 18 -
E
B1,E
B1,E
E
B1,E
1. USE ADULT SEAT BELTS TO FASTEN
THE SEAT IN GROUP II (15-25KGS)
Suitable for kids approx 3 to 7 years old.
If your child is bigger enough and can not fit the shoulder belts, you should
adjust it or take it off.
Pressing the button on the central adjuster and pull the shoulder belts out(D-1)
Push the Red button of buckle, Open the buckle and let two belt hang on the
Harness B
Pull belts out from the slots (D-4)
Harness belt and shoulder belts hiding.
Open six buttons on the seat cover inside (D-6)
uckle body removal (D-5)
Locate the metal buckle strap retainer on bottom of the shell.
Pull retainer away from child restraint to loosen.
Turn the retainer so that the short side will go through the slot in the restraint
shell.
Push the retainer through slots in the shell and cover to the top of the restraint.
D-1
D-5
D-3
D-2
both side of car seat. (D-2)
D-4
Take the pillow,cushion and buckle crotch pad away accordingly. (D-3)
Put the Harness belt and two shoulder belt hide at behind of the seat over.(D-7)
PULL PULL
PULLPULL
PULL PULL
D-6 D-7
Pull the adult seat belts out and feed the diagonal section of the vehicle belt
Fasten the seat belt across your child. The lap section should rest on the lap
belt guides on seat. Make sure the seat belt is not twisted.each side of the child
(E-4,E-5)
Buckle the adult seat belts to the anchorage of the vehicle seat
Check the position of vehicle buckle, ensuring it is not being pulled around
child seat onto the red belt guide.the
Feed the diagonal section of the adult belt through the upper belt guide on
the opposite side to the buckle.(E-6)
- 19 - - 20 -
E
B1,E
B1,E
E
B1,E
E-1 E-2
E-3
E-4
E-5
through the upper belt guide,(E-1,E-2)
E-4
E-5
E-6
- 21 - - 22 -
B1,E
E
B1,E
E-3
ATTENTION:
make the belt goes through the belt guides on the
headrest(1) and the seat(2) (E-3)
1
2
- 17 - - 18 -
E
B1,E
B1,E
E
B1,E
1. USE ADULT SEAT BELTS TO FASTEN
THE SEAT IN GROUP II (15-25KGS)
Suitable for kids approx 3 to 7 years old.
If your child is bigger enough and can not fit the shoulder belts, you should
adjust it or take it off.
Pressing the button on the central adjuster and pull the shoulder belts out(D-1)
Push the Red button of buckle, Open the buckle and let two belt hang on the
Harness B
Pull belts out from the slots (D-4)
Harness belt and shoulder belts hiding.
Open six buttons on the seat cover inside (D-6)
uckle body removal (D-5)
Locate the metal buckle strap retainer on bottom of the shell.
Pull retainer away from child restraint to loosen.
Turn the retainer so that the short side will go through the slot in the restraint
shell.
Push the retainer through slots in the shell and cover to the top of the restraint.
D-1
D-5
D-3
D-2
both side of car seat. (D-2)
D-4
Take the pillow,cushion and buckle crotch pad away accordingly. (D-3)
Put the Harness belt and two shoulder belt hide at behind of the seat over.(D-7)
PULL PULL
PULLPULL
PULL PULL
D-6
D-7
- 17 - - 18 -
E
B1,E
B1,E
E
B1,E
1. USE ADULT SEAT BELTS TO FASTEN
THE SEAT IN GROUP II (15-25KGS)
Suitable for kids approx 3 to 7 years old.
If your child is bigger enough and can not fit the shoulder belts, you should
adjust it or take it off.
Pressing the button on the central adjuster and pull the shoulder belts out(D-1)
Push the Red button of buckle, Open the buckle and let two belt hang on the
Harness B
Pull belts out from the slots (D-4)
Harness belt and shoulder belts hiding.
Open six buttons on the seat cover inside (D-6)
uckle body removal (D-5)
Locate the metal buckle strap retainer on bottom of the shell.
Pull retainer away from child restraint to loosen.
Turn the retainer so that the short side will go through the slot in the restraint
shell.
Push the retainer through slots in the shell and cover to the top of the restraint.
D-1
D-5
D-3
D-2
both side of car seat. (D-2)
D-4
Take the pillow,cushion and buckle crotch pad away accordingly. (D-3)
Put the Harness belt and two shoulder belt hide at behind of the seat over.(D-7)
PULL PULL
PULLPULL
PULL PULL
D-6 D-7
Pull the adult seat belts out and feed the diagonal section of the vehicle belt
Fasten the seat belt across your child. The lap section should rest on the lap
belt guides on seat. Make sure the seat belt is not twisted.each side of the child
(E-4,E-5)
Buckle the adult seat belts to the anchorage of the vehicle seat
Check the position of vehicle buckle, ensuring it is not being pulled around
child seat onto the red belt guide.the
Feed the diagonal section of the adult belt through the upper belt guide on
the opposite side to the buckle.(E-6)
- 19 - - 20 -
E
B1,E
B1,E
E
B1,E
E-1 E-2
E-3
E-4
E-5
through the upper belt guide,(E-1,E-2)
E-4
E-5
E-6
- 21 - - 22 -
B1,E
E
B1,E
E-3
ATTENTION:
make the belt goes through the belt guides on the
headrest(1) and the seat(2) (E-3)
1
2
- 17 - - 18 -
E
B1,E
B1,E
E
B1,E
1. USE ADULT SEAT BELTS TO FASTEN
THE SEAT IN GROUP II (15-25KGS)
Suitable for kids approx 3 to 7 years old.
If your child is bigger enough and can not fit the shoulder belts, you should
adjust it or take it off.
Pressing the button on the central adjuster and pull the shoulder belts out(D-1)
Push the Red button of buckle, Open the buckle and let two belt hang on the
Harness B
Pull belts out from the slots (D-4)
Harness belt and shoulder belts hiding.
Open six buttons on the seat cover inside (D-6)
uckle body removal (D-5)
Locate the metal buckle strap retainer on bottom of the shell.
Pull retainer away from child restraint to loosen.
Turn the retainer so that the short side will go through the slot in the restraint
shell.
Push the retainer through slots in the shell and cover to the top of the restraint.
D-1
D-5
D-3
D-2
both side of car seat. (D-2)
D-4
Take the pillow,cushion and buckle crotch pad away accordingly. (D-3)
Put the Harness belt and two shoulder belt hide at behind of the seat over.(D-7)
PULL PULL
PULLPULL
PULL PULL
D-6
D-7
Pull the adult seat belts out and feed the diagonal section of the vehicle belt
Fasten the seat belt across your child. The lap section should rest on the lap
belt guides on seat. Make sure the seat belt is not twisted.each side of the child
(E-4,E-5)
Buckle the adult seat belts to the anchorage of the vehicle seat
Check the position of vehicle buckle, ensuring it is not being pulled around
child seat onto the red belt guide.the
Feed the diagonal section of the adult belt through the upper belt guide on
the opposite side to the buckle.(E-6)
- 19 - - 20 -
E
B1,E
B1,E
E
B1,E
E-1 E-2
E-3
E-4
E-5
through the upper belt guide,(E-1,E-2)
E-4
E-5
E-6
- 21 - - 22 -
B1,E
E
B1,E
E-3
ATTENTION:
make the belt goes through the belt guides on the
headrest(1) and the seat(2) (E-3)
1
2
- 17 - - 18 -
E
B1,E
B1,E
E
B1,E
1. USE ADULT SEAT BELTS TO FASTEN
THE SEAT IN GROUP II (15-25KGS)
Suitable for kids approx 3 to 7 years old.
If your child is bigger enough and can not fit the shoulder belts, you should
adjust it or take it off.
Pressing the button on the central adjuster and pull the shoulder belts out(D-1)
Push the Red button of buckle, Open the buckle and let two belt hang on the
Harness B
Pull belts out from the slots (D-4)
Harness belt and shoulder belts hiding.
Open six buttons on the seat cover inside (D-6)
uckle body removal (D-5)
Locate the metal buckle strap retainer on bottom of the shell.
Pull retainer away from child restraint to loosen.
Turn the retainer so that the short side will go through the slot in the restraint
shell.
Push the retainer through slots in the shell and cover to the top of the restraint.
D-1
D-5
D-3
D-2
both side of car seat. (D-2)
D-4
Take the pillow,cushion and buckle crotch pad away accordingly. (D-3)
Put the Harness belt and two shoulder belt hide at behind of the seat over.(D-7)
PULL PULL
PULLPULL
PULL PULL
D-6
D-7
Falls Ihr Kind groß genug ist
und die Schultergurte nicht
ein oder entfernen Sie diese. Drü-
Einstellvorrichtung und ziehen Sie
die Schultergurte heraus.
Drücken Sie auf die rote Taste
Gurte an beiden Seiten des Auto-
sitzes herunterhängen.
Suchen Sie die Gurthalte-
rung der Metallschnalle an
der Unterseite der Schale. Ziehen
der Rückhalteeinrichtung weg.
Drehen Sie die Halterung so, dass
das kurze Ende durch den Schlitz
in der Schale geschoben werden
kann. Schieben Sie die Rückhalte-
einrichtung durch die Schlitze in
der Schale und durch den Bezug
bis zur Oberseite der Rückhalte-
einrichtung. Ziehen Sie die Gurte
aus den Schlitzen heraus.
Polsterung und das Becken-
polster.
Entfernung der Gurtschnalle.
3.
A C H T U N G: Führen Sie
den Gurt durch die Gurtfüh-
rungen der Kopfstütze (1) und
des Sitzes (2)
Verstauen Sie die Gurte
des Gurtgeschirrs und die
Verstauen Sie den Gurt des
Gurtgeschirrs und die zwei
Sichern Sie die Sitzgurte für
Erwachsene in den Schnal-
len des Autositzes. Überprüfen
Sie die Position der Autoschnalle;
gezogen werden. Führen Sie den
diagonalen Abschnitt des Er-
wachsenengurts durch die obere
Gurtführung auf der gegenüberlie-
genden Seite der Schnalle.
Ziehen Sie die Gurte
für Erwachsene her-
aus und führen Sie den diagonalen
Abschnitt des Autogurts durch die
obere Gurtführung.
Sichern Sie Ihr Kind
Der Hüftteil des Gurtes sollte auf
den Gurtführungen an beiden
Der Sitzgurt darf nicht verheddert
sein.

DE
EN
FR
10 11
FIXLEG 360
LESEN SIE DIESE BEDIENUNGSANLEITUNG SORG-
FÄLTIG DURCH UND BEWAHREN SIE DIESE FÜR
EIN ZUKÜNFTIGES NACHSCHLAGEN GUT AUF
WICHTIG
ECE R44/04
• WARNUNG: Lesen Sie diese Bedienungsanleitung VOR der Installation des Kinder-
sitzes sorgfältig durch.
• WARNUNG: -
• WARNUNG:
Autositz.
• WARNUNG: Verwenden Sie KEINE Gegenstände wie Kissen oder Jacken zur Erhö-
-
• WARNUNG: Verwenden Sie den Kindersitz NICHT zuhause. Er wurde nicht für den
• WARNUNG:
-
• WARNUNG:
kurze Dauer.
• WARNUNG: Lassen Sie KEINE losen Gegenstände wie z.B. Gepäck oder Bücher auf
• -
-
ursachen. Große und schwere Gegenstände stellen ein besonderes Risiko dar.
• WARNUNG:-
• WARNUNG: -
len.
• DECKEN -
einstrahlung ausgesetzt ist. Anderenfalls könnten Verschraubungen sehr heiß
werden und die Bezüge verblassen.
• ACHTEN
• STELLEN -
grund dünnerer Kleidung gegebenenfalls enger gezogen werden.
• SICHEREN
Ort auf. Stellen Sie keine schweren Gegenstände auf den Kindersitz und bewahren
-
einstrahlung auf.
• SCHÜTZEN
• ANGSCHNALLT sind.
• WICHTIG
•
Haltegurt und den Autogurten gesichert werden.
• Bewahren Sie die Bedienungsanleitung für ein zukünftiges Nachschlagen auf.
•
• -
gehender Airbag sehr gefährlich sein kann.
• Falls das Kind unter 13 kg wiegt, darf der Sitz nicht nach vorn gerichtet installiert
werden.
• Lesen Sie die Bedienungsanleitung vor der Installation des Kindersitzes sorgfältig
•
Haltegurt ausgestattet sind.
•
installieren Sie den Kindersitz auf der Rückbank.
• -
•
• WARNUNG:
Rücksitz liegen.
• -
-
ursachen. Große und schwere Gegenstände stellen ein besonderes Risiko dar.
• -
-
ursachen. Große und schwere Gegenstände stellen ein besonderes Risiko dar.
• WARNUNG:-
sichert werden, auch wenn kein Kind darin sitzt. Ein nicht gesicherter Kindersitz
• WARNUNG:
• WARNUNG:
• WARNUNG:
Sitzgurts oder Autogurts zu verändern.
• WARNUNG: Verwenden Sie den Kindersitz nicht zuhause. Es wurde nicht für den

DE
EN
FR
12 13
FIXLEG 360
• -
strahlung ausgesetzt ist. Anderenfalls könnten Verschraubungen sehr heiß wer-
den und die Bezüge verblassen.
•
auf.
• Stellen Sie keine schweren Gegenstände auf den Kindersitz und lagern Sie den Sitz
• Stellen Sie sicher, dass alle Sitzgurte gerade und nicht verdreht sind.
• -
gurt ausgestattet ist.
•
•
-
• -
verwendet werden;
Bezug ist Bestandteil der Rückhaltefunktion.
Erlaubte Sitze, für die Installation des
Kindersitzes
- 05 - - 06 -
WARNING!
E
B1,E
B1,E
E
B1,E
If your child is secured in the vehicle seat with only a 2
point belts, he or she could sustain serious injuries
possibly resulting in death.
Never use in connection with a 2 point belts.
Do not fasten the child seat on the front passenger
seat with validated airbag as it will casue death or
serious injury if airbag exploded. Please always secure
the child seat on the rear seats.
Do not fasten the child seat on the rear facing or
lateral vehicle seats.
Please refer to the following graphic when you install
your child seat
Shut down the air bag three point seat belts
Okay No Meet the certain
conditions
WARNING!
Please leave your baby sit on the cushion if the weight
of he or she is less than 15kgs.
This cushion is designed for new born baby which is not
only keep baby comfortable but also could offer a
certain protection.
Here is the positions of installation for your reference
Forward facing
Rear facing
Two points seat belts
Three points seats belts
Front passenger seat
The rear vehicle seats
√
×
√
×
√
The importance of ensuring that any lap,strap is worn low
down,so that the pelvis is firmly engaged shall be stressed .
Tt shall be recommended that:
(a) The child restraint shall not be used without the cover;
(b) The seat cover should not be replaced with any other than
the one recommended by the manufacturer, because the cover
constitutes an integral part of the restraint performace
√
✅
Forward facing
✅
Rear facing
❎
Two points seat belts
✅
Three points seats belts
❎
Front passenger seat
✅
The rear vehicle seats
Nach vorn gerichtet
Nach hinten gerichtet
Zwei-Punkt-Gurt
Drei-Punkt-Gurt
Beifahrersitz vorn
Rücksitze
WARNUNG! -
zeug sichern, kann es schwer oder sogar tödlich verletzt werden.
WARNUNG! Falls Ihr Kind weniger als 15 kg wiegt, setzen Sie es auf das
•
des Airbags schwer oder sogar tödlich verletzt werden könnte. Instal-
lieren Sie den Kindersitz auf der Rückbank des Autos.
• Installieren Sie den Kindersitz nicht auf Sitzen, die nach hinten oder
zur Seite gerichtet sind.
• Beachten Sie bei der Installation folgende Abbildung.
✅
OK
❎
NEIN
⚠
Bitte An-
forderungen
überprüfen
- 05 - - 06 -
WARNING!
E
B1,E
B1,E
E
B1,E
If your child is secured in the vehicle seat with only a 2
point belts, he or she could sustain serious injuries
possibly resulting in death.
Never use in connection with a 2 point belts.
Do not fasten the child seat on the front passenger
seat with validated airbag as it will casue death or
serious injury if airbag exploded. Please always secure
the child seat on the rear seats.
Do not fasten the child seat on the rear facing or
lateral vehicle seats.
Please refer to the following graphic when you install
your child seat
Shut down the air bag three point seat belts
Okay No Meet the certain
conditions
WARNING!
Please leave your baby sit on the cushion if the weight
of he or she is less than 15kgs.
This cushion is designed for new born baby which is not
only keep baby comfortable but also could offer a
certain protection.
Here is the positions of installation for your reference
Forward facing
Rear facing
Two points seat belts
Three points seats belts
Front passenger seat
The rear vehicle seats
√
×
√
×
√
The importance of ensuring that any lap,strap is worn low
down,so that the pelvis is firmly engaged shall be stressed .
Tt shall be recommended that:
(a) The child restraint shall not be used without the cover;
(b) The seat cover should not be replaced with any other than
the one recommended by the manufacturer, because the cover
constitutes an integral part of the restraint performace
√
✅
✅
✅❎
⚠
⚠
❎
Abhängig von den örtlichen Vorschriften. Bitte
überprüfen Sie die Bedienungsanleitung ihres Autos!
Airbag ausschalten!

DE
EN
FR
14 15
FIXLEG 360
WARTUNG
HINWEIS
-
-
könnte sich anderenfalls von der Polsterung lösen)).
-
den Kundendienst wenden.
Entsorgen Sie den Kindersitz sicher. Verkaufen oder verschenken Sie ihn nicht.
Lösen Sie nacheinan-
der die Druckknöpfe
und ziehen Sie dann
den Bezug ab.
können Sie den Bezug
wieder installieren.
ISOFIX-Verankerungen ausgestattet sind. Das Produkt passt je nach Kategorie des Sitzes
Fahrzeugs). Das Produkt ist für folgende Gruppe und ISOFIX-Größe vorgesehen: B1, E
-
Kinder-Rückhalteeinrichtung für die entsprechende Altersgruppe unterstützt.
älterer Modelle, die diesen Hinweis nicht tragen.
Bei Fragen wenden Sie sich bitte an den Hersteller oder den Händler des Produkts.
und geeignet für Sitzpositionen in folgenden Fahrzeugen:
AUTO VORNE HINTEN
für alle Fahrzeuge
Außen Mitte
✅ ❎
Die Sitze und Positionen in anderen Autos sind gegebenenfalls auch geeignet.
Wenden Sie sich an den Hersteller oder Händler des Produkts
-
können.
SPÜLEN Sie die Schnalle GRÜNDLICH ab oder weichen Sie diese über Nacht in war-
Versuchen Sie NICHT,
Verwenden Sie KEINE
Die Teile des Sitzes dürfen NICHT
SITZBEZUG REINIGEN BEZUG ENTFERNEN UND INSTALLIEREN
GURTSCHNALLE REINIGEN
E-3
E-4
E-5
- 21 - - 22 -
E
B1,E
B1,E
E
B1,E
HOW TO MAINTAIN AND CLEAN THE SEAT
1. CLEAN THE SEAT COVER
The seat cover could be removed and
items(do not exceed 30℃, do not spin,
dryer(the fabric may separate
from the padding)
The plastic parts can be cleaned using soapy water. Do not use
A replacement cover is available from your product stockist
or contact your product customer service department.
We advice that child car seat should not be bought or
sold second-hand.
Please dispose of your child seat safely. Do not sell or pass it on.
After an accidient, hte child seat and your car seat belts
should be replaced.
Although they may look undamaged, if you were to have
another accident, the child seat and your car seat belts
may not be able to protect your child as well as they should.
PULL PULL
PULL
PULL
Open both side of the Four buttons and
the front of Two buttons on seat.( F-1)
Take the completed seat cover away.
washed with a mid detergent using the
washing machine’s cycle for delicate
and never tumble dry in an electric
clothes
harsh cleaning agents(such as solvents)
NOTICE
This is an ISOFIX CHILD RESTRAINT SYSTEM. Tt is approved to
Regulation No.44,04 series of amendments for general use in
vehicles fitted with ISOFIX anchorages systems.
It will fit vehicles with positions approved as ISOFIX positions (as
detailed in the vehicle handbook),depending on the category of the
child seat and of the fixture.
The mass group and the ISOFIX size class for which this device is
intended is:B1,E
This is a “Unicersal”child restraint. Tt is approved to Regulation
No.44,04 series of amendments for general use in vehicles fitted
most,but not all,car seats.
A corect fit is likely if the vehicle manufactutrer has declared in the
vehicle handbook that the vehicle is eapable of accepting
a”Universal”child restraint for this age group.
This child restranint has classified as”Universal”under more
stringent conditions than those which applied to earlier designs
which do not carry this notice.
If in doubt,consult either the child restranint manufacturer or the
retailer.
- 23 -
E
B1,E
B1,E
E
B1,E
This child restraint is classified for “(Semi-universal)”used and
is suitable for fixing intothe seat positions of the following cars:
CAR FRONT REAR
Outer Centre
(For all vehicles equipped with isofix) Yes Yes No
Seat positions in other cars may also be suitable to accept this child
restraint,If in doubt,consult either the child restraint manufacturer
or the relailer.
2
1
2. CLEANING THE HARNESS BUCKLE(1)
If child eats and drinks while in the restraint, the harness
buckle may need to be periodically checked and cleaned
of any accumulated debris or dried liquids.
THOROUGHLY RINSE, using warm water SOAK, overnight
if possible, using warm water to loosen hardened drinks
or food.
DO NOT take apart, or attempt to take apart, any part of
the harness of seat when cleaning.
DO NOT use solvents, detergents or washing-up liquid as
these may weaken the harness and the seat.
DO NOT lubricate or oil any part of the seat.
3. REMOVING AND REFITTING THE COVER(2)
Release the snap button one by one, you will take the seat
cover off.
When the seat cover is washed and you could put it on as
well.
- 24 -

DE
EN
FR
16 17
FIXLEG 360
Dear Parents:
Thank you for purchasing the Car Seat.
Please read and follow all instructions before using the Carry Cot.
WARNING! Read the Instruction carefully before use and keep them
for future reference.
EN INSTRUCTION MANUAL
PARTS
- 07 - - 08 -
B1,EB1,E
11
12
13
15 14
16
17 18
19
20
21
22
23
24
25
26
27
28
29
30
31
32
33
1. Belt hook
2. Seat shell
3. Reinforcement
4. Back guard
5. Belt guide
6. ISOFIX indicator
7. ISOFIX release button
8. Fixing sleeve
9. ISOFIX connector
10. ISOFIX SYSTEM
11. Handle for adjusting the height of headrest
12. Headrest
13. Head pillow
14. Holes for belts
15. Shoulder belts
16. Seat cover
17. Crotch pad
18. Center adjuster
19. Center adjuster belt
20. Handle to adjust the reclining positions
21. Base
22. Support Leg Fold switch
23. Support leg adjustment button..
24. Indicator
25. Adult seat belts
26. Vehicle metal tongue
27. Vehicle Buckle
28. Shoulder pads
29. Shoulder belts
30. Metal tongue on child seat
31. Red release button
32. Buckle body on child seat
PRESS
33. Pedal
1. Belt hook
2. Seat shell
3.
4. Back guard
5. Belt guide
6. ISOFIX indicator
7. ISOFIX release button
8. Fixing sleeve
9. ISOFIX connector
10. ISOFIX SYSTEM
11. Handle for adjusting
the height of headrest
12. Headrest
13. Head pillow
14. Holes for belts
15. Shoulder belts
16. Seat cover
17. Crotch pad
18. Center adjuster
19. Center adjuster belt
20. Handle to adjust the
reclining positions
21. Base
22. Support Leg Fold switch
23.
button..
24. Indicator
25. Adult seat belts
26.
27. Vehicle Buckle
28. Shoulder pads
29. Shoulder belts
30. Metal tongue on child
seat
31. Red release button
32. Buckle body on child
seat
33. Pedal
ECE R44/04 GROUP0+I/II(0-25KG)
说明书尺寸为:成品(95X140MM)/纸质:128g铜版纸/装订方式:骑马装

DE
EN
FR
18 19
FIXLEG 360
ASSEMBLY STEP
- 09 - - 10 -
E
B1,E
B1,E
E
B1,E
INSTALLATION IN GROUP0+ REAR FACING
Fastened by ISOFIX+SUPPORT LEG
(Approx for baby from birth-13kgs)
The ISOFIX anchors are behind the vehicle seat where are
always marked with "isofix”(A-1)
Put the child seat on the vehicle seat and adjust it in the
maximal positions(A-2)
One hand pulls the button on the base and turn the seat
aound (it will be locked in 180 degress) with the other
hand(A-3, A-4)
Pull the ISOFIX connectors out at the both side of the seat
and aim at the low anchors at the bottom of the seat(A-5).
Push the seat untill they are locked, you'll hear "click"
"click"(A-6)
One hand press the button on the loading leg, the other
hand stretch it and make it touch the ground(A-7)
The indicator will turn in green (A-8)
A-1
ISOFIX ISOFIX
4
4
A-5
A-3 A-4
A-6
BB--11
CC--33
A-2
A-8
BB--11
CC--33
B-4
- 11 - - 12 -
E
B1,E
B1,E
E
B1,E
INSTALLATION IN GROUP I /FORWARD FACING
Fastened by ISOFIX+SUPPORT LEG
Suitable for baby from 9-18kgs . Approx 9 months to 4 years old)
The ISOFIX anchors are behind the vehicle seat where are always
marked with "isofix"(A-1)
Put the child seat on the vehicle seat in forward facing.
Pull the ISOFIX connectors out at the both side of the seat, if it is
in the locked condition, unlock it and the indicators show in
green. Aim at the low anchors at the bottom of the seat.(B-1)(B-
2)(B-3)
Push the seat back until they are locked, you'll hear "click"
"click” (B-4)
One hand press the red button, the other hand pull the
extension tube down and make sure it touch the ground
and trun in green. (B-5)
A-1
ISOFIX ISOFIX
B-3
B-1
B-2
B-5
- 09 - - 10 -
E
B1,E
B1,E
E
B1,E
INSTALLATION IN GROUP0+ REAR FACING
Fastened by ISOFIX+SUPPORT LEG
(Approx for baby from birth-13kgs)
The ISOFIX anchors are behind the vehicle seat where are
always marked with "isofix”(A-1)
Put the child seat on the vehicle seat and adjust it in the
maximal positions(A-2)
One hand pulls the button on the base and turn the seat
aound (it will be locked in 180 degress) with the other
hand(A-3, A-4)
Pull the ISOFIX connectors out at the both side of the seat
and aim at the low anchors at the bottom of the seat(A-5).
Push the seat untill they are locked, you'll hear "click"
"click"(A-6)
One hand press the button on the loading leg, the other
hand stretch it and make it touch the ground(A-7)
The indicator will turn in green (A-8)
A-1
ISOFIX ISOFIX
44
A-5
A-3 A-4
A-6
BB--11
CC--33
A-2
A-8
BB--11
CC--33
B-4
- 11 - - 12 -
E
B1,E
B1,E
E
B1,E
INSTALLATION IN GROUP I /FORWARD FACING
Fastened by ISOFIX+SUPPORT LEG
Suitable for baby from 9-18kgs . Approx 9 months to 4 years old)
The ISOFIX anchors are behind the vehicle seat where are always
marked with "isofix"(A-1)
Put the child seat on the vehicle seat in forward facing.
Pull the ISOFIX connectors out at the both side of the seat, if it is
in the locked condition, unlock it and the indicators show in
green. Aim at the low anchors at the bottom of the seat.(B-1)(B-
2)(B-3)
Push the seat back until they are locked, you'll hear "click"
"click” (B-4)
One hand press the red button, the other hand pull the
extension tube down and make sure it touch the ground
and trun in green. (B-5)
A-1
ISOFIX ISOFIX
B-3
B-1
B-2
B-5
- 09 - - 10 -
E
B1,E
B1,E
E
B1,E
INSTALLATION IN GROUP0+ REAR FACING
Fastened by ISOFIX+SUPPORT LEG
(Approx for baby from birth-13kgs)
The ISOFIX anchors are behind the vehicle seat where are
always marked with "isofix”(A-1)
Put the child seat on the vehicle seat and adjust it in the
maximal positions(A-2)
One hand pulls the button on the base and turn the seat
aound (it will be locked in 180 degress) with the other
hand(A-3, A-4)
Pull the ISOFIX connectors out at the both side of the seat
and aim at the low anchors at the bottom of the seat(A-5).
Push the seat untill they are locked, you'll hear "click"
"click"(A-6)
One hand press the button on the loading leg, the other
hand stretch it and make it touch the ground(A-7)
The indicator will turn in green (A-8)
A-1
ISOFIX ISOFIX
44
A-5
A-3
A-4
A-6
BB--11
CC--33
A-2
A-8
BB--11
CC--33
B-4
- 11 - - 12 -
E
B1,E
B1,E
E
B1,E
INSTALLATION IN GROUP I /FORWARD FACING
Fastened by ISOFIX+SUPPORT LEG
Suitable for baby from 9-18kgs . Approx 9 months to 4 years old)
The ISOFIX anchors are behind the vehicle seat where are always
marked with "isofix"(A-1)
Put the child seat on the vehicle seat in forward facing.
Pull the ISOFIX connectors out at the both side of the seat, if it is
in the locked condition, unlock it and the indicators show in
green. Aim at the low anchors at the bottom of the seat.(B-1)(B-
2)(B-3)
Push the seat back until they are locked, you'll hear "click"
"click” (B-4)
One hand press the red button, the other hand pull the
extension tube down and make sure it touch the ground
and trun in green. (B-5)
A-1
ISOFIX ISOFIX
B-3
B-1
B-2
B-5
- 09 - - 10 -
E
B1,E
B1,E
E
B1,E
INSTALLATION IN GROUP0+ REAR FACING
Fastened by ISOFIX+SUPPORT LEG
(Approx for baby from birth-13kgs)
The ISOFIX anchors are behind the vehicle seat where are
always marked with "isofix”(A-1)
Put the child seat on the vehicle seat and adjust it in the
maximal positions(A-2)
One hand pulls the button on the base and turn the seat
aound (it will be locked in 180 degress) with the other
hand(A-3, A-4)
Pull the ISOFIX connectors out at the both side of the seat
and aim at the low anchors at the bottom of the seat(A-5).
Push the seat untill they are locked, you'll hear "click"
"click"(A-6)
One hand press the button on the loading leg, the other
hand stretch it and make it touch the ground(A-7)
The indicator will turn in green (A-8)
A-1
ISOFIX ISOFIX
44
A-5
A-3 A-4
A-6
BB--11
CC--33
A-2
A-8
B
B
-
-
1
1
C
C
-
-
3
3
B-4
- 11 - - 12 -
E
B1,E
B1,E
E
B1,E
INSTALLATION IN GROUP I /FORWARD FACING
Fastened by ISOFIX+SUPPORT LEG
Suitable for baby from 9-18kgs . Approx 9 months to 4 years old)
The ISOFIX anchors are behind the vehicle seat where are always
marked with "isofix"(A-1)
Put the child seat on the vehicle seat in forward facing.
Pull the ISOFIX connectors out at the both side of the seat, if it is
in the locked condition, unlock it and the indicators show in
green. Aim at the low anchors at the bottom of the seat.(B-1)(B-
2)(B-3)
Push the seat back until they are locked, you'll hear "click"
"click” (B-4)
One hand press the red button, the other hand pull the
extension tube down and make sure it touch the ground
and trun in green. (B-5)
A-1
ISOFIX ISOFIX
B-3
B-1
B-2
B-5
- 09 - - 10 -
E
B1,E
B1,E
E
B1,E
INSTALLATION IN GROUP0+ REAR FACING
Fastened by ISOFIX+SUPPORT LEG
(Approx for baby from birth-13kgs)
The ISOFIX anchors are behind the vehicle seat where are
always marked with "isofix”(A-1)
Put the child seat on the vehicle seat and adjust it in the
maximal positions(A-2)
One hand pulls the button on the base and turn the seat
aound (it will be locked in 180 degress) with the other
hand(A-3, A-4)
Pull the ISOFIX connectors out at the both side of the seat
and aim at the low anchors at the bottom of the seat(A-5).
Push the seat untill they are locked, you'll hear "click"
"click"(A-6)
One hand press the button on the loading leg, the other
hand stretch it and make it touch the ground(A-7)
The indicator will turn in green (A-8)
A-1
ISOFIX ISOFIX
44
A-5
A-3 A-4
A-6
BB--11
CC--33
A-2
A-8
- 09 - - 10 -
E
B1,E
B1,E
E
B1,E
INSTALLATION IN GROUP0+ REAR FACING
Fastened by ISOFIX+SUPPORT LEG
(Approx for baby from birth-13kgs)
The ISOFIX anchors are behind the vehicle seat where are
always marked with "isofix”(A-1)
Put the child seat on the vehicle seat and adjust it in the
maximal positions(A-2)
One hand pulls the button on the base and turn the seat
aound (it will be locked in 180 degress) with the other
hand(A-3, A-4)
Pull the ISOFIX connectors out at the both side of the seat
and aim at the low anchors at the bottom of the seat(A-5).
Push the seat untill they are locked, you'll hear "click"
"click"(A-6)
One hand press the button on the loading leg, the other
hand stretch it and make it touch the ground(A-7)
The indicator will turn in green (A-8)
A-1
ISOFIX ISOFIX
44
A-5
A-3
A-4
A-6
BB--11
CC--33
A-2
A-8
BB--11
CC--33
B-4
- 11 - - 12 -
E
B1,E
B1,E
E
B1,E
INSTALLATION IN GROUP I /FORWARD FACING
Fastened by ISOFIX+SUPPORT LEG
Suitable for baby from 9-18kgs . Approx 9 months to 4 years old)
The ISOFIX anchors are behind the vehicle seat where are always
marked with "isofix"(A-1)
Put the child seat on the vehicle seat in forward facing.
Pull the ISOFIX connectors out at the both side of the seat, if it is
in the locked condition, unlock it and the indicators show in
green. Aim at the low anchors at the bottom of the seat.(B-1)(B-
2)(B-3)
Push the seat back until they are locked, you'll hear "click"
"click” (B-4)
One hand press the red button, the other hand pull the
extension tube down and make sure it touch the ground
and trun in green. (B-5)
A-1
ISOFIX ISOFIX
B-3
B-1
B-2
B-5
- 09 - - 10 -
E
B1,E
B1,E
E
B1,E
INSTALLATION IN GROUP0+ REAR FACING
Fastened by ISOFIX+SUPPORT LEG
(Approx for baby from birth-13kgs)
The ISOFIX anchors are behind the vehicle seat where are
always marked with "isofix”(A-1)
Put the child seat on the vehicle seat and adjust it in the
maximal positions(A-2)
One hand pulls the button on the base and turn the seat
aound (it will be locked in 180 degress) with the other
hand(A-3, A-4)
Pull the ISOFIX connectors out at the both side of the seat
and aim at the low anchors at the bottom of the seat(A-5).
Push the seat untill they are locked, you'll hear "click"
"click"(A-6)
One hand press the button on the loading leg, the other
hand stretch it and make it touch the ground(A-7)
The indicator will turn in green (A-8)
A-1
ISOFIX ISOFIX
44
A-5
A-3 A-4
A-6
B
B
-
-
1
1
C
C
-
-
3
3
A-2
A-8
BB--11
CC--33
B-4
- 11 - - 12 -
E
B1,E
B1,E
E
B1,E
INSTALLATION IN GROUP I /FORWARD FACING
Fastened by ISOFIX+SUPPORT LEG
Suitable for baby from 9-18kgs . Approx 9 months to 4 years old)
The ISOFIX anchors are behind the vehicle seat where are always
marked with "isofix"(A-1)
Put the child seat on the vehicle seat in forward facing.
Pull the ISOFIX connectors out at the both side of the seat, if it is
in the locked condition, unlock it and the indicators show in
green. Aim at the low anchors at the bottom of the seat.(B-1)(B-
2)(B-3)
Push the seat back until they are locked, you'll hear "click"
"click” (B-4)
One hand press the red button, the other hand pull the
extension tube down and make sure it touch the ground
and trun in green. (B-5)
A-1
ISOFIX ISOFIX
B-3
B-1
B-2
B-5
- 09 - - 10 -
E
B1,E
B1,E
E
B1,E
INSTALLATION IN GROUP0+ REAR FACING
Fastened by ISOFIX+SUPPORT LEG
(Approx for baby from birth-13kgs)
The ISOFIX anchors are behind the vehicle seat where are
always marked with "isofix”(A-1)
Put the child seat on the vehicle seat and adjust it in the
maximal positions(A-2)
One hand pulls the button on the base and turn the seat
aound (it will be locked in 180 degress) with the other
hand(A-3, A-4)
Pull the ISOFIX connectors out at the both side of the seat
and aim at the low anchors at the bottom of the seat(A-5).
Push the seat untill they are locked, you'll hear "click"
"click"(A-6)
One hand press the button on the loading leg, the other
hand stretch it and make it touch the ground(A-7)
The indicator will turn in green (A-8)
A-1
ISOFIX ISOFIX
44
A-5
A-3 A-4
A-6
BB--11
CC--33
A-2
A-8
ISOFIX anchors are behind the
vehicle seat where are always
Put the child seat on the
vehicle seat and adjust it in
The ISOFIX anchors are behind
the vehicle seat where are
Put the child seat on
the vehicle seat in
forward facing. Pull the ISOFIX con-
nectors out at the both side of the
seat, if it is in the locked condition,
unlock it and the indicators show
One hand pulls the
button on the base
locked in 180 degress) with the
other hand.
Pull the ISOFIX connectors out
at the both side of the seat
Push the seat untill they are
Push the seat back until they
One hand press the red but-
ton, the other hand pull the
sure it touch the ground and trun
in green.
One hand press the button
on the loading leg, the other
the ground.
The indicator will turn in
green.
GROUP0+ / REAR FACING
Fastened by ISOFIX+SUPPORT LEG (Approx for baby from birth-13kgs) GROUP I /FORWARD FACING
Fastened by ISOFIX+SUPPORT LEG (Approx for baby from 9-18kgs)
B-1
B-3
B-5
B-2
B-4
B-6

DE
EN
FR
20 21
FIXLEG 360
SETTINGS
- 13 - - 14 -
E
B1,E
B1,E
E
B1,E
HOW TO RESTRAIN YOUR BABY ON THE
SEAT IN GROUP0+/1
reclining positions:
By pull the red reclining adjusting
device up, you will get the right
and suitable positions for your child.
1.sitting position
3. sleeping position
◆
◆
RECLINING POSITIONS(C)
Open the buckle by pressing the red button(C-5)
Make sure the baby's head won't exceed the heardrest (C-7)
Put the metal tongues together and lock the buckle(C-8)
Pull the central adjuster belt(C-9)
Test the gab between baby's shoulder and shoulder pad(1
finger gab is okay, don't too tight and too loose)
Also check if all belts are straight, as the twisted belts are
dangerous(C-10)
One hand press the central adjuster button, the other hand
pull the seat belts out(C-1)(C-2)
Adjust the height of the headrest by pulling "Height adjuster"
There are 7 positions to adjust the height of the headrest.(C-3)(C-4)
C
1
1
2
2
3
3
C-1
2
C-2
C-3
C-5 C-6
C-4
- 13 - - 14 -
E
B1,E
B1,E
E
B1,E
HOW TO RESTRAIN YOUR BABY ON THE
SEAT IN GROUP0+/1
reclining positions:
By pull the red reclining adjusting
device up, you will get the right
and suitable positions for your child.
1.sitting position
3. sleeping position
◆
◆
RECLINING POSITIONS(C)
Open the buckle by pressing the red button(C-5)
Make sure the baby's head won't exceed the heardrest (C-7)
Put the metal tongues together and lock the buckle(C-8)
Pull the central adjuster belt(C-9)
Test the gab between baby's shoulder and shoulder pad(1
finger gab is okay, don't too tight and too loose)
Also check if all belts are straight, as the twisted belts are
dangerous(C-10)
One hand press the central adjuster button, the other hand
pull the seat belts out(C-1)(C-2)
Adjust the height of the headrest by pulling "Height adjuster"
There are 7 positions to adjust the height of the headrest.(C-3)(C-4)
C
11
22
33
C-1
2
C-2
C-3
C-5
C-6
C-4
C-10
- 15 - - 16 -
E
B1,E
B1,E
E
B1,E
C-8
D-8
C-9
C-7
HOW TO INSTALL THE CHILD SEAT IN
GROUP II
FORWARD FACING
Attention:
Please remove 5 points harness system in Group II (15-25KGS)
15-25
C-10
- 15 - - 16 -
E
B1,E
B1,E
E
B1,E
C-8
D-8
C-9
C-7
HOW TO INSTALL THE CHILD SEAT IN
GROUP II
FORWARD FACING
Attention:
Please remove 5 points harness system in Group II (15-25KGS)
15-25
- 13 - - 14 -
E
B1,E
B1,E
E
B1,E
HOW TO RESTRAIN YOUR BABY ON THE
SEAT IN GROUP0+/1
reclining positions:
By pull the red reclining adjusting
device up, you will get the right
and suitable positions for your child.
1.sitting position
3. sleeping position
◆
◆
RECLINING POSITIONS(C)
Open the buckle by pressing the red button(C-5)
Make sure the baby's head won't exceed the heardrest (C-7)
Put the metal tongues together and lock the buckle(C-8)
Pull the central adjuster belt(C-9)
Test the gab between baby's shoulder and shoulder pad(1
finger gab is okay, don't too tight and too loose)
Also check if all belts are straight, as the twisted belts are
dangerous(C-10)
One hand press the central adjuster button, the other hand
pull the seat belts out(C-1)(C-2)
Adjust the height of the headrest by pulling "Height adjuster"
There are 7 positions to adjust the height of the headrest.(C-3)(C-4)
C
11
22
33
C-1
2
C-2
C-3
C-5 C-6
C-4
- 13 - - 14 -
E
B1,E
B1,E
E
B1,E
HOW TO RESTRAIN YOUR BABY ON THE
SEAT IN GROUP0+/1
reclining positions:
By pull the red reclining adjusting
device up, you will get the right
and suitable positions for your child.
1.sitting position
3. sleeping position
◆
◆
RECLINING POSITIONS(C)
Open the buckle by pressing the red button(C-5)
Make sure the baby's head won't exceed the heardrest (C-7)
Put the metal tongues together and lock the buckle(C-8)
Pull the central adjuster belt(C-9)
Test the gab between baby's shoulder and shoulder pad(1
finger gab is okay, don't too tight and too loose)
Also check if all belts are straight, as the twisted belts are
dangerous(C-10)
One hand press the central adjuster button, the other hand
pull the seat belts out(C-1)(C-2)
Adjust the height of the headrest by pulling "Height adjuster"
There are 7 positions to adjust the height of the headrest.(C-3)(C-4)
C
11
22
33
C-1
2
C-2
C-3
C-5
C-6
C-4
C-10
- 15 - - 16 -
E
B1,E
B1,E
E
B1,E
C-8
D-8
C-9
C-7
HOW TO INSTALL THE CHILD SEAT IN
GROUP II
FORWARD FACING
Attention:
Please remove 5 points harness system in Group II (15-25KGS)
15-25
C-10
- 15 - - 16 -
E
B1,E
B1,E
E
B1,E
C-8
D-8
C-9
C-7
HOW TO INSTALL THE CHILD SEAT IN
GROUP II
FORWARD FACING
Attention:
Please remove 5 points harness system in Group II (15-25KGS)
15-25
- 13 - - 14 -
E
B1,E
B1,E
E
B1,E
HOW TO RESTRAIN YOUR BABY ON THE
SEAT IN GROUP0+/1
reclining positions:
By pull the red reclining adjusting
device up, you will get the right
and suitable positions for your child.
1.sitting position
3. sleeping position
◆
◆
RECLINING POSITIONS(C)
Open the buckle by pressing the red button(C-5)
Make sure the baby's head won't exceed the heardrest (C-7)
Put the metal tongues together and lock the buckle(C-8)
Pull the central adjuster belt(C-9)
Test the gab between baby's shoulder and shoulder pad(1
finger gab is okay, don't too tight and too loose)
Also check if all belts are straight, as the twisted belts are
dangerous(C-10)
One hand press the central adjuster button, the other hand
pull the seat belts out(C-1)(C-2)
Adjust the height of the headrest by pulling "Height adjuster"
There are 7 positions to adjust the height of the headrest.(C-3)(C-4)
C
11
22
33
C-1
2
C-2
C-3
C-5 C-6
C-4
RECLINING POSITIONS
By pull the red reclining adjusting device up, you will get the
right and suitable positions for your child.
1. sitting position
3. sleeping position
HOW TO RESTRAIN YOUR BABY
Open the buckle by pressing
the red button.
Put the beld together.
Make sure the baby‘s head
won‘t exceed the heardrest.
together and lock the buckle.
Pull the central adjuster belt
Test the gab between ba-
by‘s shoulder and shoulder
tight and too loose) Also check if
all belts are straight, as the twisted
belts are dangerous.
One hand press
the central adjuster
button, the other hand pull the
seat belts out.
Adjust the height
of the headrest by
are 7 positions to adjust the height
of the headrest.

DE
EN
FR
22 23
FIXLEG 360
ASSEMBLY STEP
GROUP II / FORWARD FACING
Fastened by ISOFIX+SUPPORT LEG (Approx for kids from 15-25kg)
- 17 - - 18 -
E
B1,E
B1,E
E
B1,E
1. USE ADULT SEAT BELTS TO FASTEN
THE SEAT IN GROUP II (15-25KGS)
Suitable for kids approx 3 to 7 years old.
If your child is bigger enough and can not fit the shoulder belts, you should
adjust it or take it off.
Pressing the button on the central adjuster and pull the shoulder belts out(D-1)
Push the Red button of buckle, Open the buckle and let two belt hang on the
Harness B
Pull belts out from the slots (D-4)
Harness belt and shoulder belts hiding.
Open six buttons on the seat cover inside (D-6)
uckle body removal (D-5)
Locate the metal buckle strap retainer on bottom of the shell.
Pull retainer away from child restraint to loosen.
Turn the retainer so that the short side will go through the slot in the restraint
shell.
Push the retainer through slots in the shell and cover to the top of the restraint.
D-1
D-5
D-3
D-2
both side of car seat. (D-2)
D-4
Take the pillow,cushion and buckle crotch pad away accordingly. (D-3)
Put the Harness belt and two shoulder belt hide at behind of the seat over.(D-7)
PULL PULL
PULLPULL
PULL PULL
D-6 D-7
Pull the adult seat belts out and feed the diagonal section of the vehicle belt
Fasten the seat belt across your child. The lap section should rest on the lap
belt guides on seat. Make sure the seat belt is not twisted.each side of the child
(E-4,E-5)
Buckle the adult seat belts to the anchorage of the vehicle seat
Check the position of vehicle buckle, ensuring it is not being pulled around
child seat onto the red belt guide.the
Feed the diagonal section of the adult belt through the upper belt guide on
the opposite side to the buckle.(E-6)
- 19 - - 20 -
E
B1,E
B1,E
E
B1,E
E-1
E-2
E-3
E-4
E-5
through the upper belt guide,(E-1,E-2)
E-4
E-5
E-6
- 21 - - 22 -
B1,E
E
B1,E
E-3
ATTENTION:
make the belt goes through the belt guides on the
headrest(1) and the seat(2) (E-3)
1
2
- 17 - - 18 -
E
B1,E
B1,E
E
B1,E
1. USE ADULT SEAT BELTS TO FASTEN
THE SEAT IN GROUP II (15-25KGS)
Suitable for kids approx 3 to 7 years old.
If your child is bigger enough and can not fit the shoulder belts, you should
adjust it or take it off.
Pressing the button on the central adjuster and pull the shoulder belts out(D-1)
Push the Red button of buckle, Open the buckle and let two belt hang on the
Harness B
Pull belts out from the slots (D-4)
Harness belt and shoulder belts hiding.
Open six buttons on the seat cover inside (D-6)
uckle body removal (D-5)
Locate the metal buckle strap retainer on bottom of the shell.
Pull retainer away from child restraint to loosen.
Turn the retainer so that the short side will go through the slot in the restraint
shell.
Push the retainer through slots in the shell and cover to the top of the restraint.
D-1
D-5
D-3
D-2
both side of car seat. (D-2)
D-4
Take the pillow,cushion and buckle crotch pad away accordingly. (D-3)
Put the Harness belt and two shoulder belt hide at behind of the seat over.(D-7)
PULL PULL
PULLPULL
PULL PULL
D-6 D-7
Pull the adult seat belts out and feed the diagonal section of the vehicle belt
Fasten the seat belt across your child. The lap section should rest on the lap
belt guides on seat. Make sure the seat belt is not twisted.each side of the child
(E-4,E-5)
Buckle the adult seat belts to the anchorage of the vehicle seat
Check the position of vehicle buckle, ensuring it is not being pulled around
child seat onto the red belt guide.the
Feed the diagonal section of the adult belt through the upper belt guide on
the opposite side to the buckle.(E-6)
- 19 - - 20 -
E
B1,E
B1,E
E
B1,E
E-1 E-2
E-3
E-4
E-5
through the upper belt guide,(E-1,E-2)
E-4
E-5
E-6
- 21 - - 22 -
B1,E
E
B1,E
E-3
ATTENTION:
make the belt goes through the belt guides on the
headrest(1) and the seat(2) (E-3)
1
2
- 17 - - 18 -
E
B1,E
B1,E
E
B1,E
1. USE ADULT SEAT BELTS TO FASTEN
THE SEAT IN GROUP II (15-25KGS)
Suitable for kids approx 3 to 7 years old.
If your child is bigger enough and can not fit the shoulder belts, you should
adjust it or take it off.
Pressing the button on the central adjuster and pull the shoulder belts out(D-1)
Push the Red button of buckle, Open the buckle and let two belt hang on the
Harness B
Pull belts out from the slots (D-4)
Harness belt and shoulder belts hiding.
Open six buttons on the seat cover inside (D-6)
uckle body removal (D-5)
Locate the metal buckle strap retainer on bottom of the shell.
Pull retainer away from child restraint to loosen.
Turn the retainer so that the short side will go through the slot in the restraint
shell.
Push the retainer through slots in the shell and cover to the top of the restraint.
D-1
D-5
D-3
D-2
both side of car seat. (D-2)
D-4
Take the pillow,cushion and buckle crotch pad away accordingly. (D-3)
Put the Harness belt and two shoulder belt hide at behind of the seat over.(D-7)
PULL PULL
PULLPULL
PULL PULL
D-6
D-7
- 17 - - 18 -
E
B1,E
B1,E
E
B1,E
1. USE ADULT SEAT BELTS TO FASTEN
THE SEAT IN GROUP II (15-25KGS)
Suitable for kids approx 3 to 7 years old.
If your child is bigger enough and can not fit the shoulder belts, you should
adjust it or take it off.
Pressing the button on the central adjuster and pull the shoulder belts out(D-1)
Push the Red button of buckle, Open the buckle and let two belt hang on the
Harness B
Pull belts out from the slots (D-4)
Harness belt and shoulder belts hiding.
Open six buttons on the seat cover inside (D-6)
uckle body removal (D-5)
Locate the metal buckle strap retainer on bottom of the shell.
Pull retainer away from child restraint to loosen.
Turn the retainer so that the short side will go through the slot in the restraint
shell.
Push the retainer through slots in the shell and cover to the top of the restraint.
D-1
D-5
D-3
D-2
both side of car seat. (D-2)
D-4
Take the pillow,cushion and buckle crotch pad away accordingly. (D-3)
Put the Harness belt and two shoulder belt hide at behind of the seat over.(D-7)
PULL PULL
PULLPULL
PULL PULL
D-6 D-7
Pull the adult seat belts out and feed the diagonal section of the vehicle belt
Fasten the seat belt across your child. The lap section should rest on the lap
belt guides on seat. Make sure the seat belt is not twisted.each side of the child
(E-4,E-5)
Buckle the adult seat belts to the anchorage of the vehicle seat
Check the position of vehicle buckle, ensuring it is not being pulled around
child seat onto the red belt guide.the
Feed the diagonal section of the adult belt through the upper belt guide on
the opposite side to the buckle.(E-6)
- 19 - - 20 -
E
B1,E
B1,E
E
B1,E
E-1 E-2
E-3
E-4
E-5
through the upper belt guide,(E-1,E-2)
E-4
E-5
E-6
- 21 - - 22 -
B1,E
E
B1,E
E-3
ATTENTION:
make the belt goes through the belt guides on the
headrest(1) and the seat(2) (E-3)
1
2
- 17 - - 18 -
E
B1,E
B1,E
E
B1,E
1. USE ADULT SEAT BELTS TO FASTEN
THE SEAT IN GROUP II (15-25KGS)
Suitable for kids approx 3 to 7 years old.
If your child is bigger enough and can not fit the shoulder belts, you should
adjust it or take it off.
Pressing the button on the central adjuster and pull the shoulder belts out(D-1)
Push the Red button of buckle, Open the buckle and let two belt hang on the
Harness B
Pull belts out from the slots (D-4)
Harness belt and shoulder belts hiding.
Open six buttons on the seat cover inside (D-6)
uckle body removal (D-5)
Locate the metal buckle strap retainer on bottom of the shell.
Pull retainer away from child restraint to loosen.
Turn the retainer so that the short side will go through the slot in the restraint
shell.
Push the retainer through slots in the shell and cover to the top of the restraint.
D-1
D-5
D-3
D-2
both side of car seat. (D-2)
D-4
Take the pillow,cushion and buckle crotch pad away accordingly. (D-3)
Put the Harness belt and two shoulder belt hide at behind of the seat over.(D-7)
PULL PULL
PULLPULL
PULL PULL
D-6
D-7
Pull the adult seat belts out and feed the diagonal section of the vehicle belt
Fasten the seat belt across your child. The lap section should rest on the lap
belt guides on seat. Make sure the seat belt is not twisted.each side of the child
(E-4,E-5)
Buckle the adult seat belts to the anchorage of the vehicle seat
Check the position of vehicle buckle, ensuring it is not being pulled around
child seat onto the red belt guide.the
Feed the diagonal section of the adult belt through the upper belt guide on
the opposite side to the buckle.(E-6)
- 19 - - 20 -
E
B1,E
B1,E
E
B1,E
E-1 E-2
E-3
E-4
E-5
through the upper belt guide,(E-1,E-2)
E-4
E-5
E-6
- 21 - - 22 -
B1,E
E
B1,E
E-3
ATTENTION:
make the belt goes through the belt guides on the
headrest(1) and the seat(2) (E-3)
1
2
- 17 - - 18 -
E
B1,E
B1,E
E
B1,E
1. USE ADULT SEAT BELTS TO FASTEN
THE SEAT IN GROUP II (15-25KGS)
Suitable for kids approx 3 to 7 years old.
If your child is bigger enough and can not fit the shoulder belts, you should
adjust it or take it off.
Pressing the button on the central adjuster and pull the shoulder belts out(D-1)
Push the Red button of buckle, Open the buckle and let two belt hang on the
Harness B
Pull belts out from the slots (D-4)
Harness belt and shoulder belts hiding.
Open six buttons on the seat cover inside (D-6)
uckle body removal (D-5)
Locate the metal buckle strap retainer on bottom of the shell.
Pull retainer away from child restraint to loosen.
Turn the retainer so that the short side will go through the slot in the restraint
shell.
Push the retainer through slots in the shell and cover to the top of the restraint.
D-1
D-5
D-3
D-2
both side of car seat. (D-2)
D-4
Take the pillow,cushion and buckle crotch pad away accordingly. (D-3)
Put the Harness belt and two shoulder belt hide at behind of the seat over.(D-7)
PULL PULL
PULLPULL
PULL PULL
D-6
D-7
If your child is bigger enough
belts, you should adjust it or take
central adjuster and pull the shoul-
der belts out.
Push the Red button of
buckle, Open the buckle and
let two belt hang on the both side
of car seat.
child restraint to loosen. Turn the
retainer so that the short side will
go through the slot in the restraint
shell. Push the retainer through
slots in the shell and cover to the
top of the restraint.
Take the pillow,cushion and
buckle crotch pad away
accordingly.
3.
A T T E N T I O N : make the
belt goes through the belt
guides on the headrest(1) and
the seat(2)
Harness belt and shoulder
belts hiding.Open six buttons
on the seat cover inside
Put the Harness belt and
two shoulder belt hide at
behind of the seat over.
Buckle the adult seat belts
to the anchorage of the
vehicle seat Check the position of
vehicle buckle, ensuring it is not
being pulled around the child seat
onto the red belt guide. Feed the
diagonal section of the adult belt
through the upper belt guide on
the opposite side to the buckle.
Pull the adult seat
belts out and feed
the diagonal section of the vehicle
belt through the upper belt guide.
Fasten the seat belt
across your child.
The lap section should rest on the
lap belt guides on each side of the
child seat. Make sure the seat belt
is not twisted.

DE
EN
FR
24 25
FIXLEG 360
READ CAREFULLY AND READ CAREFULLY
AND KEEP THESE INSTRUCTIONS FOR FUTURE
REFERENCE
IMPORTANT
ECE R44/04
• WARNING:
your child car seat.
• WARNING: DO NOT use the child seat on a passenger seat airbag unless
your vehicle it is safe.
• WARNING: DO NOT use the child seat on side facing vehicle seats.
• WARNING: DO NOT use anything, such as a cushion or coat, to raise the
seat belts would not be able to protect your child as well as they should.
• WARNING:
• WARNING:
• WARNING:
• WARNING: DO NOT leave loose objects, such as luggage or books, in the
injuries. Large and heavy loose objects are a particular risk.
• WARNING: DO NOT leave folding passenger seats unlatched. If you have to
stop your car suddenly a loose seat back could injure your child.
• WARNING: DO NOT allow children to play with or adjust the child seat.
• DO cover the child seat if your car is left in direct sunlight. Fittings can beco-
• DO
passenger seat or in the door of your car.
• DO
• DO store the child seat in a safe place when it is not being used. Avoid pla-
cing heavy objectson top of it and do not store near direct heat sources or in
direct sunlight.
• DO always keep the child seat secure, even if it is not being used by your
child.
• DO
• IMPORTANT-The child seat only be used with 3—points belt
(approved to UN/ECE Regulation N 0. 16 or other equivalent standards).
•
•
• It is not allowed to leave your child alone in your car
• It is not allowed to install the seat in the seat which has activateair bag, as it
• It is not allowed to fasten the seat in forward facing if the weightof child is
less than 13kgs.
•
way of installation will keep safe.
•
tether.
•
install the child seat in the rear vehicle seat.
•
•
• Do not leave loose objects, such as luggage or booksin the back of the seat.
-
and heavy onjects are a particular risk.
• -
and heavy onjects are a particular risk.
•
there is no child in it. A loose seat will cause injury in a brake.
• Do not use child seat without seat cover.
• Do not allow children to play with or adjust the child seat.
• Do not attempt
• Do not use -
gand it should be only used in your car.
• Do cover the child seat if your car is left in direct sunlight. Fittings can beco-
• Do store the child seat in a safe place when it is not being used. Avoid
placing heavy objects on top and do not store near direct heat sources or in
direct sunlight.
• Do make sure all the seat belts are straight, not twisted.
• Do make sure
• Attention:

DE
EN
FR
26 27
FIXLEG 360
•
good condition.
•
Here is the positions of installation for your
reference
- 05 - - 06 -
WARNING!
E
B1,E
B1,E
E
B1,E
If your child is secured in the vehicle seat with only a 2
point belts, he or she could sustain serious injuries
possibly resulting in death.
Never use in connection with a 2 point belts.
Do not fasten the child seat on the front passenger
seat with validated airbag as it will casue death or
serious injury if airbag exploded. Please always secure
the child seat on the rear seats.
Do not fasten the child seat on the rear facing or
lateral vehicle seats.
Please refer to the following graphic when you install
your child seat
Shut down the air bag three point seat belts
Okay No Meet the certain
conditions
WARNING!
Please leave your baby sit on the cushion if the weight
of he or she is less than 15kgs.
This cushion is designed for new born baby which is not
only keep baby comfortable but also could offer a
certain protection.
Here is the positions of installation for your reference
Forward facing
Rear facing
Two points seat belts
Three points seats belts
Front passenger seat
The rear vehicle seats
√
×
√
×
√
The importance of ensuring that any lap,strap is worn low
down,so that the pelvis is firmly engaged shall be stressed .
Tt shall be recommended that:
(a) The child restraint shall not be used without the cover;
(b) The seat cover should not be replaced with any other than
the one recommended by the manufacturer, because the cover
constitutes an integral part of the restraint performace
√
✅
Forward facing
✅
Rear facing
❎
Two points seat belts
✅
Three points seats belts
❎
Front passenger seat
✅
The rear vehicle seats
WARNING! If your child is secured in the vehicle seat with only a 2 point
belts, he or she could sustain serious injuries possibly resulting in death.
Never use in connection with a 2 point belts.
WARNING! Please leave your baby sit on the cushion if the weight
of he or she is less than 15kgs. This cushion is designed for new born
certain protection.
• Do not fasten the child seat on the front passenger seat with valida-
ted airbag as it will casue death or serious injury if airbag exploded.
Please always secure the child seat on the rear seats.
• Do not fasten the child seat on the rear facing or lateral vehicle seats.
Please refer to the following graphic when you install your child seat
✅
OK
❎
NO
⚠
Meet the
certain
conditions
- 05 - - 06 -
WARNING!
E
B1,E
B1,E
E
B1,E
If your child is secured in the vehicle seat with only a 2
point belts, he or she could sustain serious injuries
possibly resulting in death.
Never use in connection with a 2 point belts.
Do not fasten the child seat on the front passenger
seat with validated airbag as it will casue death or
serious injury if airbag exploded. Please always secure
the child seat on the rear seats.
Do not fasten the child seat on the rear facing or
lateral vehicle seats.
Please refer to the following graphic when you install
your child seat
Shut down the air bag three point seat belts
Okay No Meet the certain
conditions
WARNING!
Please leave your baby sit on the cushion if the weight
of he or she is less than 15kgs.
This cushion is designed for new born baby which is not
only keep baby comfortable but also could offer a
certain protection.
Here is the positions of installation for your reference
Forward facing
Rear facing
Two points seat belts
Three points seats belts
Front passenger seat
The rear vehicle seats
√
×
√
×
√
The importance of ensuring that any lap,strap is worn low
down,so that the pelvis is firmly engaged shall be stressed .
Tt shall be recommended that:
(a) The child restraint shall not be used without the cover;
(b) The seat cover should not be replaced with any other than
the one recommended by the manufacturer, because the cover
constitutes an integral part of the restraint performace
√
✅
✅
✅❎
⚠
❎
Depending on local regulations. Please
Shut down the airbag!

DE
EN
FR
28 29
FIXLEG 360
MAINTENANCE
NOTICE
Open both side of the Four buttons and the front of Two
away.
-
or sold second-hand.
Please dispose of your child seat safely. Do not sell or pass it on. After an accidient, hte child
seat and your car seat belts should be replaced.
Release the snap
button one by one,
you will take the seat
seat cover is washed
and you could put it on
as well.
This is an ISOFIX CHILD RESTRAINT SYSTEM. Tt is approved to Regulation No.44,04 series of
-
-
size class for which this device is intended is:B1,E
-
or the retailer.
seat positions of the following cars:
CAR FRONT REAR
Outer Centre
✅ ❎
THOROUGHLY RINSE
water to loosen hardened drinks or food.
DO NOT-
ning.
DO NOT
and the seat.
DO NOT lubricate or oil any part of the seat.
CLEAN THE SEAT COVER REMOVING AND REFITTING THE COVER
CLEANING THE HARNESS BUCKLE
E-3
E-4
E-5
- 21 - - 22 -
E
B1,E
B1,E
E
B1,E
HOW TO MAINTAIN AND CLEAN THE SEAT
1. CLEAN THE SEAT COVER
The seat cover could be removed and
items(do not exceed 30℃, do not spin,
dryer(the fabric may separate
from the padding)
The plastic parts can be cleaned using soapy water. Do not use
A replacement cover is available from your product stockist
or contact your product customer service department.
We advice that child car seat should not be bought or
sold second-hand.
Please dispose of your child seat safely. Do not sell or pass it on.
After an accidient, hte child seat and your car seat belts
should be replaced.
Although they may look undamaged, if you were to have
another accident, the child seat and your car seat belts
may not be able to protect your child as well as they should.
PULL PULL
PULL
PULL
Open both side of the Four buttons and
the front of Two buttons on seat.( F-1)
Take the completed seat cover away.
washed with a mid detergent using the
washing machine’s cycle for delicate
and never tumble dry in an electric
clothes
harsh cleaning agents(such as solvents)
NOTICE
This is an ISOFIX CHILD RESTRAINT SYSTEM. Tt is approved to
Regulation No.44,04 series of amendments for general use in
vehicles fitted with ISOFIX anchorages systems.
It will fit vehicles with positions approved as ISOFIX positions (as
detailed in the vehicle handbook),depending on the category of the
child seat and of the fixture.
The mass group and the ISOFIX size class for which this device is
intended is:B1,E
This is a “Unicersal”child restraint. Tt is approved to Regulation
No.44,04 series of amendments for general use in vehicles fitted
most,but not all,car seats.
A corect fit is likely if the vehicle manufactutrer has declared in the
vehicle handbook that the vehicle is eapable of accepting
a”Universal”child restraint for this age group.
This child restranint has classified as”Universal”under more
stringent conditions than those which applied to earlier designs
which do not carry this notice.
If in doubt,consult either the child restranint manufacturer or the
retailer.
- 23 -
E
B1,E
B1,E
E
B1,E
This child restraint is classified for “(Semi-universal)”used and
is suitable for fixing intothe seat positions of the following cars:
CAR FRONT REAR
Outer Centre
(For all vehicles equipped with isofix) Yes Yes No
Seat positions in other cars may also be suitable to accept this child
restraint,If in doubt,consult either the child restraint manufacturer
or the relailer.
2
1
2. CLEANING THE HARNESS BUCKLE(1)
If child eats and drinks while in the restraint, the harness
buckle may need to be periodically checked and cleaned
of any accumulated debris or dried liquids.
THOROUGHLY RINSE, using warm water SOAK, overnight
if possible, using warm water to loosen hardened drinks
or food.
DO NOT take apart, or attempt to take apart, any part of
the harness of seat when cleaning.
DO NOT use solvents, detergents or washing-up liquid as
these may weaken the harness and the seat.
DO NOT lubricate or oil any part of the seat.
3. REMOVING AND REFITTING THE COVER(2)
Release the snap button one by one, you will take the seat
cover off.
When the seat cover is washed and you could put it on as
well.
- 24 -
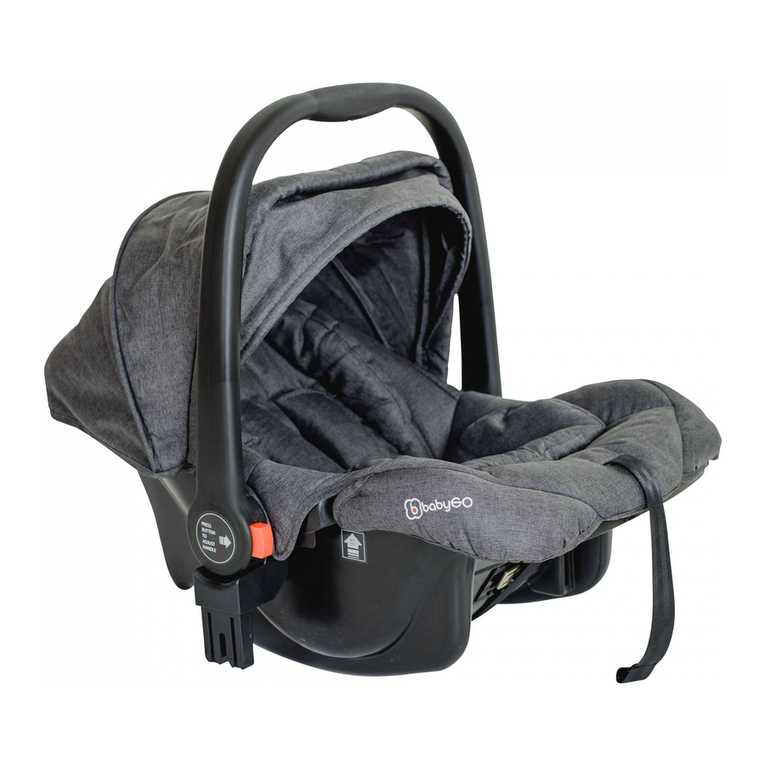
DE
EN
FR
30 31
FIXLEG 360
Chers parents :
Nous vous remercions d‘avoir acheté la nacelle siège de voiture. Veuillez
lire et suivre toutes les instructions avant d‘utiliser la nacelle Carry Cot.
AVERTISSEMENT ! Lisez attentivement les instructions avant
toute utilisation et conservez-les pour référence ultérieure.
FR MODE D’EMPLOI
PIÈCES
- 07 - - 08 -
B1,EB1,E
11
12
13
15 14
16
17 18
19
20
21
22
23
24
25
26
27
28
29
30
31
32
33
1. Belt hook
2. Seat shell
3. Reinforcement
4. Back guard
5. Belt guide
6. ISOFIX indicator
7. ISOFIX release button
8. Fixing sleeve
9. ISOFIX connector
10. ISOFIX SYSTEM
11. Handle for adjusting the height of headrest
12. Headrest
13. Head pillow
14. Holes for belts
15. Shoulder belts
16. Seat cover
17. Crotch pad
18. Center adjuster
19. Center adjuster belt
20. Handle to adjust the reclining positions
21. Base
22. Support Leg Fold switch
23. Support leg adjustment button..
24. Indicator
25. Adult seat belts
26. Vehicle metal tongue
27. Vehicle Buckle
28. Shoulder pads
29. Shoulder belts
30. Metal tongue on child seat
31. Red release button
32. Buckle body on child seat
PRESS
33. Pedal
1. Crochet de ceinture
2.
3.
4.
5. Guide d’insertion de
ceinture
6. Indicateur ISOFIX
7. Bouton de déverrouilla-
8.
9. Connecteur ISOFIX
10. SYSTÈME ISOFIX
11. Poignée de réglage de la
hauteur de l‘appui-tête
12. Appui-tête
13. Oreiller de tête
14. Trous pour ceintures
15. Bretelles
16.
17. Coussin de protection
18. Ajusteur du harnais
19. Sangle ajusteur du
harnais
20. Poignée pour régler les
positions d‘inclinaison
21. Base
22. Bouton de pliage de la
23. Bouton de réglage de la
24. Indicateur de verrou-
illage
25. Ceintures de sécurité
pour adultes
26.
véhicule
27. Boucle du véhicule
28. Coussins de protection
des bretelles
29. Bretelles
30.
31. Bouton de déverrouilla-
ge rouge
32. Boucle des bretelles du
33. Pédale
ECE R44/04 GROUP0+I/II(0-25KG)
说明书尺寸为:成品(95X140MM)/纸质:128g铜版纸/装订方式:骑马装

DE
EN
FR
32 33
FIXLEG 360
ÉTAPES D’ASSEMBLAGE
- 09 - - 10 -
E
B1,E
B1,E
E
B1,E
INSTALLATION IN GROUP0+ REAR FACING
Fastened by ISOFIX+SUPPORT LEG
(Approx for baby from birth-13kgs)
The ISOFIX anchors are behind the vehicle seat where are
always marked with "isofix”(A-1)
Put the child seat on the vehicle seat and adjust it in the
maximal positions(A-2)
One hand pulls the button on the base and turn the seat
aound (it will be locked in 180 degress) with the other
hand(A-3, A-4)
Pull the ISOFIX connectors out at the both side of the seat
and aim at the low anchors at the bottom of the seat(A-5).
Push the seat untill they are locked, you'll hear "click"
"click"(A-6)
One hand press the button on the loading leg, the other
hand stretch it and make it touch the ground(A-7)
The indicator will turn in green (A-8)
A-1
ISOFIX ISOFIX
4
4
A-5
A-3 A-4
A-6
BB--11
CC--33
A-2
A-8
BB--11
CC--33
B-4
- 11 - - 12 -
E
B1,E
B1,E
E
B1,E
INSTALLATION IN GROUP I /FORWARD FACING
Fastened by ISOFIX+SUPPORT LEG
Suitable for baby from 9-18kgs . Approx 9 months to 4 years old)
The ISOFIX anchors are behind the vehicle seat where are always
marked with "isofix"(A-1)
Put the child seat on the vehicle seat in forward facing.
Pull the ISOFIX connectors out at the both side of the seat, if it is
in the locked condition, unlock it and the indicators show in
green. Aim at the low anchors at the bottom of the seat.(B-1)(B-
2)(B-3)
Push the seat back until they are locked, you'll hear "click"
"click” (B-4)
One hand press the red button, the other hand pull the
extension tube down and make sure it touch the ground
and trun in green. (B-5)
A-1
ISOFIX ISOFIX
B-3
B-1
B-2
B-5
- 09 - - 10 -
E
B1,E
B1,E
E
B1,E
INSTALLATION IN GROUP0+ REAR FACING
Fastened by ISOFIX+SUPPORT LEG
(Approx for baby from birth-13kgs)
The ISOFIX anchors are behind the vehicle seat where are
always marked with "isofix”(A-1)
Put the child seat on the vehicle seat and adjust it in the
maximal positions(A-2)
One hand pulls the button on the base and turn the seat
aound (it will be locked in 180 degress) with the other
hand(A-3, A-4)
Pull the ISOFIX connectors out at the both side of the seat
and aim at the low anchors at the bottom of the seat(A-5).
Push the seat untill they are locked, you'll hear "click"
"click"(A-6)
One hand press the button on the loading leg, the other
hand stretch it and make it touch the ground(A-7)
The indicator will turn in green (A-8)
A-1
ISOFIX ISOFIX
44
A-5
A-3 A-4
A-6
BB--11
CC--33
A-2
A-8
BB--11
CC--33
B-4
- 11 - - 12 -
E
B1,E
B1,E
E
B1,E
INSTALLATION IN GROUP I /FORWARD FACING
Fastened by ISOFIX+SUPPORT LEG
Suitable for baby from 9-18kgs . Approx 9 months to 4 years old)
The ISOFIX anchors are behind the vehicle seat where are always
marked with "isofix"(A-1)
Put the child seat on the vehicle seat in forward facing.
Pull the ISOFIX connectors out at the both side of the seat, if it is
in the locked condition, unlock it and the indicators show in
green. Aim at the low anchors at the bottom of the seat.(B-1)(B-
2)(B-3)
Push the seat back until they are locked, you'll hear "click"
"click” (B-4)
One hand press the red button, the other hand pull the
extension tube down and make sure it touch the ground
and trun in green. (B-5)
A-1
ISOFIX ISOFIX
B-3
B-1
B-2
B-5
- 09 - - 10 -
E
B1,E
B1,E
E
B1,E
INSTALLATION IN GROUP0+ REAR FACING
Fastened by ISOFIX+SUPPORT LEG
(Approx for baby from birth-13kgs)
The ISOFIX anchors are behind the vehicle seat where are
always marked with "isofix”(A-1)
Put the child seat on the vehicle seat and adjust it in the
maximal positions(A-2)
One hand pulls the button on the base and turn the seat
aound (it will be locked in 180 degress) with the other
hand(A-3, A-4)
Pull the ISOFIX connectors out at the both side of the seat
and aim at the low anchors at the bottom of the seat(A-5).
Push the seat untill they are locked, you'll hear "click"
"click"(A-6)
One hand press the button on the loading leg, the other
hand stretch it and make it touch the ground(A-7)
The indicator will turn in green (A-8)
A-1
ISOFIX ISOFIX
44
A-5
A-3
A-4
A-6
BB--11
CC--33
A-2
A-8
BB--11
CC--33
B-4
- 11 - - 12 -
E
B1,E
B1,E
E
B1,E
INSTALLATION IN GROUP I /FORWARD FACING
Fastened by ISOFIX+SUPPORT LEG
Suitable for baby from 9-18kgs . Approx 9 months to 4 years old)
The ISOFIX anchors are behind the vehicle seat where are always
marked with "isofix"(A-1)
Put the child seat on the vehicle seat in forward facing.
Pull the ISOFIX connectors out at the both side of the seat, if it is
in the locked condition, unlock it and the indicators show in
green. Aim at the low anchors at the bottom of the seat.(B-1)(B-
2)(B-3)
Push the seat back until they are locked, you'll hear "click"
"click” (B-4)
One hand press the red button, the other hand pull the
extension tube down and make sure it touch the ground
and trun in green. (B-5)
A-1
ISOFIX ISOFIX
B-3
B-1
B-2
B-5
- 09 - - 10 -
E
B1,E
B1,E
E
B1,E
INSTALLATION IN GROUP0+ REAR FACING
Fastened by ISOFIX+SUPPORT LEG
(Approx for baby from birth-13kgs)
The ISOFIX anchors are behind the vehicle seat where are
always marked with "isofix”(A-1)
Put the child seat on the vehicle seat and adjust it in the
maximal positions(A-2)
One hand pulls the button on the base and turn the seat
aound (it will be locked in 180 degress) with the other
hand(A-3, A-4)
Pull the ISOFIX connectors out at the both side of the seat
and aim at the low anchors at the bottom of the seat(A-5).
Push the seat untill they are locked, you'll hear "click"
"click"(A-6)
One hand press the button on the loading leg, the other
hand stretch it and make it touch the ground(A-7)
The indicator will turn in green (A-8)
A-1
ISOFIX ISOFIX
44
A-5
A-3 A-4
A-6
BB--11
CC--33
A-2
A-8
B
B
-
-
1
1
C
C
-
-
3
3
B-4
- 11 - - 12 -
E
B1,E
B1,E
E
B1,E
INSTALLATION IN GROUP I /FORWARD FACING
Fastened by ISOFIX+SUPPORT LEG
Suitable for baby from 9-18kgs . Approx 9 months to 4 years old)
The ISOFIX anchors are behind the vehicle seat where are always
marked with "isofix"(A-1)
Put the child seat on the vehicle seat in forward facing.
Pull the ISOFIX connectors out at the both side of the seat, if it is
in the locked condition, unlock it and the indicators show in
green. Aim at the low anchors at the bottom of the seat.(B-1)(B-
2)(B-3)
Push the seat back until they are locked, you'll hear "click"
"click” (B-4)
One hand press the red button, the other hand pull the
extension tube down and make sure it touch the ground
and trun in green. (B-5)
A-1
ISOFIX ISOFIX
B-3
B-1
B-2
B-5
- 09 - - 10 -
E
B1,E
B1,E
E
B1,E
INSTALLATION IN GROUP0+ REAR FACING
Fastened by ISOFIX+SUPPORT LEG
(Approx for baby from birth-13kgs)
The ISOFIX anchors are behind the vehicle seat where are
always marked with "isofix”(A-1)
Put the child seat on the vehicle seat and adjust it in the
maximal positions(A-2)
One hand pulls the button on the base and turn the seat
aound (it will be locked in 180 degress) with the other
hand(A-3, A-4)
Pull the ISOFIX connectors out at the both side of the seat
and aim at the low anchors at the bottom of the seat(A-5).
Push the seat untill they are locked, you'll hear "click"
"click"(A-6)
One hand press the button on the loading leg, the other
hand stretch it and make it touch the ground(A-7)
The indicator will turn in green (A-8)
A-1
ISOFIX ISOFIX
44
A-5
A-3 A-4
A-6
BB--11
CC--33
A-2
A-8
- 09 - - 10 -
E
B1,E
B1,E
E
B1,E
INSTALLATION IN GROUP0+ REAR FACING
Fastened by ISOFIX+SUPPORT LEG
(Approx for baby from birth-13kgs)
The ISOFIX anchors are behind the vehicle seat where are
always marked with "isofix”(A-1)
Put the child seat on the vehicle seat and adjust it in the
maximal positions(A-2)
One hand pulls the button on the base and turn the seat
aound (it will be locked in 180 degress) with the other
hand(A-3, A-4)
Pull the ISOFIX connectors out at the both side of the seat
and aim at the low anchors at the bottom of the seat(A-5).
Push the seat untill they are locked, you'll hear "click"
"click"(A-6)
One hand press the button on the loading leg, the other
hand stretch it and make it touch the ground(A-7)
The indicator will turn in green (A-8)
A-1
ISOFIX ISOFIX
44
A-5
A-3
A-4
A-6
BB--11
CC--33
A-2
A-8
BB--11
CC--33
B-4
- 11 - - 12 -
E
B1,E
B1,E
E
B1,E
INSTALLATION IN GROUP I /FORWARD FACING
Fastened by ISOFIX+SUPPORT LEG
Suitable for baby from 9-18kgs . Approx 9 months to 4 years old)
The ISOFIX anchors are behind the vehicle seat where are always
marked with "isofix"(A-1)
Put the child seat on the vehicle seat in forward facing.
Pull the ISOFIX connectors out at the both side of the seat, if it is
in the locked condition, unlock it and the indicators show in
green. Aim at the low anchors at the bottom of the seat.(B-1)(B-
2)(B-3)
Push the seat back until they are locked, you'll hear "click"
"click” (B-4)
One hand press the red button, the other hand pull the
extension tube down and make sure it touch the ground
and trun in green. (B-5)
A-1
ISOFIX ISOFIX
B-3
B-1
B-2
B-5
- 09 - - 10 -
E
B1,E
B1,E
E
B1,E
INSTALLATION IN GROUP0+ REAR FACING
Fastened by ISOFIX+SUPPORT LEG
(Approx for baby from birth-13kgs)
The ISOFIX anchors are behind the vehicle seat where are
always marked with "isofix”(A-1)
Put the child seat on the vehicle seat and adjust it in the
maximal positions(A-2)
One hand pulls the button on the base and turn the seat
aound (it will be locked in 180 degress) with the other
hand(A-3, A-4)
Pull the ISOFIX connectors out at the both side of the seat
and aim at the low anchors at the bottom of the seat(A-5).
Push the seat untill they are locked, you'll hear "click"
"click"(A-6)
One hand press the button on the loading leg, the other
hand stretch it and make it touch the ground(A-7)
The indicator will turn in green (A-8)
A-1
ISOFIX ISOFIX
44
A-5
A-3 A-4
A-6
B
B
-
-
1
1
C
C
-
-
3
3
A-2
A-8
BB--11
CC--33
B-4
- 11 - - 12 -
E
B1,E
B1,E
E
B1,E
INSTALLATION IN GROUP I /FORWARD FACING
Fastened by ISOFIX+SUPPORT LEG
Suitable for baby from 9-18kgs . Approx 9 months to 4 years old)
The ISOFIX anchors are behind the vehicle seat where are always
marked with "isofix"(A-1)
Put the child seat on the vehicle seat in forward facing.
Pull the ISOFIX connectors out at the both side of the seat, if it is
in the locked condition, unlock it and the indicators show in
green. Aim at the low anchors at the bottom of the seat.(B-1)(B-
2)(B-3)
Push the seat back until they are locked, you'll hear "click"
"click” (B-4)
One hand press the red button, the other hand pull the
extension tube down and make sure it touch the ground
and trun in green. (B-5)
A-1
ISOFIX ISOFIX
B-3
B-1
B-2
B-5
- 09 - - 10 -
E
B1,E
B1,E
E
B1,E
INSTALLATION IN GROUP0+ REAR FACING
Fastened by ISOFIX+SUPPORT LEG
(Approx for baby from birth-13kgs)
The ISOFIX anchors are behind the vehicle seat where are
always marked with "isofix”(A-1)
Put the child seat on the vehicle seat and adjust it in the
maximal positions(A-2)
One hand pulls the button on the base and turn the seat
aound (it will be locked in 180 degress) with the other
hand(A-3, A-4)
Pull the ISOFIX connectors out at the both side of the seat
and aim at the low anchors at the bottom of the seat(A-5).
Push the seat untill they are locked, you'll hear "click"
"click"(A-6)
One hand press the button on the loading leg, the other
hand stretch it and make it touch the ground(A-7)
The indicator will turn in green (A-8)
A-1
ISOFIX ISOFIX
44
A-5
A-3 A-4
A-6
BB--11
CC--33
A-2
A-8
Les ancrages ISOFIX se
Les ancrages ISOFIX se trou-
-
Retirez les con-
necteurs ISOFIX
verrouillé, déverrouillez-le et les
Visez les ancrages situés au-des-
le bouton de la base
degrés)
Tirez les connecteurs ISOFIX
visez les ancrages situés au-des-
verrouillé, vous entendrez alors
bouton rouge, de l‘autre
tirez le tube d‘extension vers le
-
be de force, de l‘autre, étirez-le et
faites-le toucher le sol
L‘indicateur deviendra vert
GROUPE 0+ / DANS LE SENS CONTRAIRE
DU DÉPLACEMENT
Fixé par ancrage ISOFIX + JAMBE DE FORCE (Recommandée pour bébé à partir
de la naissance jusqu’à 13 kg)
GROUPE I / DANS LE SENS DU DÉPLACEMENT
Fixé par ancrage ISOFIX + JAMBE DE FORCE
(Convient aux bébés de 9 à 18 kg d’environ 9 mois à 4 ans)
B-1
B-3
B-5
B-2
B-4
B-6

DE
EN
FR
34 35
FIXLEG 360
EINSTELLUNGEN
- 13 - - 14 -
E
B1,E
B1,E
E
B1,E
HOW TO RESTRAIN YOUR BABY ON THE
SEAT IN GROUP0+/1
reclining positions:
By pull the red reclining adjusting
device up, you will get the right
and suitable positions for your child.
1.sitting position
3. sleeping position
◆
◆
RECLINING POSITIONS(C)
Open the buckle by pressing the red button(C-5)
Make sure the baby's head won't exceed the heardrest (C-7)
Put the metal tongues together and lock the buckle(C-8)
Pull the central adjuster belt(C-9)
Test the gab between baby's shoulder and shoulder pad(1
finger gab is okay, don't too tight and too loose)
Also check if all belts are straight, as the twisted belts are
dangerous(C-10)
One hand press the central adjuster button, the other hand
pull the seat belts out(C-1)(C-2)
Adjust the height of the headrest by pulling "Height adjuster"
There are 7 positions to adjust the height of the headrest.(C-3)(C-4)
C
1
1
2
2
3
3
C-1
2
C-2
C-3
C-5 C-6
C-4
- 13 - - 14 -
E
B1,E
B1,E
E
B1,E
HOW TO RESTRAIN YOUR BABY ON THE
SEAT IN GROUP0+/1
reclining positions:
By pull the red reclining adjusting
device up, you will get the right
and suitable positions for your child.
1.sitting position
3. sleeping position
◆
◆
RECLINING POSITIONS(C)
Open the buckle by pressing the red button(C-5)
Make sure the baby's head won't exceed the heardrest (C-7)
Put the metal tongues together and lock the buckle(C-8)
Pull the central adjuster belt(C-9)
Test the gab between baby's shoulder and shoulder pad(1
finger gab is okay, don't too tight and too loose)
Also check if all belts are straight, as the twisted belts are
dangerous(C-10)
One hand press the central adjuster button, the other hand
pull the seat belts out(C-1)(C-2)
Adjust the height of the headrest by pulling "Height adjuster"
There are 7 positions to adjust the height of the headrest.(C-3)(C-4)
C
11
22
33
C-1
2
C-2
C-3
C-5 C-6
C-4
- 13 - - 14 -
E
B1,E
B1,E
E
B1,E
HOW TO RESTRAIN YOUR BABY ON THE
SEAT IN GROUP0+/1
reclining positions:
By pull the red reclining adjusting
device up, you will get the right
and suitable positions for your child.
1.sitting position
3. sleeping position
◆
◆
RECLINING POSITIONS(C)
Open the buckle by pressing the red button(C-5)
Make sure the baby's head won't exceed the heardrest (C-7)
Put the metal tongues together and lock the buckle(C-8)
Pull the central adjuster belt(C-9)
Test the gab between baby's shoulder and shoulder pad(1
finger gab is okay, don't too tight and too loose)
Also check if all belts are straight, as the twisted belts are
dangerous(C-10)
One hand press the central adjuster button, the other hand
pull the seat belts out(C-1)(C-2)
Adjust the height of the headrest by pulling "Height adjuster"
There are 7 positions to adjust the height of the headrest.(C-3)(C-4)
C
11
22
33
C-1
2
C-2
C-3
C-5
C-6
C-4
C-10
- 15 - - 16 -
E
B1,E
B1,E
E
B1,E
C-8
D-8
C-9
C-7
HOW TO INSTALL THE CHILD SEAT IN
GROUP II
FORWARD FACING
Attention:
Please remove 5 points harness system in Group II (15-25KGS)
15-25
C-10
- 15 - - 16 -
E
B1,E
B1,E
E
B1,E
C-8
D-8
C-9
C-7
HOW TO INSTALL THE CHILD SEAT IN
GROUP II
FORWARD FACING
Attention:
Please remove 5 points harness system in Group II (15-25KGS)
15-25
- 13 - - 14 -
E
B1,E
B1,E
E
B1,E
HOW TO RESTRAIN YOUR BABY ON THE
SEAT IN GROUP0+/1
reclining positions:
By pull the red reclining adjusting
device up, you will get the right
and suitable positions for your child.
1.sitting position
3. sleeping position
◆
◆
RECLINING POSITIONS(C)
Open the buckle by pressing the red button(C-5)
Make sure the baby's head won't exceed the heardrest (C-7)
Put the metal tongues together and lock the buckle(C-8)
Pull the central adjuster belt(C-9)
Test the gab between baby's shoulder and shoulder pad(1
finger gab is okay, don't too tight and too loose)
Also check if all belts are straight, as the twisted belts are
dangerous(C-10)
One hand press the central adjuster button, the other hand
pull the seat belts out(C-1)(C-2)
Adjust the height of the headrest by pulling "Height adjuster"
There are 7 positions to adjust the height of the headrest.(C-3)(C-4)
C
11
22
33
C-1
2
C-2
C-3
C-5 C-6
C-4
- 13 - - 14 -
E
B1,E
B1,E
E
B1,E
HOW TO RESTRAIN YOUR BABY ON THE
SEAT IN GROUP0+/1
reclining positions:
By pull the red reclining adjusting
device up, you will get the right
and suitable positions for your child.
1.sitting position
3. sleeping position
◆
◆
RECLINING POSITIONS(C)
Open the buckle by pressing the red button(C-5)
Make sure the baby's head won't exceed the heardrest (C-7)
Put the metal tongues together and lock the buckle(C-8)
Pull the central adjuster belt(C-9)
Test the gab between baby's shoulder and shoulder pad(1
finger gab is okay, don't too tight and too loose)
Also check if all belts are straight, as the twisted belts are
dangerous(C-10)
One hand press the central adjuster button, the other hand
pull the seat belts out(C-1)(C-2)
Adjust the height of the headrest by pulling "Height adjuster"
There are 7 positions to adjust the height of the headrest.(C-3)(C-4)
C
11
22
33
C-1
2
C-2
C-3
C-5 C-6
C-4
- 13 - - 14 -
E
B1,E
B1,E
E
B1,E
HOW TO RESTRAIN YOUR BABY ON THE
SEAT IN GROUP0+/1
reclining positions:
By pull the red reclining adjusting
device up, you will get the right
and suitable positions for your child.
1.sitting position
3. sleeping position
◆
◆
RECLINING POSITIONS(C)
Open the buckle by pressing the red button(C-5)
Make sure the baby's head won't exceed the heardrest (C-7)
Put the metal tongues together and lock the buckle(C-8)
Pull the central adjuster belt(C-9)
Test the gab between baby's shoulder and shoulder pad(1
finger gab is okay, don't too tight and too loose)
Also check if all belts are straight, as the twisted belts are
dangerous(C-10)
One hand press the central adjuster button, the other hand
pull the seat belts out(C-1)(C-2)
Adjust the height of the headrest by pulling "Height adjuster"
There are 7 positions to adjust the height of the headrest.(C-3)(C-4)
C
11
22
33
C-1
2
C-2
C-3
C-5
C-6
C-4
C-10
- 15 - - 16 -
E
B1,E
B1,E
E
B1,E
C-8
D-8
C-9
C-7
HOW TO INSTALL THE CHILD SEAT IN
GROUP II
FORWARD FACING
Attention:
Please remove 5 points harness system in Group II (15-25KGS)
15-25
C-10
- 15 - - 16 -
E
B1,E
B1,E
E
B1,E
C-8
D-8
C-9
C-7
HOW TO INSTALL THE CHILD SEAT IN
GROUP II
FORWARD FACING
Attention:
Please remove 5 points harness system in Group II (15-25KGS)
15-25
- 13 - - 14 -
E
B1,E
B1,E
E
B1,E
HOW TO RESTRAIN YOUR BABY ON THE
SEAT IN GROUP0+/1
reclining positions:
By pull the red reclining adjusting
device up, you will get the right
and suitable positions for your child.
1.sitting position
3. sleeping position
◆
◆
RECLINING POSITIONS(C)
Open the buckle by pressing the red button(C-5)
Make sure the baby's head won't exceed the heardrest (C-7)
Put the metal tongues together and lock the buckle(C-8)
Pull the central adjuster belt(C-9)
Test the gab between baby's shoulder and shoulder pad(1
finger gab is okay, don't too tight and too loose)
Also check if all belts are straight, as the twisted belts are
dangerous(C-10)
One hand press the central adjuster button, the other hand
pull the seat belts out(C-1)(C-2)
Adjust the height of the headrest by pulling "Height adjuster"
There are 7 positions to adjust the height of the headrest.(C-3)(C-4)
C
11
22
33
C-1
2
C-2
C-3
C-5 C-6
C-4
RÉGLAGES
positions d‘inclinaison :
En tirant le dispositif de réglage d‘inclinaison rouge vers le
haut, vous obtiendrez les positions adaptées pour votre
enfant.
1. position assise
SICHERUNG DES KINDES
Ouvrez la boucle en appuyant
sur le bouton rouge
bébé ne dépasse pas l‘appui-
tête
boucle
Tirez l’ajusteur de harnais
Testez l‘écart entre l‘épaule
et les bretelles du bébé
pas trop serrée, ni trop lâche)
sangles sont droites, car des sang-
les torsadées peuvent présenter
sur le bouton de
réglage des harnais, de l‘autre tirez
les ceintures de sécurité
Réglez la hauteur de
l‘appui-tête en tirant
selon 7 positions de hauteur.

DE
EN
FR
36 37
FIXLEG 360
ÉTAPES D’ASSEMBLAGE
GROUPE II / DANS LE SENS DU DÉPLACEMENT
Fixé par ancrage ISOFIX + JAMBE DE FORCE (Convient aux bébés de 15 à 25 kg)
- 17 - - 18 -
E
B1,E
B1,E
E
B1,E
1. USE ADULT SEAT BELTS TO FASTEN
THE SEAT IN GROUP II (15-25KGS)
Suitable for kids approx 3 to 7 years old.
If your child is bigger enough and can not fit the shoulder belts, you should
adjust it or take it off.
Pressing the button on the central adjuster and pull the shoulder belts out(D-1)
Push the Red button of buckle, Open the buckle and let two belt hang on the
Harness B
Pull belts out from the slots (D-4)
Harness belt and shoulder belts hiding.
Open six buttons on the seat cover inside (D-6)
uckle body removal (D-5)
Locate the metal buckle strap retainer on bottom of the shell.
Pull retainer away from child restraint to loosen.
Turn the retainer so that the short side will go through the slot in the restraint
shell.
Push the retainer through slots in the shell and cover to the top of the restraint.
D-1
D-5
D-3
D-2
both side of car seat. (D-2)
D-4
Take the pillow,cushion and buckle crotch pad away accordingly. (D-3)
Put the Harness belt and two shoulder belt hide at behind of the seat over.(D-7)
PULL PULL
PULLPULL
PULL PULL
D-6 D-7
Pull the adult seat belts out and feed the diagonal section of the vehicle belt
Fasten the seat belt across your child. The lap section should rest on the lap
belt guides on seat. Make sure the seat belt is not twisted.each side of the child
(E-4,E-5)
Buckle the adult seat belts to the anchorage of the vehicle seat
Check the position of vehicle buckle, ensuring it is not being pulled around
child seat onto the red belt guide.the
Feed the diagonal section of the adult belt through the upper belt guide on
the opposite side to the buckle.(E-6)
- 19 - - 20 -
E
B1,E
B1,E
E
B1,E
E-1
E-2
E-3
E-4
E-5
through the upper belt guide,(E-1,E-2)
E-4
E-5
E-6
- 21 - - 22 -
B1,E
E
B1,E
E-3
ATTENTION:
make the belt goes through the belt guides on the
headrest(1) and the seat(2) (E-3)
1
2
- 17 - - 18 -
E
B1,E
B1,E
E
B1,E
1. USE ADULT SEAT BELTS TO FASTEN
THE SEAT IN GROUP II (15-25KGS)
Suitable for kids approx 3 to 7 years old.
If your child is bigger enough and can not fit the shoulder belts, you should
adjust it or take it off.
Pressing the button on the central adjuster and pull the shoulder belts out(D-1)
Push the Red button of buckle, Open the buckle and let two belt hang on the
Harness B
Pull belts out from the slots (D-4)
Harness belt and shoulder belts hiding.
Open six buttons on the seat cover inside (D-6)
uckle body removal (D-5)
Locate the metal buckle strap retainer on bottom of the shell.
Pull retainer away from child restraint to loosen.
Turn the retainer so that the short side will go through the slot in the restraint
shell.
Push the retainer through slots in the shell and cover to the top of the restraint.
D-1
D-5
D-3
D-2
both side of car seat. (D-2)
D-4
Take the pillow,cushion and buckle crotch pad away accordingly. (D-3)
Put the Harness belt and two shoulder belt hide at behind of the seat over.(D-7)
PULL PULL
PULLPULL
PULL PULL
D-6 D-7
Pull the adult seat belts out and feed the diagonal section of the vehicle belt
Fasten the seat belt across your child. The lap section should rest on the lap
belt guides on seat. Make sure the seat belt is not twisted.each side of the child
(E-4,E-5)
Buckle the adult seat belts to the anchorage of the vehicle seat
Check the position of vehicle buckle, ensuring it is not being pulled around
child seat onto the red belt guide.the
Feed the diagonal section of the adult belt through the upper belt guide on
the opposite side to the buckle.(E-6)
- 19 - - 20 -
E
B1,E
B1,E
E
B1,E
E-1 E-2
E-3
E-4
E-5
through the upper belt guide,(E-1,E-2)
E-4
E-5
E-6
- 21 - - 22 -
B1,E
E
B1,E
E-3
ATTENTION:
make the belt goes through the belt guides on the
headrest(1) and the seat(2) (E-3)
1
2
- 17 - - 18 -
E
B1,E
B1,E
E
B1,E
1. USE ADULT SEAT BELTS TO FASTEN
THE SEAT IN GROUP II (15-25KGS)
Suitable for kids approx 3 to 7 years old.
If your child is bigger enough and can not fit the shoulder belts, you should
adjust it or take it off.
Pressing the button on the central adjuster and pull the shoulder belts out(D-1)
Push the Red button of buckle, Open the buckle and let two belt hang on the
Harness B
Pull belts out from the slots (D-4)
Harness belt and shoulder belts hiding.
Open six buttons on the seat cover inside (D-6)
uckle body removal (D-5)
Locate the metal buckle strap retainer on bottom of the shell.
Pull retainer away from child restraint to loosen.
Turn the retainer so that the short side will go through the slot in the restraint
shell.
Push the retainer through slots in the shell and cover to the top of the restraint.
D-1
D-5
D-3
D-2
both side of car seat. (D-2)
D-4
Take the pillow,cushion and buckle crotch pad away accordingly. (D-3)
Put the Harness belt and two shoulder belt hide at behind of the seat over.(D-7)
PULL PULL
PULLPULL
PULL PULL
D-6
D-7
- 17 - - 18 -
E
B1,E
B1,E
E
B1,E
1. USE ADULT SEAT BELTS TO FASTEN
THE SEAT IN GROUP II (15-25KGS)
Suitable for kids approx 3 to 7 years old.
If your child is bigger enough and can not fit the shoulder belts, you should
adjust it or take it off.
Pressing the button on the central adjuster and pull the shoulder belts out(D-1)
Push the Red button of buckle, Open the buckle and let two belt hang on the
Harness B
Pull belts out from the slots (D-4)
Harness belt and shoulder belts hiding.
Open six buttons on the seat cover inside (D-6)
uckle body removal (D-5)
Locate the metal buckle strap retainer on bottom of the shell.
Pull retainer away from child restraint to loosen.
Turn the retainer so that the short side will go through the slot in the restraint
shell.
Push the retainer through slots in the shell and cover to the top of the restraint.
D-1
D-5
D-3
D-2
both side of car seat. (D-2)
D-4
Take the pillow,cushion and buckle crotch pad away accordingly. (D-3)
Put the Harness belt and two shoulder belt hide at behind of the seat over.(D-7)
PULL PULL
PULLPULL
PULL PULL
D-6 D-7
Pull the adult seat belts out and feed the diagonal section of the vehicle belt
Fasten the seat belt across your child. The lap section should rest on the lap
belt guides on seat. Make sure the seat belt is not twisted.each side of the child
(E-4,E-5)
Buckle the adult seat belts to the anchorage of the vehicle seat
Check the position of vehicle buckle, ensuring it is not being pulled around
child seat onto the red belt guide.the
Feed the diagonal section of the adult belt through the upper belt guide on
the opposite side to the buckle.(E-6)
- 19 - - 20 -
E
B1,E
B1,E
E
B1,E
E-1 E-2
E-3
E-4
E-5
through the upper belt guide,(E-1,E-2)
E-4
E-5
E-6
- 21 - - 22 -
B1,E
E
B1,E
E-3
ATTENTION:
make the belt goes through the belt guides on the
headrest(1) and the seat(2) (E-3)
1
2
- 17 - - 18 -
E
B1,E
B1,E
E
B1,E
1. USE ADULT SEAT BELTS TO FASTEN
THE SEAT IN GROUP II (15-25KGS)
Suitable for kids approx 3 to 7 years old.
If your child is bigger enough and can not fit the shoulder belts, you should
adjust it or take it off.
Pressing the button on the central adjuster and pull the shoulder belts out(D-1)
Push the Red button of buckle, Open the buckle and let two belt hang on the
Harness B
Pull belts out from the slots (D-4)
Harness belt and shoulder belts hiding.
Open six buttons on the seat cover inside (D-6)
uckle body removal (D-5)
Locate the metal buckle strap retainer on bottom of the shell.
Pull retainer away from child restraint to loosen.
Turn the retainer so that the short side will go through the slot in the restraint
shell.
Push the retainer through slots in the shell and cover to the top of the restraint.
D-1
D-5
D-3
D-2
both side of car seat. (D-2)
D-4
Take the pillow,cushion and buckle crotch pad away accordingly. (D-3)
Put the Harness belt and two shoulder belt hide at behind of the seat over.(D-7)
PULL PULL
PULLPULL
PULL PULL
D-6
D-7
Pull the adult seat belts out and feed the diagonal section of the vehicle belt
Fasten the seat belt across your child. The lap section should rest on the lap
belt guides on seat. Make sure the seat belt is not twisted.each side of the child
(E-4,E-5)
Buckle the adult seat belts to the anchorage of the vehicle seat
Check the position of vehicle buckle, ensuring it is not being pulled around
child seat onto the red belt guide.the
Feed the diagonal section of the adult belt through the upper belt guide on
the opposite side to the buckle.(E-6)
- 19 - - 20 -
E
B1,E
B1,E
E
B1,E
E-1 E-2
E-3
E-4
E-5
through the upper belt guide,(E-1,E-2)
E-4
E-5
E-6
- 21 - - 22 -
B1,E
E
B1,E
E-3
ATTENTION:
make the belt goes through the belt guides on the
headrest(1) and the seat(2) (E-3)
1
2
- 17 - - 18 -
E
B1,E
B1,E
E
B1,E
1. USE ADULT SEAT BELTS TO FASTEN
THE SEAT IN GROUP II (15-25KGS)
Suitable for kids approx 3 to 7 years old.
If your child is bigger enough and can not fit the shoulder belts, you should
adjust it or take it off.
Pressing the button on the central adjuster and pull the shoulder belts out(D-1)
Push the Red button of buckle, Open the buckle and let two belt hang on the
Harness B
Pull belts out from the slots (D-4)
Harness belt and shoulder belts hiding.
Open six buttons on the seat cover inside (D-6)
uckle body removal (D-5)
Locate the metal buckle strap retainer on bottom of the shell.
Pull retainer away from child restraint to loosen.
Turn the retainer so that the short side will go through the slot in the restraint
shell.
Push the retainer through slots in the shell and cover to the top of the restraint.
D-1
D-5
D-3
D-2
both side of car seat. (D-2)
D-4
Take the pillow,cushion and buckle crotch pad away accordingly. (D-3)
Put the Harness belt and two shoulder belt hide at behind of the seat over.(D-7)
PULL PULL
PULLPULL
PULL PULL
D-6
D-7
Si votre enfant est assez grand
et n’est plus tenu correcte-
régler ou l‘enlever. Appuyez sur le
bouton du dispositif de réglage du
harnais et tirez sur les bretelles
Appuyez sur le bouton rouge
de la boucle, ouvrez la boucle
et laissez deux sangles pendre des
Localisez le dispositif de
retenue de la sangle au bas
retenue du dispositif de retenue
pour le desserrer. Tournez le dis-
haut du dispositif de retenue.
Retirez les sangles des fentes
Retirez l‘oreiller, le coussin
et le coussin de protection
Retrait des sangles de la bou-
cle du harnais
3.
A T T E N T I O N : faire
passer la ceinture par les
guides de ceinture sur l‘appui-
tête (1) et le siège (2)
Cachez la sangle de harnais
et bretelles. Ouvrez les six
Placez la sangle du harnais
Bouclez les ceintures de sé-
-
position de la boucle du véhicule
le guide de ceinture rouge. Faites
passer la section diagonale de la
guide de ceinture supérieur du
Tirez les ceintures
de sécurité pour
adultes et faites passer la section
diagonale de la ceinture du véhi-
supérieur
Attachez la ceinture
de sécurité sur votre
reposer sur les guides de ceinture
la ceinture de sécurité n‘est pas
tordue.

DE
EN
FR
38 39
FIXLEG 360
LIRE ATTENTIVEMENT ET CONSERVER CES
INSTRUCTIONS POUR RÉFÉRENCE FUTURE
IMPORTANT
ECE R44/04
sécurité pour adultes.
• AVERTISSEMENT :
• AVERTISSEMENT :-
sécurisé.
• AVERTISSEMENT :
• AVERTISSEMENT :
et les ceintures de sécurité de votre voiture ne pourraient pas protéger votre
• AVERTISSEMENT :
• AVERTISSEMENT :
-
• AVERTISSEMENT :
une courte période.
• AVERTISSEMENT :
• -
particulier.
• AVERTISSEMENT :
peut blesser votre enfant.
• AVERTISSEMENT :
•
peut se décolorer.
• ASSUREZ-VOUS-
• ASSUREZ-VOUS
• RANGEZ-
• VEILLEZ
enfant.
• ASSUREZ-VOUS
• IMPORTANT
-
lentes).
•
•
• Ne laissez pas votre enfant seul dans votre voiture.
•
danger.
• -
•
sans danger.
•
Tether.
• -
• -
•
• AVERTISSEMENT :
•
particulier.
•
particulier.
• AVERTISSEMENT :
Table of contents
Other BabyGo Stroller manuals

BabyGo
BabyGo Jumper User manual

BabyGo
BabyGo Twiner User manual

BabyGo
BabyGo MICRO User manual

BabyGo
BabyGo SPRING User manual

BabyGo
BabyGo Vogue User manual

BabyGo
BabyGo TRAVEL XP User manual

BabyGo
BabyGo BASKET 2IN1 User manual

BabyGo
BabyGo SIMPLEX User manual

BabyGo
BabyGo STYLE User manual

BabyGo
BabyGo BASKET User manual