manuals.online logo
Brands
  1. Home
  2. •
  3. Brands
  4. •
  5. Balanced Body
  6. •
  7. Fitness Equipment
  8. •
  9. Balanced Body CenterLine Pole System Programming manual

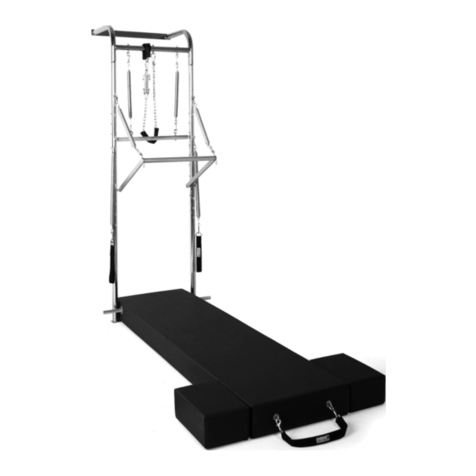
Balanced Body CenterLine Pole System Programming manual

Assembling the Balanced Body®
CenterLine®Pole System
READ FIRST: IMPORTANT INSTALLATION NOTE
The CenterLine Pole System is designed to be mounted on a wall
with wood studs spaced 16” apart. Be sure the lag bolts go into
the studs. If your wood studs are not 16” apart, a 2x4 (stringer)
may be horizontally mounted to the wall into at least 3 studs.
The top of the Pole System can then be attached to the stringer
using the included lag bolts.
If you do not have wood frame construction,
consult a local hardware store or contractor.
PARTS LIST
PART DESCRIPTION PART NUMBER QTY
Curved Pole System Tower top WLL0201 1
Pole System tube left WLL0202 1
Pole System tube right WLL0203 1
Pole System base plate WLL0200 1
Wooden push-through bar 707-288 1
Maple roll-down bar 607-127 1
Safety strap and carabiner 607-354, GEN9149 1
Cotton loops 607-346 2
Long red springs with snaps SPR9246 2
Green springs with snaps SPR9000 1
Red springs with snaps SPR9001 1
Blue springs with snaps SPR9004 2
Grey springs with snaps SPR9245 2
21 mm x 1/2 “ wrench ALL0060 1
Hardware package (see Figures A and B)
If you have ordered the complete Pole System package your
shipment will include:
»Mat (1)
»Moon boxes (2)
»Weighted metal roll-up bar (1)
»24” foot strap (1)
Figure A
Flat Head Bolts GEN9473 (2)
Lag Bolts GEN9415 (4)
Washers GEN9204 (4)
Set Screws GEN9409 (2)
Hex Key GEN9282 (1)
TOOLS YOU WILL NEED (NOT INCLUDED)
»7/16 wrench
»Screwdriver (to hold eyebolts in place while tightening)
Figure B:
12 of each: Eyebolt (GEN9086), nut 1/4”-20 (GEN9056) and 1/4” washer
(GEN9206)
Contact Us
1-800-PILATES | +1-916-388-2838
pilates.com | info@pilates.com
400-353 | 10.07.16
ASSEMBLE THE POLE SYSTEM
LAY OUT ALL THE PARTS.
1. Make sure you have all the components listed in the parts list.
Also make sure you have acquired the hardware necessary to
attach the equipment to your wall.
ATTACHING TUBES TO THE CURVED TOP PIECE
2. Make sure there is enough
room to lay the entire system
on the floor without hitting
any furniture in the room.
Remove the tube assembly
from the shipping box. Lay
the tube assembly on the
floor so the riv nuts face
down on the floor. See Figure
C. Place the curved piece on
the open end of the tubes by
sliding the welded ends into the curved top piece. See Figure
D for orientation and locations of set screws. Insert the set
screws (located in your hardware package) and tighten using
the provided hex key.
SECURE THE POLE SYSTEM TO THE WALL
3. Secure the Pole System
to your wall using the
appropriate method. See
Important Installation Note
on page 1.
SECURE THE POLE SYSTEM INTO THE FLOOR
4. There are two 1/4” holes in
the base plate to secure the
Pole System to the floor.
See Figure G. If you have a
wood floor, you can use the
enclosed lag bolts. If you
have a concrete floor, check
with your local hardware
store or contractor to obtain
the necessary hardware and
tools.
YOU MUST PROPERLY SECURE THE POLE SYSTEM TO THE
WALL AND THE FLOOR.
INSTALL EYE BOLTS INTO TUBES.
5. Install eyebolts and washers
into the riv nuts that are
inserted into the tubes. Using
a screwdriver and a 7/16”
wrench, tighten the eyebolts
so they are in the line with the
main tube. See Figure E.
Figure C
Figure F
Figure G
Figure E
Figure D
Set Screws
2
HOW TO ADJUST YOUR SLIDING PUSH THROUGH BAR
Position your hands on the outside of each slider. Place your
middle and/or ring fingers under the silver base of the knob; right
where the black body of the knob threads into. Place your index
finger and thumb around the knob itself. Pull each of the knobs
outwards, away from the vertical tubes, until they stop. Using the
same force on each arm, move the slider upwards or downwards
to each new location. Once you near a new location slightly
release the outward pull of the knobs. The pins will automatically
fall into the next position when aligned.
PUSH-THROUGH BAR CONTROL WARNING!
The push-through bar can be extremely dangerous to both the
client and trainer if used improperly.
Always control the push-through bar securely through any
movement, especially when the bar has springs attached to it. If
the bar is released under spring tension, it will move forcefully in
the direction of the spring connection point. Always be aware of
the full arc area of the bar and keep that area clear of both the
instructor’s body and the client’s body.
Note: Use only with qualified instructor supervision. When not
in use, the push-through bar should be secured out of the way
with the safety strap. Attach the safety strap by looping the strap
around the top end tube and through the sewn end loop. Never
attach the safety strap to any eye bolt on the frame.
CLEANING AND MAINTENANCE
It is recommended to check to ensure the pins in the plunger
knobs protrude and lock into the vertical tubes. First pull both
knobs out and start moving the sliders to a different position.
Release the knobs before the next hole and continue to slide the
system. Once over a hole the pin of the knob will drop into the
opening. Once each slider is in a new position apply a down force
on the PTB directly downwards. The pins of the sliders should
not come out of the holes. If the pins do not stay in the tube
holes, the pull knobs need to be replaced; call Balanced Body for
replacement parts.
Cleaning
To clean wood and metal, use a damp cloth and mild soap. Wipe
dry. Periodically check the machine for anything that might have
become loose, such as the eyebolts where the springs attach.
If you have a mat or moon box please note that Balanced Body
upholstery has built-in antimicrobial/antibacterial protection. For
light soiling use a solution of 10% household liquid dish soap
with warm water applied with a soft damp cloth (do not use
paper towels). If necessary a solution of liquid cleanser and water
applied with a soft bristle will also work. For heavier soiling please
call Balanced Body Technical Support.
IN CASE OF FREIGHT DAMAGE
If there is freight damage, make certain you keep all packaging
material. You must call Balanced Body within 3 days.
QUESTIONS?
Call Balanced Body Tech Support at +1 916-388-2838 or
1-800-PILATES
3
Contact Us
1-800-PILATES | +1-916-388-2838
pilates.com | info@pilates.com
400-353 | 10.07.16

Other Balanced Body Fitness Equipment manuals

Balanced Body CenterLine Reformer User manual

Balanced Body

Balanced Body CenterLine Reformer User manual

Balanced Body Konnector Instruction Manual

Balanced Body

Balanced Body Konnector Instruction Manual

Balanced Body Konnector User manual

Balanced Body

Balanced Body Konnector User manual

Balanced Body Allegro Reformer User manual

Balanced Body

Balanced Body Allegro Reformer User manual

Balanced Body Duet User manual

Balanced Body

Balanced Body Duet User manual

Balanced Body Contrology User manual

Balanced Body

Balanced Body Contrology User manual

Balanced Body CenterLine Reformer User manual

Balanced Body

Balanced Body CenterLine Reformer User manual

Balanced Body CenterLine Tower Retrofit Instruction Manual

Balanced Body

Balanced Body CenterLine Tower Retrofit Instruction Manual

Balanced Body Studio Reformer User manual

Balanced Body

Balanced Body Studio Reformer User manual

Balanced Body Allegro User manual

Balanced Body

Balanced Body Allegro User manual

Balanced Body Konnector LITE Instruction Manual

Balanced Body

Balanced Body Konnector LITE Instruction Manual

Balanced Body Reformer with Tower Instruction sheet

Balanced Body

Balanced Body Reformer with Tower Instruction sheet

Balanced Body Rialto with Tower Konnector Instruction Manual

Balanced Body

Balanced Body Rialto with Tower Konnector Instruction Manual

Balanced Body Trapeze Table (Cadillac) Administrator Guide

Balanced Body

Balanced Body Trapeze Table (Cadillac) Administrator Guide

Balanced Body Exo Chair Guide

Balanced Body

Balanced Body Exo Chair Guide

Balanced Body Ladder Barrel Manual

Balanced Body

Balanced Body Ladder Barrel Manual

Balanced Body Wall Tower Administrator Guide

Balanced Body

Balanced Body Wall Tower Administrator Guide

Balanced Body Studio Reformer User manual

Balanced Body

Balanced Body Studio Reformer User manual

Balanced Body Precision Rotator Discs User manual

Balanced Body

Balanced Body Precision Rotator Discs User manual

Balanced Body Legacy Reformer User manual

Balanced Body

Balanced Body Legacy Reformer User manual

Balanced Body Studio Reformer User manual

Balanced Body

Balanced Body Studio Reformer User manual

Balanced Body Cadillac Trapeze Table Administrator Guide

Balanced Body

Balanced Body Cadillac Trapeze Table Administrator Guide

Balanced Body Contrology User manual

Balanced Body

Balanced Body Contrology User manual

Balanced Body Studio Reformer User manual

Balanced Body

Balanced Body Studio Reformer User manual

Popular Fitness Equipment manuals by other brands

MFJ MFJ-414 instruction manual

MFJ

MFJ MFJ-414 instruction manual

Flow Team Binding manual

Flow

Flow Team Binding manual

Spirit Commercial CVC800 owner's manual

Spirit Commercial

Spirit Commercial CVC800 owner's manual

Merrithew Spine Supporter owner's manual

Merrithew

Merrithew Spine Supporter owner's manual

ETENON Fitness PTT0232 owner's manual

ETENON Fitness

ETENON Fitness PTT0232 owner's manual

Echelon ROW instruction manual

Echelon

Echelon ROW instruction manual

Gold's Gym VIBEMAX 580 user manual

Gold's Gym

Gold's Gym VIBEMAX 580 user manual

Rogers Athletic Drive Sled Product information

Rogers Athletic

Rogers Athletic Drive Sled Product information

Striale SE-402-2 manual

Striale

Striale SE-402-2 manual

AsVIVA MS2 manual

AsVIVA

AsVIVA MS2 manual

HMS S3096 Manual instruction

HMS

HMS S3096 Manual instruction

Stairmaster FreeClimber 4600 PT owner's manual

Stairmaster

Stairmaster FreeClimber 4600 PT owner's manual

Nustep TRANSITT manual

Nustep

Nustep TRANSITT manual

Belifu FM-B2409 instruction manual

Belifu

Belifu FM-B2409 instruction manual

KingsBox KB08RI-028 quick start guide

KingsBox

KingsBox KB08RI-028 quick start guide

Matrix C7xi owner's manual

Matrix

Matrix C7xi owner's manual

Horizon Fitness Andes 3 Operation guide

Horizon Fitness

Horizon Fitness Andes 3 Operation guide

Doufit CM-01 instruction manual

Doufit

Doufit CM-01 instruction manual

manuals.online logo
manuals.online logoBrands
  • About & Mission
  • Contact us
  • Privacy Policy
  • Terms and Conditions

Copyright 2025 Manuals.Online. All Rights Reserved.