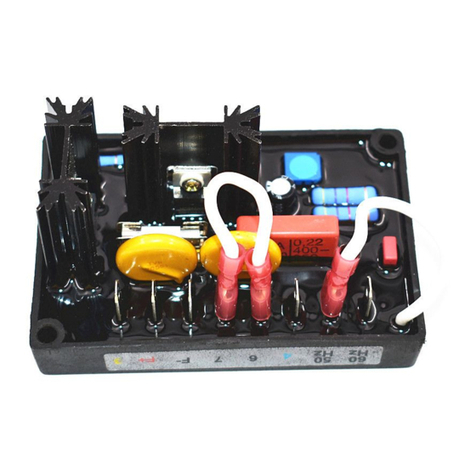
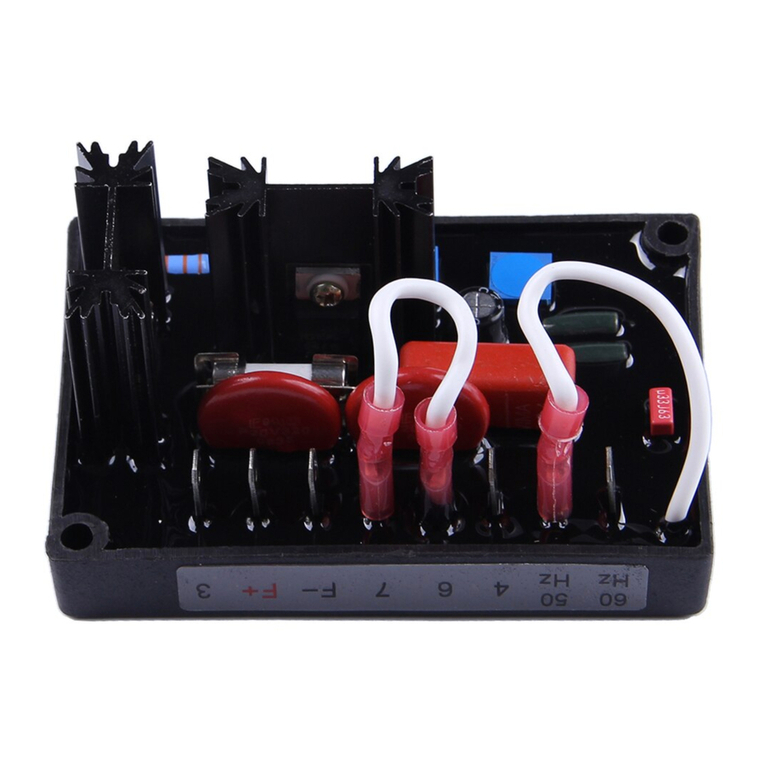
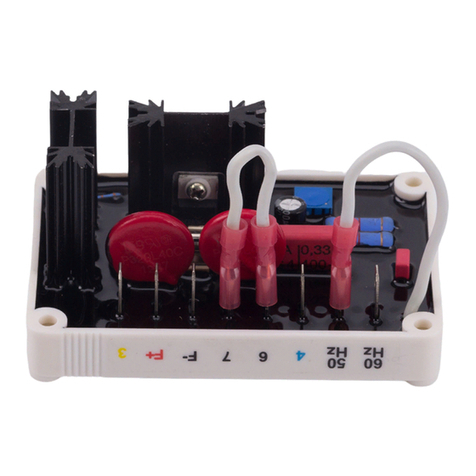
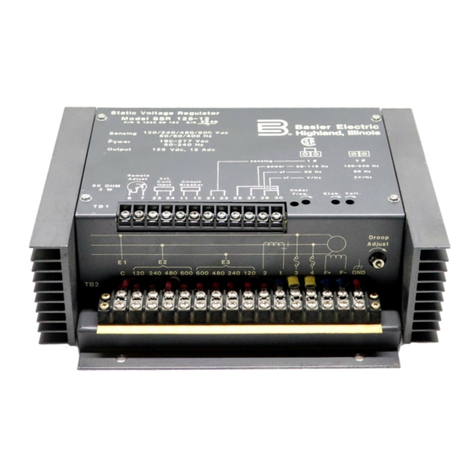
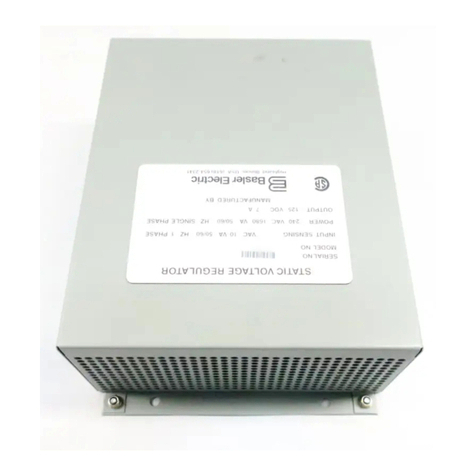
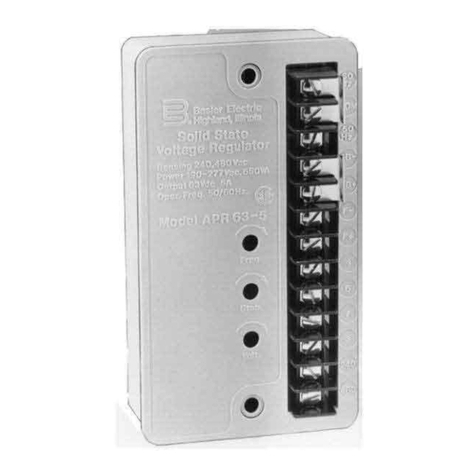
Basler KR4FFX User manual

Publication: Rev First Printing 04/90 Copyright
9 1606 00 991 F Revised 06/2000 1997-2000
Basler Electric
Phone 618 654-2341
Route 143 Box 269
Highland IL 62249 USA
Power Systems Group
Fax 618 654-2351
http://www.basler.com
INSTRUCTIONS
FOR
VOLTAGE REGULATOR
KR4FFX/FFMX and KR7FFX/FFMX
9 1610 00 101/9 1606 00 101 and 9 1611 00 101/9 1607 00 101
INTRODUCTION
The Basler KR Series Voltage Regulators
precisely control the output voltage of an ac
electric generating system by controlling the
amount of current supplied to the exciter (or
generator) field. The KR Series Voltage
Regulators contain built-in Electromagnetic
Interference (EMI) filtering and an
underfrequency roll-off characteristic.
ELECTRICAL SPECIFICATIONS
Input Power Requirements
KR4FFX/FFMX: 120 to 139 Vac (nom.),
1
1
, 60 Hz, 300 VA. 100 to 127 Vac (nom.), 1
1
,
50 Hz, 300 VA.
KR7FFX/FFMX: 208 to 277 Vac (nom.),
1
1
, 60 Hz, 840 VA. 220 to 240 Vac (nom.), 1
1
,
50 Hz, 840 VA.
Input Sensing Requirements
50 Hz, 1
1
: 100-110/220-230-
240/380-400-415/500 Vac, ±10%, 60 Hz, 1
1
;
120-139/208-240/416-480/520-600 Vac, ±10%.
Input Sensing Burden
10 VA per phase
Power Output
KR4FFX/FFMX: 2.5 A @ 63 Vdc max-
imum continuous. 3.5 A @ 90 Vdc 1 minute
forcing (120 Vac input).
KR7FFX/FFMX: 3.5 A @ 125 Vdc max-
imum continuous. 5.0 A @ 180 Vdc 1 minute
forcing (240 Vac input).
Field Resistance
KR4FFX/FFMX: 25 ohms minimum, 400
ohms maximum.
KR7FFX/FFMX: 36 ohms minimum, 400
ohms maximum.
Regulation Accuracy
±1% from no-load to full-rated load and 5%
frequency variation.
Thermal Stability
±1% voltage variation for a 40
(
C (104
(
F)
change within the operating range.
Power Dissipated
<20 watts at maximum continuous rating.
Underfrequency Operational Threshold
54 Hz nominal in 60 Hz systems (see Figure 1).
44 Hz nominal in 50 Hz systems (see Figure 2).
Regulator Response
<17 milliseconds in 60 Hz systems.
<20 milliseconds in 50 Hz systems.
Frequency Compensation
Variable. Frequency roll-off is preset at the
factory for 48.5 Hz (50 Hz systems) and 58.5
Hz (60 Hz systems). Either V/Hz or 2 V/Hz can
be selected. Refer to Figures 1 and 2.
Electromagnetic Interference (EMI) Filtering
Refer to Figure 3.
PHYSICAL SPECIFICATIONS
Operating Temperature: -40
(
C (-40
(
F) to
+60
(
C (+140
(
F).
Storage Temperature: -65
(
C (-85
(
F) to +85
(
C (+185
(
F).
Weight 6.0 lbs. (2.7 kg) net. 7.0
lbs. (3.2 kg) shipping.
Vibration: Withstands thefollowing:5
to 26 Hz at 1.2 g. 27 to 52 Hz at 0.036 inch
double amplitude. 53 to 260 Hz at 5.0 g.
Shock: Withstands 20 g in each
of three mutually perpendicular planes.
Mounting The unit is designed to
operate when mounted directly on a diesel or
turbine driven generator system. The unit can
also be mounted in switchgear or control
panels.
Accessories
The KR Series Voltage Regulator is designed
to be compatible with any of the following listed
accessories and equipment.
1. VAR/Power Factor Controller (SCP 250)
2. Series Boost Option
3. Current Transformers (CT2 through CT50)
4. Minimum/Maximum Excitation Limiter (EL
200)
5. Auto-Synchronizer (BE3-25A)
6. Auto-Synchronizer (BE1-25A)
7. Line Drop Compensator (LDC 300)
CONTROLS
External Voltage Adjust
This 175 ohm, 25 watt rheostat is supplied as a
loose item for remote panel mounting. It
provides an adjustment of ±10% of the nominal
voltage of the regulated generator voltage.
When connected as shown in Figure 4,
adjustment of the rheostat to maximum
resistance (CCW) will obtain minimum
generator voltage output. Maximum generator
voltage output is obtained by turning the rheo-
stat clockwise (CW) to the minimum resistance
position.
Voltage Range Adjustment
This screwdriver adjustment is factory set to
establish the nominal ranges of sensing
voltages associated with 60 Hz operation. If 60
Hz sensing is used, this control will not
normally need adjustment.
When nominal 50 Hz sensing voltages are
required, this control is used to establish the
desired nominal sensing voltage. This is done
in the following manner.
(1) Set the External Voltage Adjust Rheostat
to the middle of its adjustment range.
(2) Ensure that the appropriate sensing
voltage connection is made (refer to Figure 4)
and that the 50 Hz connection is made.
(3) With the regulator properly connected into
the system (Figure 4), bring the generator up to
rated frequency (50 Hz).
(4) While watching the generator voltmeter,
adjust the Internal Voltage Range Adjustment
until the nominal generator voltage is obtained.
(Voltage increases with CW rotation.)
After the internal Voltage Range Adjustment
has been properly set, the External Voltage
Adjust Rheostat will provide a voltage
adjustment of ±10% of nominal (both 50 and 60
Hz systems).
Stability Adjustment
This screwdriver adjustment adjusts the system
stability by controlling the amount of feedback
that is applied to the Sensing and Gating
Circuitry. Normally, it is factory preset near the
extreme clockwise (CW) position. This setting
normally assures good stability, but tends to
slow the response time of the generator. If
rotated counterclockwise (CCW), the system
response time becomes faster. However, if
rotated too far CCW, the generator voltage may
oscillate (hunt). It should then be rotated CW
well above the point where oscillating occurred.
The system voltage stability is most critical at
no-load. If a setting is desired that provides the
fastest possible voltage response with good
generator stability, an oscilloscope or some
load transient voltage recording device should
be used.
Sensing Transformer Reconnection
An internal sensing transformer has provisions
for the following voltages:
60 Hz: 120-139/208-240/416-480 and 520-
600; ±10%
50 Hz: 100-110/220-230-240/380-400-415
and 500; ±10%
The transformer is normally factory connected
to the 120 Vac tap and must be reconnected to
another tap before operation if a voltage other
than the 120 Vac sensing is used.
Reconnection is facilitated through the use of
solderless connectors. Figure 4 shows the
sensing transformer location and the voltage
tap identification.
INSTALLATION
General
The Regulator must be connected to the
generator system as instructed in this section
and as shown in the basic interconnection
diagram (Figure 5).
Input Power (Terminals 3 and 4)
The voltage regulator operates on a power
input voltage applied to terminals 3 and 4. If
the correct voltage is not available at the
generator, or if the field flashing circuit is
grounded, a power isolation transformer must
be used. The transformer is not furnished with
www . ElectricalPartManuals . com

CAUTION!
The voltage regulator dc output (terminals
F+ and F-) must never be opened during
operation. To do so will produce inductive
arcing that can possibly destroy the exciter
and/or the voltage regulator. Therefore,
never place the voltage shutdown switch in
the exciter field circuit.
CAUTION!
Do not attempt to flash the machine when
it is rotating.
the regulator but can be ordered separately
from the Basler Electric Company.
The KR Voltage Regulators contain filter
capacitors that are internally connected
between terminal 3 and the chassis and
between terminal 4 and the chassis. Each
capacitor is rated at 370 Vac. When using
these regulators with generators whose output
is above 370 Vac, ensure that the voltage
between terminal 3 and ground and terminal 4
and ground does not exceed 370 Vac. The
voltage across the regulator's filter capacitors
can exceed 370 Vac on an ungrounded
generating system when the line-to-line voltage
exceeds 370 Vac.
Example (Figure 6): On a 480 Vac generating
system with an ungrounded neutral lead and
regulator chassis, if the KR7FFX regulator input
power (terminals 3 and 4) is obtained line-to-
neutral (277 Vac), and then a ground occurs on
one of the other two generator lines, 480 Vac
will be applied across one of the voltage
regulator filter capacitors.
On this same system with the same conditions,
but with the regulator connected phase-to-
phase (T7 and T9) at the generator's Wye con-
nection tie point (240 Vac) the voltage across
the regulator's filter capacitors would have been
reduced to 366 Vac.
If the line-to-line voltage of the generating
system is reduced to 416 Vac, the voltage
across the regulator's filter capacitors is
reduced to 318 Vac.
The power input leads are EMI filtered. In most
applications, securing the regulator with a good
metal-to-metal bond ensures a reduction in
interference to acceptable limits. As in all
interference reduction situations, it is necessary
to maintain a good electrical connection
between the filter ground and the system
ground. A good electrical power ground is not
necessarily a good interference ground.
Ground leads should be as short as possible,
preferably of a copper braid whose width is 1/5
of the length. For applications involving radio
reception, additional improvement can be
noticed by connecting the system to earth
ground. This is because radio reception takes
place between an antenna and earth ground.
Grounding the system to earth ground simply
makes all grounds common.
Output Power (Terminals F+ and F-)
The dc resistance of the exciter field winding
must be at least the minimum value specified in
the
Electrical Specifications
. If the field
resistance is less than this value, a series
resistor is required to increase the field
resistance. This additional resistance is
required to limit the regulator field current
forcing because excessive current may damage
the regulator semiconductors. This resistance
must not be of such a value as to restrict the
excitation at full load.
Because the regulator output leads are not
connected to any part of the system except the
generator field, they are not filtered. Since EMI
is present on these leads, it may be necessary
to observe precautions with regard to the lead
installation. Optimum results will be obtained
when the field leads are kept as short as
possible and shielded. Effective shielding can
be achieved by routing both leads through a
standard 0.5 inch diameter conduit. Not more
than one or two feet of the field leads should be
unshielded. If the regulator is installed on the
generator frame, it is possible to achieve
satisfactory results with short, unshielded
leads.
External Voltage Adjust Rheostat
The voltage adjust rheostat (Terminals 6 and 7)
is furnished with the voltage regulator for
remote mounting and wiring. It should be 175
ohms and 2 watts minimum.
MOUNTING
The Voltage Regulator may be mounted in any
position. However, it should be vertically
mounted to obtain optimum cooling. The Reg-
ulator can be mounted in any location where
the ambient temperature does not exceed the
operational limits. Due to its rugged construc-
tion, the Regulator can be mounted directly on
the generator. Mounting hardware should be
selected based upon the vibration and shock
expected to be encountered during shipping/
transport and normal operation. Refer to Figure
7 for the outline drawing of the unit which pro-
vides overall and mounting dimensions.
ACCESSORY ITEMS
Voltage Shutdown Switch
The system can be equipped with a switch to
allow the removal of the excitation in case of an
emergency or when the generator prime mover
must be operated at reduced speed. This
switch must always be placed in the input
power line that is connected to the regulator at
terminals 3 and 4.
Parallel Operation
An APM 300 Paralleling Module is available
for use with the voltage regulator and will
provide for the parallel operation of two or
more generators.
Manual Voltage Control
A Manual Voltage Control is available for use
with the voltage regulator to provide a manual
backup that is independent of the voltage
regulator.
Excitation Support System
In brushless exciter applications, no source of
power is available for field forcing during short
circuit and large motor starting conditions. The
addition of an Excitation Support System will
prevent the collapse of excitation by providing
constant voltage to the regulator for all load
conditions and short circuits.
OPERATION
This section contains operation procedures.
Before operating, ensure that the regulator is
connected into the system as shown on the
interconnection diagram (Figure 5). Even
momentary operation with an incorrect
connection can damage the regulator or other
control equipment.
Field Flashing
When the Voltage Regulator is operated with
the generator for the first time, the polarity of
residual magnetism may not be correct or of
sufficient magnitude. If the generator does not
build up after start-up, check for 6 volts or more
residual at the regulator terminals TB1-3 and
TB1-4. If the voltage is below 6 volts, shut
down the prime mover and proceed as follows:
1. With the prime mover at rest, connect a
limiting resistor of 25 to 30 ohms in series with
the field (terminals F+ and F-).
2. Observe polarity and apply a dc source
(non-grounded) of not more than 12 Vdc, to the
series circuit of the field and resistor.
3. Allow approximately 3 seconds before
removing the dc source.
4. With the voltage regulator power input
disconnected (terminals 3 and 4), start the
prime mover and measure the voltage at the
generator terminals. If the generator output is
less than 6 volts, repeat steps 1 through 3. If
the voltage is greater than 6 volts, voltage
build-up should occur. Stop the prime mover
and reconnect the regulator input power.
Preliminary Operation
Verify that all wiring is properly and securely
connected (Refer to Figure 5).
System Checkout
Perform the following steps to ensure the
proper operation of the regulator initial
operation.
Step 1. Start the prime mover and bring up to
rated speed. If a voltage shutdown switch is
used, close the switch to apply excitation.
When this switch is not used, generator voltage
will build-up automatically.
Step 2. Verify the generator output voltage.
Note that any of the following conditions may
occur:
(a)
Overvoltage
. If this condition occurs,
open the shutdown switch and stop the prime
mover. determine the cause of the overvoltage.
If necessary refer to the troubleshooting chart.
(b)
No Voltage Build-up
. If this condition
occurs, field flashing may be required.
(c)
Undervoltage
. If this condition occurs,
adjust the External Voltage Adjust Rheostat. If
not corrected, refer to the troubleshooting chart.
(d)
Voltage Builds Up and Then Collapses
.
If this condition occurs, stop the prime mover
and determine the cause by referring to the
troubleshooting chart.
(e)
Oscillating Voltage
. If this condition
occurs, rotate the Stability Adjustment Poten-
tiometer (R15) to correct. If the voltage
continues to oscillate and the Stability
Adjustment (R15) has no effect, refer to the
troubleshooting chart.
WARNING!
To eliminate any electrical shock hazard,
it is imperative that the regulator chassis
(filter ground) be connected to the system
power ground. This is because the filter
capacitors are connected between the line
and the regulator case.
www . ElectricalPartManuals . com

Publication: Rev Copyright 1997-2000 Page
9 1606 00 991 F Revised 06/2000 3 of 4
Step 3. Adjust the External Voltage Adjust
Rheostat for nominal generator output voltage.
Step 4. Apply a load to the generator.
Step 5. Verify that voltage regulation is within
±1%. If it is not, refer to the troubleshooting
chart.
Step 6. Alternately remove and apply the load
several times to determine if the generator
voltage is stable.
MAINTENANCE AND TROUBLESHOOTING
Preventive Maintenance
The only preventive maintenance required on
the KR Series Voltage Regulators is to
periodically check that the connections between
the Regulator and system are clean and tight
and that the air flow is not obstructed by
accumulations of dirt and dust.
Corrective Maintenance
The KR Series Voltage Regulators are
designed for ease of repair by the replacement
of major parts, such as the transformers,
heatsinks, or the printed circuit board.
Warranty and Repair Service
The Basler KR Series Voltage Regulators are
warranted against defective material and
workmanship for 18 months from the date of
shipment from our factory. Units submitted for
warranty repair should be returned to the
factory in Highland, Illinois, freight prepaid, with
a complete description of the installation and
the reported problem. Pre-arrangement with
either the nearest Basler Sales Office or with
the factory will assure the fastest possible turn
around time.
Functional Testing
To functional test the KR Voltage Regulator,
refer to Figure 8 and proceed as follows:
Step 1. Move the wire on the regulator sensing
transformer to the 120 V tap.
Step 2. Connect regulator as shown in Figure
8. The light bulb should be 120 Vac with a
wattage reading below 200 W.
Step 3. Adjust the External Voltage Adjust
Rheostat for maximum resistance (fully counter-
clockwise).
Step 4. Connect the regulator to a 120 Vac, 60
Hz. source. Note that the light bulb will flash
momentarily when the voltage is applied.
Step 5. Slowly adjust the External Voltage
Adjust Rheostat toward minimum resistance
(CW). Before reaching full CW rotation, the
light bulb should come on to near full brilliance.
If the light bulb(s) do not illuminate, the
regulator is defective.
Step 6. At the regulating point, a small change
in the External Voltage Adjust Rheostat should
turn the light bulb on or off.
Step 7. This test may not reveal a stability
problem.
Step 8. Before installing the regulator back into
the system, connect the regulator sensing
transformer back to the original tap selected.
Troubleshooting Chart
Common generator system malfunctions and
the appropriate repair procedures are listed in
the following paragraphs.
Voltage Does Not Build up to Rated Value
Step 1. Check for low residual voltage (less
than 6 volts). If low residual voltage exists,
flash the field in accordance with
Field
Flashing
. If residual voltage is normal, proceed
to Step 2.
Step 2. Check that Shutdown Switch is closed
and that fuses are intact. If Shutdown Switch is
closed and fuses are intact, proceed to Step 3.
Step 3. Check that prime mover is up to
speed. If prime mover is operating at rated
speed, proceed to Step 4.
Step 4. Verify that generator output is not
shorted or heavily loaded. If output is not
shorted, proceed to Step 5.
Step 5. Verify that wiring and external Voltage
Adjust Rheostat is not defective. If wiring is
defective, repair or replace wiring. If rheostat is
defective, replace rheostat. If wiring and
rheostat are not defective, proceed to Step 6.
Step 6. Verify that all wiring is correctly
connected at power input terminals 3 and 4 and
that input power is of correct value. If power
input is low or not present, repair wiring. If
power input is present, proceed to Step 7.
Step 7. Verify that connections at terminals F+
and F- are correct. If connections are incorrect,
repair wiring. If connections are correct,
proceed to Step 8.
Step 8. Verify that correct sensing tap has
been selected. If wrong sensing tap has been
selected, reconnect to proper tap. If correct tap
has been selected, proceed to Step 9.
Step 9. Verify generator/exciter operation. If
generator/exciter operation is improper, contact
generator/exciter manufacturer. If generator/
exciter operation is proper, proceed to Step 10.
Step 10. If the above steps fail to correct the
malfunction, replace the voltage regulator.
Voltage Builds up and Then Decays
Step 1. Check for open circuit from external
Voltage Adjust Rheostat. If wiring is defective,
repair wiring. If rheostat is defective, replace
rheostat. If connections are proper and not
defective and rheostat is not defective, proceed
to Step 2.
Step 2. Replace the voltage regulator.
Voltage High and Uncontrollable with Voltage
Adjust Rheostat
Step 1. Verify that sensing voltage is available
at terminals E1 and E3 and that the proper taps
are used. If sensing voltage is not available,
correct wiring. If sensing voltage is proper,
proceed to step 2.
Step 2. Replace the voltage regulator.
Voltage High and Controllable with Voltage
Adjust Rheostat
Step 1. Verify that the sensing voltage is
available at terminals E1 and E3 and that the
proper taps are used. If the sensing voltage is
not available, repair wiring. If the sensing
voltage is proper, proceed to Step 2.
Step 2. Check for defective voltmeter. If
voltmeter is defective, replace voltmeter. If
voltmeter is not defective, proceed to Step 3.
Step 3. If the above steps fail to correct the
malfunction, replace the regulator.
Poor Stability (Hunting).
Step 1. Verify that the frequency is stable. If
the frequency is unstable, consult with the
governor manufacturer. If the frequency is
stable, proceed to Step 2.
Step 2. Check the adjustment of the Stability
Adjustment (R15). If adjusting the Stability
Adjustment does not correct the malfunction,
proceed to Step 3.
Step 3. Verify that the no-load field voltage is
not below rated. If the no-load field voltage is
below rated, refer to
Installation, Output Power
(Terminals F+ and F-)
, and change the field
series resistance. If the no-load field voltage is
at rated, proceed to Step 4.
Step 4. Verify generator/exciter operation. If
generator/exciter operation is improper, contact
generator/exciter manufacturer. If generator/
exciter operation is proper, proceed to Step 5.
Step 5. If the above steps fail to correct the
malfunction, replace the voltage regulator.
Poor Regulation.
Step 1. Verify that the field voltage/current
requirements at full load are not in excess of
the maximum regulator output capability. If
regulator limits are being exceeded (per
Specifications)
, consult with the factory for a
suitable model. If regulator limits are not
exceeded, proceed to Step 2.
Step 2. Verify that the input power to terminals
3 and 4 is correct (see
Specifications
). If input
power is incorrect, connect proper power input.
If input power is correct, proceed to Step 3.
Step 3. Verify that the generator output
voltmeter is connected at the same location as
sensing inputs. If voltmeter location is different,
reconnect. If voltmeter location is the same,
proceed to Step 4.
Step 4. Check for waveform distortion due to
harmonic content in generator output voltage.
(Regulator senses average voltage, meter may
be indicating RMS value.) If waveform
distortion is present, use an average sensing
(rectifier type) voltmeter to verify regulation
accuracy. If waveform distortion is not present,
proceed to Step 5.
Step 5. Verify that the Unit/Parallel switch is in
Unit position except during parallel operation.
If Unit/Parallel is in an incorrect position, place
switch into proper position. If Unit/Parallel
switch is in proper position, proceed to Step 6.
Step 6. Verify generator/exciter operation. If
generator/exciter operation is improper, contact
generator/exciter manufacturer. If generator/
exciter operation is proper, proceed to step 7.
Step 7. If the above steps fail to correct the
malfunction, replace the voltage regulator.
www . ElectricalPartManuals . com
0 1020304050
10
20
30
40
50
60
70
80
90
100
'
Figure 1. 50 Hz Frequency Compensation
0 10203040 60
10
20
30
40
50
60
70
80
90
100
'
50
Figure 2. 60 Hz Frequency Compensation
10
20
30
40
50
60
70
80
90
100
130
120
110
0
0.010.01 50.0 100.00.05 1.0 5.0 10.0
'
)5(48(1&< 0+]
GE X$
0+]
'$7$ 5(35(6(176
(0, 68335(66,21
21 /,1(6
Figure 3. Typical Suppression of Conducted EMI
60 HZ* 600
520
240
208
480
416
139
120
500 415
400
380
240
230
220
110
100
50 HZ*
D2779-06
02-27-98
Figure 4. Sensing Transformer Connections
KR-FX/KR-FFX VOLTAGE REGULATOR
VOLT
ADJ.
INPUT
POWER
SENSING
VOLTAGE
FIELD
POWER
500
OHMS 1 2 3
67 34E1E3F+F-
6
4
1
GENERATOR CHASSIS
CW
GENERATOR
A
B
C
N
+-
EXCITER FIELD
3
5
D2779-07
06-19-00
Figure 5. Interconnection Diagram (Typical)
T1
T4
T7
T10
T12 T11
T9
T6
T3
T8
T5
T2
240 VAC
OR
277 VAC
120 VAC
OR
139 VAC
208 VAC
OR
240 VAC
318 VAC
OR
366 VAC
416 VAC
OR
480 VAC
34
KR-FX/FFX
D2779-08
02-27-98
Figure 6. Ungrounded Neutral Generator System (Typical)
2.015
(51.18)
7.125
(180.97)
5.50
(139.70)
2.75
(69.85)
7.10
(180.34)
0.218 (5.537) DIA., 6 PLACES
6.50
(165.10)
8 TERMINALS
WITH 5-40
SCREWS SPACED
ON .437 (9. 5 25)
CENTERS
NOTE: NUMBERS IN PARENTHESIS ARE IN MILLIMETERS.
D2779-09
03-03-98
3.937
(99.99)
3.25
(82.55)
1.00
(25.4)
5.25
(133.35)
5.10
(129.5)
1.00
(25.4)
Figure 7. KR Regulator, Outline Drawing
KR-FX OR KR-FFX VOLTAGE REGULATOR
6 7 3 4 E1 E3 F+ F-
LIGHT
BULB
POWER
SOURCE
120 VOLTS
60 HERTZ
EXTERNAL
VOLTAGE
ADJUST
RHEOSTAT
D2779-10
10-16-98
(IF GLASS TYPE FUSE IS USED
ENCLOSE FOR SAFETY.)
Figure 8. Functional Test Setup
NOTES:
1. Power matching transformer is required if appropriate input voltage is not available at
generator terminals. If field or flashing circuit is grounded, an isolation transformer is
also required.
2. Internal sensing transformer is provided with taps. It is shipped connected to the 120
Volt tap. If voltage other than 120 V is required, connect wire to applicable tap.
3. The exciter field dc resistance must be at least that listed in the
Specifications
. If not,
a series resistor must be added so that the total resistance is at least this value.
4. Shutdown switch allows removal of field excitation. If switch is not used, a temporary
switch should be installed during initial operation.
5. The regulator contains an internal relay for voltage buildup. If flashing is required,
refer to
Field Flashing
. If permanent field flashing is desired, connect as shown and
limit flashing current to <50% of no-load field current. Diode rating: 15 A, 600 PIV.
6. Regulator and generator must be grounded. This is pertinent for EMI suppression. If
ungrounded, the KR regulator will be electrically hot.
www . ElectricalPartManuals . com
This manual suits for next models
3
Other Basler Controllers manuals

Basler
Basler BE2000E User manual

Basler
Basler AVC63-4A User manual

Basler
Basler DGC-2020ES User manual

Basler
Basler DGC-2020ES User manual

Basler
Basler SCP 250 User manual

Basler
Basler DECS-250 User manual

Basler
Basler DECS-200 User manual

Basler
Basler VR63-4A/UL User manual

Basler
Basler AVC63-4A User manual

Basler
Basler AVC63-12A1 User manual

Basler
Basler AVC63-2 User manual

Basler
Basler AVC634A-12 User manual

Basler
Basler AVC63-12 User manual

Basler
Basler DGC-2020 User manual

Basler
Basler SR6A User manual

Basler
Basler SR4A User manual

Basler
Basler DGC-500 User manual

Basler
Basler VR63-4B User manual

Basler
Basler AVC63-2.5 User manual

Basler
Basler AVC63-4 User manual