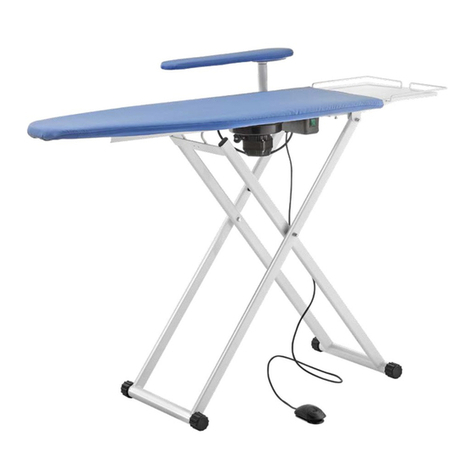
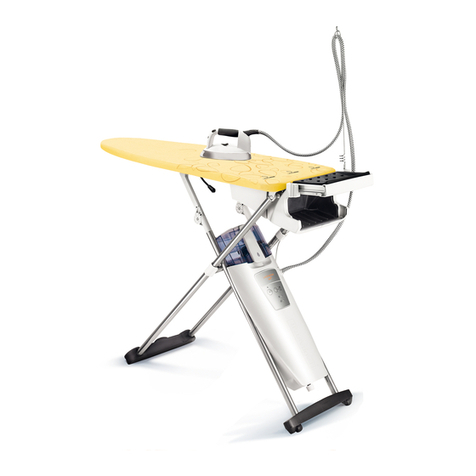
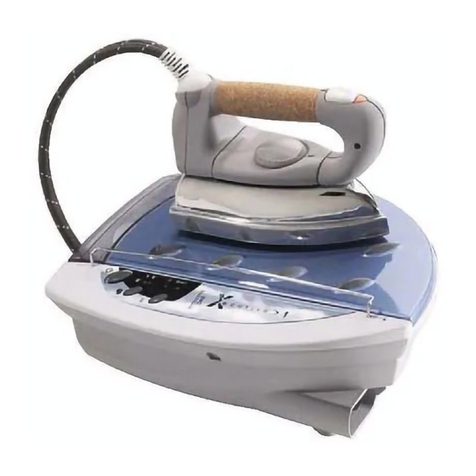
battistella EUROVAPOR Instructions for use

Manuale d’istruzioni e norme d’uso
Instructions and maintenance
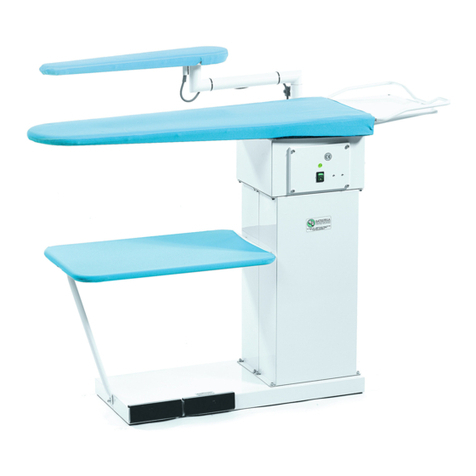
EUROVAPOR
EUROVAPOR MAXI
EUROVAPOR RETTANGOLARE
BATTISTELLA B.G. S.r.l.
Via Bessica, 219 36028 Rossano Veneto (VI) ITALY : +39-0424-549027
: +39-0424-549007 : www.battistellag.it : info@battistellag.it
Questo manuale è di proprietà della BATTISTELLA B.G. S.r.l. Qualsiasi riproduzione è vietata.
La Ditta si riserva il diritto di apportare modifiche ritenute opportune senza darne preavviso.
This manual is property of BATTISTELLA B.G. S.r.l. We reserve the right to make changes without
notice. All rights reserved.

Eurovapor 1 2016
MANUALE D’ISTRUZIONI E NORME D’USO
EUROVAPOR
Prima di mettere in funzione l’apparecchio leggere attentamente questo
manuale ed attenersi scrupolosamente alle indicazioni specificate.
Non utilizzare il prodotto in maniera difforme da quanto qui riportato.
1. CARATTERISTICHE DELLA MACCHINA
MODELLO:
EUROVAPOR
EUROVAPOR
MAXI
EUROVAPOR
RETTANGOLARE
ALIMENTAZIONE ELETTRICA:
230 V - 50 Hz
230 V - 50 Hz
230 V - 50 Hz
POTENZA INSTALLATA TOTALE:
2923 W
3123 W
3580 W
POTENZA FERRO:
800 W
800 W
800 W
POTENZA PIANO:
600 W
800 W
1200 W
POTENZA ASPIRATORE:
73 W
73 W
130 W
POTENZA CALDAIA:
1450 W
1450 W
1450 W
POTENZA BRACCIO (accessorio):
150 W
150 W
150 W
CAPACITÀ UTILE CALDAIA:
3,4 L
3,4 L
3,4 L.
AUTONOMIA DI STIRO:
3-4 ore circa
3-4 ore circa
3-4 ore circa
PRESSIONE D’ESERCIZIO:
2,8 BAR
2,8 BAR
2,8 BAR
PRESSIONE MASSIMA
AMMISSIBILE:
5 BAR
5 BAR
5 BAR
PESO:
37 kg.
40 kg.
42 kg.
DIMENSIONI D’INGOMBRO:
140x41x98 h. cm
147x48x98 h. cm
145x58x98 h. cm
MADE IN ITALY
A C
PRONTOTOP
(imbottitura)
PEDALIERA
ASPIRAZIONE SPINA
RUBINETTO
SCARICO-CALDAIA
VETRO LIVELLO
MANOMETRO
SPINA FERRO
DA STIRO
TAPPO VALVOLA
DI SICUREZZA
SPINA BRACCIO
ELETTROVALVOLA
FERRO DA STIRO ANTENNA
GANCIO
ANTENNA
POMELLO REG.
VAPORE
POGGIA FERRO
Fig. 1

Eurovapor 2 2016
2. IMPORTANTE
Prima dell’arrivo del tavolo da stiro mod. EUROVAPOR è necessario che il cliente
prepari, vicino al posto in cui verrà installato, una presa di corrente protetta e
adeguata alla potenza dell’EUROVAPOR.
Questo apparecchio non è adatto all’uso da parte di persone (inclusi i bambini) con
capacità fisiche, sensoriali e mentali ridotte, o inesperte, a meno che non vengano
supervisionate ed istruite nell’uso dell’apparecchio da una persona responsabile per la
loro sicurezza. I bambini devono essere controllati per assicurarsi che non giochino
con l’apparecchio.
3. APERTURA DELL’IMBALLO
1. Aprire la scatola contenente l’ EUROVAPOR dalla parte contrassegnata con ALTO
, prendere il libretto delle istruzioni e leggerlo attentamente.
2. Estrarre il tavolo mod. EUROVAPOR dalla scatola, inserire l’antenna nell’apposito
porta antenna (fig. 1), avendo l’avvertenza di inserirla bene fino in fondo.
3. Fissare la molla reggi filo al gancio dell’antenna evitando attorcigliamenti (fig. 1).
4. Posare il ferro sul poggia ferro in gomma in dotazione (fig. 1).
4. ALLACCIAMENTO E ACCENSIONE
Con il tavolo stiro mod. EUROVAPOR spento e
spina disinserita:
1. Svitare il tappo valvola dall’EUROVAPOR
(fig. 1) e riempire con la quantità
desiderata d’acqua la caldaia (si
raccomanda di non superare
l’indicazione MAX nel vetro livello - fig.
2). Si consiglia di riempire d’acqua la
caldaia servendosi di un imbuto.
Riavvitare il tappo prendendolo per la
parte in plastica con l’avvertenza di non
serrarlo troppo altrimenti si rovina la
guarnizione (vedi capitolo 7).
NB: prestare attenzione che il
rubinetto di scarico della caldaia
sia chiuso (fig. 1).
2. Inserire la spina di alimentazione nella presa di corrente da 230 V 16 A.
Nel caso si riempia troppo la caldaia, il ferro da stiro potrebbe perdere acqua.
In questo caso bisogna svitare di un giro il tappo valvola, aspettare che tutto il
vapore all’interno della caldaia sia fuoriuscito quindi aprire il rubinetto di scarico-
caldaia e far fuoriuscire l’acqua in eccesso.
3. Accendere l’interruttore generale e l’interruttore caldaia (fig. 2 A e B), ruotare il
volantino termostato piano sugli 80/90° C (fig. 2 F). Dopo circa 5 minuti attivare
l’interruttore ferro (fig. 2 C) e portare il relativo volantino termostato sulla
posizione “cotone”(fig. 3).
Fig. 2
AB
C
D
E
F
G
H
I

Eurovapor 3 2016
4. Attendere che la spia caldaia si spenga (fig. 2 E). A questo punto sollevare il ferro
da stiro per il manico in sughero e premere il microinterruttore del ferro (fig. 4) per
4-5 volte facendo uscire il vapore. Bisogna inoltre accertarsi che il vapore sia ben
saturo (premendo il microinterruttore con il ferro da stiro rivolto verso il
pavimento). E’ possibile inoltre regolare la quantità di vapore desiderata, tramite il
pomello di regolazione vapore situato nell’elettrovalvola (fig. 1). Eseguita
l’operazione, il ferro da stiro è pronto per stirare. Durante lo stiro la spia caldaia si
accende e si spegne in continuazione, segno di normale funzionamento (fig. 2 E).
5. AVVERTENZE GENERALI
1. Allacciare il tavolo da stiro mod. EUROVAPOR ad una presa di corrente adeguata e
protetta (evitare di collegare l’apparecchio a prese multiple e a prolunghe non
adeguate alla sua potenza).
2. Tenere lontano i bambini dall’EUROVAPOR, sia quando è in funzione sia quando è
spento.
3. L’apparecchio deve essere utilizzato e lasciato a riposo su una superficie stabile.
4. Non lasciare indumenti sopra il tavolo da stiro quando è acceso in quanto si
possono rovinare o bruciare.
5. Mai utilizzare l’apparecchio senza la tela (Prontotop) nella sua corretta posizione.
6. L’utilizzatore non deve lasciare il tavolo da stiro senza sorveglianza, quando è
allacciato alla rete elettrica.
7. Usare soltanto acqua potabile proveniente dalla rete idrica per uso domestico.
8. Non aggiungere additivi di alcun genere nell’acqua.
9. Non scaricare l’acqua dalla caldaia durante il funzionamento dell’apparecchio (vedi
capitolo 8).
10.Il tappo valvola non deve essere aperto quando l’apparecchio è in funzione.
11.Non bisogna mai sostituire il tappo valvola (fig. 1) con tappi di altro
genere. N.B.: il tappo valvola è tarato a 4,5 bar ed inoltre ha la funzione di
valvola di sicurezza.
12.Mai lasciare il ferro acceso sopra il piano da stiro dell’EUROVAPOR o sopra i capi da
stirare.
13.Non appoggiare il ferro da stiro direttamente sul poggia ferro metallico
dell’apparecchio (utilizzare sempre l’apposito tappetino in gomma).
14.Mai utilizzare il ferro da stiro per stirare indumenti posti su persone o cose.
15.Non salire sopra il portabiancheria, non sedersi sopra il tavolo da stiro e non
appoggiarsi al braccio stiramaniche: il tavolo da stiro mod. EUROVAPOR è stato
studiato e costruito esclusivamente per stirare i capi di vestiario.
16.Non avvicinare l’apparecchio, quando è in funzione, a parti termolabili o
infiammabili.
17.Prestare attenzione nel maneggiare la pedaliera di aspirazione. Per evitare di
danneggiarla riporla sopra l’apparecchio al termine dello stiro o quando si intende
spostare il tavolo da stiro mod. EUROVAPOR (l’apparecchio deve essere freddo).
6. STIRATURA
Il tavolo è dotato di aspirazione che serve per tenere il capo ben disteso ed eliminare
l’umidità presente durante la stiratura.
1. Passare il ferro da stiro sui capi da stirare, premendo ad intervalli il
microinterruttore del ferro per far uscire il vapore e contemporaneamente
Eurovapor 4 2016
schiacciare il pedale dell’aspirazione (fig. 1). Si consiglia di tenere schiacciato il
pedale dell’aspirazione qualche secondo in più rispetto al microinterruttore del
ferro, per permettere al capo di asciugarsi.
2. Per i capi delicati, blu o neri, si consiglia l‘uso dell’apposita soletta antilucido.
3. È prudente, durante lo stiro, riporre il ferro solamente sull’apposito poggia ferro in
gomma (fig. 1).
4. Per la stiratura a secco si può regolare il termostato (fig. 3) sulle varie posizioni, a
seconda del tipo di tessuto che si vuole stirare (fare riferimento quindi alle
indicazioni apposte sui capi). Per lo stiro a vapore si deve regolare il termostato
sulla posizione “cotone” o “lino”.
7. RICARICA ACQUA IN CALDAIA
L’acqua è terminata quando, durante lo stiro, si accende la
spia “senza acqua” (fig. 2 D). A questo punto rimuovere la
spina dalla presa, ruotare di 360° il tappo valvola (fig. 1) e
aspettare che sia fuoriuscito tutto il vapore (il manometro
deve indicare 0 bar). Con molta cautela svitare e togliere il
tappo e attendere 5/10 minuti.
Rifornire quindi d’acqua la caldaia (fig. 5) avendo
l’avvertenza di non superare il segno MAX (vedi capitolo 4
punto 1). Riavvitare il tappo valvola (fig. 1), reinserire la
spina nella presa e attendere finché non si spegne la spia
caldaia (fig. 2 E). Il ferro è nuovamente pronto per stirare.
Durante l’operazione di ricarica prestare attenzione a non
rovesciare acqua all’esterno della macchina, se ciò dovesse
accadere asciugare subito per evitare rischi di natura
elettrica.
8. SCARICO CALDAIA
Scaricare la caldaia periodicamente. Eseguire l’operazione con il tavolo da stiro mod.
EUROVAPOR spento e freddo (il manometro deve indicare 0 BAR) e con la spina
disinserita dalla rete elettrica. Attendere almeno 1 ora dopo lo spegnimento. Durante
questa operazione, indossare guanti da lavoro per evitare possibili scottature.
FILO
ELETTRICO
TERMOSTATO
MICROINTERRUTTORE
FERRO
TUBO
VAPORE
Fig. 3
Fig. 4
Fig. 5

Eurovapor 5 2016
Togliere il tappo valvola e aprire il rubinetto scarico-caldaia (fig. 1), aspettare che
fuoriesca tutta l’acqua e infine chiudere il rubinetto scarico-caldaia. Può succedere che
il rubinetto di scarico si otturi: in questo caso, prendere un filo di ferro del diametro di
3-4 mm o similari ed introdurlo nel condotto per sturarlo.
9. BUON FUNZIONAMENTO
Il tavolo da stiro mod. EUROVAPOR è stato progettato e costruito per stirare capi di
abbigliamento ad uso familiare. Può lavorare un massimo di 20 ore settimanali
(suddivise in più volte), con un massimo di 80 ore mensili.
10. INTERVENTI E PICCOLE RIPARAZIONI
1. E’ consigliato sostituire la tela (Prontotop) ogni 400 ore di lavoro o al massimo ogni
6 mesi o qualora l’aspirazione del tavolo non sia soddisfacente o si formino degli
aloni sopra il piano da stiro. L’operazione va eseguita con l’apparecchio spento e
freddo. Gli aloni potrebbero formarsi anche nel caso in cui si utilizzi molto vapore
e/o si aspiri poco (in questo caso diminuire il flusso vapore e aspirare
maggiormente). N.B.: il Prontotop si può lavare 1-2 volte.
2. È consigliato scaricare la caldaia dopo 2 o 3 volte che la si utilizza.
3. È consigliato sostituire la guarnizione di tenuta del tappo valvola ogni 1200 ore di
accensione o al massimo ogni 2 anni (utilizzando solo guarnizioni originali).
L’operazione va eseguita con l’apparecchio spento e freddo e quando il manometro
indica 0 bar.
4. Se il cavo di alimentazione risulta danneggiato, provvedere alla sua immediata
sostituzione. Il cavo è disponibile presso il costruttore o il servizio di assistenza
tecnica.
11. MANUTENZIONE OBBLIGATORIA E PERIODICA
(Da effettuarsi esclusivamente nei centri di assistenza o presso la ditta
costruttrice)
È consigliato sostituire:
1. la valvola di sicurezza interna ogni 2100 ore di accensione o al massimo ogni 3
anni;
2. il termostato interno ogni 2100 ore di accensione o al massimo ogni 3 anni;
3. il tubo vapore e il filo del ferro da stiro ogni qualvolta risultino danneggiati (fig. 3);
4. il tappo valvola ogni 2500 ore di lavoro o al massimo ogni 3 anni (fig. 1).
È altresì consigliato pulire la caldaia per rimuovere il calcare ogni 2500 ore di
accensione o al massimo ogni 3 anni.
12. RISCHI DI NATURA ELETTRICA
Le situazioni sotto riportate sono definite pericolose dal punto di vista elettrico, poiché
possono porre l’operatore che usa il tavolo da stiro mod. EUROVAPOR in condizioni
pericolose:
1. quando interviene l’interruttore differenziale (salvavita) nel momento in cui si
accende l’apparecchio;

Eurovapor 6 2016
2. quando si usa il tavolo da stiro mod. EUROVAPOR durante un temporale;
3. quando si usa il tavolo da stiro mod. EUROVAPOR senza adeguate protezioni ai
piedi (senza scarpe…) o con i piedi bagnati;
4. quando risultano danneggiati i cavi elettrici;
5. quando il cavo di alimentazione o quello della pedaliera di aspirazione toccano parti
calde dell’apparecchio;
6. quando il ferro si surriscalda o perde acqua (fig. 3);
7. quando si lava o si pulisce il ferro da stiro con l’acqua (fig. 3);
8. quando l’apparecchio perde acqua;
9. quando si riempie d’acqua la caldaia con l’apparecchio acceso.
13. RISCHI DI NATURA MECCANICA
Le situazioni sotto riportate sono definite pericolose dal punto di vista meccanico,
poiché possono porre l’operatore che usa il tavolo da stiro mod. EUROVAPOR in
condizioni pericolose:
1. quando si usa il tavolo da stiro mod. EUROVAPOR al di fuori della stiratura
normale;
2. quando si sostituisce la guarnizione del tappo valvola con guarnizioni non originali.
14. RISCHI DI NATURA TERMICA
L’apparecchio può diventare estremamente caldo: porre molta cautela durante l’uso e
disinserire l’alimentazione quando non lo si utilizza.
Le situazioni sotto riportate sono definite pericolose dal punto di vista termico, poiché
possono porre l’operatore che usa il tavolo da stiro mod. EUROVAPOR in condizioni
pericolose:
1. quando si tocca la piastra del ferro da stiro in funzione;
2. quando si tocca l’elettrovalvola vapore dell’EUROVAPOR in pressione;
3. quando si scarica l’acqua o si tocca il rubinetto di scarico con la caldaia in
pressione;
4. quando si tocca il tappo valvola dell’EUROVAPOR in pressione;
5. quando si dirige il getto di vapore verso persone o animali.
Non stirare capi di vestiario
direttamente sulle persone.
Non lasciare il ferro acceso sui
capi da stirare.
Dopo l’uso il ferro da stiro va
riposto sempre sull’apposito
poggia ferro in gomma.

Eurovapor 7 2016
15. IMBALLAGGIO, IMMAGAZZINAMENTO E TRASPORTO
Il tavolo da stiro mod. EUROVAPOR può essere imballato con cellophane o in una
scatola di cartone che non può essere capovolta.
Non essendo un imballo rigido, è poco resistente agli urti (Materiale fragile), porre
quindi la massima attenzione nel maneggiare l’apparecchio imballato, non usarlo come
sgabello o come punto d’appoggio.
Per i centri autorizzati alla rivendita: si raccomanda di non sovrapporre le scatole e di
immagazzinare le stesse in un luogo asciutto con l’apertura verso l’alto .
16. CONDIZIONI DI GARANZIA
La garanzia del costruttore decade:
in caso di riparazioni effettuate da parte di personale o centro di assistenza non
autorizzato;
per l’inosservanza totale o parziale delle istruzioni contenute nel presente
manuale;
per cattiva conservazione, mancata manutenzione/pulizia o errato montaggio;
quando ci sono danni causati dal cliente;
quando ci sono guasti o danni che non derivano da un difetto di fabbricazione;
quando ci sono danni che derivano da caso fortuito (incendi, cortocircuiti) o da
fatto imputabile a terzi (manomissioni);
quando ci sono danni causati dal calcare;
quando i danni sono stati causati dall’utilizzo di acqua diversa da quella indicata
nelle istruzioni (vedi capitolo “QUALE ACQUA UTILIZZARE”);
quando si utilizza l’apparecchio per un uso diverso da quello specificato nel
presente manuale;
quando si utilizzano ricambi o accessori non originali, modificati o non adatti
all’apparecchio.
17. SMALTIMENTO
Ai sensi dell’art. 26 del D. Lgs. 14 Marzo 2014 nr. 49 “attuazione della
direttiva 2012/19/UE sui rifiuti da apparecchiature elettriche ed
elettroniche”, non smaltire l’apparecchio insieme ai rifiuti urbani misti.
Questo prodotto è conforme alla direttiva 2011/65/UE, relativa alla
restrizione dell’uso di determinate sostanze pericolose nelle
apparecchiature elettriche ed elettroniche.
Il simbolo del cassonetto barrato riportato sull’apparecchiatura indica che
il prodotto, alla fine della propria vita utile, deve essere raccolto
separatamente dagli altri rifiuti.
L’utente finale dovrà conferire l’apparecchiatura giunta a fine vita agli idonei centri di
raccolta differenziata dei rifiuti elettronici ed elettrotecnici, oppure riconsegnarla al
rivenditore al momento dell’acquisto di una nuova apparecchiatura di tipo equivalente,
in ragione di uno a uno.
L’adeguata raccolta differenziata per l’avvio successivo dell’apparecchiatura dismessa
al riciclaggio, al trattamento e/o allo smaltimento ambientalmente compatibile
contribuisce ad evitare possibili effetti negativi sull’ambiente e sulla salute e favorisce
il riciclo dei materiali di cui è composta l’apparecchiatura.

Eurovapor 8 2016
Lo smaltimento abusivo del prodotto da parte dell’utente comporta l’applicazione delle
sanzioni amministrative previste dalla normativa vigente.
Ogni acquisto di prodotti BATTISTELLA in Italia è sottoposto alle seguenti
limitazioni:
La Battistella B.G. S.r.l. garantisce che la macchina, correttamente montata e
usata, funzionerà in sostanziale conformità con il manuale. Ogni garanzia implicita
sulla macchina è limitata ai termini di legge dalla data di acquisto.
Esclusione di responsabilità per danni indiretti: In nessun caso la Battistella
B.G. S.r.l. sarà responsabile per i danni (inclusi senza limitazioni, il danno indiretto
per perdita o mancato guadagno, interruzione dell’attività, o altre perdite
economiche), derivanti dall’uso della macchina Battistella, anche nel caso che la
Battistella B.G. S.r.l. sia stata avvertita dell’eventuale possibilità di tali danni.
Chiunque desideri porre ulteriori quesiti e specifiche domande riguardanti questo
manuale può contattare la Battistella B.G. S.r.l. o rivolgersi al rivenditore
responsabile della vendita dei nostri prodotti.

Eurovapor 9 2016
INSTRUCTIONS AND MAINTENANCE
EUROVAPOR
Read these directions carefully before operating.
Don’t use the machine differently from the following description.
1. SPECIFICATIONS
A C
PRONTOTOP
(padding)
VACUUM
PEDAL PLUG
WATER
EXHAUST TAP
VISIBLE
WATER LEVEL
MANOMETER
IRON PLUG
SAFETY VALVE PLUG
ARM PLUG
SOLENOID VALVE
CABLE SUPPORT
HOOK FOR
CABLE SUPPORT
IRON REST
Fig. 1
MODEL:
EUROVAPOR
EUROVAPOR
MAXI
EUROVAPOR
RECTANGULAR
POWER SUPPLY:
230 V - 50 Hz
230 V - 50 Hz
230 V - 50 Hz
TOTAL INSTALLED POWER:
2923 W
3123 W
3580 W
IRON POWER:
800 W
800 W
800 W
BOARD POWER:
600 W
800 W
1200 W
VACUUM POWER:
73 W
73 W
130 W
BOILER POWER:
1450 W
1450 W
1450 W
ARM POWER (optional):
150 W
150 W
150 W
BOILER CAPACITY:
3,4 L
3,4 L
3,4 L.
IRONING ENDURANCE:
about 3-4 hours
about 3-4 hours
about 3-4 hours
OPERATING STEAM PRESSURE:
2,8 BAR
2,8 BAR
2,8 BAR
MAXIMUM PRESSURE:
5 BAR
5 BAR
5 BAR
WEIGHT:
37 kg.
40 kg.
42 kg.
OVERALL DIMENSIONS:
140x41x98 h. cm
147x48x98 h. cm
145x58x98 h. cm
MADE IN ITALY

Eurovapor 10 2016
2. IMPORTANT
Before installing EUROVAPOR, it is necessary to set up a protected electrical socket
suitable to its power.
This ironing board is not suitable for children, people with physical or mental handicaps or
inexperienced persons, unless they are instructed by a person who takes the responsibility
for their safety. Children must not play with the ironing board.
3. OPENING OF PACKAGE
1. Open the box containing EUROVAPOR (ALTO ), take out the instructions manual
and read it carefully.
2. Remove EUROVAPOR from the box, position the iron rest support and insert the
cable support deep into the special hole (fig. 1).
3. Fix the spring to the support hook, paying attention in order to avoid entwining
(fig. 1).
4. Place the iron on the rubber iron rest supplied with the machine (fig. 1).
4. CONNECTION AND STARTING
With EUROVAPOR switched off and
disconnected plug:
1. Unscrew the safety valve plug (fig. 1)
and fill the boiler with water to the
desired level by using a funnel, paying
attention not to exceed MAX level
marked on the sight glass (fig. 2). Take
the plug by the plastic part and screw it
again: do not tighten too much or its
gasket might get ruined (see section 7).
N.B. make sure the exhaust tap of
the boiler is closed (fig. 1).
2. Insert the plug into a 230 V 16 A socket.
In case the boiler is filled too much,
the iron might leak water. In this case
unscrew the safety valve plug a bit, let
all the steam come out of the boiler and
turn the exhaust tap so that the excess
water flows out.
3. Switch on the main switch and the boiler (fig. 2 A and B) and set the board
thermostat on 80/90° (fig. 2 F). Five minutes later switch on the iron (fig. 2 C) and
adjust the thermostat (fig. 3) on “cotton”.
4. Wait for the boiler lamp to switch off (fig. 2 E). Seize the iron by the cork handle
and press the red micro-switch 4 or 5 times (fig. 4), so that steam comes out. It is
important to make sure it is a saturated steam (by pressing the micro switch with
the iron pointed downwards). You can adjust the steam flux by turning the knob
placed on the solenoid valve (fig. 1). Now everything is ready for ironing. During
normal ironing operation, the boiler lamp switches on and off (fig. 2 E).
Fig. 2
AB
C
D
E
F
G
H
I

Eurovapor 11 2016
5. GENERAL WARNINGS
1. Connect EUROVAPOR to a suitable protected socket (avoid connecting the device
to multiple sockets or extensions which are not suitable to its power).
2. Keep out of reach of children, both when it is on or off.
3. Always place equipment on a sturdy surface, whether it is being used or not.
4. Never leave garments on the board when it is on because they might get spoilt or
even burnt.
5. Never use EUROVAPOR if the cover (Prontotop) is not properly positioned.
6. The operator must never leave the ironing board unattended when it is plugged in.
7. Use only drinkable tap water from the water supply.
8. Never add additives to water.
9. Never empty the boiler when the machine is being used. (see section 8).
10.The safety valve plug must never be opened while the machine is being used.
11. Never replace the safety valve plug (fig. 1) with other types of plug. N.B.
the safety valve plug is set at 4,5 BAR and it has the function of a safety
valve.
12. When switched on, never leave the iron on the board or on the garments.
13.Do not place the iron directly on the metal part of the iron rest (always use proper
rubber rest).
14.Do not iron garments directly on persons or things.
15. Do not mount the linen support, do not sit on the board, nor lean against the
sleeve arm: the ironing board EUROVAPOR has been specifically designed for
ironing of garments.
16.When in use, do not bring it near inflammable or thermo-labile parts.
17.Pay attention when handling the vacuum pedal. In order not to damage it place it
on top of the ironing board once ironing is finished, or upon moving the board
(EUROVAPOR must be cold).
6. IRONING OPERATION
The ironing board is equipped with vacuum which helps keep the garments stretched
and eliminates any humidity.
1. Run the iron on garments, pressing the iron micro-switch for steam and the
vacuum pedal at the same time (fig. 1). We suggest you to press the pedal a bit
longer than the micro-switch in order to dry the garment.
2. For delicate, black and blue garments, we suggest to use the anti-sheen shoe.
3. During ironing, always put the iron on its rubber rest (fig. 1).
4. For dry ironing it is possible to adjust the thermostat (fig. 3) on different positions
according to the type of fabric (look at garment label). For steam ironing, set the
thermostat on “cotton” or “linen”.

Eurovapor 12 2016
7. WATER FILLING
When the water in the boiler is finished, the “water
missing”pilot lamp switches on (fig. 2 D). Unplug the
machine, unscrew the safety valve plug just slightly
(360°) (fig. 1) so that all the steam comes out
(manometer on 0 BAR). Completely unscrew the valve
plug with care and wait at least 5/10 minutes.
Then fill the boiler with water (fig. 5) making sure not to
exceed MAX level (point 4.1). Screw the valve plug again
(fig. 1), turn on the machine and wait for the boiler lamp
to switch off (fig. 2 E). Now the iron is ready again.
While refilling the boiler, do not spill water onto the
machine. In the event his should happen, dry
immediately in order to avoid electrical risks.
8. BOILER DISCHARGE
Empty the boiler periodically. Carry out this operation when the machine is unplugged
and cold (manometer at 0 BAR). Wait at least 1 hour and then empty the boiler. Wear
proper gloves in order to avoid accidental burns.
Unscrew the valve plug and open the discharge tap (fig. 1), wait for all the water to
come out and then close the tap again. The tap might get clogged: in this case use a
wire with a diameter of 3-4 mm to unclog it.
9. GOOD FUNCTIONING
EUROVAPOR was designed for the ironing of domestic garments. It can be used
maximum 20 hrs. per week or 80 hrs. per month (subdivided in many times).
ELECTRIC
WIRE
THERMOSTAT
MICROSWITCH
FOR IRON
STEAM
HOSE
Fig. 3
Fig. 4
Fig. 5

Eurovapor 13 2016
10. INTERVENTIONS AND SMALL REPAIRS
1. Replace the cover (Prontotop) every 400 hrs. or maximum every 6 months.
Replace it also if the vacuum of the board in unsatisfactory or if stains appear on
it. This operation must be carried out with EUROVAPOR switched off and cold.
Stains may appear if too much steam is used or if vacuum function is not used
enough (in this case reduce steam flow and use more vacuum). N.B.: the cover
can be washed 1-2 times.
2. Empty the boiler every 2-3 times you use the machine.
3. Replace the gasket of the safety valve plug every 1200 hrs. of lighting or
maximum every 2 years (use only original spare parts).
Carry out this operation when the machine is unplugged and cold (manometer at 0
BAR).
4. Replace the electric wire when it is damaged. The wire is supplied by the
manufacturer or authorized service centres.
11. COMPULSORY PERIODICAL MAINTENANCE
(To be carried out exclusively by authorized service centres or by the
manufacturer)
It is recommended to replace:
1. the internal safety valve every 2100 hrs. of ironing or maximum every 3 years;
2. the internal thermostat every 2100 hrs. of ironing or maximum every 3 years;
3. steam hose and iron electric wire whenever they seem damaged (fig. 3);
4. the safety valve plug every 2500 hrs. or maximum every 3 years (fig. 1).
It is recommended also to clean the boiler from limestone every 2500 hrs. of ironing
or maximum every 3 years.
12. ELECTRICAL RISKS
The following situations are considered dangerous for the operator:
1. earth protector switch is activated when turning on the machine;
2. using EUROVAPOR during thunderstorms;
3. using EUROVAPOR without proper protection for feet (without shoes) or with wet feet;
4. damage of electric wires;
5. using EUROVAPOR when the electric wires touch hot parts of the machine;
6. iron overheating or loss of water from iron (fig. 3);
7. cleaning or washing the iron using water (fig. 3);
8. loss of water from machine;
9. filling the boiler while the machine is on.
13. MECHANICAL RISKS
The following situations are considered dangerous for the operator:
1. using EUROVAPOR for different purposes other than ironing;
2. replacing the safety valve plug gasket with non-original gaskets.

Eurovapor 14 2016
14. THERMIC RISKS
The ironing board can become extremely hot when in function: use it very carefully
and disconnect plug when not in use.
The following situations are considered dangerous for the operator:
1. touching the iron base when it is hot;
2. touching the solenoid valve while the machine is under pressure;
3. emptying the boiler or touching the discharge tap while there is pressure inside the
boiler;
4. touching the safety valve plug when EUROVAPOR is under pressure;
5. pointing the steam iron towards persons or animals.
Do not iron garments directly on
persons.
Do not leave hot iron on
garments.
After use, always put the iron on
its rubber iron rest.
15. PACKING, STORAGE AND TRANSPORT
EUROVAPOR may be packed with cellophane or in a cardboard box which cannot be
turned upside down. As this is not a stiff package it is not shock-resistant. We
therefore suggest to handle the box with utmost care and not to use it as a stool or
support.
For authorized distributors and resellers: Do not store the boxes one on top of another
and keep them dry, paying attention to store them with upwards (Handle with
care).
16. WARRANTY
The manufacturer's warranty becomes void:
in the event of repairs carried out by unauthorized personnel or service centers;
total or partial failure to follow the instructions contained in this manual;
for poor storage, lack of maintenance/cleaning or incorrect assembly;
when there are damages caused by the customer;
when there are failures or damages that do not derive from a manufacturing
defect;
when there are damages deriving from a fortuitous event (fire, short circuit) or
due to third parties (tampering);
when there are damages caused by limescale;
when the damage has been caused by the use of water different from that
indicated in the instructions (see "WATER CONNECTION" chapter);
when using the machine for a purpose different than the one specified in this
manual;
ATTENTION:
THERMIC DANGER
INCANDESCENT
IRON BASE

Eurovapor 15 2016
when using non-genuine spare parts or accessories, modified or not suitable for
the appliance.
17. DISPOSAL
According to the directive 2012/19/UE on waste of electrical and
electronic equipment, do not treat this product as household waste.
This appliance is marked according to the directive 2011/65/UE on
restriction of use of specific dangerous substances in electrical and
electronic equipment.
This symbol on the product or on its packaging indicates that this product
shall not be treated as household waste. Instead it shall be handed over
to the applicable collection point for the recycling of electrical and
electronic equipment.
Ensuring this product is disposed of correctly will help prevent potential negative
consequences for the environment and human health which could otherwise be caused
by inappropriate waste handling of this product. The recycling of materials will help to
conserve natural resources.
The abusive disposal of the product by the user may lead to administrative sanctions.
Every product manufactured by BATTISTELLA B.G. S.r.l. is subject to the
following limitations:
BATTISTELLA B.G. S.r.l. guarantees that this machine, correctly installed and
used, works accordingly to this manual of instructions. Each implicit guarantee is
limited by law as from purchase date.
Declination of responsibility for consequential damages: BATTISTELLA
B.G. S.r.l. will never take the responsibility for any damage (included, without any
limitation, consequential damages due to loss or no profit, cutback or any other
economical loss) deriving from the use of a BATTISTELLA machine, even in case
the Company had been previously informed of such kind of possibility.
Should you need further information about this manual, please contact
BATTISTELLA B.G. S.r.l. or the person who sold you the machine.
This manual suits for next models
2
Table of contents
Languages:
Other battistella Ironing Center manuals

battistella
battistella 2016 Instructions for use

battistella
battistella BARBARA 31 2010 Instructions for use

battistella
battistella ANDROMEDA MAX VAP 2009 Instructions for use

battistella
battistella BARBARA 27 2010 Instructions for use

battistella
battistella BARBARA 27 2010 Instructions for use

battistella
battistella SATURNINO 2010 Instructions for use

battistella
battistella PLUTONE 2009 Instructions for use

battistella
battistella VAPORSPRINT Instructions for use

battistella
battistella EOLO Instructions for use

battistella
battistella LUNA PLUS 2009 Instructions for use