manuals.online logo
Brands
  1. Home
  2. •
  3. Brands
  4. •
  5. Bayco
  6. •
  7. Work Light
  8. •
  9. Bayco BAR-2134 User manual

Bayco BAR-2134 User manual

Please read these instructions before using your work light. Be sure to charge the
work light before the first use.
CAUTION: Do not use this work light in explosive atmospheres, near flammable
liquids, or where explosion-proof lamps are required. Do not immerse in water.
CAUTION: For light duty work only.
CHARGING
Initial Use
Fully charge the work light before the first use. If the battery is new or has been
unused for several months, several charge and discharge cycles may be needed to
reach full battery capacity. To reach maximum performance, run the light to completely
discharge the battery and then recharge. Each charge cycle will extend the operation
time until maximum capacity is achieved. The charge time for maximum capacity is
approximately 8 hours.
Regular Use
Use only the supplied AC or DC charging adapter.
For best performance, charge the work light when the LED’s start to dim.
Connect the AC power adapter to the light. The red indicator will light.
The red light indicates the work light is being charged. The red light remains on until
the battery is fully charged. At full charge, the light turns off. The total time to full charge
varies depending on the remaining charge in the battery pack.
Keep the work light plugged into the charger to maintain a trickle charge.
TIPS TO EXTEND BATTERY LIFE
The work light NiMH internal battery pack does not have a memory effect. Charging
the work light often helps extend its useful life.
A new work light or one that has not been used for a long period of time may not
accept a full charge initially. This is normal and does not indicate a problem. Fully
discharge and then charge the unit several times to condition the battery pack for full
capacity. As the battery pack capacity increases the charge time shortens.
Charge the unit after each use, whether the work light is fully discharged or not.
Store the work light at room temperature
OPERATION
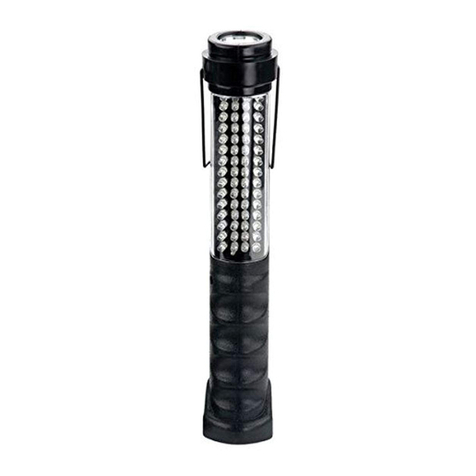
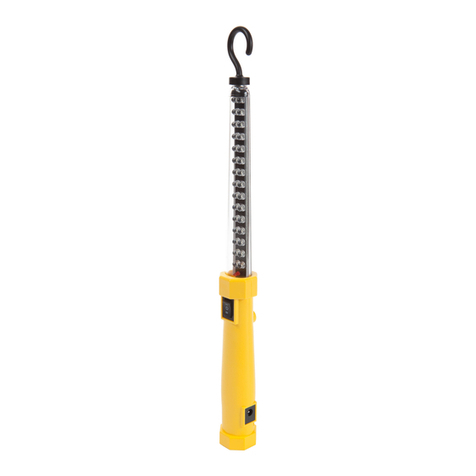
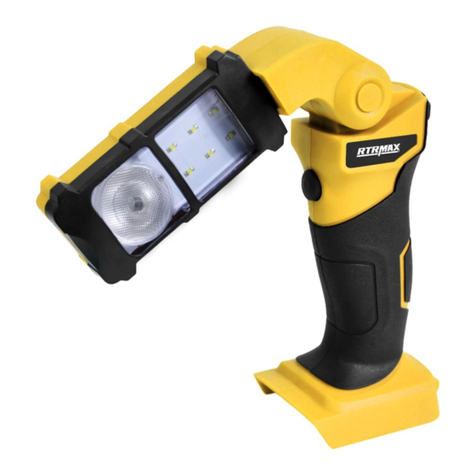
The work light has a 2 position rocker switch to activate either the floodlight or
spotlight. The center position turns the light off. The magnetic hook can be placed on the
top of the light or the side. The integrated body or tip magnet can be used without the
magnet to attach the light to most metal surfaces.
Bayco Products, Inc. • 640 South Sanden Blvd. • Wylie, TX 75098 • 1-800-233-2155 • 1-469-326-9400 • www.baycoproducts.com
INS-BAR2134-14
Instruction Manual
BAR-2134
THANK YOU FOR PURCHASING THE BAR-2134 RECHARGEABLE WORK LIGHT
WITH INTEGRATED MAGNET. SAVE THESE INSTRUCTIONS.
WARRANTY
1 Year Limited Warranty
This product is warranted to the original purchaser for 1 year and only covers failures
due to defects in materials or workmanship. If this product is used for rental purposes,
the warranty term is reduced to 90 days from the date of purchase.
Not Covered
Consequential damages, incidental damages or incidental expenses, including
damage to property. Some states do not allow the exclusion or limitation of incidental or
consequential damages, so the above limitation or exclusion may not apply to you. This
warranty gives you specific legal rights, which may vary from state to state.
Warranty Claims - USA
Contact Bayco Products, Inc. for USA warranty claims. Call 800-233-2155 or email
[email protected] and Bayco Customer Service will provide a Return Goods
Authorization (RGA) to facilitate rapid warranty action. After receiving the RGA, send
the product (shipping prepaid) to BAYCO PRODUCTS, INC. • 640 S. SANDEN BLVD •
WYLIE, TEXAS • 75098. Include a dated proof of purchase and a brief description of the
defect with your name, address and phone number. Your product will either be repaired
or replaced at the option of Bayco and returned as soon as practical, but no later than 45
days after being received by Bayco.
Warranty questions and international claims
If you live outside the USA or have questions about this warranty or an inquiry about
other Bayco products, contact BAYCO PRODUCTS, INC. • 640 S. SANDEN BLVD •
WYLIE, TEXAS • 75098 or call 800-233-2155 (or 469-326-9400).
Mode d’emploi
BAR-2134
MERCI D’AVOIR ACHETÉ LA BALADEUSE BAR-2134 RECHARGEABLE AVEC
AIMANT INTÉGRÉ. VEUILLEZ CONSERVER CES INSTRUCTIONS.
Veuillez lire ces instructions avant d’utiliser ce produit. Veillez à charger la baladeuse
avant de l’utiliser pour la première fois.
AVERTISSEMENT : Ne pas utiliser ce produit dans une atmosphère explosive,
à proximité de liquides inflammables, ou dans des endroits exigeant un éclairage
antidéflagrant. Ne pas immerger dans l’eau.
AVERTISSEMENT : uniquement pour les travaux légers.
CHARGE
Utilisation initiale
Chargez la baladeuse à bloc avant la première utilisation. Si la batterie est neuve
ou n’a pas été utilisée depuis plusieurs mois, il est possible qu’il faille plusieurs cycle de
charge et décharge pour que la batterie atteigne sa capacité maximale. Pour obtenir les
meilleurs résultats possibles, utilisez la baladeuse de façon à complètement décharger
la batterie puis rechargez-la. Chaque cycle de recharge prolongera la durée d’utilisation
jusqu’à ce que la capacité maximale soit atteinte. La durée maximale de charge requise
est d’environ 8 heures.
Utilisation normale
Utilisez exclusivement l’adapteur de chargeur c.a ou c.c fourni.
Pour de meilleurs résultats, chargez la baladeuse quand les LEDs commencent à
s’affaiblir.
Connectez l’adapteur de courant c.a. à la baladeuse. Le voyant rouge s’allumera.
Le voyant rouge indique que la baladeuse est en train de charger. Le voyant reste
rouge jusqu’à ce que la batterie soit complètement chargée. Une fois complètement
chargée, le voyant s’éteint. La durée totale de charge varie en fonction de la charge
qui reste dans la batterie.
Conservez la baladeuse branchée dans le chargeur pour obtenir une charge
d’entretien.
CONSEILS POUR PROLONGER LA VIE DE LA BATTERIE
La batterie interne NiMH n’a pas d’effet de mémoire de recharge. Recharger souvent
la batterie contribue à prolonger sa durée de vie.
Une nouvelle baladeuse, ou une baladeuse qui n’a pas été utilisée pendant
longtemps, n’accepte pas initialement de charge complète. Cela est normal et
n’indique pas de problème. Déchargez complètement puis chargez la baladeuse
plusieurs fois pour permettre à la batterie d’atteindre sa capacité maximale. Le temps
de charge devient plus bref au fur et à mesure que la capacité de la batterie augmente.
Chargez la batterie après chaque utilisation, que la baladeuse soit complètement
déchargée ou non.
Stockez la baladeuse à température ambiante.
FONCTIONNEMENT
La baladeuse comprend un interrupteur basculant à 2 positions permettant
d’activer le mode projecteur ou le mode faisceau étroit. La position centrale permet
d’éteindre la baladeuse. La crochet magnétique peut être placé sur le dessus ou sur le
côté de la baladeuse. L’aimant intégré au boîtier ou au bout de la baladeuse peut être
utilisé sans le crocher magnétique pour fixer la baladeuse sur la plupart des surfaces
métalliques.
GARANTIE
Garantie limitée d’un an
Le produit est garanti exempt de tout défaut, tant au niveau des matériaux utilisés
que de la fabrication, pour un an à compter de la date d’achat, pour l’acheteur original.
Si le produit est utilisé dans le cadre de locations, la garantie est de 90 jours à compter
de la date d’achat.
Ce que la garantie ne couvre pas
Les dommages accessoires, les dommages consécutifs, ou les dépenses
accessoires, dont les dommages matériels. Certains états ne permettent pas
l’exclusion ou la limitation des dommages accessoires ou consécutifs, aussi la
limitation ou l’exclusion ci-dessus ne s’applique-t-elle peut-être pas à vous. Cette
garantie vous confère des droits spécifiques qui peuvent varier d’un état à l’autre.
Réclamations au titre de la garantie – États-Unis
Veuillez contacter Bayco Products, Inc. pour les réclamations au titre de la
garantie aux États-Unis. Appelez le 800-233-2155 ou envoyez un courriel à cs@
baycoproducts.com et le Service Clientèle de Bayco vous fournira une autorisation
de renvoi de produit (ARP) pour faciliter le traitement de votre réclamation au titre de
la garantie. Une fois l’ARP reçue, renvoyez le produit à : BAYCO PRODUCTS, INC.
• 640 S. SANDEN BLVD • WYLIE, TEXAS • 75098 (frais de port prépayés). Joignez
une preuve d’achat datée et une courte description du défaut, ainsi que votre nom,
votre adresse et votre numéro de téléphone. Votre produit sera réparé ou remplacé,
à la discrétion de Bayco, et renvoyé dans les plus brefs délais possibles, moins de 45
jours après avoir été reçu par Bayco.
Questions sur la garantie et réclamations internationales
Si vous n’habitez pas aux États-Unis ou si vous avez des questions sur cette
garantie ou souhaitez des renseignements sur d’autres produits de Bayco Products,
Inc., veuillez contacter BAYCO PRODUCTS, INC. • 640 S. SANDEN BLVD • WYLIE,
TEXAS • 75098 • ÉTATS-UNIS, ou appelez le 00+1+800-233-2155 ou le 00+1+469-
326-9400.
Bayco Products, Inc. • 640 South Sanden Blvd. • Wylie, TX 75098 • 1-800-233-2155 • 1-469-326-9400 • www.baycoproducts.com
INS-BAR2134-14
Manual de Instrucción
BAR-2134
GRACIAS POR COMPRAR LA LINTERNA DE TRABAJO RECARGABLE CON
IMÁN INTEGRADO BAR-2134. GUARDE ESTAS INSTRUCCIONES.
Por favor, lea estas instrucciones antes de utilizar su linterna de trabajo. Asegúrese
de cargar la linterna de trabajo antes del primer uso.
PRECAUCIÓN: No utilice esta linterna de trabajo en atmósferas explosivas, cerca
de líquidos inflamables o donde se requieren lámparas a prueba de explosión. No
la sumerja en agua.
PRECAUCIÓN: Para trabajo liviano solamente.
CARGANDO
Uso Inicial
Cargue completamente la linterna de trabajo antes del primer uso. Si la batería es
nueva o no se ha utilizado durante varios meses, varios ciclos de carga y descarga
pueden ser necesarios para alcanzar la capacidad total de la batería. Para alcanzar
el máximo rendimiento, deje prendida la linterna hasta que se descargue por
completo la batería y después recargarla. Cada ciclo de carga extenderá el tiempo de
funcionamiento hasta que se consiga la máxima capacidad. El tiempo de carga para
la capacidad máxima es de aproximadamente 8 horas.
Uso Regular
Utilice sólo el adaptador de carga AC o CC suministrado.
Para un mejor rendimiento, cargue la linterna de trabajo, cuando el LED sea tenue.
Conecte el adaptador de alimentación de AC a la linterna. El indicador rojo se
encenderá.
La luz roja indica que la linterna de trabajo se está cargando. La luz roja
permanece encendida hasta que la batería está completamente cargada. A plena
carga, la linterna se apaga. El tiempo total de carga completa varía dependiendo de
la carga restante en la batería.
Mantenga la linterna de trabajo conectada en el cargador para mantener una
carga de mantenimiento.
CONCEJOS PARA PROLONGAR LA DURACIÓN DE LA BATERÍA
El paquete de la batería interna de la linterna de trabajo NiMH no tiene un efecto
de memoria. El cargar la linterna de trabajo a menudo ayuda a prolongar su vida útil.
Una nueva linterna de trabajo o una que no se ha utilizado durante un largo
período de tiempo no pueden aceptar una carga completa inicial. Esto es normal
y no indica un problema. Descargue completamente y después cargue la unidad
varias veces para preparar la batería para máxima capacidad. A medida que la
capacidad de la batería aumenta el tiempo de carga se acorta.
Cargue la unidad después de cada uso, aunque la linterna de trabajo se encuentre
completamente descargada o no.
Guarde la linterna de trabajo a temperatura ambiente
FUNCIONAMIENTO
La linterna de trabajo tiene un interruptor de 2 posiciones del eje de balance para
activar ya sea del proyector o el reflector. La posición central apaga la luz. El gancho
magnético se puede colocar en la parte superior de la linterna o al lado. El cuerpo
integrado o la punta del imán pueden ser utilizados sin el imán para fijar la linterna a
la mayoría de las superficies de metal.
GARANTÍA
1 Año de Garantía Limitada
Este producto está garantizado al comprador original durante 1 año y sólo cubre
fallos debidos a defectos en materiales o mano de obra. Si este producto se utiliza
para fines de alquiler, el plazo de garantía se reduce a 90 días desde la fecha de
compra.
Sin Cobertura
El daño emergente, daños accidentales o gastos incidentales, incluyendo daños
a la propiedad. Algunos estados no permiten la exclusión o limitación de daños
incidentales o consecuentes, por lo que la limitación o exclusión anterior puede no
aplicarse en su caso. Esta garantía le otorga derechos legales específicos, que
pueden variar de estado a estado.
Reclamos de garantía - EE.UU.
Póngase en contacto con Bayco Products, Inc. para los derechos de garantía
USA. Llame al 800-233-2155 o email [email protected] y Bayco Servicio al
Cliente proporcionará un retorno de Autorización de Mercancías (RGA) para facilitar
una rápida acción de garantía. Después de recibir la RGA, envíe el producto (envió
pre pagado) a Bayco PRODUCTOS, INC • 640 S. SANDEN BLVD • WYLIE, TEXAS
• 75098. Incluir una prueba de la fecha de compra y una breve descripción del
defecto con su nombre, dirección y número de teléfono. Su producto será reparado o
reemplazado a opción de Bayco y se le regresará tan pronto como sea posible, pero
no más tarde de 45 días después de ser recibido por Bayco.
Preguntas de garantía y reclamos internacionales
Si usted vive fuera de los EE.UU. o tiene preguntas sobre esta garantía o de
una investigación acerca de otros productos Bayco, póngase en contacto Bayco
PRODUCTS, INC • 640 S. SANDEN BLVD • WYLIE, TEXAS • 75098 o llame al 800-
233-2155 (o 469-326 -9400).
Other Bayco Work Light manuals

Bayco SL-1522 User manual

Bayco

Bayco SL-1522 User manual

Bayco UVR-9014 User manual

Bayco

Bayco UVR-9014 User manual

Bayco SL-1003 User manual

Bayco

Bayco SL-1003 User manual

Bayco SL-1512 User manual

Bayco

Bayco SL-1512 User manual

Bayco SL-1082 User manual

Bayco

Bayco SL-1082 User manual

Bayco SL-1514 User manual

Bayco

Bayco SL-1514 User manual

Bayco 2134 User manual

Bayco

Bayco 2134 User manual

Bayco SL-1514 User manual

Bayco

Bayco SL-1514 User manual

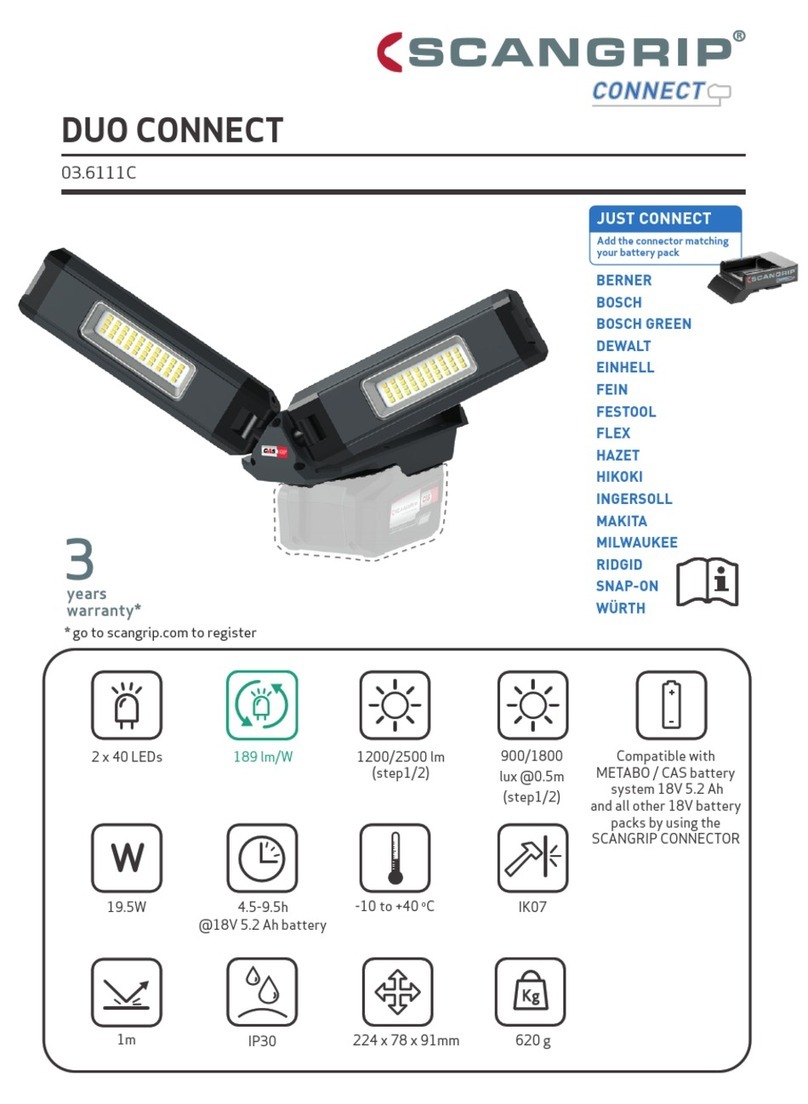
Bayco NIGHTSTICK Dual-Light Xtreme Lumens... User manual
Bayco

Bayco NIGHTSTICK Dual-Light Xtreme Lumens... User manual

Bayco SL-2125 User manual

Bayco

Bayco SL-2125 User manual

Bayco 825 User manual

Bayco

Bayco 825 User manual

Bayco 918 User manual

Bayco

Bayco 918 User manual

Bayco 623 User manual

Bayco

Bayco 623 User manual

Bayco 908 User manual

Bayco

Bayco 908 User manual

Bayco SL-864 User manual

Bayco

Bayco SL-864 User manual

Bayco 651 User manual

Bayco

Bayco 651 User manual

Bayco Nightstick 2166 User manual

Bayco

Bayco Nightstick 2166 User manual

Bayco 9000 User manual

Bayco

Bayco 9000 User manual

Bayco SL-1504 User manual

Bayco

Bayco SL-1504 User manual

Bayco SL-868 User manual

Bayco

Bayco SL-868 User manual

Bayco SL-2135 User manual

Bayco

Bayco SL-2135 User manual

Bayco 821 User manual

Bayco

Bayco 821 User manual

Bayco SL-866 User manual

Bayco

Bayco SL-866 User manual

Bayco Night Stick NSP-1202 User manual

Bayco

Bayco Night Stick NSP-1202 User manual

Popular Work Light manuals by other brands

Elation Artiste REMBRANDT user manual

Elation

Elation Artiste REMBRANDT user manual

Staudte SH-5.100 instruction manual

Staudte

Staudte SH-5.100 instruction manual

Parkside PAL 2200 A1 manual

Parkside

Parkside PAL 2200 A1 manual

TaoTronics TT-DL069 user guide

TaoTronics

TaoTronics TT-DL069 user guide

Sirena E-LITE INSTALLATION AND APPLICATION INSTRUCTIONS

Sirena

Sirena E-LITE INSTALLATION AND APPLICATION INSTRUCTIONS

OSA Opto OLM-034 Air Series manual

OSA Opto

OSA Opto OLM-034 Air Series manual

NOMA 052-9322-6 instruction manual

NOMA

NOMA 052-9322-6 instruction manual

Performance Tool W2251 owner's manual

Performance Tool

Performance Tool W2251 owner's manual

Pro-Elec PELL0017 quick start guide

Pro-Elec

Pro-Elec PELL0017 quick start guide

BATO 6536 instruction manual

BATO

BATO 6536 instruction manual

Schwaiger ALK25 user guide

Schwaiger

Schwaiger ALK25 user guide

REV Ritter JR0410MR Instructions for installation and use

REV Ritter

REV Ritter JR0410MR Instructions for installation and use

BENEITO FAURE KORA 25W LED Instructions for use

BENEITO FAURE

BENEITO FAURE KORA 25W LED Instructions for use

Marmitek Glow XSE manual

Marmitek

Marmitek Glow XSE manual

SP tools SP81456 user manual

SP tools

SP tools SP81456 user manual

Surtek 136108 quick start guide

Surtek

Surtek 136108 quick start guide

ATD Tools Saber ATD-80365 owner's manual

ATD Tools

ATD Tools Saber ATD-80365 owner's manual

Forch 5424 10 instructions

Forch

Forch 5424 10 instructions

manuals.online logo
manuals.online logoBrands
  • About & Mission
  • Contact us
  • Privacy Policy
  • Terms and Conditions

Copyright 2025 Manuals.Online. All Rights Reserved.