manuals.online logo
Brands
  1. Home
  2. •
  3. Brands
  4. •
  5. BDI
  6. •
  7. Indoor Furnishing
  8. •
  9. BDI Sequel User manual

BDI Sequel User manual

1
Product Registration
Registering your new BDI product allows us to send you important
product updates, service information and helpful hints related to your
BDI products. Register today, and you will be entered to win free a
BINK table from BDI: www.bdiusa.com/register
Placement and Maintenance
Sequel®Office Furniture is designed for indoor use. Clean glass with
glass cleaner, and steel parts and wood veneer with a moist cloth.
Your Sequel®Home Office Furniture is engineered for easy assembly.
Carefully follow this procedure to prevent any damage.
Do not use power tools for assembly of this product.
Step 1
Unpack and identify the parts listed below. The assembly workspace
should be a non-marring surface such as carpet. For missing hardware
pieces, please contact BDI Customer Service at customerservice@
bdiusa.com. For all other concerns, please contact your BDI Retailer.
sequel®
6004
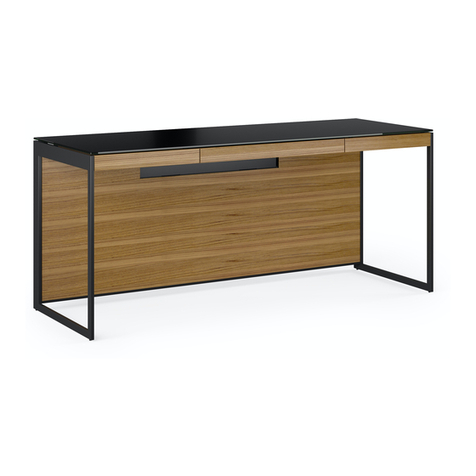
wall-mounted desk
Designed by Matthew Weatherly.
These distinctive product configurations are protected by US and international
patents, trade dress, and/or copyright laws. “Sequel” and BDI are trademarks of
Becker Designed, Inc. All Rights reserved. ©2014 Becker Designed, Inc.
Made in Taiwan. 6004REV052416v4
R-1/4-20 x 6mm Screw
x 4
H - 4mm Hex Wrench x 1
H2 - 3mm Hex Wrench x 1
Component List
W -1/4-20 x 58mm Screw
x 3
X-Adhesive Foam/Magnet
x 2
O-Adhesive Dot x 4
U-Adhesive Bumper x 2
N-Set Screw x 4
T-Power Strip Bay x 1
I -Toggle Anchor Kit x 2
S-Kick Panel Stop x 2
L - Drywall Anchor x 2
M - Drywall Screw x 2
K - Wood Screw x 4
J - Washer x 6
V - Drawer Liner x 1
assembly instructions
bdiusa.com [email protected]
P - 1/4-20 x 38 mm Screw
x 4
Q - 1/4-20 x 12 mm Screw
x 4
F - Top Glass x 1
A - Wall Attachment Rail x 1
CR - Right Desk Side x 1
D - Wire Management Trough x 1
CL - Left Desk Side x 1
G-Wire Management Lid x 1
B - Drawer Assembly x 1
E - Kick Panel x 1
TWO PERSON ASSEMBLY
2assembly instructions
bdi
usa.com [email protected]
sequel®
6004
WALL
-
MOUNTED
DESK
Step 3 - Align the bottom of the Wall Attachment Rail (A) to the marked line and level. While
holding the leveled Wall Attachment Rail (A), allow the second person to outline the holes on
the Wall Attachment Rail (A) and mark within each outline.
Step 2 - The desk can be mounted at any height desired. For a sitting desk at 29” H, mark the center
of the desk in its desired location 24.75 in/63 cm from the floor. For a standing desk, measure and mark
4.25 in/10.8 cm from the bottom of your elbow at a 90º position. The top of the desk will be 4.25” above
the bottom of the Wall Attachment Rail.
TWO PERSON ASSEMBLY
A
Sitting 24.75 in/ 63 cm
Standing
4.25 in/ 10.8 cm
3assembly instructions
bdi
usa.com [email protected]
sequel®
6004
WALL
-
MOUNTED
DESK
Step 5 - Install Set Screws (N) into threaded holes of Wall Attachment Rail (A) using Hex Wrench (H2).
Step 4 - Determine which wall attachment method below is needed to attach Wall Attachment Rail (A)
to the wall at each of the marks from the previous step. Follow instructions included in the Toggle Anchor
Kit (I) for proper installation of Toggle Anchors. If installing into a masonry wall, please contact your local
hardware store for preferred method of attachment.
A
J
J
J
J
A
N
N
N
N
A
N
N
Wooden Stud: (A) Wall Attacment Rail
(K) Wood Screw
(J) Washer
Sheet Rock: (I) Toggle Anchor
(A) Wall Attachment Rail
(I-S) Toggle Anchor Screw
(J) Washer
J
A
K
I
J
A
I-S
4assembly instructions
bdi
usa.com [email protected]
sequel®
6004
WALL
-
MOUNTED
DESK
Step 6 - With the Drawer Assembly (B) upside down, attach Desk Sides (CL, CR) with Screw (P) using
Hex Wrench (H). Apply Adhesive Dots (O) to the back edge of Desk Sides (CL, CR) at the top and
bottom.
Step 7 - Confirm that the attached Desk Sides (CL, CR) are flush with the Drawer Assembly (B).
Incorrect Alignment Correct Alignment
P
P
O
CL
B
CL CR
P P
P P
O O
O
O
5assembly instructions
bdi
usa.com [email protected]
sequel®
6004
WALL
-
MOUNTED
DESK
Step 9 - Attach Kick Panel Stops (S) to the back holes of Drawer Assembly (B) using Screw (R) and
Hex Wrench (H).
B
S
R
B
Step 8 - With the help of another person, carefully lower Wire Management Trough (D)
between the Desk Sides (CL, CR) and align holes. Attach Wire Management Trough (D) to
Desk Sides (CL, CR) with Screw (Q) using Hex Wrench (H).
CL
D
CR
D
Q
Q
CR
TWO PERSON ASSEMBLY
6assembly instructions
bdi
usa.com [email protected]
sequel®
6004
WALL
-
MOUNTED
DESK
Step 10 - Apply Adhesive Bumpers (U) to the bottom of the back side of Power Strip Bay (T).
U
U
T
Step 11 - Secure Power Strip Bay (T) to Wall Attachment Rail (A) using Screw (R) and Hex Wrench (H).
R
R
T
A
7assembly instructions
bdi
usa.com [email protected]
sequel®
6004
WALL
-
MOUNTED
DESK
Step 12 - With the help of another person gently lower the Desk Assembly onto the Wall
Attachment Rail (A). Ensure the hooks of the Desk Assembly are fully engaged with the
Wall Attachment Rail (A) before releasing the assembly.
TWO PERSON ASSEMBLY
A
A
Step 13 - Center the Desk Assembly within the Wall Attachment Rail (A) using the indentations in the
Wall Attachment Rail (A) as a guide.
indentation
A
8assembly instructions
bdi
usa.com [email protected]
sequel®
6004
WALL
-
MOUNTED
DESK
Step 14 - Using Hex Wrench (H), adjust Set Screws (N) on
Wall Attachment Rail (A) to create a level work surface that is
flush against wall before moving to Step 15.
A
In
Out
Up
Down
A
N
N
Step 15 - Duplicate the wall attachment method used on the outermost screws from Step 3 for attaching
Wire Management Trough (D) to the wall. If Toggle Anchors were used on Step 3, use standard Drywall
Anchors (L) for this step. Attach Wire Management Trough (D) to wall using Screw and Washer (J)
combination. DO NOT OVERTIGHTEN!
B
D
J
JD
9assembly instructions
bdi
usa.com [email protected]
sequel®
6004
WALL
-
MOUNTED
DESK
Step 16 - With the help of another person gently lower Top Glass (F) onto Drawer Assembly
(B) and fasten into place using Screw (W) and Hex Wrench (H). With the grippy side facing
down, insert Drawer Liner (V) into drawer body.
W
W
W
B
F
V x 1
W x 3
TWO PERSON ASSEMBLY
Pre-installed
Rubber Bumper
Pre-installed
Rubber Bumper
10 assembly instructions
bdi
usa.com [email protected]
sequel®
6004
WALL
-
MOUNTED
DESK
Step 17 (Optional) - Remove Adhesive Foam/Magnets (X) from the Power Strip Bay (T). Peel film
from side of the Adhesive Foam/Magnets (X) and attach to clean, dry back side of AC power strip (not
included). Cleaning of power strip surface with rubbing alcohol will ensure best adhesive bond.
**UNPLUG POWER STRIP FROM POWER SOUCE BEFORE CLEANING**
Attach AC power strip/surge protector (not included) on platform of
Power Strip Bay (T) as shown in illustration below.
Use the slot holes provided to run all wire to and from the desk. Keep
all wire behind the folded metal lips. Failure to do so will prevent Kick
Panel (E) from attaching properly.
T
X
X
1.
2.
3.
* AC Power Strip Not Included
11 assembly instructions
bdi
usa.com [email protected]
sequel®
6004
WALL
-
MOUNTED
DESK
Step 18 - Once all the electrical wire are routed, install Kick Panel (E) as shown below. The rear side of the
panel has magnets that will hold it into place. Place Wire Management Lid (G) into opening of Top Glass
(F).
G
E
F

Other manuals for Sequel

5

This manual suits for next models

1

Other BDI Indoor Furnishing manuals

BDI CORRIDOR User manual

BDI

BDI CORRIDOR User manual

BDI VALENCIA 1856 User manual

BDI

BDI VALENCIA 1856 User manual

BDI SOMA 6331 User manual

BDI

BDI SOMA 6331 User manual

BDI CIRRUS 8157 User manual

BDI

BDI CIRRUS 8157 User manual

BDI CODE 7376 User manual

BDI

BDI CODE 7376 User manual

BDI Novia 8421 User manual

BDI

BDI Novia 8421 User manual

BDI Novia 8429-2 User manual

BDI

BDI Novia 8429-2 User manual

BDI signal 8323 User manual

BDI

BDI signal 8323 User manual

BDI LINEA 6220 User manual

BDI

BDI LINEA 6220 User manual

BDI Sequel User manual

BDI

BDI Sequel User manual

BDI CENTRO 6402 User manual

BDI

BDI CENTRO 6402 User manual

BDI SEQUEL 20 6116 User manual

BDI

BDI SEQUEL 20 6116 User manual

BDI Icon 9422 User manual

BDI

BDI Icon 9422 User manual

BDI KRONOS 6729 User manual

BDI

BDI KRONOS 6729 User manual

BDI Sequel User manual

BDI

BDI Sequel User manual

BDI EILEEN 5166 User manual

BDI

BDI EILEEN 5166 User manual

BDI SEMBLANCE 15030 User manual

BDI

BDI SEMBLANCE 15030 User manual

BDI Sweep User manual

BDI

BDI Sweep User manual

BDI Vertica 8556 User manual

BDI

BDI Vertica 8556 User manual

BDI LINEA 5801A User manual

BDI

BDI LINEA 5801A User manual

BDI format User manual

BDI

BDI format User manual

BDI 6414 User manual

BDI

BDI 6414 User manual

BDI CODA 3521 User manual

BDI

BDI CODA 3521 User manual

BDI Novia 8424 User manual

BDI

BDI Novia 8424 User manual

Popular Indoor Furnishing manuals by other brands

ZUO 100563 Assembly instructions

ZUO

ZUO 100563 Assembly instructions

aspenhome Credenza IML-318-GRY Assembly instructions

aspenhome

aspenhome Credenza IML-318-GRY Assembly instructions

Glorious Turntable Lowboard Assembly instructions

Glorious

Glorious Turntable Lowboard Assembly instructions

Whalen Midland Twin over Full Bunk Bed instruction manual

Whalen

Whalen Midland Twin over Full Bunk Bed instruction manual

LDI Spaces SAFCO 1988 instructions

LDI Spaces

LDI Spaces SAFCO 1988 instructions

Eurovema Euroflex user manual

Eurovema

Eurovema Euroflex user manual

Next 876703 Assembly instructions

Next

Next 876703 Assembly instructions

Winco 8550 CUSTOMER INSTRUCTIONS

Winco

Winco 8550 CUSTOMER INSTRUCTIONS

Pulaski Furniture A887U-305-1797 Assembly instructions

Pulaski Furniture

Pulaski Furniture A887U-305-1797 Assembly instructions

Gami BOSTON 175 manual

Gami

Gami BOSTON 175 manual

BiGDUG MD4A Guide to Assembly & Usage

BiGDUG

BiGDUG MD4A Guide to Assembly & Usage

Ameriwood HOME 2893222COM manual

Ameriwood HOME

Ameriwood HOME 2893222COM manual

Argos Osaka 2283935 Assembly instructions

Argos

Argos Osaka 2283935 Assembly instructions

Furniture of America CM7059Q Assembly instructions

Furniture of America

Furniture of America CM7059Q Assembly instructions

HiB 21700 Fixing instructions

HiB

HiB 21700 Fixing instructions

aspenhome I349-412-WST Assembly instructions

aspenhome

aspenhome I349-412-WST Assembly instructions

Lucid PREMIUM ADJUSTABLE BASE owner's manual

Lucid

Lucid PREMIUM ADJUSTABLE BASE owner's manual

fantastic furniture Java manual

fantastic furniture

fantastic furniture Java manual

manuals.online logo
manuals.online logoBrands
  • About & Mission
  • Contact us
  • Privacy Policy
  • Terms and Conditions

Copyright 2025 Manuals.Online. All Rights Reserved.