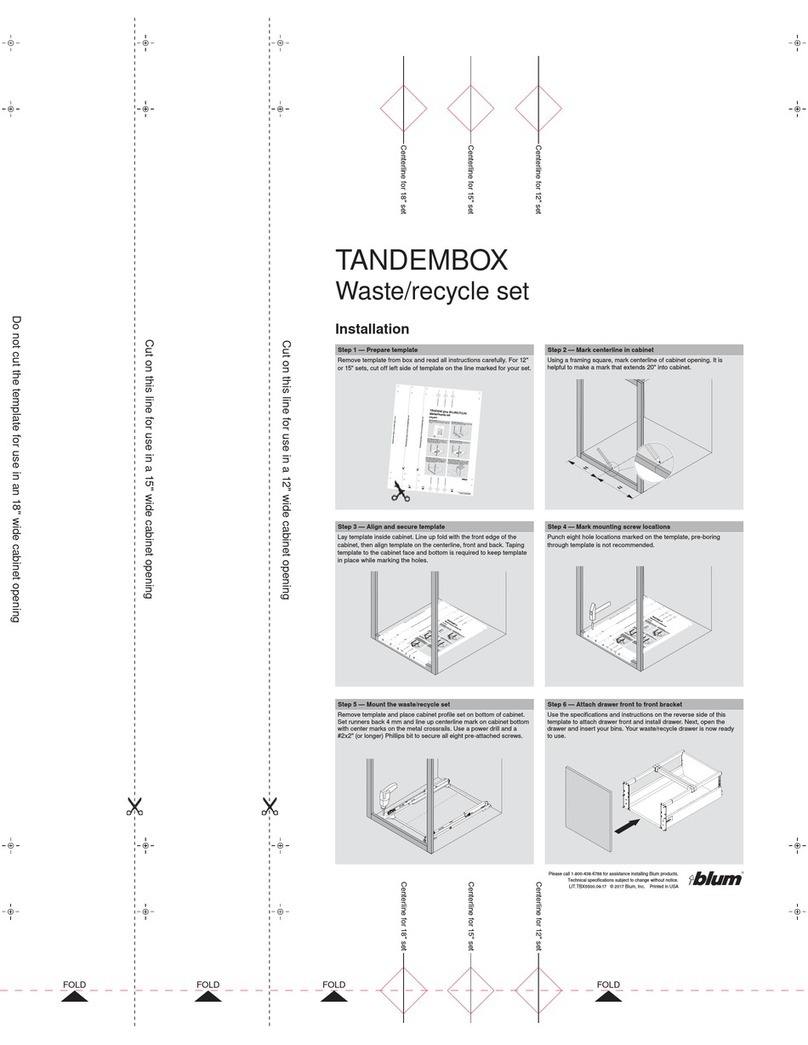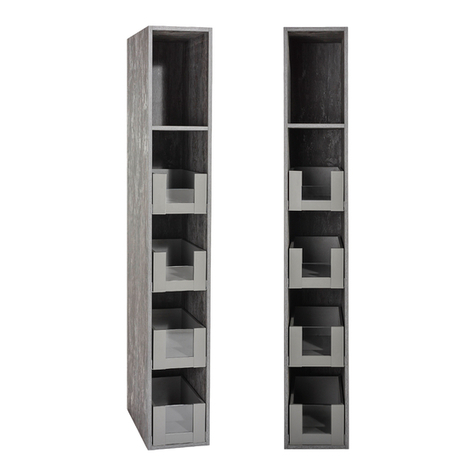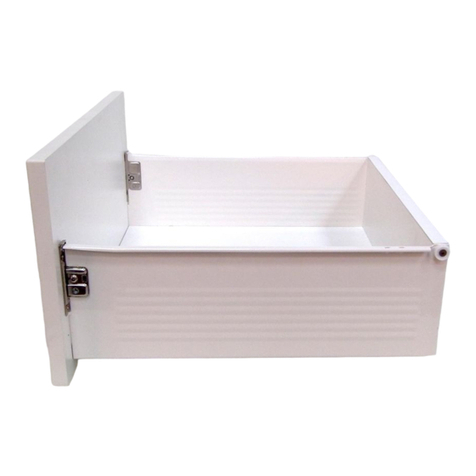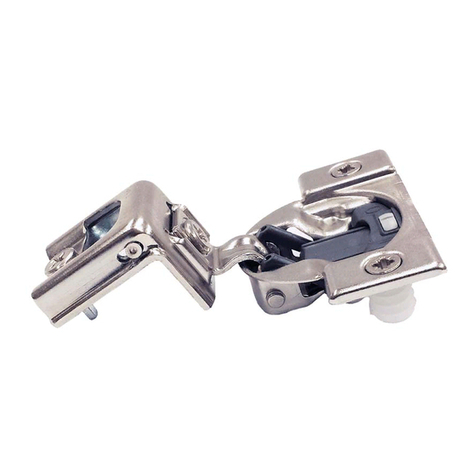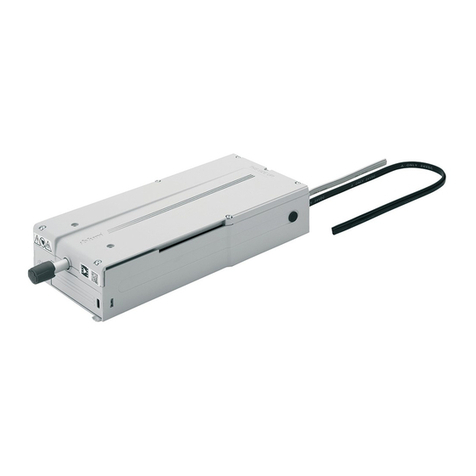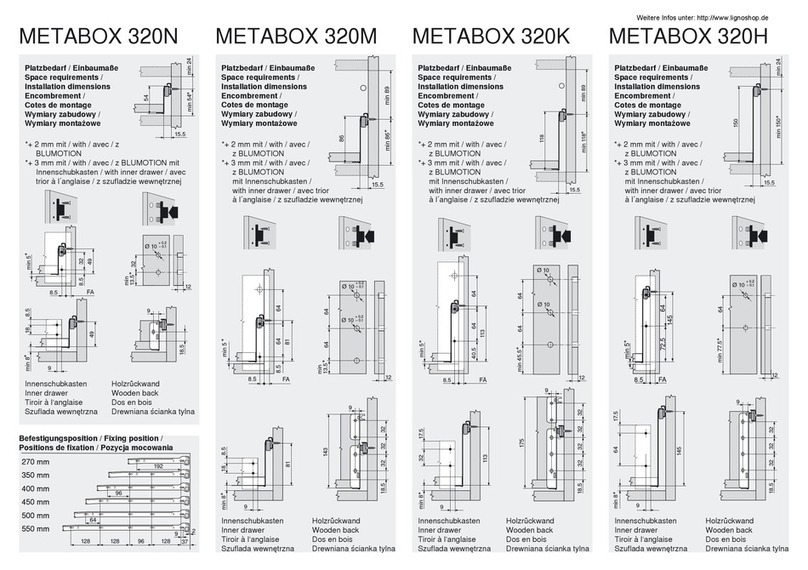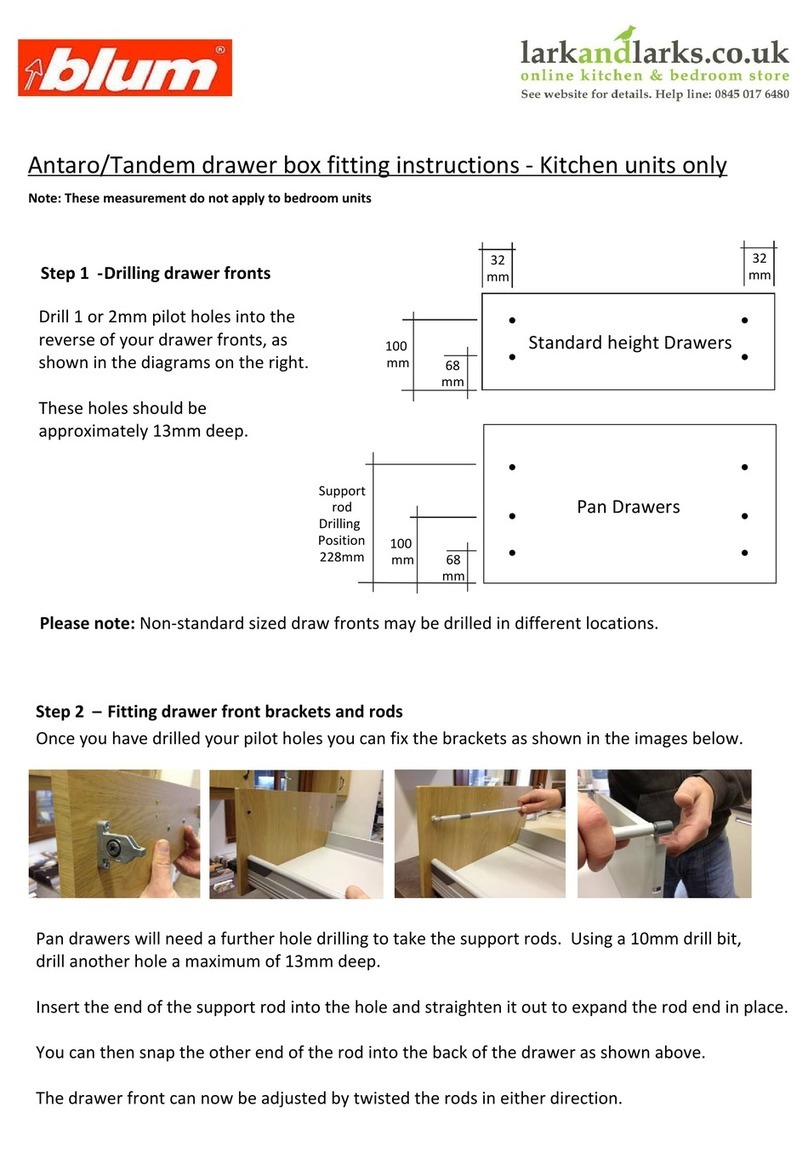
Step 1 — Prepare template
Remove template from box and read all instructions carefully. For 12"
or 15" sets, cut off left side of template on the line marked for your set.
Please call 1-800-438-6788 for assistance installing Blum products.
Technical specifications subject to change without notice.
LIT.TBX5500.07.11 © 2011 Blum, Inc. Printed in USA
Do not cut the template for use in an 18" wide cabinet opening
Cut on this line for use in a 15" wide cabinet opening
Cut on this line for use in a 12" wide cabinet opening
FOLD FOLD FOLD FOLD
Centerline for 12" set
Centerline for 18" set
Centerline for 15" set
Centerline for 12" set
Centerline for 18" set
Centerline for 15" set
Installation
TANDEMBOX
Waste/recycle set
Step 2 — Mark centerline in cabinet
Using a framing square, mark centerline of cabinet opening. It is
helpful to make a mark that extends 20" into cabinet.
Step 4 — Mark mounting screw locations
Punch eight hole locations marked on the template, pre-boring
through template is not recommended.
Step 3 — Align and secure template
Lay template inside cabinet. Line up fold with the front edge of the
cabinet, then align template on the centerline, front and back.
Taping
template to the cabinet face and bottom is required to keep template
in place while marking the holes.
Step 6 — Attach drawer front to front bracket
Use the specifications and instructions on the reverse side of this
template to attach drawer front and install drawer. Next, open the
drawer and insert your bins. Your waste/recycle drawer is now ready
to use.
Step 5 — Mount the waste/recycle set
Remove template and place cabinet profile set on bottom of cabinet.
Set runners back 4 mm and line up centerline mark on cabinet bottom
with center marks on the metal crossrails. Use a power drill and a
#2x2" (or longer) Phillips bit to secure all eight pre-attached screws.
Step 1 — Prepare template
Remove template from box and read all instructionscarefully. For the
12" or 15" sets, cut off the left side of the template on the line marked
for your set.
Pleasecall 1-800-438-6788 for assistance installing Blum products.
Technicalspecifications subject to change without notice.
LIT.TBX5500.07.11 ©2011 Blum,Inc. Printedin USA
Do not cut the template for 18" wide cabinet opening
Cut on this dotted line for use in a 15" wide cabinet opening
Cut on this dotted line for use in a 12" wide cabinet opening
FOLD FOLD FOLD FOLD
Centerline for 12"set
Centerline for 18"set
Centerline for 15"set
Centerline for 12"set
Centerline for 18"set
Centerline for 15"set
Installation
TANDEMBOX
Waste/recycle set
Step 2 — Mark centerline in cabinet
Using a square, mark the centerline of the cabinet opening. It is helpful
to make a mark that extends 20" into the cabinet.
Step 4 — Prebore for mounting screws
Punch the eight hole positions marked on the template, preboring
through the template is not recommended.
Step 3 — Align and secure template
Lay the template inside the cabinet. Line up the fold with the front
edge of the cabinet, then align template on the centerline, front and
back.
Taping the template to the cabinet fl oor is required to keep the
template in place while marking the holes.
Formarkfor18"widecabinetopeningdo not cut the template
Cutonthisdottedlineforusein a 15" wide cabinet opening
Cutonthisdottedlineforusein a 12" wide cabinet opening
FOLDFOLD FOLDFOLD
Centerlinefor12"set
Centerlinefor18"set
Centerlinefor15"set
Centerlinefor12"set
Centerlinefor18"set
Centerlinefor15"set
Installation
TANDEMplusBLUMOTION
Waste/recycledrawerset
Step2—Markcenterlineincabinet
Usingasquare,markthecenterlineofthecabinetopening.Itis helpful
tomakeamarkthatextends20"intothecabinet.
Step1—Preparetemplate
Punchoutthefrontandbackdiamondsmarkedonthecenterlinefor
yourkit(12",15"or18").Then,forthe12"or15"kits, cutofftheleft
sideonthelinemarkedforyourkit.
Step4—Preboreformountingscrews
Preboretheeightholepositionsmarkedonthetemplatewitha
2.5mmbit.
Step3—Alignandsecuretemplate
Laythetemplateinsidethecabinet.Lineupthefoldwiththefront
edgeofthecabinet,thenaligntemplateonthecenterline,frontand
back.
NOTE:Tapingittothecabinetfloormayhelpkeepthetemplatein
placewhilepreboringtheholes.
Step6—Insertthedrawerandbins
Extendthetworunnersfullyandsetthedrawerontopof themso they
fitintothenotchesinthebackofthedrawer
.Closethedrawer
completelyandlistenforthelockingdevicestoengagetherunners
witha“click.”Openthedrawerandinsertthebins.YourWaste/recycle
drawerisnowreadytouse.
Step5—MounttheWaste/recycledrawerset
RemovethetemplateandplacetheWaste/recycledrawersetonthe
floorofthecabinet.Setbacktherunners4mmandlineup the
centerlinemarkonthecabinetfl
oorwiththecentermarksonthemetal
crossrails.Useapowerdrillanda#2x2"(orlonger)Phillipsbitto
securealleightpreattachedscrews.
Pleasecal
l1-800-438-
6
7
88
f
or
as
sistanceinstalli
n
gBl
u
m
p
roducts.
Technicalspecificationssubjectto
c
h
a
ngewithoutnotice
.
LIT.WR
M
5
000
.0
3.
11
©2
0
11
PrintedinUSA
Formarkfor18”widecabinetopeningdonotcutthe
template
Cutonthisdottedlineforuseina15”widecabinetopening
Cutonthisdottedlineforuseina12”widecabinetopening
FOLDFOLDFOLDF
OLD
Centerlinefor12"set
Centerlinefor18"set
Centerlinefor15"set
Centerlinefor12"set
Centerlinefor18"set
Centerlinefor15"set
Cutout
for
18
"
Cutout
for15
"
Cutout
for
12
"
Cutou
t
for
18
"
Cutou
t
for
15
"
Cutou
t
for
12"
Installation
TANDEMplusBLUMOTION
Waste/recycledrawerset
Step2
—
M
arkcenterlineincabine
t
Usinga
sq
uare
,ma
rk
the
ce
nt
erlineofthe
cabi
netopenin
g.
Itis
helpful
toma
keama
rk
th
at
ex
te
nd
s20
”intothe
cabi
net.
Step
1
—
Pr
epar
etemplate
Cutoutthediamon
dsh
ape
sma
rk
ed
onthe
ce
nterlinefor
yo
ur
ki
t
(1
2
”,
15
”
or
18
”
).
Then
,
for
the
12
”
or
15
inch
kits
,
cu
tof
fthele
ft
sideonthe
linema
rk
ed
for
yo
ur
kit.
Step4—
Pr
ebor
eformountingsc
rews
Pr
eboretheeightholepositionsmark
ed
onthetemplatewitha
2.
5mmbit.
Step3
—
Alig
n
andsecu
retemplate
La
ythetemplateonthe
fl
oo
r
ofthe
cabi
netliningupthefoldwiththe
front
ed
ge
.Th
e
nalig
ntemplateonthe
ce
nt
erline
,fron
tan
dba
ck
.
Onceitis
int
he
co
rr
ectposition
we
su
g
ges
tta
p
ingitdo
wn
soit
doe
sn
’tmo
ve
.
Ste
p
6
—
In
se
rt
dr
aw
erandbin
s
Ex
te
nd
thetw
orunner
sfullyandsetthedrawerontopofthemsotha
t
they
fi
tin
tothenotchesintheba
ck
ofthe
drawer
.Closethedrawer
co
mple
te
lyandlist
enfortheLo
c
k
in
g
devi
ce
stoengagetherunne
rs
witha
“
cl
ick
.”
Op
enthedrawerandinse
rt
thebins.
Yo
ur
Wa
st
e/
re
cy
cle
dr
aweris
nowreadytous
e.
Step5
—
Mountthe
Wa
ste/
rec
ycl
ed
r
aw
erse
t
Re
mo
ve
thetemplatean
dplacethe
Wast
e/
re
cy
cl
edrawerset
onthe
fl
oor
of
the
cabi
net.S
etba
ck
therunners4mman
dlineupthe
ce
nt
erlinema
rk
on
the
cabi
net
fl
oorwiththecent
erma
rk
sonthemeta
l
crossrails.Usea
po
werdr
illan
da
#2x2
”
(o
rlonger
)
Ph
illi
ps
bitto
secureal
leightprea
tt
ache
dscrew
s.
I
nsta
l
l
a
t
i
o
n
T
A
ND
EM
plu
sBL
U
MO
TI
O
N
Wa
s
t
e/
r
ec
y
c
le
d
r
aw
er
se
t
St
ep
2
Step
1
S
te
p
4
S
t
ep
3
Ste
p6
S
te
p
5
Pleaseca
1-
800-438
-67
8
8fo
r
a
s
s
is
tan
c
e
in
sta
l
lin
g
Bl
um
pr
od
u
cts.
Tec
hn
i
ca
lspe
ci
fi
cation
s
subj
ect
to
ch
ange
w
itho
u
tno
tice
.
LIT.W
R
M500
0.03
.1
1©2
01
1
Printed
in
U
SA
F
o
r
ma
r
k
fo
r
1
8
”
wi
d
e
ca
b
in
e
t
o
p
e
ning
d
o
no
t
c
u
tthe
te
m
p
lat
e
Cu
t
o
n
this
d
ott
e
d
l
in
efo
r
u
se
i
n
a
1
5
”
w
id
ecabi
ne
top
e
n
i
ng
C
uton
th
is
d
o
t
t
ed
li
ne
fo
r
u
se
in
a
1
2
”
w
i
d
e
cabine
to
p
en
in
g
F
OL
DF
OL
DF
OL
DF
OL
D
Ce
n
te
r
lin
e
f
o
r
1
2
"
s
e
t
C
e
n
te
rl
in
e
fo
r
1
8"
se
t
C
en
t
e
rlin
e
fo
r
1
5
"
se
tC
e
n
t
e
r
li
ne
fo
r
12
"
s
e
t
C
e
n
t
e
rl
in
e
f
o
r
1
8"
s
e
t
C
e
n
ter
l
in
e
f
o
r
1
5
"
set
Formarkfor18"widecabinetopeningdo not cut the template
Cutonthisdottedlineforusein a 15" wide cabinet opening
Cutonthisdottedlineforusein a 12" wide cabinet opening
FOLD FOLD FOLD FOLD
Centerlinefor12"set
Centerlinefor18"set
Centerlinefor15"set
Centerlinefor12"set
Centerlinefor18"set
Centerlinefor15"set
Installation
TANDEMplusBLUMOTION
Waste/recycledrawerset
Step2—Markcenterlineincabinet
Usingasquare,markthecenterlineofthecabinetopening.Itishelpful
tomakeamarkthatextends20"intothecabinet.
Step1—Preparetemplate
Punchoutthefrontandbackdiamondsmarkedonthecenterlinefor
yourkit(12",15"or18").Then,forthe12"or15"kits,cutofftheleft
sideonthelinemarkedforyourkit.
Step4—Preboreformountingscrews
Preboretheeightholepositionsmarkedonthetemplatewitha
2.5mmbit.
Step3—Alignandsecuretemplate
Laythetemplateinsidethecabinet.Lineupthefoldwith the front
edgeofthecabinet,thenaligntemplateonthecenterline,frontand
back.
NOTE:Tapingittothecabinetfl
oormayhelpkeepthetemplatein
placewhilepreboringtheholes.
Step6—Insertthedrawerandbins
Extendthetworunnersfullyandsetthedrawerontopofthemso they
fi
tintothenotchesinthebackofthedrawer.Closethedrawer
completelyandlistenforthelockingdevicestoengagetherunners
witha“click.”Openthedrawerandinsertthebins.YourWaste/recycle
drawerisnowreadytouse.
Step5—MounttheWaste/recycledrawerset
RemovethetemplateandplacetheWaste/recycledrawersetonthe
fl
oorofthecabinet.Setbacktherunners4mmandlineupthe
centerlinemarkonthecabinetfl
oorwiththecentermarksonthemetal
crossrails.Useapowerdrillanda#2x2"(orlonger)Phillipsbitto
securealleightpreattachedscrews.
Pleasecall
1-800-438-
6
7
88
f
or
a
s
sistanceinstalli
n
gBl
u
m
p
r
oducts.
Technicalspecificationssubj
ectto
c
h
a
ngewithoutnotice
LIT.WR
M
5
000
.0
3.
11
©2
0
11
PrintedinUSA
Formarkfor18”widecabinetopenin
gdonotcutthetemplate
Cutonthisdottedlineforuseina15”widecabinetopening
Cutonthisdottedlineforuseina12”widecabinetopening
FOLDFOLDFOLDF
OLD
Centerlinefor12"set
Centerlinefor18"set
Centerlinefor15"set
Centerli
nefor12"set
Centerlinefor18"se
t
Centerlinefor15"set
Cutout
for
18
"
Cutout
for
15"
Cutout
for
12
"
Cutout
f
or
18
"
Cutou
t
for
15
"
Cutout
for
12"
Installation
T
ANDEMplusBLUMOTION
Waste/recycledrawerset
Step2
—
M
arkcenterlinein
cabine
t
Usinga
sq
uare
,ma
rk
the
ce
nt
erlineofthe
cabi
netopenin
g.
Itis
helpful
toma
keama
rk
that
ex
te
nd
s20
”intothe
cabi
net.
Step
1
—
Pr
epar
etemplat
e
Cut
outthediamo
n
dsh
ape
s
ma
rk
ed
onthe
ce
nt
erlinefor
yo
ur
ki
t
(1
2”
,
15
”
or
18
”)
.Then
,f
orthe
12
”
or
15
inch
ki
ts
,
cu
tof
fthele
ft
sideonthe
linema
rk
ed
for
yo
ur
kit.
Step
4
—
Prebor
efo
rmounting
sc
re
ws
Pr
eboretheeigh
tholepositionsmark
ed
onthetemplatewi
tha
2.
5mmbit.
S
tep3
—
Align
andsecuretemplate
La
ythet
emplateonthe
fl
oor
ofthe
cabi
net
liningupthe
foldwiththe
front
ed
ge
.
Th
e
nalig
n
templateonthe
ce
nt
erline
,frontan
dba
ck
.
Onceitis
inthe
co
rrectposition
we
su
g
ges
tta
p
ingitdo
wn
soit
do
e
sn
’tmo
ve
.
Ste
p
6
—
Inse
rt
draw
er
andbi
n
s
Ex
te
nd
the
tw
orunner
sfullyandsetthedrawerontopofthemsotha
t
th
ey
fi
tintothenotche
sintheba
ck
ofthedrawer
.Closethedrawer
co
mple
te
ly
andlist
enfortheLo
c
k
in
gdevi
ce
sto
engagetherunne
rs
witha“cl
ick
.”
Op
enthedrawerandinse
rt
thebin
s.
Yo
urWa
st
e/
re
cy
cle
dr
aweri
s
nowreadytous
e.
Step5
—
Mou
ntthe
Wa
ste/
rec
ycl
edr
aw
erse
t
Re
mo
ve
thetemplatean
dpl
acethe
Wa
st
e/
re
cy
cl
edrawersetonthe
fl
oor
ofthe
cabi
net.Setba
ck
therunners4mman
dlineupthe
ce
nt
erlinema
rk
onthe
cabi
net
fl
oorwitht
hecent
erma
rk
son
themetal
crossrails.Usea
po
werdr
ill
an
da
#2x2
”
(o
rlonger
)
Ph
illi
ps
bitto
se
curealleightprea
tt
ache
dscrew
s
.
I
nsta
l
la
ti
o
n
T
A
ND
EM
plusBL
U
MO
TI
O
N
Wa
s
t
e/
r
ec
y
c
le
d
r
aw
er
se
t
St
ep
2
Step
1
S
te
p
4
S
t
ep
3
Ste
p
6
S
te
p
5
Pleasec
1-
800-438
-67
8
8fo
r
a
s
s
istan
ce
in
st
a
llin
g
Bl
um
pr
od
u
cts.
Tec
hn
i
ca
lspe
ci
fication
s
su
bj
ect
to
ch
ange
wit
ho
u
tno
tice
.
LIT.W
R
M500
0.03
.1
1
©2
01
1
Printed
in
U
SA
F
o
r
ma
r
k
fo
r
1
8
”
wi
d
e
ca
b
in
e
t
o
p
e
ning
d
o
no
t
c
u
tthe
te
m
p
la
t
e
Cu
t
o
n
this
d
o
tt
e
d
l
in
efo
r
u
se
i
n
a
1
5
”
w
id
ecabi
ne
top
e
n
i
ng
C
uton
th
is
d
o
t
ted
li
ne
fo
r
u
se
i
n
a
1
2
”
w
i
d
e
cabine
t
o
p
en
in
g
F
OL
DF
OL
DF
OL
DF
OL
D
Ce
n
te
rl
in
e
f
o
r
1
2"
s
e
t
C
e
n
te
rl
in
e
f
o
r
1
8"
se
t
C
en
t
e
r
lin
e
fo
r
1
5
"
se
tC
e
n
t
e
r
li
ne
fo
r
1
2
"
s
e
t
C
e
n
t
e
rl
in
e
f
o
r
1
8"
s
e
t
C
e
n
ter
l
in
e
f
o
r
1
5
"
se
t
Step 6 — Attach drawer front to front bracket
Use the specifications and instructions on the reverse side of this
template to attach drawer front and install drawer. Next,open the
drawer and insert your bins. Your waste/recycle drawer is now ready
to use.
Step 5 — Mount the waste/recycleset
Remove template and place cabinet profile set on bottom of cabinet.
Set runners back 4 mm and line up centerline mark oncabinet bottom
with center marks on the metal crossrails. Use a powerdrill and a
#2x2" (or longer) Phillips bit to secure all eight pre-attached screws.
For mark for 18"wide cabinet opening do not cut the template
Cut on this dotted line for use in a 15"wide cabinet opening
Cut on this dotted line for use in a 12"wide cabinet opening
FOLD FOLD FOLD FOLD
Centerlinefor 12" set
Centerlinefor 18" set
Centerlinefor 15" set
Centerlinefor 12" set
Centerlinefor 18" set
Centerlinefor 15" set
Installation
TANDEMBOX
Waste/recycle drawer set
Step2 — Mark centerline in cabinet
Usinga square, mark the centerline of the cabinet opening. It is helpful
tomake a mark that extends 20" into the cabinet.
Step1 — Pre pare template
Punchout the front and back diamonds mark ed on the centerline for
yourkit (12", 15"or 18"). Then, for the 12" or 15" kits, cut off the left
sideon the line marked for your ki t.
Step4 — Prebore for mounting sc rews
Preborethe eight hole positions mark ed on the template with a
2.5mm bit.
Step3 — Align and secure template
Laythe template inside the c abinet. Line up the fold with the front
edgeof the c abinet, then align template on the centerline, front and
back.
NOTE:Taping it to the cabinet floor may help keep the template in
placewhile prebor ing the holes.
Step6 — I nsert the drawer and bins
Extendthe two runners fully and set the drawer on top of them so they
fitinto the notches in the back of the drawer.Close the drawer
completelyand listen for the locking devices to engage the runners
witha “click.” Open the drawer and insert the bins. Your Waste/recycle
draweris now ready to use.
Step5 — Mount the Waste/recycl e drawer set
Removethe template and place the Waste/recycle drawer set on the
floorof the ca binet. Set back the runners4 mm and line up the
centerlinemark on the cab inet fl
oor with the center marks on the metal
crossrails. Use a power drill and a #2x2" (or longer) Phillips bit to
secureall eight preattached screws.
Pleasecall1-800-438-6
7
88
f
or
a
s
sistanceinstalli
n
gBl
u
m
p
r
oducts.
Technicalspecificationssubjectto
c
h
a
ngewithoutnotice.
LIT.WR
M
5
000
.0
3.
11
©2
0
11
PrintedinUSA
Formarkfor18”widecabinetopeningdonot cut the template
Cutonthisdottedlineforusein a 15”wide cabinet opening
Cutonthisdottedlineforusein a 12”wide cabinet opening
FOLD FOLD FOLD FOLD
Centerlinefor12"set
Centerlinefor18"set
Centerlinefor15"set
Centerlinefor12"set
Centerlinefor18"set
Centerlinefor15"set
Cutout
for
18
"
Cutout
for
15
"
Cutout
for
12
"
Cutou
t
for
18
"
Cutou
t
for
15
"
Cutout
for
12
"
Installation
TANDEMplusBLUMOTION
Waste/recycledrawerset
Step2
—
M
arkcenterlineincabine
t
Usingasq
uare
,ma
rk
the
ce
nt
erlineofthecabi
netopenin
g.
Itis
helpful
toma
keama
rk
that
ex
te
nd
s20
”intothe
cabi
net.
Step1
—
Pr
epar
etemplate
Cutoutthediamo
n
dsh
ape
s
ma
rk
ed
onthe
ce
nt
erlinefor
yo
ur
ki
t
(1
2
”
,
15
”or18
”)
.Then
,forthe
12
”or
15
inch
kits
,
cu
tof
fthele
ft
sideonthe
linema
rk
ed
for
yo
ur
ki
t.
Step4
—
Pr
ebor
eformountingsc
re
ws
Pr
eboretheeightholepositionsmark
ed
onthetemplatewitha
2.
5mmbit.
Step3
—
Align
andsecuretemplate
La
ythetemplateonthe
fl
oor
ofthe
cabi
netliningupthefoldwiththe
front
ed
ge
.
Th
e
nalig
n
templateonthe
ce
nt
erline
,frontan
dba
ck
.
Onceitis
inthe
co
rrectposition
we
su
g
ges
tta
pingitdo
wnsoit
doe
sn
’tmo
ve
.
Ste
p
6
—
Inse
rt
draw
erandbin
s
Ex
te
ndthe
tw
orunner
sfullyandsetthedrawerontopofthemso tha
t
th
ey
fi
tintothenotchesintheba
ck
ofthedrawer
.Closethedrawer
co
mple
te
lyandlistenfortheLo
c
k
in
g
devi
ce
stoengagetherunne
rs
witha
“click
.
”Op
enthedrawerandinse
rt
thebins.
Yo
urWa
st
e/
re
cy
cle
dr
aweris
nowreadytous
e.
Step5
—
Mountthe
Wa
ste/rec
ycl
edr
awerse
t
Re
mo
ve
thetemplateandplacethe
Wa
st
e/
re
cy
cl
edrawersetonthe
fl
oorofthe
cabi
net.Setba
cktherunners4mman
dlineupthe
ce
nt
erlinema
rk
onthe
cabi
net
fl
oorwiththecent
erma
rk
sonthemetal
crossrails.Usea
po
werdr
illan
da
#2x2
”(o
rlonger
)
Ph
illips
bitto
securealleightpreatt
ache
dscrew
s
.
I
n
sta
l
lat
i
o
n
T
A
ND
EM
plusBL
U
MO
TI
O
N
Wa
s
t
e/
r
ec
yc
le
d
r
aw
er
se
t
St
ep
2
Step
1
S
te
p
4
S
t
ep
3
S
t
e
p
6
S
te
p
5
Pleaseca
1
-
8
0
0-438-
67
8
8
f
o
r
a
s
s
is
t
an
c
e
in
s
ta
l
li
n
g
Bl
u
m
p
r
od
u
c
t
s.
T
e
c
h
n
i
c
a
l
s
pe
ci
fi
cation
s
s
u
bj
e
ct
to
ch
a
nge
w
it
ho
u
t
n
o
tice
.
L
IT.WR
M
500
0
.
0
3
.
1
1
©2
0
1
1
P
rinted
i
n
U
S
A
F
o
r
ma
r
k
fo
r
1
8
”
wi
d
e
ca
b
in
e
t
o
p
e
ning
d
o
no
t
c
u
tthe
te
m
p
la
t
e
Cu
t
o
n
this
d
ott
e
d
l
inefo
r
u
se
i
n
a
1
5
”
w
i
d
ecabi
ne
tope
n
i
ng
C
uton
th
i
s
d
o
t
t
ed
l
i
ne
fo
r
u
se
i
n
a
1
2”
w
i
d
e
cabine
t
o
p
en
i
n
g
F
OL
DF
OL
DF
OL
DF
OL
D
Cen
t
e
r
l
i
n
e
f
o
r
1
2
"
s
e
t
C
en
t
e
r
l
i
n
e
f
o
r
1
8"
se
t
C
en
t
e
r
l
i
n
e
f
o
r
1
5
"
se
tC
e
n
t
e
r
li
ne
f
o
r
1
2
"
s
e
t
Ce
nt
e
rl
in
e
f
o
r
1
8"s
e
t
Ce
n
t
er
l
i
n
e
f
or
1
5
"
se
t
For mark for 18"wide cabinet opening do not cut the template
Cut on this dotted line for use in a 15"wide cabinet opening
Cut on this dotted line for use in a 12"wide cabinet opening
FOLD FOLD FOLD FOLD
Centerlinefor 12" set
Centerlinefor 18" set
Centerlinefor 15" set
Centerlinefor 12" set
Centerlinefor 18" set
Centerlinefor 15" set
Installation
TANDEMBOX
Waste/recycle drawer set
Step2 — Mark centerline in cabinet
Usinga square, mark t he centerline of thecabinet opening. It is helpful
tomake a mark that extends 20" into the cabinet.
Step1 — Pre pare template
Punchout the front and back diamonds mark ed on the centerline for
yourkit (12", 15"or 18"). Then, for the 12" or 15" kits, cut off the left
sideon the line marked for your ki t.
Step4 — Prebore for mounting sc rews
Preborethe eight hole positions mark ed on the template with a
2.5mm bit.
Step3 — Align and secure template
Laythe template inside the c abinet. Line up the fold with the front
edgeof the c abinet, then align template on the centerline, front and
back.
NOTE:Taping it to the cabinet floor may help keep the template in
placewhile prebor ing the holes.
Step6 — I nsert the drawer and bins
Extendthe two runners fully and set the drawer on top of them so they
fitinto the notches in the back of the drawer.Close the drawer
completelyand listen for the locking devices to engage the runners
witha “click.” Open the drawer and insert the bins. Your Waste/recycle
draweris now ready to use.
Step5 — Mount the Waste/recycl e drawer set
Removethe template and place the Waste/recycle drawer set on the
floorof the ca binet. Set back the runners4 mm and line up the
centerlinemark on the cab inet fl
oor with the center marks on the metal
crossrails. Use a power drill and a #2x2" (or longer) Phillips bit to
secureall eight preattached screws.
Pleasecall1-800-438-6
7
88
for
a
s
sistanceinstalli
n
gBl
u
m
p
r
oducts.
Technicalspecificationssubjectto
c
h
a
ngewithoutnotice.
LIT.WR
M
5
000
.0
3.
11
©2
0
11
PrintedinUSA
Formarkfor18”widecabinetopeningdonot cut the template
Cutonthisdottedlineforusein a 15”wide cabinet opening
Cutonthisdottedlineforusein a 12”wide cabinet opening
FOLD FOLDFOLD FOLD
Centerlinefor12"set
Centerlinefor18"set
Centerlinefor15"set
Centerlinefor12"set
Centerlinefor18"set
Centerlinefor15"set
Cutout
for
18
"
Cutout
for
15
"
Cutout
for
12
"
Cutou
t
for
18
"
Cutou
t
for
15
"
Cutout
for
12
"
Installation
TANDEMplusBLUMOTION
Waste/recycledrawerset
Step2
—
M
arkcenterlineincabine
t
Usinga
sq
uare
,ma
rk
the
ce
nt
erlineofthecabi
netopenin
g.
Itis
helpful
toma
keama
rk
that
ex
te
nd
s20
”intothe
cabi
net.
Step1
—
Pr
epar
etemplate
Cutoutthediamo
n
dsh
ape
s
ma
rk
ed
onthe
ce
nt
erlinefor
yo
ur
ki
t
(1
2
”
,
15
”or
18
”)
.Then
,forthe
12
”
or
15
inch
kits
,
cu
tof
fthele
ft
sideonthe
linema
rk
ed
for
yo
ur
ki
t.
Step4—
Pr
ebor
eformountingsc
re
ws
Pr
eboretheeightholepositionsmark
ed
onthetemplatewitha
2.
5mmbit.
Step3
—
Align
andsecuretemplate
La
ythetemplateonthe
fl
oor
ofthe
cabi
netliningupthefoldwiththe
front
ed
ge
.
Th
e
nalig
n
templateonthe
ce
nt
erline
,frontan
dba
ck
.
Onceitis
inthe
co
rrectposition
we
su
gges
ttapingitdo
wnsoit
doe
sn
’tmo
ve
.
Ste
p6
—
Inse
rt
dr
aw
erandbin
s
Ex
te
nd
the
tw
orunner
sfullyandsetthedrawerontopofthemso tha
t
th
ey
fi
tintothenotchesintheba
ck
ofthedrawer
.Closethedrawer
co
mple
te
lyandlist
enfortheLo
c
k
in
g
devi
ce
stoengagetherunne
rs
witha
“click
.
”Op
enthedrawerandinse
rtthebins.
Yo
ur
Wa
st
e/
re
cy
cle
dr
aweris
nowreadytous
e.
Step5
—Mountthe
Waste/rec
ycl
edr
awerse
t
Re
mo
ve
thetemplateandplacethe
Wa
st
e/
re
cy
cl
edrawersetonthe
fl
oorofthe
cabi
net.Setba
ck
therunners4mman
dlineupthe
ce
nt
erlinema
rk
onthe
cabinet
fl
oorwiththecent
erma
rk
sonthemetal
crossrails.Usea
po
werdr
illan
da
#2x2
”(o
rlonger
)
Ph
illips
bitto
securealleightprea
tt
ache
dscrew
s
.
I
n
sta
l
lat
i
o
n
T
A
ND
EM
plusBL
U
MO
TI
O
N
Was
t
e/
r
ec
y
cle
d
r
aw
er
se
t
St
ep
2
Step
1
S
te
p
4
S
t
ep
3
S
t
e
p
6
S
te
p
5
Pleaseca
1
-
8
0
0-438
-
67
8
8
f
o
r
a
s
s
is
t
an
c
e
in
s
ta
l
li
n
g
Bl
u
m
p
r
od
u
c
t
s.
T
e
c
h
n
ic
a
l
s
pe
ci
fi
cation
s
s
u
bj
e
ct
to
ch
a
nge
w
it
ho
u
t
n
o
tice
.
L
IT.WR
M
500
0
.
0
3
.
1
1
©2
0
1
1
P
rinted
i
n
U
S
A
F
o
r
ma
r
k
fo
r
1
8
”
wi
d
e
ca
b
in
e
t
o
p
e
ning
d
o
no
t
c
u
tthe
te
m
p
la
t
e
Cu
t
o
n
this
d
ott
e
d
l
inefo
r
u
se
i
n
a
1
5
”
w
i
d
ecabi
ne
tope
n
i
ng
C
uton
th
i
s
d
o
t
t
ed
l
i
ne
fo
r
u
se
i
n
a
1
2”
w
i
d
e
cabine
t
o
p
en
i
n
g
F
OL
DF
OL
DF
OL
DF
OL
D
Cen
t
e
r
l
i
n
e
f
o
r
1
2
"
s
e
t
C
en
t
e
r
l
i
n
e
f
o
r
1
8"
se
t
C
en
t
e
r
l
i
n
e
f
o
r
1
5
"
se
tC
e
n
t
e
r
li
ne
f
o
r
1
2
"
s
e
t
Ce
nt
e
rl
in
e
f
o
r
1
8"
s
e
t
Ce
n
t
er
l
i
n
e
f
o
r
1
5
"
se
t
