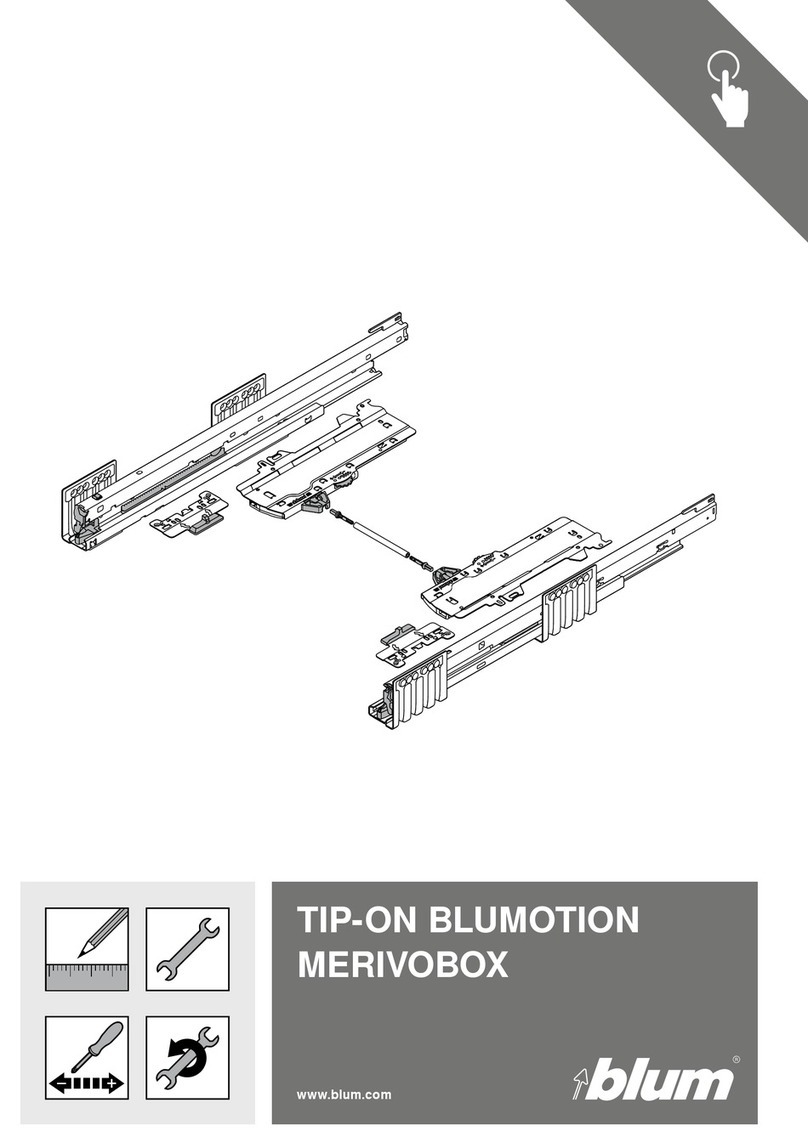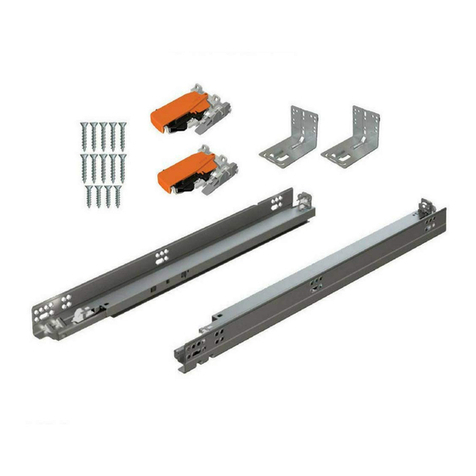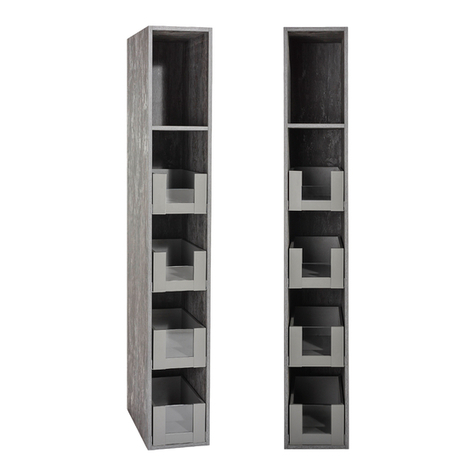
Step 1 — Prepare template
Remove template from box and read all instructions carefully. For 12"
or 15" sets, cut off left side of template on the line marked for your set.
Please call 1-800-438-6788 for assistance installing Blum products.
Technical specifications subject to change without notice.
LIT.TBX5500.09.17 © 2017 Blum, Inc. Printed in USA
Do not cut the template for use in an 18" wide cabinet opening
Cut on this line for use in a 15" wide cabinet opening
Cut on this line for use in a 12" wide cabinet opening
FOLD FOLD FOLD FOLD
Centerline for 12" set
Centerline for 18" set
Centerline for 15" set
Centerline for 12" set
Centerline for 18" set
Centerline for 15" set
Installation
TANDEMBOX
Waste/recycle set
Step 2 — Mark centerline in cabinet
Using a framing square, mark centerline of cabinet opening. It is
helpful to make a mark that extends 20" into cabinet.
Step 4 — Mark mounting screw locations
Punch eight hole locations marked on the template, pre-boring
through template is not recommended.
Step 3 — Align and secure template
Lay template inside cabinet. Line up fold with the front edge of the
cabinet, then align template on the centerline, front and back.
Tap in g
template to the cabinet face and bottom is required to keep template
in place while marking the holes.
Step 6 — Attach drawer front to front bracket
Use the specifications and instructions on the reverse side of this
template to attach drawer front and install drawer. Next, open the
drawer and insert your bins. Your waste/recycle drawer is now ready
to use.
Step 5 — Mount the waste/recycle set
Remove template and place cabinet profile set on bottom of cabinet.
Set runners back 4 mm and line up centerline mark on cabinet bottom
with center marks on the metal crossrails. Use a power drill and a
#2x2" (or longer) Phillips bit to secure all eight pre-attached screws.
Step1 — Prepare template
Removetemplate from box and read all instructionscarefully. For the
12"or 15" sets, cut off the left side of the template on the line marked
foryour set.
Pleasecall1-800-438-6788for assistance installing Blumproducts.
Technicalspecificationssubject to change without notice.
LIT.TDM5500.03.11©2011 Blum, Inc. Printed in USA
Do not cut thete mplatefor 18" wide cabinet opening
Cut on this dottedline for use in a 15" wide cabinet opening
Cut on this dottedline for use in a 12" wide cabinet opening
FOLD FOLD FOLD FOLD
Centerlinefor 12" set
Centerlinefor 18" set
Centerlinefor 15" set
Centerlinefor 12" set
Centerlinefor 18" set
Centerlinefor 15" set
Installation
TANDEM plus BLUMOTION
Waste/recycle set
Step2 — Mark centerline in cabinet
Usinga square, mark the centerline of the cabinet opening. It is helpful
tomake a mark that extends20" into the cabinet.
Step4 — Prebore for mounting screws
Punchthe eight hole positions markedon the template, preboring
throughthe template is not recommended.
Step3 — Align and secure template
Laythe template inside the cabinet.Line up the fold with the front
edgeof the cabinet, then align template on the centerline, front and
back.
Taping the template to the cabinet floor is required to keep the
templatein place while marking the holes.
Step6 — Insertthe drawer and bins
Attachthe drawer front to the drawer. Extend the two runners fully and
setthe drawer on top of them so the runners fi t into the notches in the
backof the drawer.Close the drawer completely. Listen for a “click” as
thelocking devices engage the runners. Open the drawer and insert
thebins. Your waste/recycle drawer is now ready to use.
Step5 — Mount the waste/recycle drawer set
Removethe template and place the waste/recycle drawer set on the
bottomof the cabinet.Set the runners bac k 4 mm and line up the
centerlinemark on the cabinet fl
oor with the centermarkson the metal
crossrails. Usea power drill and a #2x2" (or longer)Phillips bit to
secureall eight preattached screws.
Formarkfor18"widecabinetopeningdonotcutthetemplate
Cutonthisdottedlineforuseina15"widecabinetopening
Cutonthisdottedlineforuseina12"widecabinetopening
FOLDF
OLDFOLDFOLD
Centerlinefor12"set
Centerlinefor18"set
Centerlinefor15"set
Centerlinefor12"set
Centerlinefor18"set
Centerlinefor15"set
Installation
TANDEMplusBLUMOTION
Waste/recycledrawerset
Step2—Markcenterlineincabinet
Usingasquare,markthecenterlineofthecabinetopening.Itishelpful
tomakeamarkthatextends20"intothecabinet.
Step1—Preparetemplate
Punchoutthefrontandbackdiamondsmarkedonthecenterlinefor
yourkit(12",15"or18").Then,forthe12"or15"kits,cutofftheleft
sideonthelinemarkedforyourkit.
Step4—Preboreformountingscrews
Preboretheeightholepositionsmarkedonthetemplatewitha
2.5mmbit.
Step3—Alignandsecuretemplate
Laythetemplateinsidethecabinet.Lineupthefoldwiththefront
edgeofthecabinet,thenaligntemplateonthecenterline,frontand
back.
NOTE:Tapingittothecabinetfl
oormayhelpkeepthetemplatein
placewhilepreboringtheholes.
Step6—Insertthedrawerandbins
Extendthetworunnersfullyandsetthedrawerontopofthemsothey
fi
tintothenotchesintheba
ckofthedrawer
.Closethedrawer
completelyandlistenforthelockingdevicestoengagetherunners
witha“click.”Openthedrawerandinsertthebins.YourWaste/recycle
drawerisnowreadytouse.
Step5—MounttheWaste/recycledrawerset
RemovethetemplateandplacetheWaste/recycledrawersetonthe
fl
oorofthecabinet.Setbacktherunners4mmandlineupthe
centerlinemarkonthecabinetfl
oorwiththecentermarksonthemetal
crossrails.Useapowerdrillanda#2x2"(orlonger)Phillipsbitto
securealleightpreattachedscrews.
Pl
easecal
l1-80
0-438-
6
7
88
for
a
s
sis
tanc
eins
tall
i
n
g
Bl
u
m
p
roducts.
Techn
ical
spe
cifi
cationss
ubj
ectto
c
h
a
n
gew
itho
utnot
ic
LI
T.WR
M
5
000
.03.
11©2
0
1
1Printed
inUSA
Formarkfor18”widecabinetopeni
ngdonotcutthetemplate
Cutonthisdottedl
ineforuseina15”widecabinetopening
Cutonthisdottedlineforuseina12”widecabinetopeni
ng
F
OLDFOLDFOLDFOLD
Centerline
for12"set
Cent
erline
for18"set
Centerlinef
or1
5"set
Centerlinefor1
2"set
C
enterlinef
o
r18"
set
C
enterlinef
or15"set
Cutout
f
or
18
"
Cut
out
for15
"
C
utou
t
f
or12
"
Cutout
f
or1
8
"
Cut
out
for15
"
C
utou
t
f
or12
"
Installation
TANDEMplusBLUMOTION
Waste/recycledrawerset
Step2
—
M
arkc
enterlineinc
abine
t
Us
ing
a
sq
u
are,m
ark
the
ce
n
terline
ofthe
cabi
netopenin
g.
Itis
help
ful
to
ma
kea
ma
rk
th
at
e
x
te
nds20
”in
tothe
cabi
net.
Step
1
—
Prepar
etem
plate
Cu
tout
thedi
amon
ds
hape
s
marked
on
the
ce
n
terline
for
yo
urk
it(1
2
”
,
15”or
18”).Th
en
,fo
r
the
12
”or
15
i
nch
kits
,c
u
tof
fth
ele
ft
s
ideo
nthe
linem
a
rk
e
d
for
yo
ur
kit.
Step4
—
Pr
e
bor
eform
ountingsc
re
ws
Preb
orethe
eigh
thole
pos
ition
sma
rk
ed
o
nthe
templ
atewith
a
2.
5m
mbi
t.
Step3
—
Align
and
securetempl
ate
L
a
y
thetempla
teont
he
fl
oor
oft
he
cab
i
netl
inin
gupt
hefol
dwit
hth
e
front
ed
g
e
.Th
e
nal
ig
ntempl
ateon
the
ce
nterlin
e
,
frontan
dbac
k
.
Once
itis
i
nthe
c
o
rrectposition
we
sug
gestta
p
ing
itdo
wn
soit
doe
sn
’
tm
ove
.
Step
6—
Inse
rtdraw
erand
bi
n
s
Ex
te
n
d
the
tw
o
runner
s
full
yand
set
thedra
wero
ntop
ofthem
sot
ha
t
t
h
ey
fi
tinto
then
otche
sin
theba
ck
ofth
edrawer.Close
thedra
wer
comple
te
ly
andl
ist
enf
ortheL
o
c
ki
n
gdev
i
ce
stoe
ngage
therunne
r
s
wit
ha
“clic
k
.”O
p
e
nthed
rawe
randi
nse
rtthe
bins
.
YourWas
te
/
re
cy
cle
draweris
nowready
tous
e.
Step5
—
Mountthe
Waste/
rec
y
cl
e
dr
a
w
e
rs
e
t
Re
mo
ve
the
templateand
placethe
Waste/re
c
y
cl
edrawerse
tonth
e
fl
o
or
ofthe
cabi
net.Setb
a
ckthe
ru
nners4mm
an
dl
ineu
pthe
ce
nterli
nema
rk
on
the
cab
i
net
floorw
ith
thecent
erm
a
rk
son
themetal
crossrail
s.Use
a
po
werdr
ill
and
a
#2x2
”(orlonge
r
)
Ph
i
llips
bi
tto
s
ecure
alle
ightp
rea
t
tac
hed
scre
w
s
.
In
sta
lla
tion
TA
NDE
M
plusBL
U
MO
TI
O
N
Wa
s
te/
rec
y
cle
d
raw
er
s
e
t
St
ep
2
Step
1
Ste
p
4
Step
3
Step6
Ste
p
5
Please
1-
800-438
-67
8
8for
as
sis
tan
c
ein
sta
lling
Bl
ump
rod
ucts.
Technica
lspe
ci
ficatio
s
subj
ect
to
ch
ange
witho
utno
tice
.
LIT.W
RM
500
0.03
.11©
2
011Printe
in
USA
Fo
r
ma
rk
for1
8”wi
d
eca
b
in
e
to
pe
ning
d
o
no
t
cu
tthe
te
m
plate
Cu
tonthi
s
d
ot
tedlin
e
fo
ru
se
in
a1
5”
wid
ecabi
ne
t
op
e
ning
C
utont
hisd
ot
t
e
d
line
fo
ru
se
in
a1
2”
wid
e
cabinet
o
pen
in
g
FOL
DFOL
DF
O
L
DFOL
D
Centerlin
e
fo
r12"
set
Cen
terlinefo
r18"
se
t
C
en
te
rline
for1
5"
se
tC
ente
rli
ne
for12"
s
et
C
ente
rl
in
e
for
18"
set
C
e
nterlinef
or1
5
"se
t
Formarkfor18"widecabinetopeningdonotcutthetemplate
Cutonthisdottedlineforuseina15"widecabinetopening
Cutonthisdottedlineforuseina12"widecabinetopening
FOLDFOLDFOLDFOLD
Centerlinefor12"set
Centerlinefor18"set
Centerlinefor15"set
Centerlinefor12"set
Centerlinefor18"set
Centerlinefor15"set
Installation
TANDEMplusBLUMOTION
Waste/recycledrawerset
Step2—Markcenterlineincabinet
Usingasquare,markthecenterlineofthecabinetopening.Itishelpful
tomakeamarkthatextends20"intothecabinet.
Step1—Preparetemplate
Punchoutthefrontandbackdiamondsmarkedonthecenterlinefor
yourkit(12",15"or18").Then,forthe12"or15"kits,cutofftheleft
sideonthelinemarkedforyourkit.
Step4—Preboreformountingscrews
Preboretheeightholepositionsmarkedonthetemplatewitha
2.5mmbit.
Step3—Alignandsecuretemplate
Laythetemplateinsidethecabinet.Lineupthefoldwiththefront
edgeofthecabinet,thenaligntemplateonthecenterline,frontand
back.
NOTE:Tapingittothecabinetfl
oormayhelpkeepthetemplatein
placewhilepreboringtheholes.
Step6—Insertthedrawerandbins
Extendthetworunnersfullyandsetthedrawerontopofthemsothey
fi
tintothenotchesintheba
ckofthedrawer
.Closethedrawer
completelyandlistenforthelockingdevicestoengagetherunners
witha“click.”Openthedrawerandinsertthebins.YourWaste/recycle
drawerisnowreadytouse.
Step5—MounttheWaste/recycledrawerset
RemovethetemplateandplacetheWaste/recycledrawersetonthe
fl
oorofthecabinet.Setbacktherunners4mmandlineupthe
centerlinemarkonthecabinetfl
oorwiththecentermarksonthemetal
crossrails.Useapowerdrillanda#2x2"(orlonger)Phillipsbitto
securealleightpreattachedscrews.
Pleas
eca
ll1-8
00-438-
6
7
88
fo
r
a
s
si
stanc
ein
stal
li
n
gBl
u
m
p
r
odu
cts
.
Tech
nic
alsp
eci
fica
tions
sub
ject
to
c
h
a
ngew
ith
outno
tic
LIT.WR
M
5
000
.
0
3.
11©2
0
11Printe
dinUSA
Formarkfor1
8”wi
decabinetopeningdonotcutthetemplate
Cutonthisdottedlineforusei
na15”widecabinetopening
Cutonthisdottedlineforuseina12”widecabinetopening
FOLDFOLDFOL
DF
OLD
Center
linef
or12"set
Centerlinefor18"set
Centerlinef
or
15"
set
Centerlinefor
12"set
C
enterlinef
o
r18"se
t
Centerlinefor15"set
Cutout
f
or
18
"
Cut
out
for15
"
C
uto
ut
for12
"
Cuto
u
t
f
or
18
"
Cut
out
for15
"
C
uto
ut
for12
"
Installa
tion
TANDEMplusBLUMOTION
Waste/recycledrawerset
Step2
—
M
ark
centerlinein
cabine
t
U
sing
a
sq
uare,
mark
th
e
ce
nterlin
eofth
e
cab
i
neto
penin
g.Itis
hel
pful
t
oma
ke
ama
rk
t
hat
ex
te
n
d
s20
”i
ntothe
cab
i
net.
Step
1
—
Prepar
e
te
mplate
Cutout
thedi
amo
nd
shap
e
s
m
ark
ed
o
nthe
ce
nterlin
efor
yo
ur
kit(1
2
”
,
15
”o
r18”).
Then
,f
orthe
12
”or
15inch
kits
,
cu
to
f
fthele
fts
ideo
nthe
linema
rk
ed
fo
r
y
o
ur
kit.
Step4
—
Prebor
eformountingsc
re
ws
Preboreth
eeig
hthol
epos
itio
nsm
ark
edonthe
temp
latewitha
2.
5
mmbi
t.
Step3
—
Ali
gn
a
ndsecuretem
plate
La
y
thet
empla
teon
the
fl
oor
of
the
ca
bi
net
lini
ngup
thefo
ldwit
ht
he
fron
t
ed
ge
.Th
e
na
lig
n
temp
lateo
nthe
ce
nterli
ne
,fronta
n
dba
ck
.
Once
iti
s
i
nthe
co
rrec
tpos
ition
we
s
u
g
gestt
a
p
in
gitdo
wn
soit
doe
sn
’tm
ove
.
Step
6—
Inse
rt
dra
w
e
ra
ndbin
s
Ex
t
e
nd
th
e
tw
orunne
r
s
ful
lyan
dse
tthed
rawe
r
ontop
ofthemso
tha
t
th
ey
fi
tint
othe
notch
esi
ntheba
ck
of
thedrawer
.Closethedrawer
co
mpl
e
te
l
yand
lis
t
en
forthe
Lo
ck
in
gde
vi
c
e
sto
engagethe
runne
r
s
wi
tha
“click
.”
Openthe
drawerand
inse
rtthe
bins.
Yo
ur
Wa
s
te/
re
cy
cle
dra
weri
s
nowread
ytou
s
e
.
Step
5
—
Mountthe
Waste/
recycl
edr
aw
er
se
t
Re
mo
v
e
the
templatea
n
d
plac
ethe
Waste/re
c
y
c
ledrawerseton
the
fl
oor
ofth
e
cab
i
net.Setba
c
k
the
runners
4mm
an
d
line
upthe
ce
nterlinem
a
rk
o
nthe
cabi
net
floo
rwi
ththe
cent
erma
rk
son
them
etal
cros
srai
ls.Use
a
p
o
werdr
il
lan
da
#2x2”(o
rlon
ger
)
Ph
i
lli
ps
bi
tto
s
ecure
all
eight
prea
tta
che
dsc
rew
s
.
In
sta
lla
tio
n
T
AN
D
EMplusBL
UMO
TI
O
N
Wa
s
te/
r
ec
y
c
le
d
raw
er
se
t
St
ep
2
Step
1
S
te
p
4
Step
3
Step6
Ste
p5
P
lease
1-
800-438
-
67
88
for
ass
i
s
tan
c
ein
sta
lli
ng
Bl
umprod
ucts.
Technicalspe
ci
ficatio
s
subj
ect
to
ch
ange
wit
ho
utno
tic
e
.
LIT.W
R
M500
0.03.
11©2
011Printe
in
USA
Fo
r
ma
r
k
for1
8”wi
d
eca
b
in
e
to
pe
ning
d
o
no
t
cu
tthe
t
e
m
pla
te
Cu
t
on
t
his
d
ottedlin
e
fo
ru
s
e
ina1
5”wid
ecabi
ne
top
e
ning
C
ut
ont
hisd
o
tted
line
fo
r
use
in
a
12”
w
ide
cabine
t
open
ing
FOL
DFOL
DFOL
DF
OL
D
Cent
erlin
e
fo
r12"
set
Ce
n
terlinefo
r1
8"
s
e
t
C
en
te
rline
for1
5"se
tC
ente
rli
ne
for
12"s
e
t
C
ent
erl
in
e
fo
r
18"
set
Ce
n
ter
linef
or1
5"
s
e
t
Formark for 18" wide cabinet opening do not cut the template
Cuton this dotted line for use in a 15" wide cabinet opening
Cuton this dotted line for use in a 12" wide cabinet opening
FOLDFOLDFOLDFOLD
Centerlinefor12" set
Centerlinefor18"set
Centerlinefor15"set
Centerlinefor12" set
Centerlinefor18" set
Centerlinefor15"set
Installation
TANDEMBOX
Waste/recycle drawer set
Step2—Markcenterline incabinet
Usingasquare, markthe centerline of thecabinetopening.Itis helpful
tomakea mark thatextends 20"intothe cabinet.
Step1—Prepare template
Punchoutthe front andback diamonds markedon the centerline for
yourkit(12",15" or 18"). Then, for the12" or 15"kits, cut off the left
sideonthe linemarked for your kit.
Step4—Preborefor mounting screws
Preboretheeighthole positionsmarked on the template witha
2.5mmbit.
Step3— Alignand secure template
Laythetemplate insidethecabinet. Lineup the fold with the front
edgeofthecabinet,then aligntemplate on thecenterline, front and
back.
NOTE:Tapingittothe cabinetfl
oormay help keep the templatein
placewhilepreboringthe holes.
Step6—Insertthedrawerand bins
Extendthetworunnersfullyandsetthe drawer ontop of them so they
fitinto the notchesinthe backof thedrawer
.Closethedrawer
completelyandlistenfor the lockingdevicesto engagethe runners
witha“click.” Open the drawer and insertthe bins.Your Waste/recycle
drawerisnowready to use.
Step5—Mount the Waste/recycle drawerset
Removethetemplate andplace theWaste/recycle drawer seton the
fl
oorof the cabinet. Set back therunners 4mm andlineupthe
centerlinemarkonthecabinetfl
oorwiththecenter marks onthemetal
crossrails.Useapower drill anda #2x2"(orlonger) Phillipsbit to
securealleightpreattachedscrews.
Pleasecall1-800-438-
6
7
88
f
or
a
s
sistanceinstalli
n
gBl
u
m
p
r
oducts.
Technicalspecificationssubjectto
c
h
a
ngewithoutnotice
LIT.WR
M
5
000
.0
3.11
©2
0
11
PrintedinUSA
Formarkfor18”widecabinetopeningdonotcutthetemplate
Cutonthisdottedlineforuseina15”widecabinetopening
Cutonthisdottedlineforuseina12”widecabinetopening
FOLDFOLDFOLDFOLD
Centerlinefor12"set
Centerlinefor18"set
Centerlinefor15"set
Centerlinefor12"set
Centerlinefor18"set
Centerlinefor15"set
Cutout
for
18
"
Cutout
for15
"
Cutout
for
12
"
Cutou
t
for
18
"
Cutout
for
15
"
Cutout
for
12
"
Installation
TANDEMplusBLUMOTION
Waste/recycledrawerset
Step2
—
M
arkcenterlineincabine
t
Usinga
sq
uare
,ma
rk
the
ce
nterlineofthe
cabi
netopenin
g.
Itis
helpful
toma
keama
rk
that
ex
te
nd
s20
”intothe
cabi
net.
Step
1
—
Prepar
etemplate
Cutoutthediamo
n
dsh
ape
s
ma
rk
ed
onthe
ce
nterlinefor
yo
ur
ki
t
(1
2
”
,
15
”or
18”)
.Then
,forthe
12
”
or
15
inch
ki
ts
,
cu
tof
fthele
ft
sideonthe
linema
rk
ed
for
yo
ur
ki
t.
Step4
—
Pr
ebor
eformountingsc
re
ws
Preboretheeightholepositionsmark
ed
onthetemplatewitha
2.5mmbit.
Step3
—
Align
andsecuretemplate
La
ythetemplateonthe
fl
oor
ofthe
cabi
netliningupthefoldwiththe
fronted
ge
.
Th
e
nalig
n
templateonthe
ce
nt
erline
,frontan
dba
ck
.
Onceitis
inthe
co
rrectposition
we
su
g
ges
tta
p
ingitdo
wn
soit
doe
sn
’tmo
ve
.
Ste
p
6
—
Insert
draw
erandbin
s
Ex
te
nd
the
tw
orunner
sfullyandsetthedrawerontopofthemsotha
t
th
ey
fi
tintothenotchesintheba
ckofthedrawer
.Closethedrawer
co
mple
te
lyandlist
enfortheLo
c
k
in
g
devi
ce
stoengagetherunne
rs
witha
“click
.
”Op
enthedrawerandinse
rt
thebins.
Yo
ur
Wa
st
e/
re
cy
cle
dr
aweris
nowreadytous
e.
Step5
—
Mountthe
Wa
ste/
rec
ycl
edr
aw
erse
t
Re
mo
ve
thetemplatean
dplacethe
Wa
st
e/re
cy
cledrawersetonthe
fl
oor
ofthecabi
net.Setba
ck
therunners4mmandlineupthe
ce
nt
erlinema
rk
onthe
cabi
net
fl
oorwiththecent
erma
rk
sonthemetal
crossrails.Useapo
werdr
illan
da
#2x2
”(o
rlonger
)
Ph
illi
ps
bitto
securealleightprea
tt
ache
dscrew
s
.
I
n
sta
l
la
t
i
o
n
T
A
ND
EM
plusBL
U
MO
TI
O
N
Wa
s
t
e/
r
ec
y
c
le
d
r
aw
er
se
t
St
ep
2
Step
1
S
te
p
4
S
t
ep
3
S
te
p
6
S
te
p
5
Please
1
-
8
0
0-438
-
67
8
8
f
o
r
a
s
s
is
t
an
c
e
in
s
ta
l
li
n
g
Bl
u
m
p
r
od
u
c
t
s.
T
e
c
h
n
i
c
a
ls
pe
ci
fi
cation
s
s
u
bj
e
ct
to
ch
a
nge
w
it
ho
u
t
n
o
tice
.
L
IT.W
R
M
500
0
.
0
3
.
1
1
©2
0
1
1
P
rinte
i
n
U
S
A
F
o
r
ma
r
k
fo
r
1
8
”
wi
d
e
ca
b
in
e
t
o
p
e
ning
d
o
no
t
c
u
tthe
te
m
p
la
t
e
Cu
t
o
n
this
d
o
tt
e
d
l
in
efo
r
u
se
i
n
a
1
5
”
w
i
d
ecabi
ne
top
e
n
i
ng
C
uton
th
i
s
d
o
t
t
ed
l
i
ne
fo
r
u
se
i
n
a
1
2
”
w
i
d
e
cabine
t
o
p
en
i
n
g
F
OL
DF
OL
DF
OL
DF
OL
D
Ce
n
t
e
r
l
i
n
e
f
o
r
1
2
"
s
e
t
C
e
n
te
r
l
i
n
e
f
o
r
1
8"
se
t
C
en
t
e
r
l
i
n
e
f
o
r
1
5
"
se
tC
e
n
t
e
r
li
ne
f
o
r
1
2
"
s
e
t
C
e
n
t
e
rl
in
e
f
o
r
1
8"
s
e
t
C
e
n
t
er
l
in
e
f
o
r
1
5
"
se
t
Formark for 18" wide cabinet opening do not cut the template
Cuton this dotted line for use in a 15" wide cabinet opening
Cuton this dotted line for use in a 12" wide cabinet opening
FOLDFOLDFOLDFOLD
Centerlinefor12" set
Centerlinefor18"set
Centerlinefor15" set
Centerlinefor12" set
Centerlinefor18"set
Centerlinefor15"set
Installation
TANDEMBOX
Waste/recycle drawer set
Step2—Markcenterlineincabinet
Usingasquare,mark the centerline of thecabinet opening.Itishelpful
tomakeamarkthatextends 20"intothe cabinet.
Step1—Prepare template
Punchoutthefront and backdiamondsmarked on thecenterline for
yourkit(12",15"or18").Then,for the 12"or15"kits,cutoff theleft
sideontheline marked foryour kit.
Step4—Preboreformounting screws
Preboretheeighthole positions marked on thetemplate witha
2.5mmbit.
Step3— Alignandsecure template
Laythetemplate inside the cabinet.Line upthe foldwiththefront
edgeofthecabinet,thenaligntemplate on the centerline,frontand
back.
NOTE:Tapingittothecabinetfl oormayhelpkeep the templatein
placewhilepreboringtheholes.
Step6—Insertthedrawerandbins
Extendthetworunners fully and set the drawerontop of themsothey
fitinto thenotches in the back of thedrawer
.Closethe drawer
completelyandlisten for thelockingdevices toengage the runners
witha“click.”Openthe drawerand insertthe bins.Your Waste/recycle
drawerisnowreadytouse.
Step5—MounttheWaste/recycle drawerset
Removethetemplate andplacetheWaste/recycledrawerseton the
fl
oorof the cabinet. Setback therunners 4 mmandlineup the
centerlinemarkonthecabinet fl
oorwith thecentermarks on the metal
crossrails.Use a powerdrillanda#2x2"(orlonger) Phillipsbit to
securealleightpreattachedscrews.
Pleasecall1-800-438-
6
7
88f
or
a
s
sistanceinstalli
n
gBl
u
m
p
r
oducts.
Technicalspecificationssubjectto
c
h
a
ngewithoutnotice
LIT.WR
M
5
000
.0
3.
11
©2
0
11
PrintedinUSA
Formarkfor18”widecabinetopeningdonotcutthetemplate
Cutonthisdottedlineforuseina15”widecabinetopening
Cutonthisdottedlineforuseina12”widecabinetopening
FOLDFOLDFOLDFOLD
Centerlinefor12"set
Centerlinefor18"set
Centerlinefor15"set
Centerlinefor12"set
Centerlinefor18"set
Centerlinefor15"set
Cutout
for
18
"
Cutout
for
15
"
Cutout
for
12
"
Cutou
t
for
18
"
Cutou
t
for
15
"
Cutout
for
12
"
Installation
TANDEMplusBLUMOTION
Waste/recycledrawerset
Step2
—
M
arkcenterlineincabine
t
Usinga
sq
uare
,ma
rk
the
ce
nt
erlineofthe
cabi
netopenin
g.
Itis
helpful
toma
keama
rk
that
ex
te
nd
s20
”intothe
cabi
net.
Step
1
—
Prepar
etemplate
Cutoutthediamo
n
dsh
ape
s
ma
rk
ed
onthe
ce
nt
erlinefor
yo
ur
kit
(1
2
”
,
15
”or
18
”).Then
,forthe
12”or15
inch
kits
,
cu
tof
fthele
ft
sideonthe
linema
rk
ed
for
yo
ur
kit.
Step4
—
Pr
ebor
eformountingsc
re
ws
Preboretheeightholepositionsmark
ed
onthetemplatewitha
2.
5mmbit.
Step3
—
Align
andsecuretemplate
La
ythetemplateonthe
fl
oor
ofthe
cabi
netliningupthefoldwiththe
front
ed
ge
.
Th
e
nalig
n
templateonthe
ce
nt
erline
,frontan
dba
ck
.
Onceitis
inthe
co
rrectposition
we
su
g
ges
tta
p
ingitdo
wn
soit
doe
sn
’tmo
ve
.
Ste
p
6
—
Inse
rt
draw
erandbin
s
Ex
te
nd
the
tw
orunner
sfullyandsetthedrawerontopofthemsotha
t
th
ey
fi
tintothenotchesintheba
ck
ofthedrawer
.Closethedrawer
co
mple
te
lyandlist
enfortheLo
c
k
in
gdevi
ce
stoengagetherunne
rs
witha
“click
.
”Op
enthedrawerandinse
rt
thebins.
Yo
ur
Wa
st
e/
re
cy
cle
dr
aweris
nowreadytous
e.
Step5
—
Mountthe
Wa
ste/
rec
ycl
edr
aw
erse
t
Re
mo
ve
thetemplatean
dplacethe
Wa
st
e/
re
cy
cledrawersetonthe
fl
oor
ofthe
cabi
net.Setba
ck
therunners4mmandlineupthe
ce
nterlinema
rk
onthe
cabi
net
floorwiththecent
erma
rk
sonthemetal
crossrails.Usea
powerdr
illan
da
#2x2
”(o
rlonger
)
Ph
illi
ps
bitto
securealleightprea
tt
ache
dscrew
s
.
I
n
sta
l
la
t
i
o
n
T
A
ND
EM
plusBL
U
MO
TI
O
N
Wa
s
t
e/
r
ec
y
c
le
d
r
aw
er
se
t
St
ep
2
Step
1
S
te
p
4
S
t
ep
3
S
t
e
p
6
S
te
p
5
Please
1
-
8
0
0-438
-67
8
8
f
o
r
a
s
s
is
t
an
c
e
in
s
ta
l
li
n
g
Bl
u
m
p
rod
u
c
t
s.
T
e
c
h
n
i
c
a
ls
pe
ci
fi
cation
s
s
u
bj
e
ct
to
ch
ange
w
it
ho
u
tn
o
tice
.
L
IT.W
R
M
500
0.
0
3
.1
1
©2
0
1
1
P
rinte
i
n
U
S
A
F
o
r
ma
r
k
fo
r
1
8
”
wi
d
e
ca
b
in
e
t
o
p
e
ning
d
o
no
t
c
u
tthe
te
m
p
la
t
e
Cu
t
o
n
this
d
o
tt
e
d
l
in
efo
r
u
se
i
n
a
1
5
”
w
i
d
ecabi
ne
top
e
n
i
ng
C
uton
th
i
s
d
o
t
t
ed
l
i
ne
fo
r
u
se
i
n
a
1
2
”
w
i
d
e
cabine
t
o
p
en
i
n
g
F
OL
DF
OL
DF
OL
DF
OL
D
Ce
n
t
e
r
l
i
n
e
f
o
r
1
2
"
s
e
t
C
e
n
t
e
r
l
i
n
e
f
o
r
1
8"
se
t
C
en
t
e
r
l
i
n
e
f
o
r
1
5
"
se
tC
e
n
t
e
r
li
ne
f
o
r
1
2
"
s
e
t
C
e
n
te
rl
in
e
f
o
r
1
8"
s
e
t
C
e
n
t
er
l
i
n
e
f
o
r
1
5
"
se
t
