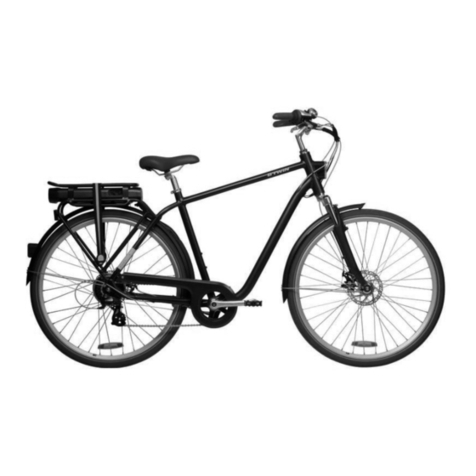
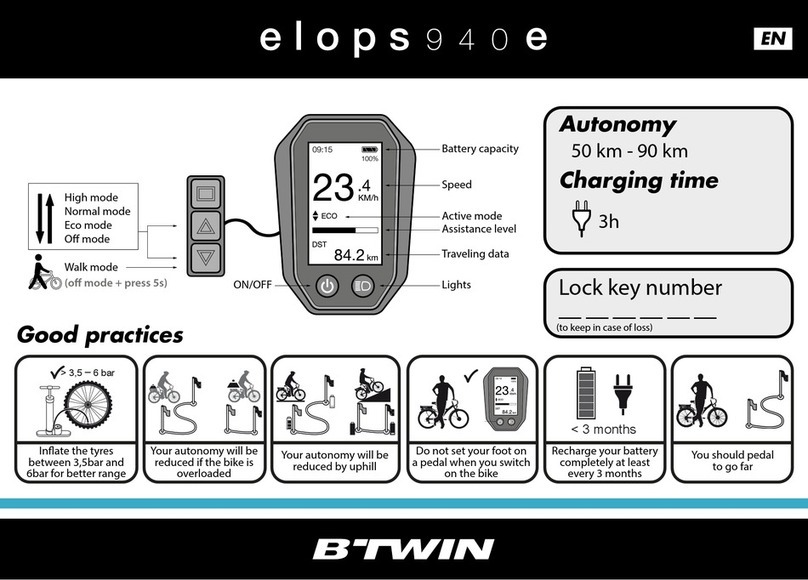
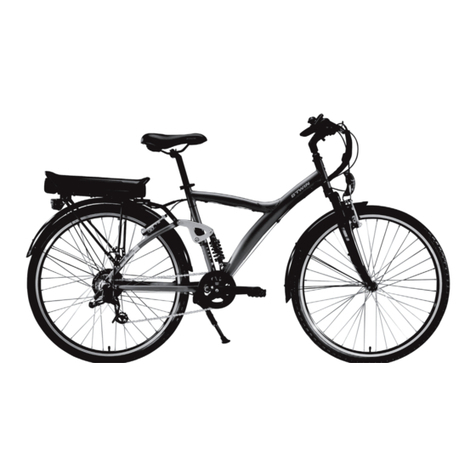
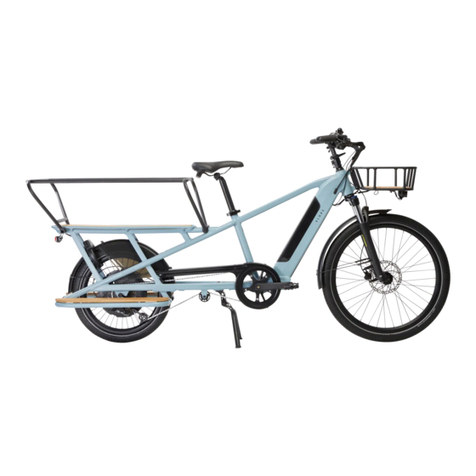
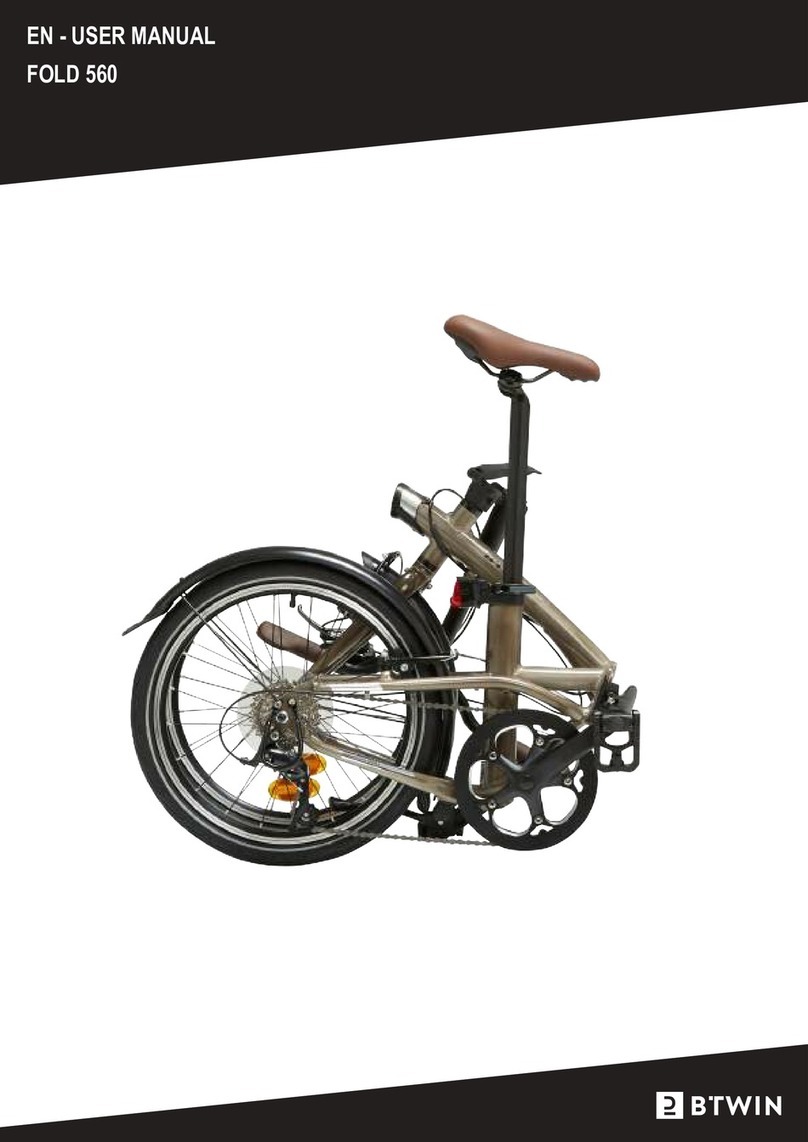
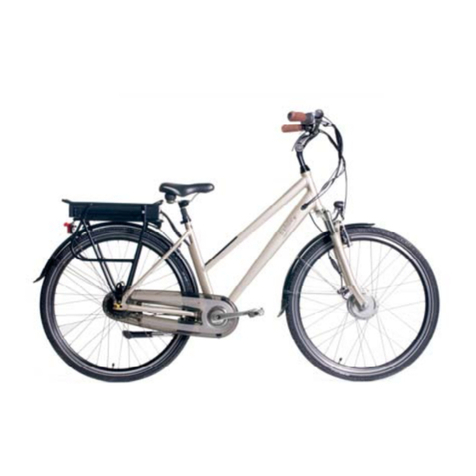
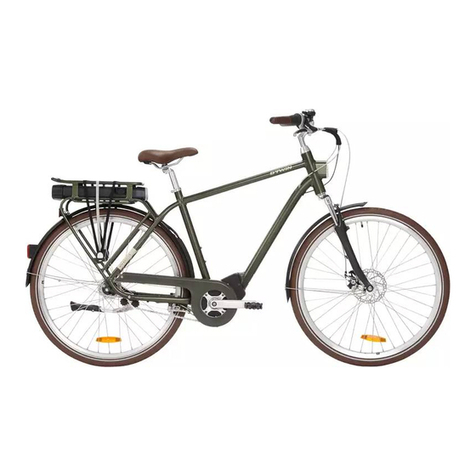
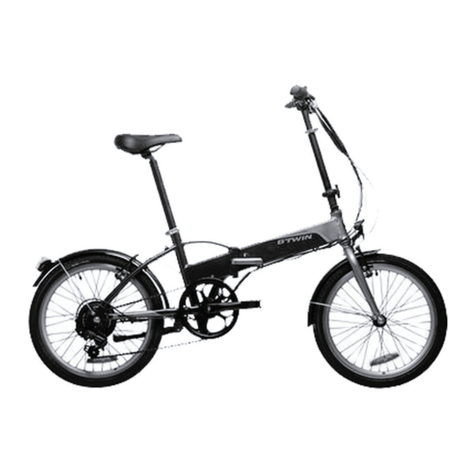
Btwin E-LD500 User manual

EN - INSTRUCTIONS FOR USE
E-LD500

3
Dear cuomers.
Thank you for buying a B’TWIN electric-assied bike. It will let you get a tae for travelling
around on 2 wheels for your leisure trips, oer the mo practical, economical mode of trans-
port for your city trips, and nally, help you burn calories to keep in shape. However, we invite
you to read the inruction manual to make the mo of your B’TWIN electrically assied bike.
Remember that an electric-assied bike is not a moped and your input is required to make it
go further, faer and for longer. We sugge that you learn how to use your electric-assied
bike in an open area in order to get used to the feel of the motor kicking in and ensure opti-
mum control when riding.Engage sport mode for your r few miles only if you’re sure of your
ability to control your bike. Here are 10 tips to take full advantage of your B’TWIN electrically
assied bike.
Electrically assied bicycles are heavier than classic pushbikes. Without assiance, pedal-
ling can be harder. You mu always ensure you are capable of completing the entire journey
without using the pedal-assi, in case of breakdown.
Please note, these inructions only refer to the bike’s electric features. For
other features, common to all our bikes, you need to refer to the B’TWIN user
manual which accompanies this document and is also available on our website
www.supportdecathlon.com or on reque from our DECATHLON ores.

4 5
10 recommended biking practices so you can really get the mo out of your E-bike.
B
A
1. You need to pedal to go further
3.5 - 5 bar
2. In order to improve battery life and eciency, pump the
tyres to between 3.5 and 5 bar
< 3,5 bar
3. Under-inated tyres are more prone to punctures
A
B
A
B
+/- 20° +/- 5°
4. cold weather reduces battery life
A
B
A
B
5. Overloading the bicycle will reduce the battery life
A
B
A
B
6. Battery life will drop when cycling uphill
7. The battery mu be fully charged at lea once every
3 months 8. We recommend reducing use of pedal-assi mode
when the battery charge is low
9. the battery level indicator is more accurate when
ationary
!
10. Remove the battery before carrying out any mainte-
nance work
PRODUCT DESCRIPTION ............................................................................... 6
Technical features of e-bike ................................................................................................ 6
Pedal-assi mode overview ................................................................................................ 6
SPEED AND CONTROL ELEMENTS .............................................................. 7
Display screen and function ............................................................................................... 7
MOTOR ............................................................................................................. 8
BATTERY AND CHARGER .............................................................................. 8
User precautions .................................................................................................................. 9
Inserting and removing the battery .................................................................................. 11
Recharging Battery ............................................................................................................ 12
Maintenance and service life (warranty conditions) ....................................................... 12
Battery diagnoics ............................................................................................................ 13
Inserting and removing the battery .................................................................................. 14
Additional safety precautions ........................................................................................... 15
Maintenance ........................................................................................................................ 16
Error codes ......................................................................................................................... 18
WARRANTY INFORMATION FOR YOUR E-BIKE ........................................ 19
CONTENTS

6 7
PRODUCT DESCRIPTION
Technical features of e-bike
A
LED rear lighting
B
Battery and controller
C
Harness + connectors: Brakes/Control screen
D
LED front lighting
E
Motor
F
Pedalling sensor
Pedal-assi mode overview
The electrically assied bike can be used with or without assiance by pressing the ON/OFF button. Always make sure the battery
is properly inserted and locked. The electrical assiance will only work if you pedal. The assiance is cut o as soon as one of
the two brake levers is operated or the speed exceeds 25 km/h. It will automatically art again below 23 km/h. In order to preserve
battery life, the bike is equipped with a «power» limiter which limits assiance when the motor is under heavy ress. During inten-
sive use and in exceptional weather conditions, the pedal-assi mode may cut out to safeguard the syem.
SPEED AND CONTROL ELEMENTS
Display screen and function
10
52
KM / HPOWER
TRIP
to GO
ODO
NORMAL
KM
ECO
12 7 8143
6
11
9
1
Power assiance mode (0-1-2-3):
«0» no power assiance.
«1» is the default power assiance mode.
Each mode corresponds to the maximum assiance speeds set out below:
Mode 0 1 2 3
Average battery life* /115 km 80 km 60 km
2ON/OFF button:
Switch the electrically-assied bicycle on and o by holding the button down for a few seconds.
3«+» button:
Step up to the higher power assiance mode by briey pressing the button
Switch to «walk assi» mode by holding the button down for a few seconds.
4«-» button:
Step down to the lower assiance mode
5Lighting button
The lighting on the bicycle can be switched on and o by briey pressing the button
Go to the settings by holding the button down for a few seconds
6Speed indicator**
7
ODO: Records the total diance travelled. It cannot be reset to zero.
TRIP: Records the partial diance travelled. It can be reset to zero by pressing the «-» button for 10 seconds.
TRIPtoGO: Remaining diance that may be covered with the power assiance mode.
A
B
C
D
E
F

8 9
MOTOR
the sound pressure level expressed in dBA at the rider’s ear position is less than 70 dB (A).
BATTERY AND CHARGER
All batteries in our electric bikes use Lithium-Ion cell technology and have no memory eect. The battery should be recharged after
each use.
Charge the battery fully before using for the r time.
Battery Charger
36 V / 14 Ah battery*
Input: 100-240V
Output: 42V
* Your 36 V battery is inactive at the time of purchase. Plug in your charger to activate it. Your battery is guaranteed for up to 500
charge cycles (1 cycle = 1 charge/discharge cycle) subject to compliance with orage conditions and conditions of use. It’s impor-
tant to follow the inructions outlined on the battery charger label.
User precautions
Do not expose to temperatures above 50°C.
< +10°C +10°C / 50°C > +50°C
+10°C
+25°C
Storage conditions: It is important to ore the charged battery in a cool (between +10°C and
+25°C), dry place, out of direct sunlight.
<+10°C +10°C / +25°C +25°C
+10°C
+40°C
Charge your battery in a dry place at a temperature between 10°C and 40°C.
< +10°C +10°C / +40°C +40°C
Caution: In exceptional conditions, the controller can get very hot.
Do not dismantle.
Dispose of the battery in an appropriate container. Return the used battery to your neare
Decathlon ore for recycling.
Risk of re.
Risk of electrocution.
Handle with care. Impact sensitive.
Never short-circuit the battery by connecting the positive and negative terminals.
8Diance indicator
9Units:
kilometres or miles
10 Lighting indicator:
Appears on the screen when the lights are on
11 Five battery levels.***
When the battery level is low, the indicator arts ashing.
12 Additional battery and syem information:
Indicates the battery charge level as a percentage
Setting
Hold the «Lighting» button down for a few seconds to enter or quit the settings
Briey press the «Lighting» button to display the dierent settings
Briey press the «+» and «-» buttons to display the dierent adjuments.
SET 1: Choice of units (km/h or mph)
SET 2: Standby timer setting (in minutes)
* Under te protocol conditions, for a rider weighing 75 kg with tyre pressure of 4 bar and following the 10 guidelines. ** Speed
display accuracy is +/-2%. *** Check the battery charge display when you op; you may notice a big reduction in charge level
when using high pedal-assi mode.

10 11
Never allow children to play with or handle the battery.
Do not immerse in water.
Do not use a high-pressure washer.
Rain resiant
=
V / Hz
Always check that the charger and battery are compatible.
=
+200 V / +240 V
Always make sure the charger is compatible with the local electricity network:
Voltage: 100 V, maximum 240 V.
+50 Hz / +60 Hz
Frequency: minimum 50, maximum 60 Hz.
Preferably charge the battery indoors.
Plane transportation prohibited.
Any failure to comply with recommended safety precautions will result in a cancellation
of the warranty.
Inserting and removing the battery
Insertion:
CLIC
Before inserting your battery into its housing, check there are
no foreign bodies or objects on the connectors. Insert the
battery until it clicks.
Removal:
Before removing your battery, unlock it using the key.
Turn o the switch. Then, remove the battery by pulling on it.

12 13
Recharging Battery
7H
Start of charging red LED.
Green LED when charging is nished. LED ashing red, problem during char-
ging, contact cuomer services.
Maintenance and service life (warranty conditions)
Do not ore the battery when completely discharged to prevent it from becoming over-
discharged, which could result in malfunctioning.
In case of prolonged orage, recharge the battery every 3 months.
Battery diagnoics
Continuous LED
11% - 20%
21% - 40%
41% - 60%
61% - 80%
81% - 100%
Flashing LED
<10%
7H
recharge your battery urgently
temperature protection
Do not put your battery back in the
bike. Return your battery to the After
Sales Department
short-circuit protection
other protection

14 15
No motor operation despite force applied to the torque sensor
!
When performing bike maintenance, ensure there is adequate lighting.
!
If removing your wheel take care to observe the correct rotation direction when
remounting.
!
Before each use, you need to check that your brakes and the electric syem works
properly.
KW
2020 Km/h
The weight, power, year of manufacture and maximum speed are indicated on the
frame of your bike. Your electric bicycle may weigh more than 15kg so we recom-
mend that at lea two people carry it.
!
Always wear a helmet when cycling.
14+
These e-bikes are designed for riders aged 14 years and over.
!
Be aware that your bike tyres will have less grip in rain, or in icy or snowy weather
conditions.
Total maximum permitted weight (cycli + bike + accessories) = 150 kg
Weight of bike = 24.5 kg
!
P
The bicycle mu be parked with its kickand on at, able ground or using a
parking device.
Please note: This bike is designed for city use. The following uses are inappropriate
and should be avoided: Mountain sports - trekking
Never modify the bike’s components or electrical syem! Any modication is dange-
rous and prohibited by law.
If a modied bike breaks down or is damaged, Decathlon will not be held responsible
for the repairs under any circumances (warranty cancelled). You will also be legally
responsible for any accident that occurs when using the bike.
Cadence sensor error
Please note that servicing of electrical components is a specialised job which cannot
be carried out in ore but needs to be done in a regional Decathlon workshop and
may take several days.
!
All cleaning, and electrical or mechanical maintenance mu be carried out with the
power switched o and the battery removed from bike!
Maintenance operations specic to the electric syem mu be performed by trained,
qualied a. If the chain comes o, turn the power o before attempting any
repairs.
NB: the weight of the bicycle may exceed that of your assembly and or bicycle rack.
We recommended taking your e-bike to your local DECATHLON shop for a service
every 6 months.

16 17
Unauthorised: cleaning with jet washer.
Not recommended: splashing with water.
Suggeed: wash using a damp sponge.
Despite being reinforced, the motorized wheel is also subject to greater resses than
a andard bicycle wheel which can result in broken spokes. In the event of a broken
spoke, contact your DECATHLON ore.
Check the ructural integrity of the battery, in the event of a crash or if the battery
falls o.
We are unable to guarantee the water-tightness of your battery in the event of a fall
or crash.
For more information on use, maintenance, after-sales services or if you have any queions, visit
DECATHLON’s support website: www.supportdecathlon.com or a DECATHLON ore.
Error codes
Error code display on the control screen
Breakdown
code Denition Solutions
10
Low-voltage protection Charging the battery
11
Over-voltage protection Reart the bike
12
Battery completely discharged Charging the battery
20
Current measurement error
Reart the bike
21
Temperature sensor error
23
24
Abnormal voltage outside the normal range
Charging the battery
25
Abnormal current in the motor
26
Error in programme reart
30
Walk mode error
31
Pressing the ON button for too long when
switching on Release the ON button as soon as the syem arts
up
40
Motor power surge Allow it to re by reducing the assiance mode
41
42
Motor operation error Reart the bike > Check the motor connections at
the rear chainay
43
Motor short circuit
44
Motor overheating Allow it to re by reducing the assiance mode
45
Error corrected while using the bike Reart the bike > Check the motor connections at
the rear chainay
46
No motor operation despite force applied to the
torque sensor
60
Battery / motorised unit communication data
exchanges interrupted Check the screen connector at the handlebar

18 19
WARRANTY INFORMATION FOR YOUR E-BIKE
Please keep your receipt safe as proof of purchase.
The bike has a lifetime warranty that covers its ructural components (frame, handlebar and em, and saddle-pillar) and a 2 year
warranty for wear parts.
The warranty does not cover damage caused by improper use, non-compliance with safety precautions, accidents, or incorrect or
commercial use of the bike.
The bike is intended for personal and non-professional use only.
This warranty does not cover damage resulting from repairs carried out by persons not authorised by Decathlon.
All electronic components are securely sealed. Opening any of these components (Battery, battery casing, controller, screen, motor)
may result in physical injury or damage to the syem. Opening or modifying a syem component will void the bike warranty. The
warranty does not cover cracked or broken screens displaying obvious signs of impact.
FIND OUT MORE ABOUT THE LIFETIME WARRANTY FOR ALL B’TWIN BIKES purchased after the 1 June 2013.
Our B’twin bikes are designed to provide total user satisfaction.
This is why B’twin wants to commit to providing high-quality, hard-wearing bikes.
As such, B’twin is oering its cuomers a life-time warranty valid only for the following parts (excluding carbon frames): frames, rigid
forks (forks without suspension), handlebars and ems used on B’twin brand bikes. This warranty comes into eect on the day of
purchase of your B’twin bike(s).
It should be noted that for this lifetime warranty to remain valid, the purchaser mu:
either have a DECATHLON loyalty card and regier his purchase at the checkout desk,
or complete the warranty certicate available on line on www.supportdecathlon.com within a month of purchase. When regiering, the
purchaser mu provide the following information: surname, r name, date of purchase, email address and bike serial number.
Under this warranty, B’twin undertakes to replace the frame, rigid fork, handlebar and em with an equivalent part, or repair it within a
reasonable period of time after inspection at a DECATHLON ore workshop. It should be noted that cos of transport and travel are
the responsibility of the cuomer.
However, this contractual obligation will not apply in the event of poor maintenance or improper use of B’twin bikes as set out in the
relevant product inruction manual.
To be able to claim under the warranty for one of the parts lied above, simply visit a DECATHLON ore workshop and present your
DECATHLON loyalty card or your warranty certicate.
B’twin reserves the right to check that all the lifetime warranty terms and conditions have been met and to take all the necessary
measures to verify this.
It should also be noted that the lifetime warranty does not exclude the application of the legal warranty/ies set out in the Consumer
and Civil Codes, namely:
article L. 211-4 of the Consumer Code: «The seller is required to deliver a product that conforms with the contract and shall be liable
for any defects that exi at the time of delivery. The seller shall also be liable for any defects caused as a result of the packaging,
assembly inructions or inallation inructions if the seller is contractually required to package, assemble or inall the product or if
the product is packaged, assembled or inalled under its responsibility.
article L. 211-5 of the Consumer Code: «In order to comply with the contract, the product mu:
Be t for the purpose ordinarily expected of similar goods and, where appropriate:
match the description given by the seller and possess the qualities that the seller has presented to the buyer in the form of a sample
or model;
possess the qualities that a buyer might reasonably expect given public atements made by the seller, by the producer or by his
representative, particularly in advertising or labelling;
Or have the characteriics jointly dened by both parties or be t for any specic use sought by the buyer which has been brought to
the seller’s attention and which the seller has accepted.»
article L. 211-12 of the Consumer Code: «Legal action resulting from a product defect mu be taken within two years of delivery of the
product.»
article 1641 of the Civil Code: «The seller is required to provide a warranty again any hidden defects aecting the item sold which
render the item unt for the purpose for which it is intended, or which impair its use to such an extent that the buyer would not have
purchased the item or would have paid less for the item had he been aware of said defects.»
article 1648 paragraph 1 of the Civil Code: «Any action resulting from hidden defects mu be taken by the buyer within two years of
discovery of the defect.»
Cable motor connector
Control screen connector
Error codes
Error code display on the control screen
Breakdown
code Denition Solutions
70
Sensor error
Reart the bike
71
Pedalling not detected
72
Force applied to the pedal not detected
73
Torque sensor error
80
Incorrect motorised unit settings
81
Speed information not recognised /
82
Programme manipulation
Reart the bike
83
Motorised unit programme error
84
Wrong motor parameter
200
Torque sensor over-voltage
201
Torque sensor under-voltage
202
Cadence sensor error
204
Motor error Reart the bike > Check the motor connections at
the rear chainay
If the solution proposed does not solve the problem, please contact the workshop at your DECATH-
LON ore.
20
For more information on use, maintenance, after-sales services or if you have
any queions, visit DECATHLON’s support website: www.supportdecathlon.
com or a DECATHLON ore.

FR - Notice d’utilisation
E-LD500

3
Chères clientes, chers clients.
Merci d’avoir acheté un vélo à assiance électrique B’TWIN. Il vous permettra de prendre
goût au déplacement en 2 roues pour vos loisirs, sera le meilleur atout pratique et écono-
mique pour vos déplacements citadins et enn, vous permettra de consommer des calories
pour conserver la forme. Nous vous invitons néanmoins à lire le manuel d’inructions pour
proter pleinement de votre vélo à assiance électrique B’TWIN. N’oubliez jamais qu’un vélo
à assiance électrique n’e pas un cyclomoteur, il nécessitera de votre part une participa-
tion pour aller plus loin, plus vite et plus longtemps. Nous vous encourageons à prendre en
mains votre vélo à assiance électrique dans un espace dégagé, ceci an de bien sentir le
déclenchement de votre moteur, et ainsi assurer un contrôle optimal de votre vélo.Engagez
le mode sportif pour vos premiers kilomètres que si vous êtes sûr de votre capacité à contrô-
ler votre vélo. Voici 10 commandements pour proter pleinement de votre vélo à assiance
électrique B’TWIN.
Un vélo à assiance électrique e plus lourd qu’un vélo classique, sans assiance le péda-
lage peut être plus dicile. Vous devez toujours vous assurer d’etre en capacité d’eectuer
votre trajet sans assiance en cas de panne.
Attention, cette notice ne concerne que les spécicités électriques de votre
vélo. Vous devez vous référer au guide d’utilisation B’TWIN communs à tous
nos vélos qui accompagne le présent document et qui sont également pré-
sents sur notre site www.supportdecathlon.com ou sur demande dans nos ma-
gasins DECATHLON.

4 5
DESCRIPTION PRODUIT ................................................................................ 6
Caractériiques techniques du V.A.E ............................................................................... 6
Fonctionnement général de l’assiance ........................................................................... 6
ÉCRAN ET ÉLÉMENTS DE COMMANDE ....................................................... 7
Descriptif écran et fonction ................................................................................................. 7
MOTEUR ........................................................................................................... 8
BATTERIE ET CHARGEUR ............................................................................. 8
Précaution d’usage .............................................................................................................. 9
Mise en place et retrait de la batterie................................................................................ 11
Recharge de la Batterie...................................................................................................... 12
Entretien et durée de vie (conditions de garantie) .......................................................... 12
Auto diagnoic batterie .................................................................................................... 13
Mise en place et retrait de la batterie................................................................................ 14
Précautions d’usage complémentaires ............................................................................ 15
Maintenance ........................................................................................................................ 16
Codes Erreurs ..................................................................................................................... 18
CONTENU DE LA GARANTIE COMMERCIALE DE VOTRE VAE ............... 19
SOMMAIRE
Les 10 bonnes pratiques pour proter pleinement de votre VAE
B
A
1. Il faut pédaler pour aller plus loin
3.5 - 5 bar
2. L’autonomie et le rendement seront meilleurs avec des
pneus gonés entre 3,5 et 5bar
< 3,5 bar
3. Le risque de crevaison e fort si la roue n’e pas
assez gonée
A
B
A
B
+/- 20° +/- 5°
4. l’autonomie sera réduite par temps froid
A
B
A
B
5. L’autonomie sera réduite si le vélo e surchargé
A
B
A
B
6. L’autonomie sera réduite en montée
7. La batterie doit être rechargée complétement au
moins tous les 3 mois 8. Il e conseillé de réduire le mode d’assiance quand
le niveau de la batterie e bas
9. l’indication du niveau de batterie e plus précise à
l’arrêt
!
10. La batterie doit être retirée avant chaque intervention
de maintenance

6 7
ÉCRAN ET ÉLÉMENTS DE COMMANDE
Descriptif écran et fonction
10
52
KM / HPOWER
TRIP
to GO
ODO
NORMAL
KM
ECO
12 7 8143
6
11
9
1
Mode d’assiance (0-1-2-3) :
«0» pas d’assiance.
«1» e le mode d’assiance par défaut.
Chaque mode correspond aux vitesses d’assiance maximales dénies ci-dessous :
Mode 0 1 2 3
Autonomie moyenne* /115 km 80 km 60 km
2Bouton ON/OFF :
Allumer et éteindre le vélo à assiance électrique par un appui long.
3Bouton «+» :
Passer au mode d’assiance supérieur par un appui court
Passer en mode «piéton» par un appui long.
4Bouton «-» :
Passer au mode d’assiance inférieur
5Bouton Eclairage
Allumer et éteindre les éclairages du vélo par un appui court
Rentrer dans les paramètres par un appui long
6Indicateur de vitesse**
7
ODO : Compteur globale de diance. Il ne peut être remis à zéro.
TRIP : Compteur partiel de diance. Il peut être remis à zéro par un appui de 10 secondes sur le bouton «-».
TRIPtoGO : Diance reante pouvant être parcourue avec le mode d’assiance actif.
DESCRIPTION PRODUIT
Caractériiques techniques du V.A.E
A
Eclairage LED arrière
B
Batterie et contrôleur
C
Faisceau + connectiques : Freins / Ecran de contrôle
D
Eclairage LED avant
E
Moteur
F
Détecteur de pédalage
Fonctionnement général de l’assiance
Le vélo à assiance électrique peut être utilisé avec ou sans assiance en actionnant le bouton ON/OFF. Toujours veiller à ce
que la batterie soit bien insérée et verrouillée. L’assiance électrique fonctionnera uniquement si vous pédalez. L’assiance se
coupe dès que l’un des deux leviers de frein e actionné ou que la vitesse e supérieure à 25 km/h. Celle-ci reprendra automa-
tiquement en dessous de 23 km/h. An de préserver l’autonomie de la batterie, le vélo e doté d’un limiteur de « puissance » qui
limite l’assiance lorsque le moteur e fortement sollicité. En cas d’utilisation intensive et lors de conditions climatiques exception-
nelles, l’assiance peut se couper pour préserver l’intégralité du syème.
A
B
C
D
E
F

8 9
Précaution d’usage
Ne pas exposer à des températures supérieures à 50°C.
< +10°C +10°C / 50°C > +50°C
+10°C
+25°C
Conditions de ockage : Il e impératif de la ocker chargée dans un endroit frais (entre
+10°C et +25°C), sec et à l’abri du soleil.
<+10°C +10°C / +25°C +25°C
+10°C
+40°C
Chargez votre batterie dans un environnement sec et à une température située entre +10°C
et 40°C.
< +10°C +10°C / +40°C +40°C
Attention : Dans certaines conditions exceptionnelles le contrôleur peut atteindre des tempé-
ratures élevées.
Ne pas démonter.
Ne pas jeter la batterie dans des conteneurs non-appropriés. Rapporter la batterie usagée
dans votre magasin Décathlon pour son recyclage.
Risque d’incendie.
Risque d’électrocution.
A manipuler avec précaution. Produit sensible aux chocs.
Ne jamais court-circuiter la batterie en faisant contact entre les bornes positives et néga-
tives.
MOTEUR
Le niveau de pression acouique exprimé en dB A au niveau des oreilles du conducteur e inférieur à 70 dB (A).
BATTERIE ET CHARGEUR
Toutes les batteries de nos vélos électriques utilisent la technologie cellules Lithium-Ion et n’ont pas d’eet mémoire. Il e préconi-
sé de recharger la batterie après chaque utilisation.
Eectuer une charge complète de la batterie avant première utilisation.
Batterie Chargeur
Batterie 36 V / 14 Ah*
Entrée : 100-240V
Sortie : 42V
* A l’achat votre batterie 36 V e inactive. Brancher votre chargeur pour l’activer. Votre batterie e garantie jusqu’à 500 cycles de
charges et décharges (1 cycle = 1 charge + décharge) sous réserve du respect des bonnes conditions d’usage et de ockage. Il
e important de respecter les inructions portées sur l’étiquette du chargeur de batterie.
8Indicateur de diances
9Unités :
kilomètre ou miles
10 Indicateur d’éclairage :
Apparaît à l’écran quand l’éclairage e allumé
11 Cinq niveaux de batterie.***
Lorsque le niveau de batterie e faible, l’indicateur se met à clignoter.
12 Informations complémentaires batterie et syème :
Indique en pourcentage le niveau de charge de la batterie
Paramètre
Appui long sur le bouton «Eclairages» pour rentrer ou sortir des paramètres
Appui court sur le bouton «Eclairages» pour faire déler les diérents paramètres
Appui court sur les boutons «+» ou «-» pour faire déler les diérents réglages.
SET 1 : Choix des unités (Km/h or Mph)
SET 2 : Réglage du minuteur de mise en veille (en minute)
* Dans les conditions de tes protocolés, pour un utilisateur de 75kg, une pression des pneus de 4bar et sous respect des 10
bonnes pratiques ** La précision d’achage de la vitesse e de +/-2%. *** Vérier l’indication de charge de votre batterie à l’arrêt,
en cas de forte sollicitation de l’assiance, des écarts peuvent être conatés.

10 11
Mise en place et retrait de la batterie
Insertion :
CLIC
Avant d’insérer votre batterie dans son emplacement, vérier
qu’aucun objet ou corps étranger ne se trouve dans le four-
reau. Insérer la batterie jusqu’au «Clic».
Retrait :
Avant de retirer votre batterie de son emplacement, déver-
rouiller avec la clé.
Éteindre l’interrupteur. Puis, retirer votre batterie en tirant
dessus.
Ne jamais laisser les enfants jouer ou manipuler la batterie.
Ne pas immerger.
Ne pas laver avec un nettoyeur «haute pression».
Résie à la pluie.
=
V / Hz
Toujours s’assurer de la compatibilité chargeur / batterie.
=
+200 V / +240 V
Toujours vous assurer de la compatibilité du chargeur avec le réseau électrique local :
Tension : 100 V, maximum 240 V.
+50 Hz / +60 Hz
Fréquence : minimum 50, maximum 60 Hz.
Priviligier un chargement de la batterie à l’intérieur.
Transport en avion interdit.
Tout non respect des précautions d’usage entraînera une annulation de la garantie
conructeur.

12 13
Auto diagnoic batterie
LED xe
11% - 20%
21% - 40%
41% - 60%
61% - 80%
81% - 100%
LED clignotante
<10%
7H
recharger votre batterie en urgence
protection en température
Ne pas remettre votre batterie dans
le vélo. Retourner votre batterie à
votre SAV
protection court circuit
autre protection
Recharge de la Batterie
7H
Début de charge LED rouge.
Fin de charge LED verte. LED clignotante rouge, problème durant la
charge, contacter le SAV.
Entretien et durée de vie (conditions de garantie)
Ne pas ocker la batterie déchargée an d’éviter toute décharge profonde pouvant
entraîner son dysfonctionnement.
En cas de ockage prolongé, recharger la batterie tous les 3 mois.

14 15
!
P
le vélo doit être ationné avec béquille sur un sol plat et able ou sur un dispositif
de ationnement
Remarque : Ce vélo e conçu pour une utilisation urbaine. Les utilisations suivantes
ne sont pas appropriées et doivent être évitées : Sports de montagne - randonnée
Ne modiez en aucun cas les composants et le syème électrique du vélo! Tout
changement e dangereux et interdits par la loi.
Si le vélo modié tombe en panne ou e accidenté, Decathlon ne prendra en aucun
cas en charge les réparations (garantie annulée). Vous serez également respon-
sable pénalement de tout accident survenu avec le vélo.
Erreur du capteur de cadence
Attention, la maintenance des composants électriques nécessite une compétence
spéciale et n’e pas réalisée en magasin mais en atelier régional Décathlon et peut
prendre plusieurs jours.
!
Toutes opérations de nettoyage, de maintenance électrique ou mécanique, doivent
impérativement se faire hors tension avec la batterie retirée du vélo !
les opérations de maintenance spéciques à l’electrication du vélo doivent être réa-
lisées par un personnel qualié et formé. Si la chaine déraille, coupez l’alimentation
avant toute intervention.
Attention le poids du vélo peut dépasser le poids maximum de votre pied d’atelier ou
de votre porte vélo
Nous vous recommandons de ramener votre vélo à assiance électrique pour eec-
tuer la révision des 6 mois dans votre magasin DECATHLON.
Pas de fonctionnement moteur malgré un eort appliqué sur le capteur de couple
!
Toujours réaliser vos opérations de maintenance avec un éclairage adéquat.
!
Attention en cas de démontage roue vous devez vous assurer que le sens de rota-
tion de votre roue e le bon.
!
Avant chaque utilisation vous devez vous assurer du bon fonctionnement de vos
freins et de votre syême électrique.
KW
2020 Km/h
Le poids, la puissance, l’année de fabrication et la vitesse maximum sont indiqués
sur le cadre de votre vélo. Le poids de votre vélo à assiance électrique dépasse
15Kg, nous vous recommandons de le transporter à 2 personnes.
!
Toujours rouler avec un casque.
14+
Ces vélos électriques ont été conçus pour des personnes de 14 ans et plus.
!
Attention en cas de pluie, de gel ou de neige vous pouvez avoir une perte d’adhé-
rence du vélo sur le sol.
Poids total maximal autorisé (cyclie+vélo+accessoires) = 150 kg
Poids du vélo = 24,5 Kg

16 17
Codes Erreurs
Achage code erreur sur l’écran de commandes
Code panne Dénition Solutions
10
Protection sous-tension Charger la batterie
11
Protection sur-tension Redémarrer le vélo
12
Batterie complétement déchargée Charger la batterie
20
Erreur mesures courant
Redémarrer le vélo
21
Erreur capteur température
23
24
Voltage anormal en dehors de l’intervale
normale
Charger la batterie
25
Courant anormal dans le moteur
26
Erreur dans le redémarrage du programme
30
Erreur mode piéton
31
Appuie trop long sur le bouton ON lors de
l’allumage Relacher le bouton ON dès la mise en route du
syème
40
Sur tension moteur Laisser reposer en diminuant le mode d’assiance
41
42
Erreur fonctionnement moteur Redémarrer le vélo > Vérier la connectique du
moteur au niveau de la base arrière
43
Court-circuit moteur
44
Surchaue moteur Laisser reposer en diminuant le mode d’assiance
45
Erreur corrigée durant l’utilisation du vélo Redémarrer le vélo > Vérier la connectique du
moteur au niveau de la base arrière
46
Pas de fonctionnement moteur malgré un eort
appliqué sur le capteur de couple
60
Echanges des données de communications
batterie / unité motorisée interrompue Vérier la connectique écran au niveau du guidon
Interdit : nettoyage avec un jet haute pression.
Déconseillé : nettoyer à grande eau.
Préconisé : laver à l’aide d’une éponge humide.
La roue motorisée e également soumise à des contraintes plus importantes qu’une
roue de vélo classique, bien que renforcée, il e possible d’avoir des casses de
rayons. En cas de casse d’un rayon rapprochez vous de votre magasin DECATH-
LON.
En cas de chute du vélo ou de la batterie vérier l’intégrité de votre batterie.
Attention, suite à une chute l’étanchéité de votre batterie n’e plus garantie.
Pour plus d’information relatives à l’utilisation, la maintenance, les services SAV ou en cas de
queions, rendez-vous sur le site support de DECATHLON : www.supportdecathlon.com ou en
magasin DECATHLON.
Table of contents
Languages:
Other Btwin Bicycle manuals

Btwin
Btwin Bicycle User manual

Btwin
Btwin SPEED 900E User manual

Btwin
Btwin ELOPS 900E User manual

Btwin
Btwin HOPTOWN 500E User manual

Btwin
Btwin R500E User manual

Btwin
Btwin FOLD 560 User manual

Btwin
Btwin ELOPS 900E User manual

Btwin
Btwin ROCKRIDER E-ST500 User manual

Btwin
Btwin Bicycle User manual

Btwin
Btwin TILT 500E User manual

Btwin
Btwin B'ebike 9 User manual

Btwin
Btwin Original 7E User manual

Btwin
Btwin Bicycle User manual

Btwin
Btwin ELOPS 900E User manual

Btwin
Btwin E-FOLD 500 User manual

Btwin
Btwin ORIGINAL 900E User manual

Btwin
Btwin ELOPS R500 E User manual

Btwin
Btwin ELOPS 920E User manual

Btwin
Btwin FOLD 500 User manual

Btwin
Btwin ELOPS 920E User manual