manuals.online logo
Brands
  1. Home
  2. •
  3. Brands
  4. •
  5. Burtonsafes
  6. •
  7. Safe
  8. •
  9. Burtonsafes Keyguard User manual

Burtonsafes Keyguard User manual

Thank you for purchasing Keyguard
by Burton Safes Ltd. In order to
correctly install and use your
Keyguard it is important that you
read and follow these instructions
carefully.
www.burtonsafes.co.uk
01484 663388
GETTING STARTED.
Please note that all Keyguard safes are
supplied without a preset code. To open
the Keyguard for the first time replicate
the following steps:
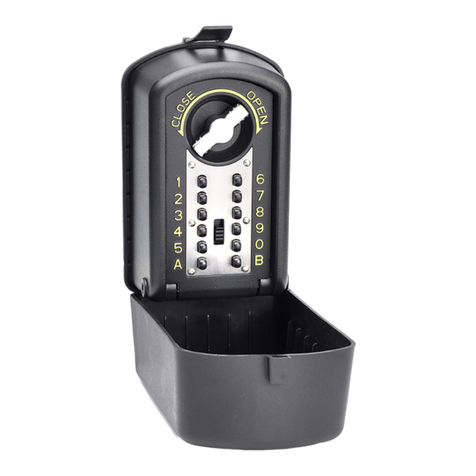
1.With the Keyguard in an upright position
(As pictured) slide the button marked ‘Clear’
downwards and then release it allowing the
button to return to its usual position.
2.Firmly hold the facia of the Keyguard
and simultaneously slide the button marked
‘Open’ downwards. With the ‘Open’ button
still pushed downward pull the facia away
from the safe body.
SETTING YOUR OWN CODE.
1. Place the facia of the Keyguard face
down on a firm surface.
2. Decide upon your new personal code,
please be aware that you may only use
each number and / or letter once. (It is
suggested that you select a 4-8 digit
figure for your new code. It is very
important that you remember this
combination.)
3. To set your code you will require a
small flat-headed screwdriver. Observe
that on the back of the Keyguard facia
there are twelve slotted disks with arrows
pointing upward. These disks are
numbered or lettered and represent each
of the twelve available digits. Flip the
safe cover face up and familiarise
yourself with which disks represent which
number.
4. Unscrew the small screw that holds
the numbered plastic plate in position.
Now remove the plate from the facia.
5. Using the screwdriver turn the disk
that represents the first number or letter
in your code 180°so that the arrow now
points downward. Repeat this step for
each number and / or letter in your code.
6. Replace the numbered plastic plate
and secure it in position with the small
screw.
7. Once you have input your code you
should check that it has been correctly
set. It is vital that you first check this with
the Keyguard open. DO NOT YET
REPLACE THE FACIA!
CHECKING YOUR CODE.
1. With the Keyguard facia in an upright
position slide the button marked ‘Clear’
downwards and then release it allowing the
button to return to its usual position.
2. Input each digit of your personal code,
one figure at a time. It does not matter
which order you punch in your numbers
and / or letters. For instance if your
personal code is 1-2-3-4-B you can input
your code as B-4-3-2-1 or 3-1-B-2-4 etc.
and the Keyguard will still operate.
3. Once you have depressed the buttons
for each number in your code the ‘Open’
button should slide easily downwards.
N.B. If any of the numbered buttons fail to
depress after you have set your code
then please ensure that they have been
turned fully 180°.
4. Re-check that your code works two or
three more times. If these tests are
successful you can now place the
Keyguard facia into its position on the
body.
REPLACING THE FACIA.
1. Start by resetting the lock by sliding
down the clear button and releasing it.
2. Input your new personal code and
depress the ‘Open’ button (Do not
release the open button yet.).
3.Note that on the lowest edge of the
facia there is an extended metal keep.
Locate this keep into the shaped recess
on the lowest inside surface of the
Keyguard body.
4.Push the facia forward into position
and release the ‘Open’ button. The
Keyguard should now be shut.
NORMAL KEYGUARD USE.
Your Keyguard can now be operated
using the techniques you have learnt
so far. The following points should
help clarify any final uncertainties.
1. During any operation of the
Keyguard always begin by depressing
the ‘Clear’ button.
2. To open first input your personal
code and depress the ‘Open’ button,
whilst simultaneously pulling the facia
towards you.
3. To close the Keyguard follow the
steps described in the section
‘Replacing the facia’.
CHANGING YOUR CODE.
You may wish at some stage to alter the
personal code you have set. You can
change your code by following the steps
below.
1. In the usual manner open your
Keyguard and remove the facia.
2. To change the code you will need a
small flat-headed screwdriver. Now
begin by placing the facia face down.
3. Unscrew the small knob that holds the
numbered metal plate in position. Now
remove the plate from the facia.
KeyguardInstructions
4. Again note the arrows displayed on
the slotted disks. Using the screwdriver
return any of the disks used in the original
code to their upright and neutral position.
5. Now carefully repeat all of the steps in
the sections marked ‘Setting your own
code’ and ‘Checking your code’.
FITTING YOUR KEYGUARD.
To fit your Keyguard you will need the
following tools:
1 x Power Drill
1 x 3mm and 1 x 6mm Masonry Drill Bit
1 x Small Socket Driver
1 x 8mm Socket Head
1 x Lightweight Hammer
1 x Black Permanent Marker
1. The diagram below shows an internal
view of the rear wall of your Keyguard.
Four appropriate fixing bolts have been
supplied with your Keyguard and it is
recommended that you use the four
corner fixing points highlighted on the
diagram.
2. Locate a sound piece of masonry or
brickwork in the area where you wish to
fix your Keyguard. It is suggested that
you choose a site that is accessible yet
one that is not too prominent. Remove
the facia from the Keyguard, position the
body firmly against the wall and hold in
place. Use the pen to make marks on
the wall through the highlighted fixing
holes.
3. Attach the 3mm bit to the power drill
and carefully drill a pilot hole
approximately 40mm deep at each of the
marked fixing points. Now attach the
6mm bit to the power drill and carefully
drill a wider hole at each of the fixing
points, using the pilot holes as a guide.
Again this hole should be approximately
40mm deep.
4. Position the Keyguard so that the
fixing holes are aligned with the drilled
cavities. By hand push the first fixing bolt
into position. Repeat this with the three
remaining fixings.
5. Affix the 8mm socket head to the
socket driver and locate it on to the head
of your first fixing bolt. Now using the
socket driver tighten the first fixing until it
has gripped into the wall, but do not fully
tighten at this stage. Repeat this step
with the three remaining fixing bolts.
6. Finally use the socket driver to fully
tighten all four fixings into position. You
should find your Keyguard is firmly
secured in position.
LIMITED WARRANTY.
Burton Safes Ltd, Brockholes, Holmfirth,
HD9 7BN, Tel: 01484 663388, (“Burton
Safes”) warrants the original buyer of its
products for a period of 1 year after the
date of purchase that the products are
free from defects in workmanship and
materials. This warranty does not cover
forgotten or incorrectly set combinations.
Burton Safes will, without charge to the
buyer, repair or replace, at its option, any
defective product returned by the original
buyer to Burton Safes at the business
address above within 1 year of purchase.
The foregoing warranty does not cover
damage caused by abuse or misuse.
Burton Safes does not warrant that this
product cannot be broken into.
IN NO EVENT WILL BURTON SAFES LTD.BE
LIABLE FOR LOSS OF USE,LOST PROFITS,
THEFT,PROPERTY DAMAGE,OR SPECIAL,
INCIDENTAL,OR CONSEQUENTIAL,DAMAGES
OF ANY SORT.
In the event of product malfunction
please contact Burton Safes Ltd on
01484 663388.
Operating and Fixing
Instructions
Burton Safes Ltd. advocate safe
working practices. Please take care
when using power tools to fix this
product into position.

Other Burtonsafes Safe manuals

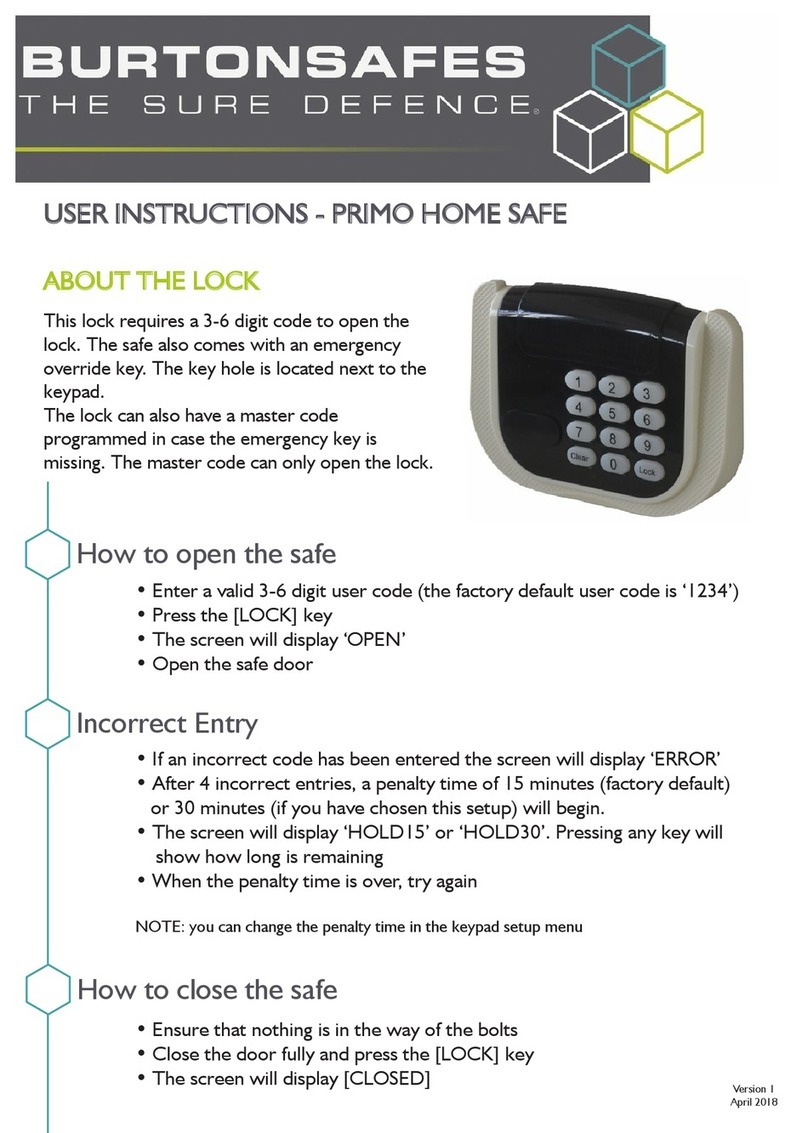
Burtonsafes HOTEL PRIMO User manual

Burtonsafes

Burtonsafes HOTEL PRIMO User manual

Burtonsafes BURTON Home S2 User manual

Burtonsafes

Burtonsafes BURTON Home S2 User manual

Burtonsafes Keyguard Combi User manual

Burtonsafes

Burtonsafes Keyguard Combi User manual

Burtonsafes PS310 User manual

Burtonsafes

Burtonsafes PS310 User manual

Burtonsafes PRIMO HOME SAFE User manual

Burtonsafes

Burtonsafes PRIMO HOME SAFE User manual

Burtonsafes Hotel Standard User manual

Burtonsafes

Burtonsafes Hotel Standard User manual

Burtonsafes KS Series User manual

Burtonsafes

Burtonsafes KS Series User manual

Burtonsafes FIRESEC 4/60 User manual

Burtonsafes

Burtonsafes FIRESEC 4/60 User manual

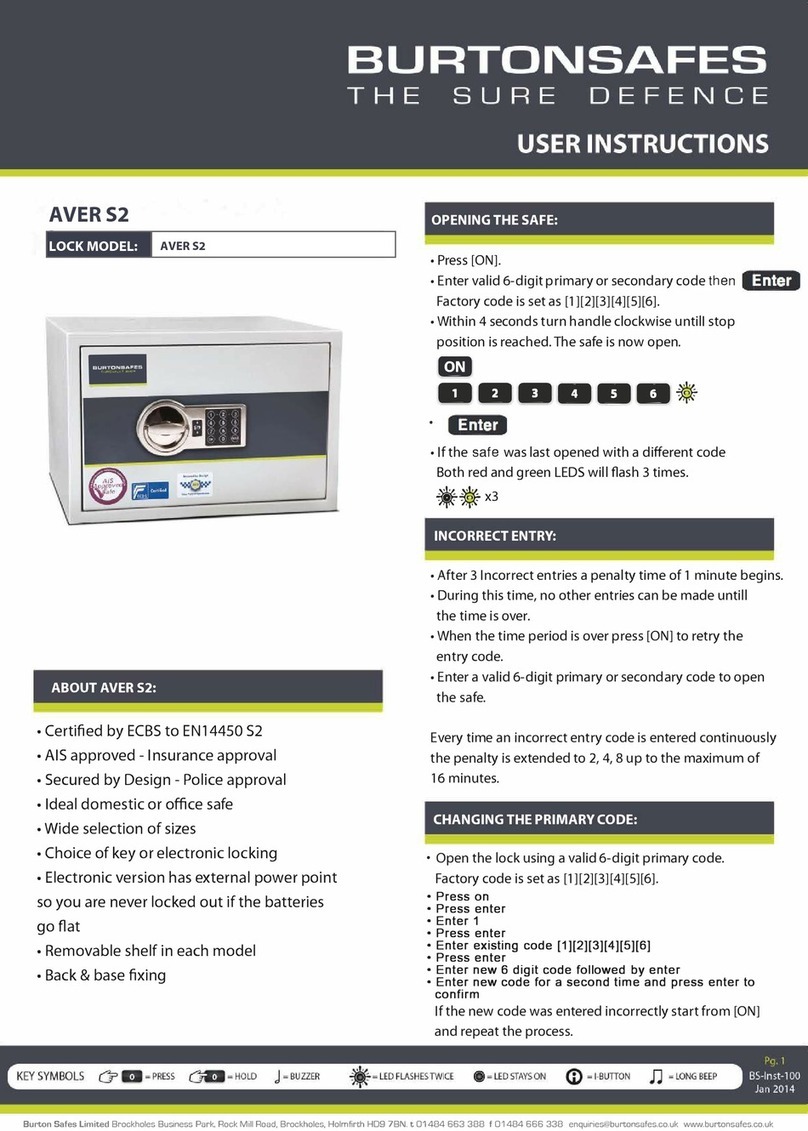
Burtonsafes AVER S2 Installation instructions
Burtonsafes

Burtonsafes AVER S2 Installation instructions

Burtonsafes Keyguard XL User manual

Burtonsafes

Burtonsafes Keyguard XL User manual

Burtonsafes Biosec Home User manual

Burtonsafes

Burtonsafes Biosec Home User manual

Burtonsafes Keyguard Jupiter User manual

Burtonsafes

Burtonsafes Keyguard Jupiter User manual

Burtonsafes BRIXIA User manual

Burtonsafes

Burtonsafes BRIXIA User manual

Burtonsafes KEYGUARD ELECTRONIC SIZE 1 User manual

Burtonsafes

Burtonsafes KEYGUARD ELECTRONIC SIZE 1 User manual

Burtonsafes Hotel Standard User manual

Burtonsafes

Burtonsafes Hotel Standard User manual

Burtonsafes Standard MK/II User manual

Burtonsafes

Burtonsafes Standard MK/II User manual

Burtonsafes Torino GMT/4P User manual

Burtonsafes

Burtonsafes Torino GMT/4P User manual

Burtonsafes BURTON HOME G1 User manual

Burtonsafes

Burtonsafes BURTON HOME G1 User manual

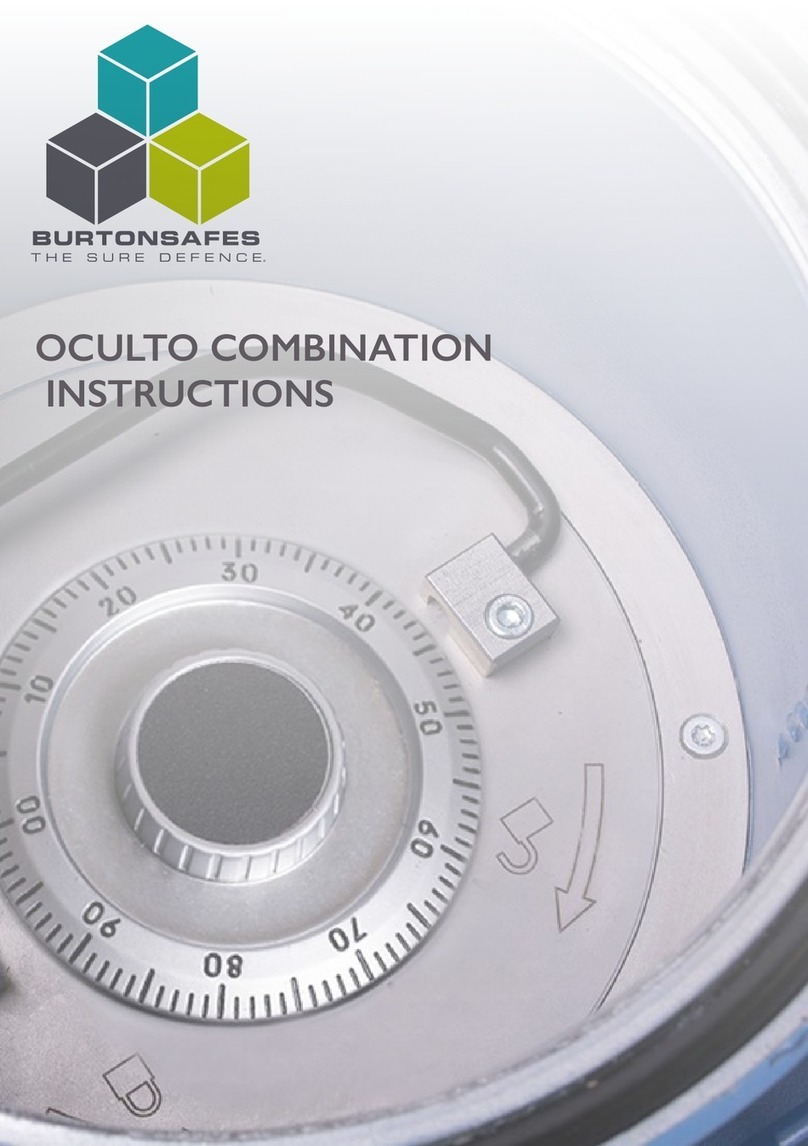
Burtonsafes OCULTO User manual

Burtonsafes

Burtonsafes OCULTO User manual

Burtonsafes HOTEL POP UP User manual

Burtonsafes

Burtonsafes HOTEL POP UP User manual

Burtonsafes Keyguard DigitalXL User manual

Burtonsafes

Burtonsafes Keyguard DigitalXL User manual

Popular Safe manuals by other brands

Assa Abloy Sentinel Digital Ph III RF-Online Upgrade manual

Assa Abloy

Assa Abloy Sentinel Digital Ph III RF-Online Upgrade manual

Megasat ST-100 user manual

Megasat

Megasat ST-100 user manual

YitaHome IMISSB-0008 Assembly instructions

YitaHome

YitaHome IMISSB-0008 Assembly instructions

Sandleford 2026.5L instructions
Sandleford

Sandleford 2026.5L instructions

Arregui PLUS Instruction manual and guarantee

Arregui

Arregui PLUS Instruction manual and guarantee

SPORTS AFIELD SA-HD5-BIO-DP instruction manual

SPORTS AFIELD

SPORTS AFIELD SA-HD5-BIO-DP instruction manual

Genie Hand EN Series User instructions

Genie Hand

Genie Hand EN Series User instructions

Dometic ProSafe MD283 Installation and operating manual

Dometic

Dometic ProSafe MD283 Installation and operating manual

Assa Abloy INFINITY ID25 Specifications

Assa Abloy

Assa Abloy INFINITY ID25 Specifications

BorMann BDS2300 manual

BorMann

BorMann BDS2300 manual

XPOtool 63075 Operation manual

XPOtool

XPOtool 63075 Operation manual

Sandleford KSS02 instructions

Sandleford

Sandleford KSS02 instructions

Stack-On TDS-42-SG-E-S instructions

Stack-On

Stack-On TDS-42-SG-E-S instructions

Honeywell 2070A - 43 Cubic Foot Expandable Anti-Theft Wall... Operations & installation guide

Honeywell

Honeywell 2070A - 43 Cubic Foot Expandable Anti-Theft Wall... Operations & installation guide

Sanctuary DIAMOND SA-DIA1-COM instruction manual

Sanctuary

Sanctuary DIAMOND SA-DIA1-COM instruction manual

First Alert 2096DF-BDC Operations & installation guide

First Alert

First Alert 2096DF-BDC Operations & installation guide

G21 GA-E45 manual

G21

G21 GA-E45 manual

Stack-On SS-22-MB-E instructions

Stack-On

Stack-On SS-22-MB-E instructions

manuals.online logo
manuals.online logoBrands
  • About & Mission
  • Contact us
  • Privacy Policy
  • Terms and Conditions

Copyright 2025 Manuals.Online. All Rights Reserved.