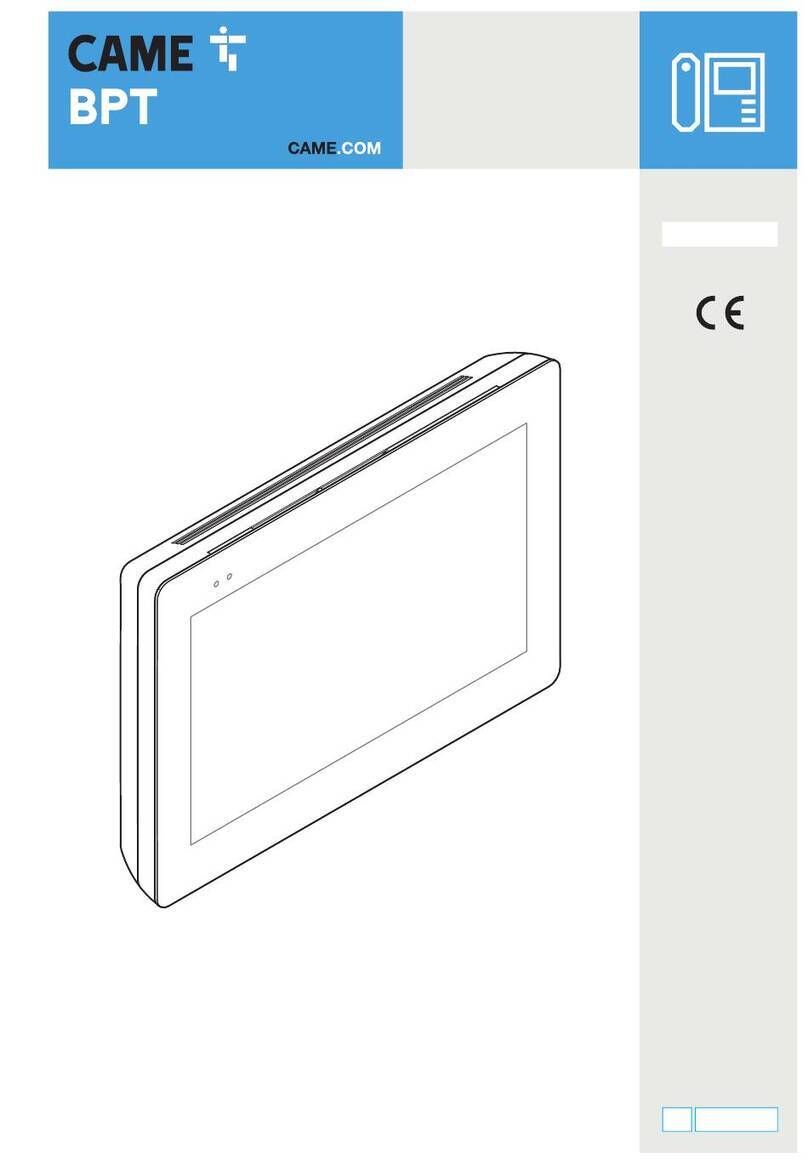
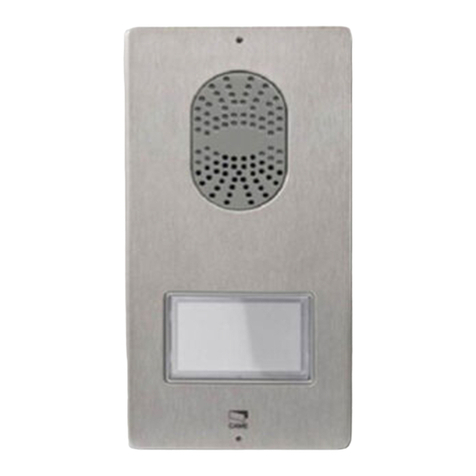
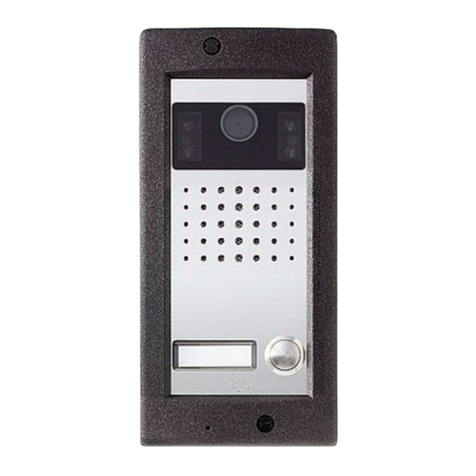
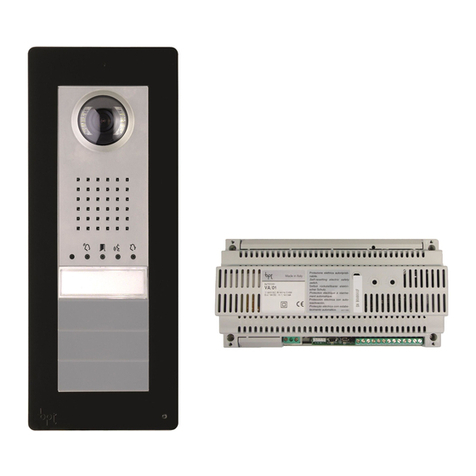
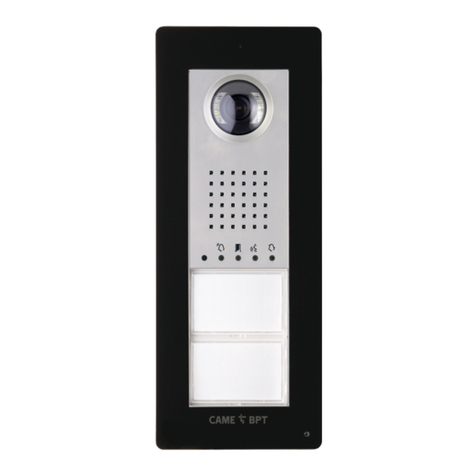
CAME BPT DVC/01 Owner's manual

Audio and video
entry panel
DVC/01-DVC/01ME
DC/01-DC/01ME
PROGRAMMING MANUAL
EN
E
n
g
l
i
sh
FB00865-EN

M1
CN4
M2
PROG
DATI
BOUT
CN2
MINI USB
5
5
8
8
2
2
I
I
3
3
4
4
6
6
7
7
A
A
A
Page 2- Manual FA01031-IT - 08/2019 - © CAME S.p.A. - The contents of this manual may be changed, at any time, and without notice. - Translation of the original instructions
Page 2- Manual FB00865-EN - 11/2019 - © CAME S.p.A. - The contents of this manual may be changed, at any time, and without notice. - Translation of the original instructionsPage 2- Manual FB00865-EN - 11/2019 - © CAME S.p.A. - The contents of this manual may be changed, at any time, and without notice. - Original instructions
General precautions
• Read the instructions carefully before beginning the installation and carry out the actions as specified by the manufacturer.
• The installation, programming, commissioning and maintenance of the product must only be carried out by qualified technicians,
properly trained in compliance with the regulations in force, including health and safety measures and the disposal of packaging.
• Before carrying out any cleaning or maintenance operation, disconnect the device from the power supply.
• The equipment must be destined solely for the use for which it was expressly designed.
• The manufacturer declines all liability for any damage as a result of improper, incorrect or unreasonable use.
PROG key 3and PROG LED 4
Programming key and LED (see 'Programming' paragraph). The
PROG LED can be in the following conditions:
O
On
Flashing slowly
Flashing quickly
Adjustments 5
Speaker audio
microphone audio
solenoid lock 1÷10 s. (default 1 s)
Connectors
6 CN2: Connector for the unit controlling access to keypad or
RFID.
7CN4: Connector for possible connection of an additional key-
pad
8 MINI USB: Connector for programming from PC
Messages 9
Red - Call in progress
Green - Door open
Yellow - Conversation in progress
Blue - System busy
Technical features
Type DVC/01-DVC/01 ME
DC/01-DC/01 ME
Power supply (VDC) 14÷18
Consumption (mA max) 320
Consumption in stand-by mode (mA) 130
Dimensions (mm) 99x254x25
Storage temperature (°C) -25/+70
Operating temperature (°C) -15/+50
IP Rating 54
Video standard PAL/NTSC
Resolution (pixel) 680x512
Minimum lighting (LUX) 1
Functions
Terminal board 1
+14-18 VDC power supply
–
BOUT Busbar
Terminal Board 2
–
Solenoid lock
12 V - 1 A max
Door release button (NA)
Door open contact input (NC)
–Ground
System output (active to ground)
–Ground
Attention. For Manual programming of the Entry Panels the
self-connection order is BIN1-BIN2-BIN3.

M2
+12V
BIN1 BIN2 BIN3 BOUT
PROG
M1
CN4
M2
CN2
DATI
OUT
VLS/300
B
B
–
NO
C
–+
BOUT
CN1
IN
VLS/300
VA/01
DVC/01
DVC/01 ME
Page 3- Manual FA01031-IT - 08/2019 - © CAME S.p.A. - The contents of this manual may be changed, at any time, and without notice. - Translation of the original instructions
Page 3- Manual FB00865-EN - 11/2019 - © CAME S.p.A. - The contents of this manual may be changed, at any time, and without notice. - Translation of the original instructionsPage 3- Manual FB00865-EN - 11/2019 - © CAME S.p.A. - The contents of this manual may be changed, at any time, and without notice. - Original instructions
Connection examples

1212
M1
CN4
M2
CN2
PROG
DATI
MINI USB
OUT
VLS/101
1
2
1
2
BOUT
VAS/100.30
DVC/01
DVC/01 ME
Page 4- Manual FA01031-IT - 08/2019 - © CAME S.p.A. - The contents of this manual may be changed, at any time, and without notice. - Translation of the original instructions
Page 4- Manual FB00865-EN - 11/2019 - © CAME S.p.A. - The contents of this manual may be changed, at any time, and without notice. - Translation of the original instructionsPage 4- Manual FB00865-EN - 11/2019 - © CAME S.p.A. - The contents of this manual may be changed, at any time, and without notice. - Original instructions
Connection examples

111
12
13
14
10
9
8
7
6
5
2
3
4
111
12
13
14
10
9
8
7
6
5
2
3
4
111
12
13
14
10
9
8
7
6
5
2
3
4
1
10
9
8
7
6
5
2
3
4
111
12
13
14
10
9
8
7
6
5
2
3
4
1
7
8
6
5
2
3
4
7
8
9
10
13
14
111
12
13
14
10
9
8
7
5
2
3
4
5
1
1
27
5
4
3
1
6
2
3
4
3
5
78
6
4
2
1
3
5
78
6
4
2
Page 5- Manual FA01031-IT - 08/2019 - © CAME S.p.A. - The contents of this manual may be changed, at any time, and without notice. - Translation of the original instructions
Page 5- Manual FB00865-EN - 11/2019 - © CAME S.p.A. - The contents of this manual may be changed, at any time, and without notice. - Translation of the original instructionsPage 5- Manual FB00865-EN - 11/2019 - © CAME S.p.A. - The contents of this manual may be changed, at any time, and without notice. - Original instructions
It is possible to programme entry panels (connected to the same
power supply) with dierent types of keys, still respecting the se-
quence shown on the left.
It is not possible to programme
entry panels with dierent
types of keys.
Programming with PC soft-
ware removes all of the re-
strictions just outlined.
It is possible to programme only one or several audio/video entry
panels that have the same calls (unless "blind units" are used that
disable one or more of them).
Manual programming of entry panels

M
PROGPROG
>3’’
>3’’
1
33 A
D
3 B
1
2
3
4
5
6
7
8
9
10
1
2
3
4
5
6
7
8
9
10
3 C
E
F
beep
beep
3
8
4
6
9
7
5
2
1
100 °
82 °
54 °
72 °
1÷9
0
9
PROGPROG
78
8
<1’’
<1’’
2
Page 6- Manual FA01031-IT - 08/2019 - © CAME S.p.A. - The contents of this manual may be changed, at any time, and without notice. - Translation of the original instructions
Page 6- Manual FB00865-EN - 11/2019 - © CAME S.p.A. - The contents of this manual may be changed, at any time, and without notice. - Translation of the original instructionsPage 6- Manual FB00865-EN - 11/2019 - © CAME S.p.A. - The contents of this manual may be changed, at any time, and without notice. - Original instructions
Programming the call keys. Press the door release and AUX2 buttons 5. On
the entry panel, press the call key to be linked to the receiver 6: a beep will confirm
that the setting has been stored. Continue, repeating the same operations for all the
other receivers.
Exiting Programming. Briefly press the PROG key on the power supply 7: the PROG
LED and the LEDs on the entry panels will go out. NOTE. If no action is performed, the
procedure will end automatically after 30 minutes.
Programming entry panel video cameras. While programming the call keys the
"visual range" of the video camera can be adjusted from any receiver (with handset
raised, it there is one), by pressing on the "Self-connection" key 8. From the default
settings it is possible to scroll through the following ones Iby pressing the AUX1
key or to go back to the previous ones with the AUX2 key J: the setting is saved
automatically.
Should call keys be present ONLY ON ADDITIONAL BUTTON PANELS, the oper-
ation shown in figure 3is carried out on these as shown in figure 3C.
Programming Type of Keys. Press the first key on the entry panel 3/3A/3Buntil
the LED stops flashing along with the backlighting LEDs 4.
PROGRAMMING ENTRY PANELS WITH VA/01
First Programming with ONE entry panel
Entering Programming Mode. Press the PROG key on the power supply 1until the
PROG LED lights up. If the PROG LED immediately goes out, this indicates a malfunction
in the connections between the power supply and the entry panel. Check the connec-
tions and return to programming. The LEDS on the entry panels light up as shown in fig-
ure 2. Wait 5 seconds for the auto test to be completed and continue as shown below.

J
7
8
beep
beep
2
34
56
PROGPROG
>3’’
>3’’
1
Page 7- Manual FA01031-IT - 08/2019 - © CAME S.p.A. - The contents of this manual may be changed, at any time, and without notice. - Translation of the original instructions
Page 7- Manual FB00865-EN - 11/2019 - © CAME S.p.A. - The contents of this manual may be changed, at any time, and without notice. - Translation of the original instructionsPage 7- Manual FB00865-EN - 11/2019 - © CAME S.p.A. - The contents of this manual may be changed, at any time, and without notice. - Original instructions
Entry panel brightness level adjustment. While programming the call keys the entry
panel brightness level can be adjusted from any receiver. Pressing the "Self-connec-
tion" key on the receiver causes the video camera of the entry panel for which the
brightness level is to be adjusted to be activated. The brightness level can be increased/
decreased by using a previously assigned call key, or by simulating a call from DNA.
First Programming with SEVERAL entry panels
Entering Programming Mode. Press the PROG key on the power supply 1until the
PROG LED lights up. If the PROG LED immediately goes out, this indicates a malfunction
in the connections between the power supply and the entry panel. Check the connec-
tions and return to programming. The LEDS on the entry panels light up as shown in
figure 2. Wait 5 seconds for the auto test to be completed and
continue as shown below.
Programming Type of Keys. Press the first key on the entry
panel 3until the LED stops flashing along with the back-
lighting LEDs 4. Repeat this operation for all the entry panels
to be programmed 45: at the end the signals will have this
configuration 6.
- Should call keys be present ONLY ON ADDITIONAL BUTTON PANELS, proceed as
shown in the NOTE on page 6.
Programming the call keys. Press the door release and AUX2 buttons 7. On the
entry panel, press the call key to be linked to the receiver 8: a beep will confirm that
the setting has been stored. Continue, repeating the same operations for all the other
receivers. The operation can be carried out only from the entry panel with the LED o
(PE1 in fig. 6): to change the entry panel from which to carry out the call programming,
press one of the first 4 positions of the call keys for at least 3 seconds (or press key 1
followed by the key for entry panels with DNA).
1 P.E
1 P.E
1 P.E
1 P.E
1 P.E
1 P.E
1 P.E
1 P.E
2 P.E
2 P.E 2 P.E
2 P.E
3 P.E
3 P.E
1 P.E
1 P. E 2 P. E
3 P.E
3 P.E
3 P.E
3 P.E
3 P.E
3 P.E
3 P.E
3 P.E

2
34
beep
beep
7H
IJ
PROGPROG
>3’’
>3’’
1
PROGPROG
>3’’
>3’’
6
PROGPROG
<1’’
<1’’
5
Page 8- Manual FA01031-IT - 08/2019 - © CAME S.p.A. - The contents of this manual may be changed, at any time, and without notice. - Translation of the original instructions
Page 8- Manual FB00865-EN - 11/2019 - © CAME S.p.A. - The contents of this manual may be changed, at any time, and without notice. - Translation of the original instructionsPage 8- Manual FB00865-EN - 11/2019 - © CAME S.p.A. - The contents of this manual may be changed, at any time, and without notice. - Original instructions
Exiting Programming. Briefly press the PROG key on the power supply: the PROG LEDs and the LEDs on the entry panels will go out.
NOTE. If no action is performed, the procedure will end automatically after 30 minutes.
Programming entry panel video cameras. While programming the call keys the "visual range" of the video camera can be adjusted
in the way already described.
Entry panel brightness level adjustment. While programming the call keys the entry panel brightness level can be adjusted in the
way already described.
Reprogramming Procedure
Entering Programming Mode. Press the PROG key on the power supply 1until the
PROG LED lights up. The LEDS on the entry panels light up as shown in figure 2. Wait
5 seconds for the auto test to be completed and continue as shown below.
Programming the call keys. Press the door release and AUX2 buttons 3. On the
entry panel, press the call key to be linked to the receiver 4: a beep will confirm that
the setting has been stored. Continue, repeating the same operations for all the other
receivers. The operation can be carried out only from the entry
panel with the LED o (PE1 2): to change the entry panel
from which to carry out the call programming, press one of the
first 4 positions of the call keys for at least 3 seconds (or press
key 1 followed by the key for entry panels with DNA).
Exiting Programming. Briefly press the PROG key on the power supply 5: the PROG
LEDs and the LEDs on the entry panels will go out. If no action is performed, the proce-
dure will end automatically after 30 minutes.
Programming Type of Keys. In “Programming Call Keys" 6press and hold down the
PROG key of the power supply until you go into the "Programming Type of Keys” pro-
cedure 7. Press one of the first 4 "keys" on the entry panels to be reprogrammed, the
LED will stop flashing, as will the backlighting LEDs of the first 4 positions of the call
keys 8. Repeat this operation on all the entry panels to be reprogrammed 8and I.
1 P. E 1 P. E2 P. E 2 P. E3 P. E 3 P. E
1 P. E 2 P. E 3 P. E 1 P. E 2 P. E 3 P. E

2
4
5
XX
XX
beep
beep
+
6
PROGPROG
>3’’
>3’’
K
PROGPROG
>3’’
>3’’
1
PROGPROG
>3’’
>3’’
3
Page 9- Manual FA01031-IT - 08/2019 - © CAME S.p.A. - The contents of this manual may be changed, at any time, and without notice. - Translation of the original instructions
Page 9- Manual FB00865-EN - 11/2019 - © CAME S.p.A. - The contents of this manual may be changed, at any time, and without notice. - Translation of the original instructionsPage 9- Manual FB00865-EN - 11/2019 - © CAME S.p.A. - The contents of this manual may be changed, at any time, and without notice. - Original instructions
If all the entry panels are reprogrammed, the configuration will be as shown in figure
J. To exit reprogramming, briefly press the PROG key on the power supply K: the
PROG LEDs and the LEDs on the entry panels will go out. If no action is performed, the
procedure will end automatically after 30 minutes.
Programming entry panel video cameras. While programming the call keys the "visual range" of the video camera can be adjusted
in the way already described.
Entry panel brightness level adjustment. While programming the call keys the entry panel brightness level can be adjusted in the
way already described.
Should call keys be present ONLY ON ADDITIONAL BUTTON PANELS, proceed as shown in the NOTE on page 6.
WARNING. If an entry panel is added, replaced or moved, the modifications are acquired by going into "Programming Type
of Keys" (from figure 6-K).
Programming with DNA
1
2
3
4
5
6
7
8
9
10
For this type of configuration of Entry
panels refer to the procedures already
described.
For this type of configuration of Entry panels refer
to the procedures described below.
Entering Programming Mode. Press the PROG key on the power supply for more than
3 seconds 1. The LEDS on the entry panels light up as shown in figure 2. If the PROG
LED immediately goes out, this indicates a malfunction in the connections between the
power supply and the entry panel. Check the connections and return to programming.
Repeat the operation 3a second time. Check that the configuration on the Entry panels
is as shown in figure 4. Wait 5 seconds for the auto test to be completed and continue
as shown below.
Programming the call codes. Press the door release and
AUX2 buttons 5. Enter the call code for the group (from 1
to 99), followed by the key 6to link the call code to the
receiver. Continue, repeating the same operations for all the other
receivers. The operation can only be carried out from the entry
panel with the LED o (PE1 4): to change the entry panel
from which to carry out the programming of calls, press key 1
followed by the key.
1 P.E 2 P.E 3 P.E
1 P. E 2 P. E 3 P. E
+
7
1-2-3
1-2-3
12345
12345
beep
beep
8
+ +
5),'
352*
²0
352*
5),'
352*
²0
352*
1
2 4
beep
beep
3
12345
12345
12345
12345
++
5
beep
beep
6
7
beep
beep
+
Page 10 - Manual FA01031-IT - 08/2019 - © CAME S.p.A. - The contents of this manual may be changed, at any time, and without notice. - Translation of the original instructions
Page 10 - Manual FB00865-EN - 11/2019 - © CAME S.p.A. - The contents of this manual may be changed, at any time, and without notice. - Translation of the original instructionsPage 10 - Manual FB00865-EN - 11/2019 - © CAME S.p.A. - The contents of this manual may be changed, at any time, and without notice. - Original instructions
Programming the door release code and relay with DNA. Press and key in the
relay code you wish to programme (press key 1 to activate the door opening control in
the entry panel; press key 2 to activate relay 1 on the VLS/2 relay module; press key 3
to activate relay 2 on the VLS/2 relay module) 7. Press once again and key in the
desired code (from 3 to 5 figures).
Once programming has been completed, by pressing the key plus the desired code
and 8 , it is possible to activate the door opening control and relay 1 or 2.
Exiting Programming. Briefly press the PROG key on the power
supply: the PROG LEDs and the LEDs on the entry panels will
go out. NOTE. If no action is performed, the procedure will end
automatically after 30 minutes.
Entering Codes and Tags
Position the power supply's PROG RFID jumper at “+” 1: the power supply's PROG
LED will flash slowly along with the message LEDs with the configuration in fig. 2. If
the LEDs immediately go out it means there is a malfunction in the connections between
the power supply and entry panel. Check the connections and return to programming.
Badge. Bring a badge/tag up to the reader of any entry panel that
has already been addressed 3and, after the confirmation beep,
press the key (group) to which the code should be assigned 4. If
the maximum permitted number is exceeded (5) for each group,
an error tone will be generated.
Codes. Press , enter the access code (4-8 figures) followed by the key on the
keypad of any already addressed entry panel reader 5and, after the confirmation beep,
enter the call code for the group and then press 6(or press the group key). If
the maximum permitted number is exceeded (5) for each group, an error tone will be
generated.
Finally, reposition the PROG RFID jumper in the rest position 7: the procedure is
NOT terminated automatically!

5),'
352*
²0
352*
1
2
beep
beep
beep
beep
3 4
12345
12345
++
5
beep
beep
>10’’
>10’’
>1’’
>1’’
beep
beep
beep
beep
6
7
12345
12345
12345
12345
beep
beep
beep
beep
+ +
8 9
352*
5),'
352*
²
J
Page 11 - Manual FA01031-IT - 08/2019 - © CAME S.p.A. - The contents of this manual may be changed, at any time, and without notice. - Translation of the original instructions
Page 11 - Manual FB00865-EN - 11/2019 - © CAME S.p.A. - The contents of this manual may be changed, at any time, and without notice. - Translation of the original instructionsPage 11 - Manual FB00865-EN - 11/2019 - © CAME S.p.A. - The contents of this manual may be changed, at any time, and without notice. - Original instructions
Badge. Bring a badge/tag up to the reader of any entry panel that
has already been addressed 3and, after the confirmation beep,
repeat this once again to confirm 4: ALL the badges relating to
the GROUP will be deleted.
Codes. Press , enter the access code (4-8 figures) followed by the key on the key-
pad of any entry panel that has already been addressed 5and, after the confirmation
beep, repeat this once again to confirm: ALL the codes relating to the GROUP will be
deleted.
Badges and Codes. Entry panels with buttons: hold down for at least 10 seconds the
call key 6relating to the GROUP for which the codes are to be deleted and, after the
beep, press the key again (briefly) 7. In this way ALL the GROUP's codes and badges
of any type will be deleted.
Entry panels with DNA. Enter the call code followed by the 8key related to the
GROUP for which the codes are to be deleted and, after the beep, enter the call code
again followed by the key 9. In this way ALL the GROUP's codes of any type will
be deleted.
Finally, reposition the PROG RFID jumper in the rest position J: the procedure is
NOT terminated automatically!
Deleting Codes and Tags
Position the power supply's PROG RFID jumper at “–” 1: the power supply's PROG LED
will flash slowly, along with the message LEDs with the configuration in fig. 2. If the
LEDs immediately go out it means there is a malfunction in the connections between the
power supply and the entry panel. Check the connections and return to programming.

33 A
4
3 B
1
2
3
4
5
6
7
8
9
10
1
2
3
4
5
6
7
8
9
10
3 C
5
6
beep
beep
PROG
M1
CN
4
B
B
>3’’
>3’’
<6’’
<6’’
1
+
7
1-2-3
1-2-3
12345
12345
beep
beep
8
+ +
2
Page 12 - Manual FA01031-IT - 08/2019 - © CAME S.p.A. - The contents of this manual may be changed, at any time, and without notice. - Translation of the original instructions
Page 12 - Manual FB00865-EN - 11/2019 - © CAME S.p.A. - The contents of this manual may be changed, at any time, and without notice. - Translation of the original instructionsPage 12 - Manual FB00865-EN - 11/2019 - © CAME S.p.A. - The contents of this manual may be changed, at any time, and without notice. - Original instructions
PROGRAMMING ENTRY PANELS WITH VAS/100.30 or VAS/101
First Programming
Entering Programming Mode. Press the PROG key 1for at least 3 seconds and
release within 6 seconds. If the PROG LED immediately goes out it means there is a
malfunction. Check the connections and return to programming. The LEDS on the entry
panels light up as shown in figure 2. Wait 5 seconds for the auto test to be completed
and continue as shown below.
Programming Type of Keys. Press the first key on the entry panel 3/3A/3Buntil
the LED stops flashing along with the backlighting LEDs 4.
Programming the call keys. Press the door release and AUX2 buttons 5. On
the entry panel, press the call key to be linked to the receiver 6: a beep will confirm
that the setting has been stored. Continue, repeating the same operations for all the
other receivers.
Programming the door release code and relay with DNA. Press and key in the
relay code you wish to programme (press key 1 to activate the door opening control in
the entry panel; press key 2 to activate relay 1 on the VLS/2 relay module; press key 3
to activate relay 2 on the VLS/2 relay module) 7. Press once again and key in the
desired code (from 3 to 5 figures). Once programming has been completed, by pressing
the key plus the desired code and it is possible to activate the door opening control
and relay 1 or 2 8.
Exiting Programming. Briefly press the PROG key I: the PROG LEDs and entry panel
LEDs will go out. NOTE. If no action is performed, the procedure will end automatically
after 30 minutes.
Should call keys be present ONLY ON ADDITIONAL BUTTON PANELS, the oper-
ation shown in figure 3is carried out on these as shown in figure 3C.

L
3
8
4
6
9
7
5
2
1
100 °
82 °
54 °
72 °
1÷9
0
J
J
PROG
M1
CN
4
B
B
<1’’
<1’’
9
34
beep
beep
PROG
M1
CN
4
B
B
>3’’
>3’’
<6’’
<6’’
1
2
+
5
1-2-3
1-2-3
K
12345
12345
beep
beep
6
+ +
Page 13 - Manual FA01031-IT - 08/2019 - © CAME S.p.A. - The contents of this manual may be changed, at any time, and without notice. - Translation of the original instructions
Page 13 - Manual FB00865-EN - 11/2019 - © CAME S.p.A. - The contents of this manual may be changed, at any time, and without notice. - Translation of the original instructionsPage 13 - Manual FB00865-EN - 11/2019 - © CAME S.p.A. - The contents of this manual may be changed, at any time, and without notice. - Original instructions
Programming entry panel video cameras. While programming the call keys the
“visual range” of the video camera can be adjusted from any receiver (with handset
raised, it there is one), by pressing the “Self-connection” key 8. From the default
settings it is possible to scroll through the following ones Kby pressing the AUX1
key, or to go back to the previous ones with the AUX2 key L: the setting is saved
automatically.
Entry panel brightness level adjustment. While programming the call keys the entry
panel brightness level can be adjusted from any receiver. Pressing the “Self-connection”
key on the receiver activates the video camera of the entry panel for which the bright-
ness level is to be adjusted. The brightness level can be increased/decreased by using
a previously assigned call key, or by simulating a call from DNA.
Reprogramming Procedure
Entering Programming Mode. Press the PROG key 1for at least 3 seconds and
release within 6 seconds. If the PROG LED immediately goes out it means there is a
malfunction. Check the connections and return to programming. The LEDS on the entry
panels light up as shown in figure 2. Wait 5 seconds for the auto test to be completed
and continue as shown below.
Programming the call keys. Press the door release and AUX2 buttons 3. On
the entry panel, press the call key to be linked to the receiver 4: a beep will confirm
that the setting has been stored. Continue, repeating the same operations for all the
other receivers.
Programming the door release code and relay with DNA. Press and key in the
relay code you wish to programme (press key 1 to activate the door opening control in
the entry panel; press key 2 to activate relay 1 on the VLS/2 relay module; press key 3
to activate relay 2 on the VLS/2 relay module) 5. Press once
again and key in the desired code (from 3 to 5 figures). Once
programming has been completed, by pressing the key plus
the desired code and it is possible to activate the door opening
control and relay 1 or 2 6.

PROG
M1
CN
4
B
B
<1’’
<1’’
7
PROG
M1
CN
4
B
B
>3’’
>3’’
<6’’
<6’’
8
9
JK
Page 14 - Manual FA01031-IT - 08/2019 - © CAME S.p.A. - The contents of this manual may be changed, at any time, and without notice. - Translation of the original instructions
Page 14 - Manual FB00865-EN - 11/2019 - © CAME S.p.A. - The contents of this manual may be changed, at any time, and without notice. - Translation of the original instructionsPage 14 - Manual FB00865-EN - 11/2019 - © CAME S.p.A. - The contents of this manual may be changed, at any time, and without notice. - Original instructions
Exiting Programming. Briefly press the PROG key 7: the PROG LEDs and entry panel
LEDs will go out. If no action is performed, the procedure will end automatically after
30 minutes.
Programming Type of Keys. In “Programming Call Keys” 2press the PROG key 8
and release it within 6 seconds to go into the “Programming Type of Keys” procedure
I. Press one of the first 4 “keys” on the first entry panel, the LED will stop flashing,
as will the backlighting LEDs of the first 4 positions of the call keys J. The messages
will take on the configuration in K. Finally, to exit programming, briefly press the PROG
key K: the PROG LEDs and the LEDs on the entry panels will go out. If no action is
performed, the procedure will end automatically after 30 minutes.
Programming entry panel video cameras. While programming the call keys the
“visual range” of the video camera can be adjusted in the way already described.
Entry panel brightness level adjustment. While programming the call keys the entry
panel brightness level can be adjusted in the way already described.
Should call keys be present ONLY ON ADDITIONAL BUTTON PANELS, proceed as
shown in the NOTE on page 12.
The product complies with the relevant directives in force.
Decommissioning and disposal. Dispose of the packaging and the device responsibly at the end of its life cycle, in compliance with the laws in force
in the country where the product is used. The recyclable components are marked with a symbol and the material’s ID marker.
THE DATA AND INFORMATION SHOWN IN THIS MANUAL ARE TO BE CONSIDERED AS SUBJECT TO CHANGE AT ANY TIME AND WITHOUT THE NEED
FOR ANY ADVANCE WARNING. MEASUREMENTS, UNLESS OTHERWISE INDICATED, ARE IN MILLIMETRES.

Page 15 - Manual FA01031-IT - 08/2019 - © CAME S.p.A. - The contents of this manual may be changed, at any time, and without notice. - Translation of the original instructions
Page 15 - Manual FB00865-EN - 11/2019 - © CAME S.p.A. - The contents of this manual may be changed, at any time, and without notice. - Translation of the original instructionsPage 15 - Manual FB00865-EN - 11/2019 - © CAME S.p.A. - The contents of this manual may be changed, at any time, and without notice. - Original instructions

CAME S.p.A.
Via Martiri Della Libertà, 15
31030 Dosson di Casier - Treviso - Italy
tel. (+39) 0422 4940 - fax. (+39) 0422 4941
Page 16 - Manual FA01031-IT - 08/2019 - © CAME S.p.A. - The contents of this manual may be changed, at any time, and without notice. - Translation of the original instructions
Page 16 - Manual FB00865-EN - 11/2019 - © CAME S.p.A. - The contents of this manual may be changed, at any time, and without notice. - Translation of the original instructionsPage 16 - Manual FB00865-EN - 11/2019 - © CAME S.p.A. - The contents of this manual may be changed, at any time, and without notice. - Original instructions
This manual suits for next models
3
Table of contents
Other CAME Intercom System manuals

CAME
CAME XTS 5IP WH User manual

CAME
CAME XTS 7 WH WIFI Manual

CAME
CAME ENTROTEC PRO-DC4 User manual

CAME
CAME XTS 7 WH WIFI User manual

CAME
CAME PLACO-C User manual

CAME
CAME PLX A User manual

CAME
CAME XVP S User manual

CAME
CAME Entrotec Entroview User manual

CAME
CAME XTS 7IP WH WIFI User manual

CAME
CAME AGT V User manual

CAME
CAME DIR 10 User manual

CAME
CAME BPT KIT FREE LVC User manual

CAME
CAME STLCDFN User manual

CAME
CAME 001CK0010 User manual

CAME
CAME BPT THANGRAM Owner's manual

CAME
CAME KIT AGT V + LITHOS User manual

CAME
CAME 001DC011AC User manual

CAME
CAME VK01 User manual

CAME
CAME 001DC02EARY User manual

CAME
CAME VRK01 User manual