15
14
2.3. Displays
2.3.1 Weight Display
The WEIGHT display shows the weight of an item on the platter whether it be positive or
negative and within the range of the scale. The WEIGHT display also indicates if the scale is
at ZERO or if there is a tare entered into the scale by way of a ZERO and NET lamps.
2.3.2 Unit Price Display
The UNIT PRICE display shows the price per pound of an item to be weighed. It also
indicates whether the SAVE function is active by way to the indicator lamp. The UNIT
PRICE display, in program mode only, indicates the condition of the SHIFT lamp. If the
SHIFT lamp is OFF, you can type in capital letters, but if the SHIFT lamp is ON, you can
only type lowercase letters. Finally, the UNIT PRICE display also indicates if the scale is in
AUTO mode by way of an indicator lamp.
2.3.3 Total Price Display
The TOTAL PRICE display shows the unit price multiplied by the weight to give the total
price.
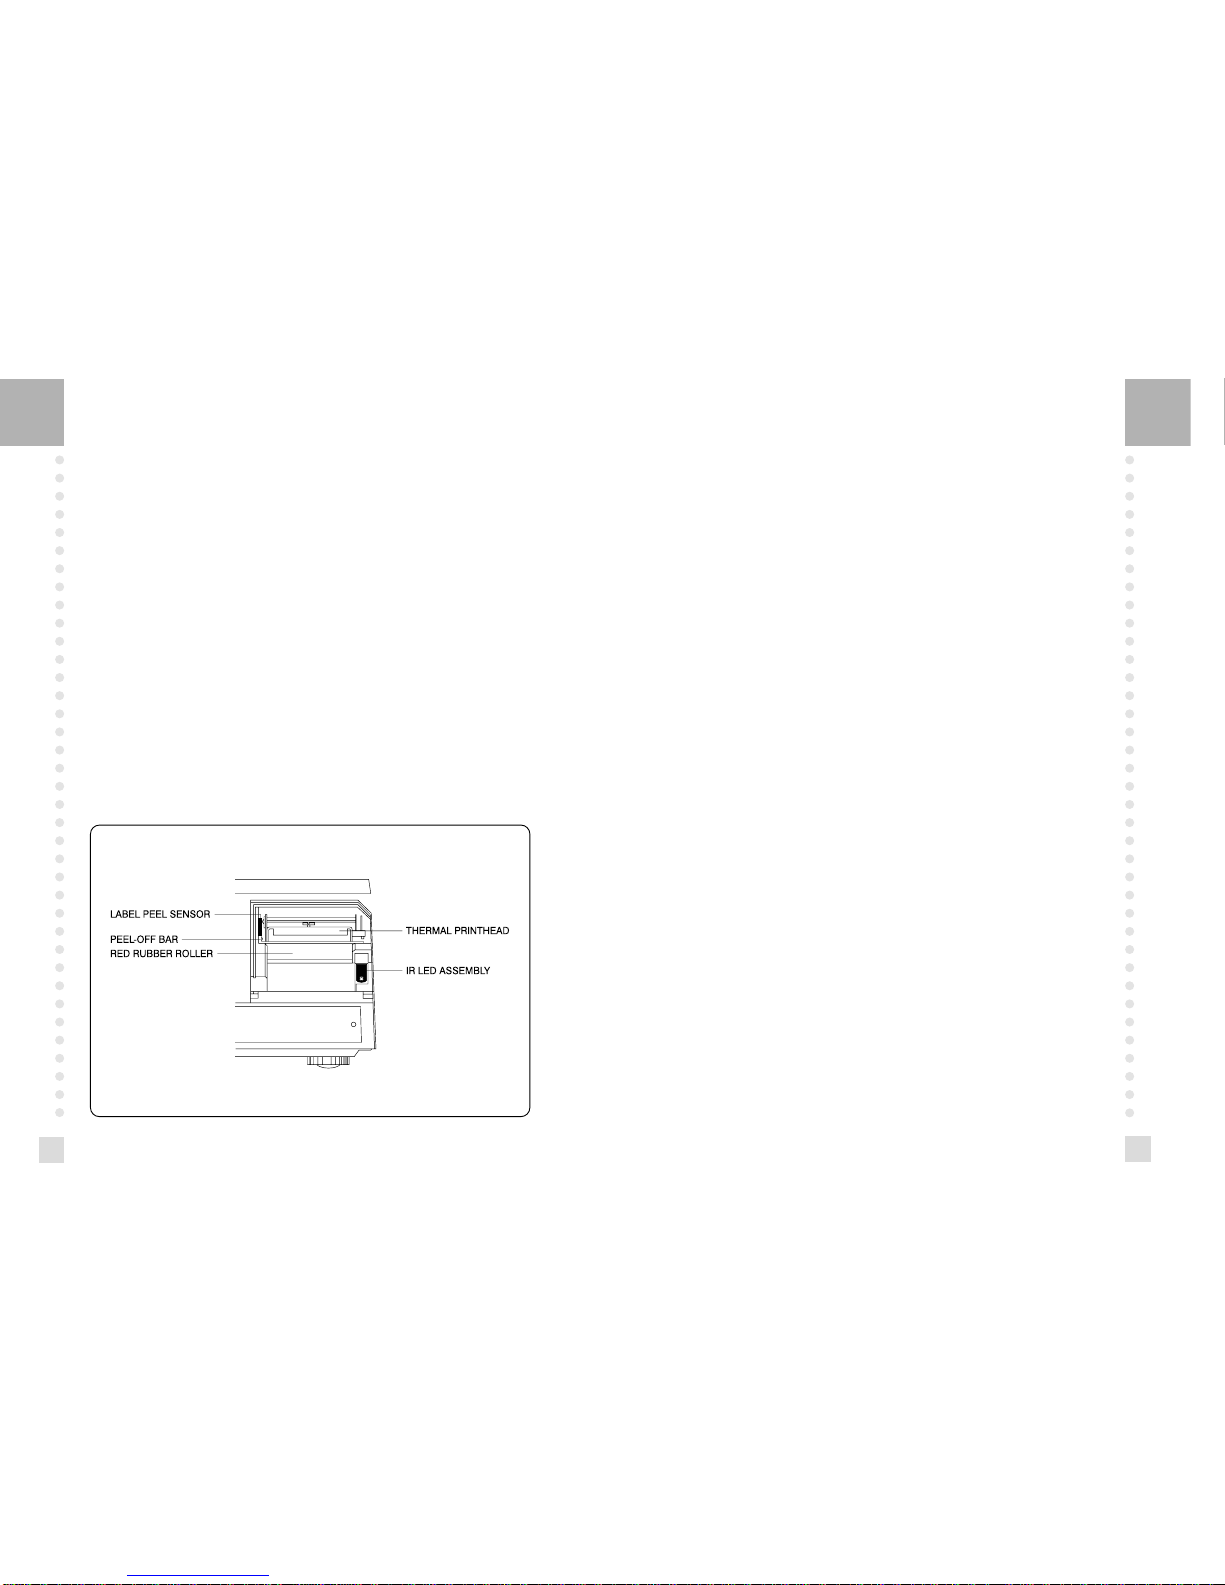
2.4. Printer Mechanism
It is very important that you be familiar with the printer mechanism. Every time your labels
run out you will be required to install the label roll and you will need to know the general
parts of the printer.
Front View: (With Printer Front Cover removed)
LABEL PEEL SENSOR : This sensor is used in conjunction with IR LED to detect if there is a
printed label waiting to be taken.
THERMAL PRINTHEAD : The Thermal Printhead is the part that does the actual printing. The
printhead is VERY sensitive! Please keep water and other liquids AWAY from the printhead.
DO NOT TOUCH the underside of the printhead. If labels become jammed and stuck to the
printhead, please call a qualified CAS Dealer to solve this problem. When finished installing
labels, it is necessary to push down on the TOP of the printhead to lock it in place.
RED RUBBER ROLLER : This is the part that the printhead press the labels against in order to
print. Please do not scratch or harm in any way this roller. Any damage to the roller can result in
bad print or lower quality print.
PEEL-OFF BAR : This part causes the labels to peel-off their backing paper when the paper slides
over it. Always install the labels OVER the Peel-Off Bar.
IR LED : This part is used in conjunction with the Label Peel Sensor to detect if there is a printed
label waiting to be taken. (Infra-Red Light Emiting Diode)
NOTE : Always replace the Printer Side Cover and the Printer Front Cover to ensure proper
operation of the scale. Failure to do so can result in printer failure. Also, failure to comply with
any or all of the guidelines for proper maintenance can adversely affect your scales warrantee.