Cassida Cube User manual

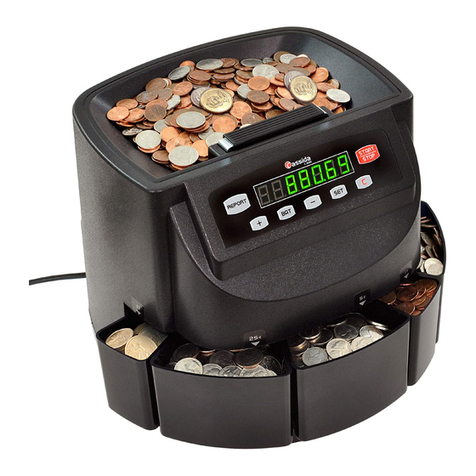
CASSIDA CUBE Compact Value Counter
USER MANUAL
ver.:070915

3
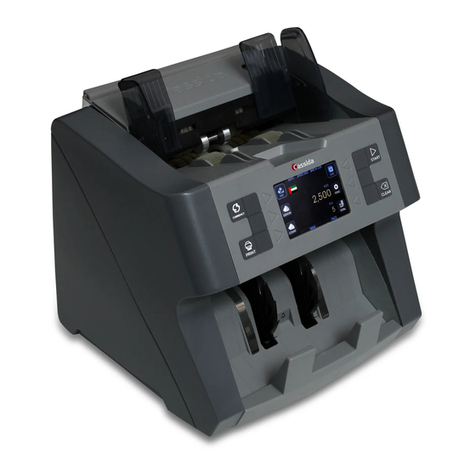
Cassida CUBE compact value counter
This manual contains important information on safety
measures and operational features. Please read it carefully
before operating your value counter, and keep it for future
reference.

4
Table of contents:
1.1 About the Cassida Cube
1.2 Box contents
1.3 Front and rear views
1.4 Control panel
1.5 Specifications
1.6 Important safety notes
2.1 Open the stacker assembly
Open the hopper
2.2
Adjust the hopper guide
2.3
2.4 Connect the power source
2.5 Install the battery
Select currency
4.1
Select Auto/Manual mode
4.2
Select counting mode
4.3
rinting function
4.4 P
4.5 Select accumulative counting
4.6 Select batch counting
6.1 Self-test error message display and solutions
6.2 Detective error message display and solutions
7.1 Maintenance
7.2 Warranty
7.3 Contact information
5
5
6
7
8
8
10
11
11
11
12
5
1.
Thank you for choosing the Cassida Cube compact value counter. We hope you enjoy
using it.
The Cassida Cube is the most sophisticated compact mixed value counter on the market
today. It applies the latest technology to give you the ultimate in counting performance
and counterfeit detection.
Cassida Cube value counter
AC/DC power adapter
User manual
USB download cable (optional)
Print transfer cable (optional)
Micro-printer (optional)
Cleaning brush
Micro SD-card (optional)
Rechargeable battery (optional)
External LCD display (optional)
1. Introduction
2. Getting started
Loading bills
3.
4. Operation
5. Time settings of real time
6. Troubleshooting
7. Maintenance, warranty and contact info
1.1 About the Cassida CUBE
1.2 Box contents
INTRODUCTION
moving money forward
Cassida CUBE compact value counter
13
15
16
16
16
18
18
19
19
20
20
21
22
22
23
24

1.3 Front and rear views
1. Control panel
2. LCD display screen
3. Adjusting screw
4. Main body
5. Hopper
6. Hopper guide
7. Front housing
8. Bill adjustable pressing
frame
9. Stacker
10. Bill receiving adjustable
plate
7
1.4 Control panel
6
11. Printer interface
12. Power socket
13. External display interface
14. USB interface
15. Micro-SD card socket
: Press this key to select currency type or free count (simple count mode)
: Press this key to select a counting mode: Mix & Sort (when currency is selected)
: Press this key to enter the ADD function (accumulative counting)
: Press this key to set the batch function
: Use this key to increase the batch number by 1 (just press) or by 10 (press and
hold)
: Clear count memory
: Press and hold this key to print the counting result report
: Press this key to view the counting result report
: Press this key to enter setting function menu
: Press and hold this key to turn on/off the machine
moving money forward
CUR
MODE
ADD
BATCH
+1/+10
CLR
PRT
REP
MENU
Cassida CUBE compact value counter
14 15
13
12
11
4
56
8
10
1
2
3
7
9

• Do not use this unit in areas where it may be exposed to water or any other liquids
• Make certain the unit is installed on a flat surface. Do not operate the machine in
areas with high temperature, humidity or smoke, as these conditions may prevent proper
operation.
• This unit is designed for indoor use in a ventilated environment. Keep the machine
away from direct sunlight or strong directional interior lighting and strong magnetic fields.
These could interfere with the counterfeit detection sensors.
• During operation, do not touch the moving parts of the unit
• Avoid foreign objects, paper clips, and staples
• Avoid dropping the unit
• When finished be sure there are no bills in the hopper or transport system
• When not using the unit for an extended period of time, disconnect the power cord from
the wall outlet
• Unplug the unit from the wall outlet before cleaning. Use a damp cloth or specifically
designed maintenance accessories such as an air duster, soft bristle brush, or cleaning
cards.
• To avoid the risk of electrical shock, do not disassemble this unit. Disassembly will expose
you to dangerous voltages and other safety risks. Incorrect reassembly can cause
electrical shock when the appliance is subsequently used.
• Clean the unit regularly
• Take the unit to a qualified technician when service or repair is required. Do not try to
replace any parts yourself. Supplied spare parts are intended for use by qualified repair
personnel only.
Remember the manufacturer is in no way responsible for damage to the unit or injury to
the operator in the event of incorrect operation/care of the unit.
1.6 Important safety notes
8
1.5 Specifications
9
moving money forward
: Press “RESET” to start/stop counting. Press “RESET” once to stop
counting, press again to continue
RESET
LCD display screen : Displays counting result or error message
Counting speed:
Hopper capaity:
Stacker capacity:
Batch size:
Display:
Detections:
Power supply:
Power consumption:
Battery:
Operating temparture:
Storage temprature:
Size:
Weight:
250 bills/min
100 bills
100 bills
100, 50, 20,10 or from 1 to 200
with +1/+10
LCD
3D, MG, IR, UV, IMG, RGB
AC100V~240V, 50/60 Hz or
DC12V/2.0A
<20 W
2000 mAH
0-40 °C
-25 - +65 °C
170x157x150x152 mm
1.8 kg (w/o battery)
Cassida CUBE compact value counter
When using this unit, basic safety precautions should always be observed, including the
following:
• Read this manual before operation
• The manual should be available to operator

2. GETTING STARTED
2.1 Open the stacker assembly
1110
2.2 Open the hopper
2.3 Adjust the hopper guide
2.4 Connect the power source
moving money forward
Before start the counting process, set the hopper guide according to the width of the
bills w/o gaps.
Open the positional block Increase the width Decrease the width
There are two types of power source can be connected to the counter:
- The AC/DC power adapter: convenient for indoor use
- The battery: convenient for portable use
Cassida CUBE compact value counter

2.5 Install the battery
1312
moving money forward
• When the counter connects to the external power supply, it will be charged
automatically. The battery status symbol is displayed on the upper right corner of the LCD.
A solid symbol means the battery is full and an empty symbol means the battery is
insufficient. If the symbol is flashing and changing from solid to empty, it means the battery
is being charged. When the battery is poor, “Low battery” will be displayed. It means the
battery is too low, you shall stop counting and charge the device.
• The battery status symbol will not be displayed on-screen if a battery is not connected.
• If the device works on a battery, then in working mode, when the counter idles up to 20
minutes, it will turn off automatically.
3. LOADING BILLS
Place the machine on a flat surface, then open the underprop foot, ensure that no strong
electromagnetic fields or bright light or sunshine are contacting the Cube. Plug the electric
socket into AC electric source. If you have purchased an external display, connect it to the
external display interface on the back of the counter.
Press “ “ for 2 seconds, machine will perform a self-test (see Figure 4-1).
If the self-test is successful, the machine will enter into ready state (see Figure 4-2), if some
error messages are displayed, please deal with them according to the Troubleshooting in
the manual.
Put the bills in order (See Figure 4-3), with small denomination bills in the middle where
possible. Then set the hopper guide to the minimum position, and put the bills on the
hopper flatly, the counter will start counting (See Figure 4-4, Figure 4-5).
Cassida CUBE compact value counter
Low Battery
NOTE: Operate following the direction of arrow, mind your hand. Ver. 2.10
Self-Test
AED Mix
PCS:
VAL:
0
0
A B:---
Figure 4-1 Figure 4-2
It is very important to place the bills into the hopper correctly, because recognition
performance of the bills is highly affected by the arrangement of the bills. Bills shall
be placed in a neat stack prior to being placed into the hopper. Please avoid
counting bills that are wet, excessively dirty, spoiled, folded, curled or with
foreign material like clips, bands, etc.
It will damage and cause malfunction of the machine.

The operations as shown in Figure 4-4, Figure 4-5 are correct operations, while operation
shown in Figure 4-6 is wrong operation.
When a suspicious bill is detected, the counter will stop immediately and the beeper will
emit. The top piece in the stacker is a suspicious one (see Figure 4-7). Remove the
suspicious bill, press “RESET” key, the machine will continue counting.
1514
NOTE: When an error is found and causes the machine to stop automatically,
please re-count all bills in the stack.
moving money forward
Cassida CUBE compact value counter
Figure 4-3 Figure 4-4
Figure 4-5 Figure 4-6
Figure 4-7
The top piece
After turning on the machine, the symbol of current currency is displayed on the LCD. To
change the currency, pres "CUR" key. The symbol of selected currency will be displayed
on the screen.
4. OPERATION
4.1 Select currency

17
To switch between Auto (A) and Manual (M) start modes, enter setting menu with pressing
"MENU" key, then "CUR" key, then press "ADD" key to select Auto mode ON or OFF. To
confirm and leave settings menu, press "MENU" key.
In Auto mode "A" will be displayed on the screen. The machine starts counting
automaticaly, when the bills are placed into the hopper.
In Manual mode "M" will be displayed on the screen. The machine starts counting, when
the user presses "RESET" key.
16
moving money forward
4.2 Select Auto/Manual mode
Cassida CUBE compact value counter
4.3 Select counting mode
AED Mix
PCS:
VAL:
0
0
M B:---
AED Mix
PCS:
VAL:
0
0
A B:---
Auto mode Manual mode
C. Sort Count Mode
To start SORT mode, select the currency first by pressing CUR key, then select "Sort" by
pressing MODE key. This mode is used to count and sort bills by one denomination which
is automatically determined by the first passing bill. the first bill in the hopper determines
the counting denomination. If the denomination on the second, or other bills in the stack,
differs from the first bill, the machine will stop the operation. Once the bill with the different
denomination is removed from the stacker, press "RESET" key to resume the operation.
Total number (PCS) and total value (VAL) will be displayed on the screen. When operation
is complete, the user may press REP key and the detailed report will be displayed on the
screen. By pressing REP key once again, the user may return to the main screen.
In Mix and Sort modes, after detecting, the machine will provide a report of all counted
bills by pressing “REP” key. The detailed report will be displayed on the screen as follows:
5:
10:
20:
50:
100:
200:
500:
1000:
Sum:
0
0
5
2
1
1
1
0
10
0
0
100
100
100
200
500
0
1000
Total number Total value
Piece Value
Denomination
A. Simple Count Mode
This mode can be used for various currencies. This mode is used to count the total number
of bills. To start this mode, select "Free Count" by pressing "CUR" key. AED Mix
PCS:
VAL:
10
1000
M B:---
B. Mixed Count Mode
To start MIXED mode, select the currency first by pressing CUR key, then select "MIX" by
pressing MODE key. This mode is used to count a stack of mixed denominations of a
selected currency. Total number (PCS) and total value (VAL) will be displayed on the
screen. When operation is complete, the user may press REP key and the detailed report
will be displayed on the screen. By pressing REP key once again, the user may return to the
main screen.
Free Count
PCS: 0
A B:---

1918
moving money forward
If the printer is connected to the machine, press and hold “PRT” key, “Print...” will be
displayed on the LCD (shown in the following figure) and the report will be printed. After
printing is completed, the Cube returns to its ready state.
4.5 Select accumulative counting
When you need an accumulative counting, press “ADD” key on the control panel and the
“ADD” will be displayed on the LCD. The machine will count on the basic of the original
number displayed on the LCD. After bill counting is finished, the number displayed on the
LCD is the sum of the multiple counts just completed. When accumulative pieces reach
999+1 or accumulative value reaches 999999+1, the count and/or value will be reset
to 0.
4.6 Select batch counting
When you need a batch counting, press “BAT” key, when “100" is displayed on the preset
window, it shows the batch function has been turned on, the batch number is 100. Each
time when you press “BAT” key, 100, 50, 20, 10 and “---” will be displayed in turn
repeatedly. If the LCD displays “---”, the batch function is disabled. You also can press or
hold “+1/+10" key to increase the batch number by 1 or 10 according to desire. The
batch number can be selected in the range of 1~200. After setting the batch number, put
the bills on the hopper and the machine will count automatically. When the unit reaches its
batch number, the machine will stop automatically.
Cassida CUBE compact value counter
Print...
AED Mix
PCS:
VAL:
0
0
ADD A B:---
AED Mix
PCS:
VAL:
999
999999
ADD A B:---
To adjust the time settings, enter Settings menu by pressing MENU key.
To enter into time face interface, press "ADD" key. It will display like below:
5. TIME SETTINGS OF REAL TIME
Time Set
Auto :
Sleep Time:
ON
OFF
Time Set: Setting time
Auto: Setting Auto/Manual mode
Sleep Time: Setting sleep time (5 minutes, 10 minutes or off)
Click “CUR” key to select the option continuously.
Click “ADD” key to change the parameter.
When reach the Time Set option, press “ADD” to enter into time set interface, it will display
like below:
21:06 2015-04-03
4.4 Printing function
Press any key to exit the report mode automatically. Press “CLR” key to clear the count
memory.

2120
moving money forward
Press “CUR” key to switch the value that need modify, click “ADD” key (+) and “MODE”
key (-) to change the parameter of time.
Press “MENU” key to save the change and exit settings menu automatically.
6. TROUBLESHOOTING
6.1 Self-test error message display and solutions
The machine performs a self-test automatically after powering on. If one of the following
error messages is displayed on the LCD, usually it is because the sensor is blocked by bills
or dust. Please use a brush or piece of soft cloth to remove dust from the sensor. Remove
the bills and restart the machine.
Error message display Solution
PassA counting sensor
PassB counting sensor
PassC counting sensor
PassD counting sensor
Upper IRA sensor
Upper IRB sensor
Upper IRC sensor
Upper IRD sensor
Lower IRD sensor
Lower IRF sensor
Lower IRG sensor
Lower IRH sensor
Upper color sensor
Lower color sensor
Upper spectrum sensor
Lower spectrum sensor
Banknote feeding sensor
Remove the bills and remove dust from the
counting sensor. Additionally confirm the
sensors are aimed at the axis of the light
beam.
Remove the bills and clear away the dust
Cassida CUBE compact value counter
Magnetic A sensor
Magnetic B sensor
Magnetic C sensor
Magnetic D sensor
Internal memory fault
Remove the bills and clean the magnetic
sensor
Resume to factory setting
Clean the code wheel and sensor, or replace
the rubber-belt
Rotate speed sensor
6.2 Detective error message display and solutions
If any of the following error messages are displayed during counting, use the following
solutions to correct the problems after the machine has stopped.
Error message display Causes and solutions
Incomplete notes
Magnetic feature fail
IR error
UV error
Image error
Paper error
Spectrum error
Holograph error
Denomination different
Half piece or incomplete bill. Remove it and
press “RESET” to continue counting
Counterfeit or suspicious bill. Remove it and
press “RESET” to continue counting.
Error message display Solution

2322
moving money forward
Error message display Causes and solutions
Slant notes Bill tilt. Press “RESET” to continue counting. If it
occurs frequently, adjust the adjusting screw
toward the counter-clockwise direction.
Double notes
Chained notes
Some bills are connected or overlapped. Put
the bills in the bill stacker back to the bill
hopper to count again. If it occurs frequently,
adjust the adjusting screw toward the
clockwise direction.
Passing error
Press “RESET” key, or press the handle up to
open the bill transport path, then remove the
bill and clear away the dusts.
Cassida CUBE compact value counter
Regular maintenance procedures are not included into the warranty
7.1 Maintenance
Regular maintenance will ensure accurate operation of the unit, and will prolong its
service life. Periodically check the voltage of the power supply to ensure that the voltage is
within the specified range. Keep the counter in ventilated place and beyond strong
sunshine and strong magnetic field. Periodically clean the sensors: use a piece of cotton
with a small amount of alcohol to clean all sensors, rubber wheels and rubber
synchronous belt. Keep the surface of sensors away from sharp and hard articles to avoid
damage.
ATTENTION: The interior cleaning of the unit should only be completed
by professional engineers.
7. MAINTENANCE, WARRANTY AND CONTACT INFO
7.2 Warranty
Warranty is effective for a period of one year from the date of purchase. In most cases, the
malfunction of the machine can be resolved by cleaning the unit.
• Customer should allow Cassida the time and opportunity to test and diagnose the
machine to determine warranty and non- warranty claims.
• After receiving and unpacking the units, Customer shall keep the package and its user
manual. Warranties are canceled in the event the device is transported in a non-original
packaging or operation/ maintenance conditions are not met.
• Company is not responsible for unit malfunction due to improper maintenance, storage
and transportation including mechanical damage.
• Manufacturer is entitled to introduce updated software, not described in the current user
manual.
Non-warranty service:
Cassida can perform maintenance and cleaning for an extra fee. For a non-warranty
repair or maintenance quotation, contact Cassida Technical Support.
• After receiving and unpacking the units, Customer shall keep the package and its user
manual. Warranties are canceled in the event the device is transported in a non-original
packaging or operation/ maintenance conditions are not met.
• Company is not responsible for unit malfunction due to improper maintenance, storage
and transportation including mechanical damage.
• Manufacturer is entitled to introduce updated software, not described in the current user
manual.

2524
moving money forward
Cassida CUBE compact value counter
Non-warranty service:
Cassida can perform maintenance and cleaning for an extra fee. For a non-warranty
repair or maintenance quotation, contact Cassida Technical Support.
Warranty service is not available in the following cases:
• Cleaning of the unit from dust and mud
• Absence of a warranty card or an incorrectly filed warranty card
• Operation or maintenance requirements detailed in the user manual are not met
• There is mechanical damage to the unit or the seal portions of the unit have been
opened or tampered with
• There are foreign objects or liquid inside of the unit.
Shipping:
The warranty does not cover shipping cast to or from Cassida Technical Service Center.
Before shipping the unit to the Cassida Technical Service Center the warranty card must
be filled out with model full name and number, serial number, cause for service, errors
occurred.
7.3 Contact information
Technical Support contact information:
e-mail: [email protected]
tel: 042 739 328
www.cassida.me, www.cassidausa.com
When contacting Cassida Technical Support, please have the following:
• Product model – Located on the back side of your currency counter
• Serial number – Located on the back side of your currency counter
• Nature of the problem – What happens, and when did it happen? Did the machine
display an error message?
• Steps already taken to resolve the problem, and the results.
Office # 101,
Biyat Complex (Landmarks: Emirates Billiard Centre)
Hor Al Anz East, Behind Al Mamzar Centre
Dubai - United Arab Emirates
PO box 454867

26
moving money forward
Other manuals for Cube
1
Table of contents
Other Cassida Cash Counter manuals

Cassida
Cassida C 200 User manual

Cassida
Cassida 6600 Manual

Cassida
Cassida 6600 User manual

Cassida
Cassida 3200 User manual

Cassida
Cassida Xpecto LiTE User manual

Cassida
Cassida Cube User manual

Cassida
Cassida 5520 UV User manual

Cassida
Cassida 5510 User manual

Cassida
Cassida TillTally User manual

Cassida
Cassida InstaCheck II User manual
Popular Cash Counter manuals by other brands

Vega Absolute
Vega Absolute VEGA NB-11 user manual

Nautilus Hyosung
Nautilus Hyosung MONiMAX5600 Service manual

LOVATO ELECTRIC
LOVATO ELECTRIC DMED320 instruction manual

Ribao
Ribao CS-95A Operation manual

MULTISPAN
MULTISPAN BC-1046D operating manual

JAMAR Technologies
JAMAR Technologies TRAX Totalizer user manual