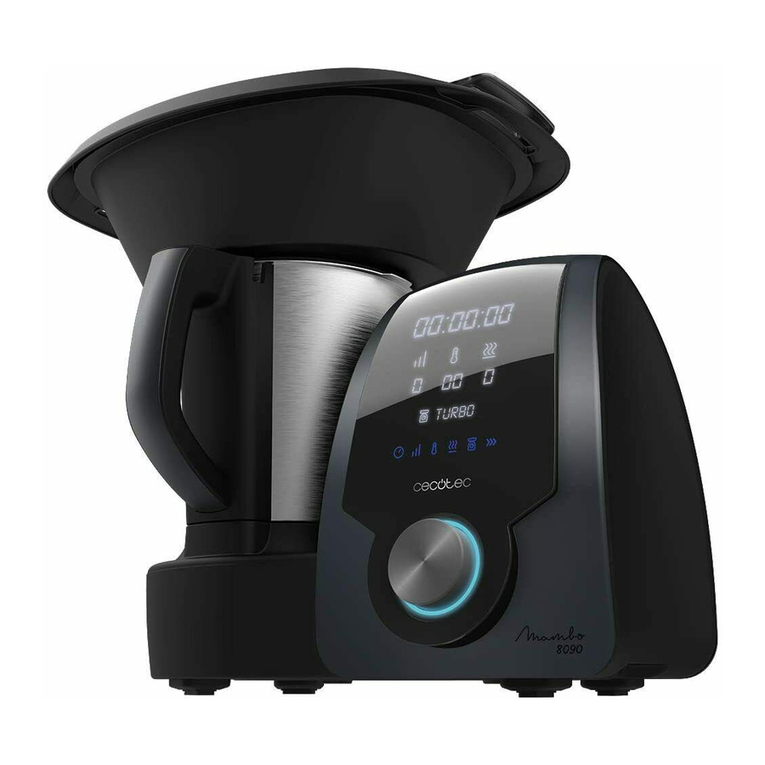
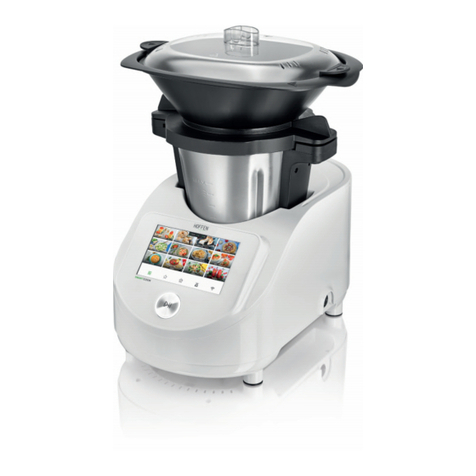
cecotec Mambo 9090 User manual

Robot de cocina / Food processor/Кухонна машина-робот багатофункціональна
/Кухонная машина-робот многофункциональная
Manual de instrucciones
Instruction manual
Інструкція з експлуатації
Руководство по
эксплуатации

ÍNDICE
1. Instrucciones de seguridad 10
2. Piezas y componentes 12
3. Accesorios 13
4. Antes de usar 15
5. Funcionamiento 16
6. Limpieza y mantenimiento 22
7. Resolución de problemas 22
8. Especicaciones técnicas 24
9. Reciclaje de electrodomésticos 24
10. Garantía y SAT 25
INDEX
1. Safety instructions 26
2. Parts and components 28
3. Accessories 28
4. Before use 31
5. Operation 31
6. Cleaning and maintenance 36
7. Troubleshooting 37
8. Technical specications 39
9. Disposal of old electrical appliances 39
10. Technical support service and warranty 39
ЗМІСТ
40
1. Інструкція з техніки безпеки
2. Компоненти пристрою
3. Аксесуари
4. Перед першим використанням
5. Експлуатація пристрою
6. Попереджувальні сигнали
7. Очищення та обслуговування пристрою
8. Технічні характеристики
9. Утилізація старих електроприладів
10. Сервіс і гарантія
42
46
46
52
53
54
54
55
Fig./Img./
Мал. 1
1
2
3
4
5
6
7
8
9
10
12 14
13
11
СОДЕРЖАНИЕ
64
1. Инструкция по технике безопасности
2. Компоненты устройства
3. Аксессуары
4. Перед первым использованием
5. Эксплуатация устройства
6. Предупредительные сигналы
7. Чистка и обслуживание устройства
8. Технические характеристики
9. Утилизация старых электроприборов
10. Сервисное обслуживание и гарантия
66
67
70
70
76
77
78
79

Fig./Img./
Мал
. 2 Fig./Img./
Мал
3
Fig./Img./
Мал
. 4
Fig./Img./
Мал
. 5
Fig./Img./
Мал
. 6
Fig./Img./
Мал
. 7
Fig./Img./
Мал.
9
Fig./Img./
Мал
8
Fig./Img./
Мал
. 10

Fig./Img./
Мал
. 11 Fig./Img./
Мал
. 12 Fig./Img./
Мал.
12
Fig./Img./
Мал.
12
Fig./Img./
Мал
. 13 Fig./Img./
Мал.
14

1110
ESPAÑOL ESPAÑOL
10
ESPAÑOL
1. INSTRUCCIONES DE SEGURIDAD
Lea las siguientes instrucciones atentamente antes de usar
el producto. Guarde este manual para referencias futuras o
nuevos usuarios.
Asegúrese de que el voltaje de red coincida con el voltaje
especicado en la etiqueta de clasicación del producto y de
que el enchufe tenga toma de tierra.
Coloque el dispositivo sobre una supercie plana, estable
y resistente al calor, manteniendo una distancia mínima de
seguridad desde el borde la encimera para evitar que se caiga.
Este producto está diseñado exclusivamente para uso
doméstico. No es apropiado para usos comerciales o
industriales.
No sumerja el cable, el enchufe o cualquier otra parte del
producto en agua o cualquier otro líquido, ni exponga las
conexiones eléctricas al agua. Asegúrese de que tiene las
manos completamente secas antes de tocar el enchufe.
No deje el dispositivo sin supervisión.
Apague el dispositivo y desconéctelo de la toma de corriente
antes de cambiar los accesorios, de desmontar o montar el
producto o de acercarse a los elementos que puedan cortar o
moverse.
Inspeccione elcable de alimentación regularmente en busca de
daños visibles. Si el cable presenta daños, debe ser reparado
por el Servicio de Asistencia Técnica ocial de Cecotec para
evitar cualquier tipo de peligro.
No retire la tapa del producto cuando esté hirviendo agua o
durante el funcionamiento del dispositivo.
No utilice ningún accesorio que no haya sido recomendado por
Cecotec ya que podría ocasionar daños.
Compruebe el cuerpo principal, la jarra, la vaporera y los demás
componentes para comprobar que no haya daños. Si detecta
cualquier daño, no utilice el dispositivo.
Asegúrese de que las cuchillas están montadas correctamente,
con el anillo de sellado en su posición, antes de utilizar el
dispositivo.
Al cocinar con temperatura, no bloquee el vaso medidor. Déjelo
en la posición de desbloqueo o no lo coloque para facilitar la
salida de vapor.
Si el producto dejara de funcionar de forma inesperada, apáguelo
y desconéctelo de la toma de corriente inmediatamente.
No intente reparar el dispositivo por su propia cuenta.
El oricio en la tapa del producto solo se puede cubrir con el
vaso medidor. No utilice paños ni cualquier otro objeto.
No exceda la marca de max en el cuerpo principal de la jarra.
Asegúrese de que la tapa está correctamente colocada en su
posición antes de ponerlo en funcionamiento y no la abra hasta
que el producto haya parado de funcionar.
La supercie del producto puede alcanzar temperaturas
elevadas durante el funcionamiento, por encima de los 60 ºC.
Utilice algún tipo de protección para tocarlo o moverlo.
Tenga cuidado al manejar las cuchillas del producto durante la
limpieza.
Al utilizar la vaporera:
Asegúrese de que la vaporera y la jarra están correctamente
encajadas.
Cuando la utilice a velocidades altas, coloque la tapa y
asegúrese de que está bien cerrada.
No exponga ninguna de las partes del cuerpo al vapor emitido
durante el funcionamiento.
Asegúrese de que las rejillas de ventilación de la parte trasera

1312
ESPAÑOL ESPAÑOL
del producto no están cubiertas o bloqueadas para evitar que
el producto se dañe.
El aparato no debe ser usado por niños desde 0 hasta 8 años.
Este electrodoméstico puede ser usado por niños a partir de 8
años de edad si están continuamente supervisados.
Este producto puede ser usado por niños/as de a partir de
8 años y personas con capacidades físicas, sensoriales o
mentales reducidas, o con falta de experiencia y conocimiento
si están supervisados o han recibido instrucción concerniente
al uso del aparato de una forma segura y entienden los riesgos
que este implica. No permita que los niños jueguen con el
dispositivo.
Supervise a los niños para asegurarse de que no jueguen
con el producto. Es necesario dar una supervisión estricta
si el producto está siendo usado por o cerca de niños.
2. PIEZAS Y COMPONENTES
Fig. 1.
1. Cuerpo principal
2. Jarra
3. Tapa de la jarra
4. Pantalla LCD
5. Selector de inicio y pausa
6. Cuerpo de la vaporera
7. Tapa de la vaporera
8. Mariposa
9. Espátula
10. Cuchara MamboMix
11. Cuchillas
12. Vaso medidor
13. Cestillo
14. Jarra cerámica
3. ACCESORIOS
Montaje de la jarra
La jarra de acero inoxidable de alta calidad es para limpieza en lavavajillas y compatible con
todas las funciones de cocinado.
La jarra cerámica, de elevada antiadherencia, permite lograr excelentes resultados en las
elaboraciones más delicadas, como bechamel, cremas, chocolate fundido, etc.
Advertencia: la jarra cerámica no es compatible con las cuchillas. Únicamente se puede utilizar
con la cuchara MamboMix.
Coloque la tapa en la jarra, presione hacia abajo y gírela en el sentido de las agujas
del reloj hasta que esté bien cerrada. Si la tapa no está bien cerrada, el producto no
funcionará.
Fig. 2.
Coloque la tapa en la jarra, presione ligeramente y gírela en el sentido de las agujas del reloj
hasta que esté bien cerrada.
Si la jarra no está en su posición correcta, el producto no funcionará.
Aviso: la jarra tiene marcas en uno de sus lados. Su capacidad máxima útil es de 2 litros. No
exceda esta cantidad para asegurar un buen funcionamiento.
Fig.3.
Coloque la jarra en el cuerpo principal asegurándose de que está bien encajada en su posición
correcta. Si la jarra no está en su posición correcta, el producto no funcionará.
Montaje de las cuchillas
Ajuste el anillo de sellado al conjunto de cuchillas, introdúzcalo en la jarra y colóquelo en el
hueco de la base.
Sujete la parte superior del conjunto de cuchillas rmemente y dele la vuelta a la jarra.
Asegúrese de que encaja en su posición correcta.
Instale el soporte de jación a la parte inferior de la jarra y gírelo en sentido horario para jar
el conjunto de cuchillas a la jarra.
Para sacar el conjunto de cuchillas de la jarra, gire el soporte de jación en sentido antihorario.
Asegúrese de sujetar el conjunto de cuchillas rmemente para evitar que se caigan y causen
algún daño.
Fig. 4.
Advertencias:
Utilice un paño para cubrir el conjunto de cuchillas antes de manejarlas para evitar lesiones.
Coloque el soporte de jación y el anillo de sellado correctamente para evitar que salpiquen o
salgan despedidos los alimentos o líquidos que se estén cocinando.

1514
ESPAÑOL ESPAÑOL
Cuchara MamboMix
Este accesorio está diseñado para amasar, remover y mezclar alimentos sin cortarlos.
Sujete rmemente el conjunto de cuchillas, dele la vuelta a la jarra y gire el soporte de jación
en sentido antihorario para retirar el conjunto de cuchillas.
Advertencia:
No utilice este accesorio con velocidades superiores a 3, ya que la jarra podría temblar y causar
daños.
Fig. 5.
Advertencia: la distancia entre el eje amasador y la pared de la jarra es de 1 cm, por lo que es
posible que los alimentos se queden atascados. En caso de ocurrir esto, el motor del producto
dejaría de funcionar como método de protección. Utilice la espátula para mezclar y remover
los alimentos atascados para que el dispositivo pueda reanudar el proceso de cocción.
Vaso medidor
El vaso medidor se utiliza como la tapa del producto para evitar que salpique y se pierda el
calor, y para medir la cantidad de comida. Tiene una capacidad máxima de 150 ml.
Cuando utilice funciones sin temperatura, coloque el vaso medidor en el hueco de la tapa.
Gírelo en sentido horario para cerrarla y en sentido contrario para abrirlo y sacarlo.
Fig. 6.
Advertencias:
Utilice el vaso medidor y no cualquier otro accesorio u objeto para cerrar la tapa de la jarra.
Para cocinar sin temperatura (triturar, remover, picar...), gire el vaso medidor en sentido horario
hasta que quede jado.
Si desea cocinar con temperatura, coloque el vaso en el oricio de la tapa sin jarlo mediante
el giro. De esta forma, podrá salir el vapor de forma segura.
Espátula
Fig. 7.
La espátula es la única herramienta apta para remover los alimentos de dentro de la jarra, ya
que las demás herramientas pueden rayar y dañar la supercie.
No se puede utilizar mientras el producto esté en funcionamiento con las cuchillas o el
accesorio de mariposa.
Mariposa
Fig. 8.
Este accesorio funciona instalado en la parte superior del conjunto de cuchillas, de esta
manera, ayuda a mezclar los alimentos sin ser cortados por las cuchillas. Ayuda a mezclar la
comida y deshacer los grumos.
Instale la mariposa sobre el conjunto de cuchillas, asegurándose que el centro del eje encaje
con el hueco del accesorio de mariposa, y presione hacia abajo.
Advertencias:
No ponga el dispositivo en funcionamiento a menos que el accesorio esté bien jado en su
posición.
No lo utilice con velocidades superiores a 4.
No utilice el accesorio de mariposa a la vez que la espátula.
No vierta comida dentro mientras esté funcionando con este accesorio para evitar que se dañe
o se bloquee.
Cestillo
Fig. 9.
El cestillo sirve para llevar a cabo las siguientes funciones:
Colar, tanto jugos como salsas. Después de triturar, cocinar o preparar salsas, coloque el
cestillo en la jarra y vierta la mezcla.
Guisar alimentos blandos, como pasta o deos.
Cocinar guarniciones como arroz o patatas.
Vaporera
La vaporera consta de 3 piezas: una vaporera pequeña, una más grande y la tapa.
Cierre la vaporera con la tapa antes de utilizarla.
Coloque la vaporera en la jarra y asegúrese de que encaja.
Advertencias:
No toque ni se acerque demasiado a la vaporera para evitar quemaduras.
No cubra los agujeros de la vaporera con un paño ni con cualquier otro objeto. Es posible que el
vapor salga por el borde o por otras partes, causando riesgo de quemaduras.
Permita que el vapor salga tanto por el oricio como por los laterales de la tapa; de esta
manera, se favorecerá la circulación del vapor y ayudará a una cocción más homogénea de
los alimentos.
4. ANTES DE USAR
Aviso: el producto emitirá un suave olor al ser utilizado por primera vez y desaparecerá a los
pocos minutos.
Esto es consecuencia de restos de fabricación y no afecta al funcionamiento del aparato.
Saque el producto de la caja y retire todo el material de embalaje.
Asegúrese de que el producto está en buenas condiciones. Si se observara algún daño visible,
contacte de forma inmediata con el Servicio de Atención Técnica ocial de Cecotec.

1716
ESPAÑOL ESPAÑOL
Coloque el dispositivo sobre una supercie limpia, estable y plana. No lo coloque cerca del
borde, dentro de armarios empotrados o soportes colgados.
Limpie el dispositivo antes de usarlo por primera vez.
Conecte el dispositivo a una toma de corriente y accione el interruptor de encendido para
activarlo. La máquina emitirá un pitido y la pantalla se encenderá.
5. FUNCIONAMIENTO
ON/OFF
Fig. 10.
Utilice este interruptor para encender y apagar el producto.
INICIO/PAUSA
Pulse el selector de la parte frontal del producto para activar el dispositivo.
Desde la pantalla principal, seleccione la función deseada.
Durante el proceso de conguración, mantenga pulsado el selector durante 2 segundos para
resetear todos los ajustes.
Mientras está cocinando, pulse el selector para pararlo y manténgalo pulsado durante 2
segundos para resetear los ajustes.
Tras 10 minutos de inactividad, el dispositivo entrará en modo standby.
Cuando haya seleccionado el ajuste o la función deseada, pulse el selector para activarla y el
dispositivo comenzará a funcionar de forma automática.
Durante el funcionamiento, pulse el selector para pausar el proceso de cocción. La pantalla
mostrará “PAUSE”. Puede abrir la tapa, remover o mezclar los alimentos, retirar la jarra
etc. Después, coloque cada elemento de nuevo en su posición correcta y pulse de nuevo el
selector para reanudar el proceso. Después de 10 minutos en pausa, el dispositivo se apagará
automáticamente.
Utilice el selector para congurar todos los ajustes: tiempo, temperatura etc. Gire el selector
en sentido horario para aumentar los valores o en el sentido contrario para bajarlos.
TEMPORIZADOR
La pantalla mostrará 88:88:88, como hora:minutos:segundos.
Pulse el botón del temporizador 1 vez, los dígitos de los minutos parpadearán. Gire el selector
hacia la izquierda o la derecha para congurar los minutos deseados. Pulse de nuevo para
cambiar a la conguración de los segundos, los dígitos de los segundos parpadearán. Pulse de
nuevo para cambiar a la hora. Gire el selector hacia la izquierda o la derecha para congurar
la hora deseada.
Durante el funcionamiento, pulse el botón del temporizador y el dispositivo comenzará la
cuenta atrás automáticamente.
Si el temporizador no se ha congurado, el producto funcionará con los tiempos
precongurados.
Calentar (sin batir): máximo 12 horas.
Batir (velocidad 1-4) máximo 1 hora.
Batir (velocidad 5-10): máximo 5 minutos.
VELOCIDAD
Pulse este botón para acceder a la conguración de la velocidad. El icono de velocidad
parpadeará en la pantalla.
Gire el selector hacia la izquierda para disminuir y a la derecha para aumentar el nivel de
velocidad, de 1 a 10.
Si la velocidad congurada es entre 5 y 10, el temporizador solo se podrá congurar hasta 5
minutos. Para el resto de las opciones de velocidad, 1 hora.
Advertencia:
al cambiar la velocidad de 5 a 6 o al encender el dispositivo, éste podrá producir algo de ruido.
Esto es completamente normal y no afecta al funcionamiento del dispositivo.
Para picar o trocear alimentos duros o grandes cantidades de comida, seleccione velocidad 5
al principio y luego cambie a velocidad 10 para asegurar un alto rendimiento.
TEMPERATURA
Pulse este botón para acceder a la conguración de la temperatura. El icono de temperatura
parpadeará en la pantalla.
Gire el selector hacia la izquierda para disminuir y a la derecha para aumentar la temperatura,
de 37 a 120 ºC. Este valor parpadeará hasta que el robot alcance la temperatura seleccionada.
El indicador de la temperatura se iluminará en rojo cuando la jarra alcance temperaturas muy
altas, como aviso de riesgo de quemadura.
Si el icono de la temperatura está iluminado en rojo y desea utilizar la máquina a una velocidad
alta, introduzca menos de 1,5 litros de alimentos.
POTENCIA CALORÍFICA
Pulse este botón para acceder a la conguración de la potencia caloríca. El icono de la
potencia caloríca parpadeará en la pantalla.
Gire el selector hacia la izquierda para disminuir y a la derecha para aumentarla, de 1 a 10.
Se recomienda seleccionar una potencia caloríca baja para cocinar alimentos grasos o
pequeñas cantidades de comida, y evitar que se quemen, ya que requieren un control de la
temperatura más preciso.
A potencia caloríca alta se cocinan los alimentos de forma mucho más rápida.
La función de la potencia caloríca no se activará a menos que la temperatura esté
previamente congurada. Se recomienda utilizar los ajustes precongurados para cada nivel
de temperatura.

1918
ESPAÑOL ESPAÑOL
BÁSCULA
Mambo 8090 dispone de báscula incorporada. Pesa hasta un máximo de 4.999 gramos, en
intervalos de 1 gramo.
Para activar la báscula, el robot debe estar en modo pause. Pulse el icono de la báscula y la
pantalla mostrará “0 00 0” por defecto, indicando que se ha activado. Cuando introduzca los
ingredientes en la jarra, la pantalla mostrará el peso exacto.
Si ya hay alimentos en el interior de la jarra y añade nuevos, la báscula sumará el peso total y
lo indicará en la pantalla. Si, por el contrario, desea retirar ingredientes del interior de la jarra,
la báscula restará el peso y mostrará el total. Es posible que la pantalla muestre un valor
negativo cuando retire ingredientes.
FUNCIÓN TARA
Si desea poner a cero la báscula tras haber introducido ya una cantidad de ingredientes en la
jarra, pulse el icono de la báscula. La pantalla mostrará “0 00 0” de nuevo y el robot estará listo
para pesar más alimentos.
Para dejar de pesar y volver al modo pause, pulse cualquiera de los iconos del robot. La
pantalla mostrará los parámetros congurados anteriormente.
TURBO
Durante el modo pause, pulse este botón para que el dispositivo funcione a máxima velocidad.
El dispositivo mostrará TURBO parpadeando.
Deje de pulsar el botón para que el dispositivo deje de funcionar bajo este modo. El robot
parará automáticamente.
Esta función solo se puede utilizar por un máximo de 1 minuto cada vez.
Advertencia: al activar el modo TURBO, es posible que el dispositivo emita algunos ruidos. Esto
es completamente normal y no afecta al funcionamiento del dispositivo.
FUNCIONES
1. Trocear: trocea cualquier ingrediente desde carne o pescado hasta frutas o verduras.
Asegura el corte perfecto.
2. Picar: pica cómodamente verduras, carne, especias o hielo en cuestión de segundos.
Perfecta para procesar alimentos en crudo.
3. Triturar: consigue la textura perfecta en salsas y cremas. Tritura en frío o en caliente,
ajustando la velocidad y el tiempo a cada tipo de alimento.
4. Moler: obtiene el nivel de molido ideal en todas las recetas. Muele café, semillas, arroz y
frutos secos rápidamente. También permite preparar harinas propias.
5. Pulverizar: pulveriza cualquier ingrediente hasta conseguir la textura más na. Prepara
azúcar glass o vainillado para las recetas de repostería.
6. Rallar: se introducen los ingredientes sin sobrepasar la mitad de la jarra y se programa
la velocidad 10 durante pocos segundos. Ralla todos los ingredientes con resultados
excelentes.
7. Batir: logra los mejores resultados en las mezclas de forma sencilla. Prepara deliciosos
batidos, masas de bizcochos, tortitas, bate huevos y mucho más.
8. Montar: monta nata o claras de huevo al punto de nieve gracias a su mariposa. Es la
función ideal para ser un auténtico profesional de la repostería.
9. Emulsionar: prepara cómodamente salsas, aliños y mayonesas. Introduce los ingredientes
en la jarra y Mambo se encarga de procesarlos. Emulsiona de manera homogénea para
darle el toque deseado a todos los platos.
10. Mezclar: consigue mezclas más homogéneas con las 10 velocidades de Mambo. Las
mejores masas de la manera más fácil.
11. Cocinar: cocina todo tipo de platos, estofados, guisos, pollo con almendras y pistos con
una textura increíble.
12. Remover: remueve la comida mientras la cocina para garantizar un calentamiento
uniforme y una textura profesional. Prepara exquisitos risottos, ensaladas de pasta,
natillas o chocolate a la taza.
13. Cocinar al vapor: las recetas más saludables con la función de cocinar al vapor. Con la
vaporera a dos niveles se puede hacer más de una receta a la vez y, así, ahorrar tiempo.
14. Escalfar: cocina progresivamente y muy poco a poco, con un control absoluto de la
temperatura y el tiempo. Escalfados perfectos sin tener que estar pendiente del tiempo.
La función es idónea para obtener los resultados más jugosos.
15. Contar: procesa los alimentos a baja temperatura y consigue resultados irresistibles.
La técnica del contado es perfecta para cocinar todo tipo de alimentos, especialmente
carnes, pescados y aves.
16. Amasar: consigue masas perfectas de una sola pieza. Amasar nunca había sido tan fácil
gracias a la exclusiva cuchara MamboMix. No corta la masa y la estira en cada movimiento
para conseguir el resultado perfecto. Disfruta de tus panes y pizzas favoritas en cualquier
momento.
17. Hervir: se ha de añadir suciente agua para cubrir todos los ingredientes y programar a
120 ºC de temperatura, a potencia caloríca 10 y según la cantidad o tipo de ingrediente
seleccionar más o menos tiempo.
18. Mantener caliente: preserva la temperatura de las elaboraciones hasta el momento de
servirlas. Después de cocinar, se ha de programar el robot a 45 ºC para platos sólidos, y a
60 ºC para platos con líquido durante el tiempo oportuno.
19. Cocina de precisión: esta es la función más amplia de todas. Permite cocinar cualquier
plato con un control absoluto de la potencia.
20. Fermentar: prepara excelentes masas con la función fermentar. En poco tiempo consigue
nalizar panes o repostería, darles subida rápidamente es tan fácil como mantener la
masa en el vaso a 50 ºC con velocidad 0.
21. Baño María: consigue el punto deseado en anes o verduras tiernas. Para cocinar al baño
María, se ha de llenar la jarra con agua hasta los 2 litros, programar el robot sin velocidad,
a temperatura de 120 ºC y a potencia caloríca 10. Cuando rompa a hervir, se ha de bajar
a la potencia 9 e introducir la anera hasta que su base quede en contacto con el agua
agua.

2120
ESPAÑOL ESPAÑOL
22. Turbo: procesa los alimentos más duros con la máxima efectividad. En esta función no se
llena la jarra más de la mitad para conseguir el máximo rendimiento.
23. SlowMambo: los mejores risottos y guisos tradicionales con la exclusiva cuchara
MamboMix y el movimiento SlowMambo. Este movimiento único de Mambo permite
remover mimando las elaboraciones como si se hiciera con una cuchara.
24. Licuar: obtiene limonadas, licuados y zumos multifruta en cuestión de segundos.
25. Sofreír: sofreír algunos ingredientes, antes de cocinarlos, enriquece los platos y mejora
su sabor nal. Puede sofreír desde un ajo hasta carnes. Dora los alimentos más o menos,
regulando la potencia y el tiempo.
26. Recalentar: Mambo permite recalentar lo ya cocinado. Si se quedó frío, es del día anterior
o lo congelaste, calienta con 87 ºC de temperatura y potencia caloríca 7. ¡Listo en solo
unos minutos!
27. Yogurtera: consigue yogures caseros fácilmente. Solo se tienen que introducir los
ingredientes en la jarra y Mambo hace el resto. Mantiene el preparado a temperatura de
fermentación para que a la mañana siguiente el yogur esté listo para enfriar y consumir.
28. Cestillo: sirve para cocinar al vapor en el interior de la jarra, y permite preparar hasta 4
elaboraciones a la vez. Además, se puede utilizar como alternativa al vaso medidor para
conseguir una evaporación más rápida.
29. Cocción lenta: el buen guiso tradicional de los de chup chup toda la mañana se puede
hacer con Mambo. Cocina lentamente y durante largas horas para obtener el mejor sabor.
30. Velocidad cero: cocinar sin movimiento permite mantener la jarra destapada y remover
cuando elijas. Pruebe la comida a medida que la cocina, como si de una cazuela o sartén
se tratase.
Advertencias:
No abra nunca la tapa mientras las cuchillas estén en funcionamiento, el contenido de la jarra
podría salir despedido.
Una vez que haya terminado de triturar, espere al menos 10 segundos antes de abrir la tapa.
Cuando utilice el dispositivo a una velocidad superior a 6, asegúrese de que el vaso medidor
está colocado correctamente, de lo contrario, el contenido podría salir despedido.
No active la función triturar con líquidos o ingredientes calientes con un volumen superior a
1,5 litros.
Al utilizar funciones con temperatura, no bloquee el vaso medidor para facilitar la salida de
vapor.
Velocidad y capacidad recomendada para cada accesorio
Accesorio Imagen Función Velocidad Capacidad Tiempo de
funcionamiento
Cuchillas
de acero
inoxidable
Fig. 11. Trocear (+) 5Máx. 2 litros,
trocear en
trozos de 1-2 cm
antes del
funcionamiento
1 min.
Trocear (++) 10 Máx. 2 litros,
trocear en
trozos de 1-2 cm
antes del
funcionamiento
1 min.
Cuchara
MamboMix
Fig. 12. Amasar masa
de pan, pizza,
etc.
2-3
Máx. 800 g de
masa
5-20 min.
Amasar
masa para
espaguetis
3 Máx. 400 g de
masa
3 min.
Mariposa Fig. 13. Remover 1-3 Máx. 2 litros 10 min.
Batir claras
de huevo o
nata
4 Máx. 2 litros 10 min.
Vaporera Fig. 14. Cocinar
verduras al
vapor
N/A 3,5 max. 15 min.
Cocinar carne
al vapor
N/A Máx. 3,5 litros 20-30 min.

2322
ESPAÑOL ESPAÑOL
6. LIMPIEZA Y MANTENIMIENTO
La jarra de acero inoxidable es apta para lavar en el lavavajillas.
Fig.15.
Advertencia: coloque la pieza como se muestra a continuación únicamente cuando lave la
jarra de acero inoxidable en el lavavajillas.
La jarra cerámica no es apta para lavavajillas. Utilice agua tibia y jabón para limpiarla. Luego,
enjuáguela y séquela cuidadosamente. No moje ni sumerja los conectores situados en la parte
inferior de la jarra cerámica.
Fig.16.
Al limpiar la jarra cerámica, tenga cuidado de no sumergirla en agua y evite que la parte inferior,
donde se encuentra la resistencia, entre en contacto con agua.
Limpie el robot de cocina después de cada uso.
Apague el dispositivo, desconéctelo de la toma de corriente y permita que se enfríe antes de
limpiarlo o repararlo.
Limpie la mariposa y los demás accesorios con agua tibia y jabón. Enjuáguelo y séquelo bien.
Limpie el cuerpo principal con un paño limpio y húmedo. Si quedan restos de comida,
humedezca un trapo en agua tibia y jabón y límpielo. Nunca sumerja el cuerpo principal en
agua o cualquier otro líquido.
Para asegurar y mantener el buen funcionamiento del dispositivo, compruebe y limpie la parte
inferior desmontable de la jarra después de cada uso. Límpielo con un paño suave y húmedo, y
luego séquelo a fondo antes de utilizarlo de nuevo.
Si el dispositivo no se va a utilizar en un periodo prolongado de tiempo, desconéctelo de la
toma de corriente y guárdelo en un lugar fresco y seguro.
Las cuchillas y la cuchara MamboMix son aptas para lavavajillas.
7. RESOLUCIÓN DE PROBLEMAS
Código de error Descripción Posibles causas Solución
E1 Interruptor de
seguridad
La jarra o la tapa
de la jarra no
están colocadas
correctamente.
Vuelva a montar la
jarra con la tapa,
asegúrese de que
todas las partes
están montadas
correctamente
y bien jadas y
vuelva a ponerlo en
funcionamiento.
E2 Fallo del sensor de
temperatura
La jarra no está
colocada en su
posición correcta o la
conexión del sensor
de temperatura de la
base de la jarra está
dañada.
Vuelva a montar la
jarra y asegúrese
de que está
correctamente
colocada.
E3 El motor está
bloqueado
Hay demasiada
cantidad de comida
dentro de la jarra.
Saque parte de los
alimentos de dentro
de la cara o córtelos
en trozos más
pequeños y reinicie el
robot.
E4 La temperatura es
demasiado elevada
No hay o hay muy
pocos alimentos
dentro de la jarra y
la temperatura está
demasiado elevada
durante mucho
tiempo.
Añada alimentos a la
jarra.
E5 La temperatura del
motor es demasiado
elevada
El robot ha estado
funcionando con
demasiada cantidad
de comida durante
mucho tiempo.
Deje de utilizar el
robot y permita
que se enfríe antes
de ponerla en
funcionamiento de
nuevo.

2524
ESPAÑOL ESPAÑOL
E6 El cambio de
velocidad no se ha
realizado con éxito.
La función de cambio
de velocidad baja (1-5)
a velocidad alta (6-10)
se ha bloqueado.
Retire la jarra, gire el
soporte de jación
de forma manual y
coloque la jarra de
nuevo. Reinicie el
robot.
E7 y E8 Contacte con el
Servicio de Atención
Técnica de Cecotec
llamando al +96 321
07 28.
E12 Fallo de medición de
la báscula
Se ha superado el
valor máximo
de medición.
Retire peso de la
báscula hasta
alcanzar un valor por
debajo de
4.999 g.
8. ESPECIFICACIONES TÉCNICAS
Modelo: Mambo 8090
Referencia del producto: 04131
1700 W (Motor 700 W Potencia caloríca 1000 W)
200-240 V ~ 50/60 Hz
Fabricado en China | Diseñado en España
9. RECICLAJE DE ELECTRODOMÉSTICOS
La directiva europea 2012/19/UE sobre Residuos de Aparatos Eléctricos y
Electrónicos (RAEE) especica que los electrodomésticos no deben ser
reciclados con el resto de los desperdicios municipales. Dichos
electrodomésticos han de ser desechados de forma separada, para optimizar
la recuperación y reciclaje de materiales y, de esta manera, reducir el impacto
que puedan tener en la salud humana y el medioambiente.
El símbolo del contenedor tachado le recuerda su obligación de desechar
este producto de forma correcta. Si el producto en cuestión cuenta con una batería o pila para
su autonomía eléctrica, esta deberá extraerse antes de ser desechado y ser tratada a parte
como un residuo de diferente categoría.
Para obtener información detallada acerca de la forma más adecuada de desechar sus
electrodomésticos y/o las correspondientes baterías, el consumidor deberá contactar con las
autoridades locales.
10. GARANTÍA Y SAT
Este producto tiene una garantía de 2 años desde la fecha de compra, siempre y cuando se
conserve y envíe la factura de compra, el producto esté en perfecto estado físico y se le dé un
uso adecuado tal y como se indica en este manual de instrucciones.
La garantía no cubrirá:
• Si el producto ha sido usado fuera de su capacidad o utilidad, maltratado, golpeado, expuesto
a la humedad, sumergido en algún líquido o substancia corrosiva, así como cualquier otra falta
atribuible al consumidor.
• Si el producto ha sido desarmado, modicado o reparado por personas no autorizadas por el
SAT ocial de Cecotec.
• Si la incidencia ha sido originada por el desgaste normal de las piezas debido al uso.
El servicio de garantía cubre todos los defectos de fabricación durante 2 años en base a la
legislación vigente, excepto piezas consumibles. En caso de mal uso por parte del usuario el
servicio de garantía no se hará responsable de la reparación.
Si en alguna ocasión detecta una incidencia con el producto o tiene alguna consulta, póngase
en contacto con el Servicio de Asistencia Técnica ocial de Cecotec a través del número de
teléfono +34 96 321 07 28.

2726
ENGLISH ENGLISH
1. SAFETY INSTRUCTIONS
Read these instructions thoroughly before using the appliance.
Keep this instruction manual for future reference or new users.
Make sure that the mains voltage matches the voltage stated
on the rating label of the appliance and that the wall outlet is
grounded.
Place the appliance on a at, stable and heat-resistant surface,
maintaining a safe distance from the edge of the countertop to
avoid it from falling.
This appliance is intended for domestic use only. It is not
suitable for commercial or industrial use.
Do not immerse the cord, plug, or any non-removable part
of the appliance in water or any other liquid, nor expose the
electrical connections to water. Make sure your hands are dry
before handling the plug.
Do not leave the appliance unattended.
Always turn the appliance off and disconnect it from the
power supply before changing accessories, disassembling
or assembling the product or approaching cutting or moving
elements.
Check the power cord regularly for visible damage. If the cord is
damaged, it must be replaced by the ofcial Technical
Support Service of Cecotec in order to avoid any type of danger.
Do not remove the product’s lid when boiling water or during
operation.
Do not use any accessory that has not been recommended by
Cecotec, as they might cause injuries or damage.
Check the main body, jar, steamer and other components
regularly for damage. If any damage is detected, do not use the
appliance.
Make sure the blades are properly assembled, with the sealing
ring in place, before operating the device.
When cooking with temperature setting, do not lock the
measuring cup. Place it in the unlocked position or remove it
for a better steam release.
If the product stops working unexpectedly, turn it off and
switch it off immediately from the power supply.
Do not try to repair the device by yourself.
The hole on the product’s lid can only be covered with the
measuring cup. Do not use clothing or other objects.
Do not exceed the max mark on the product’s jar.
Make sure the lid is properly placed in its position before
operating and do not open it until the product stops operating.
The product’s surface may reach high temperatures when
operating over 60 ºC, use some type of protection to touch or
move it.
Care shall be taken when handling the product’s blade during
cleaning.
When using the steamer:
Make sure the steamer and the jar are properly
When using it at high speeds, use it only with its lid in the
correct place.
Do not expose any body part to the steam produced during
operation.
Make sure the vents on the product’s back are not covered or
blocked to avoid the appliance from damaging.
The appliance is not intended to be used by children under the
age of 8. It can be used by children over the age of 8, as long as
they are given continuous supervision.
This appliance can be used by children aged 8 and above, and
persons with reduced physical, sensory or mental capabilities
or lack of experience and knowledge, as long as they have
been given supervision or instruction concerning the use of the

2928
ENGLISH ENGLISH
appliance in a safe way and understand the hazards involved.
Children shall not play with the appliance.
Supervise young children to make sure that they do not play
with the appliance. Close supervision is necessary when the
appliance is being used by or near children.
2. PARTS AND COMPONENTS
Fig. 1.
1. Main body
2. Jar
3. Jar lid
4. LCD display
5. Start and pause knob
6. Steamer body
7. Steamer cover
8. Buttery whisk
9. Spatula
10. MamboMix spoon
11. Blades
12. Measuring cup
13. Basket
14. Ceramic jar
3. ACCESSORIES
Jar assembly
The high-quality jar made of stainless steel is dishwasher safe and can be used with all the
cooking functions.
The ceramic jar with highly non-stick properties allows performing perfect results in all of
your preparations, especially the most delicate ones such as béchamel, creamy soups, melted
chocolate, etc.
Warning: The ceramic jar cannot be used with the blades. It is only compatible with the
MamboMix spoon.
Place the lid on the jar, press it down and turn it clockwise until it is properly closed.
The product will not operate unless the lid is not properly closed.
Fig. 2.
Place the lid on the jar, press it down and turn it clockwise until it is properly closed.
The product will not operate unless the lid is not properly closed.
Note: The jar has marks on one of its sides and the effective maximum capacity is 2L. Do not
exceed this quantity to ensure good operation.
Fig.3.
Place the jar on the main body making sure it ts properly in its correct position. If the jar is not
properly placed, the product will not operate.
Blade assembly
Fix the sealing ring on the blades unit, introduce it in the jar and place it on the base’s gap.
Hold the blades unit’s top part rmly and turn the jar upside down. Make sure it is in its correct
position.
Install the xing bracket to the jar’s bottom part and turn it clockwise in order to x the blades
unit to the jar.
To remove the blades unit from the jar, turn the xing bracket anticlockwise. Make sure you
hold the blades unit rmly to avoid it from falling and causing damage.
Fig. 4.
Warnings:
Use a cloth to cover the blades unit before handling them to avoid injuries.
Assemble the xing bracket and the sealing ring properly to avoid food or liquids being cooked
from splattering.
MamboMix spoon
This accessory is designed for kneading, stirring and mixing foods without cutting them.
Remove the blades unit by holding them tightly, turning the jar upside down and turning the
xing bracket anticlockwise.
Warning:
Fig. 5.
Do not use this accessory for speeds over 3 as the jar could vibrate and result in risk.
Warning:
The distance between the MamboMix spoon and the jar’s wall is 1 cm, therefore food might get
stuck. If this happens, the product’s motor will stop operating as a self-protection method. Use
the spatula to mix and remove the stuck food for the appliance to resume the cooking process.
Measuring cup
The measuring cup is used as the product’s lid to prevent splashing and heat loss and is used
to measure food quantity. Its maximum capacity is 150 ml.
When cooking with functions without temperature, place the measuring cup on the cover’s
gap.

3130
ENGLISH ENGLISH
Turn it clockwise to lock it and anticlockwise to open it and take it out.
Fig. 6.
Warnings:
Use this measuring and no other accessory or object to close the jar’s lid.
When cooking without setting temperature (mash, stir or mince), turn the measuring cup
counter clockwise until it xes into place.
When cooking with temperature setting, place the cup in the lid’s whole without locking it in
place. This way, steam will be able to be released safely.
Spatula
Fig. 7.
The spatula is the only tool suitable for stirring food inside the jar, other tools could scratch
and damage the surface.
It cannot be used while the product is operating with the blades or the buttery whisk.
Buttery
Fig. 8.
This accessory works installed on top of the blades unit, this way it helps mixing food and is
not cut by the blades. It helps food mixing and removes lumps.
Install the buttery on the blades unit by matching the shaft’s centre with the buttery’s gap
and push it down.
Warnings:
Do not operate the appliance unless the accessory is xed in its place.
Do not operate it with speeds over 4.
Do not use the buttery at the same time as the spatula.
Do not pour food in while it is operating with this accessory to avoid it from damaging or
getting blocked.
Basket
Fig. 9.
The basket allows carrying out different functions:
Straining, juicer or sauces, dips etc. After blending, cooking or preparing sauce, assemble the
basket in the jar and pour the mixture.
Cooking soft foods, such as pasta or noodles.
Cooking side dishes such as rice or potatoes.
Steamer
The steamer includes 3 parts: a small steamer, a big one and the lid.
Close the steamer with its lid before using it.
Place the steamer on the jar, making sure it ts.
Warnings:
Do not touch or get close to the steamer to avoid burns.
Do not cover the steamer’s holes with any cloth or object. Steam may come out from the
edge or other parts causing risk of burns.
Allow steam to be released through the cover’s middle hole and sides; this way, steam
circulation will be improved, allowing a more even cooking of foods.
4. BEFORE USE
Note: The product will produce a light smell when it is used for the rst time and will disappear
after a few minutes.
This is due to the manufacturing rests and does not affect to its operating.
Take the product out of the box and remove all packaging materials.
Make sure the product is in good conditions. If any sign of visible damage is observed,
contact immediately with our ofcial Technical Support Service.
Place the appliance on a clean, stable and at surface. Do not place it close to the edge,
inside built-in wardrobes or hanging brackets.
Clean the appliance before using it for the rst time.
Connect it to a power supply and press the power switch to turn it on.
The machine will beep and the display will turn on.
5. OPERATION
ON/OFF
Fig. 10.
Use this switch to switch the product on and off.
START/PAUSE
Press the knob on the product’s front part to activate the device.
From the main display, select the desired function.
During the setting process, long-press the knob for 2 seconds to reset all settings.
While it is cooking, press the knob to stop it and long-press it for 2 seconds to reset all settings.
After 10 minutes of no operation, the device will enter standby mode.
Once the desired setting or program has been selected, press the knob to activate it and the
device will start operating.

3332
ENGLISH ENGLISH
During operation, press the knob to pause the cooking process, the display will show “PAUSE”.
You can open the lid, stir or mix food, remove the jar etc. then, place every element back in its
correct position and press the knob again to resume operation. After 10 minutes in “PAUSE”, the
device will automatically turn off.
Use the knob to adjust all settings: time, temperature etc. Turn it clockwise to increase the
value and anticlockwise to decrease it.
TIMER
The display shows 88:88:88, as: hour:minutes:seconds.
Press the timer button once, the minute digits will ash. Turn the knob left or right to adjust the
desired minutes. Press it again to switch to seconds, the seconds digits will ash. Press it again
to switch to hours. Turn the knob left or right to adjust the desired hours.
During operation, press the timer button and the device will start counting down automatically.
If the timer has not been set, the product will operate with the preset times:
Heating (without blending): max. 12 hours.
Blending (speed 1-4): max 1 hour.
Blending (speed 5-10): max. 5 minutes.
SPEED
Press this button to enter speed-setting mode. The speed icon will ash on the display.
Turn the knob left to decrease speed and right to increase it, from level 1 to 10.
If the selected speed is 5-10, the timer will only be set up to 5 minutes. For the rest of the speed
options, 1 hour.
Warning:
When speed changes from 5 to 6 or when the device starts working, the device could emit
some noise. This is completely normal and does not affect the device’s operation.
To crush or chop hard or large quantities of food, select speed 5 at rst and then switch it to 10
to ensure perfect performance.
TEMPERATURE
Press this button to enter temperature-setting mode. The temperature icon will ash on the
display.
Turn the knob left to decrease the temperature and right to increase it, from 37 ºC to 120 ºC. The
selected temperature value will blink until the robot reaches the set temperature.
The temperature indicator will turn on red when the jar reaches very high temperatures, as a
warning to avoid burns.
If the temperature icon is red and you want to operate the machine at a high speed, reduce the
food quantity to below 1.5L.
HEATING POWER
Press this button to enter heat-power setting mode. The heat power icon will ash on the
display.
Turn the knob left to decrease heat power and right to increase it, from level 1 to 10.
Low heat power is suggested to cook fatty foods to avoid it from burning and small quantities
of food, as both require precise temperature and control.
High heating power will cook food much faster.
The heat power function will not activate unless the temperature is set too. It is suggested to
use the default setting for each temperature level.
SCALE
Mambo 8090 includes a built-in kitchen scale. It weights up to 4,999 grams, in a 1-gram
interval.
The robot must be paused to to use the scale tool. Tap the scale icon, the display will show “0
00 0” by default, indicating the scale has been activated. Ingredients are weighed as they are
introduces in the jar, and the display shows the exact value.
If there are ingredients inside the jar already and new ones are introduced, the scale will add
both values and the display will show the total weigh. If food is removed from the jar, the scale
will take away that weight from the total and will display the nal value. The display might
show negative values when food is removed from the inside of the jar.
TARE FUNCTION
To restore the weight displayed and tare the scale with food inside the jar, tap the scale icon.
The display will show “0 00 0” again and the robot will be ready to weight new foods.
To quit the scale menu and return to pause mode, tap any of the robot icons. The display will
show the parameters previously set.
TURBO
When the robot is paused, press this button for the appliance to operate at maximum speed.
The display will show TURBO ashing.
Stop pressing the button for the appliance to stop operating under this function. The machine
will stop automatically.
This function can only operate for 1 minute maximum each time.
Warning: When the TURBO function is activated, the device could emit some noise. This is
completely normal and does not affect the device’s operation.
FUNCTIONS
1. Chop: Chops all kinds of ingredients, from meat or sh to fruit or vegetables. Perfect cuts
assured.
2. Mince: Mince vegetables, meat, spices and crush ice easily in just a few seconds. Perfect
for processing raw ingredients.

3534
ENGLISH ENGLISH
3. Mash: Prepare sauces and creams with perfect texture. Mashes cold or hot ingredients
just by adjusting speed and time to each food type.
4. Grind: Perfect ground level for all your recipes. Grinds coffee, seeds, rice and dry nuts. It
also allows preparing homemade our.
5. Pulverize: Pulverize any type of ingredient until it reaches the nest texture. Prepare icing
sugar or vanilla sugar for confectionery recipes.
6. Grate: Introduce ingredients in the jar, do not exceed halfway the jar, and set speed 10 for
some seconds. Perfect results.
7. Beat: Blend perfect mixtures in the simplest way. Delicious milkshakes, sponge cake
dough, pancakes, crepes, beat eggs and more.
8. Whip: Whip cream or egg whites until stiff thanks to its buttery whisk. This is the ideas
function to turn into a professional cook.
9. Emulsify: This function allows preparing dips, dressings and different types of mayonnaise
easily. Just introduce ingredients in the jar, Mambo will do the rest. Emulsies evenly for
you to nish off your dishes as desired.
10. Mix: Performs homogeneous mixtures with its 10 Mambo speeds. Perfect doughs
obtained in the simplest way.
11. Cook: Cook all types of dishes, such as stews, chicken with almonds or ratatouille, all of
them perfectly textured.
12. Stir: Stirs foodstuffs as it cooks them to ensure uniform heating and to achieve professional
textures. Cook delicious risottos, pasta salads, custard or prepare hot chocolate.
13. Steam: This function is ideal for steaming the healthiest recipes. It allows saving time
thanks to its 2-level steamer, as you can cook more than 1 dish at once.
14. Poach: Progressive and little-by-little cooking, with absolute control over temperature
and time. Perfectly poached without paying attention to the clock. Perfect for obtaining
soft, juicy results.
15. Cont: Process ingredients at low temperatures and obtain irresistible results. This
technique is ideal for cooking all types of foodstuffs, especially meat, hard sh and all
kinds of poultry.
16. Knead: Kneads perfect doughs in one whole piece. Kneading has never been as easy as
with the exclusive MamboMix spoon. It does not cut dough, instead it stretches it out for
perfect results. Enjoy homemade bread and pizzas at any time.
17. Boil: Pour enough water into the jar as to cover all the ingredients, set 120 ºC and heating
power 10, and then choose the desired cooking time depending on the ingredients.
18. Keep warm: Keeps your dishes warm until they are served. After cooking your dishes, just
set the robot at 60 ºC for liquid dishes or 45 ºC for solid dishes for the desired amount of
time.
19. Precision cooking: This function is the widest and most general function out of all. It
allows cooking any type of dish with absolute control over power.
20. Ferment: Use this function to prepare excellent doughs. It nishes off bread or
confectionery recipes in little time, making dough rise quickly just by keeping it in the cup
at 50 ºC and speed 0.
21. Bain Marie: Prepare perfect ans and tender vegetables. To use this function, ll the jar
with 2 litres of water, set no speed, 120 ºC and heating power 10. When it starts boiling,
lower heating power to 9 and introduce the custard moulds until the base touches water.
22. Turbo: Process hard ingredients in the most effective way. Do not ll the jar over halfway
to achieve maximum performance.
23. Slow Mambo: The best risottos and traditional stews with its exclusive MamboMix spoon
and SlowMambo motion. This unique Mambo motion allows stirring and mixing recipes
as if it was done with a real spoon.
24. Juice: Prepare lemonade, juices and multi-fruit shakes in just a few seconds.
25. Stir-fry: Stir-frying ingredients before cooking them, enhances avours and improves
nal results. Stir-fry from garlics to meats. Brown foodstuffs to taste, adjusting power
and time.
26. Reheat: Mambo allows reheating cooked food. If it has cooled down, it was cooked the
day before or has thawed, reheat it at 87 ºC and heating power 7. Just a few minutes and
ready!
27. Yoghurt: Prepare homemade yogurts easily. Just out all the ingredients in the jar and
Mambo will do the rest for you. It keeps the mixture at ferment temperature so that the
next morning yoghurt is ready to cool and eat.
28. Basket: It can be used to steam food inside the jar, and allows preparing up to 4 dishes
at once. It also can be used to allow better evaporation of food or liquids, instead of the
measuring cup.
29. Simmer: The traditional stews that require long-lasting cooking processes can be now
done with Mambo. Slow cooking, long hours, the best avours.
30. Zero speed: Cooking without speed setting allows you to cook without the lid and to stir
it when desired. You can taste food as you cook it, as if it was cooked in a conventional
pot or pan.
Warnings:
Do not open the lid while the blades are operating, the jar’s content could spill out.
Once you have nished mashing, wait at least 10 seconds before opening the lid.
When the product is operated at any speed over 6, make sure the measuring cup is placed
correctly to avoid food from splashing.
Do not activate the mashing function with more than 1.5 L of liquids or hot ingredients.
When operating functions with temperature, do not lock the measuring cup to allow steam to
be released.

3736
ENGLISH ENGLISH
Suggested speed and capacity for each accessory
Accessory Image Function Speed Capacity Operation
time
Stainless
steel blades
Fig. 11 Chop (+) 52L max, chop
1-2 cm
size before
operation
1 min.
Chop (++) 10 2L max, chop
1-2 cm
size before
operation
1 min.
MamboMix
spoon
Fig. 12 Knead dough
for bread,
pizza, etc.
2-3
800 g dough
max.
5-20 min.
Knead dough
for noodles
3400 g dough
max.
3 min.
Buttery Fig. 13 Stir 1-3 2L max. 10 min.
Whisk egg
whites or
cream
4 2L max. 10 min.
Steamer Fig. 14 Steam
vegetables
N/A 3.5L max. 15 min.
Steam meat N/A 3.5L max. 20-30 min.
6. CLEANING AND MAINTENANCE
The stainless-steel jar is dishwasher safe.
Fig.15.
Warning: Assemble the part as shown below, only when the stainless-steel jar is washed in
the dishwasher.
The ceramic jar is not dishwasher safe. Clean it with lukewarm water and soap. Then rinse and
dry it thoroughly. Do not immerse or expose to water the connectors located on the bottom
part of the ceramic jar.
Fig.16.
When cleaning the ceramic jar, be careful not to soak it in water and avoid the bottom part,
where the heating element is, from getting wet.
Clean the food processor after each use.
Turn off and unplug the appliance from the power supply and allow it to cool down before
cleaning it.
Wash the buttery whisk and the rest of the accessories with warm soapy water. Rinse and
dry thoroughly.
Wipe the main body with a clean damp cloth. If food residue remains, dampen the cloth in
warm soapy water before wiping it. Never immerse the main body in water or other liquid.
In order to maintain the good performance of your appliance, check and clean the removable
bottom part of the jar after each use. Wipe it with a soft damp cloth and dry it thoroughly
before using it again.
If the appliance is not going to be used for a long time, unplug it from the power supply and
store it in a cool and safe place.
The blades and the MamboMix spoon are dishwasher safe.
7. TROUBLESHOOTING
Error code Description Possible causes Solution
E1 Safety switch
not xed
The jar or the jar’s lid is
not xed
properly.
Re-assemble the jar
and jar
lid, make sure all the
parts are
assembled properly
and tightly
and try operating it
again.
E2 Temperature
sensor error
The jar is not in its
correct
position or connection
of the
temperature sensor at
the jar
base is damaged.
Re-assemble the jar
and make
sure, it is xed
properly.

3938
ENGLISH ENGLISH
E3 The motor is
blocked
There is too much food
inside
the jar.
Remove some food
from inside
the jar or cut the food
to smaller
pieces and restart the
machine.
E4 The temperature
is too high
There is no or very
little food in
the jar and the set
temperature is
too high for too much
time.
Add food in the jar.
E5 The motor’s
temperature is
too high
The machine has been
operating
with too much
quantity of food
for too much time.
Stop operating the
machine and
allow it to cool down
before
restarting it again.
E6 The change in
speed could
not be done
successfully
Speed change
between low level
(1-5) and high level
(6-10) was
blocked.
Remove the jar, turn
the xing
bracket manually and
x the jar
and restart.
E7 & E8 Please, contact the
Technical
Support Service of
Cecotec at
+96 321 07 28.
E12 Scale measure-
ment error
The maximum measu-
rement value has been
exceeded.
Remove weight
from the scale until
it reaches a value
below 4.999 g.
8. TECHNICAL SPECIFICATIONS
Model: Mambo 8090
Product reference: 04131
1700 W (Motor 700 W Heating power 1000 W)
200-240 V~ 50/60 Hz
Made in China | Designed in Spain
9. DISPOSAL OF OLD ELECTRICAL APPLIANCES
The European directive 2012/19/EU on Waste Electrical and Electronic
Equipment (WEEE), species that old household electrical appliances must
not be disposed of with the normal unsorted municipal waste. Old appliances
must be collected separately, in order to optimize the recovery and recycling
of the materials they contain and reduce the impact on human health and
the environment.
The crossed out “wheeled bin” symbol on the product reminds you of your
obligation to dispose of the appliance correctly. If the product has a built-in battery or uses
batteries, they should be removed from the appliance and disposed of appropriately.
Consumers must contact their local authorities or retailer for information concerning the
correct disposal of old appliances and/or their batteries.
10. TECHNICAL SUPPORT SERVICE AND WARRANTY
This product is under warranty for 2 years from the date of purchase, as long as the proof
of purchase is submitted, the product is in perfect physical condition, and it has been given
proper use, as explained in this instruction manual.
The warranty will not cover the following situations:
• The product has been used for purposes other than those intended for it, misused, beaten,
exposed to moisture, immersed in liquid or corrosive substances, as well as any other fault
attributable to the customer.
• The product has been disassembled, modied, or repaired by persons, not authorised by the
ofcial Technical Support Service of Cecotec.
• Faults deriving from the normal wear and tear of its parts, due to use.
The warranty service covers every manufacturing defects of your appliance for 2 years, based
on current legislation, except consumable parts. In the event of misuse, the warranty will not
apply.
If at any moment you detect any problem with your product or have any doubt, do not hesitate
to contact Cecotec Technical Support Service at +34 963 210 728.

4140
•Переконайтеся, що напруга мережі відповідає значенню,
надрукованому на табличці пристрою і що розетка
заземлена.
•Цей пристрій призначений тільки для домашнього
використання.
•Встановлюйте пристрій на суху, стійку, плоску,
термостійку поверхню, подалі від країв, для забезпечення
стійкості пристрою.
•Не занурюйте шнур, вилку або будь-яку незнімну частину
пристрою в воду або будь-яку іншу рідину, а також не
піддавайте впливу води електричні з'єднання пристрою.
Переконайтеся, що ваші руки сухі, перш ніж брати в руки
вилку або включати пристрій.
•Регулярно перевіряйте шнур живлення на наявність
видимих пошкоджень. Якщо шнур пошкоджений, його
необхідно замінити в уповноваженому сервісному центрі
Cecotec.
•Не залишайте пристрій без нагляду
•Використання аксесуарів, які не рекомендовані компанією
Cecotec, можуть призвести до пожежі, ураження
електричним струмом або травми людей.
•Вимикайте свій пристрій перед тим, як знімати або
встановлювати будь-який аксесуар.
•Регулярно перевіряйте основний корпус, чашу, пароварку
та інші компоненти на наявність пошкоджень. Якщо
виявлено якесь ушкодження, не використовуйте пристрій.
Перед експлуатацією пристрою переконайтеся, що ніж з
кільцем ущільнювача правильно встановлені
При приготуванні їжі з температурними параметрами не
закривайте мірну склянку пристрою. Залиште її у
відкритому положенні або зніміть для кращого виходу
пари. Якщо пристрій зупиняється, працює в незвичайному
режимі, вимкніть його і негайно відключіть від джерела
живлення.
Не намагайтеся ремонтувати пристрій самостійно.
Отвір на кришці пристрою можна закривати тільки мірною
чашою. Не використовуйте для цього одяг або інші
предмети.
Не перевищуйте максимальну позначку на чаші пристрою.
Перед увімкненням пристрою переконайтеся, що кришка
встановлена правильно і поки пристрій не перестане
працювати не знімайте її.
Поверхня пристрою може нагріватися при роботі на
температурних режимах вище 60 ° C, використовуйте
захисні елементи будь-якого типу для контакту з
пристроєм або його переміщення.
Будьте обережні при поводженні з ножами під час
очищення пристрою.
При використанні пароварки:
Переконайтеся, що пароварка і чаша правильно
встановлені
При використанні пристрою на високих швидкостях,
накривайте його кришкою.
Не піддавайте будь-яку частину тіла впливу пари, що
утворюється під час роботи пристрою.
Переконайтеся, що вентиляційні отвори на задній панелі
виробу не закриті і не заблоковані, щоб не пошкодити
пристрій.
• Пристрій не призначений для використання дітьми віком
до 8 років, діти старше 8 років, можуть використовувати
пристрій якщо вони знаходяться під постійним наглядом
дорослих.
УКРАЇНСЬКА
1. ІНСТРУКЦІЯ З ТЕХНІКИ БЕЗПЕКИ
Уважно прочитайте цю інструкцію перед використанням
пристрою. Збережіть цю інструкцію для використання в
майбутньому або для нових користувачів.
УКРАЇНСЬКА
Other manuals for Mambo 9090
1
This manual suits for next models
1
Table of contents
Languages:
Other cecotec Food Processor manuals

cecotec
cecotec Mambo 11090 User manual

cecotec
cecotec Mambo 12090 User manual

cecotec
cecotec Mambo Touch 04345 User manual

cecotec
cecotec Mambo Black User manual

cecotec
cecotec Mambo 9090 User manual

cecotec
cecotec Mambo 04103 User manual

cecotec
cecotec Mambo 9590 User manual

cecotec
cecotec Mambo 12090 User manual

cecotec
cecotec IronMix User manual

cecotec
cecotec Mambo 10070 User manual