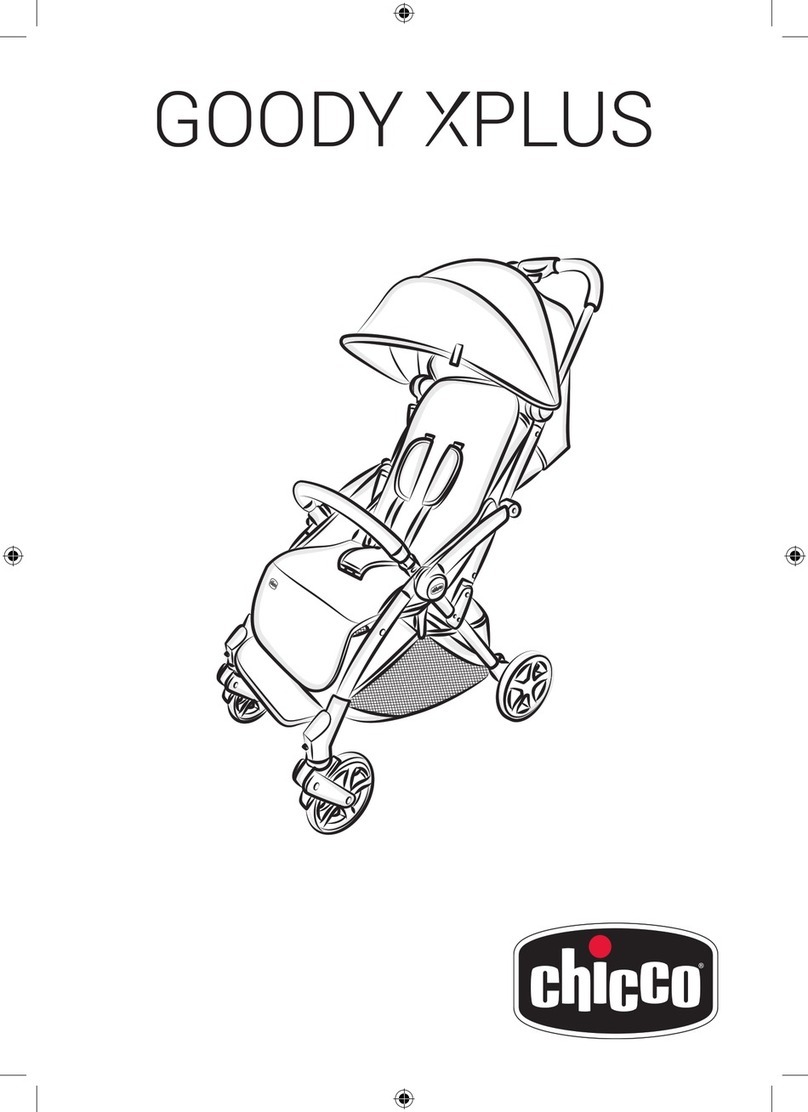
Chicco Stroll'in'2 User manual

TM

2
3

2
3
1A
3
1B 2
ABCD
4
5A

4
5
5B
5C 6A
6B 7A
6C
7B 8

4
5
9A 9B
10B 11
10A
12

6
7
13 14
15A
15B
16B 18A
16A
17
18B
18C 18D

6
7
18E 18G
18F
19A
19B
20B 22
20A
21
22A 22B 23

8
9
Stroll’in’2
Il passeggino Stroll’in’2 è adatto per l’utilizzo da parte di due
bambini. È dotato di una seduta anteriore fronte strada a cui
si può agganciare anche il Seggiolino Auto CHICCO KEYFIT e
di una postazione posteriore utilizzabile nella duplice confi-
gurazione: pedana (utilizzabile da un bambino in posizione
eretta) o seduta.
IMPORTANTE - CONSERVARE
QUESTE ISTRUZIONI PER RIFERI-
MENTI FUTURI.
ATTENZIONE: PRIMA DELL’USO RI-
MUOVERE ED ELIMINARE EVENTUA-
LI SACCHETTI DI PLASTICA E TUTTI
GLI ELEMENTI FACENTI PARTE DELLA
CONFEZIONE DEL PRODOTTO O CO-
MUNQUE TENERLI LONTANI DALLA
PORTATA DEI BAMBINI.
AVVERTENZE
• ATTENZIONE: Non lasciare mai il
vostro bambino incustodito.
• ATTENZIONE: Prima dell’ uso as-
sicurarsi che tutti i meccanismi di
bloccaggio siano correttamente
agganciati.
• ATTENZIONE: Per evitare lesioni
o ferimenti assicurarsi che il vostro
bambino sia a debita distanza du-
rante le operazioni di apertura e
chiusura del prodotto.
• ATTENZIONE: Non lasciare che il
vostro bambino giochi con questo
prodotto.
• ATTENZIONE: Utilizzare sempre la
cintura di sicurezza.
• L’uso di spartigambe e cinture di sicu-
rezza è indispensabile per garantire
la sicurezza del bambino. Utilizzare
sempre le cinture di sicurezza con-
temporaneamente allo spartigambe.
• ATTENZIONE: Prima dell’ uso con-
trollare che i meccanismi di aggan-
cio della seduta anteriore, seduta
posteriore e Seggiolino Auto siano
correttamente agganciati.
• ATTENZIONE: Questo prodotto non
è adatto per correre o pattinare.
• L’uso della seduta anteriore è con-
sentita a bambini di età compresa
tra 6 e 36 mesi, sino ad un massimo
di 15 kg di peso.
• ATTENZIONE: Questa seduta non
è adatta per bambini di età inferiore
a 6 mesi.
• Questo passeggino è adatto a bam-
bini di età compresa tra 0 e 6 mesi
e peso di 13 kg, SOLO QUANDO in-
stallato il Seggiolino Auto CHICCO
KEYFIT sulla seduta principale.
• A T T E N Z I O N E : La seduta posteriore
è adatta a partire dai 36 mesi di età
(maggiore 15 kg) fino a 25 kg.
• ATTENZIONE: Il bambino posiziona-
to sulla seduta posteriore, deve esse-
re seduto rivolto verso il genitore che
spinge il passeggino. È consentito
solo sedersi sulla seduta posteriore,
vietato stare in piedi o in ginocchio.
• Solo il seggiolino Auto CHICCO KEYFIT
può essere agganciato al passeggino
STROLL’IN’2.
• Il dispositivo di frenatura deve essere
sempre inserito quando si posiziona
e rimuove il bambino.
• Utilizzare il dispositivo frenante ogni
qualvolta si sosti.
• Non lasciare mai il passeggino su un
piano inclinato, con dentro il bambi-
no, anche se con i freni azionati.
• Non sovraccaricare il cestello. Peso
massimo 3 kg.
• Ogni peso attaccato ai manici e/o
sullo schienale e/o sui lati del pas
-
seggino potrebbe compromettere
la stabilita del passeggino.
• Non sovraccaricare il contenitore pre-

8
9
sente sul maniglione. Peso massimo
1 kg.
• Non sovraccaricare manicotto / vas-
soio bambino. Peso massimo 1 kg.
• Non trasportare più di due bambini
alla volta.
• Non applicare al passeggino acces-
sori, parti di ricambio o componenti
non fornite o approvate dal costrut-
tore.
• Non usare il prodotto se alcune parti
sono rotte, strappate o mancanti.
• Con il Seggiolino Auto installato
sul passeggino, questo veicolo non
sostituisce una culla o lettino. Se il
bambino necessita di dormire, allora
dovrebbe essere collocato in una
navicella, culla o lettino.
• ATTENZIONE: La pedana posteriore
deve essere utilizzata da un bambi-
no di almeno 36 mesi, avente buon
equilibrio e coordinazione, peso mas-
simo 25 kg.
• ATTENZIONE: Il bambino deve ave-
re la capacità di usare la pedana in
modo sicuro.
• ATTENZIONE: Non mettere liquidi
caldi nel manicotto paracolpi / vas-
soio bambino.
• ATTENZIONE: Non lasciare bottiglie
o biberon in vetro nel manicotto pa-
racolpi/vassoio bambini.
• ATTENZIONE: Quando si apre o
chiude il passeggino, assicurarsi che il
vostro bambino o altri bambini siano
a distanza di sicurezza. Assicurarsi
che durante queste operazioni, le
parti in movimento del passeggino
non vengano in contatto con il vo-
stro bambino.
• ATTENZIONE: Il manicotto para-
colpi/vassoio bambino deve essere
rimosso per utilizzare il Seggiolino
Auto CHICCO KEYFIT.
• ATTENZIONE: Verificare sempre che
il Seggiolino Auto CHICCO KEYFIT sia
agganciato in modo sicuro al telaio
del passeggino tirandolo verso l’alto.
• ATTENZIONE: Assicurarsi sempre
che le cinture di sicurezza siano al-
lacciate quando il bambino è posi-
zionato sul Seggiolino Auto CHICCO
KEYFIT installato sul passeggino.
• ATTENZIONE: Utilizzare questo pro-
dotto solo per trasportare neonati
che rispettano i limiti di peso ed età
indicate dal Seggiolino Auto CHIC-
CO KEYFIT. Per ulteriori avvertenze e
istruzioni prima di utilizzare questo
prodotto, fare riferimento al manuale
del Seggiolino Auto.
• ATTENZIONE: Il Seggiolino Auto
CHICCO KEYFIT dovrà essere installato
nel telaio solo rivolto verso il posterio-
re. Il bambino dovrà guardarti mentre
spingi il passeggino.
• Vericare prima dell’assemblaggio
che il prodotto e tutti i suoi com-
ponenti non presentino eventuali
danneggiamenti dovuti al trasporto,
in tal caso il prodotto non deve es-
sere utilizzato e dovrà essere tenuto
lontano dalla portata dei bambini.
• Nelle operazioni di regolazione, as-
sicurarsi che le parti mobili del pas-
seggino non vengano in contatto
con il corpo del bambino.
• Assicurarsi che gli utilizzatori del pas-
seggino siano a conoscenza dell’e-
satto funzionamento dello stesso.
• Il prodotto deve essere assemblato
esclusivamente da un adulto.
• Questo prodotto deve essere utiliz-
zato esclusivamente da un adulto.
• Per evitare rischi di strangolamento,
non dare al bambino e non riporre

10
11
vicino al bambino oggetti muniti di
corde.
• Non usare il passeggino sulle scale o
sulle scale mobili: si potrebbe perdere
improvvisamente il controllo.
• Prestare attenzione quando si sale e
scende un gradino o il marciapiede.
• Se lasciate il passeggino esposto al
sole per molto tempo, aspettate che
si raffreddi prima di mettervi il bam-
bino. L’esposizione prolungata al sole
può causare cambiamenti di colore
nei materiali e tessuti.
• Evitare il contatto del passeggino con
acqua salina per prevenire la forma-
zione di ruggine.
• Non utilizzare il passeggino in spiaggia.
• Quando non in uso, il passeggino
va tenuto lontano dalla portata dei
bambini.
LISTA DEI COMPONENTI
• Telaio passeggino
• 2 ruote anteriori
• 2 ruote posteriori
• Asse posteriore
• Kit installazione ruote posteriori (2 rondelle, 2 mollette, 2 tappi)
• Manicotto paracolpi/vassoio bambino
• Capotte
• Kit comfort (spallacci e spartigambe imbottiti)
• Tasca portaoggetti
• Mantellina parapioggia
CONSIGLI PER LA PULIZIA E LA MANUTENZIONE
ATTENZIONE: Questo prodotto necessita di regolare manu-
tenzione periodica. Le operazioni di pulizia e manutenzione
devono essere effettuate solo da un adulto.
PULIZIA
Pulire le parti in tessuto mediante una spugna umida e del
sapone neutro. Il passeggino è sfoderabile (fare riferimento
al capitolo “Vestizione/svestizione seduta”). Per la pulizia delle
parti tessili riferirsi alle etichette di lavaggio. Di seguito sono
riportati i simboli di lavaggio ed i relativi significati:
Lavare a mano in acqua fredda
Non candeggiare
Non asciugare meccanicamente
Non stirare
Non lavare a secco
Pulire le parti in plastica periodicamente con un panno umido,
non utilizzare solventi o prodotti abrasivi. Asciugare le parti
in metallo, dopo un eventuale contatto con acqua, al fine di
evitare il formarsi di ruggine.
MANUTENZIONE
Lubrificare le parti mobili, in caso di necessità, con olio secco
al silicone. Controllare periodicamente lo stato di usura delle
ruote e tenerle pulite da polvere e sabbia. Assicurarsi che tutte
le parti in plastica che scorrono sui tubi in metallo siano pulite
da polvere, sporco e sabbia, al fine di evitare attriti che possano
compromettere il corretto funzionamento del passeggino.
Tenere il passeggino in un posto asciutto.
APERTURA E PRIMO MONTAGGIO
1. Aprire completamente il telaio del passeggino (Fig. 1A-1B)
fino ad udire il clack di completa apertura.
2. Inserire i perni delle ruote anteriori nelle apposite sedi del telaio
(Fig. 2). Ripetere l’operazione anche per l’altra ruota anteriore.
ATTENZIONE: Prima dell’ uso accertarsi che le ruote siano fissate
correttamente, tirandole verso il basso.
3. Per montare ciascuna ruota sull’asse posteriore inserire nell’or-
dine, vedi Fig. 3:
• ruota (A)
• rondella (B)
• molletta (C)
• tappo (D)
Prestare attenzione ad inserire la molletta di fissaggio come
indicato in figura: il lato diritto deve essere inserito nel foro
del perno. Ripetere quest’operazione anche per l’altra ruota
utilizzando la stessa sequenza.
4. Inserire l’asse posteriore con le ruote montate negli appositi
alloggiamenti del telaio no ad udire un “click” di avvenuto
montaggio (Fig. 4).
ATTENZIONE: prima dell’ uso accertarsi che le ruote e l’asse
posteriore siano fissati correttamente.
5. Per completare il montaggio è necessario agganciare la
piattaforma all’asse posteriore (Fig. 5A-5B), ad operazione
conclusa la piattaforma risulterà installata come in Figura 5C.
6. Per fissare la capotta agganciare le clip di plastica ai tubi
del telaio facendo combaciare i fori delle stesse clip con i
relativi perni presenti sui tubi (Fig. 6A-6B). Per rimuovere
la capotta, è sufficiente far ruotare verso l’esterno le clip di
aggancio (Fig. 6C).
7. Inserire il manicotto paracolpi/vassoio bambino nelle appo-
site sedi fino ad udire il clack di avvenuto aggancio (Fig. 7A).
Per rimuovere il manicotto / vassoio bambino è suciente
premere i due tasti laterali e tirare verso di sé (Fig. 7B).
ATTENZIONE: Il manicotto paracolpi / vassoio bambino non
deve essere utilizzato per sollevare il prodotto con il bambino
all’interno di esso.
CINTURE DI SICUREZZA
Il passeggino presenta sulla seduta anteriore un sistema di ritenuta
a cinque punti di ancoraggio costituito da due spallacci, una cin-
tura girovita ed uno spartigambe con fibbia, mentre, sulla seduta
posteriore, un sistema di ritenuta a 3 punti costituita da una cintura
girovita ed uno spartigambe con fibbia.
8. Verificare che gli spallacci siano all’altezza ideale per il vostro
bambino: in caso contrario regolarne l’altezza (Fig. 8).
9. Dopo aver adagiato il bambino sulla seduta anteriore, infilare
le 2 forchette nella fibbia (Fig. 9A) e regolare, se necessario,
la larghezza del girovita agendo sui pulsanti esterni della
fibbia. Per sganciare la cintura girovita, premere il pulsante
centrale (Fig. 9B).
10. Dopo aver adagiato il secondo bambino sulla seduta po-
steriore, regolare la cinghia girovita agendo sui pulsanti
esterni della fibbia (Fig.10A). Per sganciare la cintura girovita,
premere il pulsante centrale (Fig. 10B).
ATTENZIONE: Per garantire la sicurezza del bambino è indispen-
sabile utilizzare contemporaneamente sparti-gambe, cintura
girovita e cinture di sicurezza.
ATTENZIONE: Dopo la rimozione delle cinture di sicurezza (es.
per il lavaggio), assicurarsi che le cinture siano riassemblate
30° C
30° C

10
11
correttamente usando i punti di ancoraggio. Le cinghie devono
essere nuovamente regolate.
REGOLAZIONE SCHIENALE
11. Lo schienale può essere regolato, mediante la leva posta sul
retro, in due posizioni. Per inclinare lo schienale è necessario
tirare la leva verso l’alto e spingere indietro lo schienale (Fig.
11). Viceversa, per alzare lo schienale, è necessario sollevare
la leva o spingere in avanti lo stesso.
ATTENZIONE: Con il peso del bambino le operazioni possono
risultare più dicoltose.
FRENI POSTERIORI
Le ruote posteriori sono dotate di freni gemellati che permet-
tono di operare contemporaneamente su entrambe le ruote
posteriori agendo su un solo pedale.
12. Per frenare il passeggino, premere verso il basso uno dei due
pedali posti al fianco delle ruote posteriori, come mostrato
in Figura 12.
13. Per sbloccare il sistema frenante, spingere verso l’alto uno
dei due pedali posti al fianco delle ruote posteriori, come
mostrato in Figura 13.
CAPOTTA PARASOLE
ATTENZIONE: L’operazione di fissaggio della capotta deve
avvenire su entrambi i lati del passeggino. Verificare il corretto
bloccaggio della stessa (vedere punto 6).
14. Per aprire la capote, spingere in avanti l’archetto anteriore
(Fig. 14)
15. Per una maggior protezione dai raggi solari è possibile in-
crementare la superfice tessile della capote, estendendo le
alette e lo spicchio tessile centrale ripiegati sotto la capote
(Fig. 15A-15B).
CHIUSURA PASSEGGINO
ATTENZIONE: Effettuare questa operazione facendo attenzione
che il bambino ed eventuali altri bambini siano a debita distanza.
Assicurarsi che in queste fasi le parti mobili del passeggino
non vengano a contatto con il corpo del bambino. Prima della
chiusura, verificare che il cestello portaoggetti sia vuoto e che
la capotta sia chiusa.
Il passeggino è dotato di comando di chiusura utilizzabile con
una sola mano.
16. Per chiudere il passeggino, raggiungere il dispositivo di
chiusura (Fig. 16A), movimentare il cursore “A” verso l’esterno
e sollevare contemporaneamente il tubo (Fig.16B).
17. Una volta chiuso, il passeggino rimane in piedi da solo (Fig. 17).
SVESTIZIONE E VESTIZIONE DEL PASSEGGINO
18. Per rimuovere il vestito dalla seduta anteriore, occorre ab-
bassare completamente lo schienale azionando la leva
e spingendolo in avanti (Fig. 18A), sfilare le tre alette in
plastica laterali (lato sinistro e lato destro) dalla struttura
dello schienale (Fig. 18B) e svestirlo dal bordo superiore
dello schienale (Fig. 18C). Sganciare i bottoni automatici
posti sotto la seduta e svincolare il tessile dalla seduta (Fig.
18D). Sfilare poi le cinture di sicurezza facendole passare
attraverso le asole presenti sullo schienale e sulla seduta
(Fig. 18E-18F-18G).
19. Per rimuovere il tessile della seduta posteriore, occorre far
passare le cinghie girovita e spartigambe nelle asole come
indicato nelle Figure 19A e 19B.
Per vestire di nuovo il passeggino, occorre ripetere le operazioni
appena descritte in senso inverso, riassemblare le cinture di
sicurezza facendole passare nelle asole tessili.
AGGANCIO SEGGIOLINO AUTO CHICCO KEYFIT
Sul passeggino può essere installato il Seggiolino Auto CHICCO
KEYFIT.
ATTENZIONE: Il Seggiolino Auto CHICCO KEYFIT può essere
installato soltanto in posizione fronte genitori.
20. Per installare il Seggiolino Auto CHICCO KEYFIT sul passeg-
gino, occorre rimuovere il manicotto paracolpi/vassoio ed
abbassare completamente lo schienale (Fig. 20A). Posizionare
il Seggiolino Auto come indicato in Figura 20B sino ad udire
un doppio clack di avvenuto aggancio.
ATTENZIONE: Accertarsi dell’avvenuto aggancio tirando verso
l’alto il Seggiolino Auto.
21. Per rimuovere il Seggiolino Auto dal telaio del passeggino,
occorre azionare la leva posta sul Seggiolino Auto e sollevare
lo stesso (Fig. 21).
PEDANA POSTERIORE
Sul passeggino, posteriormente, è presente
una pedana per il trasporto di un secondo
bambino in posizione eretta, utilizzabile solo quando la seduta
posteriore è completamente sollevata.
22. Per sollevare la seduta è sufficiente ruotarla verso l’alto
(Fig. 22).
ATTENZIONE: Quando si spinge il passeggino, non permettere
al bambino di stare sulla pedana rivolto all’indietro. Non lasciare
che il bambino rimanga in piedi sul sedile. Per evitare la caduta,
il bambino deve tenere le maniglie e tenere entrambi i piedi
sulla pedana (Fig. 22A-22B).
MANTELLINA PARAPIOGGIA
23. Per fissare la mantellina parapioggia, far passare i lacci intorno
ai tubi del passeggino in corrispondenza delle posizioni indi-
cate in Figura 23 (le operazioni vanno eseguite su entrambi
i lati del passeggino). A fine utilizzo, lasciar asciugare all’aria
la mantellina qualora si bagnasse.
ATTENZIONE: La mantellina parapioggia non può essere utilizza-
ta sul passeggino sprovvisto di capotta, poiché può provocare
il soffocamento del bambino.
ATTENZIONE: Quando la mantellina parapioggia è montata sul
passeggino non lasciare mai lo stesso esposto al sole con dentro
il bambino per il rischio di surriscaldamento.
GARANZIA
Il prodotto è garantito contro ogni difetto di conformità in
normali condizioni di utilizzo secondo quanto previsto dalle
istruzioni d’uso. La garanzia non sarà applicata, dunque, in caso
di danni derivanti da un uso improprio, usura o eventi accidentali.
Per la durata della garanzia sui difetti di conformità si rinvia alle
specifiche previsioni delle normative nazionali applicabili nel
paese d’acquisto, dove previste.

12
13
Stroll’in’2
The Stroll’in’2 stroller can be used to transport two children.
It has a forward facing front seat to which the CHICCO KEYFIT
car seat can be attached and a space at the rear that can be
used in two ways: as a footboard (by a standing child) or a
seat.
IMPORTANT - KEEP THESE IN-
STRUCTIONS FOR FUTURE REF-
ERENCE.
WARNING: BEFORE USING, REMOVE
AND DISPOSE OF ALL PLASTIC BAGS
AND PACKAGING MATERIALS AND
KEEP THEM OUT OF REACH OF CHIL-
DREN.
WARNINGS
• WARNING: Never leave your child
unattended.
• WARNING: Ensure that all the lock-
ing devices are engaged before use.
• WARNING: To avoid injury, ensure
that your child is kept away when
unfolding and folding this product.
• WARNING: Do not let your child
play with this product.
• WARNING: Always use the restraint
system.
• The use of the crotch strap and safety
harness is necessary to guarantee the
safety of your child. Always use the
safety harness in combination with
the crotch strap.
• WARNING: Check that the front
seat, rear seat and car seat attach-
ment devices are correctly engaged
before use.
• WARNING: This product is not suit-
able for running or skating.
• The front seat is designed for chil-
dren aged between 6 and 36 months
weighing a maximum of 15 kg.
• WARNING: This seat unit is not suit-
able for children under 6 months.
• This stroller is suitable for children
from 0 to 6 months weighing a
maximum of 13kg, ONLY WHEN the
CHICCO KEYFIT car seat is installed
on the main seat.
• W A R N I N G : The rear seat is suita-
ble for children from 36 months and
above (over 15kg) up to a maximum
weight of 25kg.
• WARNING: The child on the rear
seat must face the parent pushing
the stroller. Children may only sit on
the rear seat; they must not stand or
kneel on it.
• Only the CHICCO KEYFIT car seat
can be attached to the STROLL’IN’2
stroller.
• The parking device shall be engaged
when placing and removing the chil-
dren.
• Always apply the brakes when the
stroller is stationary.
• Never leave the stroller on a sloped
surface, with a child inside, even with
the brakes engaged.
• Do not overload the storage basket.
Maximum weight 3 kg.
• Any load attached to the handle and/
or on the backrest and/or the sides
of the vehicle will affect the stability
of vehicle.
• Do not overload the container on
the handle. Maximum weight 1 kg.
• Do not overload the bumper bar /
children’s tray. Maximum weight 1 kg.
• Do not carry more than two children
at a time.
• Do not use accessories, replacement
parts, or any component not sup-
plied or approved by the manufac-
turer / distributor.
• Do not use this product if any part
is broken, torn or missing.
• For car seats used in conjunction
with a chassis, this vehicle does not
replace a cot or a bed. Should your
child need to sleep, then it should
be placed in a suitable pram body,
cot or bed.
• WARNING: The rear footboard must
only be used by children of at least
36 months with good balance and
coordination and weighing a maxi-
mum of 25 kg.
• WARNING: Your child must be able
to use the footboard safely.
• WARNING: Do not place hot liquids
on the bumper bar/children’s tray.
• WARNING: Do not leave glass bot-
tles or feeding bottles on the bump-
er bar/children’s tray.
• WARNING: Check that your child
or other children are at a safe dis-
tance when opening and closing
the stroller. Ensure that during these
operations the moving parts of the
stroller do not come into contact
with your child.
• WARNING: The bumper bar/chil-
dren’s tray must be removed to use
the CHICCO KEYFIT car seat.
• WARNING: Always check that the
CHICCO KEYFIT car seat is securely
attached to the frame of the stroller
by pulling it upwards.
• WARNING: Always check that the
safety harnesses are fastened when
your child is sat in the CHICCO KEYFIT
car seat installed on the stroller.
• WARNING: Use this product only
to transport babies that meet the
weight and age limits indicated by
the CHICCO KEYFIT car seat. For fur-
ther warnings and instructions be-
fore using this product, refer to the

12
13
able for children under 6 months.
• This stroller is suitable for children
from 0 to 6 months weighing a
maximum of 13kg, ONLY WHEN the
CHICCO KEYFIT car seat is installed
on the main seat.
• W A R N I N G : The rear seat is suita-
ble for children from 36 months and
above (over 15kg) up to a maximum
weight of 25kg.
• WARNING: The child on the rear
seat must face the parent pushing
the stroller. Children may only sit on
the rear seat; they must not stand or
kneel on it.
• Only the CHICCO KEYFIT car seat
can be attached to the STROLL’IN’2
stroller.
• The parking device shall be engaged
when placing and removing the chil-
dren.
• Always apply the brakes when the
stroller is stationary.
• Never leave the stroller on a sloped
surface, with a child inside, even with
the brakes engaged.
• Do not overload the storage basket.
Maximum weight 3 kg.
• Any load attached to the handle and/
or on the backrest and/or the sides
of the vehicle will affect the stability
of vehicle.
• Do not overload the container on
the handle. Maximum weight 1 kg.
• Do not overload the bumper bar /
children’s tray. Maximum weight 1 kg.
• Do not carry more than two children
at a time.
• Do not use accessories, replacement
parts, or any component not sup-
plied or approved by the manufac-
turer / distributor.
• Do not use this product if any part
is broken, torn or missing.
• For car seats used in conjunction
with a chassis, this vehicle does not
replace a cot or a bed. Should your
child need to sleep, then it should
be placed in a suitable pram body,
cot or bed.
• WARNING: The rear footboard must
only be used by children of at least
36 months with good balance and
coordination and weighing a maxi-
mum of 25 kg.
• WARNING: Your child must be able
to use the footboard safely.
• WARNING: Do not place hot liquids
on the bumper bar/children’s tray.
• WARNING: Do not leave glass bot-
tles or feeding bottles on the bump-
er bar/children’s tray.
• WARNING: Check that your child
or other children are at a safe dis-
tance when opening and closing
the stroller. Ensure that during these
operations the moving parts of the
stroller do not come into contact
with your child.
• WARNING: The bumper bar/chil-
dren’s tray must be removed to use
the CHICCO KEYFIT car seat.
• WARNING: Always check that the
CHICCO KEYFIT car seat is securely
attached to the frame of the stroller
by pulling it upwards.
• WARNING: Always check that the
safety harnesses are fastened when
your child is sat in the CHICCO KEYFIT
car seat installed on the stroller.
• WARNING: Use this product only
to transport babies that meet the
weight and age limits indicated by
the CHICCO KEYFIT car seat. For fur-
ther warnings and instructions be-
fore using this product, refer to the
car seat manual.
• WARNING: The CHICCO KEYFIT car
seat must only be installed on the
frame facing the rear. Your child must
watch you as you push the stroller.
• Before assembly, ensure that the
product and its components have
not been damaged during transpor-
tation. In this case, do not use and
keep out of reach of children.
• Ensure that during these operations
the moving parts of the stroller do
not come into contact with your
child.
• Make sure that the person using the
stroller knows how to use it safely.
• The product must only be assembled
by an adult.
• This product must only be used by
an adult.
• To avoid all risk of suocation, never
give children objects with cords or
strings attached, or leave them close
to such objects.
• Never use the stroller on staircases or
escalators: you could suddenly loose
control of it.
• Always pay attention when going
up and down steps or pavements.
• If the stroller has been exposed di-
rectly to sunlight for a long time, leave
it to cool down before placing your
child in it. Prolonged exposure to
direct sunlight may cause the colour
of the materials and fabric to fade.
• Prevent the stroller from coming into
contact with salty water. It may cause
rusting.
• Do not use the stroller on the beach.
• When not in use, the stroller should
be kept out of reach of children.
LIST OF COMPONENTS
• Stroller frame
• 2 front wheels

14
15
• 2 rear wheels
• Rear axle
• Rear wheel installation kit (2 washers, 2 spring pins, 2 plugs)
• Bumper bar/children’s tray
• Hoods
• Comfort kit (padded shoulder and crotch straps)
• Carry-all bag
• Rain cover
TIPS FOR CLEANING AND MAINTENANCE
WARNING: This product requires regular periodical maintenance.
The cleaning and maintenance of the product must only be
carried out by an adult.
CLEANING
Clean the fabric parts using a wet sponge and neutral soap.
The lining can be removed (please refer to the section “Fitting/
removing the seat lining”). Please refer to the care labels for
instructions on how to clean the fabric parts. Below are the
cleaning symbols and their meanings:
Wash by hand with cold water.
Do not bleach
Do not tumble dry
Do not iron
Do not dry clean
Routinely wipe clean plastic parts with a soft damp cloth. Never
use solvents or abrasive detergents. Always dry the metal parts
to prevent the formation of rust if the stroller has come into
contact with water.
MAINTENANCE
If necessary, lubricate the moving parts with dry silicone lubri-
cant. Regularly check the condition of the wheels and clean
off all dust and sand. To avoid friction that may compromise
the correct functioning of the stroller, make sure that all plastic
parts that slide on the metal tubes are free of dust, dirt and
sand. Keep the stroller in a dry place.
OPENING AND FIRST ASSEMBLY
1. Completely open the stroller frame (Fig. 1A-1B) until you
hear a click.
2. Insert the front wheel pins in the dedicated slots on the frame
(Fig. 2). Repeat the operation for the other front wheel.
WARNING: Before using, ensure that the wheels are correctly
attached by pulling them downwards.
3. To assemble the wheels on the rear axle, fit the following
parts in the correct order, see Fig. 3:
• wheel (A)
• washer (B)
• spring pin (C)
• plug (D)
Make sure you insert the fastening spring pin as indicated in the
diagram: the straight side must be inserted in the hole in the
pin. Repeat this operation also for the other wheel, following
the same sequence.
4. Fit the rear axle with the wheels mounted in the relevant
slots in the frame until you hear it click into place (Fig. 4).
WARNING: Before using ensure that the wheels and rear axle
are correctly attached.
5. To complete assembly attach the platform to the rear axle
(Fig. 5A-5B). When concluded, the platform will be assembled
as in Figure 5C.
6. To fit the hood, fasten the plastic clips to the frame’s tubes
matching the holes in the clips with the pins on the tubes
(Fig. 6A-6B). To remove the hood, turn the fastening clips
outwards (Fig. 6C).
7. Insert the bumper bar/children’s tray in the dedicated slots
until they click into place (Fig. 7A). To remove the bumper bar/
children’s tray press the two side buttons and pull towards
you (Fig. 7B).
WARNING: Never use the bumper bar/children’s tray to lift the
stroller with your child sitting in it.
SAFETY HARNESS
On the front seat the stroller has a five-point safety harness which
consists of two shoulder straps, a waist strap and a crotch strap
with buckle. The rear seat has a three-point safety harness which
consists of a waist strap and a crotch strap with buckle.
8. Make sure the shoulder straps are at a suitable height for
your child: adjust if necessary (Fig. 8).
9. After placing your child in the front seat, insert the two forks
in the buckle (Fig. 9A) and adjust the waist belt if necessary
by pressing the buttons at the side of the buckle. To unfasten
the waist belt press the central button (Fig. 9B).
10. After placing the second child in the rear seat, adjust the
waist belt by pressing the buttons at the side of the buck-
le (Fig. 10A). To unfasten the waist belt press the central
button (Fig. 10B).
WARNING: The use of the crotch strap, waist strap and safety
harness is necessary to guarantee the safety of your child.
WARNING: After removing the safety harness (e.g. to wash it),
ensure that the harness is reassembled correctly using the
anchorage points. The harness must be re adjusted.
HOW TO ADJUST THE BACKREST
11. The backrest can be adjusted into two positions using the
lever at the rear. To lower the backrest pull the lever up and
push the backrest back (Fig. 11). Vice versa, to straighten the
backrest lift the lever or push it forwards.
WARNING: These operations may be more difficult if your child
is sitting in the chair.
REAR BRAKES
The rear wheels have linked brakes, which can be applied
simultaneously on both rear wheels using one pedal only.
12. To apply the brakes, press one of the two pedals at the sides
of the rear wheels down, as shown in Figure 12.
13. To release the brakes, push up one of the two pedals to the
sides of the rear wheels, as shown in Figure 13.
SUN CANOPY
WARNING: The canopy must be fixed to both sides of the
stroller. Ensure that the canopy is correctly secured (see point 6).
14. To open the canopy, push the front arch forward (Fig. 14).
15. For greater protection from the sun’s rays it is possible to
increase the fabric surface of the canopy by extending the
wings and the central fabric segment folded under the
canopy (Fig. 15A-15B).
CLOSING THE STROLLER
WARNING: When opening the stroller, make sure that your child
or other children are at a safe distance. Make sure that during
these operations the moving parts of the stroller do not come
into contact with your child. Before closing the stroller, make
sure that the storage basket is empty and the canopy is closed.
The stroller has a closing device that can be used with one hand.
16. To close the stroller push cursor “A” on the closing device (Fig.
16A) outwards and lift the tube at the same time (Fig. 16B).
17. When closed, the stroller stands up on its own (Fig. 17).
FITTING AND REMOVING THE STROLLER LINING
18. To remove the lining from the front seat lower the backrest
completely by pulling the lever and pushing it forwards
(Fig. 18A), remove the three plastic side wings (left and
right) from the backrest structure (Fig. 18B) and remove the
lining from the top edge of the backrest (Fig. 18C). Undo
the buttons under the seat and remove the fabric from the
seat (Fig. 18D). Then remove the safety harness by passing
the straps through the holes on the backrest and the seat
(Fig. 18E-18F-18G).
19. To remove the fabric from the rear seat, pass the crotch
strap and waist strap through the holes as shown in Figures
19A and 19B.
To replace the cover on the stroller, repeat these steps in reverse
order and reassemble the safety harness by passing the straps
through the fabric holes.
INSTALLING THE CHICCO KEYFIT CAR SEAT
The CHICCO KEYFIT car seat can be attached to the stroller.
WARNING: The CHICCO KEYFIT car seat can only be attached
to the stroller in the forward facing position.
20. To install the CHICCO KEYFIT car seat to the stroller remove
the bumper bar/tray and completely lower the backrest
(Fig. 20A). Position the car seat as shown in Figure 20B until
you hear a double click.
WARNING: Make sure it is attached properly by pulling the car
seat upwards.
21. To remove the car seat from the stroller structure push the
lever on the car seat and lift it up (Fig. 21).
REAR FOOTBOARD
At the back of the stroller there is a footboard for transporting
a second child in the standing position. This can only be used
when the rear seat has been completely raised.
22. To raise the seat push it upwards (Fig. 22).
WARNING: When pushing the stroller do not allow your child
to stand on the footboard facing backwards. Do not allow your
child to stand on the seat. To prevent falls, your child must hold
the handles and keep both feet on the footboard (Fig. 22A-22B).
RAIN COVER
23. To fit the rain cover, fasten the straps around the stroller’s
frame, in the positions shown in Fig. 23 (the steps are to be
repeated on both sides of the stroller). When you have fin-
ished using the rain cover, allow it to dry properly if it is wet.
WARNING: The rain cover cannot be used on the stroller without
a hood, as it may cause suffocation.
WARNING: When the rain cover is fitted on the stroller, never
leave it exposed to direct sunlight with your child inside, as the
temperature will rise considerably.
WARRANTY
The product is guaranteed against any conformity defect in
normal conditions of use as provided for by the instructions
for use. The warranty shall not therefore apply in the case of
damages caused by improper use, wear or accidental events.
For the duration of warranty on conformity defects please
refer to the specific provisions of national laws applicable in
the country of purchase, where provided.
30° C
30° C

14
15
outwards (Fig. 6C).
7. Insert the bumper bar/children’s tray in the dedicated slots
until they click into place (Fig. 7A). To remove the bumper bar/
children’s tray press the two side buttons and pull towards
you (Fig. 7B).
WARNING: Never use the bumper bar/children’s tray to lift the
stroller with your child sitting in it.
SAFETY HARNESS
On the front seat the stroller has a five-point safety harness which
consists of two shoulder straps, a waist strap and a crotch strap
with buckle. The rear seat has a three-point safety harness which
consists of a waist strap and a crotch strap with buckle.
8. Make sure the shoulder straps are at a suitable height for
your child: adjust if necessary (Fig. 8).
9. After placing your child in the front seat, insert the two forks
in the buckle (Fig. 9A) and adjust the waist belt if necessary
by pressing the buttons at the side of the buckle. To unfasten
the waist belt press the central button (Fig. 9B).
10. After placing the second child in the rear seat, adjust the
waist belt by pressing the buttons at the side of the buck-
le (Fig. 10A). To unfasten the waist belt press the central
button (Fig. 10B).
WARNING: The use of the crotch strap, waist strap and safety
harness is necessary to guarantee the safety of your child.
WARNING: After removing the safety harness (e.g. to wash it),
ensure that the harness is reassembled correctly using the
anchorage points. The harness must be re adjusted.
HOW TO ADJUST THE BACKREST
11. The backrest can be adjusted into two positions using the
lever at the rear. To lower the backrest pull the lever up and
push the backrest back (Fig. 11). Vice versa, to straighten the
backrest lift the lever or push it forwards.
WARNING: These operations may be more difficult if your child
is sitting in the chair.
REAR BRAKES
The rear wheels have linked brakes, which can be applied
simultaneously on both rear wheels using one pedal only.
12. To apply the brakes, press one of the two pedals at the sides
of the rear wheels down, as shown in Figure 12.
13. To release the brakes, push up one of the two pedals to the
sides of the rear wheels, as shown in Figure 13.
SUN CANOPY
WARNING: The canopy must be fixed to both sides of the
stroller. Ensure that the canopy is correctly secured (see point 6).
14. To open the canopy, push the front arch forward (Fig. 14).
15. For greater protection from the sun’s rays it is possible to
increase the fabric surface of the canopy by extending the
wings and the central fabric segment folded under the
canopy (Fig. 15A-15B).
CLOSING THE STROLLER
WARNING: When opening the stroller, make sure that your child
or other children are at a safe distance. Make sure that during
these operations the moving parts of the stroller do not come
into contact with your child. Before closing the stroller, make
sure that the storage basket is empty and the canopy is closed.
The stroller has a closing device that can be used with one hand.
16. To close the stroller push cursor “A” on the closing device (Fig.
16A) outwards and lift the tube at the same time (Fig. 16B).
17. When closed, the stroller stands up on its own (Fig. 17).
FITTING AND REMOVING THE STROLLER LINING
18. To remove the lining from the front seat lower the backrest
completely by pulling the lever and pushing it forwards
(Fig. 18A), remove the three plastic side wings (left and
right) from the backrest structure (Fig. 18B) and remove the
lining from the top edge of the backrest (Fig. 18C). Undo
the buttons under the seat and remove the fabric from the
seat (Fig. 18D). Then remove the safety harness by passing
the straps through the holes on the backrest and the seat
(Fig. 18E-18F-18G).
19. To remove the fabric from the rear seat, pass the crotch
strap and waist strap through the holes as shown in Figures
19A and 19B.
To replace the cover on the stroller, repeat these steps in reverse
order and reassemble the safety harness by passing the straps
through the fabric holes.
INSTALLING THE CHICCO KEYFIT CAR SEAT
The CHICCO KEYFIT car seat can be attached to the stroller.
WARNING: The CHICCO KEYFIT car seat can only be attached
to the stroller in the forward facing position.
20. To install the CHICCO KEYFIT car seat to the stroller remove
the bumper bar/tray and completely lower the backrest
(Fig. 20A). Position the car seat as shown in Figure 20B until
you hear a double click.
WARNING: Make sure it is attached properly by pulling the car
seat upwards.
21. To remove the car seat from the stroller structure push the
lever on the car seat and lift it up (Fig. 21).
REAR FOOTBOARD
At the back of the stroller there is a footboard for transporting
a second child in the standing position. This can only be used
when the rear seat has been completely raised.
22. To raise the seat push it upwards (Fig. 22).
WARNING: When pushing the stroller do not allow your child
to stand on the footboard facing backwards. Do not allow your
child to stand on the seat. To prevent falls, your child must hold
the handles and keep both feet on the footboard (Fig. 22A-22B).
RAIN COVER
23. To fit the rain cover, fasten the straps around the stroller’s
frame, in the positions shown in Fig. 23 (the steps are to be
repeated on both sides of the stroller). When you have fin-
ished using the rain cover, allow it to dry properly if it is wet.
WARNING: The rain cover cannot be used on the stroller without
a hood, as it may cause suffocation.
WARNING: When the rain cover is fitted on the stroller, never
leave it exposed to direct sunlight with your child inside, as the
temperature will rise considerably.
WARRANTY
The product is guaranteed against any conformity defect in
normal conditions of use as provided for by the instructions
for use. The warranty shall not therefore apply in the case of
damages caused by improper use, wear or accidental events.
For the duration of warranty on conformity defects please
refer to the specific provisions of national laws applicable in
the country of purchase, where provided.

16
17
Stroll’in’2
La poussette Stroll’in’2 peut être utilisée pour
le transport de deux enfants. Elle est munie d’une assise avant
face à la route à laquelle peut également être accroché le
siège-auto CHICCO KEY FIT et d’une place arrière utilisable
dans la double configuration suivante : plateforme (utilisable
par un enfant debout) ou assise.
IMPORTANT CONSERVER CES
INSTRUCTIONS POUR CONSUL
TATION ULTÉRIEURE
AVERTISSEMENT : AVANT L’ EM-
PLOI, ENLEVER ET ÉLIMINER TOUS LES
SACS EN PLASTIQUE ET ÉLÉMENTS
QUI FONT PARTIE DE L’EMBALLAGE
DU PRODUIT ET LES TENIR HORS DE
PORTÉE DES ENFANTS.
AVERTISSEMENTS
• AVERTISSEMENT : Ne jamais laisser
votre enfant sans surveillance.
• AVERTISSEMENT : S’assurer que
tous les dispositifs de verrouillage
sont enclenchés avant utilisation.
• AVERTISSEMENT : Pour éviter toute
blessure, maintenir votre enfant à
l’écart lors du dépliage et du pliage
du produit.
• AVERTISSEMENT : Ne pas laisser
votre enfant jouer avec ce produit.
• AVERTISSEMENT : Toujours utiliser
le système de retenue.
• L’utilisation de l’entrejambe et du
harnais de sécurité est indispensable
pour garantir la sécurité de l’enfant.
Ne jamais utiliser l’entrejambe sans
le harnais de sécurité.
• AVERTISSEMENT : Vérifier que les
dispositifs de fixation de l’assise avant,
de l’assise arrière et du siège-auto
sont correctement enclenchés avant
utilisation.
• AVERTISSEMENT : Ce produit ne
convient pas pour faire du jogging
rieur à 1 kg.
• Ne pas surcharger l’arceau de sécurité
/ le plateau enfant. poids supérieur
à 1 kg.
• Ne pas transporter plus de deux en-
fants à la fois.
• Ne pas monter sur la poussette
d’accessoires, pièces de rechange
ou composants non fournis ou non
approuvés par le constructeur.
• Ne pas utiliser la poussette si des
parties sont cassées, arrachées ou
manquantes.
• Une fois le siège-auto xé à la pous-
sette, le dispositif ne remplace pas
un berceau ou un lit enfant. Si votre
enfant veut dormir, il faut l’installer
dans une nacelle, un berceau ou un
lit enfant.
• AVERTISSEMENT : la plateforme
arrière doit être utilisée par un enfant
âgé de 36 mois minimum, ayant un
équilibre et une coordination appro-
priés, d’un poids maximum de 25 kg.
• AVERTISSEMENT : l’enfant doit
avoir la capacité d’utiliser la plate-
forme de manière sûre.
• AVERTISSEMENT : ne pas placer
de liquides chauds sur l’arceau de
sécurité / le plateau enfant.
• AVERTISSEMENT : ne pas laisser de
bouteilles ou de biberons en verre
sur l’arceau de sécurité / le plateau
enfant.
• AVERTISSEMENT : lors de l’ouver-
ture ou du pliage de la poussette,
s’assurer que votre enfant ou d’autres
enfants se tiennent à une distance
de sécurité. Durant ces opérations,
s’assurer que les parties mobiles de
la poussette n’entrent pas en contact
avec l’enfant.
• AVERTISSEMENT : l’arceau de sé-
ou des promenades en rollers.
• L’utilisation de l’assise avant est au-
torisée pour les enfants âgés de 6 à
36 mois, jusqu’à un poids maximum
de 15 kg.
• AVERTISSEMENT : Ce siège ne
convient pas à des enfants de moins
de 6 mois.
• Cette poussette convient aux enfants
âgés de 0 à 6 mois, jusqu’à un poids
maximum de 13 kg., UNIQUEMENT
QUAND le siège-auto CHICCO KEY
FIT est installé sur l’assise principale.
• AVERTISSEMENT : l’assise arrière
convient aux enfants à partir de 36
mois (plus de 15 kg), jusqu’à un poids
maximum de 25 kg.
• AVERTISSEMENT : L’enfant installé
sur l’assise arrière doit être tourné face
au parent qui pousse la poussette. Il
est interdit de se mettre debout ou à
genoux sur l’assise arrière, la position
assise étant la seule autorisée.
• Seul le siège-auto CHICCO KEY FIT
peut être accroché à la poussette
ST ROLL’IN’2.
• Le système de freinage doit être ac-
tionné avant de positionner ou de
retirer l’enfant.
• Utiliser le dispositif de freinage
chaque fois que la poussette est à
l’arrêt.
• Ne jamais laisser la poussette sur un
plan incliné avec l’enfant à l’intérieur,
même avec le frein actionné.
• Ne pas mettre dans le panier de poids
supérieur à 3 kg.
• Tout poids suspendu aux poignées
et/ou au dossier et/ou sur les côtés de
la poussette pourrait compromettre
sa stabilité.
• Ne pas surcharger le compartiment
présent sur la poignée. poids supé-

16
17
rieur à 1 kg.
• Ne pas surcharger l’arceau de sécurité
/ le plateau enfant. poids supérieur
à 1 kg.
• Ne pas transporter plus de deux en-
fants à la fois.
• Ne pas monter sur la poussette
d’accessoires, pièces de rechange
ou composants non fournis ou non
approuvés par le constructeur.
• Ne pas utiliser la poussette si des
parties sont cassées, arrachées ou
manquantes.
• Une fois le siège-auto xé à la pous-
sette, le dispositif ne remplace pas
un berceau ou un lit enfant. Si votre
enfant veut dormir, il faut l’installer
dans une nacelle, un berceau ou un
lit enfant.
• AVERTISSEMENT : la plateforme
arrière doit être utilisée par un enfant
âgé de 36 mois minimum, ayant un
équilibre et une coordination appro-
priés, d’un poids maximum de 25 kg.
• AVERTISSEMENT : l’enfant doit
avoir la capacité d’utiliser la plate-
forme de manière sûre.
• AVERTISSEMENT : ne pas placer
de liquides chauds sur l’arceau de
sécurité / le plateau enfant.
• AVERTISSEMENT : ne pas laisser de
bouteilles ou de biberons en verre
sur l’arceau de sécurité / le plateau
enfant.
• AVERTISSEMENT : lors de l’ouver-
ture ou du pliage de la poussette,
s’assurer que votre enfant ou d’autres
enfants se tiennent à une distance
de sécurité. Durant ces opérations,
s’assurer que les parties mobiles de
la poussette n’entrent pas en contact
avec l’enfant.
• AVERTISSEMENT : l’arceau de sé-
curité / le plateau enfant doit être
enlevé pour utiliser le siège-auto
CHICCO KEY FIT.
• AVERTISSEMENT : toujours véri-
fier que le siège-auto CHICCO KEY
FIT est accroché de manière sûre au
châssis de la poussette en le tirant
vers le haut.
• AVERTISSEMENT : toujours s’as
-
surer que le harnais de sécurité est
attaché quand l’enfant est positionné
dans le siège-auto CHICCO KEY FIT
installé sur la poussette.
• AVERTISSEMENT : n’utiliser ce
produit que pour transporter des
nourrissons qui respectent les limites
de poids et d’âge indiquées par le
siège-auto CHICCO KEY FIT. Pour
tout avertissement ou instruction
complémentaire avant d’utiliser ce
produit, se référer au manuel du
siège-auto.
• AVERTISSEMENT: le siège-auto
CHICCO KEY FIT doit être installé sur
le châssis uniquement tourné vers
l’arrière. L’enfant doit être tourné vers
le parent lorsqu’il pousse la poussette.
• Avant l’assemblage, vérier que le
produit et tous ses composants ne
présentent aucun endommagement
éventuel dû au transport ; dans le
cas contraire, le produit ne doit pas
être utilisé et il devra être tenu hors
de portée des enfants.
• Pendant les opérations de réglage,
s’assurer que les parties mobiles
de la poussette n’entrent pas en
contact avec le corps de l’enfant.
• Vérier que les utilisateurs de la pous-
sette connaissent le fonctionnement
exact de celle-ci.
• Le produit doit être monté unique-
ment par un adulte.

18
19
• Ce produit doit être utilisé unique-
ment par un adulte.
• Pour éviter tout risque d’étrangle-
ment, ne pas donner à l’enfant ni
poser près de l’enfant d’objets munis
de cordes.
• Ne pas utiliser la poussette dans les
escaliers ou sur un escalator : elle
pourrait être déséquilibrée.
• Faire attention quand on monte ou
descend le trottoir.
• En cas d’exposition prolongée au so-
leil, attendre que la poussette refroi-
disse avant d’y positionner l’enfant.
Une exposition prolongée au soleil
peut provoquer des variations de
couleur des matériaux et des tissus.
• Éviter tout contact de la poussette
avec de l’eau salée pour empêcher
la formation de rouille.
• Ne pas utiliser la poussette à la plage.
• Lorsque la poussette n’est pas utilisée,
la ranger hors de portée des enfants.
LISTE DES COMPOSANTS
• Châssis poussette
• 2 roues avant
• 2 roues arrière
• Axe arrière
• Kit d’installation roues arrière (2 rondelles, 2 molettes, 2 bouchons)
• Arceau de sécurité / plateau enfant
• Capote
• Kit confort (couvre-harnais et entrejambe rembourrés)
• Poche porte-objets
• Habillage-pluie
CONSEILS DE NETTOYAGE ET D’ENTRETIEN
AVERTISSEMENT : Ce produit doit être entretenu régulièrement.
Les opérations de nettoyage et d’entretien doivent être effec-
tuées par un adulte.
NETTOYAGE
Nettoyer les parties en tissu avec une éponge humide et du
savon neutre. La poussette est déhoussable (consulter le chapitre
« Comment enlever/remettre la housse de l’assise »). Pour net-
toyer les parties en tissu, consulter les étiquettes de lavage. Les
symboles de lavage et leur signification sont décrits ci-dessous :
Laver à la main à l’eau froide
Ne pas blanchir
Ne pas sécher en machine
Ne pas repasser
Ne pas laver à sec
Nettoyer régulièrement les parties en plastique avec un chiffon
humide. Ne pas utiliser de solvants ou de produits abrasifs. Es-
suyer les parties en métal si elles sont mouillées, pour empêcher
toute formation de rouille.
ENTRETIEN
En cas de besoin, lubrifier les parties mobiles avec de l’huile
sèche de silicone. Contrôler régulièrement l’état d’usure des
roues, et les tenir à l’abri de la poussière et du sable. Vérifier
que toutes les parties en plastique qui coulissent sur les tubes
en métal sont dépourvues de poussière, saleté et sable, afin
d’éviter que des frottements nuisent au bon fonctionnement
de la poussette. Ranger la poussette dans un endroit sec.
OUVERTURE ET PREMIER MONTAGE
1. Ouvrir complètement le châssis de la poussette (Fig. 1A-1B)
jusqu’à entendre le déclic d’ouverture complète.
2. Introduire les chevilles des roues avant dans les logements
du châssis prévus à cet effet (Fig. 2). Répéter l’opération pour
l’autre roue avant.
AVERTISSEMENT : avant l’utilisation, s’assurer que les roues sont
correctement fixées en les tirant vers le bas.
3. Pour monter chaque roue sur l’axe arrière, insérer dans l’ordre,
voir Fig. 3 :
• roue (A)
• rondelle (B)
• goupille (C)
• bouchon (D)
Veiller à introduire la goupille de fixation comme l’illustre
la gure : le côté droit doit être introduit dans le trou de la
cheville. Répéter cette opération pour l’autre roue en suivant
la même séquence.
4. Introduire l’axe arrière avec les roues montées dans les loge-
ments du châssis prévus à cet effet jusqu’à entendre le déclic
d’enclenchement (Fig. 4).
AVERTISSEMENT : avant l’utilisation, s’assurer que les roues et
l’axe arrière sont correctement fixés.
5. Pour compléter le montage, il faut accrocher la plateforme
à l’axe arrière (Fig. 5A-5B). Une fois cette opération terminée,
la plateforme devra être installée comme dans la Figure 5C.
6. Pour fixer la capote, accrocher les clips en plastique aux
tubes du châssis en faisant coïncider les trous des clips avec
les chevilles présentes sur les tubes (Fig. 6A-6B). Pour enlever
la capote, il suffit de faire tourner les clips d’accrochage vers
l’extérieur (Fig. 6C).
7. Introduire l’arceau de sécurité / plateau enfant dans leurs
logements jusqu’à entendre le déclic d’enclenchement (Fig.
7A). Pour enlever l’arceau de sécurité / plateau enfant, il sut
d’appuyer sur les deux boutons latéraux et de tirer vers soi
(Fig. 7B).
AVERTISSEMENT : l’arceau de sécurité / plateau enfant ne doit
pas être utilisé pour soulever le produit avec l’enfant à l’intérieur.
HARNAIS DE SÉCURITÉ
La poussette présente au niveau de l’assise avant un système de
retenue à 5 points d’ancrage constitué de deux couvre-harnais,
une ceinture abdominale et un entrejambe avec une boucle,
tandis que l’assise arrière est munie d’un système de retenue à 3
points composé d’une ceinture abdominale et d’un entrejambe
avec une boucle.
8. Vérifier que les épaulières se trouvent à la hauteur idéale
pour l’enfant. Si ce n’est pas le cas, régler leur hauteur (fig. 8).
9. Après avoir installé l’enfant dans l’assise avant, enfiler les 2
crans dans la boucle (Fig. 9A) et régler, si nécessaire, la largeur
de la ceinture abdominale en agissant sur les boutons exté-
rieurs de la boucle. Pour décrocher la ceinture abdominale,
appuyer sur le bouton central (Fig. 9B).
10. Après avoir installé l’enfant dans l’assise arrière, régler la
ceinture abdominale en agissant sur les boutons extérieurs
de la boucle (Fig.10A). Pour décrocher la ceinture abdominale,
appuyer sur le bouton central (Fig. 10B).
AVERTISSEMENT : pour garantir la sécurité de votre enfant, il est
indispensable d’utiliser simultanément l’entrejambe, la ceinture
abdominale et le harnais de sécurité.
AVERTISSEMENT : après avoir ôté les ceintures de sécurité (par
exemple, pour le lavage), vérifier que les ceintures sont ras-
semblées correctement en utilisant les points d’ancrage. Les
sangles doivent être de nouveau réglées.
RÉGLAGE DU DOSSIER
11. Le dossier peut être réglé au moyen du levier situé à l’arrière,
sur deux positions : pour incliner le dossier, il faut tirer le
levier vers le haut et pousser le dossier en arrière (Fig. 11).
Vice-versa, pour relever le dossier, il faut soulever le levier
et pousser le dossier en avant.
AVERTISSEMENT : Le poids de l’enfant peut rendre ces opérations
plus difficiles à accomplir.
FREINS ARRIÈRE
Les roues arrière sont équipées de freins jumelés qui permettent
de travailler simultanément sur les deux roues arrière, en inter-
venant sur une seule pédale.
12. Pour freiner la poussette, appuyer vers le bas sur l’une
des deux pédales situées à côté des roues arrière, comme
l’illustre la Figure 12.
13. Pour débloquer le système de freins, pousser vers le haut
l’une des deux pédales situées à côté des roues arrière,
comme l’illustre la Figure 13.
CAPOTE AVEC FILET PARE-SOLEIL
AVERTISSEMENT : L’opération de fixation de la capote doit être
eectuée des deux côtés de la poussette. Vérier que la capote
est correctement fixée (voir point 6).
14. Pour ouvrir la capote, pousser l’arceau avant vers l’avant
(Fig. 14).
15. Pour une plus grande protection contre les rayons du soleil,
il est possible d’augmenter la surface en tissu de la capote
en étendant les ailettes et le secteur central en tissu repliés
sous la capote (Fig. 15A-15B).
PLIAGE DE LA POUSSETTE
AVERTISSEMENT : Effectuer cette opération en veillant à ce que les
enfants soientsuffisamment éloignés. Lorsdeces phases, s’assurer
que les parties mobiles de la poussette n’entrent pas en contact
avec l’enfant. Avant le pliage, s’assurer que le panier porte-objets
est vide et que la capote est fermée.
La poussette est munie d’une commande de fermeture à utiliser
d’une seule main.
16. Pour plier la poussette, accéder au dispositif de pliage (Fig.
16A), déplacer le curseur « A » vers l’extérieur et soulever en
même temps le tube (Fig.16B).
17. Une fois pliée, la poussette reste debout toute seule (Fig.17).
COMMENT ENLEVER / REMETTRE LA HOUSSE DE LA
POUSSETTE
18. Pour déhousser l’assise avant, il faut abaisser complètement
le dossier en actionnant le levier et en le poussant en avant
(Fig. 18A), dégager les trois ailettes latérales en plastique (côté
gauche et côté droit) de la structure du dossier (Fig. 18B)
et enlever la housse par le bord supérieur du dossier (Fig.
18C). Décrocher les boutons à pression situés sous l’assise et
enlever le tissu de l’assise (Fig. 18D). Enlever ensuite le harnais
de sécurité en le faisant passer par les fentes présentes sur
le dossier et sur l’assise (Fig. 18E-18F-18G).
19. Pour enlever le tissu de l’assise arrière, il faut faire passer
les ceintures abdominales et l’entrejambe dans les fentes
comme indiqué dans les Figures 19A et 19B.
30° C
30° C

18
19
Ne pas laver à sec
Nettoyer régulièrement les parties en plastique avec un chiffon
humide. Ne pas utiliser de solvants ou de produits abrasifs. Es-
suyer les parties en métal si elles sont mouillées, pour empêcher
toute formation de rouille.
ENTRETIEN
En cas de besoin, lubrifier les parties mobiles avec de l’huile
sèche de silicone. Contrôler régulièrement l’état d’usure des
roues, et les tenir à l’abri de la poussière et du sable. Vérifier
que toutes les parties en plastique qui coulissent sur les tubes
en métal sont dépourvues de poussière, saleté et sable, afin
d’éviter que des frottements nuisent au bon fonctionnement
de la poussette. Ranger la poussette dans un endroit sec.
OUVERTURE ET PREMIER MONTAGE
1. Ouvrir complètement le châssis de la poussette (Fig. 1A-1B)
jusqu’à entendre le déclic d’ouverture complète.
2. Introduire les chevilles des roues avant dans les logements
du châssis prévus à cet effet (Fig. 2). Répéter l’opération pour
l’autre roue avant.
AVERTISSEMENT : avant l’utilisation, s’assurer que les roues sont
correctement fixées en les tirant vers le bas.
3. Pour monter chaque roue sur l’axe arrière, insérer dans l’ordre,
voir Fig. 3 :
• roue (A)
• rondelle (B)
• goupille (C)
• bouchon (D)
Veiller à introduire la goupille de fixation comme l’illustre
la gure : le côté droit doit être introduit dans le trou de la
cheville. Répéter cette opération pour l’autre roue en suivant
la même séquence.
4. Introduire l’axe arrière avec les roues montées dans les loge-
ments du châssis prévus à cet effet jusqu’à entendre le déclic
d’enclenchement (Fig. 4).
AVERTISSEMENT : avant l’utilisation, s’assurer que les roues et
l’axe arrière sont correctement fixés.
5. Pour compléter le montage, il faut accrocher la plateforme
à l’axe arrière (Fig. 5A-5B). Une fois cette opération terminée,
la plateforme devra être installée comme dans la Figure 5C.
6. Pour fixer la capote, accrocher les clips en plastique aux
tubes du châssis en faisant coïncider les trous des clips avec
les chevilles présentes sur les tubes (Fig. 6A-6B). Pour enlever
la capote, il suffit de faire tourner les clips d’accrochage vers
l’extérieur (Fig. 6C).
7. Introduire l’arceau de sécurité / plateau enfant dans leurs
logements jusqu’à entendre le déclic d’enclenchement (Fig.
7A). Pour enlever l’arceau de sécurité / plateau enfant, il sut
d’appuyer sur les deux boutons latéraux et de tirer vers soi
(Fig. 7B).
AVERTISSEMENT : l’arceau de sécurité / plateau enfant ne doit
pas être utilisé pour soulever le produit avec l’enfant à l’intérieur.
HARNAIS DE SÉCURITÉ
La poussette présente au niveau de l’assise avant un système de
retenue à 5 points d’ancrage constitué de deux couvre-harnais,
une ceinture abdominale et un entrejambe avec une boucle,
tandis que l’assise arrière est munie d’un système de retenue à 3
points composé d’une ceinture abdominale et d’un entrejambe
avec une boucle.
8. Vérifier que les épaulières se trouvent à la hauteur idéale
pour l’enfant. Si ce n’est pas le cas, régler leur hauteur (fig. 8).
9. Après avoir installé l’enfant dans l’assise avant, enfiler les 2
crans dans la boucle (Fig. 9A) et régler, si nécessaire, la largeur
de la ceinture abdominale en agissant sur les boutons exté-
rieurs de la boucle. Pour décrocher la ceinture abdominale,
appuyer sur le bouton central (Fig. 9B).
10. Après avoir installé l’enfant dans l’assise arrière, régler la
ceinture abdominale en agissant sur les boutons extérieurs
de la boucle (Fig.10A). Pour décrocher la ceinture abdominale,
appuyer sur le bouton central (Fig. 10B).
AVERTISSEMENT : pour garantir la sécurité de votre enfant, il est
indispensable d’utiliser simultanément l’entrejambe, la ceinture
abdominale et le harnais de sécurité.
AVERTISSEMENT : après avoir ôté les ceintures de sécurité (par
exemple, pour le lavage), vérifier que les ceintures sont ras-
semblées correctement en utilisant les points d’ancrage. Les
sangles doivent être de nouveau réglées.
RÉGLAGE DU DOSSIER
11. Le dossier peut être réglé au moyen du levier situé à l’arrière,
sur deux positions : pour incliner le dossier, il faut tirer le
levier vers le haut et pousser le dossier en arrière (Fig. 11).
Vice-versa, pour relever le dossier, il faut soulever le levier
et pousser le dossier en avant.
AVERTISSEMENT : Le poids de l’enfant peut rendre ces opérations
plus difficiles à accomplir.
FREINS ARRIÈRE
Les roues arrière sont équipées de freins jumelés qui permettent
de travailler simultanément sur les deux roues arrière, en inter-
venant sur une seule pédale.
12. Pour freiner la poussette, appuyer vers le bas sur l’une
des deux pédales situées à côté des roues arrière, comme
l’illustre la Figure 12.
13. Pour débloquer le système de freins, pousser vers le haut
l’une des deux pédales situées à côté des roues arrière,
comme l’illustre la Figure 13.
CAPOTE AVEC FILET PARE-SOLEIL
AVERTISSEMENT : L’opération de fixation de la capote doit être
eectuée des deux côtés de la poussette. Vérier que la capote
est correctement fixée (voir point 6).
14. Pour ouvrir la capote, pousser l’arceau avant vers l’avant
(Fig. 14).
15. Pour une plus grande protection contre les rayons du soleil,
il est possible d’augmenter la surface en tissu de la capote
en étendant les ailettes et le secteur central en tissu repliés
sous la capote (Fig. 15A-15B).
PLIAGE DE LA POUSSETTE
AVERTISSEMENT : Effectuer cette opération en veillant à ce que les
enfants soientsuffisamment éloignés. Lorsdeces phases, s’assurer
que les parties mobiles de la poussette n’entrent pas en contact
avec l’enfant. Avant le pliage, s’assurer que le panier porte-objets
est vide et que la capote est fermée.
La poussette est munie d’une commande de fermeture à utiliser
d’une seule main.
16. Pour plier la poussette, accéder au dispositif de pliage (Fig.
16A), déplacer le curseur « A » vers l’extérieur et soulever en
même temps le tube (Fig.16B).
17. Une fois pliée, la poussette reste debout toute seule (Fig.17).
COMMENT ENLEVER / REMETTRE LA HOUSSE DE LA
POUSSETTE
18. Pour déhousser l’assise avant, il faut abaisser complètement
le dossier en actionnant le levier et en le poussant en avant
(Fig. 18A), dégager les trois ailettes latérales en plastique (côté
gauche et côté droit) de la structure du dossier (Fig. 18B)
et enlever la housse par le bord supérieur du dossier (Fig.
18C). Décrocher les boutons à pression situés sous l’assise et
enlever le tissu de l’assise (Fig. 18D). Enlever ensuite le harnais
de sécurité en le faisant passer par les fentes présentes sur
le dossier et sur l’assise (Fig. 18E-18F-18G).
19. Pour enlever le tissu de l’assise arrière, il faut faire passer
les ceintures abdominales et l’entrejambe dans les fentes
comme indiqué dans les Figures 19A et 19B.
Pour remettre la housse de la poussette, répéter les opérations
décrites ci-dessus mais dans le sens inverse, réassembler le
harnais de sécurité en le faisant passer par les fentes en tissu.
ACCROCHAGE DU SIÈGE-AUTO CHICCO KEY FIT
Le siège-auto CHICCO KEY FIT peut être installé sur la poussette.
AVERTISSEMENT : le siège-auto CHICCO KEY FIT ne peut être
installé que dans la position face aux parents.
20. Pour installer le siège-auto CHICCO KEY FIT sur la poussette,
il faut enlever l’arceau de sécurité / plateau enfant et abaisser
complètement le dossier (Fig. 20A). Positionner le siège-auto
comme indiqué dans la Figure 20B jusqu’à entendre le
double déclic d’enclenchement.
AVERTISSEMENT : S’assurer que l’enclenchement a bien eu lieu
en tirant le siège-auto vers le haut.
21. Pour enlever le siège-auto du châssis de la poussette, il
faut actionner le levier situé sur le siège-auto et soulever
ce dernier (Fig. 21).
PLATEFORME ARRIÈRE
Sur la poussette, à l’arrière, se trouve une plateforme pour le
transport d’un second enfant debout, utilisable uniquement
si l’assise arrière est complètement relevée.
22. Pour relever l’assise, il suffit de la tourner vers le haut (Fig. 22).
AVERTISSEMENT : quand on pousse la poussette, ne pas per-
mettre à l’enfant situé sur la plateforme de se tourner vers
l’arrière. Ne pas laisser l’enfant se tenir debout sur le siège. Pour
éviter toute chute, l’enfant doit tenir les poignées et garder les
deux pieds sur la plateforme (Fig. 22A-22B).
HABILLAGE-PLUIE
23. Fixer l’habillage-pluie en faisant passer les rubans autour
des tubes de la poussette au niveau des positions indiquées
dans la Figure 23 (ces opérations doivent être exécutées
des deux côtés de la poussette). En n d’utilisation, laisser
l’habillage sécher à l’air s’il est mouillé.
AVERTISSEMENT : L’habillage-pluie ne peut pas être utilisé sur la
poussette sans capote, car il pourrait étouffer l’enfant.
AVERTISSEMENT : Ne jamais laisser la poussette exposée au soleil
avec l’enfant à l’intérieur lorsque l’habillage-pluie est monté,
pour éviter les coups de chaleur.
GARANTIE
Le produit est garanti contre les défauts de conformité dans des
conditions normales d’utilisation selon les indications prévues
par la notice d’emploi. La garantie ne sera donc pas appliquée
en cas de dommages dérivant d’un usage inapproprié, de
l’usure ou d’événements accidentels. En ce qui concerne la
durée de la garantie contre les défauts de conformité, consulter
les conditions prévues par les normes nationales applicables,
le cas échéant, dans le pays d’achat.

20
21
Stroll’in’2
Der Sportwagen Stroll’in’2 eignet sich für die Verwendung für
zwei Kinder. Er verfügt über eine vordere Sitzeinheit mit Blick-
richtung zur Straße, an der auch der Kinderautositz CHICCO
KEYFIT befestigt werden kann, und einen hinteren Platz, der in
zwei Konfigurationen verwendet werden kann: Trittbrett (kann
von einem stehenden Kind verwendet werden) oder Sitz.
WICHTIG BEWAHREN SIE DIE
SE GEBRAUCHSANLEITUNG
FÜR SPÄTERES NACHLESEN GUT
AUF.
WARNUNG: VOR DEM GEBRAUCH
EVENTUELLE POLYBEUTEL UND ALLE
ELEMENTE, DIE TEIL DER PRODUKT-
VERPACKUNG SIND, ABNEHMEN
UND ENTSORGEN SOWIE VON KIN-
DERN FERNHALTEN.
SICHERHEITSHINWEISE
• WARNUNG: Lassen Sie Ihr Kind nie
unbeaufsichtigt.
• WARNUNG: Vergewissern Sie sich
vor Gebrauch, dass alle Verriegelun-
gen geschlossen sind.
• WARNUNG: Vergewissern Sie sich,
dass Ihr Kind beim Aufklappen und
Zusammenklappen des Wagens au-
ßer Reichweite ist, um Verletzungen
zu vermeiden.
• WARNUNG: Lassen Sie Ihr Kind nicht
mit dem Wagen spielen.
• WARNUNG: Verwenden Sie immer
das Rückhaltesystem.
• Die Verwendung von Schritt- und
Sicherheitsgurten ist unerlässlich für
die Sicherheit des Kindes. Verwenden
Sie den Sicherheitsgurt stets in Ver-
bindung mit dem Schrittgurt.
• WARNUNG: Kontrollieren Sie vor
dem Gebrauch, dass die Feststell-
vorrichtungen der vorderen Sitzein-
heit, der hinteren Sitzeinheit und des
Kinderautositzes korrekt eingeführt
ten des Sportwagens angehängte
Gegenstände beeinträchtigen die
Standfestigkeit des Wagens.
• Der Behälter am Bügel darf nicht über
1 kg beladen werden.
• Der Frontbügel / das Kindertablett
darf nicht über 1 kg beladen werden.
• Nicht mehr als zwei Kinder auf einmal
transportieren.
• Bringen Sie an dem Sportwagen kein
Zubehör, Ersatzteile oder Kompo-
nenten an, die nicht vom Hersteller
mitgeliefert oder genehmigt wurden.
• Benutzen Sie das Produkt nicht mehr,
wenn Teile davon gebrochen, abge-
rissen oder verlorengegangen sind.
• Mit dem am Sportwagen befestigten
Kinderautositz ersetzt diese Version
nicht die Wiege oder das Kinderbett.
Wenn das Baby schlafen möchte, soll-
te es in einen Kinderwagenaufsatz,
eine Wiege oder ein Bettchen gelegt
werden.
• WARNUNG: Das hintere Trittbrett
darf nur von Kindern mit einem Min-
destalter von 36 Monaten benutzt
werden, die ein gutes Gleichge-
wichtsgefühl und eine gute Koordi-
nation haben. Höchstgewicht 25 kg.
• WARNUNG: Das Kind muss fähig
sein, das Trittbrett sicher zu benut-
zen.
• WARNUNG: Keine heißen Flüssig-
keiten auf den Frontbügel / das Kin-
dertablett stellen.
• WARNUNG: Keine Flaschen oder
Glasäschchen am Frontbügel / Kin-
dertablett lassen.
• WARNUNG: Vergewissern Sie sich
vor dem Schließen des Sportwagens,
dass Ihr Kind oder andere Kinder sich
auf Sicherheitsabstand befinden. Ver-
wurden.
• WARNUNG: Dieses Produkt ist nicht
zum Joggen oder Skaten geeignet.
• Die Verwendung der vorderen Sitz-
einheit ist für Babys im Alter zwischen
6 und 36 Monaten bis zu einem Kör-
pergewicht von 15 kg zulässig.
• WARNUNG: Diese Sitzeinheit ist
für Kinder unter 6 Monaten nicht
geeignet.
• Dieser Sportwagen eignet sich für
Kinder in einem Alter zwischen 0 und
6 Monaten mit einem Gewicht bis
13 kg, NUR, wenn der Kinderautositz
CHICCO KEYFIT an der Hauptsitzein-
heit installiert ist.
• WARNUNG: Die hintere Sitzeinheit
eignet sich ab einem Alter von 36
Monaten (über 15 kg) bis 25 kg.
• WARNUNG: Das Kind auf der hinte-
ren Sitzeinheit muss mit Blickrichtung
zum Elternteil gesetzt werden, das
den Sportwagen schiebt. Das Kind
darf nur auf der hinteren Sitzeinheit
sitzen. Es ist verboten, das Kind ste-
hend oder kniend zu befördern.
• Am Sportwagen STROLL’IN’2 kann
nur der Kinderautositz CHICCO KEY-
FIT befestigt werden.
• Die Bremse muss stets angezogen
sein, wenn Sie das Kind hineinsetzen
und herausnehmen.
• Verwenden Sie stets die Bremse,
wenn Sie anhalten.
• Lassen Sie den Sportwagen niemals
mit dem Kind darin auf einer schrä-
gen Fläche stehen, selbst wenn die
Bremsen angezogen sind.
• Der Korb darf nicht mit über 3 kg
beladen werden.
• An den Grien und/oder an der
Rückenlehne und/oder an den Sei-
Table of contents
Languages:
Other Chicco Stroller manuals

Chicco
Chicco VIARO User manual

Chicco
Chicco One4Ever Snuggle Pod User manual

Chicco
Chicco SPRINT User manual

Chicco
Chicco Snappy User manual

Chicco
Chicco VIARO User manual

Chicco
Chicco SIMPLICITY User manual

Chicco
Chicco URBAN PLUS User manual

Chicco
Chicco LiteWay Plus User manual

Chicco
Chicco SEETY User manual

Chicco
Chicco Best Friend Light User manual

Chicco
Chicco Snappy User manual

Chicco
Chicco miinimo 2 User manual

Chicco
Chicco Goody Plus User manual

Chicco
Chicco LITE WAY User manual

Chicco
Chicco FULLY User manual

Chicco
Chicco Trio Love UP User manual

Chicco
Chicco Corso User manual

Chicco
Chicco SPRINT User manual

Chicco
Chicco LITEWAY 2 User manual

Chicco
Chicco LITE WAY User manual