manuals.online logo
Brands
  1. Home
  2. •
  3. Brands
  4. •
  5. Cisco
  6. •
  7. IP Phone
  8. •
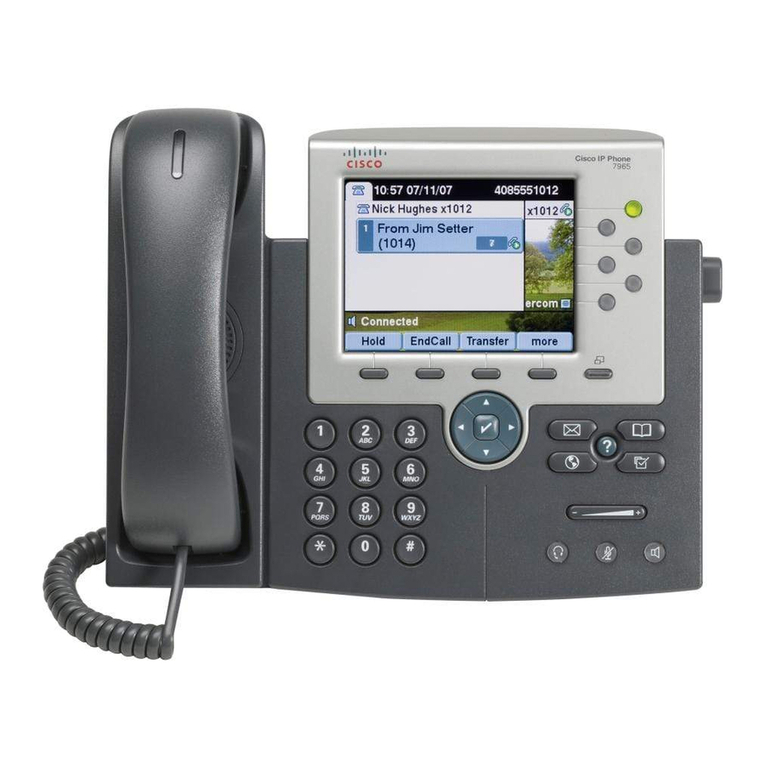
  9. Cisco 7945 Series User manual

Cisco 7945 Series User manual

Other manuals for 7945 Series

15

Other Cisco IP Phone manuals

Cisco 8845 User manual

Cisco

Cisco 8845 User manual

Cisco CP-7921G-A-K9 User manual

Cisco

Cisco CP-7921G-A-K9 User manual

Cisco Small Business Pro SPA 504G User manual

Cisco

Cisco Small Business Pro SPA 504G User manual

Cisco 7940 - IP Phone VoIP User manual

Cisco

Cisco 7940 - IP Phone VoIP User manual

Cisco 6941 - Unified IP Phone Slimline VoIP Guide

Cisco

Cisco 6941 - Unified IP Phone Slimline VoIP Guide

Cisco 7800 Series User manual

Cisco

Cisco 7800 Series User manual

Cisco 6800 Series User manual

Cisco

Cisco 6800 Series User manual

Cisco VWCC User manual

Cisco

Cisco VWCC User manual

Cisco Unified 6921 User manual

Cisco

Cisco Unified 6921 User manual

Cisco 7970 Series User manual

Cisco

Cisco 7970 Series User manual

Cisco 3905 User manual

Cisco

Cisco 3905 User manual

Cisco 7925G - Unified Wireless IP Phone VoIP User manual

Cisco

Cisco 7925G - Unified Wireless IP Phone VoIP User manual

Cisco 7965 User manual

Cisco

Cisco 7965 User manual

Cisco 8811 User manual

Cisco

Cisco 8811 User manual

Cisco 8941 User manual

Cisco

Cisco 8941 User manual

Cisco Razorline 7975 Instruction and safety manual

Cisco

Cisco Razorline 7975 Instruction and safety manual

Cisco 7970 Series User manual

Cisco

Cisco 7970 Series User manual

Cisco 7961G - IP Phone VoIP User manual

Cisco

Cisco 7961G - IP Phone VoIP User manual

Cisco 7821 How to use

Cisco

Cisco 7821 How to use

Cisco DATAVOX 7941 User manual

Cisco

Cisco DATAVOX 7941 User manual

Cisco Unified 6921 Instruction Manual

Cisco

Cisco Unified 6921 Instruction Manual

Cisco 3905 User manual

Cisco

Cisco 3905 User manual

Cisco SPA 303 Series User manual

Cisco

Cisco SPA 303 Series User manual

Cisco Unified 6921 User manual

Cisco

Cisco Unified 6921 User manual

Popular IP Phone manuals by other brands

Cortelco C62 VoIP Phone user guide

Cortelco

Cortelco C62 VoIP Phone user guide

VanillaIP Polycom IP300 user manual

VanillaIP

VanillaIP Polycom IP300 user manual

Yealink Yealink SIP-T22P Quick installation guide

Yealink

Yealink Yealink SIP-T22P Quick installation guide

Viking SR-IP product manual

Viking

Viking SR-IP product manual

Yealink VP59 Teams user guide

Yealink

Yealink VP59 Teams user guide

Panasonic KX-UT133-B Administrator's guide

Panasonic

Panasonic KX-UT133-B Administrator's guide

Avaya one-X 9600 Series overview

Avaya

Avaya one-X 9600 Series overview

AVA Enterprises B179 Installation and administration guide

AVA Enterprises

AVA Enterprises B179 Installation and administration guide

Polycom SoundPoint IP 450 datasheet

Polycom

Polycom SoundPoint IP 450 datasheet

IPitomy IP290 user manual

IPitomy

IPitomy IP290 user manual

Polycom SoundPoint IP 650 user guide

Polycom

Polycom SoundPoint IP 650 user guide

Proximus Maestro 3016 IP quick start guide

Proximus

Proximus Maestro 3016 IP quick start guide

Polycom IP 450 user guide

Polycom

Polycom IP 450 user guide

Fanvil X4 user manual

Fanvil

Fanvil X4 user manual

Snom 320 quick start guide

Snom

Snom 320 quick start guide

Avaya Integral 5 R3.0 user guide

Avaya

Avaya Integral 5 R3.0 user guide

Yealink Yealink SIP-T46G Guide

Yealink

Yealink Yealink SIP-T46G Guide

Yealink SIP-T52S quick start guide

Yealink

Yealink SIP-T52S quick start guide

manuals.online logo
manuals.online logoBrands
  • About & Mission
  • Contact us
  • Privacy Policy
  • Terms and Conditions

Copyright 2025 Manuals.Online. All Rights Reserved.

Quick Start Guide for Cisco 7945 IP Phone
Standard Phone User Guide
Technology Integration Group 1 rev 20140701
Basic Phone Use
Ringer Volume
1. Press the VOLUME key (with phone on hook) to hear a sample ring.
2.
Press the up and down arrows to reach the desired level.
3. To save, press SETTINGS and then press the SAVE key.
Handset Volume
1. To increase or decrease the volume of your handset, lift the handset and press the up or down volume
button. The volume buttons adjust the volume for the currently active condition.
2.
To save the setting, press the SAVE soft key.
* Note: Volume setting should be saved near the middle, only in
creasing as needed per call. If you are
consistently needing to increase the volume contact IT Dept.
Place a call
Either lift handset and dial, press line button and dial, or press New Call soft key and dial.
Dial 4 digits for internal calls. Dial 9 + number for local calls.
Dial 9 + 1 + number for long distance calls.
Dial 911 or 9 + 911 for Emergency Calls.
Answer a call
Lift handset, press Line Appearance, or press ANSWER soft key.
If you receive a second call on your individual extension, you will
To answer second call, press Line -OR- press ANSWER soft key. (First call is automatically put on
hold).
End a call
Hang up handset, or press END CALL soft key for speaker mode.
Mute a call
To mute, press MUTE. Press MUTE again to disengage.
Place a call on
H
old
1. Press the HOLD soft key.
2. Press the RESUME soft key or press the Line Appearance button to return to a call.
If multiple calls are on hold on the same Line Appearance, use the scroll key to select the desired
call before pressing RESUME.
Transfer a call
1. During a call, press the TRANSFER soft key. This places the call on hold.
2. Dial the number to which you wish to transfer the caller.
3. When ringing begins, press TRANSFER again, or wait for party to answer then press TRANSFER . If party
refuses call, press RESUME soft key, or extension key where call is held to take the call back.
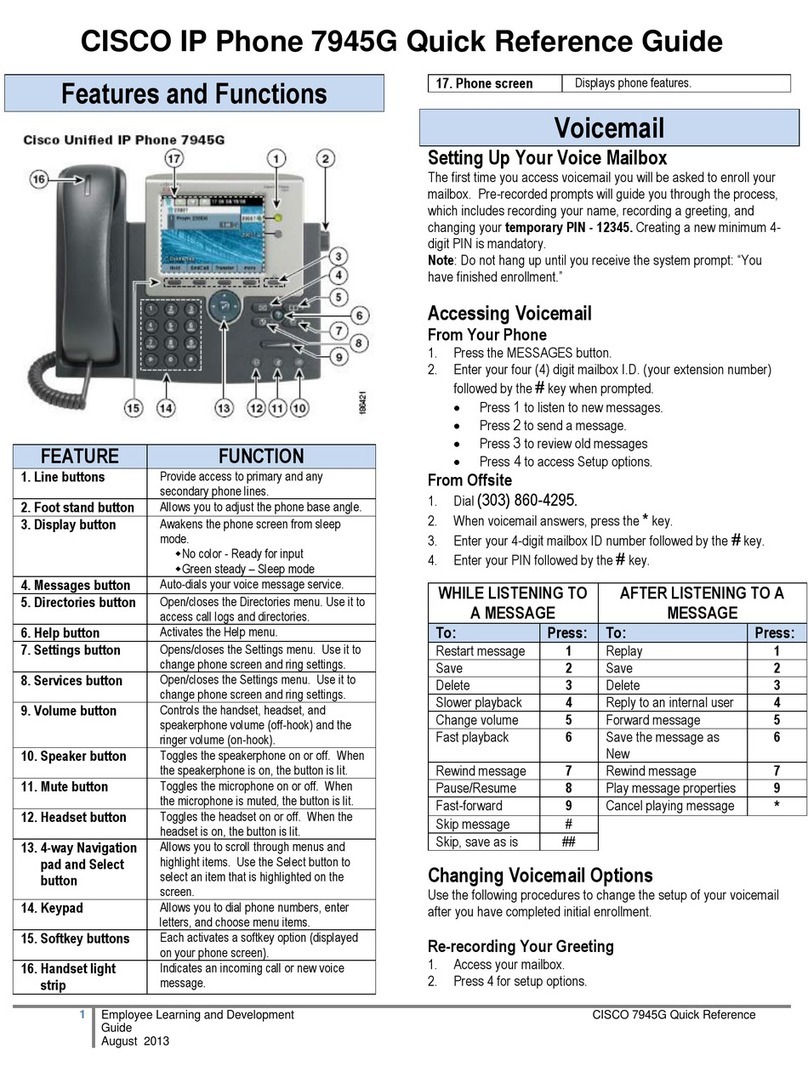
Line Appearances
Display
Soft Keys (4)
Arrows/Enter Key
Messages Button
Directories Button
Services Button
Volume
Mute Button
Speakerphone
Quick Start Guide for Cisco 7945 IP Phone
Standard Phone User Guide
Technology Integration Group 2 rev 20140701
Basic Phone Use
Blind Transfer
1. During a call, press the TRANSFER soft key. This places the call on hold.
2. Press the MESSAGES button to call the Cisco Unity system.
3. While you are being asked for your password, press the #key
4. # 2 for example,
2064 # 2
5. Press the TRANSFER button again to complete the blind transfer
Host an Ad Hoc
Conference Call
1. While on a call, press the MORE soft key, then the CONFRN soft key. This will put the first call on hold
and select a new line.
2. Place a call to another number.
3. When the call connects, press CONFRN again to add this party to the conference.
4. Repeat to add up to 5 parties.
When call originator hangs up, no additional parties can be added.
Host a Meet Me
Conference Call
1. Lift the handset or press SPEAKER
2. Press MORE soft key
3. Press MEETME soft key
4. Dial Meet Me location (4-digit number)
Participate in a
Meet Me
Conference Call
1. Lift the handset or press SPEAKER
2. Dial Meet Me location (4-digit number)
Note: Calls can be transferred to a Meet Me by using the normal transfer procedure.
Call Pick-Up
1. As the phone rings at an extension within your Call Group, lift the handset or select a line button.
2. Press the MORE soft key to view the PickUp soft key.
3. Press the PickUp soft key to transfer the call to your extension.
4. Press the Answer soft key to answer the re-directed call on your phone.
Call Park
1. While on a call, press MORE soft key until you see PARK tab.
2. Press PARK. The display shows the number where the call is parked.
3. To retrieve the parked call from any phone, lift handset and dial Park number.
Last Number
Redial
Lift handset and press REDIAL soft key. To redial from a line other than primary, press line first, then press
REDIAL.
Call Forward
(to another
extension)
1. Press the CFWDALL soft key (two beeps) and enter the internal number to which you wish to forward
your calls.
2. To cancel, press the CFWDALL soft key.
Do Not Disturb
1. Press the CFwdAll softkey
2. Press the MESSAGES button
Viewing/Dialing
Missed Calls
3. Press the DIRECTORIES button. Use scroll key to select MISSED CALLS.
4. Press the SELECT soft key to select MISSED CALLS from the directory menu.
5. Press the DIAL soft key to dial a number from the missed call list.
6. To edit a number, such as adding a 9, use the EditDial soft key to add digits to the front of the
number.
7. Press the EXIT soft key twice to exit the directory menu.
Viewing/Dialing
Placed or
Received Calls
1. Press the DIRECTORIES button. Use scroll key to select PLACED or RECEIVED CALLS.
2. Press the SELECT soft key to select either PLACED or RECEIVED CALLS from the directory menu.
3. Press the DIAL soft key to dial a number from the list.
4. To edit a number, such as adding a 9, use the EditDial soft key to add digits to the front of the
number.
5. Press the EXIT soft key twice to exit the directory menu.
Accessing/Dialing
from the
Corporate
Directory
1. Press the DIRECTORIES button.
2. Use the scroll key to select CORPORATE DIRECTORY.
3. Press the SELECT soft key to display the directory search options.
4. Use the SCROLL key to select a search option: First or Last Name, or Extension.
5. Use the numbers corresponding to the letters on the dialing pad to enter a name or number to find it
in the directory.
6. Press the DIAL soft key to speed dial a number from the corporate directory.
Quick Start Guide for Cisco 7945 IP Phone
Standard Phone User Guide
Technology Integration Group 3 rev 20140701
Unity Voice Mail Setup & Basic Voice Mail Functions
Voice Mail Initial Setup
You can access your voice mailbox . You will be asked
to Initialize your mailbox the first time you access voice mail. Initialization includes recording your name,
recording a greeting, and changing your password.
Your temporary password is 12345. Your new password must be at least 3 digits in length.
NOTE: Be sure to press "#" after every entry for which the system prompts you.
Basic Voice Mail Use
To access voice mail from your
phone:
1. Press MESSAGES button.
2. Enter your password followed by the # key when prompted.
3. Press 1 to listen to new messages, 2 to send a message, 3 to review old
messages, or 4 to access SETUP options.
To access voice mail when away
from the office:
1. Dial the main office number or your DID (skip to #3 if DID).
2. When the auto attendant answers, dial your extension.
3. When voice mail answers, press * key.
4. Enter your 4 digit mailbox I.D. number (i.e., your "Extension Number")
followed by the # key.
5. Enter your password followed by the # key.
While listening to a message:
Press 1 to repeat, 2 to save, 3 to delete, 5 to change volume, 7 to reverse, 8 to
pause, 9 to fast-forward, or # to go to end of message.
After a message:
Press 3 to delete, 4 to reply to internal user, 5 to forward message, 6 to mark as
new, or 9 to hear date/timestamp.
Setup Options
To rerecord greeting:
1. Enter mailbox.
2. Press 4 for Setup options.
3. Press 1 for Greetings.
4. Press 1 to change greetings and follow prompts.
To rerecord name:
1. Enter mailbox.
2. Press 4 for Setup options.
3. Press 3 personal settings.
4. Press 2 to change name and follow prompts.
To change password:
1. Enter mailbox.
2. Press 4 for Setup options.
3. Press 3 for Personal settings.
4. Press 1 to change password and follow prompts.
Quick Start Guide for Cisco 7945 IP Phone
Standard Phone User Guide
Technology Integration Group 4 rev 20140701
Ring Settings Setup Options
Fast Dial Options
To Select Ring Type
1.
2. Select Ring Type
pressing 2.
3. -or- highlight desired extension and
4.
ose that ring,
5.
6.