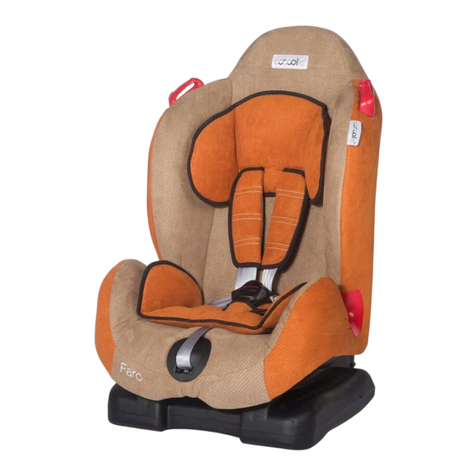
Coccolle Argo User manual

HU autosules 9-36 kg
RO scaun auto grupa 9-36 kg
R
IT seggiolino grupo 9-36 kg
GB car seat group 9-36 kg
Argo
Manual de instructiuni / User’s manual /
Hasznalati utmutato / Manuale di istruzioni

Dragi parinti:
Va mulțumim ca ati cumparat scaunul auto pentru
copii Coccolle Argo. Asigurati-va ca acest scaun
auto este potrivit in functie de varsta si greutatea
copilului dvs. si se potriveste autovehiculului dvs.
Acest produs este potrivit pentru copiii cu kg
cuprinse intre 9-36.
Sondajele au aratat ca in mod constant o mare
parte din scaunele auto sunt instalate si utilizate
incorect.
Va recomandam sa cititi cu atentie acest manual de
instructiuni inainte de a plasa copilul pe scaunul
auto.
Acest scaun de masina este creat pe baza
standardului din Regulamentul ECE 44/04 pentru
echipamentele de siguranta pentru copii.
Daca aveti intrebari legate de utilizarea acestui
scaun auto va rugam sa contactati vanzatorul sau
distribuitorul.
INTRODUCERE
Pentru siguranța copilului dvs.,va rugam sa va faceti timp
pentru a verifica urmatoarele:
● Verificati daca centura de siguranta a scaunului este
corect ajustata pentru copilul dvs.
● Imbracamintea poate afecta modul de ajustare al centurii.
Verificati la fiecare calatorie daca centura e bine ajustata.
● Corect este ca centura sa fie purtata cat mai strans iar
suporturile de umar sa fie la inaltimea corecta.
● Verificati periodic daca centura nu este deteriorata.
● Catarama centurii nu trebuie sa se ajunga pe burta
copilului.
● Cureaua transversala trebuie sa treaca peste regiunea
pelviana, nu peste stomac.
● Cureaua diagonala trebuie sa se sprijine pe umarul
copilului, nu pe gat.
● Nu introduceti niciodata centura de siguranta sub bratul
copilului sau in spatele lui.
● Conexiunea cataramei (catarama se sprijina pe o parte a
cadrului scaunului pentru copii, ceea ce inseamna ca intr-o
coliziune se poate rupe sau se poate deschide)
● Daca reductorul de greutate de pe scaun este pozitionat
corect.
● Verificati daca copilul este prea mare sau prea mic pentru
scaunul pe care il foloseste
ATENTIE: Asigurati-va ca aveti in vedere urmatoarele
aspecte:
- Tipul vehiculului pentru scaunul de copii care urmeaza sa
fie instalat.
- Varsta si greutatea copilului.
Daca aveti intrebari, contactati vanzatorul sau distribuitorul
produsului.
ATENTIE
RO RO

Scoaterea si inlocuirea husei si a centurii
a) Slabiti catarama hamului (verificati ajustarea
inaltimii a curelelor de umar)
b) Slabiti hamul in intregime (F20)
c) Trageti hamurile, buzunarele si catarama prin
husa.
d) Scoateti husa.
e) Dupa spalare, atasati centura si plasati husa pe
carcasa.
f) Insurubati catarama, limbile si hamurile prin husa
si fixati husa la butonul de eliberare / manerul de
pozitionare.
g) Asigurati husa pe clemele de prindere.
h) Inchideti catarama si introduceti cureaua prin
suporturile de umar, husa si carcasa.
I) Conectati centurile de umar la catarama centurii.
j) Strangeti capacul in jurul acestuia, in spatele
clemelor.
INLOCUIREA HUSEI
● Acest scaun auto este conceput pentru grupa I,II
si III (9-36 kg) sau pentru copiii cu varsta cuprinsa
intre 9 luni – 12 ani
● Cititi cu atentie acest manual de instructiuni si
intotdeauna urmati regulile prezentate in manual.
Acest scaun auto este sigur doar atunci cand este
utilizat in mod corect la fel conform indicatiilor din
manualul de utilizare.
● Instalarea corecta este extrem de importanta
pentru siguranta copilului. Centura de siguranta a
autoturismului trebuie sa fie fixata de-a lungul
ghidajului centurii rosii de pe scaunul auto Coccolle
Argo. Nu incercati niciodata sa folositi alte ghidaje
de centura decat cele specificate.
● Pozitia cea mai sigura pentru scaunul auto este
bancheta din spate a autoturismului. Acesta trebuie
folosit doar cu fata la sensul de mers deoarece este
prevazut cu o centura de siguranta automata in 3
puncte, aprobata de ECE R16 sau de un standard
de siguranta similar.
● Sa nu pozitionati niciodata scaunul auto pe un
scaun al autoturismului echipat cu airbag frontal
deoarece acest lucru ar putea duce la vatamari
grave sau la moarte.
● Inainte de a instala scaunul auto, asigurati-va ca
in masina nu exista obiecte grele, ascutite sau
pierdute.
● Centura nu trebuie rasucita in nici un fel.
● Asigurati-va ca scaunul auto nu este deteriorat
prin strangerea intre articolele grele ( usa masinii,
bagaje etc)
IMPORTANT
F20
RO RO

● Se recomanda ca scaunul auto de copii sa fie
schimbat atunci cand el a fost supus unor violente
provocate de un accident.
● Manualul de utilizare al scaunului auto trebuie pastrat
pe toata perioada de viata al acestuia.
● Va rugam sa cititi cu atentie manualul de utilizare al
acestui sistem ISOFIX.
● Scaunul auto trebuie utilizat cu materialul din fabrica.
Va rugam sa utilizati carcasa originala a scaunului
deoarece aceasta contribuie la siguranta scaunului
auto.
● Este recomandat sa nu folositi un scaun de masina
second hand deoarece nu stiti cu siguranta istoria
scaunului auto.
● Asigurati-va ca centura de siguranta este corect
reglata pentru copilul dumneavoastra. Aceasta ar trebui
sa fie destul de stransa astfel incat numai unul sau
doua degete sa se potriveasca intre pieptul copilului si
centura.
● Nu lasati niciodata copilul nesupravegheat in masina.
● Asigurati-va ca cel mic nu se joaca cu catarama
centurii.
● Va recomandam ca in timpul unei calatorii mai lungi
cu copilul dumneavostra, sa luati o scurta pauza de
relaxare.
● Nu efectuati niciodata modificari sau adaugiri la
scaunul auto si respectati intotdeauna instructiunile
aflata in acest manual atat la instalare cat si utilizare.
● Purtati intotdeauna centura de siguranta atat
dumneavoastra cat si copilul dumneavoastra.
● Pastrati acest manual pentru referinte viitoare.
General:
a) Scaunul auto poate fi curatat folosind apa calduta
si sapun. Nu folositi agenti de curatare agresivi cum
ar fi abrazivii sau diluantii.
b) Carcasa trebuie spalata manual, la o temperatura
maximă de 30 ° C. Nu puneti in masina de spalat
sau uscator.
c) Pasul 1. Scoateti scaunul din masina, asigurati-
va ca jucariile copilului dvs sunt indepartate inainte
sa il curatati.
Pasul 2. Indepartati particulele de mancare si
murdaria cu un aspirator fara fir iar daca este
posibil, utilizati capatul cel mai mic al aspiratorului
pentru a curata zonele mici si greu accesibile ale
scaunului auto.
Pasul 3. Curatati portiunile din plastic ale scaunului
cu sapun si apa.
Pasul 4. Indepartati intreaga husa a scaunului auto
si spalati la masina de spalat la un ciclu bland.
Pasul 5. Spalati petele murdare de pe scaunul auto
iar daca nu puteti sa scoateti husa asigurati-va ca
folositi un sapun pentru material verificand
instructiunile pe ambalaj.
Pasul 6. Instalati din nou scaunul auto curat in
masina si asigurati-va ca toate partile acestuia sunt
prezente si instalate in siguranta si in mod corect.
CURATARE SI INTRETINERE IMPORTANT
RO RO

e) Trageti centurile de umar prin gaurile centurii de
siguranta asigurandu-va ca, catarama ramane fixa
pentru a preveni rasucirea curelelor. (F17)
f) Daca doriti sa modificati centurile din sau in
pozitiile inferioare, reglati scaunul auto in pozitia de
somn.
g) Dacă doriti sa modificati centurile din sau în
pozitiile superioare, reglati scaunul pentru masina in
pozitia asezat.
h) Asezati protectia de umar la inaltimea potrivita si
introduceti curelele de umar inapoi prin protectia de
umeri, husa si carcasa.(F18)
I) Conectati centurile de umar centura de siguranta.
(F19-a)
1 -Maner de ridicare
2.1 -Ghidaj centura Gr.Ⅲ
2.2 -Ghidaj centura Gr.Ⅱ
Gr. III
3 -Tetiera
4 -Clema
5 -Carcasa
6 -Spatar
INSTALARE
7 -Gaura ghidaj centura
8 -Ghidajul centurii 9 -
Centura jugului
10 -Baza
11 -Sistem de protectie
lateral
12 - Isofix
13 -Buton ajustare isofix
14 -Top Tether
1
3
2.1
2.2 5
4
6 7
11
14
8
9
12
10
13
F18
F17
F19-a
F19
RO RO
INSTALARE

15 -Tetiera reductoare
16 -Amortizor
17 -Protectie umar
18 – Curea de umar
19 – Catarama centrala
20 - Bifurcatie curea
21 -Catarama captusita
22 - Perna reductoare sezut
23 – Ajustare acoperita
24 - Adjustor centura
25 - Maner ajustare pozitie
CARACTERISTICI
Reglarea inaltimii centurilor de umeri
a) Inaltimea corecta a centurilor de umeri este
atinsa atunci cand centura dispare in carcasa
scaunului, usor deasupra umerilor copilului.
Asigurati-va ca centurile de umeri sunt puse
confortabil peste umerii copilului. (F15)
b) Slabiti centurile de umar prin apasarea butonului
de eliberare al dispozitivului de ajustare, tragand
cureaua de umar spre dumneavoastra cat mai mult
posibil.
Atentie: Nu trageti protectie de umar atunci cand
faceti asa.(F9)
c) Asezati carcasa scaunului in pozitia de somn.
d) Scoateti centurile de umar din
jug(catarama).(F16-a).
INSTALARE
16 15
18 17
20 19
21 22
23
25 24
F15 F16
RO RO

Instalare pentru grupaⅡ/Ⅲ
Aceasta metoda de instalareeste potrivita pentru
copii din cadrul grupei Ⅱ(15-25kg) si grupei Ⅲ(22-
36kg).
Atentie: La scaunul auto Coccolle Argo trebuie sa
fie folosite tot timpul ancorele isofix plus Top tether-
ul in acelasi timp cu centura de siguranta in 3
puncte pentru grupa Ⅱ/Ⅲ.
a) Scoateti centura de siguranta, inclusiv protectia
de umeri, catarama centrala si bifurcatia curelei.
b) Reglati tetiera prin tragerea manerului de ridicare
in pozitia dorita, in functie de inaltimea copilului dvs.
c) Asezati copilul in scaunul auto.
d) Trageti centura autovehiculului prin orificiul de
ghidare pentru grupaⅡ(F14-a), si pentru grupa Ⅲ
(F14-b),si inchideti centura de siguranta in ghidajul
centurii. (F14-c). Acum instalarea este finalizata
(F14-d).
e) Imbinati curelele si inchideti.
INSTALARE
1) Scaunul auto Coccolle Argo poate fi folosit cu
sistemul isofix + top tether pentru grupa I (9-18kg).
2) Scaunul auto Coccolle Argo trebuie folosit cu
sistemul Isofix + top tether in acelasi timp cu
centura de siguranta in 3 puncte pentru grupa 2 ,3
(15-36kg child).
3) Scaunul auto Coccolle Argo trebuie sa fie montat
pe bancheta din spate a masinii cu fata la sensul de
mers.
Patru pozitii ale scaunului de masina
Scaunul auto Coccolle Argo poate fi folosit in 4
pozitii diferite (F2): Trageti manerul de ajustare aflat
sub scaunul auto, in fata sau in spate (simtiti arcul
de dedesubt) si apoi eliberati manerul din fata in
pozitia dorita pana ce auziti „Click"
PASI DE INSTALARE
F13 F14
F14-a F14-b F14-c F14-d
10
F1 F2
RO RO

Instalare pentru grupa I (9-18kg)
a) Asezati scaunul auto Coccolle Argo pe bancheta
masinii.
b) Rotiti butonul de ajustare in directia inversa a
acelor de ceasornic(1-1),si trageti ancorele isofix in
afara atat cat de mult se poate fiind siguri ca
acestea nu se pot impinge inapoi. (1.2)
c) Impingeti scaunul auto in bancheta masinii.(2.1)
d) Impingeti sistemul isofix in bancheta masinii pana
cand auziti sunetul „Click". (2-2)
e) Rotiti butonul de ajustare in sensul invers al
acelor de ceasornic (3.1),si impingeti scaunul auto
cat mai mult posibil. (3.2)
f) Ridicati top tether-ul si trageti cat mai mult
posibil.(4)
INSTALARE
Plasarea copilului in scaunul auto Coccolle Argo
Slabiti centurile de umeri prin apasarea butonului de
eliberare si trageti de ele spre dvs.
Important: Nu trageti centurile de umeri cand faceti
asa. (F8-9)
Apasati butonul rosu pentru a deschide
catarama.(F10) Puneti curelele pe partile laterale
ale scaunului. (F11)
Asezati copilul in scaun si asigurati-va ca nu sunt
jucarii sau obiecte periculoase (F12) Aduceti
impreuna partile cataramei si apoi introduceti-le in
catarama centrala. (F13).
f) Asigurati-va ca centurile de umeri se potrivesc
copilului dvs prin tragerea curelei de reglare.(F14)
Atentie! Dupa ce ati instalat scaunul de masina,
verificati-l incercand sa il mutati. Acesta nu ar trebui
sa se miste mai mult de un centimetru in fiecare
parte. Daca totusi acesta se misca, strangeti mai
tare centurile sau instalati-l din nou. Curelele
centurii nu trebuie sa fie invartite niciodata. Daca nu
puteti sa faceti click pe sectiunile acestora deblocati
catarama apasand butonul rosu si incercati din nou.
INSTALARE
F8 F9
F10 F11 F12
Push
4
2.1
Push
3.2
1.1 1.2
3.1
2.2
Pull
RO RO

Dear parents:
Thank you for purchasing this Child Safety Car
Seat.
Please make sure this car seat is suitable according
to your child's age and weight, and also fits your
vehicle. This product suits for the weight has been
tested and approved for children from 9kg to 36kg,
or age group from 9 months to 12 years old.
Surveys have consistently shown that a high
proportion of child restraints were incorrectly
installed and used.
We strongly recommend that you carefully read
through this instruction manual before placing your
child in the car seat.
This Child Safety Car Seat is designed base on the
standard of the ECE Regulation 44 / 04 for child
safety equipment.
If you have any questions concerning the use of this
car seat, please contact the distributor or the retailer
in your area.
INTRODUCTION
For your child's safety, please take your time to check
the following:
● Check the seat's harness system is correctly
adjusted for your child.
● Clothing can affect how snugly the harness
fits,
so check it each journey.
● The belt is worn as tight as possible; the
shoulder belts are at the proper height.
● Check regularly that the belt is not damaged.
● The harness buckle should not rest over the
child's tummy.
● The lap belt goes over the pelvic region (from
hip-bonito hip-bone), not the stomach.
● The diagonal strap rests on the child's
shoulder, not the neck.
● Never tuck the seat belt under the child's arm
or behind their back.
● Buckle crunch (buckle resting against part of
the child seat's frame, which means that in a collision
it might break or snap open)
● The pillow on the seat is positioned properly.
● Check if the child is too large or too small for
the seat they are using.
AGAIN: Make sure that you have the following
details:
-The type of the vehicle for the child car seat to be
installed.
-Your child's age and weight.
If you have any questions, please contact the
distributor or retailer.
CHECKLIST
EN EN

Removing and Replacing the cover and belt
pads
a) Loosen the belts pads. (See adjusting the height
of the shoulder belts)
b) Loosen the cover all around.(F20)
c) Pull the belts, buckle tongues and buckle through
the cover.
d) Remove the cover.
e) After washing, attach the belt pads and place the
cover on the shell.
f) Thread the buckle, tongues and belts through the
cover and fasten the cover at the release button/
positioning handle.
g) Secure the cover on the pins.
h) Close the buckle and thread the belts through the
belt pads, cover and shell.
I) Connect the shoulder belts to the belt yoke.
j) Fasten the cover all around, behind the pins.
CHANGING THE COVER
● Make sure this Child Car Seat is suitable for
Group I (9-18kg), Group II (15-25kg) and Group III
(22-36kg); Or for age group from 9 months to 12
years old.
● Read this instruction manual carefully, and always
follow the car seat manufacturer's advice. The Car
Seat is only safe when used according to the proper
installation based on this instruction manual.
● The correct installation is extremely important for
the safety of your child. The vehicle seat belt must
be threaded along the red belt guide on the Car
Seat. Never try to use other belt routings other than
specified.
● The safest placement for the car seat is the rear
seat, and it must only be used as forward facing
position that is fitted for an automatic 3-point safety
belt, which is approved by ECE R16 or an
equivalent standard.
● Remember to never place for car seat onto a seat
equipped with a front airbag, as this might result in
serious injury or death.
● Ensure that there are no heavy, sharp-edged or
loose objects in the car before installing the child
car seat.
● The belt must not be twisted in any using
circumstances.
● Make sure that the child seat is not damaged by
being squeezed between hard items (car door, seat
rails, luggage etc.)
IMPORTANCE
F20
EN EN

● It shall be recommended that the child car seat
should be changed when it has been subject to
violent stresses in an accident;
● There shall be provisions made so that the
instructions can be retained on the child restraint for
its life period or in the vehicle handbook in the case of
built-in restraints.
● For this ISOFIX child restraint system, the
instruction for use must be given to read the car
manufacturer's handbook.
● The child car seat must be used with the fabric
cover. Please use an original cover because that the
cover contributes to the safety of the seat.
● It is recommended that you do not use a second-
hand car seat as there are uncertainties of the car
seat's history.
● Make sure the seat's harness is correctly adjusted
for your child. It should be quite tight, so that only one
or two fingers can fit between the child's chest and
harness.
● Never leave your child unattended in the car.
● Make sure that your child does not play with the belt
buckle.
● Take a short break in a long journey, have some
relaxation and fresh air for your child.
●Never make any alterations or additions to the car
seat, and follow the manufacturer's instructions when
installing and using it.
● Always buckle up yourself for your child's example.
● Please store this instruction manual properly for
future use.
General:
a) The car seat can be cleaned by using lukewarm
water and soap. Do not use aggressive cleaners
like abrasives or thinners.
b) The cover should be washed by hand at a
maximum temperature of 30℃. Do not put it in the
dryer.
Step 1. Take the car seat out of your car; ensure
your baby's toys are put away before you begin
cleaning it.
Step 2. Remove food particles and dirt with a
cordless vacuum cleaner if possible, use a portable
vacuum cleaner's furniture attachment to clean the
small, hard-to-reach areas of the car seat.
Step 3. Clean off the plastic portions of the seat with
gentle soap and water.
Step 4. Remove the entire car seat cover, if
possible, and run it through your washing machine
using a gentle cycle.
Step 5. Spot clean the stained spots on the car seat
if you cannot remove the cover; make sure you can
use the soap on the car seat's material by checking
the package's guidelines.
Step 6. Reinstall the clean car seat in your car, and
take special care that all parts of the car seat being
present and installed safely and correctly.
MAINTENANCE & CLEANING IMPORTANCE
EN EN

e) Pull the shoulder belts through the belt pads and
belting slots in shell, ensuring that the buckle
remains fixed to prevent the belts being
twisted.(F17)
f) If you want to alter the belts from or to the lowest
positions, adjust the car seat to the sleeping
position.
g) If you want to alter the belts from or to the higher
positions, adjust the car seat to the sitting position.
h) Place the shoulder pads at the expected height
and thread the shoulder straps back through the
shoulder pads, cover and shell. (F18)
I) Connect the shoulder belts to the belt yoke.
(F19-a)
1 -Lifting Handle
2.1 -Gr.III Belt Guide
Slot
2.2 -Gr.II Belt Guide Slot
3 -Headrest
4 -Peg
5 -Shell
6 -Backrest
RESTRAINT FEATURES INSTALLATION
7 -Belt Guide Hole 8 -
Lap Belt Guide 9 -Belt
Yoke
10 -Base
11 -Side protection
system 12 -Isofix
anchors
13 -Isofix Adjuster
Button
14 -Top Tether
F18
F17
F19-a
F19
1
3
2.1
2.2 5
4
6 7
11
14
8
9
12
10
13
EN EN

15 -Head Pillow
16 -Cushion
17 -Shoulder Belt Pad
18 - Shoulder Belt
19 - Central Buckle
20 -Crotch Strap
21 -Buckle Pad
22 -Sitting Pillow
23 - Adjuster Cover
24 - Adjuster Belt
25 -Positioning Handle
RESTRAINT FEATURES
Adjusting the height of the shoulder belts.
a) The correct height of the shoulder belts is
attained when the belt disappears into the shell
slightly above the shoulder of the child. Ensure that
the shoulder belts fit comfortably over the child's
shoulder. (F15)
b) Loosen the shoulder belts by pressing the
release button of the adjuster and pulling the
shoulder belts towards you as far as possible.
Important: Do not pull the belt pads when doing
so.(F9)
c) Place the shell of the seat in the sleeping
position.
d) Remove the shoulder belts from the yoke.(F16-
a).
INSTALLATION
16 15
18 17
20 19
21 22
23
25 24
F15 F16
EN EN

Installation for groupⅡ/Ⅲ
This installation method is for a child within Group
Ⅱ(15-25kg)and GroupⅢ(22-36kg).
Note: must be used Isofix anchors plus top tether at
the same time with 3-point automatic seat belt for
group Ⅱ/Ⅲ all the time.
a) Remove the harness system, including the belt
pads, central buckle and crotch strap.
b) Adjust the headrest by pulling the lifting handle at
your required position according to your child's
height.
c) Place your child into the car seat.
d) Thread the vehicle's shoulder belt from the Group
Ⅱbelt guide slot (F14-a), or GroupⅢbelt guide slot
(F14-b),and thread the lap belt into the belt guide
hole (F14-c).So the installation is completed (F14-
d).
e) Joint the belts and buckle up.
INSTALLATION
1) The car seat can be used with isofix anchors plus
top tether for group I 9-18kg child.
2) The car seat must be used with ISOFIX anchors
plus top at the same time with.3-point seat belt for
group 2 ,3 15-36kg child.
3) The car seat must be fitted as a forward-facing
position in the rear seats of vehicle
Four positions of the car seat
The car seat can be used in four different positions.
(see pic F2): Pull the positioning handle under the
front of the seat forwards or backwards (feel the
spring underneath),then release the handle on your
required position while hearing a distinct click.
INSTALLATION TIPS
F13 F14
F14-a F14-b F14-c F14-d
10
F1 F2
EN EN

Installation for group I(9-18kg)
a) Place the car seat on the vehicle's seat
b) Rotate the adjuster button in anti-clock wis
direction(1-1),and pull the isofix anchors outwards
as far as it goes, wake sure it cann't be push back
(1.2)
c) Push the car seat towards the back of vehicle's
seat(2.1)
d) Match the isofix anchors to the vehicle's
anchoring point until hear a "click"(2-2)
e) Rotate the adjuster button in anti-clock wise
direction(3.1),and push the car seat fo the bock of
vehicle's seat as much as possible(3.2)
f) Hook the top tether up and pull as tight as
possible(4)
INSTALLATION
Placing child in the seat
Loosen the shoulder belts by pressing the release
button and pull the shoulder belts towards you.
Important: Do not pull on the belt pads when doing
so. (F8-9)
Press the red button to open the buckle.(F10) Part
the belts over the sides of the shell.(F11)
Place your child into the shell and make sure that
there are no toys or other hard objects in the
shell.(F12) Match buckle tongue sections together
and insert them into the buckle.(F13)
f) Make sure the shoulder belts fit your child snugly
by pulling the adjuster belt. (F14)
Note! After you have done the installation, check it
by trying to move it, it shouldn't move more than an
inch at either side, if it does, tighten the straps or try
installing it again. The belts should never be twisted.
If you are unable to click the tongue sections into
the buckle, unlock the buckle by pressing the red
button and try again.
INSTALLATION
F8 F9
F10 F11 F12
Push
4
2.1
Push
3.2
1.1 1.2
3.1
2.2
Pull
EN EN

Coccolle Argo 9-36 kg biztonsági autósülés
I. súlycsoport: 9-18 kg
II. súlycsoport: 15-25 kg-ig
III. súlycsoport: 22-36 kg-ig
Jótállás
● A garancia a vásárlás napjával kezdődik,
időtartama 12 hónap. A vásárlás napja szerepel a
kerekedő által kiadott jótállási jegyen és nyugtán,
ezért kérjük őrizze meg, mert a garancia csak így
érvényesíthető. A garancia az autósülés
alapanyagára és a gyári hibára vonatkozik. A
jótállás a termék eredeti tulajdonosához tartozik,
mely másra át nem ruházható. A garancia csak
azon termékekre érvényesíthető, melyen annak
tulajdonosa semmilyen átalakítást nem hajtott
végre. A garancia nem vonatkozik a felhasználó
hibájából vagy a használati útmutató be nem
tartásából származó sérülésekre. A garancia nem
vonatkozik a termék természetes
elhasználódásából származó hibákra, pl: hosszan
tartó napfény okozta kárpit színárnyalat változás
● Bármilyen felmerülő hiba esetén a fogyasztó
köteles a terméket visszajuttatni a kereskedőhöz
vagy a forgalmazóhoz. Amennyiben az eladást
végző üzlet nem tudja orvosolni a problémát, úgy a
kereskedő kötelessége, hogy felvegye a kapcsolatot
a gyártóval/importőrrel. Azonnali termékcsere nem
kérhető. A javítás nem hosszabbítja meg a garancia
idejét, kivéve, ha teljes csere történt vagy új
alkatrész került beépítésre. Új alkatrész beépítése
esetén a garancia csak a cserélt alkarészre indul
újra. A kereskedő nem felelős azokért a
karcokért/sérülésekért, melyek a termék átvételekor
már rajta voltak az autósülésen. A javítást módját a
garanciát vállaló cég állapítja meg. A reklamált
terméket tiszta állapotban kell átadni a
forgalmazó/viszonteladó részére.
● A garancia nem érvényesíthető:
- jótállási jegy és eredeti nyugta/számla nélkül
-nem rendeltetésszerű használat esetén, illetve a
termék általános karbantartásának hiányában, mely
szerepel a használati útmutatóban
-a javítást harmadik fél végzi (nem szakszervíz)
-a hibát hanyagság okozta
-a vevő hibájából lépett fel ( pl. eltörte,elszakította)
-normális mértékű szakadás a termék mindennapos
használatából, az anyag természetes
elhasználódásából adódik
-a kárpitozás megrongálódása
-jótállási feltételek be nem tartása
Tartalom – 1
Bemutatkozás – 2
Fontos információk – 3-4
A biztonsági autósülés elemei – 5-6
Bekötési útmutató – 7
HU HU

Az autósülés rögzítése
I. súlycsoport bekötése – 8-9
II. és III. súlycsoport bekötése – 10
A megfelelő vállmagasság beállítása – 11-12
Karbantartás és Tisztítás - 13
A huzat eltávolítása - 14
Ellenőrzési lista - 15
Jótállás – 16
BEMUTATKOZÁS
Kedves Szülők:
Köszönjük, hogy cégünk ISOFIX-es biztonsági
autósülését választotta. Kérjük, hogy ügyeljen arra,
hogy az autósülés a gyermek kora –és súlya
szempontjából megfelelő, valamint az Ön
gépjárművébe való legyen. A termék az alábbiak
szerint lett tesztelve és megfelelve: 9 hónaptól 12
éves korig, illetve 9 kg-tól 36 kg-ig. Felmérések
kimutatták, hogy a legtöbb hiba a
gyermekbiztonsági rendszerek helytelen
beszerelésekor lép fel. Ezért ajánljuk az Ön
figyelmébe, hogy gondosan olvassa el, majd őrizze
meg a használati utasítást. Ez a biztonsági
autósülés az ECE R44 szabványának megfelelően
készült. Amennyiben bármilyen kérdése merülne fel
a termék használatával kapcsolatban, kérjük vegye
fel a kapcsolatot a termék gyártójával vagy
forgalmazójával.
ELLENŐRZÉSI LISTA
Gyermeke biztonságának érdekében, kérjük
szánjon időt az alábbiak ellenőrzésére:
●Ellenőrizze, hogy az 5 pontos biztonsági öv
megfelelően illeszkedik a gyermeken
●A gyermek ruházata befolyásolhatja a biztonsági
öv illeszkedését, ezért kérjük ellenőrizze minden
indulás előtt
●Az övnek a lehető legfeszesebbnek kell lennie és
nézze meg, hogy megfelelő –e a vállmagasság
●Rendszeresen ellenőrizze, hogy ép –e a
biztonsági öv
●A biztonsági öv soha ne keresztezze a gyermek
hasát
●Az alsó övszárakat a medence körül kell elvezetni,
soha sem a gyermek hasánál
●Soha ne helyezze a biztonsági övet a gyermek
hónalja alá vagy a háta mögé.
●A szűkítő betétek a helyükön vannak
●Az autósülés a gyermek korának és méretének
megfelelően van rögzítve
●Ismételjen győződjön meg az alábbiakról:
● a gépjármű megfelelő felszereltségű az autósülés
rögzítéséhez - a gyermek kora – és súlya megfelelő
ehhez a biztonsági autósüléshez. Amennyiben
HU HU

bármilyen kérdése merülne fel a termék
használatával kapcsolatban, kérjük vegye fel a
kapcsolatot a termék gyártójával vagy
forgalmazójával.
HUZAT LEVÉTELE ÉS VISSZAHELYEZÉSE
A huzat levétele és felhelyezése
a) Lazítsa meg a biztonsági övet a teljes
hosszúságig.
b) Lazítsa ki a huzatot. ( F20 kép)
c) A biztonsági övet és csatot távolítsa el,
húzza át a huzaton keresztül
d) Vegye le a huzatot az autósülésről.
e) Mosás után csatlakoztassa a biztonsági
öveket, majd helyezze a huzatot az autósülés
vázára.
f) Fűzze át a csatot és a szíjakat, majd
rögzítse a fedelet.
g) Rögzítse a huzatot az autósülés hátulján és
oldalain található rögzítő fülekhez.
h) A biztonsági öveket rögzítse az ülés
hátulján található fém csathoz. Ezt követően
rögzítse az ülést a fém rudakkal az ülés hátuljához.
i) Csatlakoztassa a vállszíjakat a biztonsági
övhöz.
FONTOS
● Ez a biztonsági autósülés I. súlycsoport (9-18
kg), II. súlycsoport (15-25 kg) és III. súlycsoport (
22-36 kg )besorolásnak felel meg, vagy 9 hónapos
kortól kb. 12 éves korig.
● Figyelmesen olvassa el és kövesse a használati
útmutatót. Az autósülés csak akkor ad megfelelő
biztonságot, amennyiben az megfelelően van
rögzítve ezen útmutató szerint.
● A helyes beszerelés nagyon fontos a gyermek
biztonsága szempontjából. A gépjármű biztonsági
övét a kijelölt övvezetőkön kell átvezetni. Soha ne
próbálja más módon rögzíteni az autósülést.
● A legbiztonságosabb az, ha az autósülés a
gépjármű hátsó ülésén helyezkedik el,
menetiránynak megegyező pozícióban. Csak olyan
gépjárműbe szerelhető be, mely rendelkezik 3
pontos biztonsági övvel, mely megfelel az ECE R16
vagy azzal egyenértékű szabvánnyal. Soha ne
helyezze az autósülést légzsákkal felszerelt első
ülésre.
● Amennyiben az autósülést erőteljes behatás érte
vagy baleset része volt, minden esetben szükséges
az autósülést cserélni. Törött vagy sérült biztonsági
autósülés gépjárműben soha nem rögzíthető.
● FIGYELMEZTETÉS: A gyermekbiztonsági
autósülés gépjárműben ISOFIX rendszer
segítségével történő szerelés megkezdése előtt
ismerkedjen meg a gépkocsigyártó által leszállított
ISOFIX rendszer használati utasításában
foglaltakkal.
HU HU

● A sérülések elkerülése érdekében győződjön meg
róla, hogy a gépjárműben nincs nehéz, éles peremű
tárgyak, mielőtt rögzíti a gyermekülést.
● Az öv semmilyen körülmények között ne legyen
megcsavarodva.
● Az autósülés csak hozzá tartozó, eredeti huzattal
használható! Soha ne használja az autósülést huzat
nélkül.
● Az autósülést kötelező mindig rögzíteni a
gépjárműben.
● Kérjük, hogy figyelmesen olvassa el és őrizze
meg a használati útmutatót!
● Javasoljuk, hogy soha ne vásároljon használt
autósülést, mert annak használati előzményei nem
tisztázottak.
Győződjön meg róla, hogy a gyermek feszesen
rögzítve van a biztonsági autósülésben, az Ön ujjai
sem férnek a gyermek és az öv közé.
● Soha ne hagyja gyermekét felügyelet nélkül az
autósülésben.
● Meleg időben a fém részek átforrósodhatnak és
esetleges égési sérülésekhez vezethetnek, ezért
ilyenkor takarja le az autósülést egy pléddel vagy
törölközővel. Majd ellenőrizze annak hőmérsékletét
mielőtt gyermekét ismét az autósülésbe ültetné.
● Magyarázza el és ügyeljen arra, hogy a gyermek
ne játsszon a biztonsági övvel vagy annak csatjával.
● Hosszú utak alkalmával iktasson be rövid
pihenőket és vegye ki a gyermeket az autósülésből.
● Soha ne végezzen átalakítást az autósülésen, ne
adjon hozzá további elemeket. Mindig kövesse a
használati útmutatóban leírtakat!
● Ön is mindig kösse be magát a gépjárműben,
hogy ezzel is példát mutasson gyermekének!
KARBANTARTÁS ÉS TISZTÍTÁS:
Általános:
az autósülés kizárólag langyos vízzel és semleges
mosószerrel tisztítható. Soha ne használjon erős
vegyszert vagy fehérítőt.
A autósülés huzata elsősorban kézzel, illetve
maximum 30 C fokon mosható, majd fektetve
szárítható.
A huzat nem centrifugálható és szárítógépbe sem
tehető.
Az autósülés 5 pontos biztonsági öveinek és az
autós biztonsági övek beállítását rendszeresen kell
ellenőrizni.
Az autósülés műanyag részei nedves ruhával vagy
szivaccsal tisztíthatóak.
A kárpit porszívózását óvatosan kell végezni, úgy,
hogy a kárpit ne sérüljön.
1. Vegye ki az autósülést a gépjárműből.
2. Egy porszívó használatával távolítsa el az
esetleges morzsákat, életdarabokat az autósülésről.
3. A műanyag részeket tisztítsa meg egy nedves
szivaccsal és semleges mosószerrel.
4. Távolítsa el az üléshuzatot és mossa ki kézzel
vagy mosógépben kímélő programon centrifugálás
nélkül!
HU HU

5. Amennyiben a huzatot nem tudja eltávolítani a
kisebb foltok óvatosan, dörzsölés nélkül helyileg is
tisztíthatók egy éppen nedves szivaccsal.
6. Helyezze vissza és rögzítse az autósülést a
gépjárműbe.
A BIZTONSÁGI AUTÓSÜLÉS ELEMEI:
1. fejtámla szabályzó kar
2.1 vállöv vezetés III. súlycsoport
2.2. vállöv átvezető nyílás II. súlycsoport
3. fejtámla
4. támlát feloldó mechanizmus
5. üléskagyló
6. támla
7. csípőöv átvezető nyílás II. és III. súlycsoport
8. csípőöv átvezető nyílás I. súlycsoport
9. csat
10. bázis
11. oldalsó védőrendszer SPS – Side Protection
System
12. ISOFIX csatlakozó
13. ISOFIX csatlakozó szabályozója
14. „Top Tether” öv – az ISOFIX harmadik rögzítési
pontja
15. fejtámasz
16. kárpit
17. övpárna
18. vállöv
19. központi csat
20. comböv
21. központi csat burkolata
22. ülés szűkítő betét
23. övszabályzó mechanizmus burkolata
24. övfeszítést szabályozó szíj
25. az autósülés dőlésszögét szabályozó kar
VÁLLÖVEK MAGASSÁGÁNAK SZABÁLYOZÁSA
A vállövek helyes magassága azon a ponton
található, ahol az övek kicsivel a gyermek válla
felett mennek át az ülés háttámlájába. Győződjön
meg róla, hogy az övek nem szorítják a gyermek
vállait, illetve nem helyezkednek el alacsonyabb
fokozatban.
Lazítsa meg az öveket az ülés első részén található
gomb lenyomásával. Majd húzza maga felé mind a
kettő vállövet a maximális hosszúságig. A
gyermekülést állítsa döntött pozícióba, majd hajtsa
előre a háttámlát. Vegye le az öveket a támla
mögött található fém csatról. A nyíláson keresztül
húzza át mind a kettő övszárat. Fontos, hogy a
művelet elvégzéseket az övek csatlakoztatva
legyenek a központi csatba, elkerülve ezzel a
vállövek összecsavarodását! Válassza ki a kívánt, a
gyermek számára megfelelő magasságot, majd
dugja át rajta a vállöveket. Ezt követően kösse
össze őket az autósülés háttámlája mögött
elhelyezkedő fém csattal. Feszítse meg a öveket az
ülés első részében lévő központi övfeszítő szíj
segítségével.
HU HU
Table of contents
Languages:
Other Coccolle Car Seat manuals

Coccolle
Coccolle Elona User manual

Coccolle
Coccolle Nerio User manual

Coccolle
Coccolle Sedna User manual

Coccolle
Coccolle Vigo User manual

Coccolle
Coccolle Faro User manual

Coccolle
Coccolle Mydo User manual

Coccolle
Coccolle Eris User manual

Coccolle
Coccolle Nova User manual

Coccolle
Coccolle Velsa User manual

Coccolle
Coccolle Atira User manual