Pasul 4. Scoateti intreaga husa a scaunului auto
daca este posibil, si spalati-o la masina de spalat,
folosind un program pentru rufe delicate.
Pasul 5. Daca nu puteti scoate husa, curatati local
petele, asigurandu-va ca este permisa folosirea
sapunului pe materialul scaunului de masina prin
verificarea instructiunilor de pe produs.
Pasul 6. Reinstalati scaunul auto in masina, avand
grija ca toate partile scaunului auto sunt prezente si
instalate corect pentru siguranta copilului
dumneavoastra.
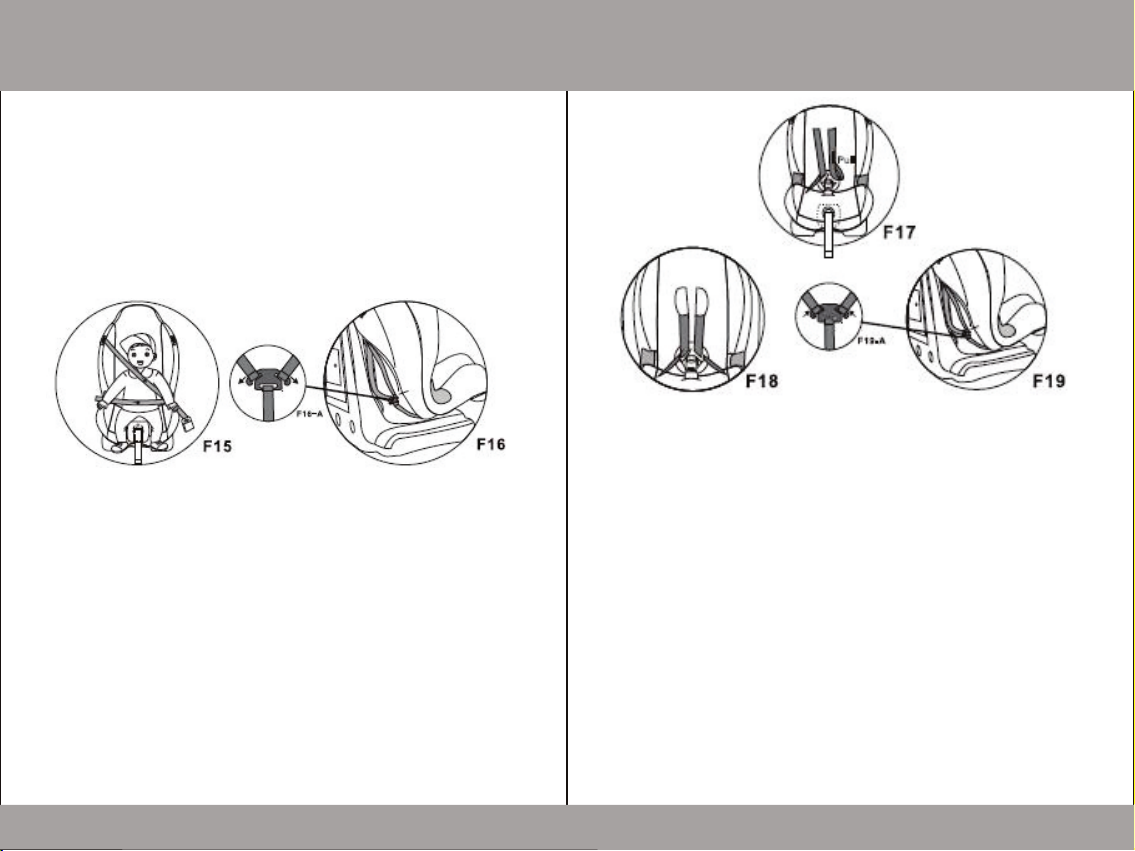
SCHIMBAREA HUSEI
Scoaterea si inlocuirea husei si a protectiilor de
umeri
a) Slabiti protectiile de umeri ( vedeti reglarea pe
inaltime a curelelor de umar).
b) Slabiti husa de jur imprejur. (fig. F20)
c) Trageti curelele, lamelele cataramei si catarama
prin husa.
d) Scoateti husa.
e) Dupa spalare, atasati protectia curelelor de
siguranta si instalati husa pe carcasa.
f) Treceti catarama, lamelele cataramei si curele
prin husa si fixati husa peste manerul de inclinare a
spatarului.
g) Fixati husa folosind partile conectoare.
h) Inchideti catarama si treceti curelele prin
protectia pentru curelele de umeri, husa si carcasa.
i) Conectati curelele de umar la catarama Yoke.
j) Fixati husa de jur inprejurul partilor conectoare.
Pentru siguranta copilului dumneavoastra verificati
urmatoarele:
Asigurati-va ca centura este bine fixata in jurul
copilului dumneavoastra.
Imbracamintea copilului poate influenta modul in
care se potriveste centura, deci verificati si ajustati
in caz de nevoie centura la fiecare calatorie.
Asigurati-va ca centura este cat mai stansa
posibil si hamurile de umar sunt la inaltimea
corespunzatoare.
Verificati regulat ca centura sa nu fie deteriorata.
Verificati catarama hamului, aceasta nu trebuie sa
fie lejera pe abdomenul copilului.
Asigurati-va ca centura de mijloc trece peste zona
pelviana si nu peste stomacul copilului.
Asigurati-va ca centura diagonala a masinii se
sprijina pe umarul copilului, nu pe gatul acestuia.
Nu pozitionati niciodata centura de siguranta sub
bratul copilului sau la spatele lui.
ATENTIONARI FINALE INGRIJIRE SI MENTENANTA