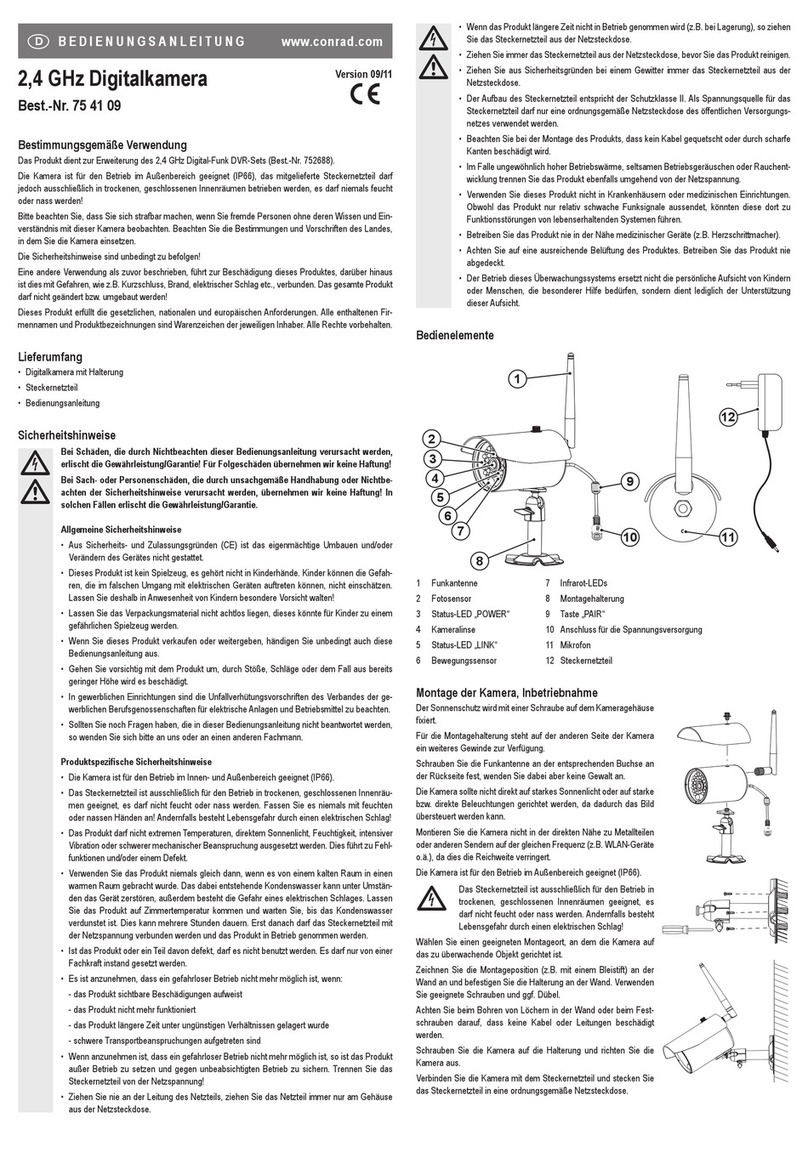
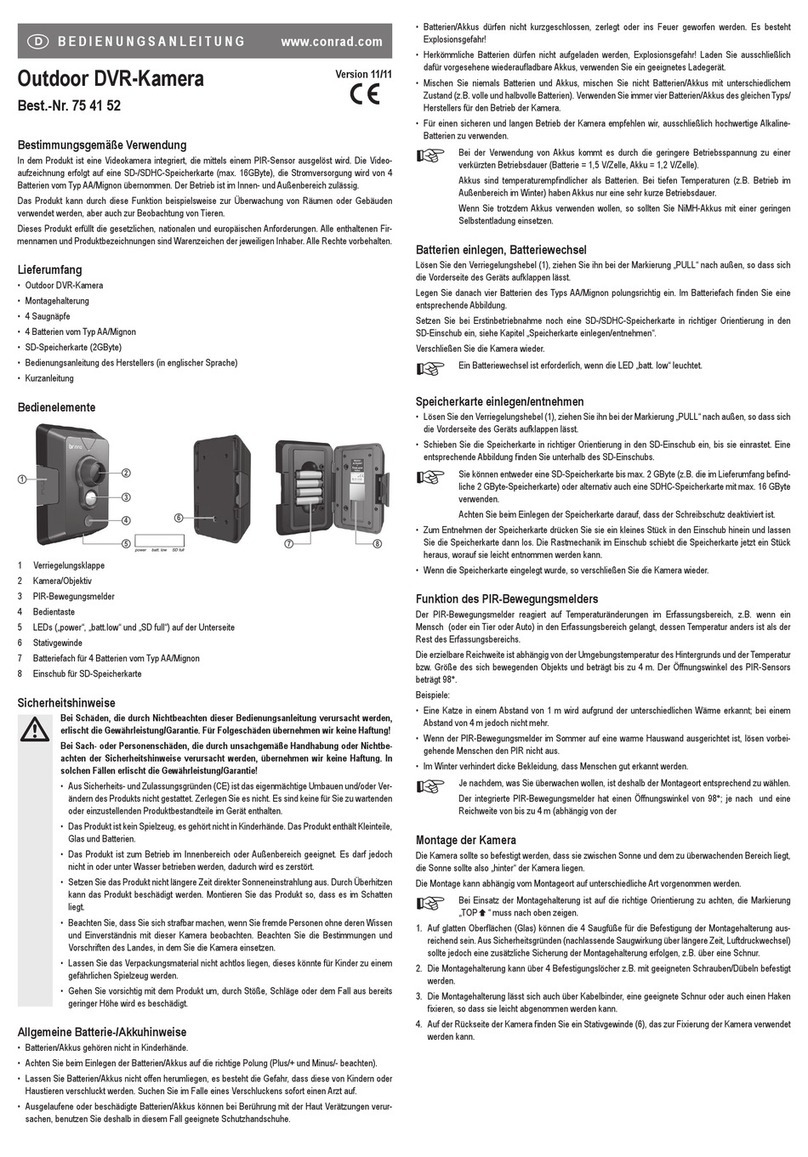
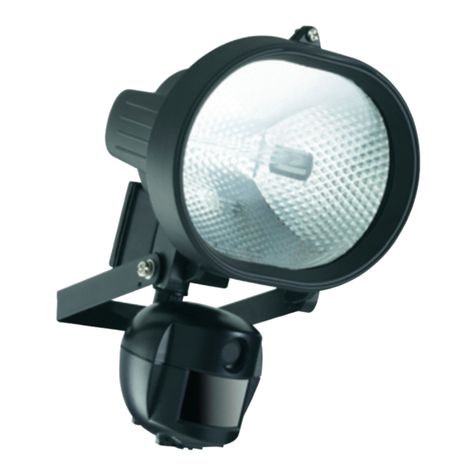
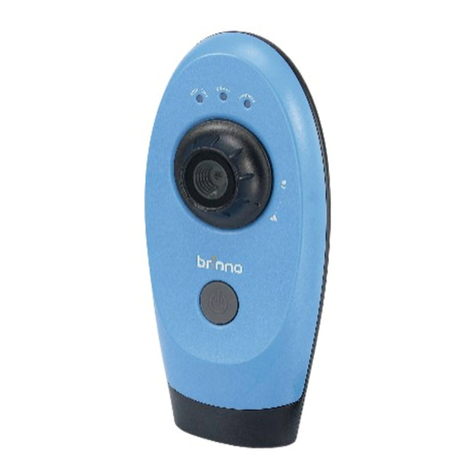
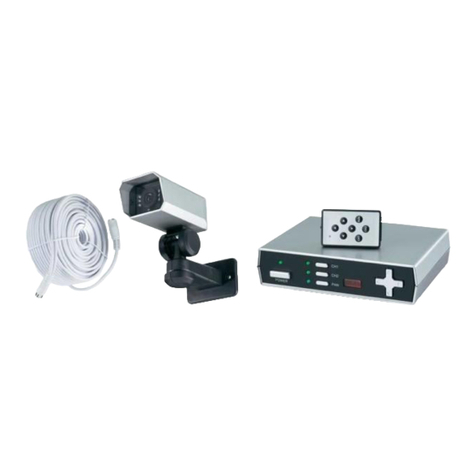
Conrad KC-3800 User manual

BEDIENUNGSANLEITUNG
Farbkamera mit Ton KC-3800 mit Objektiv 3,5mm – 8mm b/n 75 09 02
Diese Bedienungsanleitung gehört zu diesem Produkt. Sie enthält wichtige Hinweise zur Inbetriebnahme und Handhabung. Achten Sie hierauf, auch
wenn Sie dieses Produkt an Dritte weitergeben. Heben Sie deshalb diese Bedienungsanleitung zum Nachlesen auf!
Einführung
Sehr geehrter Kunde,
wir bedanken uns für den Kauf der Kamera. Dieses Produkt erfüllt die Anforderungen der geltenden europäischen und nationalen Richtlinien.
Bei Fragen wenden Sie sich an unsere Technische Beratung.
Deutschland: Tel. 0180/5 31 21 17 oder 09604/40 88 45
Fax 09604/40 88 44 E-Mail: tkb@conrad.de
Mo. - Fr. 8.00 bis 18.00 Uhr
Österreich: Tel. 0 72 42/20 30 60 · Fax 0 72 42/20 30 66
E-Mail: support@conrad.at
Mo. - Do. 8.00 bis 17.00 Uhr Fr. 8.00 bis 14.00 Uhr
Schweiz: Tel. 0848/80 12 88 · Fax 0848/80 12 89
E-Mail: support@conrad.ch
Mo. - Fr. 8.00 bis 12.00 Uhr, 13.00 bis 17.00 Uhr
Bestimmungsgemäße Verwendung
Die Kamera dient zur Überwachung und Sicherung von uneinsehbaren bzw. kritischen Bereichen (als Ladenüberwachung, in Türsprechanlagen, in
Eingangsbereichen oder auf Parkplätzen usw.) und zur Wiedergabe der aufgenommenen Bilder auf jedem geeigneten Fernsehgerät oder Monitor mit einem AV-
Eingang.
Die Kamera ist in Innenräumen einsetzbar. Mit einem passenden Wetterschutzgehäuse (nicht im Lieferumfang enthalten) kann die Kamera auch im Außenbereich
betrieben werden. Die Kamera kann mit einer optionalen Halterung an die Wand oder Decke montiert werden.
Bitte beachten Sie, dass Sie sich strafbar machen, wenn Sie fremde Personen ohne deren Wissen und Einverständnis mit dieser Kamera beobachten.
Dieses Produkt ist nur für den Anschluss an 12 Volt Gleichspannung zugelassen.
Das gesamte Produkt darf nicht geändert bzw. umgebaut werden! Die Sicherheitshinweise sind unbedingt zu beachten!
Sicherheitshinweise!! Bei Sach- oder Personenschäden, die durch unsachgemäße Handhabung oder Nichtbeachten der Sicherheitshinweise
verursacht werden, übernehmen wir keine Haftung! In solchen Fällen erlischt jeder Garantieanspruch.
Aus Sicherheits- und Zulassungsgründen (CE) ist das eigenmächtige Umbauen und/oder Verändern der Kamera nicht gestattet. Wenden Sie sich an eine
Fachkraft, wenn Sie Zweifel über die Arbeitsweise, die Sicherheit oder den Anschluss des Gerätes haben.
Beachten Sie auch die Sicherheitshinweise und Bedienungsanleitungen der übrigen Geräte, die an das Gerät angeschlossen werden, sowie in dem einzelnen
Kapitel dieser Anleitung.
Lassen Sie das Verpackungsmaterial nicht achtlos liegen, Plastikfolien/-tüten, Styroporteile, etc., könnten für Kinder zu einem gefährlichen Spielzeug werden.
Das Gerät gehört nicht in Kinderhände. Es ist kein Spielzeug.
In gewerblichen Einrichtungen sind die Unfallverhütungsvorschriften des Verbandes der gewerblichen Berufs-Genossenschaften für elektrische Anlagen und
Betriebsmittel zu beachten.
Funktionsbeschreibung: Die Kamera dient zu Überwachungszwecken in der Sicherheitstechnik, Bildtelekommunikation, in Eingangsbereichen usw. Es besteht
eine Anschlussmöglichkeit für Auto-Iris-Objektive. Die Aufnahme ist für C- oder CS-Objektive vorgesehen.
Inbetriebnahme: Um eine sachgemäße Inbetriebnahme zu gewährleisten, lesen Sie vor Gebrauch unbedingt diese Bedienungsanleitung mit den
Sicherheitshinweisen vollständig und aufmerksam durch!
Montage: Achten Sie bei der Auswahl des Aufstellungsortes Ihrer Kamera darauf, dass Einstrahlung von direktem, intensivem Sonnenlicht, Vibrationen und Staub
vermieden werden. Es dürfen sich keine Geräte mit starken Magnetfeldern in der Nähe befinden.
In der Nähe der Kamera sollte sich kein Gerät mit starken elektrischen Feldern befinden, z.B. Funktelefon, Funkgerät, elektrischer Motor, etc. Diese könnten die
Bildqualität negativ beeinflussen.
Direktes Sonnenlicht, bzw. helle Beleuchtung, etc. könnte das Kamerabild stark beeinflussen und ein Beobachten des Bildes erschweren. Achten Sie bei der Wahl
des Aufstellorts darauf.
Empfohlene Montagehöhe des Kameraobjektivs ca. 1,8m. Die Montagehöhe ist vom zu überwachenden Objekt abhängig. Vor der endgültigen Montage empfiehlt
es sich, die Kamera anzuschließen und das entsprechende Kamerabild am Monitor/TV-Gerät einzusehen, ob der zu überwachende Bereich angezeigt wird.
Gehen Sie dazu der Beschreibung wie unter Anschluss (nächstes Kapitel) beschrieben vor.
Anschluss
1a) Mikrofon (nicht abdecken)
1b) Halteschraube

Die Schutzkappen an der Kamera und am beiliegenden Objektiv durch Drehen gegen den Uhrzeigersinn entfernen. Nun das Objektiv in die Kamera schrauben.
Bei Verwendung eines Objektivs mit C-Fassung müssen Sie den Adapterring im Objektivaufnehmer entfernen. Hierzu die Halteschraube (1a) lösen und nach
erfolgter Montage wieder festschrauben. Wird ein Auto-Iris-Objektiv verwendet, muss der dazugehörige Stecker in die Steuerbuchse (6) gesteckt werden.
Verbinden Sie das beiliegende Netzteil mit der Niedervoltbuchse (5). Die Kamera wird über eine BNC-Leitung an dem Monitor/TV-Gerät angeschlossen. Sollte Ihr
Monitor/TV-Gerät einen Cinch-Eingang besitzen, müssen Sie einen Adapter (BNC-Stecker auf Cinch) verwenden. Für die Tonübertragung verbinden Sie die
Cinch-Audiobuchse (8) mit Ihren Monitor/TV-Gerät.
Beschreibung der Kamerarückseite:
MIR – spiegelverkehrte Darstellung
1. Wählschalter für Auto-Iris-Objektive mit automatischer Blendensteuerung.
Stellen Sie diesen Schalter nach Ihrem gewählten Objektiv ein.
DC-Ansteuerung: Wählen Sie diese Einstellung, wenn Ihr Auto-Iris-Objektiv ein DC-Steuersignal benötigt.
Video-Ansteuerung: Wählen Sie diese Einstellung, wenn Ihr Auto-Iris-Objektiv ein Video-Steuersignal benötigt.
2. Videobuchse: Verbinden Sie die BNC-Buchse mit dem Video-Eingang Ihres TV-Gerätes/Monitor.
3. DC-Blendeneinstellung: Bei Auto-Iris-Objektiven mit DC-Ansteuerung kann an dieser Einstellschraube die Blende justiert werden. Bei Auto-Iris-Objektiven
mit Videosignal-Ansteuerung wird diese Einstellung am Objektiv vorgenommen.
4. Betriebsanzeige: Die LED leuchtet gelb, bei korrekt angeschlossener Stromversorgung.
5. Anschlussbuchse für Stromversorgung: Verbinden Sie diese Buchse (12V/DC) mit dem beiliegenden Netzteil.
6. Belegung der Steuerbuchse für Auto-Iris-Objektiv
Video-Ansteuerung DC-Ansteuerung
Pin 1 Stromversorgung (9V 50mA) Bremse (-)
Pin 2 Nicht belegt Bremse (+)
Pin 3 Video Signal Antrieb (+)
Pin 4 Erde Antrieb (-)
7. Funktionsschalter
•MIR – spiegelverkehrte Darstellung
Bei Position „ON“ wird das Bild spiegelverkehrt dargestellt. Diese Funktion ist nützlich bei der Überwachung eines Fahrzeughecks (LKW, Bus). Bei
„OFF“ wird das Bild normal wiedergeben.
•BLC – Gegenlichtkompensation
Bei Position „ON“ wird der Bildmittelpunkt aufgehellt und der Bildrand abgedunkelt. Diese Funktion ist nützlich bei einer starken Hintergrundbeleuchtung.
Schalten Sie auf Position „OFF“, wenn das überwachte Objekt nicht im Mittelpunkt ist oder eine schwache Gegenlichtquelle vorhanden ist.
•AWB 2/AWB 1 – Automatischer Weißabgleich
Dieser Abgleich ist erforderlich, um das zu überwachende Objekt in der neutralen Grundfarbe darzustellen.
AWB 1 AWB 2
Automatische Regelung OFF OFF
Überwiegende Überwachung bei Tageslicht OFF ON
Überwiegende Überwachung bei Kunstlicht ON OFF
8. Audiobuchse: Verbinden Sie die Cinch-Audiobuchse mit Ihren Monitor/TV-Gerät.
Bedienung
Nach dem Anschluss von Video- und Audioausgang, der Spannungsversorgung und Montage des Objektivs ist die Kamera einsatzbereit. Stecken Sie das Netzteil
in die Steckdose.
Schalten Sie Ihr Fernsehgerät oder den Monitor ein und wählen Sie den Eingang, an dem die Kamera angeschlossen ist (z.B. AV-Eingang am Fernsehgerät).
Das Bild der Kamera erscheint auf dem Bildschirm. Sollte wider Erwarten auf dem Bildschirm kein Bild erscheinen oder sonst eine Fehlfunktion zu erkennen ist, so
schalten Sie sofort die Betriebsspannung ab, das TV-Gerät/Monitor aus und prüfen noch einmal entsprechend der Checkliste „Behebung von Störungen“ weiter
hinten in dieser Anleitung.

Objektiveinstellung: Zur Einstellung des Objektivs lösen Sie die Feststellschrauben 1 und 3:
1. Zoom: 3,5 bis 8mm +/-5%
2. Blende zur Anpassung der Hintergrundbeleuchtung
3. Bildschärfe
Nach erfolgter Einstellung die Feststellschraube 1 und 3 wieder fixieren.
Wartung
Überprüfen Sie regelmäßig die technische Sicherheit der Kamera und der angeschlossenen Stromquelle, z.B. auf Beschädigung der Anschlusskabel und der
Gehäuse.
Wenn anzunehmen ist, dass ein gefahrloser Betrieb nicht mehr möglich ist, so ist die Kamera bzw. das Netzgerät außer Betrieb zu setzen und gegen
unbeabsichtigten Betrieb zu sichern. Netzstecker aus der Steckdose ziehen!
Es ist anzunehmen, dass ein gefahrloser Betrieb nicht mehr möglich ist, wenn:
- die Kamera oder die Anschlussleitungen von Netzteilen sichtbare Beschädigungen aufweisen
- die Kamera oder angeschlossene Netzteile nicht mehr arbeiten
- nach längerer Lagerung unter ungünstigen Verhältnissen
- nach schweren Transportbeanspruchungen
Bevor Sie die Kamera oder ein angeschlossenes Netzteil reinigen oder warten beachten Sie unbedingt folgende Sicherheitshinweise:
Beim Öffnen von Abdeckungen oder Entfernen von Teilen können spannungsführende Teile freigelegt werden. Vor einer Wartung oder Instandsetzung muss
deshalb das Gerät von allen Spannungsquellen getrennt werden.
Kondensatoren im Gerät können noch geladen sein, selbst wenn es von allen Spannungsquellen getrennt wurde.
Eine Reparatur darf nur durch eine Fachkraft erfolgen.
D Hinweis zum Umweltschutz
Dieses Produkt darf am Ende seiner Lebensdauer nicht über den normalen Haushaltsabfall entsorgt werden, sondern muss an einem
Sammelpunkt für das Recycling von elektrischen und elektronischen Geräten abgegeben werden. Das Symbol auf dem Produkt, der
Gebrauchsanleitung oder der Verpackung weist darauf hin.
Die Werkstoffe sind gemäß Ihrer Kennzeichnung wiederverwertbar. Mit der Wiederverwendung, der stofflichen Verwertung oder anderen
Formen der Verwertung von Altgeräten leisten Sie einen wichtigen Beitrag zum Schutz unserer Umwelt. Bitte erfragen Sie bei der
Gemeindeverwaltung die zuständige Entsorgungsstelle.
Behebung von Störungen - Beachten Sie unbedingt die Sicherheitshinweise!
Problem Lösung
Ist der Niedervoltstecker vom Netzteil richtig in die Kamera gesteckt?
Leuchtet die Betriebsanzeige?
Ist Netzspannung vorhanden?
Ist das TV-Gerät/Monitor eingeschaltet und funktionsbereit?
Ist am TV-Gerät der richtige AV-Eingang bzw. am Monitor der richtige Eingang gewählt?
Ist die Schutzkappe am Objektiv abgenommen?
Kein Bild
Ist die Kamera wie unter dem Kapitel „Anschluss” weiter vorne in dieser Anleitung beschrieben an die Stromversorgung und das TV-
Gerät/Monitor angeschlossen?
Kein Ton Ist die Audio-Cinchbuchse mit dem richtigen Eingang am TV-Gerät/Monitor verbunden?
Ist das Objektiv richtig montiert?
Funktionsschalter überprüfen und gegebenenfalls umschalten.
Verfälschte
Bildwiedergabe Sind Blende und Bildschärfe richtig eingestellt?
Technische Daten
TV-System: PAL
Betriebsspannung: 12 V DC
Stromaufnahme: 150mA
Videoausgangspegel: 1 Vss / 75 Ohm
Bildaufnahmevorrichtung: ¼“ – Color Sharp CCD
Lichtempfindlichkeit: 1 Lux (F: 1,2)
Auflösung: 500H x 582V/ 400TV-Linien
Weißabgleich: automatisch / manuell
Video-Rauschabstand: > 48 dB (Auto Gain Aus)
Objektiv: 3,5mm – 8mm
Objektiv-Fassung: C-/CS-Fassung
Auto-Iris-Steuerung: DC / Video
Gewicht: 500 g
Abmessung ohne Objektiv: (L) 132 x (W) 65 x (H) 50 mm
Arbeitstemperaturbereich: -10°C bis +50°C

Introduction
Colour camera with sound and lens system 3.5 mm – 8 mm KC-3800
These operating instructions form an integral part of this product. They contain important information on installing and using the product. Please keep
this in mind, especially when passing this product on to third parties. For this reason, keep these operating instructions for future reference.
Dear Customer,
Thank you for purchasing this camera. This product meets the requirements of the applicable European and national directives.
In case of questions, consult our technical information service:
Germany: Tel. 0180/5 31 21 17 or 09604/40 88 45
Mon - Fri 8.00 to 18.00
Austria: Tel. 0 72 42/20 30 60 · Fax 0 72 42/20 30 66
e-mail: support@conrad.at
Mon - Thu 8.00 to 17.00 Fri. 8.00 to 14.00
Switzerland: Tel. 0848/80 12 88 · Fax 0848/80 12 89
e-mail: support@conrad.ch
Mon - Fri 8.00 to 12.00, 13.00 to 17.00
Intended Use
The camera is used to monitor and secure badly visible or critical areas (such as for shop monitoring, in gate telephones, in entrance areas or on car parks etc)
and to replay the images taken on every suitable TV set or monitor with AV input.
The camera is designed for indoor use. The camera is also suitable for outdoor applications when used with a suitable protection housing (not part of the supply).
The camera may be mounted to the wall or ceiling using an optional holding device.
Please keep in mind that you will render yourself liable to prosecution, if you keep persons under observation without their knowledge and approval with this
camera.
This product has been approved for connection to 12 Volt direct voltage only.
The entire product may not be changed or modified in any way. The safety instructions have to be observed without fail!
Safety instructions!! We do not accept liability for damage to property or personal injury caused by improper handling or non-compliance with the
safety instructions. Under these circumstances, any warranty expires.
For safety and certification (CE) reasons, unauthorised modifications and/or changes to the camera are not permitted.
Consult suitably qualified staff, if you have doubts about how the equipment operates or about how to connect it safely.
Comply with the safety and operating instructions of any other appliances that are connected to the device as well as to the individual chapters in these
instructions.
Do not leave the packaging material lying around carelessly. Plastic films and/or bags and polystyrene parts et cetera may become dangerous toys in the hands of
children.
Keep the device out of the reach of children. It is not a toy.
On commercial premises, the relevant accident prevention regulations for electrical equipment have to be complied with.
Functional description: The camera is used for monitoring in safety engineering, image telecommunication, in entrance areas, et cetera. Auto iris lenses can be
connected. Designed for C/CS mount lenses.
Initial Operation: In order to ensure proper commissioning, you should read these operating instructions including the safety instructions thoroughly and
attentively before using the system.
Installation
In choosing the location to set up your camera, please note that direct intense sunlight, vibrations and dust have to be avoided.
The device must not be set up in the vicinity of other devices with strong magnetic fields.
The camera should not be placed in the vicinity of devices with strong electrical fields, such as cell phones, radio sets and electrical motors, et cetera. They could
have a negative influence on the image quality.
Direct sunlight and/or bright illumination, et cetera may have a strong influence on the image and may make watching the pictures more difficult. Please observe
this fact when selecting the mounting place.
The recommended installation height of the camera lens is approx. 1.8 m. The installation height depends on the object to be monitored. Prior to the final
installation, we recommend to connect the camera and to look at the corresponding camera image on the monitor / TV set to make sure that the area to be
monitored is shown. Please proceed as described in the chapter on "Connecting the device” (next chapter).
Connecting the device
1a) Microphone (do not take off)
1b) Retaining screw

Remove the protective cover of the camera and the supplied lens by turning them anticlockwise. Now screw the lens into the camera. When using a lens with C
mount remove the adapter ring in the lens mount. Release the locking screw for it and retighten it after successful mounting. If you use an auto iris lens, plug the
appropriate connector into the control connector (6).
Connect the supplied power supply with the low-voltage connector (5). The camera is connected to the monitor/TV over a BNC line. If your monitor/TV is fitted with
a cinch input, please use an adapter (BNC connector to cinch).
For sound transmission connect the audio cinch connector (8) with your monitor/TV.
Use a direct voltage source with a 12 Volt output as a power supply. Never try to operate the camera on any other voltage.
The direct voltage source has to be able to supply a minimum current of 150 mA.
The camera is connected to the monitor / TV set by means of a BNC connector.
Description of the rear of your camera:
MIR – mirror image
1. Selector switch for auto iris lenses with automatic aperture control.
Set the selector according to your selected lens.
DC control: Please select this setting if your auto iris lens requires a DC control signal.
Video control: Please select this setting if your auto iris lens requires a video control signal.
2. Video output: Connect the BNC connector to the video input of your TV/monitor.
3. DC aperture setting: Use this adjusting screw to adjust the aperture of auto iris lenses with DC control. This setting is made at the lense in case of auto iris
lenses with video signal control.
4. Operational status indicator: The LED lights up yellow if the mains supply is connected correctly.
5. Connector for mains supply: Connect this connector (12V/DC) with the supplied power supply
6. Configuration of connector for auto iris lens
Video control DC control
Pin 1 Mains supply (9V 50mA) Brake (-)
Pin 2 Not used Brake (+)
Pin 3 Video signal Drive (+)
Pin 4 Ground Drive (-)
7. Function switch
•MIR – mirror image
In position “ON you receive a mirror image. This function is useful if you want to monitor a vehicle tail (lorry, bus). In “OFF” position you receive a
normal image.
•BLC – backlight compensation
In “ON” position the image centre is lighted up and the edge of the image is deepened. This function is useful in case of strong background
illumination. Set to “OFF” position if the monitored object is not the focus or if there is a low backlight source.

•ABW 2//AWB 1 – Automatic white balance
This balance is required if the object to be monitored is to be depicted in the neutral ground colour.
AWB 1 AWB 2
Automatic control OFF OFF
Monitoring mostly at daylight OFF ON
Monitoring mostly at artificial light ON OFF
8. Audio output: Connect the audio cinch connector with your monitor/TV.
Operation
After the connection of the video and audio output, the voltage supply and the mounting of the lens, the camera is now ready for use.
Plug the power supply into the mains socket.
Switch your TV set or the monitor on and select the input to which the camera is connected (such as AV input on the TV set).
The picture of the camera will appear on the screen. In the unlikely event that no picture appears on the screen or another malfunction occurs, immediately switch
off the operating voltage and the TV set / monitor, and check once again by using the “Troubleshooting” check list in these instructions.
Setting the lens
In order to set the lens, loosen the locking screws 1 and 3 and proceed as follows:
1. Zoom: 3.5 to 8 mm +/- 5 %
2. Aperture setting for adaptation of the background illumination
3. Image definition/focus
After making the adjustments, tighten the set screws 1 and 3 again.
Maintenance
Check the technical safety of the camera and its power supply source for damage to the connection cables or the housing, etc., at regular intervals.
If safe operation can no longer be assumed, the camera and/or the power supply unit have to be put out of service and precautions have to be taken to avoid
unintentional use. Disconnect the power plug from the mains socket!
Reasons to assume that safe operation is no longer possible include:
- the camera or the connection cables of power supply units are visibly damaged
- the camera or the connected power supply units no longer operate
- after storage for long periods under unfavourable conditions
- after considerable stress during transport
It is imperative that these safety instructions be followed before the camera or a connected device is cleaned or maintained.
Live components may be exposed when covers are opened or components are removed.
Before cleaning or servicing, the device has to be disconnected from all voltage sources.
Capacitors in the device may still be charged, even if it has been disconnected from all voltage sources.
Repair work always has to be carried out by qualified experts.
GB Environmental protection information
When no longer in use, this product may not be deposited in the normal household waste but should be brought to a collection point for
the recycling of electrical and electronic appliances. A symbol on the product, the operating instructions or the packaging draws
attention to this. The materials are recyclable as marked. By re-use, recycling or another form of using old appliances you are making
an important contribution towards the protection of the environment. Please ask your local authorities for the appropriate disposal point.
Troubleshooting - Do not fail to observe the safety instructions!
Problem Solution
Is the low-voltage connector of the power supply correctly plugged into the camera?
Has the TV set / monitor been switched on and is it operational?
Is the operational status indicator lighting?
Has the camera been connected to the right AV input of the TV set or to the right input of the monitor?
Is there any mains voltage?
No picture
Has the camera been connected up to the power supply unit and the TV set / monitor as described above in the chapter "Connecting
the device”?
No sound Is the audio cinch connector connected with the correct input of the TV/monitor?
Is the lens mounted correctly?
Check the function switch and switch if necessary.
Bad picture
reproduction Are lens and definition set correctly?
Technical specifications:
TV system: PAL

Operating voltage: 12 V DC
Power supply: 150 mA
Video output level: 1 Vss / 75 Ohm
Camera: ¼” – Color Sharp CCD
Minimum illumination: 1 Lux (F: 1,2)
Resolution: 500H x 582V / 400 TV lines
White balance: automatic / by hand
Video noise: > 45 dB (Auto Gain Off)
Lens: 3,5mm – 8mm
Lens mount: C/CS mount
Auto Iris Control: DC/video
Weight: 500 g
Dimensions without lens: (L) 132 x (W) 65 x (H) 50 mm
Operation temperature: -10°C to +50°C
Supplied power supply: 12 V DC 500 mAh
Supplied lens: 3,5mm – 8mm with CS mount
Mode d’emploi
Caméra couleur sonore avec objectif 3,5 mm – 8 mm KC-3800
Le présent mode d’emploi fait partie intégrante de ce produit. Il comporte d’importantes indications afférentes à la mise en service et à la manipulation
de l’appareil. Tenez compte de ces remarques, même en cas de cession de ce produit à un tiers. Par conséquent, ce mode d’emploi doit être conserver
pour une référence future.
Cher client,
Nous vous remercions pour l'achat de cette caméra. Avec ce système, vous avez acquis un produit fabriqué conformément à l’état actuel de la technique. Ce
produit répond aux exigences des directives européennes et nationales en vigueur.
Pour toutes questions, adressez vous à notre service conseil technique :
France: Tél. 0 826 827 000 · Fax 0 826 826 002
email: technique@conrad.fr
du lundi au vendredi de 9h00 à 19h00 samedi de 9h00 à 18h00
Suisse: Tél. 0848/80 12 88 · Fax 0848/80 12 89
email: support@conrad.ch du lundi au vendredi de 8h00 à 12h00, 13h00 à 17h00
Utilisation conforme
La caméra permet de surveiller et de protéger les espaces inaccessibles ou critiques (comme surveillance pour les commerces, dans les interphones ou les halls
d’entrée, sur les parkings etc. et de restituer les images enregistrées sur chaque téléviseur ou moniteur approprié disposant d’une entrée AV.
La caméra est conçue pour une utilisation intérieure. Mais équipée d’un boîtier de protection contre les intempéries (non fourni), la caméra peut également être
utilisée à l’extérieur. La caméra peut être fixée au mur ou au plafond à l’aide d’un support fourni en option.
Observez que vous êtes passible de peine lorsque vous observez des personnes étrangères sans qu’elles ne le sachent et sans leur consentement avec cette
caméra.
Ce produit n’est agrée que pour le branchement sur une tension continue de 12 volts.
Toute transformation ou modification de l’appareil est interdite ! Impérativement observer les consignes de sécurité !
Consignes de sécurité !! De même, le constructeur n’assume aucune responsabilité en cas de dommages matériels ou corporels résultant d’une
utilisation de l’appareil non conforme aux spécifications ou d’un non-respect des présentes instructions ! Dans de tels cas, cela a pour effet d’annuler
la garantie.
Pour des raisons de sécurité et d’homologation (CE), il est interdit de transformer ou de modifier arbitrairement la caméra.
En cas de doute à propos du mode opératoire, de la sécurité ou du branchement de l’appareil, adressez-vous à un spécialiste.
Respectez également les consignes de sécurité et les modes d’emploi des autres appareils raccordés à l'appareil considéré ainsi que les différents chapitres de ce
mode d’emploi.
Ne laissez pas traîner le matériel d'emballage sans surveillance. Les films et les sachets en matière plastique, les pièces en polystyrène, etc. peuvent se
transformer en jouets dangereux pour les enfants.
L'appareil ne doit pas être laissé à portée des enfants. Il ne s’agit pas d’un jouet.
Dans les installations industrielles, il convient d’observer les consignes de prévention d’accidents relatives aux installations et moyens d’exploitation, édictées par
les syndicats professionnels.
Description du fonctionnement : La caméra peut être employée à des fins de surveillance dans le domaine de l’ingénierie de la sécurité, la télécommunication
visuelle, dans les halls d’entrée.
La caméra offre la possibilité de brancher un objectif auto iris. Le support de fixation est prévu pour les objectifs C ou CS.
Les diodes à infrarouges intégrées qui s’allument automatiquement permettent d’effectuer une excellente surveillance, même l’obscurité absolue. La portée des
diodes à infrarouges 12 m.
Mise en service : Afin de garantir une mise en service impérativement ce mode d’emploi dans intégralité ainsi que les consignes de sécurité avant d’utiliser
l’appareil.
Montage : Lors du choix de l'emplacement pour l’installation de évitez toute exposition directe au soleil, aux vibrations, à la chaleur, au froid et à l'humidité.
L’appareil doit se trouver à distance de tout appareil à fort champ magnétique.
Aucun appareil à fort champ électrique tel que téléphone portable, radio, moteur électrique, etc. ne doit se trouver à proximité de la caméra. Caux-ci pourraient
influencer la qualité de l’image de manière négative.
Une exposition directe au soleil, respectivement un éclairage clair, etc. pourrait fortement influencer l’image de la caméra et compliquer l’observation de l’image.
Veillez-y lors du choix de l’emplacement de montage.
Hauteur de montage recommandée pour l’objectif de la caméra : env. 1,8 m.
La hauteur de montage dépend de l’objet à surveiller. Avant le montage définitif, il est recommandé de brancher la caméra et de contrôler l’image de la caméra sur
le moniteur/téléviseur afin de s’assurer qu’il s’agit bien de la zone à surveiller. Pour ce faire, suivez les indications décrites sous « Branchement » (chapitre
suivant).

Branchement
1a) Microphone (ne pas couvrir)
1b) Vis d’arrêt
Retirer les caches de protection de la caméra et sur l’objectif fourni en tournant dans le sens contraire des aiguilles d’une montre. Visser ensuite l’objectif sur la
caméra. Pour utiliser un objectif avec une monture C, vous devez retirer la bague d’adaptateur dans le support de fixation de l’objectif. Pour ce faire, dévissez la
vis de maintien et revissez-la une fois le montage terminé.
Si vous utilisez un objectif auto iris, le connecteur correspondant doit être branché dans la prise de commande (6).
Branchez l’adaptateur fourni sur la prise basse tension (5). La caméra est branchée via un câble BNC sur le moniteur/téléviseur. Si votre moniteur/téléviseur
dispose d’une entrée Chinch, vous devez utiliser un adaptateur (connecteur BNC sur Chinch). Pour la transmission du son, branchez la prise Audio Chinch (8) sur
votre moniteur/téléviseur.
Description de la face arrière de la caméra :
MIR – Image inversée
1. Bouton de sélection pour l’objectif auto iris avec commande automatique du diaphragme.
Réglez ce bouton selon l’objectif que vous avez choisi.
Commande DC : Choisissez ce réglage si votre objectif auto iris a besoin d’un signal de commande DC.
Commande Vidéo : Choisissez ce réglage si votre objectif auto iris a besoin d’un signal de commande Vidéo.
2. Prise Vidéo : Branchez la prise BNC sur l’entrée Vidéo de votre moniteur/téléviseur.
3. Réglage du diaphragme DC : Avec les objectifs auto iris disposant d’une commande DC, cette vis de réglage permet d’ajuster le diaphragme.
Avec les objectifs auto iris disposant d’une commande signal Vidéo, ce réglage est effectué sur l’objectif.
4. Affichage du fonctionnement : Le voyant DEL est allumé en jaune lorsque l’alimentation électrique est correctement raccordée.
5. Prise pour brancher l’alimentation électrique : Branchez cette prise (12 V/DC) sur l’adaptateur fourni.
6. Affectation de la prise de commande pour l’objectif auto iris
Commande Vidéo Commande DC

Pin 1 Alimentation électrique (9V 50mA) Frein (-)
Pin 2 Non attribuée Frein (+)
Pin 3 Signal Vidéo Entraînement (+)
Pin 4 Terre Entraînement (-)
7. Bouton de fonction
•MIR – Image inversée
Sur la position „ON“ l’image est inversée, comme dans un miroir.
Cette fonction est utile pour la surveillance de l’arrière d’un véhicule (camion, bus).
Sur la position „OFF“, l’image est de nouveau normale.
•BLC – Compensation de contre jour
Sur la position „ON“, le point central de l’image est éclairci et le rebord de l’image est obscurci. Cette fonction est utile en cas d’éclairage fort en arrière-
plan. Mettez sur la position „OFF“ si l’objet surveillé n’est pas au milieu ou si le contre-jour n’est pas très fort.
•AWB 2/AWB 1 – Balance de blancs automatique
Cette balance est nécessaire pour représenter l’objet surveillé en couleur de fond neutre.
AWB 1 AWB 2
Réglage automatique OFF OFF
Surveillance principalement à la lumière du jour OFF ON
Surveillance principalement à la lumière artificielle ON OFF
8. Prise Audio : Branchez la prise Audio Chinch sur votre moniteur / téléviseur Monitor.
Maniement
Après avoir branché la sortie Vidéo et la sortie Audio, l’alimentation électrique, et après montage de l’objectif, la caméra est prête à servir. Branchez l’adaptateur
dans la prise de courant.
Allumez votre téléviseur ou le moniteur puis sélectionnez l’entrée sur laquelle la caméra est branchée (entrée AV du téléviseur, par ex.).
L’image de la caméra s’affiche sur l’écran. Si, contre toute attente, l’image ne devait pas s’afficher sur l’écran ou qu’un dysfonctionnement est perceptible, coupez
immédiatement la tension de service, éteignez le téléviseur/le moniteur et contrôlez à nouveau en conséquence au moyen de la liste de vérification « Suppression
de pannes « à la fin du présent mode d’emploi.
Réglage de l’objectif
Pour régler l’objectif, dévissez les vis d’arrêt 1 et 3 et procédez de la manière suivante :
1. Zoom : 3,5 à 8 mm +/-5%
2. Diaphragme pour adapter l’éclairage d'arrière-plan
3. Netteté de l’image
Lorsque le réglage est terminé, revisser les vis de fixation 1 et 3.
Entretien
Contrôlez régulièrement la sécurité technique de la caméra et de la source de courant sur laquelle elle est branchée, absence d’endommagement au niveau des
câbles de connexion et du boîtier, par ex.
Dans la mesure où un fonctionnement sans risque du produit n’est plus assuré, il convient de mettre la caméra, respectivement son bloc d’alimentation, hors
service et de la préserver de tout fonctionnement involontaire. Retirez la fiche de secteur de la prise de courant ! Un fonctionnement sans risque n’est plus assuré
lorsque :
- la caméra ou les câbles de raccordement de blocs d’alimentation présentent des endommagements visibles,
- la caméra ou les blocs d’alimentation raccordés ne fonctionnent plus,
- l’appareil a été stocké pendant une période prolongée dans des conditions défavorables.
- la caméra a été soumise à de sévères contraintes durant le transport.
Avant de nettoyer ou d’entretenir la caméra ou un bloc d’alimentation connecté, respectez impérativement les consignes de sécurité suivantes :
L’ouverture du boîtier et le démontage de pièces risquent de mettre à nu des pièces sous tension. Avant tout entretien ou réparation, il convient donc de
débrancher la caméra de toutes les sources de tension. Les condensateurs montés dans l’appareil peuvent être encore chargés même après avoir déconnecté
l’appareil de toutes les sources de tension. Ne remplacez jamais vous-même les câbles de raccordement endommagés. Dans une telle situation, débranchez-les
du réseau et apportez-les dans un atelier spécialisé.
Les réparations doivent uniquement être effectuées par un technicien qualifié familiarisé avec les dangers potentiels encourus, respectivement les prescription
spécifiques en vigueur.
F Remarque concernant la protection de l’environnement
Ce produit, lorsqu’il est usagé, ne doit pas être jeté parmi les ordures ménagères ordinaires. Il doit être déposé dans un point de collecte
destiné au recyclage des appareils électriques et électroniques. C’est ce qu’indique le symbole apposé sur le produit, la notice d’utilisation
ou l’emballage. Les matériaux sont recyclables conformément à leur marquage. Par le recyclage des matières, la réutilisation au d’autres
formes de valorisation des anciens appareils, vous prenez part activement à la protection de notre environnement. Veuillez vous adresser
à votre mairie pour connaître les points de collecte ou déchetteries appropriés.
Dépannage : Observez impérativement les consignes de sécurité !
Problème Solution
Le connecteur basse tension de l’adaptateur est-il correctement branché sur la caméra ?
Est-ce que le téléviseur/le moniteur est allumé et en état de marche ?
Pas d’image
Est-ce que la bonne entrée AV a été sélectionnée sur le téléviseur, respectivement la bonne entrée sur le moniteur ?

L’affichage du fonctionnement est-il allumé ?
Y a-t-il une alimentation en courant du secteur ?
Est-ce que la caméra est branchée sur l’alimentation électrique et le téléviseur/le moniteur comme décrit dans le chapitre
« Branchement « du présent mode d’emploi ?
Pas de son La prise Audio Chinch est-elle branchée sur la bonne entrée du téléviseur / moniteur ?
L’objectif est-il correctement monté ?
Vérifier le bouton de fonction et modifier si nécessaire.
Rendu d’image
faussé Le diaphragme et la netteté de l’image sont-ils correctement réglés ?
Caractéristiques techniques
Système TV : PAL
Tension de service : 12 V DC
Courant absorbé : 150 mA
Niveau sortie Vidéo : 1 Vss / 75 Ohms
Capteur : ¼˝- Color Sharp CCD
Eclairage minimum : 1 lux (F: 1,2)
Résolution: 500H x 582V / 400 lignes TV
Balance des blancs : Automatique / manuel
Rapport signal / bruit : > 45 dB (Auto Gain Off)
Objectif: 3,5mm – 8mm
Monture Objectif: Monture C-/CS
Commande Auto Iris : DC / Vidéo
Poids : 500 g
Dimension sans objectif : (longueur) 132 x (largeur) 65 x (hauteur) 50 mm
Température de travail : de -10°C à +50°C
Adaptateur fourni : 12 V DC 500 mAh
Objectif fourni : de 3,5mm – 8mm avec monture CS
This manual suits for next models
1
Table of contents
Languages:
Other Conrad Digital Camera manuals

Conrad
Conrad 75 13 76 User manual

Conrad
Conrad 75 15 11 User manual

Conrad
Conrad 552331 User manual

Conrad
Conrad 500X User manual

Conrad
Conrad 1218294 User manual

Conrad
Conrad 75 16 17 User manual

Conrad
Conrad 75 42 19 User manual

Conrad
Conrad 86 10 35 User manual

Conrad
Conrad 75 01 91 User manual

Conrad
Conrad 80 85 83 User manual

Conrad
Conrad 1337784 User manual

Conrad
Conrad 75 11 71 User manual

Conrad
Conrad BC-713 User manual

Conrad
Conrad 75 26 88 User manual

Conrad
Conrad 2476051 Operating manual

Conrad
Conrad 750987 User manual

Conrad
Conrad TLC100 User manual

Conrad
Conrad 97 50 57 User manual

Conrad
Conrad 1369186 User manual

Conrad
Conrad 75 17 22 User manual