manuals.online logo
Brands
  1. Home
  2. •
  3. Brands
  4. •
  5. Cornwell Tools
  6. •
  7. Tools
  8. •
  9. Cornwell Tools CSE-1000 User manual

Cornwell Tools CSE-1000 User manual

CSE-1000 1 Rev. 07/24/07
• Operating Manual
• Warning Information
• Parts List
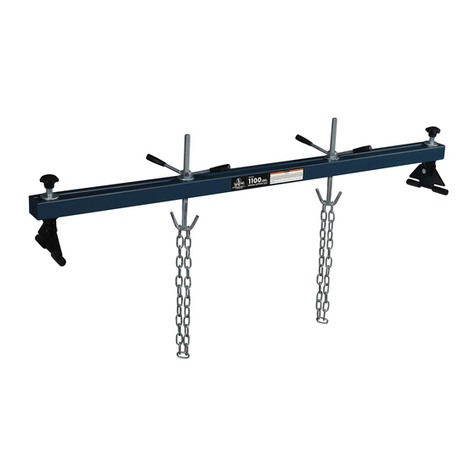
CSE-1000
1000 Lb.
Geared
Engine Stand
This operaTing
manual conTains
imporTanT safeTy
informaTion.
read carefully
and undersTand
all informaTion
before operaTing
This Tool.
save This manual
for fuTure use.
Do NoT overloaD. overloaDiNg caN
cause Damage To, or failure of The
sTaND.
This sTaND is DesigNeD for use oNly oN
harD level surfaces capable of sup-
porTiNg The loaD. use oN oTher ThaN
harD level surfaces caN resulT iN
sTaND iNsTabiliTy aND TippiNg of loaD.
lock The mouNTiNg-plaTe roTaTiNg
mechaNism before applyiNg a loaD.
release roTaTioNal lockiNg Device
sloWly aND carefully.
alWays use high sTreNgTh sae graDe 8
bolTs for eNgiNe mouNTiNg bolTs.
make sure WiDesT seT of mouNTiNg heaD
fiNgers are NearesT The grouND WheN
mouNTiNg aN eNgiNe To The sTaND.
alWays be sure ThaT The loaD is
ceNTereD aND secureD To The mouNTiNg
plaTe. off-ceNTer loaDs may make The
loaD aND haNDle roTaTe iN eiTher
DirecTioN WheN The roTaTioNal lockiNg
Device is releaseD.
Never looseN mouNTiNg bolTs uNless
eNgiNe is supporTeD by a craNe or
hoisT.
Do NoT use sTaND To Dolly or TraNsporT
eNgiNes.
No alTeraTioNs To The sTaND or aDapTers
shall be maDe.
Do NoT roTaTe moTor uNless rear legs
are secureD from TippiNg.
reaD, sTuDy aND uNDersTaND all
iNsTrucTioNs before operaTiNg.
failure To heeD These WarNiNgs may
resulT iN loss of loaD, Damage To
sTaNDs, aND/or failure resulTiNg iN
properTy Damage, persoNal or faTal
iNJury.
do noT crawl under engine or place any parT
of your body under engine aT any Time during
mounTing of engine, use of sTand, or removal
of engine.
refer To engine service manual for correcT
lifTing poinTs, mounTing poinTs and mounTing
bolTs! mounTing bolTs should be Torqued aT
appropriaTe amounT To mainTain load.
Meets or exceeds ASME PALD-1997
standards for performance & safety.
CSE-1000 2 Rev. 07/24/07
owner/user responsibiliTy
The owner and/or user must have a thorough understanding
of the manufacturer’s operating instructions and
warnings before using this engine stand. Personnel
involved in the use and operation of equipment shall
be careful, competent, trained, and qualified in the safe
operation of the equipment and its proper use when
servicing motor vehicles and their components. Warning
information should be emphasized and understood. If
the operator is not fluent in English, the manufacturer’s
instructions and warnings shall be read to and discussed
with the operator in the operator’s native language
by the purchaser/owner, making sure that the operator
comprehends its contents.
Owner and/or user must study and maintain for future
reference the manufacturer’s instructions. Owner and/
or user is responsible for keeping all warning labels
and instruction manuals legible and intact. Replacement
labels and literature are available from the manufacturer.
assembly insTrucTions
Assemble as shown in the diagram. First, install the casters
to the front and rear axles using the hardware items 1, 2
& 4, being sure to insert bolts from bottom side of caster
plate. Then attach the center beam assembly to the axle
assembly using hardware items 5, 11 & 12. Next attach
one end of brace, item 15, to the center beam using
hardware items 14, 11 & 12. Make sure position of brace is
as shown in diagram.
Make sure to secure the worm box, item 28, to the post,
item 21, using hardware item 29, before placing post onto
base assembly. Stand the post on the base and attach by
passing bolt, item 14, through middle hole B in the base
bracket and the hex shaped mount welded to the bottom
of the post. Then pass pin, item 8, through the upper hole
A in the base bracket and just in front of the post. Secure
pin with latch provided. Now, insert pin, item 8, through
the rear hole C including both brackets and secure with
latch provided. The last step is to attach the end of the
brace, item 15, to the post using pin and latch, item 8.
To fold engine stand, simply remove the three pins, fold
brace forward, and then fold post forward. The pins can
be stored in open holes.
inspecTion
Visual inspection should be made before each use of the
engine stand, checking for damaged, loose or missing
parts. Each stand must be inspected by a manufacturer’s
repair facility immediately, if accidentally subjected to an
abnormal load or shock. Any stand which appears to be
damaged in any way, found to be badly worn, or oper-
ates abnormally MUST BE REMOVED FROM SERVICE until
necessary repairs are made by a manufacturer’s autho-
rized repair facility. It is recommended that an annual
inspection of the stand be made by a manufacturer’s autho-
rized repair facility and that any defective parts, decals or
warning labels be replaced with manufacturer’s specified
parts. A list of authorized repair facilities is available from
the manufacturer.
mainTenance
Apply motor oil to support base wheels and casters. Apply
chassis grease to mounting head hub. Rotate head to
distribute grease. Keep both the grease fitting and the
gear teeth well lubricated.
operaTing insTrucTions
NOTE: Do not mount engine to mounting plate unless all
three pins, item 8, are in place and secured with latches
provided according to Assembly Instructions.
Drain oil and coolant and remove flywheel from engine
before mounting. Mount engine as directed in proce-
dures which follow. Refer to engine service manuals and
technical bulletins when mounting engines. Lift engine
(block) with crane or hoist until even with head of engine
stand. Bolt through adjustable fingers to back of block at
bell housing mounting holes. Fasten securely to mounting
plate. Slowly lower crane or hoist so that the engine stand
supports full weight of engine. To check engine balance,
carefully loosen hex bolt at back of rotating head, making
sure stand is secured from tipping, and turn handle to
rotate engine. If balance is not satisfactory, rotate engine
to its original position and raise with crane or hoist just
enough to take weight off the stand. Loosen bolts on
adjustable fingers and realign so that weight is evenly
distributed. Tighten all bolts securely and recheck balance.
To remove an engine from stand, attach a crane or hoist
and raise engine just enough to take engine weight off
stand. Carefully remove bolts attaching fingers to engine.
Be aware that there will be a slight movement of stand as
total engine weight is transferred to crane.
The engine may be rotated by turning the worm crank.
Grease before each use. The stand can be folded down
for easy storage and transportation by removing 3 pins,
item 8.
CSE-1000 3 Rev. 07/24/07
parTs breaKdown
cse-1000
*Available only in bolt kit Part #RS8300GBK.
Only items identified by Part No. are available individually.
iTem parT
no. no. descripTion qTy.
*1 M8 Nylok Nut 16
*2 M8 Washer 16
3 RS8300G04 Caster 2
*4 M8 x 20 Allen Head Bolt 16
*5 M12 x 75 Bolt 4
6 Rear Axle Assembly 1
7 Center Beam Assembly 1
*8 Pin & Latch 3
9 RS8300G16 Swivel Caster with Lock 2
10 Front Axle Assembly 1
*11 M12 Washer 6
*12 M12 Nylok Nut 6
13 Worm Crank 1
*14 M12 x 70 Bolt 2
15 Brace 1
16 RS8300G26 Finger 4
*17 M12 Nut 4
iTem parT
no. no. descripTion qTy.
*18 M12 Washer 4
19 RS8300G29BL2 Mounting Plate - Shaft Assembly 1
*20 Mounting Plate Bolt - M12 x 60 4
21 Post 1
22 RS8300G32 Worm Gear 1
23 RS8300G33 Worm Gear Pin 1
24 RS8300G34 Pin 1
25 RS8300G35 Washer 1
26 RS8300G36 Worm 1
27 RS35GF Grease Fitting 2
28 Worm Box 1
*29 M8 x 25 Bolt 3
30 Worm Box Cover 1
*31 Bolt 3
*32 Bolt 1
*33 M8 Washer 3
CSE-1000 4 Rev. 07/24/07
warranTy coverage
Cornwell Quality Tools Company (“Cornwell”) warrants against defects in material and workmanship on this product for a
period of TWO (2) YEARS from the date of original retail purchase. Subject to the conditions and limitations set forth below,
Cornwell will, at its option, either repair or replace any part of the product(s) that proves defective by reason of improper
workmanship or materials.
This warranty does not cover any damage to this product that results from accident, abuse, misuse, natural or personal disaster,
or any unauthorized disassembly, repair, or modification. Repairs, disassembly and modification are only authorized to be made
by Cornwell or a warranty service center approved by Cornwell.
warranTy service
To obtain warranty service, contact your Cornwell dealer, or you may ship the product to the nearest Cornwell Authorized
Warranty Center (see listing), transportation prepaid. You must include your name and address, proof of the date of original
retail purchase (receipt), and a detailed description of the problem you are experiencing and suspected defect.
eXclusions and limiTaTions
THIS WARRANTY AND THE REMEDIES SET FORTH ABOVE ARE EXCLUSIVE AND IN LIEU OF ALL OTHER WARRANTIES, REMEDIES
AND CONDITIONS, WHETHER ORAL OR WRITTEN, EXPRESS OR IMPLIED. CORNWELL SPECIFICALLY DISCLAIMS ANY AND ALL
IMPLIED WARRANTIES, INCLUDING, TO THE EXTENT PERMITTED BY APPLICABLE LAW, ANY WARRANTIES OF MERCHANTABILITY
AND FITNESS FOR A PARTICULAR PURPOSE. IF CORNWELL CANNOT LAWFULLY DISCLAIM IMPLIED WARRANTIES UNDER THIS
LIMITED WARRANTY, ALL SUCH IMPLIED WARRANTIES ARE LIMITED IN DURATION TO THE DURATION OF THIS WARRANTY.
IN NO EVENT SHALL CORNWELL BE LIABLE TO THE PURCHASER OR TO THE USER OF A CORNWELL PRODUCT FOR ANY SPECIAL,
INCIDENTAL OR CONSEQUENTIAL DAMAGES BASED UPON BREACH OF WARRANTY, BREACH OF CONTRACT, NEGLIGENCE,
TORT, OR ANY OTHER LEGAL THEORY. SUCH DAMAGES INCLUDE, WITHOUT LIMITATION, EXPENSES, LOST REVENUES, LOST
SAVINGS, LOST PROFITS, OR ANY OTHER INCIDENTAL OR CONSEQUENTIAL DAMAGES ARISING FROM THE PURCHASE, USE OR
INABILITY TO USE THE CORNWELL PRODUCT.
Some states do not allow the exclusion or limitation of incidental or consequential damages or exclusions or limitation on the
duration of implied warranties or conditions, so the above limitations or exclusions may not apply to you. This warranty gives
you specific legal rights, and you may also have other rights that vary by state.
Repair kits and replacement parts are available for many Cornwell products, regardless of whether or not the product is still
covered by a warranty plan.
Cornwell Quality Tools Company
667 Seville Road • Wadsworth, OH 44281-1094
Capacity.......................1000Lbs.
Height .............................36"
FoldedHeight.......................21"
Length.............................34"
Width...........................36-1/2"
Shipping Weight . . . . . . . . . . . . . . . . . . 96 Lbs.
CSE-1000 SPECIFICATIONS

Other Cornwell Tools Tools manuals

Cornwell Tools GG-CSGGA User manual

Cornwell Tools

Cornwell Tools GG-CSGGA User manual

Cornwell Tools CSEPR4T User manual

Cornwell Tools

Cornwell Tools CSEPR4T User manual

Cornwell Tools CAT4250AHBP User manual

Cornwell Tools

Cornwell Tools CAT4250AHBP User manual

Cornwell Tools CAT-2PST Product manual

Cornwell Tools

Cornwell Tools CAT-2PST Product manual

Cornwell Tools CAT250AHMV User manual

Cornwell Tools

Cornwell Tools CAT250AHMV User manual

Cornwell Tools CAT3250AHMV User manual

Cornwell Tools

Cornwell Tools CAT3250AHMV User manual

Cornwell Tools CAT850XLR User manual

Cornwell Tools

Cornwell Tools CAT850XLR User manual

Cornwell Tools CSE-1100ESB User manual

Cornwell Tools

Cornwell Tools CSE-1100ESB User manual

Cornwell Tools CAT800FR User manual

Cornwell Tools

Cornwell Tools CAT800FR User manual

Cornwell Tools CAT6000SD User manual

Cornwell Tools

Cornwell Tools CAT6000SD User manual

Cornwell Tools CAT-3190AH User manual

Cornwell Tools

Cornwell Tools CAT-3190AH User manual

Cornwell Tools CAT-255HD User manual

Cornwell Tools

Cornwell Tools CAT-255HD User manual

Cornwell Tools CSE1100 User manual

Cornwell Tools

Cornwell Tools CSE1100 User manual

Cornwell Tools CSEPR4TA User manual

Cornwell Tools

Cornwell Tools CSEPR4TA User manual

Cornwell Tools CAT820 User manual

Cornwell Tools

Cornwell Tools CAT820 User manual

Cornwell Tools CATPR14 User manual

Cornwell Tools

Cornwell Tools CATPR14 User manual

Cornwell Tools CAT900HD Product manual

Cornwell Tools

Cornwell Tools CAT900HD Product manual

Cornwell Tools CAT-250AH User manual

Cornwell Tools

Cornwell Tools CAT-250AH User manual

Cornwell Tools CTGCSGGA Product manual

Cornwell Tools

Cornwell Tools CTGCSGGA Product manual

Cornwell Tools CAT700MB User manual

Cornwell Tools

Cornwell Tools CAT700MB User manual

Cornwell Tools CAT3PST User manual

Cornwell Tools

Cornwell Tools CAT3PST User manual

Cornwell Tools CAT5500HD User manual

Cornwell Tools

Cornwell Tools CAT5500HD User manual

Cornwell Tools CTG-SSAGG User manual

Cornwell Tools

Cornwell Tools CTG-SSAGG User manual

Cornwell Tools CAT650AS User manual

Cornwell Tools

Cornwell Tools CAT650AS User manual

Popular Tools manuals by other brands

BGS technic 70971 instruction manual

BGS technic

BGS technic 70971 instruction manual

ACME DTP-125UL Operation, parts and safety manual

ACME

ACME DTP-125UL Operation, parts and safety manual

Sumake SA-4013 instruction manual

Sumake

Sumake SA-4013 instruction manual

Gage Bilt GB745SHV/LB8 Original instructions

Gage Bilt

Gage Bilt GB745SHV/LB8 Original instructions

Bolton Tools PBS-9 user manual

Bolton Tools

Bolton Tools PBS-9 user manual

Kurt SCD430 Operating instructions manual

Kurt

Kurt SCD430 Operating instructions manual

Sealey SNAP RE97/10C instructions

Sealey

Sealey SNAP RE97/10C instructions

Utility Solutions Jack Jumper USJJ-004 instruction manual

Utility Solutions

Utility Solutions Jack Jumper USJJ-004 instruction manual

Forza 5198 user manual

Forza

Forza 5198 user manual

Cessna 182 1965 owner's manual

Cessna

Cessna 182 1965 owner's manual

Graco Twistork 224854 Instructions - parts

Graco

Graco Twistork 224854 Instructions - parts

Wera 8100 SB 10 manual

Wera

Wera 8100 SB 10 manual

Sealey AK458DX.V4 manual

Sealey

Sealey AK458DX.V4 manual

ATIKA SWINGLINE 2000 - instructions

ATIKA

ATIKA SWINGLINE 2000 - instructions

Ferax FMV-160 manual

Ferax

Ferax FMV-160 manual

Impakt i1 System instruction manual

Impakt

Impakt i1 System instruction manual

Sealey VS0207 instructions

Sealey

Sealey VS0207 instructions

Schulz MIS 120 instruction manual

Schulz

Schulz MIS 120 instruction manual

manuals.online logo
manuals.online logoBrands
  • About & Mission
  • Contact us
  • Privacy Policy
  • Terms and Conditions

Copyright 2025 Manuals.Online. All Rights Reserved.