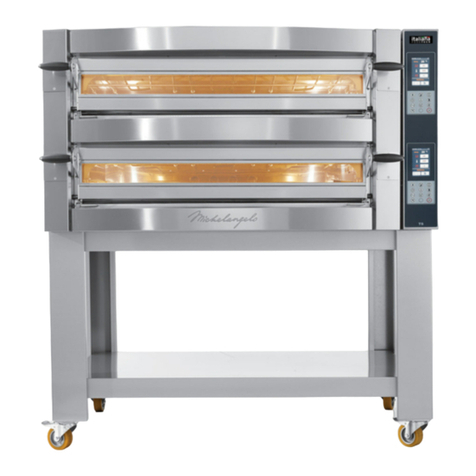
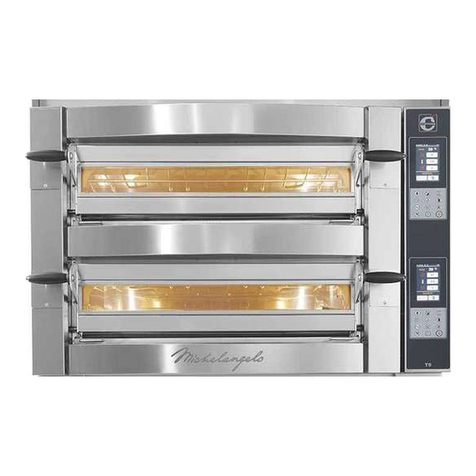
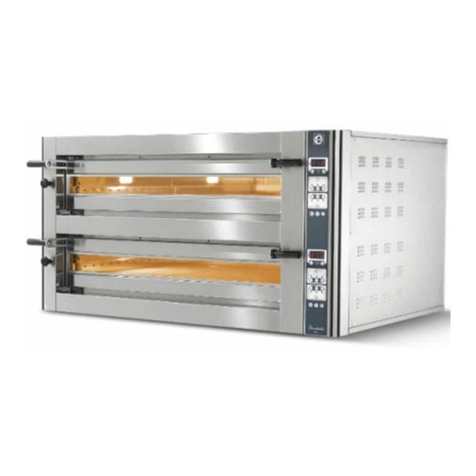
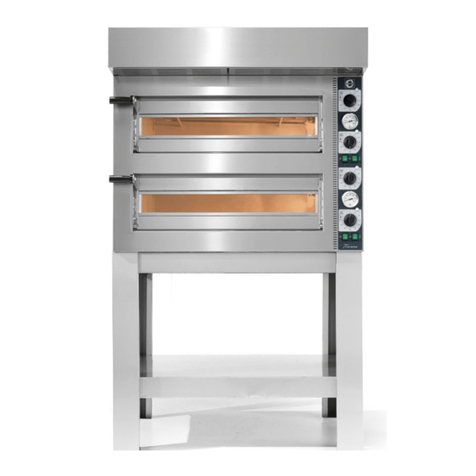
Cuppone Michelangelo User manual

Quick Guide
Michelangelo
OVEN

2
SPAZIO PER MATRICOLA
IT REGISTRATI SUBITO PER ATTIVARE LA GARANZIA SUL TUO PRODOTTO CUPPONE!
Ricordiamo che la procedura deve essere effettuata entro 48 ore dall’installazione.
www.cuppone.com/garanzia
Warranty
EN REGISTER NOW TO ACTIVATE THE WARRANTY ON YOUR CUPPONE PRODUCT!
We remind you that the procedure must be carried out within 48 hours since the
installation.
www.cuppone.com/en/warranty
FR
INSCRIVEZ-VOUSMAINTENANTPOURACTIVERLAGARANTIESURVOTREPRODUITCUPPONE!
Veuillez noter que la procédure doit être effectuée dans les 48 heures suivant
l’installation.
www.cuppone.com/fr/garantie
DE
REGISTRIEREN SIE SICH JETZT UM DIE GARANTIE DES CUPPONE PRODUKTS ZU
AKTIVIEREN!
Wir erinnern Sie daran, dass der Vorgang innerhalb von 48 Stunden nach der Installation durchgeführt werden muss.
www.cuppone.com/de/garantie
ES ¡REGÍSTRESE AHORA PARA ACTIVAR LA GARANTÍA DE SU PRODUCTO CUPPONE!
Recordamos que el procedimiento debe realizarse dentro de las 48 horas siguientes a la instalación.
www.cuppone.com/es/garantia
RU ЗАРЕГИСТРИРУЙТЕСЬ СЕЙЧАС, ЧТОБЫ ЗАДЕЙСТВОВАТЬ ГАРАНТИЮ НА ВАШ ТОВАР CUPPONE!
Напоминаем, что процедура должна быть выполнена в течение 48 часов после установки.
www.cuppone.com/ru/гарантия
NEL NOSTRO SITO POTRAI ANCHE SCARICARE I MANUALI D’USO DEI PRODOTTI!
ON OUR WEBSITE YOU CAN ALSO DOWNLOAD OUR PRODUCTS MANUALS!
VOUS POUVEZ TÉLÉCHARGER LES MANUELS D’UTILISATION DES PRODUITS SUR NOTRE SITE WEB !
AUF UNSERE WEBSITE KÖNNEN SIE AUCH DIE BEDIENUNGSANLEITUNGEN UNSERER PRODUKTE
HERUNTERLADEN
EN NUESTRO SITIO TAMBIÉN PODRÁ DESCARGAR LOS MANUALES DE USO DE LOS PRODUCTOS!
НА НАШЕМ САЙТЕ ВЫ МОЖЕТЕ СКАЧАТЬ РУКОВОДСТВА ПО ЭКСПЛУАТАЦИИ ПРОДУКЦИИ

RU Уважаемый установщик, уважаемый пользователь,
поздравляем с выбором изделия, спроектированного и изготовленного с применением авангардных технологий.
Перед поставкой заказчику оборудования прошла проверку и пусконаладочные испытания в цехах Изготовителя.
«Листок испытания производственного процесса» прилагается к изделию и гарантирует, что каждый этап производственного процесса - от сборки до
упаковки - тщательно проверен, как в отношении функциональности, так и в отношении безопасности.
Данное краткое руководство поясняет лишь некоторые базовые понятия по установке, эксплуатации и техобслуживанию оборудования.
По запросу в адрес Изготовителя доступны подробные руководства в цифровом формате, в которых представлена вся информация и рекомендации в
отношении оборудования. Перед началом эксплуатации внимательно прочитать содержимое настоящего руководства; если какие-либо понятия останутся
неясными, обратиться к Изготовителю за подробными разъяснениями.
ES Estimado instalador, amable usuario,
le felicitamos por elegir un producto diseñado y fabricado con tecnología de punta.
Antes de ser entregada al cliente, el equipo es controlado y probado en los talleres del Fabricante.
La “hoja de control del proceso de producción” adjunta, garantiza que cada paso del proceso de producción, desde el ensamblaje hasta el embalaje, ha sido
cuidadosamente verificado, tanto en términos de funcionalidad como de seguridad.
Esta guía rápida proporciona solo algunos conceptos básicos para la instalación, el uso y el mantenimiento del equipo.
A petición del fabricante, se encuentran disponibles folletos digitales ampliados que brindan todo tipo de información y asesoramiento sobre el equipo. Antes
del uso, lea atentamente el contenido de esta guía, si alguna noción no está clara, póngase en contacto con el fabricante para obtener las explicaciones adecuadas.
DE
Sehr geehrter Installateur, sehr geehrter Benutzer,
wir gratulieren Ihnen zur Entscheidung für ein Produkt, das unter Anwendung von Avantgarde-Technologien entwickelt und gefertigt wurde.
Vor der Auslieferung an den Kunden wird die Gerät in den Werkstätten des Herstellers kontrolliert und einer Abnahmeprüfung unterzogen.
Das beiliegende „Prüfblatt Produktionszyklus“ garantiert, dass jeder Schritt des Produktionsprozeses von der Montage bis zur Verpackung sowohl hinsichtlich der
Funktionalität, als auch hinsichtlich der Sicherheit sorgfältig überprüft wurde.
Diese Schnellanleitung liefert nur einige grundlegenden Angaben zur Installation, zur Benutzung und zur Wartung des Gerät.
Auf Anfrage sind beim Hersteller die vollständigen digitalen Handbücher verfügbar, die alle Informationen und Empfehlungen zum Gerät enthalten. Vor der
Benutzung aufmerksam den Inhalt der vorliegenden Anleitung lesen und für Auskünfte an den Hersteller wenden, falls etwas nicht klar sein sollte.
FR Cher installateur, cher utilisateur,
nous vous remercions d’avoir choisi un produit conçu et réalisé avec des technologies à l’avant-garde.
Avant la livraison au client, l’appareil est contrôlée et testée dans les ateliers du constructeur.
La “feuille de contrôle du processus de production” ci-joint, garantit que chaque passage du processus de production, à partir de l’assemblage à l’emballage, a été
soigneusement vérifiéautant en termes de fonctionnalité que de sécurité.
Ce guide rapide fournit seulement certaines notions de base pour l’installation, l’utilisation et l’entretien de l’appareil.
Sur demande au Constructeur sont disponibles les livrets numériques étendus qui fournissent tout type d’information et de conseil concernant l’appareil. Avant
l’utilisation, lire attentivement le contenu du présent guide ; si quelques notions ne sont pas claires, adressez-vous au constructeur pour les explications opportunes.
EN Dear installer, dear user,
we congratulate you for choosing a product designed and manufactured with cutting-edge technology.
Before delivery to the customer, the equipment is tested and inspected in the Manufacturer’s factories.
The“production process check sheet” enclosed with it guarantees that each step in the production process, from assembly to packaging, was carefully checked from
both the operating and safety standpoints.
This quick guide only provides some basic notions for equipment installation, use and maintenance.
Full digital booklets that provide every type of information and advice on the equipment are available upon request. Before use, carefully read this guide.
If any notion is not clear, please contact the Manufacturer for appropriate explanations.
IT Gentile installatore, gentile utilizzatore,
ci complimentiamo con Lei per aver scelto un prodotto progettato e realizzato con tecnologie all’avanguardia.
Prima della consegna al cliente, l’apparecchiatura viene controllata e collaudata nelle officine del Fabbricante.
Il “foglio verifica processo produttivo”allegato alla stessa, garantisce che ogni passaggio del processo produttivo, dall’assemblaggio all’imballo, è stato accuratamente
verificato, sia sotto il profilo della funzionalità che della sicurezza.
Questa guida rapida fornisce soltanto alcune nozioni di base per l’installazione, l’utilizzo e la manutenzione dell’apparecchiatura.
Su richiesta al Fabbricante sono disponibili i libretti digitali estesi che forniscono ogni tipo di informazione e consiglio riguardante l’apparecchiatura.
Prima dell’utilizzo, leggere attentamente il contenuto della presente guida, se qualche nozione non fosse chiara rivolgersi al Fabbricante per le adeguate spiegazioni.
CUPPONE 1963
Cuppone F.lli S.r.l.
Via Sile, 36
31057 Silea (TV) - ITALY
T +39 0422 361143
F +39 0422 360993
info@cuppone.com - www.cuppone.com

Ed. 0121 - 70702543 REV01 Michelangelo Oven - Quick Guide 7
Предупреждения по безопасности
Advertencias de seguridad
Sicherheitshinweise
Consignes de sécuritéSafety instructions
Installer warnings
EN
• Read this guide carefully before installing the
appliance, and keep it with care in an accessible
place for any future consultation by the various
operators.
• Moreover, the manual must always accompany
the product through its life, even in case of transfer.
• Before any movement or installation, check
that the room is suitable and systems comply
with the installation country standards and the
specifications indicated on the appliance rating
plate.
• All installation, assembly and non-routine
maintenance operations must be performed
exclusively by qualified technicians that are
authorised by the Manufacturer, in compliance
with the regulations in force in the user country,
and with the regulations on systems and work
safety.
• These appliances are intended to be used for
commercial applications, for example in restaurant
kitchens, canteens, hospitals and commercial
companies such as bakeries, butcher shops, etc.,
but not for the continuous and mass production
of food. A use other than the stated one is
considered improper, potentially dangerous for
people and animals and might permanently
damage the appliance. The improper use of the
equipment shall void the warranty
• Before performing any maintenance, replacing
components or carrying out any routine/
extraordinary cleaning, disconnect the electricity
supply.
• Unauthorised actions, tampering or modifications
that do not follow the information provided in
this manual can cause damages, injuries or fatal
accidents and null and void the warranty.
• It is forbidden to install the oven in environments
at risk of explosion.
• Installation or maintenance that fails to comply
with the instructions in this manual may cause
damage, injury or fatal accidents.
• Persons not involved with the appliance
installation may not pass through or stand in the
work area during appliance assembly.
• The serial plate provides important technical
information. This is vital in case of a request for
maintenance or repair of the equipment: please
do not remove, damage or modify it.
• Failure to follow these regulations may cause
damage or even fatal injury, subsequently
invalidating the guarantee and relieving the
Manufacturer of all liability.
• Caution, suffocation hazard! If left unattended,
packaging could be potentially dangerous for
both children and animals.
• Caution, hindrance hazard! If left unattended,
packaging could hinder vehicles and installers
during assembly operations.
User warnings
• Read this guide carefully before
using and maintaining the
appliance, and keep it with
care in an accessible place for any future
consultation by the various operators.
• Moreover, the manual must always accompany
the product through its life, even in case of transfer.
• Before performing any maintenance, disconnect
the electricity supply.
• Unauthorised actions, tampering or modifications
that do not follow the information provided in
this manual can cause damages, injuries or fatal
accidents and null and void the warranty.
• Use or maintenance that fail to comply with the
instructions in this manual may cause damage,
injury or fatal accidents.
• The serial plate provides important technical
information. This is vital in case of a request for
maintenance or repair of the equipment: please
do not remove, damage or modify it.
• Some parts of the equipment can reach high
temperatures. We recommend you avoid pressing
surfaces and do not get materials either flammable
or sensitive to heat near the appliance.
• Do not rest objects on the oven, above all if built
in material sensitive to heat.
• These appliances are intended to be used for
commercial applications, for example in restaurant
kitchens, canteens, hospitals and commercial
companies such as bakeries, butcher shops, etc.,
but not for the continuous and mass production
of food. A use other than the stated one is
considered improper, potentially dangerous for
people and animals and might permanently
damage the appliance. The improper use of the
Avvertenze di sicurezza
8
Предупреждения по безопасности
Advertencias de seguridad
Sicherheitshinweise
Consignes de sécurité
equipment shall void the warranty.
• This appliance can be used by children aged from
8 years and above and persons with reduced
physical, sensory or mental capabilities or lack
of experience and knowledge if they have been
given supervision and instruction concerning the
use of the appliance in a safe way and understand
the hazard involved. Children must not play with
the appliance. Cleaning and user maintenance
shall not be made by children without supervision.
• To clean the appliance, any of its components or
accessories and the sub-structure DO NOT use:
- aggressive, abrasive, powder or corrosive
detergents (e.g. hydrochloric or sulphuric acid,
caustic soda, etc.).
- abrasive or sharp tools (e.g. abrasive sponges,
scrapers, steel brushes, etc.);
- steamed or pressurised water jets.
• Thestaffusingtheappliancemustbeprofessionally
prepared and periodically trained on its use, as well
as the safety and accident prevention regulations.
• Children must be supervised to make sure they do
not play with the appliance or parts of it.
• Always use tools resistant to heat (e.g. In steel).
Cooking utensils in plastic or similar material
might not withstand the oven high temperatures.
• Check regularly that fumes can be discharged
safely. Do not obstruct the duct for any reason.
• FIRE RISK: leave the area around the appliance
free and clean from fuels. Do not store flammable
materials near this appliance.
• WARNING: RISK OF EXPLOSION! It is forbidden to
use the oven in environments at risk of explosion.
• WARNING: always switch off the main switch when
you finish using the appliance, above all during
cleaning or in cases of prolonged downtime.
• If you notice any anomaly (e.g. damaged power
cable, etc.), malfunction or fault, do not use the
appliance and contact a Service Centre authorized
by the Manufacturer. Demand original spare parts,
or the Warranty will be null and void.
• Place the emergency phone numbers in a visible
location.
• WARNING: it is forbidden to place flammable
solids or liquids (spirits for instance) in the cooking
chamber during the operation.
• Monitor the appliance during its entire operation,
do not leave dishes in the oven unattended!
• Failure to follow these regulations may cause
Symbols used in the manual and on
the labels applied to the machine
Indicates that caution is required when performing
an operation described in a paragraph that bears this
symbol. The symbol also indicates that maximum op-
erator awareness is required in order to avoid unwant-
ed or dangerous consequences
Reference to another chapter where the subject is
dealt with in more detail.
Manufacturer’s tip
Indicates that the surfaces marked with this symbol
may be hot and must therefore be touched carefully
Dangerous voltage
The symbol identifies the terminals which, connected
to each other, carry the various parts of a device or sys-
tem to the same potential (not necessarily the earth
potential)
Indicates that it is necessary to read carefully the para-
graph marked with this symbol before installing, using
and maintaining the equipment
The company cannot be held liable for any print or transcription
errors, reserving the right to make changes where deemed
suitable without prior notice.
Partial reproduction without the manufacturer's consent is
prohibited. Measurements are purely indicative and not binding.
The original language used to prepare this manual is Italian: the
Manufacturer is not responsible for any translation/interpretation
or print errors.
damage or even fatal injury, subsequently
invalidating the guarantee and relieving the
Manufacturer of all liability.
• We recommend you have the appliance checked
by an Authorized Service Centre at least once a
year.
Safety instructionsAvvertenze di sicurezza

Ed. 0121 - 70702543 REV01 Michelangelo Oven - Quick Guide 19
ECO
ECO
H
2
O
text
ECO
ECO
Fig.1.
Abb.1.
Pис.1.
Fig.2.
Abb.2.
Pис.2.
Fig.3.
Abb.3.
Pис.3.
ECO
ECO
min.
500 mm
[19,7 in.]
Max 35°C
Max 70%
Min 5°C
Max 95°F
Min 41°C
Kg
lb
ECO
ECO
ECO
ECO
Fig.4.
Abb.4.
Pис.4.
РУССКИЙ p. 28
Установка
ТОЛЬКО ДЛЯ ИСПОЛНЕНИЙ ДЛЯ США
Instalación
SOLO MODELOS DE EE.UU.
DEUTSCH p. 26
Installation
NURFÜR USA-VERSIONEN
FRANÇAIS p. 25
ESPAÑOL p. 27
Installation
UNIQUEMENT POUR LES VERSIONS USA
ENGLISH p. 24
Installation
FOR USA VERSIONS ONLY
ITALIANO p. 23
Installazione
SOLO PER MODELLO AMERICANO

20
ECO
ECO
MADE IN ITALY
Mod. ML935/2TS-C5-CP
VOLT AC KW
2019
S/N ML9352TC5CP 19020527
VOLT
AC
3 - 400V, 50Hz
KW 25,14
min.
min.
500 mm
[19,7 in. ]
250 mm *
[9.84 in.] *
1000 mm.
[40 in.]
250 mm *
[9.84 in.] *
min.
50 mm
[1.97 in. ]
min.
50 mm
[1.97 in. ]
Fig.5.
Abb.5.
Pис.5.
Fig.6.
Abb.6.
Pис.6.
Установка
Минимальное расстояние сбоку составляет 50 мм [1,97 in.], однако
рекомендуется оставить свободное пространство в 500 мм [19,7 in.]
с правой стороны* для облегчения доступа к электрооборудованию.
Если это невозможно, в случае необходимости проведения работ
потребуется сдвинуть печь с ее основания соответствующими
системами.
Год изготовления
Напряжение
Модель
Заводской номер
Поглощение
Instalación
La distancia lateral mínima es de 50 mm [1,97 pulgadas], sin
embargo, se recomienda dejar una distancia de 500 mm [19,7
pulgadas] en el lado derecho* para facilitar el acceso al sistema
eléctrico. Si esto no es posible, será necesario mover el horno de su
alojamiento mediante sistemas adecuados
Año de producción
Tensión
Modelo
Matrícula
Absorción
Installation
Der seitliche Mindestabstand beträgt 50 mm
[1,97 in.]
; wir empfehlen
jedoch, einen Abstand von 500 mm
[1,97 in.]
auf der rechten
Seite einzuhalten, um den Zugang zur elektrischen Anlage zu
vereinfachen. Falls dies nicht möglich ist, muss der Ofen bei Eingriffen
mit geeigneten Systemen aus seinem Fach entfernt werden.
Baujahr
Spannung
Modell
Seriennummer
Stromaufnahme
Installation
La distance latérale minimale est de 50 mm [1,97 in.]. Il est toutefois
conseillé de laisser un espace libre de 500 mm [19,7 in.] du côté
droit* pour faciliter l’accès au système électrique. Si cela n’est pas
possible, il faudra déplacer le four de son logement à l’aide de
systèmes adaptés en cas d’intervention.
Année de production
Voltage
Modèle
Plaque
signalétique
Absorption
Installation
The minimum side distance is 50 mm [1.97 in.], However we
recommend you leave a gap of 500 mm [19.7 in.] on the right side*
to make access to the electrical system easier. If this is not possible,
in case of intervention, it will be necessary to move the oven from
its housing with suitable systems
Year of production
Tension
Model
Serial number
Absorption
Installazione
La distanza minima laterale è di 50 mm [1,97 in.], tuttavia si consiglia
di lasciare uno spazio libero di 500 mm [19,7 in.] sul fianco destro
per facilitare l’accesso all’impianto elettrico. Se ciò non fosse
possibile, in caso di intervento, sarà necessario spostare il forno dal
suo alloggiamento con sistemi adeguati.
Anno di produzione
Tensione
Modello
Matricola
Assorbimento

Ed. 0121 - 70702543 REV01 Michelangelo Oven - Quick Guide 21
ABC
300 mm
[11,81 in.]
Ø150mm
[
Ø5,91
in.]
A
B
A
B
ECO
ECO
Fig.7.
Abb.7.
Pис.7.
Fig.8.
Abb.8.
Pис.8.
Установка
вытяжная система
прерыватель тяги
Instalación
instalación de aspiración
interruptor de tiro
Installation
Absauganlage
Schalter Zug
Installation
système d’aspiration
interrupteur de tirage
Installation
extraction system
draught switch
Installazione
impianto di aspirazione
interruttore di tiraggio

22
ECO
ECO
AA
N:
R - S - T... L:
T S R N
B
C
AC 3 N400
AC 230
AC 208
N
R
S
T
L
N
N
R
S
T
N
L
L1
L2
L3
L1
L2
L3
INOUT
AC 3 230
R
S
T
R
S
TINOUT
INOUT
INOUT
T S R N
D
N
R-S-T...L
Fig.9.
Abb.9.
Pис.9.
заземление фазы нейтраль
tierra fase neutro
Erde Phasen Nullleiter
terre phase neutre
earth phases neutral
terra fasi neutro

24
УстановкаInstalaciónInstallation
InstallationInstallation
EN Transport
Fig.1.
Fitted with personal protection equipment, trans-
port the appliance to the installation location.
Use a suitable vehi-
cle capable of withstanding the weight of the same.
Model single double
ML 435 169 kg - 372,5 lb 302 kg - 665,7 lb
ML 635 218 kg - 480,6 lb 380 kg - 837,7 lb
ML 635 L 212 kg - 467,3 lb 378 kg - 833,3 lb
ML 935 283 kg - 623,9 lb 473 kg - 1042,7 lb
Persons not involved with the appliance installation may not
pass through or stand in the work area during the transport of
the appliance. During the transport, pay particular attention to
passing through openings and/or doors.
Preliminary operations
Fig.2. Carefully remove the protective film.
If any glue residue is left on the surfaces, remove it with soapy
water but without any corrosive or abrasive products or sharp or
pointed instruments.
Check that all the parts making up the oven are in good con-
dition and without any faults or breakages, if that is not the
case, contact the Retailer for the procedures to follow.
Positioning
The positioning room must comply with the instructions provid-
ed in Fig.3.
Fig.4. The oven must be placed on a base, built by the Manu-
facturer or by yourself that:
• is flame and heat resistant;
• is perfectly stable and level;
• withstands the weight of the appliance.
In both cases, silicone the gap between the oven and the sup-
port or the bearing surface, using high temperature resistant sili-
cone (for USA versions only).
Comply with the measurements shown in the figure Fig.5.
Serial number plate reading
Fig.6. The serial number is on the right hand side of the ap-
pliance. It provides important technical information that is vital
in case of a request for maintenance or repair of the appliance:
please do not remove, damage or modify it.
Smoke extraction
The oven is fitted with a flue in the top to get rid of the steam
from the cooking chamber.
This steam, together with the one from the door during the work
phases, must be conveyed outside in one of the following
ways:
Fig.7.
A
through a hood supplied by the Manufacturer that ensures
perfect compatibility with the oven. For correct assembly and
fixing to the oven, see the sheet attached to it; the evacuation
flue must be for the exclusive use of the appliance, comply
with current regulations and have a diameter that allows the
passage of a
ø150 mm [Ø 5.91 in.]
evacuation pipe which
corresponds to the diameter of the tube to be fitted on the
hood (not supplied).
Bthrough a hood belonging to the user, of suitable capacity,
placed at about 300 mm [Ø 11.81 in.] from the oven;
C
through an adequate extraction system supplied by
the user connected to the oven flue: in this case a draught
switch must be installed between the extractor and the oven
chimney (the extractor, switch and tube are not supplied
by the Manufacturer). In this type of installation, the fumes
resulting from the opening of the door will not be extracted.
Electrical connection
The electrical connection must be carried out exclusively
by qualified personnel after reading the safety warnings
at the beginning of the manual.
Before installing the appliance, check that systems
comply with the regulations in force in the country
where it is going to be used and with the specications
indicated on the appliance rating plate on the RH
side of the oven.
Fig.9. The appliance is supplied without either power cable or
plug: they must both be fitted by qualified personnel. The cable
must be only of the type stated and the plug fitted to it must
be suitable for the consumption and connection of the oven to
the electrical mains.
If the oven is fitted with a double chamber, there are two
power cables and two plugs.
To connect the cable to the appliance, remove the RH side panel
of the oven, let the cable through the cable gland provided and
connect it to the terminal block correctly.
For a correct electrical connection, the appliance must:
• be included in an equipotential system in compliance
with the legislation in force. This connection must be made
between the various devices with the terminal marked with the
equipotential symbol . The cable must have a maximum
cross-section of 10 mm2 (in compliance with IEC EN 60335-2-
42:2003-09) and must be yellow-green;
• must be grounded to the mains (green-yellow wire);
• must be connected to a thermal dierential switch in com-
pliance with the regulations in force (0.03A A type);
• must be connected to an omnipolar circuit breaker allowing
complete disconnection in overvoltage III category conditions.
The Manufacturer accepts no liability for failure to comply with
the above.
If required, the cable can be replaced by the Dealer or its
technical service or by a person with similar qualifications
to prevent any risk.
Installazione

Ed. 0121 - 70702543 REV01 Michelangelo Oven - Quick Guide 29
Установка
RU
Предварительные проверки и
пусконаладочные испытания
Перед поставкой заказчику печь прошла проверку и
пусконаладочныеиспытаниявцехахИзготовителя.«Листокиспытания
производственного процесса» прилагается к изделию и гарантирует,
что каждый этап производственного процесса - от сборки до
упаковки - тщательно проверен, как в отношении функциональности,
так и в отношении безопасности. Завершить, объяснив пользователю
оптимальный и безопасный порядок эксплуатации оборудования, а
также выполнение операций планового техобслуживания и чистки.
Проверка функционирования и первое включение
Включить оборудование, следуя указаниям, приведенным в
«Руководстве по эксплуатации и техническому обслуживанию»,
прилагаемом к нему: руководствоваться им на протяжении
всех испытаний и проверить правильность функционирования
всех электрических компонентов. При первом использовании
рекомендуется задать температуру на значение 150°C - 302 °F, для
модели «TS» процент верхней части 80%, процент дна 20%, для
модели «CD» задать максимум для верхней части и минимум для
дна, минимум на 8 часов, не помещая в печь продукты питания. В
течение всего данного времени рекомендуется держать воздуховод
полностью открытым, а при наличии вытяжки включить ее. На этом
первом этапе печь, по причине испарения влаги из изолирующих
материалов, производит дым и неприятные запахи, которые
постепенно будут исчезать во время следующих циклов работы.
Instalación
ES Pre-pruebas y pruebas
Antes de la entrega al cliente, el horno se revisa y prueba en los
talleres del Fabricante. La “hoja de verificación del proceso de
producción”que se adjunta, garantiza que cada paso del proceso
de producción, del ensamblaje al embalaje, ha sido controlado,
desde el punto de vista de la funcionalidad y de la seguridad.
Termine de explicarle al usuario cómo usar el equipo de manera
óptima y segura y cómo llevar a cabo operaciones de manteni-
miento y limpieza de rutina.
Comprobacióndelfuncionamientoyprimer encendido
Opere el equipo siguiendo las instrucciones del manual “Uso
y mantenimiento” que se le adjunta: controle durante toda
la prueba y verifique que todos los componentes eléctricos
funcionen correctamente. En el primer uso, se recomienda
ajustar la temperatura a un valor de 150°C - 302 °F, para el
modelo “TS” porcentaje en el techo 80% solera 20%, para el
modelo “CD” ajustar Máx en el techo y Mín en la solera, durante
al menos, 8 horas, sin introducir alimentos en su interior.
Durante todo este tiempo, es aconsejable mantener la chimenea
de ventilación completamente abierta y, si está instalada la
campana, mantenerla encendida. En esta primera fase, el horno,
debidoala evaporaciónde lahumedadde losmateriales aislantes,
producirá humos y olores desagradables que desaparecerán
gradualmente en los siguientes ciclos operativos.
Installation
DE
Vorabnahme und Abnahmeprüfung
Vor der Auslieferung an den Kunden wird der Ofen in der Werkstatt
des Herstellers einer Abnahmeprüfung unterzogen. Das beiliegende
„Prüfblatt Produktionsprozess“ garantiert, dass alle Schritte des Produk-
tionsprozesses von der Montage bis zur Verpackung sowohl hinsicht-
lich der Funktionalität, als auch hinsichtlich der Sicherheit sorgfältig
überprüft worden sind. Zum Abschluss dem Benutzer erklären, wie das
Gerät auf optimale und sichere Weise benutzt wird und wie die ordent-
lichen Wartungs- und Reinigungsarbeiten durchgeführt werden.
Überprüfung der Funktionsweise und erstes Einschalten
Bei der Inbetriebnahme des Geräts die Angaben des beiliegenden
Handbuches „Benutzung und Wartung“ befolgen: Das Gerät während
des gesamten Tests überwachen und den ordnungsgemäßen
Betrieb der elektrischen Komponenten überprüfen. Bei der ersten
Benutzung sollte die Temperatur auf einen Wert von 150 °C - 302
°F für das Modell „TS”, Prozentsatz Oberhitze 80 %, Unterhitze 20 %
eingestellt werden, für das Modell „CD” Max. für die Oberhitze und
Min. für die Unterhitze einstellen, für zumindest 8 Stunden, ohne
Lebensmittel ins Innere zu stellen. Während dieser Zeit sollte der
Entlüftungskamin vollständig offen und - falls vorhanden - die Haube
eingeschaltetgehalten werden. Indieser ersten Phaseerzeugt der Ofen
aufgrund derVerdampfung der Feuchtigkeit der Isolierungsmaterialien
unangenehme Abgase und Gerüche, die während der nachfolgenden
Betriebszyklen nach und nach verschwinden.
Installation
FR Pré-essai et essai
Avant la livraison au client, le four est contrôlé et testé dans les
ateliers du Fabricant. La « feuille de contrôle du processus de pro-
duction » ci-joint, garantit que chaque passage du processus de
production, de l’assemblage jusqu’à l’emballage, a été soigneu-
sement vérifié tant sous le profil de la fonctionnalité que de la
sécurité. Terminez en expliquant à l’utilisateur comment utiliser
de manière optimale et sûre l’appareil et comment effectuer les
opérations d’entretien ordinaire et de nettoyage.
Vérication du fonctionnement et premier allumage
Mettez l’appareil en marche en suivant les indications du manuel
« Utilisation et Entretien » joint à celui-ci : surveillez-le durant
l’essai et vérifiez le bon fonctionnement de tous les composants
électriques.
Lors de la première utilisation, il est conseillé de
régler la température à une valeur de 150°C - 302 °F, pour le modèle
« TS » un pourcentage de 80 % en voûte et de 20 % en sole, pour le
modèle « CD » régler Max en voûte et Min en sole, pendant au moins
8 heures, sans introduire d’aliments à l’intérieur.
Durant tout ce temps, il est conseillé de laisser le conduit d’éva-
cuation complètement ouvert, et la hotte allumée, si présente.
Durant cette première phase, l’évaporation de l’humidité
des matériaux isolants produira des fumées et des odeurs
désagréables qui disparaîtront progressivement dans les cycles
de fonctionnement successifs.
Installation
EN Pre-testing and nal inspection
The oven is checked and tested in the Manufacturer’s plant
before being delivered to the customer. The“production process
check sheet” enclosed with it guarantees that each step in the
production process, from assembly to packaging, was carefully
checked from both the operating and safety standpoints.
Finish off explaining to the user how to use the appliance in an
optimal and safe way and how to carry out ordinary maintenance
and cleaning.
Checking the operation and rst start-up
Start the appliance following the instructions in the“Use and Main-
tenance” manual annexed: monitor it during the whole test and
check that all the electrical components work properly. On the
rst use, we recommend you set the temperature at a value of
150°C - 302 °F for model “TS” top percentage 80% bottom 20%,
for model “CD” set Max at the top and Min at the bottom, for at
least 8 hours, without any food inside. During this time, keep
the chimney flue fully open and the hood, if present, ON. In this first
phase, because of the humidity evaporating from the insulating
materials, the oven will give out unpleasant smells and fumes that
will gradually disappear during the following operating cycles.
IT Precollaudo e collaudo
Prima della consegna al cliente, il forno viene controllato e col-
laudato nelle officine del Fabbricante. Il “foglio verifica processo
produttivo” allegato allo stesso, garantisce che ogni passaggio
del processo produttivo, dall’assemblaggio all’imballo, è stato ac-
curatamente verificato, sia sotto il profilo della funzionalità che
della sicurezza. Terminare spiegando all’utente come utilizzare in
maniera ottimale e sicura l’apparecchiatura e come effettuare le
operazioni di ordinaria manutenzione e di pulizia.
Verica del funzionamento e prima accensione
Mettere in funzione l’apparecchiatura seguendo quanto riportato
nel manuale di “Uso e Manutenzione” allegato alla stessa: sorve-
gliarla durante tutta la prova e verificare il corretto funzionamento
di tutti i componenti elettrici.
Al primo utilizzo, si raccomanda
di impostare la temperatura ad un valore di 150°C - 302 °F, per il
modello “TS” percentuale al cielo 80% platea 20%, per il modello
“CD” impostare Max al cielo e Min alla platea, per almeno 8 ore,
senza introdurre alimenti all’interno. Durante tutto questo
tempo si consiglia di tenere completamente aperto il camino di
sfiato e, se è presente la cappa, di tenerla accesa. In questa prima
fase il forno, a causa dell’evaporazione dell’umidità dei materiali
isolanti, produrrà fumi e odori sgradevoli che scompariranno gra-
dualmente nei successivi cicli di funzionamento.
Installazione

32
text
ECO
1
4
7
10
3
6
9
11
25
8
Ven 27/04/2018 13:00
A
F G
H
B C D E ECO
Ven 27/04/2018 13:00
ECO
CUPPONE
Ven 27/04/2018 13:00
25
°C
80
27/04/2018 13:00
370
0
NAPOLETANA
-:-
25
°C
56
27/04/2018 13:00
300
20
57”
Program 01
1 2 3 4 5
6 7 8 9 0
x
OK
300 +-
Impostare valore temperaturaz
X
25
°C
80
27/04/2018 13:00
300
0
57”
Program 01
2
1
3
300°C
80
27/04/2018 13:00
300
0
MANUAL
-:-
27/04/2018 13:00
Selezione programma
CLASSICA
NAPOLETANA
TEGLIA
PADELLINO
FOCACCIA
NAPOLETANA
PRE. CLASSICA
EXIT
2
ECO
1
1
1
TS
Fig.20.
Abb.20.
Pис.20.
Fig.21. Abb.21. Pис.21.
Fig.22. Abb.22. Pис.22.
Fig.23.
Abb.23.
Pис.23.
Fig.24.
Abb.24.
Pис.24.
ECO
ECO
Эксплуатация
РУССКИЙ p. 50
BenutzungUse
DEUTSCH p. 44
Uso
FRANÇAIS p. 41
ESPAÑOL p. 47
Utilisation
ENGLISH p. 38
Utilizzo
ITALIANO p. 35
B
A
C
CUPPONE

Ed. 0121 - 70702543 REV01 Michelangelo Oven - Quick Guide 33
Fig.25. Abb.25. Pис.25.
Fig.27. Abb.27. Pис.27.
Fig.29. Abb.29. Pис.29.
Fig.28. Abb.28. Pис.28.
Fig.26. Abb.26. Pис.26.
300
°C
56
27/04/2018 13:00
300
20
MANUAL
1 2 3 4 5
6 7 8 9 0
x
OK
03:10 +-
Imposta valore tempo
X
300°C
56
27/04/2018 13:00
310
20
MANUAL
-:-
1
300°C
56
27/04/2018 13:00
310
20
MANUAL
-:-
2
3
03:10
ECO
Ven 27/04/2018 13:00
CUPPONE
300
°C
56
27/04/2018 13:00
310
20
MANUAL
03:10
ECO
Ven 27/04/2018 13:00
310
°C
70
27/04/2018 13:00
310
20
NAPOLETANA
-:-
ECO
Ven 27/04/2018 13:00
27/04/2018 13:00
Data e ora
Gestione
Programmi
HACCP
Versioni
rmware
Ore di
lavoro
Lingua
Parametri Test I/O
1
2
2
27/04/2018 13:00
Data e ora
Gestione
Programmi
HACCP
Versioni
rmware
Ore di
lavoro
Lingua
Imposta data e ora x
03 05 2018
11
Ora solare/legale
Stati Uniti
30
EXIT OK
27/04/2018 13:00
Data e ora
Gestione
Programmi
HACCP
Versioni
rmware
Ore di
lavoro
Lingua
Parametri Test I/O
Seleziona nuova lingua x
EXIT OK
English
Italiano
ECO
Ven 27/04/2018 13:00
ECO
Ven 27/04/2018 13:00
310°C
70
27/04/2018 13:00
310
20
NAPOLETANA
-:-
CUPPONE

Ed. 0121 - 70702543 REV01 Michelangelo Oven - Quick Guide 37
ЭксплуатацияBenutzungUse
UsoUtilisationUtilizzo
EN Knowing your oven
Your oven can be used only to bake pizzas or similar dishes, such
as bread or focaccia and to grill vegetables. The temperature in
the chamber is controlled by boards that switch the heating ele-
ments on and off to keep the set temperature constant.
The oven can manage separately the powers:
• of the bottom part of the oven chamber;
• of the top part of the oven chamber.
Preparing to use the oven
Clean the oven and any accessories accurately, both externally
and internally, following the instructions in the dedicated chapter
rigorously.
Oven cleaning - pag. 54.
On the rst use, we recommend you set the temperature at
a value of 150°C - 302 °F for model “TS” top percentage 80%
bottom 20%, for model “CD” set Max at the top and Min at the
bottom, for at least 8 hours, without any food inside. During
this time, keep the bleed valve open. If a hood is fitted, we rec-
ommend it is kept ON. In this first phase, because of the humidity
evaporating from the insulating materials, the oven will give out
unpleasant smells and fumes that will gradually disappear during
the following operating cycles.
Some parts of the equipment can reach high tempera-
tures. We advise you to avoid touching surfaces and not
to get materials either flammable or sensitive to heat near
the appliance.
Do not rest objects on the oven, above all if built in ma-
terial sensitive to heat. Take care and use personal protection
equipment (i.e. gloves) when putting food into the cooking
chamber or getting it out.
CD MODELS
Knowing the control panel Fig.10.
1 Main display: Displays alternatively:
• the current temperature in the chamber
• the set temperature
• the intervention time of the end-of-cooking sound warning
• the countdown time (time to the oven switching on if pro-
grammed switch-on is used)
2 Keys + and - : Allow increasing or decreasing:
• the temperature values in the chamber,
• the intervention time of the end-of-cooking sound warning
• the countdown time (time to the oven switching on if pro-
grammed switch-on is used)
3
Element LED: with the oven running, if on, this indicates that the
elements are heating; with the oven off, if flashing, it indicates a
countdown (timed switch-on)
4 Top power check: Allows checking the power of the ele-
ments in the top, offering three adjustments:
• OFF
• MIN = 33%
• MAX = 100%
4A top LEDs: highlight the selection made
5 Bottom power check: Allows checking the power of the el-
ements in the bottom, offering three adjustments:
• OFF,
• MIN = 33%
• MAX = 100%
5A bottom LEDs: highlight the selection made
6 ON/OFF switch: Switches the display on and off
7 Light key: Switches the light in the cooking chamber on and
off
8 Clock key
With the oven on: activates an end-of-cooking acoustic signal
With the oven off: sets the programmed switch-on
9 Chimney key: Opens and closes the steam holes in the back
of the cooking chamber
Use guided procedure
The oven can be switched on:
• manually: switching the oven on when it must be used it is
necessary to wait at least an hour for the oven to preheat and
get the right temperature
Check the following use procedure
(points A, B, C, D, etc.)
• programming it: setting the number of hours missing to the
next switch-on the oven will switch on automatically See
page
35 cap.“Programmed switch-on”
• automatically: using a clock or SMS (with external modules
not supplied by the Manufacturer).
A - Turning the oven on manually
Fig.11. Pressing the ON/OFF key, the display lights up and
shows the current temperature of the cooking chamber (e.g.
25°C - 77°F).
B - Setting the preheating
Pre-heating must have the same cooking parameters as the
recipe to be used. It must be carried out without products in the
cooking chamber and takes about an hour for the oven to be
ready for cooking.
During preheating, the flue gas discharge valve must al-
ways be kept closed to prevent heat escaping from the
chamber and the heating elements being turned on with
the consequent overheating of the refractory surfaces which
would cause the products to burn.
Fig.12. Set the pre-heating temperature using the “
+” o “-”
keys, until the desired value is displayed.
Fig.13. Set the top and bottom power acting on the keys
shown in the figure. After setting these three parameters, the
oven starts heating straight away. The“heating element”LED will
switch off after about an hour: this means the oven has reached
the temperature set for pre-heating and is ready to cook.
C - Starting cooking
Fig.14. Once preheating is complete, you can start cooking
and bake the products using personal protection equipment
(e.g. gloves) and tools suitable for contact with food and made of
material resistant to high temperatures (e.g. steel).
For optimal results, always adhere to the oven capacity
declared by the Manufacturer and position the products
to be cooked evenly in the cooking chamber.
During cooking, it is always possible to change any value by act-
ing as usual.
During cooking, the heating element LED may switch back
on; this means the elements have come back on to keep the
set temperature constant.

38
D - Switching the light on (optional)
Fig.15. When necessary, it is possible to switch on the oven
light to check the cooking, acting on the light key .
Press the same key to switch it off.
E - Adjusting the steam holes
Fig.16. In the back of the cooking chamber there are some
steam holes: they can be more or less open to keep the degree
of humidity more suited to the type of product to bake in the
cooking chamber.
To open the holes, keep the button indicated in the figure pressed
continuously:
they begin to open progressively. To block them in
the desired position, just release the key.
F - Activating an end-of-cooking signal (buzzer)
Fig.17. If you wish, you can enable a buzzer that will go off
when the set time expires, warning that cooking is complete.
To activate it, with the oven on, press the“clock”key.
The display will show after how long the acoustic signal will
sound (e.g. 3.3 that is three minutes and thirty seconds): if you
want to change this default time, use the “+” or “-” keys until the
display shows the desired time (e.g. 5.2 that is five minutes and
twenty seconds). After setting it, the countdown starts, at the
end of which a buzzer will sound to highlight the end of cooking.
To stop the buzzer, press the “clock”key.
Warning! the oven continues heating when the buzzer
goes off!
G - Switching the oven o
Fig.18. To switch the oven off, keep the ON/OFF key pressed
for about 2 seconds.
Programmed switch-on
The programmed switch-on function is very useful because
the oven can be already hot, and therefore ready to bake,
when the restaurant is opened.
Fig.19. To activate it, with the oven o, press the “clock”key.
The display will show the time to switch-on: if you wish to
change this default time, use the “+” or “-” keys until the display
shows the desired time (maximum time 99.5 that is 99 hours and
50 minutes).
Once set, the countdown starts, at the end of which the oven will
switch on automatically with the temperature and power param-
eters used for the last cooking.
If you wish to change them:
• exit programmed switch-on pressing the“clock” key,
• switch the oven on with the ON/OFF key,
• set a cooking cycle with the desired parameters
• switch the oven off with the ON/OFF key,
• set the programmed switch-on as explained above.
To exit the function and cancel programmed switch-on, touch
the“clock” key again.
TS MODELS
Knowing the control panel
Fig.20.
1 Pyrolysis program key: Starts the pyrolysis program to
clean the oven
2 ECO program key: Starts the ECO program for further
explanation refer to the extended digital manual.
3 MAX program key: Starts the MAX program for further
explanation refer to the extended digital manual.
4 TIMER key
Stand-by screen: enables the holiday mode;
Work screen: enables/disables the weekly switch-on timer
function.
5 Buzzer key: Activates an end-of-cooking acoustic signal
6 Program key: Allows viewing and using the programs saved
by the user
7 Chimney key: Opens and closes the steam holes in the back
of the cooking chamber
8 Light key: switches the light in the cooking chamber on and
off
9 DIARY key: Gives access to the diary page
10 SERVICE key (settings): Gives access to the user’s settings
for further explanation on use refer to the extended digital
manual.
11 ON/OFF switch: Powering the oven on and off
FUNCTION BAR
A Current date
B Chamber light
Shows the state of the light in the chamber (on or off)
C Vent
If on, it shows the chimney is opening (the user is acting on
the chimney key 7)
D Warning
Highlights a warning to read (e.g. maintenance)
E Current time
F PROGRAMMED SWITCH-ON key
Gives access to the Weekly programmed switch-on page:
it is possible to program the oven automatically switching on
and off for the whole week for further explanation on use
refer to the extended digital manual.
G HOLIDAY key
Gives access to the Holiday page: this function allows
interrupting for a certain period of time the oven switching on
and off every week, without having to cancel it for further
explanation on use refer to the extended digital manual.
HDIARY key
Gives access to the Diary page, where it is possible to set up
to 10 notes that will be displayed at the set time on the set
day. Every note can also be repeated cyclically for further
explanation on use refer to the extended digital manual.
Use guided procedure
The oven can be switched on:
• manually: switching the oven on when it must be used it is
necessary to wait at least an hour for the oven to preheat and
get the right temperature
Check the following use procedure
(points A, B, C, D, etc.)
• programming it: setting the number of hours missing to the
next switch-on the oven will switch on automatically for fur-
ther explanation on use refer to the extended digital manual.

Ed. 0121 - 70702543 REV01 Michelangelo Oven - Quick Guide 39
• automatically: using a clock or SMS (with external modules
not supplied by the Manufacturer).
A - Turning the oven on manually
Fig.21. After powering the oven, the display lights up and
shows the STAND-BY page. Pressing the ON/OFF key, the display
shows the cooking page.
B - Setting the preheating
Pre-heating must have the same cooking parameters as the rec-
ipe to be used. It must be carried out without products in the
cooking chamber and takes about an hour for the oven to be
ready for cooking.
It is possible to set the pre-heating in two ways:
• Fig.22.
entering manually the preheating temperature
(A) and the desired top (B) and bottom (C) power.
The entered parameters cannot be stored, so they need to be reset
every time.
• Fig.23. starting a recipe (program) already stored,
previously saved by the user for further explanation on how
to create a recipe, refer to the extended digital manual.
After setting, the oven starts heating straight away in compliance
with the set parameters.
During preheating, the steam holes in the back of the
cooking chamber must be kept always closed, to prevent
the elements from being on too long and warming the
refractory surfaces too much, causing the first pizzas to burn.
C - Starting cooking
Fig.24. Once preheating is complete, you can start cooking
and bake the products using personal protection equipment
(e.g. gloves) and tools suitable for contact with food and made of
material resistant to high temperatures (e.g. steel).
During cooking or preheating, if the current temperature in the chamber is:
• lower than the one set (so the elements are active), the icons
identifying the top and bottom are red
• equal to or higher than the set one (so the elements are off), the
icons identifying the top and bottom are white
For optimal results, always adhere to the oven capacity
declared by the Manufacturer and position the products
to be cooked evenly in the cooking chamber.
D - Activating an end-of-cooking signal (buzzer)
Fig.25. If you wish, you can enable a buzzer that will go off
when the set time expires, warning that cooking is complete.
The display shows after how much time the buzzer will go
o (e.g. 3:10 that is three minutes and ten seconds). After set-
ting it, the countdown starts, at the end of which a buzzer will
sound to highlight the end of cooking. To stop the buzzer, press
the buzzer key.
Warning! the oven continues heating when the buzzer
goes off!
E - Switching the light on (optional)
Fig.26. When necessary, it is possible to switch on the oven
light to check the cooking, acting on the light key .
Press the same key to switch it off.
F - Adjusting the steam holes
Fig.27. In the back of the cooking chamber there are some
steam holes: they can be more or less open to keep the degree
of humidity more suited to the type of product to bake in the
cooking chamber.
To open the holes, keep the dedicated key pressed continuously:
they begin to open progressively. To block them in the desired
position, just release the same key.
G - Switching the oven o
Fig.28. To stop cooking, press the ON/OFF key: the oven goes
into stand-by mode.
Setting the correct language, date and
time
Fig.29. In this section, the language as well as the current date
and time can be set.
In the bottom part of the page, you can set the automatic
change to summer time, choosing the Europe or United States
version.
• Europe: summer time starts the last Sunday in March at 2:00
a.m., winter time starts the last Sunday in October at 3:00 a.m.
• United States: summer time starts the second Sunday
in March at 2:00 a.m.; winter time starts the first Sunday in
November at 2:00 a.m.

52
ECO
ECO
ECO
ECO
OFF
A
B
D
E
C
x3
25°C
56
27/04/2018 13:00
300
20
NAPOLETANA
25°C
100
27/04/2018 13:00
400
100
PYR
okexit
Conferma avvio pirolisi?
-:- -:-
C
ECO
CUPPONE
Ven 27/04/2018 13:00
ECO
CUPPONE
Ven 27/04/2018 13:00
25°C
80
27/04/2018 13:00
150
5
NAPOLETANA
-:-
A
B
A
B
D
C
B
text
Fig.30.
Abb.30.
Pис.30.
Fig.31.
Abb.31.
Pис.31.
Fig.32.
Abb.32.
Pис.32.
Fig.33.
Abb.33.
Pис.33.
CD
TS
Техническое обслуживаниеТехническое обслуживание
РУССКИЙ p. 58
WartungWartungMaintenanceMaintenance
DEUTSCH p. 56
MantenimientoMantenimiento
FRANÇAIS p. 55
ESPAÑOL p. 57
EntretienEntretien
ENGLISH p. 54
ManutenzioneManutenzione
ITALIANO p. 53
CUPPONE

54
Техническое обслуживание
WartungMaintenance
MantenimientoEntretien
EN Warnings
Before any cleaning, it is necessary to switch o the
power to the appliance (acting on the system switch)
and wear suitable personal protection equipment (e.g.
gloves, etc.). The user must carry out only routine maintenance,
for extraordinary maintenance, contact a Service Centre
requesting service from an authorised technician. The
Manufacturer warranty does not cover damages due tonegligent
or incorrect maintenance or cleaning (e.g. use of unsuitable
detergents).
Any cleaning must be carried out with the oven
completely cold and wearing adequate personal
protection devices (e.g. gloves, etc.).
When cleaning any part or accessory do NOT use:
• abrasive or powder detergents;
• aggressive or corrosive detergents (e.g. hydrochloric
or sulphuric acid, caustic soda, etc,). Caution! Never use these
substances also when cleaning the substructure/floor under the
appliance or its base;
• abrasive or sharp tools (e.g. abrasive sponges, scrapers, steel brush-
es, etc.);
• steamed or pressurised water jets.
It is best to have a Service Centre perform maintenance
and inspection on the appliance at least once a year to
ensure top working and safety conditions.
Keep the vents of the electrical compartment clean and clear.
Oven cleaning
Cleaning the external steel parts
Use a cloth dampened with hot soapy water and end with rinsing
and drying.
Cleaning the glass
Clean any glass with a soft cloth and special glass detergent.
Cleaning the control panel
Clean the control panel with a soft cloth and a little detergent for
delicate surfaces.
Avoid also using very aggressive detergents that may damage
the construction material (polycarbonate).
Fig.31. Cleaning the refractory surface
On the refractory surface, there are normally some food
residues (e.g. fat, food residues, etc.) that must be removed
frequently for health and safety reasons.
Remove the coarser food residues with a natural fibre brush;
then, if necessary, remove the refractory bricks of the cooking
surface as shown in the figure and suck the carbonized residues
accumulated under them on the bottom of the oven with an ash
extraction bin.
Never use liquids to clean the refractory surface.
While reinserting the bricks, be careful not to pinch your
fingers.
Replacement refractory bricks can be obtained from the
Manufacturer on request.
If the use of a natural fibre brush to eliminate food residues from
the refractory surface is not sufficient, see chapter “Setting the
pyrolysis parameters”.
Setting the pyrolysis parameters
Pyrolysis is a thermochemical crystallization process of food residues
that have deposited in the cooking chamber, which takes place by
bringing the oven up to 400°.
Before starting the pyrolysis, remove the coarser food
residues with a natural fibre brush.
In the “TS” models, during pyrolysis, the light switches off au-
tomatically to preserve the bulbs, on the other hand, in the
“CD” models it is necessary to turn it off manually.
TS model ovens Fig.32.
ATouch the ON/OFF key 11 ;
Btouch the pyrolysis key 1;
Cconfirm pressing “OK”: the heating of the cooking chamber
starts until the temperature of 400°C - 752°F is reached,
when the function stops (to stop the function early, press the
pyrolysis key 1again);
Din a cold oven, clean the chamber from the crystallized food
residues using a natural fibre brush and then vacuum with
an ash extraction bin.
CD model ovens Fig.33.
ASet the chamber temperature to 400°C - 752°F,
BActing on the “MIN” e “MAX” keys, set the top and bottom
power to MAX,
Cswitch the lights in the cooking chamber off;
Dwhen the temperature is reached, switch the oven off with
the ON/OFF key and let it cool down with the door closed;
Ein a cold oven, clean the chamber from the crystallized food
residues using a natural fibre brush and then vacuum with
an ash extraction bin.
Manutenzione

Ed. 0121 - 70702543 REV01 Michelangelo Oven - Quick Guide 59

60
Техническое обслуживание
WartungMaintenance
DE Entsorgung am Ende der
Lebensdauer
Um eventuelle unbefugte Verwendungen und die damit
verbundenen Risiken zu vermeiden, vor der Entsorgung des
Geräts dafür sorgen, dass dieses nicht mehr verwendet werden
kann: zu diesem Zwecke ist das Netzkabel durchzuschneiden
oder zu entfernen (bei von der Stromversorgung getrenntem
Gerät).
Sicherstellen, dass keine Kinder versehentlich in der Garkammer
eingeschlossen werden kann: Dazu die Öffnung der Tür
blockieren (zum Beispiel mit Klebeband oder Anschlägen).
Entsorgung des Gerätes
Gemäß den Bestimmungen von Art. 13 der ital.
Gesetzesverordnung Nr. 49 aus dem Jahr 2014
„Umsetzung der EU-Richtlinie EEAG 2012/19 über
Elektro- und Elektronik-Altgeräte” gibt das Symbol der
durchgestrichenen Abfalltonne an, dass das Produkt nach dem
13. August 2005 auf den Markt gebracht wurde und am Ende
seiner Lebensdauer nicht als normaler Haushaltsabfall sondern
separat zu entsorgen ist. Alle Geräte bestehen zu mehr als 90 %
des Gewichts aus recycelbare Metallwerkstoffen (Edelstahl, Eisen,
Aluminium, verzinktes Blech, Kupfer usw.). Bei der Entsorgung
des Geräts muss darauf geachtet werden, dass negative
Umwelteinflüsse durch dieses vermieden und Ressourcen
geschont werden, indem das Prinzip „Wer verschmutzt, zahlt“
angewandt wird sowie durch Vorbeugung und Vorbereitung zu
Wiederverwendung, Recycling und Verwertung. Die
unsachgemäße Entsorgung des Produkts führt zur Anwendung
der von den geltenden gesetzlichen Bestimmungen
vorgesehenen Sanktionen.
Mantenimiento
FR Élimination en n de vie utile
Pour éviter toute utilisation non autorisée et les risques qui y
sont liés avant l’élimination de l’appareil, assurez-vous qu’il ne
soit plus possible de l’utiliser : pour cela, le câble d’alimentation
doit être coupé ou retiré (avec un appareil débranché du réseau
électrique).
Faites en sorte qu’aucun enfant puisse rester accidentellement
coincé à l’intérieur de la chambre du four en jouant ; pour cela,
verrouillez l’ouverture de la porte (par exemple, avec du ruban
adhésif ou des butées).
Élimination de l’appareil
En vertu de l’art. 13 du décret-loi n° 49 2014 « Mise en
œuvre de la directive DEEE 2012/19 / UE sur les déchets
des équipements électriques et électroniques» Le logo
de la poubelle barrée spécifie que le produit a été mis
sur le marché après le 13 Août 2005 et qu’à la fin de sa vie utile, il
ne doit pas être assimilée à d’autres déchets, mais doit être
collecté séparément. Tous les appareils sont réalisés avec des
matériaux métalliques recyclables (acier, inox, fer aluminium, tôle
galvanisée, cuivre, etc.) dans une quantité supérieure à 90% en
poids. Il est nécessaire de faire attention à la gestion de ce
produit à la fin de sa vie utile en réduisant les impacts négatifs sur
l’environnement et en améliorant l’efficacité d’utilisation des
ressources, en appliquant les principes de «pollueurs payeurs»,
prévention, préparation pour la réutilisation, recyclage et
récupération. Ne pas oublier que l’élimination abusive du produit
comporte l’application des sanctions prévues par la
réglementation législative en vigueur.
Entretien
EN Disposal at end of life
To avoid any unauthorised use and associated risks, before
discarding the machine make sure it cannot be used; for this
purpose, cut and remove the power cord (once the equipment
is unplugged).
Make sure no child can accidentally remain trapped inside the
cooking chamber, locking the door (for example, with adhesive
tape or locks).
Equipment disposal
Pursuant to art. 13 of Legislative Decree no. 49 of 2014
“Implementation of WEEE directive 2012/19/EU on
electric and electronic waste”, the barred bin symbol
specifies that the product was introduced on the market
after August 13, 2005 and that it must not be discarded with
other waste at the end of its working life but disposed of
separately. All the equipment has been made with recyclable
metal materials (stainless steel, iron, aluminium, zinc plate,
copper, etc.) that as a percentage make up more than 90% of the
weight. Attention must be paid to the management of this
product at the end of its life, reducing any negative impact on
the environment and improving the efficiency of resources,
applying the principles of “who pollutes pays”, prevention,
preparation for re-use, recycling and recovery. Please remember
that illicit or incorrect product disposal is punishable by law.
Manutenzione
IT Smaltimento a ne vita
Per evitare un eventuale utilizzo non autorizzato e i rischi ad
esso connessi prima di smaltire l’apparecchiatura assicurarsi che
non sia più possibile utilizzarla: a tal fine il cavo di alimentazione
va tagliato o rimosso (ad apparecchiatura scollegata dalla rete
elettrica).
Smaltimento apparecchiatura
Ai sensi dell’art. 13 del Decreto Legislativo n. 49 del
2014“Attuazione della Direttiva RAEE 2012/19/EU sui
rifiuti di apparecchiature elettriche ed elettroniche” Il
marchio del cassonetto barrato con barra specifica che il
prodotto è stata immesso sul mercato successivamente al 13
agosto 2005 e che alla fine della propria vita utile non deve venire
assimilato agli altri rifiuti ma deve essere smaltito separatamente.
Tutte le apparecchiature sono realizzate con materiali metallici
riciclabili (acciaio inox, ferro, alluminio, lamiera zincata, rame, ecc.)
in percentuale superiore al 90% in peso. E’ necessario porre
attenzione alla gestione di questo prodotto nel suo fine vita
riducendo gli impatti negativi sull’ambiente e migliorando
l’efficacia d’uso delle risorse, applicando i principi di “chi inquina
paga”, prevenzione, preparazione per il riutilizzo, riciclaggio e
recupero. Si ricorda che lo smaltimento abusivo o non corretto
del prodotto comporta l’applicazione delle sanzioni previste
dalla corrente normativa di legge.
Other manuals for Michelangelo
5
This manual suits for next models
4
Table of contents
Other Cuppone Kitchen Appliance manuals

Cuppone
Cuppone VENERE 10 User manual

Cuppone
Cuppone Michelangelo ML435 User manual

Cuppone
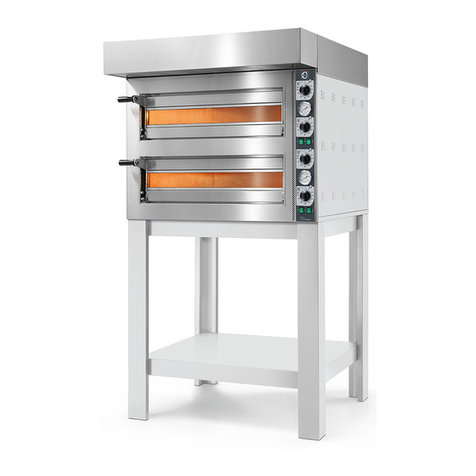
Cuppone Michelangelo User manual

Cuppone
Cuppone Leonardo User manual

Cuppone
Cuppone Tiziano TZ420 User manual

Cuppone
Cuppone Donatello DN 435 User manual

Cuppone
Cuppone Tiziano TZ420 Operating manual

Cuppone
Cuppone Pizzaform PZF/30DS Operating manual

Cuppone
Cuppone Michelangelo User manual

Cuppone
Cuppone Giotto GT110 User manual