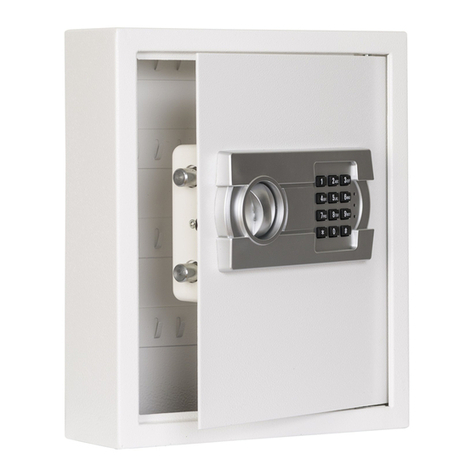
De Raat Sentry User manual

Safety reference: All codes are to be
securely stored. Do
NOT
use personal data
(i.e. Birthdays, telephonenumbers, etc) as a
code.
First you will need to install the batteries. To power the
lock, four alkaline AA batteries, equalling voltage 6Vdc (not
included) are required. Non-alkaline and rechargeable
batteries are not recommended.
To install batteries, turn the electric lock case to the right
and remove (figure H). Insert four new batteries as
indicated, replace the electric lock case and turn to the left
to reassemble.
For added security, some models (SFW082GTC and
SFW205GPC) have dual locking system (electronic lock plus
key lock). You must use both the electronic code and the
key to open the safe.
Now you will have to enter the electronic lock combination.
You will find this combination on the manual which is
supplied with the safe.
See below:
Sentry Safe manual
SFW082GTC
SFW123FTC
SFW205GPC
First time opening the safe Access codes
1. Press the Program key.
2. Enter the electronic lock combination. The green LED
remains on while you enter the 5-digit user code of
your choice. After 5 digits are entered the green LED
turns off.
To enter a new user code, repeat these steps.
To erase the user code, press the Program key and enter
your electronic lock combination twice.
Programming a 5-digit user code
There are three possible ways to unlock and access the
safe—by entering its preset 5-digit electronic lock combi-
nation, your own user code or a user PIN (Personal Identi-
fication Number).
You can always open the safe by entering the 5-digit elec-
tronic lock combination. This code can not be deleted. But
if you prefer to employ your own code, you can program
the safe to open to the 5-digit user code of your choice. If
you wish to give someone else temporary access to the
safe, you can program a 5-digit user PIN that can later be
erased.
Only a light touch is needed. A green PROCEED light and
a single beep indicate that the keypad “felt” your touch.
The lock allows 5 seconds for each key press. If you
pause longer, an error signal will occur (blinking red light
and three beeps), indicating you should start over.
Programming a 5-digit user PIN
Note: You must program a user code before programming
a user PIN.
1. Press the Program key.
2. Press it a second time.
3. Enter your 5-digit user code. The green LED remains on.
4. Enter the 5-digit user PIN of your choice (any combinati-
on except 00000). After 5 digits are entered the green
LED turns off.
To enter a new user PIN, repeat these steps.
To erase the user PIN, press the Program key twice, enter
your user code and then enter 00000.

Safety reference: All codes are to be
securely stored. Do
NOT
use personal data
(i.e. Birthdays, telephonenumbers, etc) as a
code.
Sentry Safe manual
SFW082GTC
SFW123FTC
SFW205GPC
Open unit first, then test with door open! Delay mode
This kit contains:
2 lag screws, 2 washers and 2 masonry anchors (Fig. A)
Tools needed for floor mounting:
Drill, wrench, 11 mm drill bit, for wood anchoring 7,2 mm drill
bit, for masonry anchoring 9,5 mm masonry drill bit.
Instructions:
1. Tip the safe onto its right side (door hinges horizontal with
the floor).
2. Unlock the safe and open the door.
3. Look on the bottom of the safe for two indentations in
opposite corners. Using the 11 mm bit, drill a hole through
each indentation perpen-dicular to the bottom of the safe
(Fig. B).
4. Close the door and tip the safe upright. Place it where
desired and reopen the door.
5. Use a screw or drill bit to mark the floor through both holes
(Fig. C).
6. Move the safe aside to clear both marked spots for drilling.
7. Drill into the floor:
A. For wood: using the 7,2 mm bit, drill a hole 64 mm
deep in each marked spot (Fig. D).
B. For masonry: using the 9,5 mm bit, drill a hole 64
mm deep in each marked spot (Fig.
D). Install a masonry anchor in each hole.
8. Replace the safe in the desired position, with the holes in
the safe aligned with those in the floor.
9. Securing the safe:
A. For wood: pass each lag screw through a washer,
then through the safe and into a hle.
Tighten with the wrench (Fig. E).
B. For masonry: pass each lag screw through a washer,
then through the safe and into a masonry
anchor. Tighten with the wrench (Fig. F).
Always test your new electronic lock combination several
times with the door open, to make sure you have recorded
it correctly. Your new electronic lock combination is ready
to use.
Battery recplacement Instructions for floor mounting
When old batteries are removed for replacement, your
user PIN will be voided; only electronic lock combination
and user code will work. To reestablish your user PIN, fol-
low the directions above under “Programming a 5-digit
user PIN”.
Note: If your safe does not appear to be working, please
always check your batteries first.
The lock automatically enters a two-minute delay mode
after an invalid code has been entered three consecutive
times. In this mode, the lock can not be activated and any
key entry will generate an error signal.
Signals
Your electronic lock safe communicates by means of several
audio/visual signals.
Red (error) LED + three beeps indicates one of the
following:
1. You have pressed Program key out of sequence
2. You have entered an invalid code or user pin
3. You have let 5 seconds or more elapse between key entries
Green (proceed) LED + single beep occurs:
After entering each digit of electronic lock combination, user
code, or user PIN
2. After pressing Clear key
3. After pressing Program key
Green LED only:
1. Comes on after you enter a valid code/user PIN and remains
lit during the 4-second period in which the safe can be opened
2. Comes on in the Program user code mode after you enter
the electronic lock combination and remains lit until you have
finished entering a 5-digit user code
3. Comes on in the Program user PIN mode after you have en-
tered your user code and remains on until you have entered a 5
-digit user PIN
Yellow LED:
Indicates “low battery” and will typically not turn on until bat-
tery has been in use two years or longer.
Your electronic lock automatically performs a low battery test
during each lock use.
If a “low battery” condition is detected the yellow LED will co-
me on and remain on during each subsequent lock operation.
(The lock will continue to function in a low battery state, until
battery failure.) The yellow LED will turn off only after the low
batteries are replaced. (Note: If the new batteries are installed
in less than 60 seconds the yellow LED may come on and stay
on during the first lock operation before it returns to off.)
Note: It is recommended you replace the batteries after two
years, or the the yellow LED remains on.

DO NOT store delicate items directly in your safe.
Sentry Safe products which offer fire protection have a
patented insulation that has a high moisture content. In
addition the Sentry Safe advanced safes close airtight to
offer water resistance, which may also cause moisture to
accumulate inside your safe. The desiccant packet included
in your safe during shipment, should be left in your safe.
DO NOT DISCARD IT.
It is intended to help absorb moisture which may
accumulate inside your safe. If you choose to store delicate
items such as jewelry with working parts, watches, stamps,
or photos in your safe, we recommend putting them in an
air-tight container, prior to placing them in the safe for
storage.
Warning!
DO NOT store pearls in this safe unit.
In the event of a fire, potential damage to delicate pearls
ocurs at temperatures much lower than the 350°F interior
performance measure which the UL classification perfor-
mance standard indicated guarantees. Therefore, DO NOT
store pearls in your Sentry Safe product.
Safety reference: All codes are to be
securely stored. Do
NOT
use personal data
(i.e. Birthdays, telephonenumbers, etc) as a
code.
Sentry Safe manual
SFW082GTC
SFW123FTC
SFW205GPC
Warning!
This manual suits for next models
3
Other De Raat Safe manuals

De Raat
De Raat Sun Safe ES 045 User manual
De Raat
De Raat KS24E User manual

De Raat
De Raat EM 2020 User manual
De Raat
De Raat EM 015 User manual

De Raat
De Raat Protector depo cash plus 1 E User manual

De Raat
De Raat Technomax Trony GTR/4P User manual
De Raat
De Raat Firesafe FSP User manual

De Raat
De Raat Leisure plus User manual
De Raat
De Raat Code combi B 30 User manual

De Raat
De Raat VP Safe User manual
