manuals.online logo
Brands
  1. Home
  2. •
  3. Brands
  4. •
  5. DELTA DORE
  6. •
  7. Security Sensor
  8. •
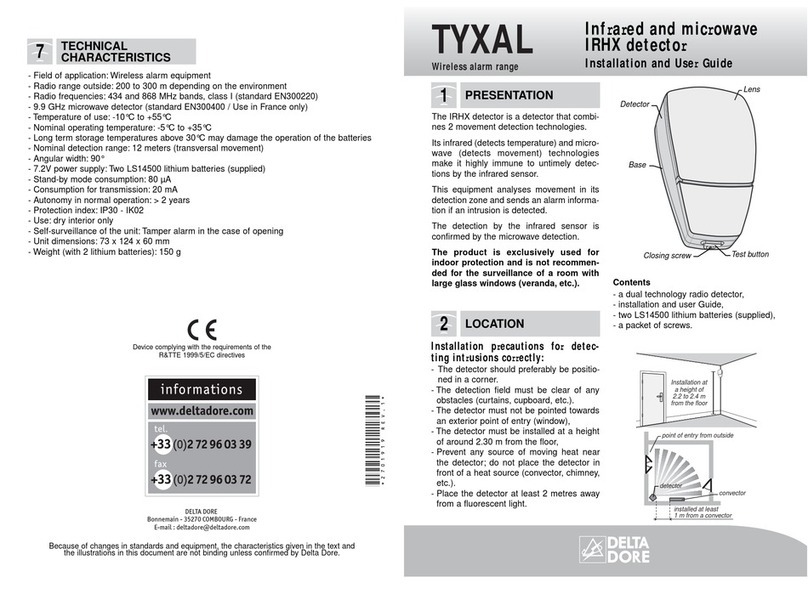
  9. DELTA DORE TYXAL DCP User manual

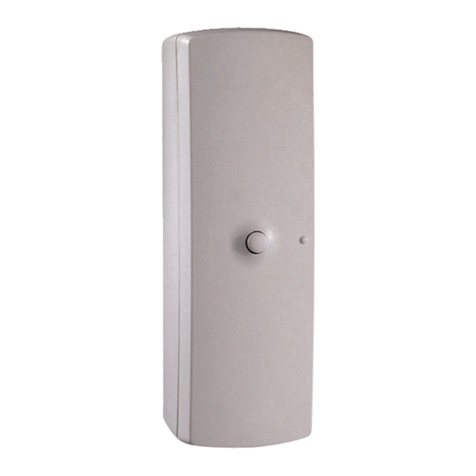
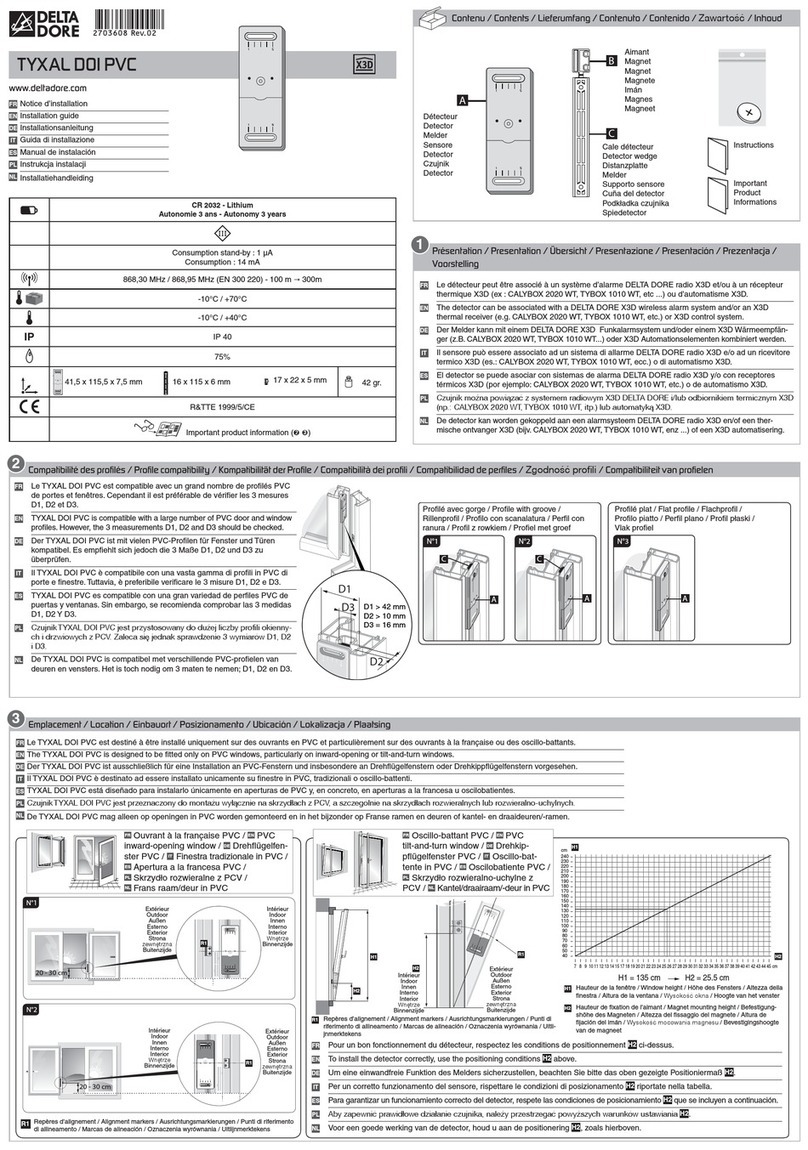
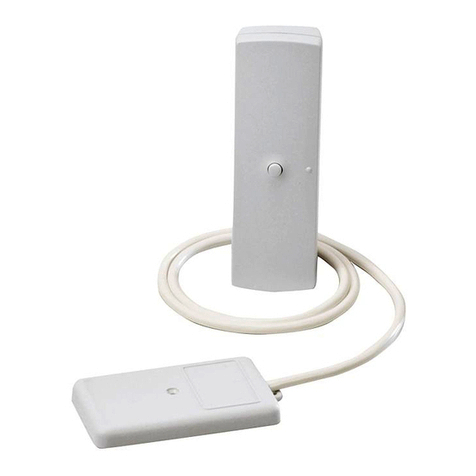
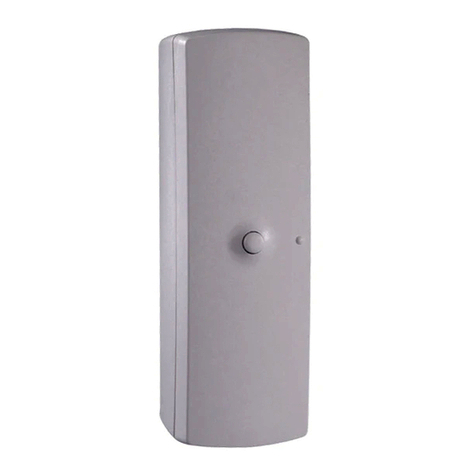
DELTA DORE TYXAL DCP User manual

D1
D2
V1
V2
2 3 4
1
2
,
5
m
a
x.
ÀÁ
- WARNING -
- WARNING -
2 à 3 cm
2 à 3 cm
www.deltadore.com
TYXAL DCP
FR Notice d’installation
EN Installation guide
DE Installationsanleitung
IT Guida di installazione
ES Manual de instalación
PL Instrukcja instalacji
NL Installatiehandleiding
LS14250 - 3.6 V - 1,2 Ah - Lithium
Autonomie 10 ans - Autonomy 10 years
Consumption stand-by : < 3,5 µA
Consumption : 14,2 mA max.
868,30 MHz et 868,95 MHz
(EN 300 220) 100 m Ý300m
-10°C / +70°C
+5°C / +40°C
IP IP 30
IK 02
75%
33 x 102 x 32 mm
32 x 32 x 110 mm
76 gr.
R&TTE 1999/5/CE
Important product information (Ì)
Contenu / Contents / Inhalt /
Contenuto / Contenido / Spis
treści / Inhoud
Instructions
Important
Product
Infor
mations
FR Le détecteur doit être associé à un système d’alarme DELTA DORE radio X3D.
EN The detector must be associated with a DELTA DORE wireless X3D alarm system.
DE Der Melder muss mit einer DELTA DORE Funk-Alarmanlage X3D verbunden werden.
IT Il sensore deve essere associato ad un sistema d’allarme DELTA DORE radio X3D.
ES El detector debe asociarse a un sistema de alarma DELTA DORE radio X3D.
PL Detektor musi być skongurowany z radiowym systemem alarmowym DELTA DORE X3D.
NL De detector moet worden gekoppeld aan een alarmsysteem DELTA DORE radio X3D.
Présentation / Presentation / Beschreibung / Presentazione / Presentación / Prezentacja /
Voorstelling
1
Emplacement / Location / Einbauort / Posizionamento / Ubicación / Lokalizacja / Locatie
2
FR • Il est conseillé de tester l’emplacement avec minutie pour être sûr de l’efcacité de la protection.
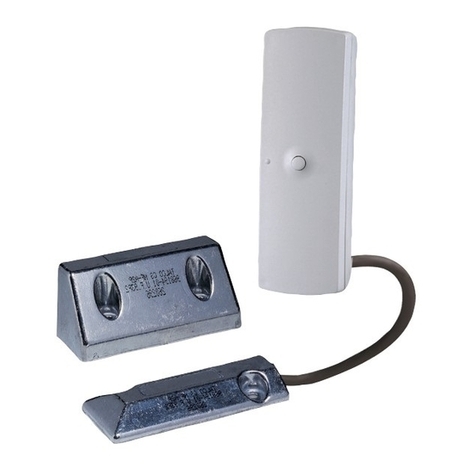
• Pour optimiser l’efcacité, le capteur de choc piézo-électrique (À) doit être installé à 2 ou 3 cm
minimum des montants de la vitre.
• Placez l’émetteur à proximité du capteur (livré avec 0,9 m de câble 2 ls).
• Pour une bonne adhérence : la vitre doit être propre et sèche. L’application sur des vitres à des
températures en dessous de +10°C n’est pas recommandée, appuyez fortement le capteur piézo sur
la vitre.
• Le détecteur de choc doit être placé en intérieur.
• Les vitres feuilletées, enrobées et le plexiglas atténuent les chocs.
EN • We recommend testing the location beforehand to ensure optimum protection.
• For optimised efciency, the piezoelectric impact sensor À) must be installed at least 2 or 3 cm away
from the window posts.
• Install the transmitter close to the sensor (delivered with a 0.9 m long 2-wire cable).
• For optimum grip: the glass must be dry and clean. Application on windows at temperatures below
+10°C is not recommended, push the piezo sensor hard against the glass.
• The impact detector must be installed indoors.
• Laminated, coated glass and plexiglass dampen impacts.
DE • Um efzienten Schutz zu gewährleisten, muss der Installationsort mit Sorgfalt ausgewählt werden.
• Für optimale Efzienz sollte der Piezo-Erschütterungsmelder in mindestens 2 - 3 cm Abstand zum
Fenster- oder Türrahmen installiert werden.
• Bringen Sie den Funksender in der Nähe des Melders an (wird mit 0,9 m 2-adrigem Kabel geliefert).
• Für eine optimale Haftung muss die Scheibe sauber und trocken sein. Von einer Befestigung bei
Temperaturen von unter +10°C wird abgeraten, weil das Klebeband unter diesen Bedingungen nicht
aushärten kann und folglich nicht richtig klebt; drücken Sie den Piezo-Sensor fest auf die Glasscheibe.
• Der Erschütterungs-Melder muss in einem Innenraum angebracht werden.
• Verbundglas, folienbeschichte Scheiben und Plexiglas dämpfen die Eschütterungen.
IT •Si consiglia di testare accuratamente il posizionamento per accertarsi che la protezione sia efcace.
• Per ottimizzare l’efcacia, il sensore d’urto piezoelettrico (À) deve essere istallato almeno a 2 o 3 cm
dai montanti del vetro.
• Posizionare l’emettitore vicino al sensore (dotato di cavo a 2 li di 0,9 m).
• Per una buona aderenza, il vetro deve essere pulito e asciutto. E’ sconsigliata l’applicazione su vetri a
temperature inferiori ai +10°C, premere forte il sensore piezoelettrico sul vetro.
• Il sensore d’urto deve essere posizionato all’interno.
• I vetri laminati, rivestiti e il plexiglas attenuano gli urti.
ES • Magna aliqua ut enim ad minim.
• Se aconseja probar minuciosamente la ubicación para estar seguro de la ecacia de la protección.
• Para optimizar la ecacia, el sensor de golpes piezoeléctrico (À) se debe instalar a 2 o 3 cm como
mínimo de los montantes del cristal.
• Coloque el emisor cerca del sensor (se suministra con 0,9 m de cable, 2 hilos).
• Para una buena adherencia: el cristal debe estar limpio y seco. No se recomienda la aplicación sobre
cristal a temperaturas por debajo de 10° C, presione rmemente el sensor piezoeléctrico sobre el
cristal.
• El detector de golpes se debe colocar en el interior.
• El cristal laminado, revestido y el plexiglás mitigan los golpes.
PL • Zaleca się staranne przetestowanie umiejscowienia w celu upewnienia się o skuteczności ochrony.
• Aby zoptymalizować skuteczność, piezoelektryczny czujnik zbicia szyby (À) musi być zainstalowany
co najmniej 2 lub 3 cm od ram okiennych.
• Umieścić nadajnik w pobliżu czujnika (sprzedawany z przewodem dwużyłowym o długości 0,9 m).
• Aby zapewnić dobrą przyczepność szyba musi być czysta i sucha. Nie zaleca się montowania na
szybach o temperaturze poniżej 10°C, docisnąć mocno czujnik piezoelektryczny do szyby.
• Detektor zbicia szyby musi być umieszczany wewnątrz.
• Szyby warstwowe, powlekane i szkło akrylowe (pleksiglas) osłabiają siłę uderzenia.
NL • Het is raadzaam om de installatie zorgvuldig te testen om zeker te zijn van de effectiviteit van de
bescherming.
• Om de efciëntie te maximaliseren, moet de sensor voor de piëzo-elektrische shock (À) ten minste
2 of 3 cm van de stijlen van het glas geïnstalleerd worden.
• Plaats de zender in de buurt van de sensor (met 0,9 m kabel, 2 kabels meegeleverd).
• Voor een goede hechting: het glas moet schoon en droog zijn. Bevestigen op glas bij temperaturen
onder 10 °C wordt afgeraden, druk de piëzo sensor stevig op het glas.
• De schokdetector moet binnen worden geplaatst.
• Gelaagd, gecoat en plexiglas verzachten schokken.
Fixation / Mounting / Montage / Fissaggio / Fijación / Mocowanie / Bevestiging
3
FR Ê Séparez les 2
parties du boîtier.
EN Ê Open the unit.
DE Ê Trennen Sie die
Gehäusehälften.
IT Ê Separare le 2
parti della
scatola.
ES Ê Separe las 2
partes de la
caja.
PL Ê Oddzielić 2
części
obudowy.
NL Ê Scheid de twee
delen van de
behuizing.
Ë Tracez et percez
les trous D1 et D2.
Ë Mark and drill
holes D1 and D2.
Ë Markieren Sie die
Bohrstellen und
bohren Sie die
Löcher D1 und D2.
Ë Segnare e fare i
fori D1 e D2.
Ë Marque y taladre
los agujeros D1
y D2.
Ë Zaznaczyć i
wywiercić otwory
D1 i D2.
Ë Markeer en boor
de gaten D1 en
D2.
Ì Fixez le socle de
l’émetteur avec les vis
V1 et V2.
Í Collez le capteur de choc
sur la vitre.
Ì Attach the transmitter
base with the V1 and
V2 screws.
Ì Befestigen Sie den
Sockel des Senders
mit den Schrauben V1
und V2.
Ì Fissare il supporto
dell’emettitore con le viti
V1 e V2.
Ì Fije el zócalo del emisor
con los tornillos V1 y
V2.
Ì Przymocować
podstawę nadajnika
śrubami V1 i V2.
Ì Bevestig de basis
van de zender met de
schroeven V1 en V2.
Í Fix the impact sensor to
the glass.
Í Kleben Sie den
Erschütterungssensor auf
die Fensterscheibe.
Í Incollare il sensore d’urto
sul vetro.
Í Pegue el sensor de golpes
en el cristal.
Í Przykleić czujnik zbicia
szyby do szyby.
Í Plak de schoksensor op
het glas.
Ø max = 3 mm
SWB
SWA
SWB
SWA
SWB
SWA
ON
ON
ON
ON
ON
Mise en service / Activation / Inbetriebnahme / Messa in funzione / Puesta en servicio /
Rozruch / Ingebruikname
4
12
À
Á
L
NC
123
FR Ê Câblez les ls du capteur de choc (À) aux bornes AL
et Com de l’émetteur radio (Á). La borne NC est non
connectée.
EN Ê Connect the wires of the impact sensor (À) to the AL
and Com terminals of the wireless transmitter (Á). The
NC terminal is not connected.
DE Ê Schließen Sie die beiden Drähte des
Erschütterungsensors (À) an die Klemmen AL und
Com des Funksenders (Á) an. Die Klemme NC wird
nicht belegt.
IT Ê Collegare i li del sensore d’urto (À) ai morsetti AL e
Com dell’emettitore radio (Á). Il morsetto NC non è
collegato.
ES Ê Cablee los hilos del sensor de golpes (À) a los bornes
AL y Com del emisor radio (Á). El borne NC no se
conecta.
PL Ê Połączyć kable czujnika zbicia szyby (À) z końcówkami
AL i Com nadajnika radiowego (Á). Końcówka NC
pozostaje niepodłączona.
NL Ê Sluit de schoksensor (À) aan op de aansluitingen AL
en Com van de radiozender (Á). De aansluiting NC
wordt niet aangesloten.
Ë Mettez la pile en place en respectant
son sens puis refermez le boîtier.
Ë Insert the battery and close the unit.
Ë Setzen Sie die Batterie unter
Beachtung der Polarität ein und
schließen Sie dann das Gehäuse.
Ë Posizionare la pila nel corretto senso
e chiudere la scatola.
Ë Coloque la pila respetando la
polaridad y cierre la caja.
Ë Włożyć baterię zgodnie z
polaryzacją, a następnie zamknąć
obudowę.
Ë Plaats de batterij in de correcte
richting en sluit de behuizing.
Changement de la pile / Changing the batteries / Batteriewechsel / Sostituzione delle
batterie / Cambio de la pila / Wymiana baterii / Batterij vervangenassociations
FR Le produit émet un bip à chaque détection, la pile est usée.
Avant d’ouvrir le boîtier, la centrale doit être en mode Maintenance (voir notice d’installation système).
EN The product beeps with every detection, the battery is dead.
Before opening the unit, the alarm control unit must be in Maintenance mode (refer to system installation
guide).
DE Das Gerät piept bei bei jeder Erfassung, die Batterie ist leer.
Die Alarmzentrale muss sich beim Öffnen des Gehäuses im Wartungsmodus benden (siehe
Installationsanleitung System).
IT Se il dispositivo emette un bip ad ogni rilevamento, la pila è esaurita.
Prima di aprire la scatola, la centralina deve essere in modalità Manutenzione (vedi istruzioni per
l’istallazione del sistema).
ES El producto emite un pitido en cada detección, la pila se agota.
Antes de abrir la caja, la central debe estar en modo Mantenimiento (consultar el manual de instalación
del sistema).
PL Produkt wydaje krótki dźwięk przy każdym wykryciu: bateria jest wyczerpana.
Przed otwarciem obudowy centrala musi być przełączona na tryb konserwacji (zob. instrukcja instalacji
systemu).
NL Het product geeft een pieptoon wanneer de batterij bijna leeg is.
Voor het openen van de behuizing, moet het apparaat in de onderhoudsmodus worden geplaatst (zie
installatiehandleiding van het systeem).
7
FR • Le switch B2 permet le choix du mode de déclenchement (ON : retardé, OFF : immédiat).
• Les autres switchs ne sont pas utilisés (SWA1, SWA2 et SWB1).
• Si votre système d’alarme est équipé d’un clavier tactile CLT 8000, le switch B2 est ignoré car cette
conguration est réalisée sur celui-ci.
EN • Switch B2 is used to select the triggering mode (ON: delayed, OFF: immediate).
• The other switches are not applicable (SWA1, SWA2 and SWB1).
• If your alarm system has a CLT 8000 touch sensitive keypad, switch B2 will be ignored as this
conguration is done on the keypad..
DE • Mit dem Schalter B2 wird die Auslöseart gewählt: ON = verzögert, OFF = sofortig.
• Die übrigen Schalter (SWA1; SWA2 und SWB1) sind ohne Funktion.
• Wenn Ihre Alarmanlage mit der Touchscreen-Tastatur CLT 8000 ausgerüstet ist, erfolgt die
Konguration über diese, der Schalter B2 ist dann außer Funktion.
IT • Lo switch B2 permette di scegliere la modalità di attivazione (ON: ritardata, OFF: immediata).
• Gli altri switch non vengono utilizzati (SWA1, SWA2 e SWB1).
• Se il vostro sistema d’allarme è dotato di tastiera tattile CLT 8000, lo switch B2 viene ignorato perché
questa congurazione viene eseguita su di esso.
ES • El conmutador B2 permite seleccionar el modo de activación (ON: retardado, OFF: inmediato).
• Los demás conmutadores no se utilizan (SWA1, SWA2 y SWB1).
• Si su sistema de alarma está equipado con un teclado táctil CLT 8000, el conmutador B2 se ignora
puesto que esta conguración se lleva a cabo sobre el mismo.
PL • Wyłącznik B2 umożliwia wybór trybu uruchamiania (ON: opóźniony, OFF: natychmiastowy).
• Inne wyłączniki nie są używane (SWA1, SWA2 i SWB1).
• Jeżeli Twój system alarmowy jest wyposażony w klawiaturę dotykową CLT 8000, wyłącznik B2 należy
zignorować, ponieważ kongurację przeprowadza się za pomocą klawiatury.
NL • Met de schakelaar B2 kan de activeringsmodus worden ingesteld (ON: vertraagd OFF: onmiddellijk).
• De andere schakelaars worden niet gebruikt (SWA1, SWA2 en SWB1).
• Als uw alarmsysteem is uitgerust met het touchscreen toetsenbord CLT 8000, dan wordt schakelaar
B2 genegeerd omdat deze conguratie door het toetsenbord wordt uitgevoerd.
Switchs / Switches / Schalter / Switch / Conmutadores / Wyłączniki / Schakelaars
5
Fonctionnement avec un système d’alarme / Operation with an alarm system / Betrieb mit einer Alarmanlage / Funzionamento con un sistema d’allarme / Funcionamiento con el sistema de alarma /
Działanie z systemem alarmowym / Werking met alarmsysteem
6
FR • Association avec un système d’alarme
• Choix du mode de déclenchement
• Test
• Retour à la conguration usine
IT • Associazione con un sistema d’allarme
• Scelta della modalità di scatto dell’allarme
• Test
• Ritorno alla congurazione di fabbrica
PL • Powiązanie z systemem alarmowym
• Wybór sposobu wyzwalania
• Test
• Przywrócenie konguracji fabrycznej
EN • Association with an alarm system
• Selection of triggering mode
• Test
• Restoring factory settings
ES • Asociación con el sistema de alarma
• Elección del modo de activación
• Prueba
• Volver a la conguración de serie
NL • Koppeling aan alarmsysteem
• Activeringsmodus selecteren
• Test
• Fabrieksinstellingen herstellen
DE • Verbindung mit einer Alarmanlage
• Wahl des Auslösungsmodus
• Test
• Rückkehr zur Werkseinstellung
Voir notice
d’intallation
système
Vedi le
istruzioni
“Sistema”
Patrz
instrukcja
instalacji
systemu
Refer to
system
installation
guide
Ver manual
de instalación
del sistema
Zie
installatiehand-
leiding
systeem
Siehe
Installationsan-
leitung
System

Other DELTA DORE Security Sensor manuals

DELTA DORE DMB TYXAL+ User manual

DELTA DORE

DELTA DORE DMB TYXAL+ User manual

DELTA DORE DME 90 Tyxal+ User manual

DELTA DORE

DELTA DORE DME 90 Tyxal+ User manual

DELTA DORE DMBD TYXAL+ User manual

DELTA DORE

DELTA DORE DMBD TYXAL+ User manual

DELTA DORE Tybox RF6700FP User manual

DELTA DORE

DELTA DORE Tybox RF6700FP User manual

DELTA DORE DMF Tyxal+ User manual

DELTA DORE

DELTA DORE DMF Tyxal+ User manual

DELTA DORE TYXAL DU User manual

DELTA DORE

DELTA DORE TYXAL DU User manual

DELTA DORE DMBE TYXAL+ User manual

DELTA DORE

DELTA DORE DMBE TYXAL+ User manual

DELTA DORE Tywatt 5400 User manual

DELTA DORE

DELTA DORE Tywatt 5400 User manual

DELTA DORE DU TYXAL + User manual

DELTA DORE

DELTA DORE DU TYXAL + User manual

DELTA DORE TYXAL DOS User manual

DELTA DORE

DELTA DORE TYXAL DOS User manual

DELTA DORE TYXAL DCS User manual

DELTA DORE

DELTA DORE TYXAL DCS User manual

DELTA DORE TYXAL DF User manual

DELTA DORE

DELTA DORE TYXAL DF User manual

DELTA DORE DCS TYXAL + User manual

DELTA DORE

DELTA DORE DCS TYXAL + User manual

DELTA DORE DTX User manual

DELTA DORE

DELTA DORE DTX User manual

DELTA DORE DMDR TYXAL+ User manual

DELTA DORE

DELTA DORE DMDR TYXAL+ User manual

DELTA DORE DMBV TYXAL+ User manual

DELTA DORE

DELTA DORE DMBV TYXAL+ User manual

DELTA DORE DOI PVC TYXAL + User manual

DELTA DORE

DELTA DORE DOI PVC TYXAL + User manual

DELTA DORE TYXAL DOI PVC User manual

DELTA DORE

DELTA DORE TYXAL DOI PVC User manual

DELTA DORE DMB TYXAL + User manual

DELTA DORE

DELTA DORE DMB TYXAL + User manual

DELTA DORE TYXAL DF User manual

DELTA DORE

DELTA DORE TYXAL DF User manual

DELTA DORE TYXAL DOS User manual

DELTA DORE

DELTA DORE TYXAL DOS User manual

DELTA DORE DMB TYXAL+ User manual

DELTA DORE

DELTA DORE DMB TYXAL+ User manual

DELTA DORE Tyxal+ DME 180 User manual

DELTA DORE

DELTA DORE Tyxal+ DME 180 User manual

DELTA DORE DVR TYXAL+ User manual

DELTA DORE

DELTA DORE DVR TYXAL+ User manual

Popular Security Sensor manuals by other brands

System Sensor B501AUS Installation and maintenance instructions

System Sensor

System Sensor B501AUS Installation and maintenance instructions
Hank HKSWL-DWS08 user manual

Hank

Hank HKSWL-DWS08 user manual

Diablo DSP-20 user manual

Diablo

Diablo DSP-20 user manual

Skinner Innovations HST Series Operation manual

Skinner Innovations

Skinner Innovations HST Series Operation manual

Lince BABY UNIVERSALE Installation, operation and maintenance manual

Lince

Lince BABY UNIVERSALE Installation, operation and maintenance manual

MSA G1 SCBA installation instructions

MSA

MSA G1 SCBA installation instructions

LEGRAND Tynetec Aidcall ZXT491 manual

LEGRAND

LEGRAND Tynetec Aidcall ZXT491 manual

Varian ProStar 325 UV-Vis Driver manual

Varian

Varian ProStar 325 UV-Vis Driver manual

Ansul AutoPulse Acclimate Plus FAPT-851 instructions

Ansul

Ansul AutoPulse Acclimate Plus FAPT-851 instructions

Fracarro IR900 installation manual

Fracarro

Fracarro IR900 installation manual

Firecraft trACer operating manual

Firecraft

Firecraft trACer operating manual

Bosch ISP-SM90-120 instruction manual

Bosch

Bosch ISP-SM90-120 instruction manual

Linear 2GIG-GB1-345 installation instructions

Linear

Linear 2GIG-GB1-345 installation instructions

Centurion FLUX 11 installation manual

Centurion

Centurion FLUX 11 installation manual

PCB Piezotronics W105C02/018C10 Installation and operating manual

PCB Piezotronics

PCB Piezotronics W105C02/018C10 Installation and operating manual

Reer PI M30 NF K Original operating instructions

Reer

Reer PI M30 NF K Original operating instructions

Profile 566025107 manual

Profile

Profile 566025107 manual

Restek 22839 instruction manual

Restek

Restek 22839 instruction manual

manuals.online logo
manuals.online logoBrands
  • About & Mission
  • Contact us
  • Privacy Policy
  • Terms and Conditions

Copyright 2025 Manuals.Online. All Rights Reserved.