digicon catrax master User manual

1
Product Manual
master

2

3
Copyright– Digicon S.A.
Electronic Control for Mechanics – 2018
All rights reserved. No part of this publication may be reproduced,
transmitted, transcribed, stored in a retrieval system, translated into any language
or computer language in any electronic, magnetic, optical, chemical, manual way,
or otherwise, without the express written permission from .Digicon S.A
Code: 069.31.251
English
Version: 07
This was ted by:manual elabora Digicon S.A. Controle Eletrônico para Mecânica
Documentation Sector - EDS
master
“At the end of a product's life cycle dispose according with local policy” .

4
Contents
master
1. Important instructions ............................................................................
2. Orientations ...........................................................................................
3. Introduction ..........................................................................................
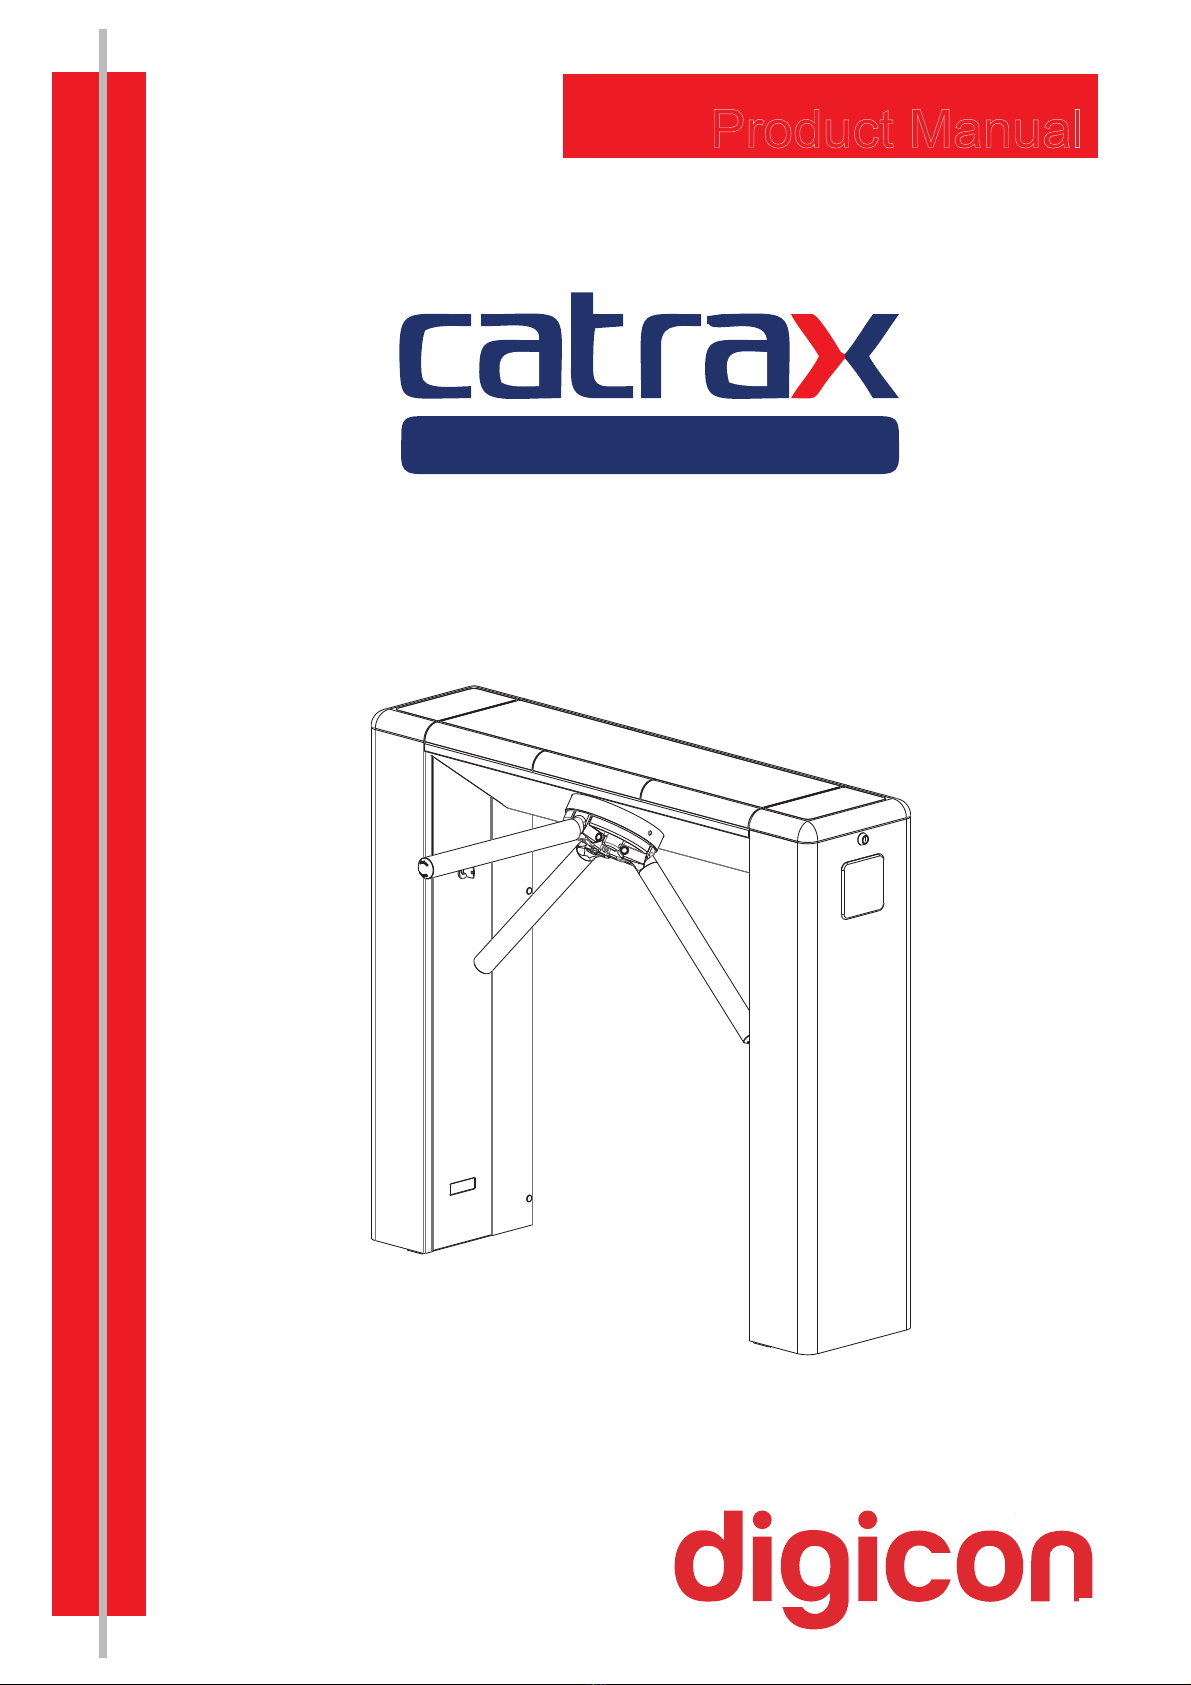
4. Features of .....................................................................Catrax Master
4.1 Operation ......................................................................Catrax Master
5. Installing/Assembling ..............................................................................
5.1 Unboxing .............................................................................................
5.2 Floor drilling and column fixation ............................................................
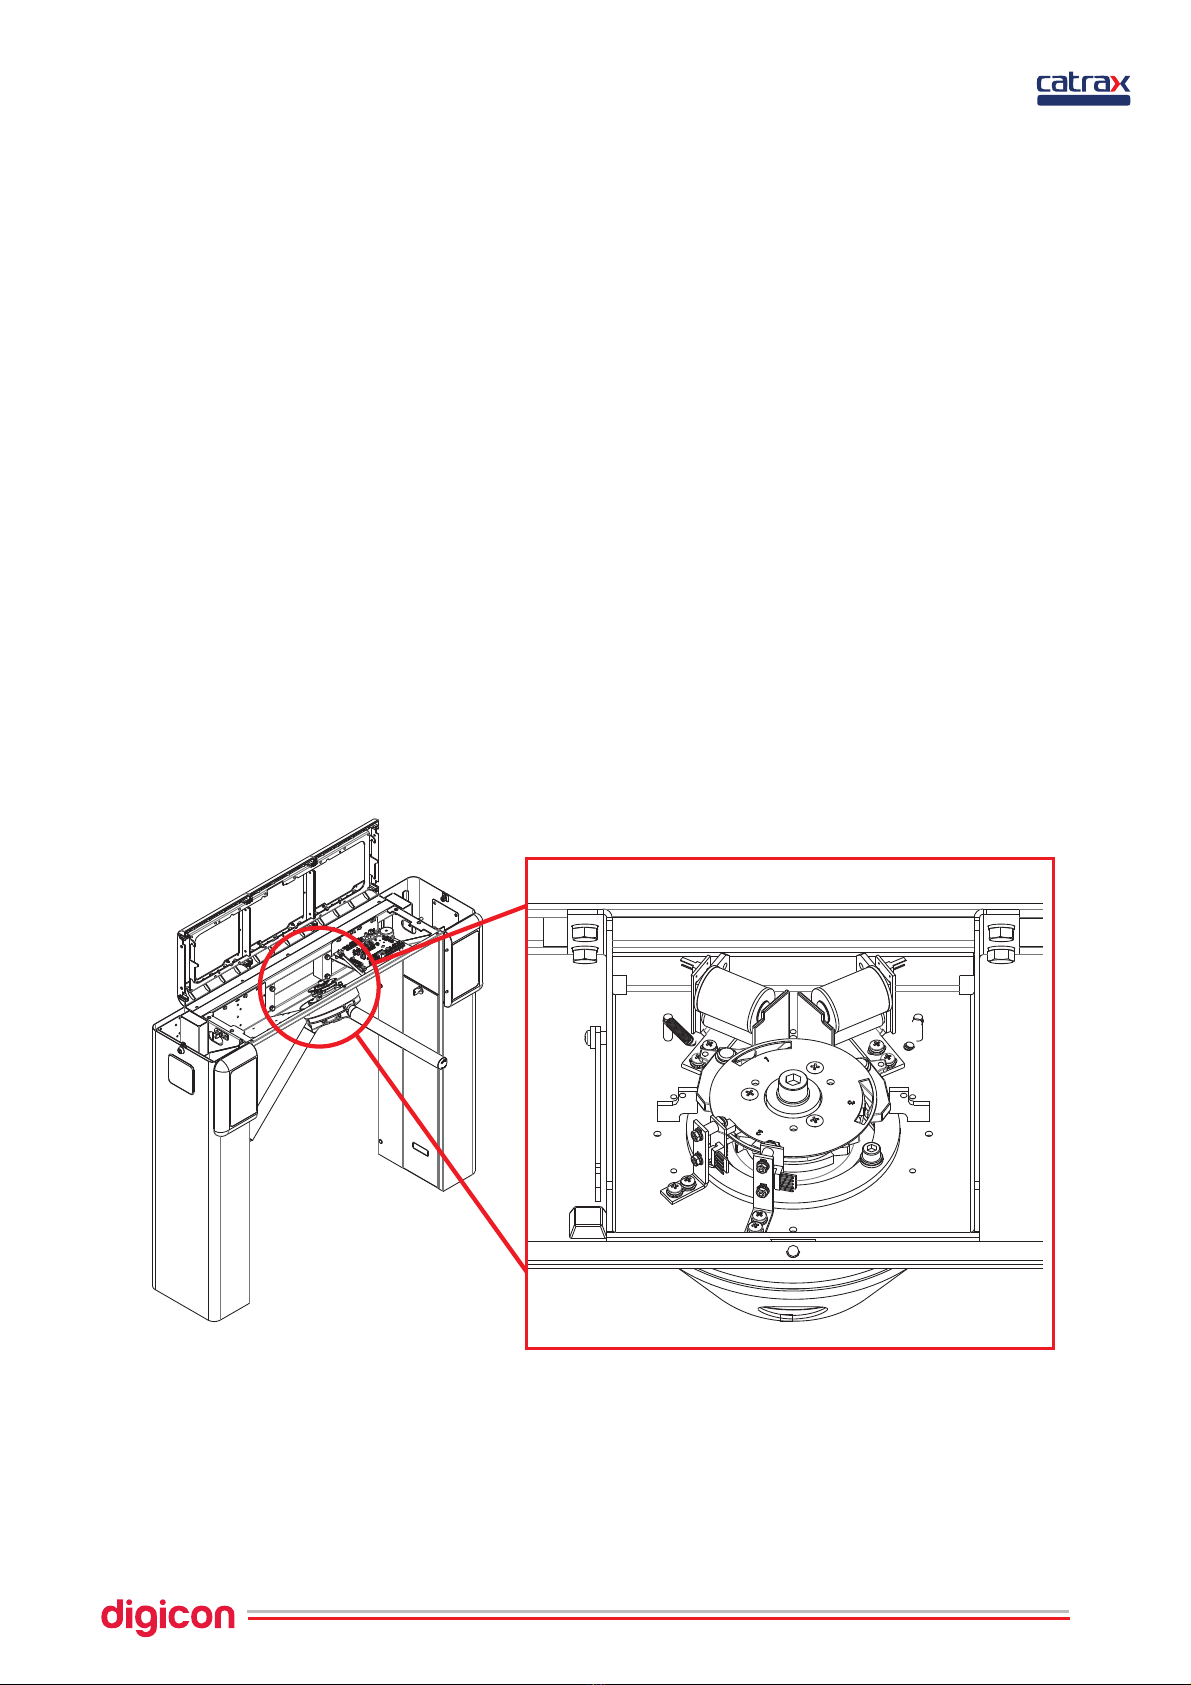
5.3 Assembling the arms ............................................................................
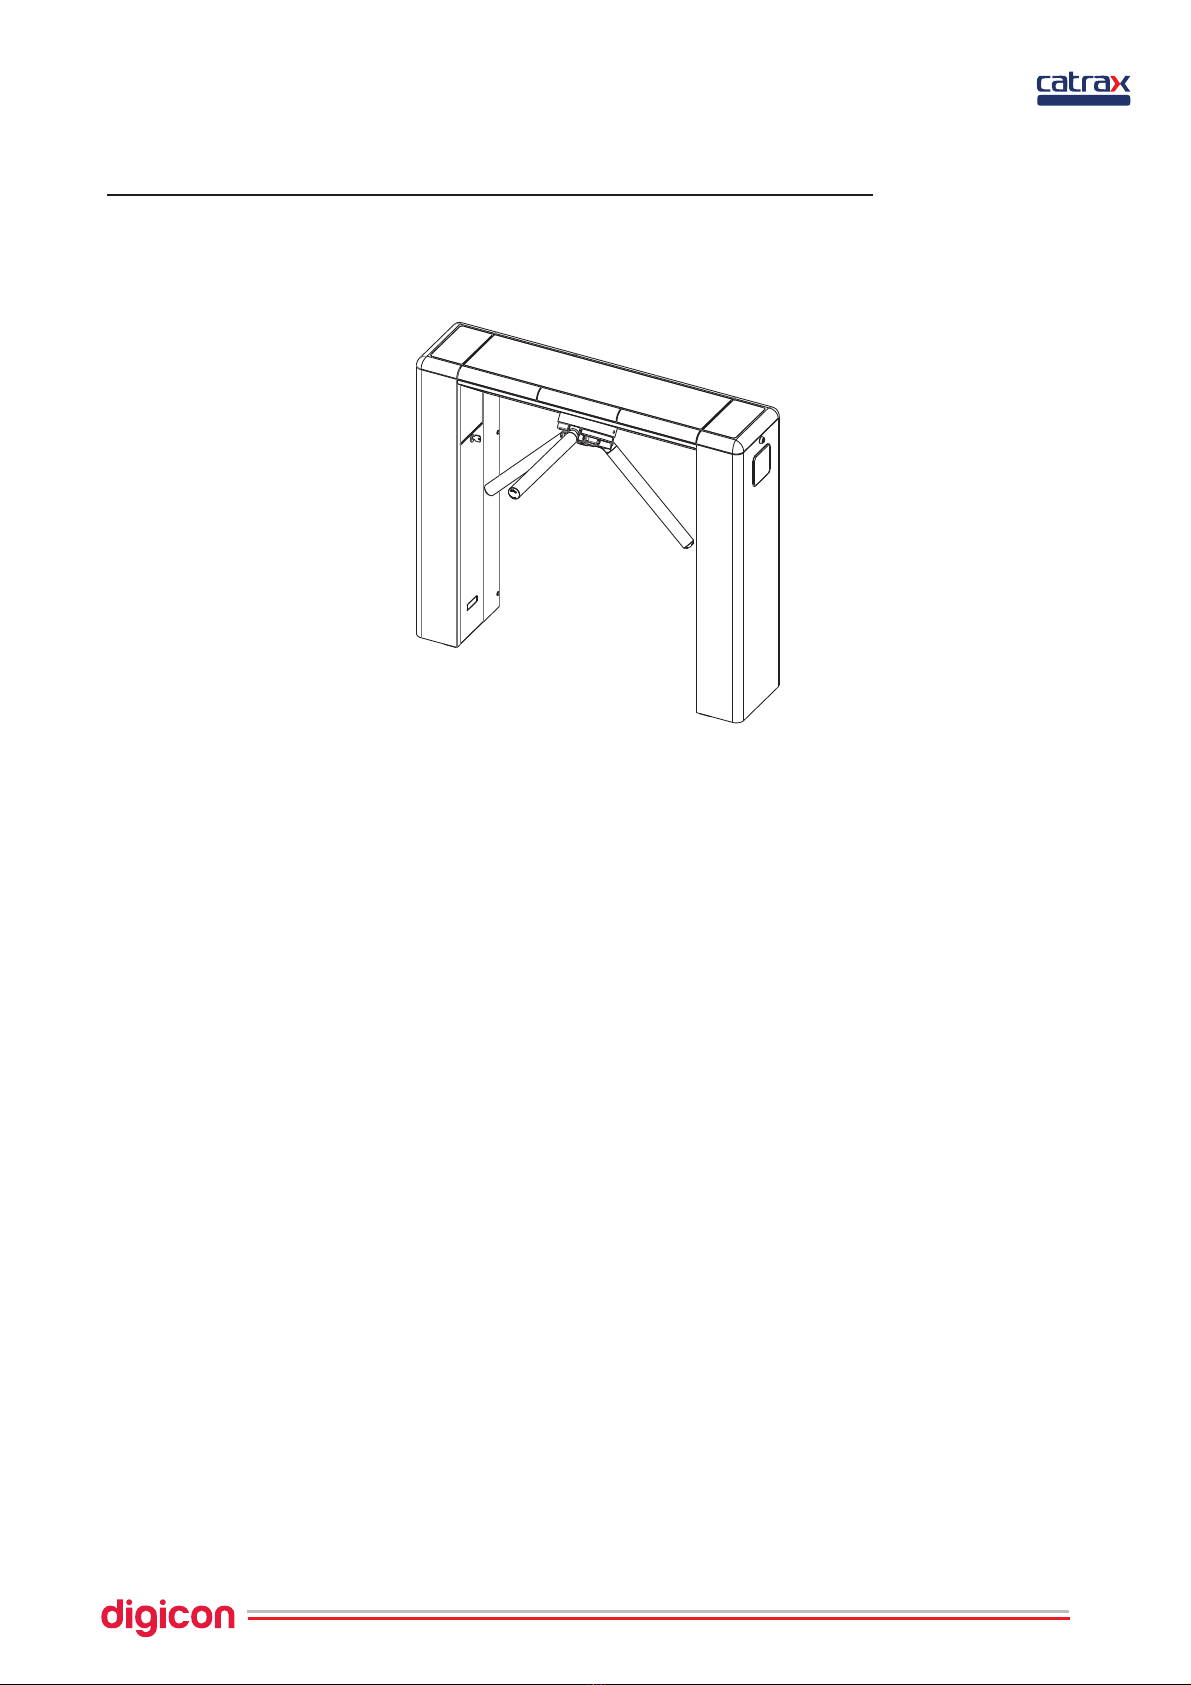
5.4 Accessing after assembly ................................................Catrax Master
6. Optional items .......................................................................................
6.1 Rear closure kit ....................................................................................
6.2 Collecting box kit .................................................................................
6.2.1 Connection of collecting kit to control board .........................................
6.3 Operational pictogram kit ......................................................................
6.4 Orientation pictogram kit .......................................................................
6.5 Electronic counter kit ............................................................................
6.6 Power supply .......................................................................................
6.7 Control board .......................................................................................
6.7.1 Inputs...............................................................................................
6.7.2 Outputs ............................................................................................
6.7.2.1 Return signals .................................................................................
6.5.2.2 Electromagnets ...............................................................................
6.7.2.3 Sound alarm ...................................................................................
6.7.2.4 Connection scheme .........................................................................
6.7.2.5 Pictogram ......................................................................................
6.7.2.6 Pictrogram connections ....................................................................
6.7.3 Configuration od control board - Switch ds1 ...........................................
6.7.4 Examples of some configurations .........................................................
6.7.5 Serial configuration ............................................................................
6.8 Anti-panic system .................................................................................
6.8.1 Power connection ...............................................................................
6.8.2 Assembling the arms ..........................................................................
6.8.3 Maintenance tests ..............................................................................
7. Maintenance ..........................................................................................
7.1 Preventive and corrective routine maintenance .........................................
7.2 Solving problems ..................................................................................
8. Technical characteristics ..........................................................................
8.1 Dimensions ..........................................................................................
9. Cleaning ...............................................................................................
9.1 Maintenance and conservation of stainless steel ........................................
10.Warranty and technical assistance ............................................................
05
06
06
07
08
09
09
10
11
12
14
14
14
15
15
16
16
18
18
20
21
21
21
21
22
22
22
23
23
24
25
26
27
28
29
29
31
32
32
34
34
35

5
1. Important instructions
You can see, below, the symbols that will appear in this manual, signaling
important moments. It is essential to pay attention to them.
TIP: Indicates something Digicon considers important.
CAUTION: Indicates a moment of extreme caution when
handling the equipment/product.
ATTENTION: Indicates a moment when your observation
skills should be extremely productive.
INFORMATION: Presents interesting facts about the
purchased product.
QR CODE: Presents additional information or links with
more details about the presented text.
master

6
2.Orientations
Read the information and instructions of this manual carefully, before using the
product. This ensures the correct use of the equipment and maximum use of its
technical features as well as a prolonged service life.
·This product does not present sealing against the rain, that is, it is designed to be
used indoors.
·Keep this manual for future consultations.
·Digicon reserves its right to alter its products at any moment to adapt them to
more recent technical advancements.
·Digicon maintains its right to alter the information contained in this manual
without previous notice.
Digicon does not provide any contractual warranty concerning the information in
this manual, and cannot be held responsible for errors it may contain and
problems due to its use.
·The information contained in this manual is exclusive property of Digicon and is
protected by copyright laws.
·This manual cannot be reproduced, photocopied or translated, in its entirety or in
part, into any kind of medium, without Digicon's written consent.
3. Introduction
Following a new technological concept focused on solidity and reliability and
counting with innovative design elements, with color variety and widely curved lines,
Digicon has launched the line CATRAX Master.
CATRAX Master serves most technologies of access control currently available,
becoming the best option in the market for access control.
This manual presents a detailed description of the components and working of
CATRAX Master.
To see our complete catalogue, visit www.digicon.com.br.
master

7
4. Features of Catrax Master
CATRAX Master, an access controller in the model blockage, presents three
bidirectional, equidistant arms at 120 degrees with brushed stainless steel (AISI
304) finishing.
The structure of can present external finishing in brushed stainlessCATRAX Master
steel (AISI 304) or 1020 carbon steel with electrostatic painting in black epoxy
powder. It has reinforced structure, fully rounded corners, and non-exposed screws,
offering space and comfort for any access control solution. It also has room for no-
break and collecting box (optional items)
Aiming at facilitating assembly and maintenance, the column CATRAX Master
presents a U-shaped internal support (mounting rack) with standard holes for the
fixation of additional electronic boards. Moreover, the clients, according to their
needs, can add additional holes. Access to the mounting rack is done through a key
with secret, whose removal and insertion are extremely easy.
A plastic cover and a stainless steel sheet compose the upper panel. The cover, made
of injected plastic, can be purchased in the colors green, burgundy, or black or in any
other color desired, on demand. Optionally, the cover can present a slot for the
reading of magnetic cards/badges and barcodes.
The upper cover in stainless steel allows easy configuration and low-cost
customization of the product. The sheet can also present slots for optional items,
such as operational pictogram (on top), orientation pictogram (side), collecting
box inlet, display kit or a combination of these items.
Besides compatibility with most available technologies, Digicon can provide the
following optional items: collecting kit with box, pictogram kit, counter kit, power
supply, and display kit.
master

8
4.1 Catrax Master operation
In the basic mechanism, has a two-dimensional rotation systemCATRAX Master
with two 12 Vcc electromagnets for activating the locks and two optical sensors that
can provide the signal for the activation of the electromagnets and passage
clearance.
In the electronic model, which includes a microprocessor control board (optional), a
signal enabling passage is sent through one of the inputs, depending on the passage
direction. If this signal is recognized, the equipment will allow the turning of the arm
of . After half of the turning is complete (60 degrees), a 400
CATRAX Master
milliseconds returning signal will be sent, informing the passage direction. After the
signal, the arm cannot be returned to the previous position.
Depending on the model and configuration, if the passage is forcedCATRAX Master
without the enabling signal, an electromagnet will be activated to prevent turn. In
addition, the equipment can emit a signal for a sound alarm and/or the exhibition of a
red X on the upper panel display (models with pictogram). In this case, a return signal
will be sent, indicating that the turnstile was forced, informing the direction of turn.
master

9
5.Installing/Assembling Catrax
Master
5.1 Unboxing
As the items inside the package can vary (depending on the client's requests), it is
important to perform a cautious visual inspection before installing and assembling the
turnstile. A checklist that works as a guide during inspection accompanies all Digicon
packages.
ATTENTION: To avoid losses, the screws and the wrenches used for
assembling the are attached to the box containing theCATRAX Master
arms. Before discarding the packing materials (cardboard and plastics),
make sure all the items in the checklist are accounted for.
Orientation
pictogram
(optional)
Lock accessing
column
Lock accessing
column
External cover
Central cover
Column
Column door
Arm
Digital counter
(optional)
Bidirectional arm:
From left to right
From right to left
master

10
ATTENTION:Since the installation requires floorCATRAX Master’s
drilling, it is important that the location be chosen carefully.
5.2 Floor drilling and column fixation
Before installing , check:CATRAX Master
1. The place chosen for the installation.
2. If there is a power source or electric socket nearby (ducts for connection).
3. If the place chosen is adequate for the installation of the access controller
(indoors).
4. If access to the the locks is clear.CATRAX Master's
5. If there will be enough space for the arms after is assembled. For
CATRAX Master
more details on the equipment's dimensions, see item 8. Technical characteristics.
6. If the floor is in conditions to receive anchor bolts (minimum of 4 cm of FCK15
M.P.A. concrete or equivalent).
Once you observe these recommendations, proceed to the installation:
1. rill the floor with 3/8” drills (then use a 12mm or the ½” drill). Make two holes inD
each column of , according to the measures indicated in the image
CATRAX Master
below:
2. Clean the holes, removing any debris from drilling.
3. Place the external part of the bolts in the holes. Leave about 25mm of the bolt out of
the hole.
4. Position the column and fasten it to the floor with the four screws that accompany
the bolts. Use a flex-head socket wrench with ¾'' or an articulated socket wrench.
master
5
(0,196")
209
(8,228")
30 (1,181")
80
(3,149")
941
(37,047")
1001
(39,409")
12,5 (4X)
35
(1,377")

11
5.3. Assembling the arms
After drilling the floor and installing the column, it is possible to assemble the arms,
as shown below:
INFORMATION:
- The cover to access the screws is open/closed by pressure (fitting).
- To assemble the arms, use an Allen n.5 wrench.CATRAX Master
master

12
5.4 Accessing Catrax Master after assembly
After is installed and assembled, access to the interior of theCATRAX Master
equipment can be done with the key that accompanies the equipment, in three ways:
external covers, central covers, or column door. See now the instructions for opening
CATRAX Master after assembly:
1. Unlock the two extremities of the , using the key providedCATRAX Master
alongside the product. Remove the external covers, which are pressed into place.
The covers feature small internal couplings that support them in the column during
operation, as can be seen in the image to the right.
Look
Fit the pins of the
external cover
2. Before opening the central cover, deactivate the security pins located on each
side of the cover.
master

13
3. Open the cover according to the following images:
Note that the equipment structure contains a device that maintains the cover in the
vertical position (see detail).
4. The following image shows with all covers open.CATRAX Master
INFORMATION:To access the column door, remove the external cover
on the appropriate side.
FRONTAL
POSTERIOR
master

14
35
784 (30,866")
598 (23,543")
598 (23,543")
750 (29,527")
A
B
35
35
35
4,5
R2,25
8
6
Detalhe 4x
6. Optional Items
CATRAX Master is compatible with most access control technologies in the market
today; however, Digicon offers a range of optional items that allow enhancing and
matching the equipment's performance to the client's needs. See the description of
each of these items:
6.1 Rear closure kit
The can be provided with a panel to close the rear space betweenCATRAX Master
the columns. The sheet can be of 6 mm tempered glass, 6 mm acrylic, or and 1.2
mm stainless steel, as the client sees fit. Besides closing the rear space, the panel
allows simple customization with low cost.
The rear closure kit is mounted has four fasteners that secure the sheet to the side
columns, as shown below:
6.2 Collecting box kit
The collecting box kit has a device for collecting, retaining, and gathering cards or
badges. It is ideal for places with eventual visitors or users. The kit is composed of a
socket, a retention device activated by a solenoid, and a storage box. The image
below shows the items that accompany the collecting box kit:
master

15
6.2.1 Connection of collecting kit to control board
6.3 Operational Pictogram Kit
The operational pictogram kit visually signals the direction of passage (green
arrows) or the blocking (red X) on the upper part of CATRAX Master.
INFORMATION:
- The box for cards is part of the kit and is positioned under the collecting
kit.
- The badge reader is not part of the kit.
ATTENTION:The power supply has no ground wire connection.
Grounding is done directly in the turnstile's casing, using the board-
mounting bolt.
master
Sensor used for collecting
the card after 1.5 seconds
For access control board
Card reader (not
included in the kit)
Inputs Outputs
Digicon control board
Box sensor Electromagnet Turnstile sensor

16
6.4 Orientation pictogram kit
The orientation pictogram kit also visually signals the direction of passage (green
arrows) or the blocking (red X), but on the front/side part of .CATRAX Master
6.5 lectronic counter kitE
The electronic counter kit of pulses or rotations is digital, has six digits and has been
developed for access control applications that employ Catrax Master turnstiles, and
can also be employed in other projects that require this type of device. The counter is
located in the same place (side slot) as the mechanical counter.
The electronic counter offers inputs for two sensors allowing it to be configured for
sequential sensing, making it possible to detect turnstile rotations in a given
direction. The device is also capable of counting single pulses (as other counters
available on the market).
Digicon electronic counter is operated by means of a single button/key that gives
access to all of its functions. Optionally, a key-operated button can be installed on the
front panel.
.
.
digicon
FRONT REAR
TECLA
Cn1 Cn2
Cn3
Signal
Name/Description
CN1
1 Ground wire
2 Input sensor 1
3 Input sensor 2
CN2
1 External supply of 5 Vcc (battery eliminator)
2 Ground wire
3 Input for clearance key of frontal key
CN3
1 Ground wire
2 Powered by batteries of 3Vcc (two AA batteries of 1.5 Vcc)
master

17
Resetting the partial totalizer
To reset the partial totalizer, it is necessary to access the partial visualization mode
and then press the function key for about 3 seconds (or until all the digits are zero).
Configuration of operation mode:
The counter can be configured to count pulses or turns clockwise or anti-clockwise
(the denomination “clockwise” and “anti-clockwise” only serves to distinguish the
two tuning directions). To configure the counter, it is necessary to access the total
visualization mode and proceed as shown:
Sensors:
The sensors must connect the sensor's input to the counter's ground wire (switches,
optical couplers, buttons, relays, etc.).
Power characteristics:
Power 2 batteries AA (3Vcc)
5V (battery eliminator)
Battery life 1,5 year or over 3.000.000 cycles
(alcaline batteries, with sensors and open buttons)
Number of digits 6
Period of data retention 1 min 30 secs (to replace batteries without losing count)
Digits size 8 x 4 mm (height x width)
master

18
6.6 Power supply
This power supply was especially designed for the CATRAX . Among the mainline
advantages of this optional item, is its adaptation capability to the voltage variations
often found in installation sites – the input voltage can vary between 100 and 240
Vca.
The supply's specific technical features, protections and dimensions were carefully
tested and approved in hostile temperature and environmental conditions, which
ensures the adequate power supply to the equipment's performance. Besides the
input and output voltages indicated in the image below, the supply has a short-circuit
and overheating protection.
6.7 Control board
CATRAX Master control board was designed to meet most technologies of access
control terminals in the market. The controller have mechanical features and layout
perfectly suited for the needs and it is one of the best options forCATRAX Master
the equipment's operation.
The following images show the control board with its straps, connectors, and
dipswitch, as well as the location of the power supply and the control board in
CATRAX Master.
The table below describes the functions of the control board's connectors:
TIP:The power supply can be mounted to the board's support that
accompanies .CATRAX Master
Cn1 Cn2
Ds1
Cn8
ENTRADA:
100 A 240 Vca
SAÍDA:
Terra
Neutro
Fase 12V 5% / 3A
+
-
GND
master

19
Signal
Name/Description
CN1 INPUTS
1 +Vext1 (enables turn through voltage)
2 HAB1 (enables turn through dry contact – from right to left)
3 GND
4 Vext2 (enables turn through voltage)
5 HAB2 (enables turn through dry contact – from left to right)
6 GND
7 +12Vcc (available to auxiliary – maximum 500 mA)
8 CLOCK1 (input for reader from left to right)
9 DATA1 (input for reader from left to right)
10 CLOCK2 (input for reader from right to left)
11 DATA2 (input for reader from right to left)
12 GND
13 PROG1 (programs direction)
14 PROG2 (programs direction)
15 PIC1 (controls frontal pictogram 1)
CN2 OUTPUTS
1 NO or NC Contact (HAB1 return)
2 Contact C (HAB1 return)
3 NO or NC Contact (HAB2 return)
4 Contact C (HAB2 return)
5 Output for indicative X (open collector NPN – maximum 500 mA) orange wire
6 for arrow > (open collector NPN – maximum 500 mA) blue wire
7 Output for arrow < (open collector NPN – maximum 500 mA) green wire
8 +12Vcc (indicative arrows’power) red wire
9 GND (indicative arrows’power) black wire
10 + solenoid of badge collector box
11 - solenoid of badge collector box
12 Sound signal (open collector –NPN)
CN3 SERIAL RS-485
1 DATE -
2 DATE +
3 GND
CN4 SIDE PICTOGRAM 2
1 +12Vcc (indicative arrows’power)
2 Output for indicative X (open collector NPN –maximum 500 mA)
3 Output for arrow >(open collector NPN –maximum 500 mA)
4 GND (indicative arrows’power)
CN5 SIDE PICTOGRAM 1
1 +12Vcc (indicative arrows’power)
2 Output for indicative X (open collector NPN –maximum 500 mA)
3 Output for arrow <(open collector NPN –maximum 500 mA)
4 GND ((open collector NPN –maximum 500 mA))
CN6 INPUT/OUTPUTS
1 input or output 1 –configure at S4 (IN or OUT)
2 input or output 2 - configure at S5 (IN or OUT)
3 GND
4 +12Vcc
CN7 SERIAL RS-232
2 TX
3 RX
5 GND
CN8 POWER – POWER INPUT
1 +12Vcc power input
2 GND power input
CN9 BOX SENSOR
1 LED anode
2 box signal
3 GND
4 GND
CN10 ELECTROMAGNETS
1 + electromagnet 1
2 - electromagnet 1
3 + electromagnet 2
4 - electromagnet 2
CN11 OPTICAL SENSORS
1 sensor 1 signal
2 LED 1 anode
3 sensor 2 signal
4 GND
5 LED2 anode
master

20
Passage direction
PROG1 (pino 13)
PROG2 (pino 14)
Free in both directions open open
Controlled from left to right GND open
Controlled right to left open GND
Controlled on both sides GND GND
INFORMATION:
-Side pictogram 1 and 2 refer to the devices located on each side of the
equipment.
- The cables of the optical sensors (CN11) and the electromagnets (CN10)
are provided alongside CATRAX Plus.
-The cable of the box sensor (CN9) is provided alongside the collecting
box kit (optional)
INFORMATION: :PIC1 and PIC2 refer to the pictograms located on each
side of the equipment.
X
X
PIC1 (pino 15) PIC2 (pino 16) Pictogram 1 Pictogram 2
Open
Open
GND
GND
Open
GND
Open
GND X
X
Particularly about the CN11 connector, pins 13 and 14: can beCATRAX Master
configured as follows to determine direction passage:
Pins 15 and 16, which control the side pictograms, must be configured thusly:
The following sections concern important aspects of control boardCATRAX Master
configuration and connections.
6.7.1 Inputs
The input signals or passage clearance (HAB1 and HAB2) can be originated by a
relay contact, pushbutton contact, tension from 5 to 24 Vca/cc, from 110 to 220
Vca/cc. To enable passage through relay contact or pushbutton, make the
connection as shown below:
master
NO or NC contact
Table of contents
Other digicon Turnstile manuals
Popular Turnstile manuals by other brands

Oxgard
Oxgard CUBE C-03 Operation and installation manual

Record
Record FlipFlow TWIN user manual

HZ Security
HZ Security HZ-TTS01 installation manual

Controlled Access
Controlled Access HS400 Series Service & installation manual

Motorline professional
Motorline professional MTT06 User's and installer's manual

Oxgard
Oxgard Cube C-01 MAINTENANCE OPERATIONS