6
©2017 DJI All Rights Reserved.
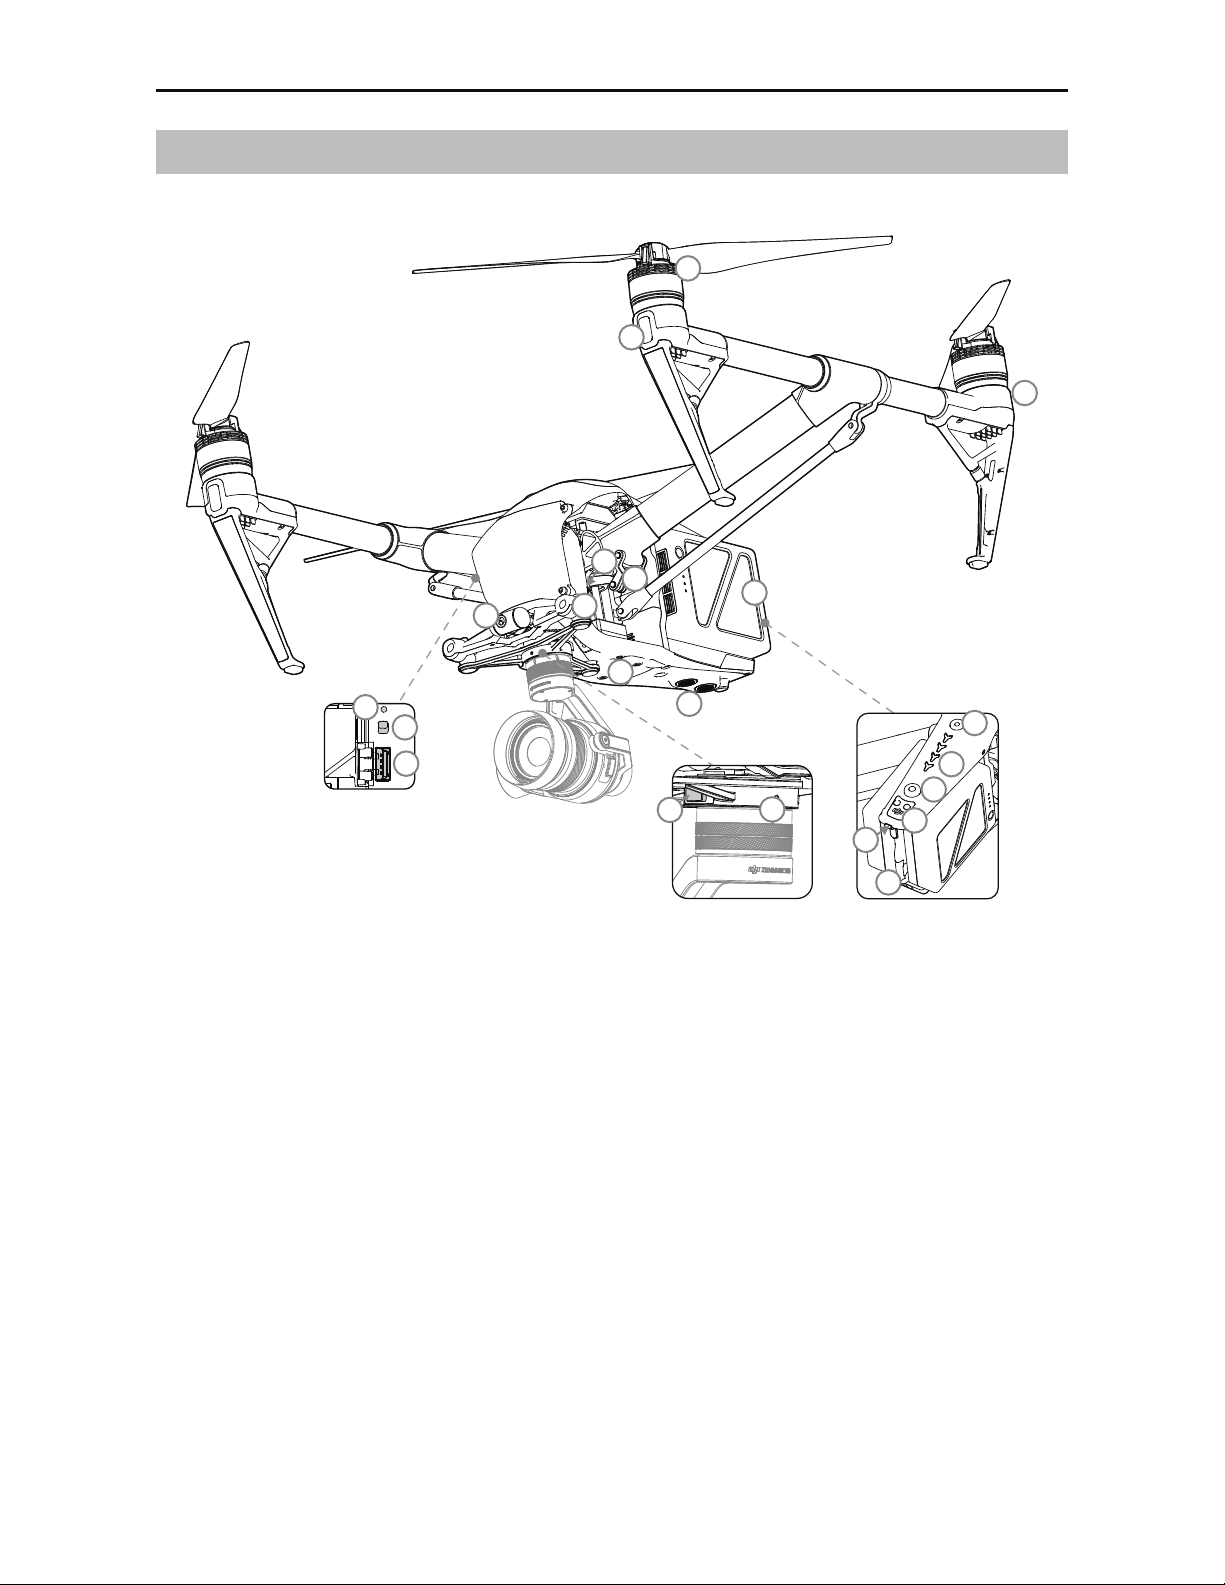
3URGXFW3URÀOH
Introduction
The Inspire 2 is a powerful aerial film making system with class leading agility and speed,
redundancy features for maximum reliability, and new, smart features that make capturing complex
shots easy. The camera unit is now independent from image processor so that you have the
nFYJCJMJUZUPDIPPTFUIFQFSGFDUHJNCBMBOEDBNFSBTZTUFNGPSFBDIPGZPVSTDFOFT%VBMGSFRVFODZ
TVQQPSUJOUIFSFNPUFDPOUSPMMFSNBLFTUIF)%WJEFPEPXOMJOLNPSFFGmDJFOUBOENPSFTUBCMF
Feature Highlights
6QHSBEFE5BQnZTM and ActiveTrackTMDPNNBOETJOUIF%+*(0BQQUIF*OTQJSFnJFTBOZXIFSF
visible on-screen with a tap and tracks moving subjects effortlessly.
Flight Controller: The flight controller has been updated to provide a safer, more reliable flight
FYQFSJFODF"OFXnJHIUSFDPSEFSTUPSFTDSJUJDBMEBUBGSPNFBDInJHIU"TZTUFNPGWJTVBMTFOTPST
FOIBODFIPWFSJOHQSFDJTJPOXIFOnZJOHJOEPPSTPSJOFOWJSPONFOUTXIFSF(14JTVOBWBJMBCMF%VBM
IMUs and compasses design provides redundancy.
HD Video Downlink: The low-latency long range (up to 4.3mi (7km)) HD downlink is powered by an
enhanced version of DJI LIGHTBRIDGETM. Support of 2.4 GHz and 5.8 GHz ensures a more reliable
connection in environments with more interference.
Camera and Gimbal: The camera unit is now independent from image processor so that you have
UIFnFYJCJMJUZUPDIPPTFUIFQFSGFDUHJNCBMBOEDBNFSBTZTUFNGPSFBDIPGZPVSTDFOFT5IJTNFBOT
that regardless of which camera you choose, you have the same powerful processing backing
it, and when using the ZENMUSETM X5S, the ability to capture RAW videos. Lossless video (in
CinemaDNG and ProRes format), and DNG RAW photo burst shooting will be available when DJI
CINESSDTM used.
Intelligent Flight Battery: The new DJI Intelligent Flight Battery features upgraded battery cells and
BOBEWBODFEQPXFSNBOBHFNFOUTZTUFNQSPWJEJOHVQUPNJOVUFTPGnJHIUXJUIB;FONVTF94
and 27-minutes with a Zenmuse X4S.
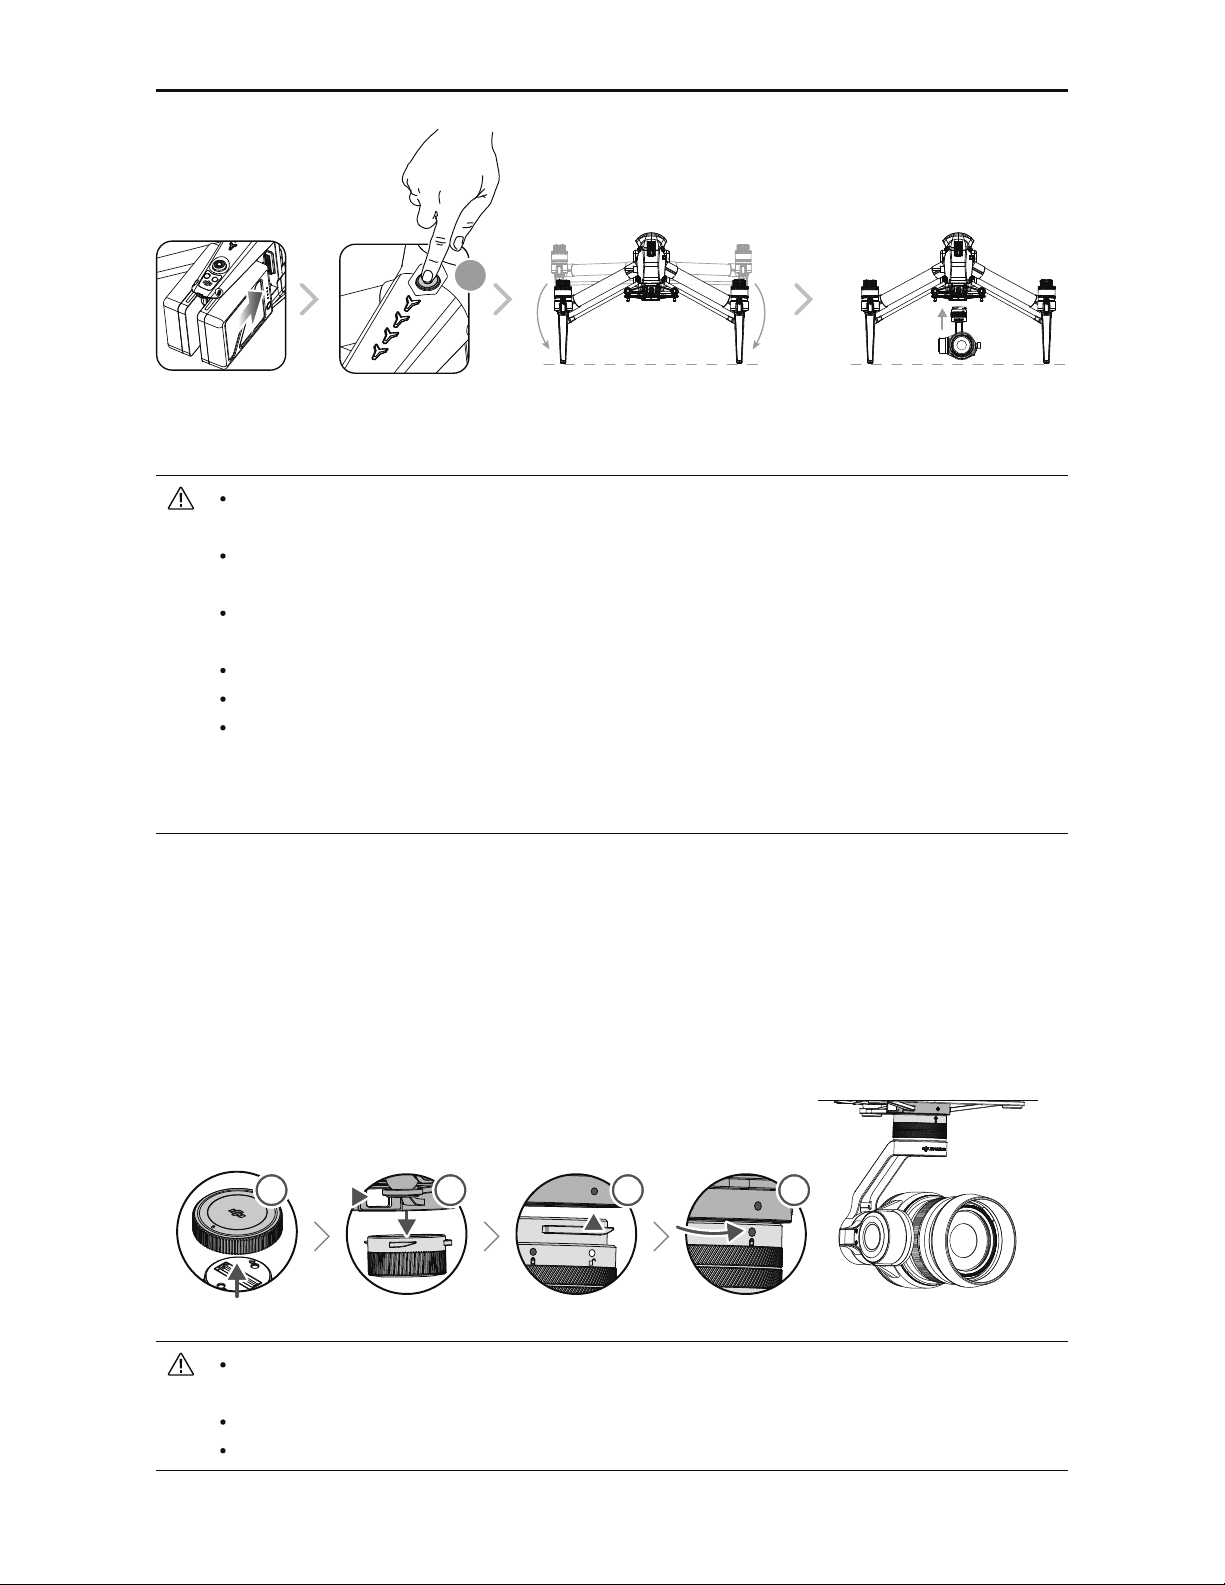
Assemble the Aircraft
Unlocking Travel Mode
The aircraft is in Travel Mode during delivery. Follow these steps to change it to Landing Mode
CFGPSFZPVSmSTUnJHIU
1. Insert the battery pair.
1SFTTUIFQPXFSCVUUPOBNJOJNVNPGmWFUJNFT
3. Unfold the landing gear to Landing Mode and power on automatically.


 user manual")