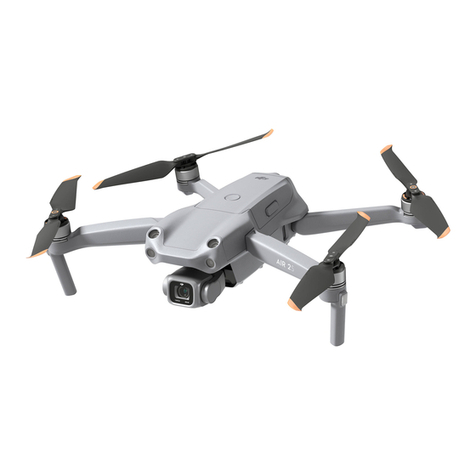
dji PHANTOM Instruction manual

©2012 大疆创新 版权所有 1 |
PHANTOM Quick Start Manual V1.0
Содержание
Disclaimer&Warning2
BeforeYouStart2
Inthebox2
OwnedTools3
Introduction4
Aircraft&TXBasicOperation5
BeforeFlying6
FlightTest9
EnhancedFail‐safe10
Low‐voltageAlarm11
LED&SoundIndicator
Description11
FCCStatement14
RFwarningstatement14
Thank you for purchasing our product. Please enter the DJI special website of PHANTOM to confirm if the
print manual is the latest one according to the manual version, because this print manual may be not the latest
one. If not, please download and refer to the latest manual. It is without any update notice.
The manual will get you ready to fly by doing simple operations. You can get an advanced manual from DJI
website to learn more about PHANTOM, for example, configuring parameters by connecting to assistant
software, changing the transmitter to Mode1, matching frequency between the transmitter and the receiver,
and intelligent orientation flight, etc.
www.dji-innovations.com

©2012 DJI Innovations. All Rights Reserved. 2 |
Disclaimer & Warning
The PHANTOM is only for the persons who are over 18 years old and have certain aero-modeling knowledge,
as it is an aero-modeling more than an ordinary toy. DJI strongly oppose the persons to use the PHANTOM
without any an aero-modeling experience, to avoid damage and injures, or even casualties. The fast rotating
propellers and aircraft drop will cause serious injury. Therefore, please fly with a high safety consciousness!!!
Please strictly follow these steps to use the PHANTOM. As DJI Innovations has no control over use, setup,
final assembly, modification or misuse, no liability shall be assumed nor accepted for any resulting damage or
injury. By the act of use, setup or assembly, the user accepts all resulting liability. DJI Innovations accepts no
liability for damage(s) or injuries incurred directly or indirectly from the use of this product.
DJI and NAZA-H is registered trademark of DJI Innovations. Names of product, brand, etc., appearing in this
manual are trademarks or registered trademarks of their respective owner companies. This product and
manual are copyrighted by DJI Innovations with all rights reserved. No part of this product or manual shall be
reproduced in any form without the prior written consent or authorization of DJI Innovations. No patent liability
is assumed with respect to the use of the product or information contained herein.
Before You Start
Checking list before every flight!!!
CAUTIONS!!!
9Keep the flight away from objects, such as obstacles, human beings, high-voltage lines, etc.
9Do not over load the multi-rotor, i.e. do not carry heavy weight
9Check that the propellers and the motors are installed correctly and firmly. Make sure the rotation direction o
f
each propeller is correct. Keep away from rotating motor and propeller to avoid injure.
9Prevent the TX from interface with other wireless device.
9Always keep the TX, battery and all other parts are charged fully.
9Please always switch on the transmitter first, then power on quad-rotor before takeoff! Power off the quad-roto
r
first, and then switch off the transmitter after landing!
9Avoid any impact by external forces to keep the high accuracy performance of the multi rotor and Tx.
9Do not disassemble or modify your multi rotor or transmitter.
9Not waterproof and not oil-proof. Please keep the multi rotor and Tx dry.
9Make sure the positive and negative poles of the battery are connected correctly, to avoid short circuit.
9The battery may cause explosion, chemical burns or ever fire hazard because of misuse. DO NOT expose the
battery to sunlight directly, burn the battery or discard the battery in fire. Always keep the children away.
9DO NOT use damaged or leaking battery. Discard it according to the tips of the battery, and use a new one.
9Please use the associates approved by DJI.
9Please contact our customer service if you have some problems you can’t solve.

©2012 DJI Innovations. All Rights Reserved. 3 |
Aircraft
Frame for Camera
Transmitter Bi-pod
Propellers(with Nuts)Charger(with Cables)
Battery Assistant Wrench
Cross Screwdriver
In the box
Owned Tools

©2012 DJI Innovations. All Rights Reserved. 4 |
Introduction
The PHANTOM is an all-in-one small Quad Copter designed for multi-rotor enthusiasts. Before shipping from
the factory, it has been configured and fully tested, which means you have no configuration to do.
LED In d icat o r
Nut Bat t er y
Cam er a M F
ounting rame
Bi pod
-
Motor
Aircraft
Aircraft Nose
Bat t er
y
Char g er
-
+
+
-+
--
-+
-
Pitch
Roll
Throttle
Yaw
IOC Switch
Power
LED Indicator
Antenna
M
ode Control Siwtch
Battery
Joystick
Joystick
TX
zBuilt-in
9NAZA-M Autopilot System
Refer to NAZA-M manual for details
9GPS & Compass module
9R/C Receiver
9Power System for Flight
9LED Indicator
zFunction
9Manual/ATTI./GPS ATTI.
9Intelligent Orientation Control
9Enhanced Fail-Safe
9Low-voltage Alarm
zCamera Frame (For Gropo)
9Working Frequency:2.4GHz ISM
9Control Channel Numbers of TX:6
9Communication Distance:300m
9Receiver Sensitivity(1%PER):>-93dBm
9Power Consumption of TX:<20dBm
9Working Current /Voltage:52 mA@6V
9AA Battery:4 Required
zCharger
9AC Input: 100-240V
9Charge Circuit:1A/2A/3A
9Current Drain for Balancing: 200mA
9Circuit Power:20W
zBattery
9Type: LiPo

©2012 DJI Innovations. All Rights Reserved. 5 |
Aircraft & TX Basic Operation
Definitions
zStick neutral position and stick released means the stick of TX is pushed to the central position.
zCommand Stick means the stick of TX is pushed away from the central position.
TX
Aircraft
(is the nose direction)
GPS ATTI. /ATTI. Mode Manual Mode
Throttle stick is for aircraft up& down
control. The aircraft will hold the height
automatically if the stick released. The
throttle stick cannot hold the central
position when released.
Throttle stick is for
aircraft up& down
control without
height hold
function.
Yaw stick is for aircraft rudder control.
Command stick is responding to the changing angle velocity of
the aircraft, with the maximum rudder angular velocity is
200°/s. Left push the stick, counter clock-wise rotation of the
aircraft, vice versa.
Roll stick is for aircraft left/right control
and Pitch stick is for front/back control.
Command stick is responding to the
changing angle of the aircraft. Stick
neutral position is for 0˚, its endpoint is
45˚. The roll and pitch stick holds the
central position when released.
zIn GPS Mode, the aircraft will hover (hold
horizontal position) when sticks released.
zIn ATTI. Mode, the aircraft will keep attitude
stabilizing without horizontal position
(different from hover in GPS Mode)
Command stick is
the changing angle
velocity (the max
velocity is 150°/s) of
the aircraft.
The aircraft will
keep the front/back
/left/right not to
rotate, but without
attitude stabilizing
in 0˚.
GPS ATTI. ATTI. Manual
Use a 3-position switch on the TX as mode control switch. After
connection to the GPS module, GPS ATTI. Mode is available.
Pay attention because the GPS ATTI. Mode is dependent on
the number of GPS satellites acquired by the main controller.
OFF Course Lock Home Point Lock
Use a 3-position switch on the TX as Intelligent Orientation
Control (IOC) switch. Flip the switch to OFF in basic flight.
Use IOC function when you are family with basic flight.
Download the advanced manual from DJI website to get more details.
You can change the operation mode of the TX according to the advanced manual if necessary.

©2012 DJI Innovations. All Rights Reserved. 6 |
1. Open the battery compartment cover of the TX.
2. Put into the 4 battery in accordance with the + /- pole.
3. Close the battery compartment cover of the TX.
1. Insert the AC power cord into the charger and AC cord into a
wall socket (100-240V). The charge status LED will flash green.
2. Select the battery type LiPo and the charging current 2A.
3. Connect the battery main charge lead to battery socket and
battery balance wire to balance port.
4. Start charging. The charge status LED and the 1S/2S/3S cell
LED will glow constant red.
5. When the charge status LED glows constant red, it is charging
in CC mode and LED glows green and red blink is in CV mode.
6. When the cell LED is flashing, it is discharging for balancing.
7. When the battery is fully charged, the charge status LED will
glow constant green. Unplug the battery from the charger.
Cell 2 LED
Cell 1 LED
Cell 4 LED
Cell 3 LED
Battery Socket
Toawallsocket
AC 100-240V
Ready
CC Mode
CV Mode
Charge
Status
LED
Finish
Charging
Cell
LED Discharging
Before Flying
1.Power on the TX
2.Battery Charging
3.AssemblethePropeller 4.Mount the Bi-pod if necessary
zIt is recommended to use the
Nickel-Hydrogen charging battery.
zTake out the battery after usage.
Make sure the rotation direction of propellers is correct.
zMake sure to use the battery after fully charging.
zWhen the charger is in CV mode (with green and red LED
blinking), the battery is over 80% charged .If you need to
use the battery at once, make sure it is 80% charged.
zPlease use the batter
y
accordin
g
to the sticker
p
rom
p
ted.

©2012 DJI Innovations. All Rights Reserved. 7 |
1. Lower the throttle stick to the bottom position, and flip the IOC and mode control switch to the top position.
2. Turn on the power switch of the TX,When the linking is successful, the LED indicator on the TX will
change to solid red.
1. Place the aircraft on the ground
2. Open the battery compartment cover of the aircraft.
3. Put the battery into the compartment with the power cord
is outward.
4. Connect the battery and aircraft by the power lead and
make sure the ESC’s work properly.
5. Keep the sticks of the TX stationary until the system start
and self-check finished, and the LED will blink according
to the control mode.
6. Put the power cable into the battery compartment.
7. Close the battery compartment cover.
5. Turn on the TX
6. Power on the aircraft
7.GPS & Compass Calibration
The GPS module is built-in magnetic field sensor for measuring the geomagnetic field, which is not the same
in different areas. Calibrate the compass at the first flight or fly area is far away from the previous area.
Make sure to keep away from ferromagnetic substance when calibration.
1. Quickly switch the control mode switch from Manual Mode to GPS Atti.
Mode for 6 to 10 times, The LED indicator will turn on constantly yellow.
2. Rotate your multi rotor around the horizontal axis until the LED changes to
constant green, and then go to the next step.
3. Hold your multi rotor vertically and rotate it around its vertical axis, keep
rotating until the LED turns off, meaning the calibration is finished.
4. The LED indicator will show whether the calibration was successful or not.
Make sure to keep the throttle stick at the bottom position before the LED change to solid red!!!
Make sure to use the PHANTOM after the four green LED is off!!! Please contact us if the last four green
blinks are abnormal.

©2012 DJI Innovations. All Rights Reserved. 8 |
zIf the calibration was successful, calibration mode will exit automatically.
zIf the LED keeps flashing quickly Red, the calibration has failed. Switch the control mode switch one
time to cancel the current calibration, and then re-start from step 1.
If you keep having calibration failure, it might suggest that there is very strong magnetic interference
around the GPS & Compass module, please avoid flying in this area.

©2012 DJI Innovations. All Rights Reserved. 9 |
Flight Test
1. If in GPS ATTI. Mode, place the aircraft in the open space without buildings or trees. Take off the
aircraft after 6 or more GPS satellites are found ( blinks once or no blinking). If in ATTI. Mode or
Manual Mode (it is not recommended for newcomer), you can skip this step.
2. Place the aircraft 3 meters away from you and others, especially children, to avoid accidentally injure.
3. Start-up
9Push both sticks to the left bottom or right bottom, to start the motors.
9Release the yaw, roll and pitch sticks and keep them at the neutral position avoiding the aircraft to tilt
to one side. At the same time push the throttle stick from the bottom quickly, because the motors will
stop if not to push the throttle stick from the bottom in time and you need to execute start-up
procedure again. When the aircraft is on the point of leaving the ground, continue to push the throttle
stick upwards to rapidly take off from the ground, pay attention not to push the stick excessively.
9Pay attention to the aircraft movement at any time when flying, and use the sticks to adjust the
motion status. Keep the yaw, roll and pitch and throttle sticks at the neutral position to hover the
aircraft at the height you need.
4. Nose down the aircraft slowly. Push the sticks to the left bottom or right bottom to stop the motors after
landing. (Push the throttle stick under 10%, and after landing 3s the motors will stop automatically)
5. Please always power off the quad-rotor first , then switch off the transmitter after landing.
FLYING NOTES!!!
9Please always switch on the transmitter first, then power on the quad-rotor before takeoff!
9If in GPS ATTI. Mode, keep the aircraft flying in the open space without obstruction. Pay attention to
the GPS satellite status indicator LED. If the GPS signal is bad (red LED blink twice or three times),
switch to ATTI. Mode. You may use the GPA ATTI. Mode again after the GPS signal back to normal
9If the multi rotor LED flashes quickly Red then this indicates battery voltage is low, please land ASAP.
Once the system enters the second-level low-voltage alarm, the aircraft will drop height automatically.
9DO NOT flying in ferromagnetic substance area, to avoid strong magnetic interference with the GPS.
9It is recommended to land the aircraft slowly, to prevent the aircraft from damage when landing.
9If the TX indicates low-battery alarm, please land ASAP. Because the TX abnormal work may cause
the aircraft out of control or even crash.
9After powering on and before the motors start, if the multi rotor LED double blinks yellow or green
without Tx stick movement, you should power cycle the multi rotor.
9The multi rotor will automatically land (or return home if in GPS mode) if the fail-safe mode is active.
9We recommend that you take off the multi rotor in ATTI. Mode. Manual mode is very sensitive.
9If the LED lights Red, please hover the aircraft until it turns off, so as to have better flight performance.
©2012 DJI Innovations. All Rights Reserved. 10 |
Enhanced Fail-safe
zEnhanced Fail-safe will be triggered when the MC loses the control signal, there are following situations.
9Signal lost between the transmitter and receiver, e.g. multi-rotor is out of the communication range, or
transmitter is down, and so on.
9One or more connections of A, E, T, R, U channels between main controller and receiver loses. If this
happens before take-off, motors will not work if you push the throttle stick; if this happens during the
flight, LED yellow light will flash to warn in addition to the failed-safe method.
zThe multi rotor will automatically land if the fail-safe mode is active, or return home if in GPS mode.
zBefore takeoff, current position will be saved as home point by MC automatically when you push the
throttle stick first time after 6 or more GPS satellites are found (red LED blinks once or no blink) 8 seconds.
zMake sure to save the home location before takeoff and keep it in mind clearly for safe reasons.
zWhen switch to Manual Mode or Atti. Mode, MC will disengage enhanced failed-safe mode, you can
re-gain control of multi-rotor.
The following schematic shown is introduction for Go-Home and Landing.
The aircraft will not go home if the GPS signal is not good; or the distance between the Home Location
and multi-rotor is less than 25m and the altitude is lower than 20m relative to the Home Location.

©2012 DJI Innovations. All Rights Reserved. 11 |
Low-Voltage Alarm
Low-voltage alarm is to indicate that the battery cannot provide enough power for the aircraft, in order to warn
you to land the aircraft ASAP. There are both first level and second level protections. It is not for fun, you should
land your aircraft ASAP to prevent your aircraft from crash or other harmful consequences!!!
zAll two level protections will only have LED warning in Manual Mode, no any automatic actions.
zIn ATTI. and GPS Mode.
9The first level protection have LED warning
9The second level protection the aircraft will land automatically having LED warning. Meanwhile the center
point of throttle stick will move up slowly to 90% of endpoint, you should land ASAP to prevent your
aircraft from crash! When the center point is at 90% of endpoint, multi-rotor will still ascend slowly if you
continue to pull the throttle stick, and the control of Pitch, Roll and Yaw are the same as before.
LED & Sound Indicator Description
LED Indicator Description
Control Mode (with GPS module)
Manual Mode ATTI. Mode GPS ATTI. Mode
GPS Satellite number < 5
GPS Satellite number = 5
GPS Satellite number = 6
GPS Satellite number > 6 NO
Flight Attitude is bad
Control Mode (without GPS module)
Manual Mode NO
ATTI. Mode
When appears, please hover the aircraft until disappears, so as to have better flight performance.
Sparking indications of Atti. and GPS Atti. are:
zBefore motors start: Single blink, all sticks (except throttle stick) return to center; Double
blinks, stick(s) (except throttle stick) not at center.
zAfter motors start and throttle stick is over 10% in 3 seconds: Single blink, all sticks return to
center; Double blinks, stick(s) not at center.

©2012 DJI Innovations. All Rights Reserved. 12 |
Compass Calibration
Begin horizontal calibration
Begin vertical calibration
Calibration or others error
Others
Tx signal lost
Low voltage / Other errors
System start and self-check
ESC Sound Introduction
NO ESC State Sound
1 Ready ♪1234567
2 Throttle stick is not at bottom BBBBBB…
3 Input signal abnormal B--------B--------B…
4 Input voltage abnormal BB---BB---BB---BB…
TX State Introduction
NO TX State Introduction
1 The throttle stick isn’t in the lowest position after turning on. B--------BB
2 Linking between the TX and the RX
3 Normal Operation
4 Low-battery Alarm(Need to change the battery) BB…………
Specifications
NO Parameters Range
1 Operating Temperature -10°C ~ 50°C
2 Power Consumption 3.12W
3 Ta k e - o ff W e i g h t <1000g
4 Hovering Accuracy (GPS Mode) Vertical: ± 0.8m. Horizontal: ± 2.5m

©2012 DJI Innovations. All Rights Reserved. 13 |
5 Max Yaw Angular Velocity 200°/s
6 Max Tilt Angle 45°
7 Max Ascent / Descent Speed ±6m/s
8 Max Flight Velocity 10m/s
9 Diagonal Wheelbase 350mm

©2012 DJI Innovations. All Rights Reserved. 14 |
FCC Statement
RF warning statement
This equipment has been tested and found to comply with the limits for a Class B digital device, pursuant
to part 15 of the FCC rules. These limits are designed to provide reasonable protection
against harmful interference in a residential installation. This equipment generates, uses and can radiate
radio frequency energy and, if not installed and used in accordance with the instructions,
may cause harmful interference to radio communications. However, there is no guarantee that
interference will not occur in a particular installation. If this equipment does cause harmful interference to
radio or television reception, which can be determined by turning the equipment off and on, the user is
encouraged to try to correct the interference by one or more of the following measures:
-Reorient or relocate the receiving antenna.
-Increase the separation between the equipment and receiver.
-Connect the equipment into an outlet on a circuit different from that to which the receiver is connected.
-Consult the dealer or an experienced radio/TV technician for help.
To assure continued compliance, any changes or modifications not expressly approved by the party
Responsible for compliance could void the user’s authority to operate this equipment. (Example- use only
shielded interface cables when connecting to computer or peripheral devices).
The device has been evaluated to meet general RF exposure requirement. The device can be used in
portable exposure condition without restriction.
Other manuals for PHANTOM
8
Table of contents
Other dji Drone manuals

dji
dji PHANTOM 4 User manual

dji
dji mavic User manual

dji
dji M1S User manual

dji
dji Mavic 2 Enterprise User manual

dji
dji AGRAS MG-1 User manual

dji
dji spreading wings s900 User manual

dji
dji Inspire 1 Pro User manual

dji
dji MINI 3 PRO User manual

dji
dji DSLRPros Nighthawk Aerial Kit User manual

dji
dji PHANTOM 4 User manual

dji
dji AGRAS MG-1 User manual

dji
dji Mavic 2 Enterprise User manual

dji
dji MINI 3 Fly More Combo User manual

dji
dji Mini 3 User manual

dji
dji PHANTOM 4 PRO User manual

dji
dji FPV FD1W4K User manual

dji
dji MAVIC 3 PRO User manual

dji
dji Matrice 600 Pro Instruction Manual

dji
dji PHANTOM 3 PROFESSIONAL User manual

dji
dji Mavic 2 Enterprise User manual