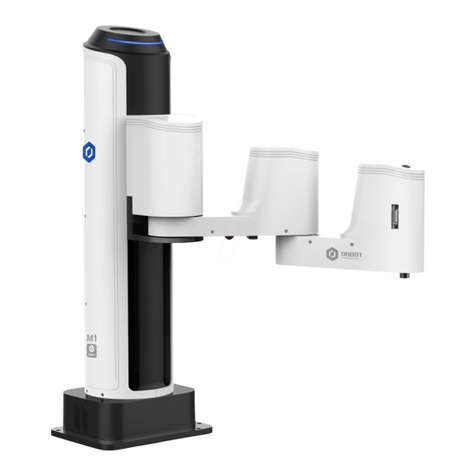
Dobot M1 Pro Installation manual

User Guide

Dobot M1 Pro Hardware User Guide
Issue V1.3 (2023-02-02)User Guide Copyright © Yuejiang Technology Co., Ltd
i
Copyright © Shenzhen Yuejiang Technology Co., Ltd 2023. All rights reserved.
No part of this document may be reproduced or transmitted in any form or by any means
without the prior written consent of Yuejiang Technology Co., Ltd.
Disclaimer
To the maximum extent permitted by applicable law, the products described (including its
hardware, software, and firmware, etc.) in this document are provided AS IS, which may have flaws,
errors or faults. Yuejiang makes no warranties of any kind, express or implied, including but not
limited to, merchantability, satisfaction of quality, fitness for a particular purpose and non-
infringement of third party rights. In no event will Yuejiang be liable for any special, incidental,
consequential or indirect damages resulting from the use of our products and documents.
Before using our product, please thoroughly read and understand the contents of this document
and related technical documents that are published online, to ensure that the robot is used on the
premise of fully understanding the robot and related knowledge. Please use this document with
technical guidance from professionals. Even if follow this document or any other related
instructions, damages or losses will be happening in the using process. Dobot shall not be considered
as a guarantee regarding all security information contained in this document.
The user has the responsibility to make sure of following the relevant practical laws and
regulations of the country, in order that there is no significant danger in the use of the robot.
Shenzhen Yuejiang Technology Co., Ltd
Address: Floor 9-10, Building 2, Chongwen Garden, Nanshan iPark, Liuxian Blvd, Nanshan
District, Shenzhen, Guangdong Province, China
Website: https://en.dobot.cn/

Dobot M1 Pro Hardware User Guide
Issue V1.3 (2023-02-02)User Guide Copyright © Yuejiang Technology Co., Ltd
ii
Preface
Purpose
This Document describes the functions, technical specifications, installation guide of Dobot
M1 Pro robot, making it easy for users to fully understand and use it.
Intended Audience
This document is intended for:
Customer
Sales Engineer
Installation and Commissioning Engineer
Technical Support Engineer
Change History
Date
Change Description
2021/04/23
The first releases.
2021/07/08
Add the general security.
2022/03/29
Add release brake button description.
2023/02/02
Overall content optimization
Symbol Conventions
The symbols that may be found in this document are defined as follows.
Symbol
Description
DANGER
Indicates a hazard with a high level of risk which, if not avoided, could result in death
or serious injury
WARNING
Indicates a hazard with a medium level or low level of risk which, if not avoided, could
result in minor or moderate injury, robot damage
NOTICE
Indicates a potentially hazardous situation which, if not avoided, can result in equipment
damage, data loss, or unanticipated result
NOTE
Provides additional information to emphasize or supplement important points in the
main text

Dobot M1 Pro Hardware User Guide
Issue V1.3 (2023-02-02)User Guide Copyright © Yuejiang Technology Co., Ltd
iii
Contents
Safety.........................................................................................................................1
Liability.............................................................................................................................1
Validity and responsibility...................................................................................1
Limitation of liability ..........................................................................................1
Intended use.........................................................................................................1
Safety warning signs.........................................................................................................2
General safety ...................................................................................................................2
Personal safety ..................................................................................................................6
Emergency ........................................................................................................................6
Emergency stop switch........................................................................................6
Emergency recovery............................................................................................6
Forced joint movement........................................................................................7
Transportation .........................................................................................................8
Product Introduction...............................................................................................9
Overview...........................................................................................................................9
Indicator light..................................................................................................................10
Drag button .....................................................................................................................10
Operation terminal ..........................................................................................................10
Product Features....................................................................................................11
Arm orientation...............................................................................................................11
Coordinate system...........................................................................................................11
Joint coordinate system .....................................................................................12
User coordinate system......................................................................................12
Tool coordinate system......................................................................................13
Home posture..................................................................................................................14
Stop time and angle.........................................................................................................14
Mechanical Specifications .....................................................................................15
Robot dimension .............................................................................................................15
Base and end-effector dimension....................................................................................15
Robot workspace.............................................................................................................16
Robot load curve.............................................................................................................16
Electrical Specifications.........................................................................................17
Interface of base..............................................................................................................17
Interface overview.............................................................................................17
Base I/O interface..............................................................................................18
End-effector I/O Interface Description ...........................................................................19
Installation..............................................................................................................21
Installation environment .................................................................................................21
Unpacking.......................................................................................................................21
Robot installation............................................................................................................21
Wiring .............................................................................................................................21
Maintenance and Repair.......................................................................................23
Dobot M1 Pro Hardware User Guide
Issue V1.3 (2023-02-02)User Guide Copyright © Yuejiang Technology Co., Ltd
iv
Safety Instructions ..........................................................................................................23
Body Maintenance ..........................................................................................................23
Appendix A Technical Specifications.......................................................................25
Appendix B Digital Circuit Description...................................................................27

Dobot M1 Pro Hardware User Guide
Issue V1.3 (2023-02-02)User Guide Copyright © Yuejiang Technology Co., Ltd
1
Safety
Liability
Validity and responsibility
The information in this document does not cover designing, installing and operating a complete
robot system, nor does it cover all peripheral equipment that can affect the safety of the complete
system. The complete system must be designed and installed in accordance with the safety
requirements set forth in the standards and regulations of the country where the robot is installed.
The integrators of Dobot are responsible for ensuring that the applicable safety laws and
regulations in the country concerned are observed and that any significant hazards in the complete
robot application are eliminated. This includes, but is not limited to:
• Performing a risk assessment for the complete robot system.
• Adding safety machines and mechanisms based on the risk assessment.
• Setting up the appropriate safety settings in the software.
• Ensuring that the user will not modify any safety measures.
• Validating that the total robot system is designed and installed correctly.
• Specifying instructions for use.
• Marking relevant signs and contact information of the integrators on the robot.
• Archiving relevant technical files.
Limitation of liability
Any safety information provided in this document should not be construed as a warranty, by
Dobot. The robot may cause injury or damage even if all safety instructions are observed.
Intended use
Dobot M1 Pro robots are collaborative robots only for general industrial use, such as
processing or delivering components or other products through end tools.
Dobot M1 Pro robots are equipped with special safety mechanisms including collision
detection. These mechanisms are purposely designed for human-robot collaborative operation, but
only intended for non-hazardous applications after risk assessment, where tools, commodities,
environments and other machines have been demonstrated to be incapable of significant risk
through application-specific risk assessments.
Any use or application deviating from intended use is deemed to be impermissible misuse,
including, but is not limited to:
• Use in potentially explosive environments.
• Use in life critical applications.

Dobot M1 Pro Hardware User Guide
Issue V1.3 (2023-02-02)User Guide Copyright © Yuejiang Technology Co., Ltd
2
• Use before performing a risk assessment.
• Use over-stated specifications.
Safety warning signs
The following safety warning signs may appear in this document, and their meanings are
described as follows. The same safety warning signs are also used in the products.
Sign
Description
DANGER
Indicates a high degree of potential danger, which, if not avoided, will result in death
or serious injury.
ELECTRICITY
May cause dangerous power consumption soon, which, if not avoided, will cause
personal injury or serious damage to the equipment.
HOT
May cause dangerous hot surfaces, which, if touched, may cause personal injury.
WARNING
Indicates a moderate or low potential hazard, which, if not avoided, may cause
minor personal injury and damage to the equipment.
ATTENTION
Indicates a potential risk, which, if ignored, may result in damage to the robot arm,
loss of data or unpredictable results
NOTICE
A situation that, if not avoided, can cause personal injury or damage to the
equipment.
For items marked with such signs, depending on the specific situation, there is
sometimes a possibility of significant consequences
General safety
Follow the safety instructions below when starting and using the robot for the first time.
DANGER
The robot system is electrical equipment. Non-professional technicians should not
modify the circuit, otherwise, it may cause damage to devices or personal injury.
Comply with the local laws and regulations when operating the robot. The security
precautions in this document are only supplemental to the local laws and
regulations.
Use the robot in the specified environment scope. Exceeding the specifications or
load conditions will shorten the service life of the robot, even damage it.
Ensure that the robot is operated under the security conditions and there is no

Dobot M1 Pro Hardware User Guide
Issue V1.3 (2023-02-02)User Guide Copyright © Yuejiang Technology Co., Ltd
3
harmful object around the robot.
Turning on or off the power continually may result in degraded performance of the
main circuit components inside the controller. If turning on or off the power
continually is required, please keep the frequency less than once per minute.
HOT
The robot and the controller will generate heat during operation. Please do not
operate or touch the robot when the robot is working or has just stopped working.
Turn off the power and wait an hour for the robot to cool down.
Do not put your fingers to where the control cabinet gets hot.
NOTICE
The personnel responsible for installation, operation and maintenance of equipment
must first receive strict training, understand various safety precautions, and master
correct operation and maintenance methods before they can operate and maintain
equipment.
Personnel without professional training shall not disassemble and repair the
equipment without authorization. If the device fails, please contact Dobot technical
support engineer in time.
Be sure to carry out daily inspections and regular maintenance, and replace faulty
components in time to ensure the safe operation of the equipment.
If the equipment is scrapped, please comply with relevant laws to properly handle
industrial waste and protect the environment.
In order to prevent personnel from accidentally entering the working space of the
robot arm, be sure to set up safety fence to prevent personnel from entering the
hazardous area.
Before operating the robot, make sure that no one is inside the safety fence. When
operating the robot, be sure to operate outside the safety fence.
Do not expose the robot to permanent magnetic fields all the time. Strong magnetic
fields can cause damage to the robot.
Dobot assumes no responsibility for robot damage or personal injury caused by
failure to follow product instructions or other improper operations.
Use appropriate and reliable lifting equipment during handling operations such as
lifting rings and bridge crane. According to the relevant regulations of various
countries, it must be carried out by personnel with operating qualification
certificates or personnel authorized by the company.
Make sure that there are no obstacles within 2 meters of the robot during
transportation. Relevant personnel should stay away from the suspended robot.

Dobot M1 Pro Hardware User Guide
Issue V1.3 (2023-02-02)User Guide Copyright © Yuejiang Technology Co., Ltd
4
Dobot is not responsible for any damage caused during the transportation and
handling of equipment.
Make sure that the robot is in the packing posture before packaging, and the brakes
on each axis are normal.
Make sure that there are no obstacles around the packing area, so that the staff can
leave in a timely manner in case of an emergency.
When the robot is transported, the packaging needs to be fixed to ensure that the
robot is stable.
After removing the outer packaging, make sure that the robot maintains the original
packing posture and the brakes of each axis are normal.
During the commissioning process, make sure that no relevant personnel and
equipment (include computer used for debugging) stay in the dangerous area of the
machine.
If necessary, wear corresponding safety protective equipment, such as safety
helmets, safety shoes (with non-slip soles), face shields, protective glasses and
gloves. Inappropriate clothing may cause personal injury.
In order to prevent personnel from entering the working space of the robot arm by
mistake, please set up safety barriers to prevent personnel from entering the
hazardous area.
Do not enter the working space of the manipulator at will during operating the robot,
otherwise cause injury to the robot or yourself.
The personnel responsible for installation, operation, and maintenance of the
equipment must first undergo strict training, understand various safety precautions,
and master the correct operation and maintenance methods before operating and
maintaining the equipment.
When an abnormality occurs in the mechanical arm, it is necessary to ensure that
the machine is stopped and then checked.
After the commissioning of the operator is completed, the test needs to be performed
in the Manual mode first, and then it is automatically run after it is confirmed to be
correct.
If the controller needs to be restarted due to power failure, when restarting, the robot
must be manually returned to the initial position of the automatic operation program
before restarting the automatic operation.
Before maintenance and wiring work, the power supply must be cut off, and the
sign No power supply must be put on. Otherwise, electric shock and personal injury
may result.
Please observe the ESD regulations when disassembling the robot or controller.

Dobot M1 Pro Hardware User Guide
Issue V1.3 (2023-02-02)User Guide Copyright © Yuejiang Technology Co., Ltd
5
Avoid dismantling the power supply system in the controller. After the controller is
turned off, its power supply system may still have high voltage for several hours.
Please contact our technical support staff for the disassembly and repair of the robot.
Maintenance and repair work must be carried out by designated personnel,
otherwise electric shock and personal injury may result.
If the brake is manually released, the robot may move because of the action of
gravity. So, when manually releasing the brake, please ensure that the robot body
and the tools or workpieces installed on the robot are effectively supported.
In order to prevent electric shock, when replacing parts, please turn off the circuit
breaker in advance and cut off the main power before proceeding.
Turn off the main power supply for 5 minutes before replacing parts.
The replacement operation must be performed by the specified operator.
The robot is designed and tested according to the group I class A engineering
medical robot standard. In order to reduce the radio interference in in light industry
or family environment, please take protective measures.
It is prohibited to operate the robot in strong radiation environment (such as RF
source without shielding), otherwise, it could interference robot work.
WARNING
Before the operation, please wear protective clothing, such as antistatic uniform,
protective gloves, and protective shoes.
It is prohibited to modify or remove the nameplates, instructions, icons and marks
on the robot and the related equipment.
Before operating the equipment, please find and be familiar with the operation
method of the emergency stop function to ensure that the robot arm can be stopped
urgently in the case of sudden stress. The emergency stop function is Stop Category
1.
Be careful when carrying or installing the robot. Please follow the instructions on
the packing box to put down the robot gently and place it correctly in the direction
of the arrow.
Please use the matched cables when connecting a robot to internal or external
equipment for personal security and equipment protection.
Please ensure that the robot and tools are installed correctly.
Please ensure that the robot has enough space to move freely.
If the robot is damaged, do not continue to use it.

Dobot M1 Pro Hardware User Guide
Issue V1.3 (2023-02-02)User Guide Copyright © Yuejiang Technology Co., Ltd
6
Any impact will release a lot of kinetic energy, which is much higher than that under
high speed and high load.
Personal safety
When operating the robot system, please strictly follow the general precautions listed below to
ensure the personal safety of the operator.
WARNING
Please comply with local laws or regulations with regard to the maximum weight
one person is permitted to carry.
Do not touch the terminal blocks or disassemble the equipment with the power ON.
Otherwise, it may result in an electric shock.
Please confirm that the equipment is well grounded, otherwise it will endanger
personal safety.
Do not touch the terminal blocks or remove the interval circuit components within
10 minutes after the power is shut off, so as to avoid an electric shock since there is
residual capacitance inside the controller.
Even if the power switch of the controller is already in the OFF status, touching the
terminal blocks or removing the interval circuit components is not allowed, so as to
avoid an electric shock since there is residual capacitance inside the controller.
When working with robots, do not wear loose clothing or jewelry. When operating
the robot, make sure that you have bundle your hair behind your head.
If the robot appears to have stopped during the operation of the equipment, it may
be because the robot is waiting for the start signal and is in the state of being about
to move. In this case, the robot should also be considered to be in motion. Do not
approach the robot.
Emergency
Emergency stop switch
After you press the emergency stop switch in emergencies, the robot will immediately stop all
motions and be locked.
Emergency equipment is not a safety guard according to IEC 60204-1 and ISO 13850. They
are supplemental protective measures and are not intended to prevent injury.
Emergency recovery
The emergency stop switch will be locked after you press it. To unlock the switch, you need to
rotate the switch according to the mark on the switch.

Dobot M1 Pro Hardware User Guide
Issue V1.3 (2023-02-02)User Guide Copyright © Yuejiang Technology Co., Ltd
7
WARNING
Please operate the robot to recover from the emergency only after the danger of the
robot system is completely removed.
Forced joint movement
In the unlikely event of an emergency, you may need to move the robot joint/s when the
robot power is either impossible or unwanted. In this case, you must push or pull the robot arm
hard to move the joint.
WARNING
Moving the locked joints forcefully may cause joint damage. Please operate only in
emergencies.

Dobot M1 Pro Hardware User Guide
Issue V1.3 (2023-02-02)User Guide Copyright © Yuejiang Technology Co., Ltd
8
Transportation
You need to transport the robot in its packaging posture (As shown below), and use the original
packaging for transportation. The robotic arm has 4 joints, namely J1, J2, J3, and J4. The joint
angles/position corresponding to the packaging posture are: J1= 0°, J2= 0°, J3=0mm, J4= 0°. The
adjustment of the joint angle/position can be realized by jogging or programming. For specific
operations, please refer to the user guide of the control software.
Figure 2.1 Packaging posture
During transportation, ensure that the robot arm is stable and fixed by corresponding measures.
During transportation and long-term storage, ensure that the ambient temperature ranges from
-20 °C to +55 °C, and the ambient humidity is no more than 95% without condensation.
When moving the robot from its packaging to the installation space, hold the robot arm in place
until all mounting bolts are securely tightened at the base of the robot.
After transportation, store the original package in a dry place for repacking and transporting it
in the future.
WARNING
Ensure that the operator is not unduly stressed on their back or other body parts
when lifting the equipment, and use appropriate lifting equipment if necessary.
Dobot shall not be held responsible for any damage caused by transportation of the
equipment.
Be sure to follow all installation instructions when installing the robot.

Dobot M1 Pro Hardware User Guide
Issue V1.3 (2023-02-02)User Guide Copyright © Yuejiang Technology Co., Ltd
9
Product Introduction
Overview
Dobot Master 2nd generation robotic arm (Dobot M1 Pro for short) focuses on the light
industrial market with great potential, and supports teaching, playback, script control, blockly,
vision identity and other functions, which is flexibly used in intelligent sorting, circuit board
soldering and other automatic production lines, so that it can become the sword to solve practical
problems for light industrial users, and can also become the platform to carry the imagination of the
maker. Dobot M1 Pro has the following characteristics.
The integrated design of the driver and controller without external controller simplifies
the process of the initial installation and deployment.
Built-in calibrated servo, harmonic reducer, combined with kinematic algorithm, can
make M1 pro bring out the best of strength and speed.
The rated load is 1.5kg, and the repeatability is ±0.02mm.
Various I/O and communication interfaces can meet the use of users in different scenarios.
The Dobot M1 Pro controller is installed in the base, and the motion part includes 3 rotation
joints (J1, J2, J4), a vertical movement joint (J4) and two connecting rods of the rear arm and the
forearm, as shown in the figure below.
Figure 3.1 M1 Pro appearance

Dobot M1 Pro Hardware User Guide
Issue V1.3 (2023-02-02)User Guide Copyright © Yuejiang Technology Co., Ltd
10
Indicator light
There is a strip indicator light on the top of the M1 Pro to indicate the status of the robotic arm,
and its meanings are as follows:
⚫White flashing: The system is starting up.
⚫Blue solid: The system is started, but the robotic arm is not enabled.
⚫Blue flashing: Hand-guiding state
⚫Green solid: Robotic arm is enabled (no project is running)
⚫Green flashing: Automatic running state (running project)
⚫Red solid: General alarm status
⚫Red flashing: Pose limit alarm status
Drag button
When the power is disconnected, the braking function of M1 Pro can avoid accidental drop of
the rear arm and forearm in J3 axis due to gravity action, resulting in equipment damage or personal
injury.
There is a drag button at the bottom of the rear arm. Press the drag button when the power is
on, and the arms can be dragged to move.
This drag button is an automatic reset switch and is effective only when pressed.
WARNING
In the process of moving by pressing the drag button, it is necessary to support the rear
arm and forearm of M1 Pro with your hand, otherwise the rear arm and forearm may fall
off.
Operation terminal
M1 Pro support control through PC and App, as shown in the table below. If you need to use
WiFi for control, you need to plug the WiFi module into the base.
Table 3.1 Operation terminal parameters
Terminal type
PC
Tablet (Android)
iPad
Operation system
Windows7/10/11
Android 10 and above
iOS 10 and above
Control software
DobotStudio Pro
Dobot CRStudio
Dobot CRStudio
Minimum
configuration
CPU: Intel Core i3
Memory: 4GB
Storage space: 256GB
CPU: 4-core
Running memory: 2G
Storage space: 32G
Storage space: 32G
Communication mode
LAN/WiFi
WiFi
WiFi

Dobot M1 Pro Hardware User Guide
Issue V1.3 (2023-02-02)User Guide Copyright © Yuejiang Technology Co., Ltd
11
Product Features
Arm orientation
With two types of the arm orientation (lefty hand orientation and righty hand orientation), M1
Pro can move to nearly any position and orientation within a given work envelope. You need to
specify the arm orientation when M1 Pro is moving. If you fail to do so, M1 Pro may move following
an unexpected path, resulting in interference with peripheral equipment. The arm orientations are
shown in Figure 4.1 and Figure 4.2.
Figure 4.1 Righty hand orientation
Figure 4.2 Lefty hand orientation
Coordinate system

Dobot M1 Pro Hardware User Guide
Issue V1.3 (2023-02-02)User Guide Copyright © Yuejiang Technology Co., Ltd
12
Joint coordinate system
The Joint coordinate system is determined by the motion joints.
Figure 4.3 shows the Joint coordinate system of a M1 Pro robot. M1 Pro contains four joints.
J1, J2, and J4 are the rotating joints, which are located and oriented in the horizontal
plane. And their axes are parallel to each other. The positive direction of these joints
is counter-clockwise.
J3 is the moving joint, which is used for the movement of the end effector in the
perpendicular plane. The positive direction of J3 is vertical upward.
Figure 4.3 Joint coordinate of a M1 Pro robot
User coordinate system
The User coordinate system is a movable coordinate system which is used for representing
equipment like fixtures, workbenches. The origin and the orientations of axes can be defined based
on site requirements, to measure point data within the workspace and arrange tasks conveniently.The
default user coordinate system is a coordinate system is located at the base of the robot, as shown
in the figure below.
The origin is the axes center of the motor of Rear Arm where Rear Arm is dropped
to the bottom of the Z-axis screw.
The direction of X-axis is perpendicular to the base forward.
The direction of Y-axis is perpendicular to the base leftward.
The direction of Z-axis is vertical upward, which is based on the right-hand rule.

Dobot M1 Pro Hardware User Guide
Issue V1.3 (2023-02-02)User Guide Copyright © Yuejiang Technology Co., Ltd
13
Figure 4.4 The default User coordinate system of M1 PRO robot
Tool coordinate system
Tool coordinate system is the coordinate system that defines the distance and rotation angle of
the offset, of which the origin and orientations vary with the position and attitude of the workpiece
located at the robot flange.
Figure 4.5 shows the default Tool coordinate system of a M1 Pro robot.
Figure 4.5 The default Tool coordinate system of M1 Pro robot

Dobot M1 Pro Hardware User Guide
Issue V1.3 (2023-02-02)User Guide Copyright © Yuejiang Technology Co., Ltd
14
Home posture
The posture when all the joint angles/position of the robot are 0 degrees/mm is called the home
posture, as shown in the figure below.
Figure 4.6 Home posture of M1 Pro robot
If the home point of the robotic arm changes due to the replacement of transmission parts or
collision, you can use the calibration block and control software in the delivery accessories to
calibrate. For details, refer to the corresponding control software user manual.
Stop time and angle
The Max. stop time and angle of axis J1, J2, J3 and J4 at the max speed, load and arm stretch
are shown below.
Table 4.1 Stop time and angle
Axis
Max. stop angle(°)
Max. stop time(ms)
J1
9.6
103
J2
9.4
102
J4
36.5
100
Axis
Max. stop distance(mm)
Max. stop time(ms)
J3
43
104

Dobot M1 Pro Hardware User Guide
Issue V1.3 (2023-02-02)User Guide Copyright © Yuejiang Technology Co., Ltd
15
Mechanical Specifications
All dimensions in this chapter are in millimeters (mm).
Robot dimension
Figure 5.1 shows the dimension of M1 Pro robot.
Figure 5.1 M1 Pro dimension
Base and end-effector dimension
You can install the matching gripper, suction cup on the end of the M1 Pro for transporting and
intelligent sorting. Figure 5.2 shows the dimension of end-effector.
Figure 5.2 Base and End-effector dimension
Other manuals for M1 Pro
1
Table of contents
Other Dobot Robotics manuals

Dobot
Dobot Magician Go DT-AC-GO4WD-01E User manual

Dobot
Dobot Magician User manual

Dobot
Dobot CR12 Installation manual

Dobot
Dobot CR A Series User manual

Dobot
Dobot Magician User manual

Dobot
Dobot MG400 Installation manual

Dobot
Dobot Conveyor Belt User manual

Dobot
Dobot PGC-50 User manual

Dobot
Dobot M1 User manual

Dobot
Dobot CR16 Installation manual

Dobot
Dobot M1 User manual

Dobot
Dobot Magician User manual

Dobot
Dobot CR 10 Installation manual

Dobot
Dobot Magician User manual

Dobot
Dobot Magician Lite User manual

Dobot
Dobot M1 User manual

Dobot
Dobot AiStarter User manual

Dobot
Dobot CR3 Installation manual

Dobot
Dobot CR Series User manual

Dobot
Dobot Magician Lite User manual