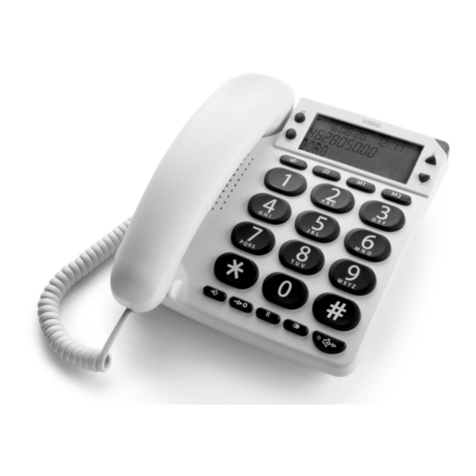
Doro Audioline AL505 User manual

505
Two-way Speaker Telephone
Téléphone mains-libres
avec présentation du numéro
Telefon mit Freisprecheinrichtung
Telefono con vivavoce a due vie
Telefon z funkcją głośnomówiącą
English
French
German
Italian
Polish
User guide
Manuel d'utilisation
Bedienungsanleitung
Istruzioni per l’uso
Instrukcja obsługi

1 Hook switch
2 Hanger Hook for wall mounting
3 Programme Button
4 Redial Button
5 Speaker
6 Recall Button
7 Microphone
8 Speaker Button and LED
9 Speaker Volume Control
10 Erase/Mute Button
11 Message Indicator LED
12 OK Button
13 Scrolling Buttons (UP/DOWN)
14 Display
English (see page 4-15)

Français (voir pages 16-26)
1 Pédale de raccroché
2 Languette de support du combiné
(montage murale)
3 Touche Programmation
4 Touche Bis
5 Haut-parleur
6 Touche R
7 Micro
8 Touche Prise de Ligne Sans
Décrocher (PLSD ) et témoin
lumineux mains-libres
9 Réglage du volume du haut-
parleur
10 Effacer/touche Secret
11 Témoin lumineux de nouvel appel
reçu/ message sur messagerie
vocale sur le réseau*
12 Touche conrmation
13 Touches de délement
14 Afcheur
* sous réserve d’abonnement auprès
de votre opérateur
Deutsch (siehe Seite 27-33)
1 Gabel
2 Höreraufhängung
3 Programmierung
4 Wahlwiederholung
5 Lautsprecher
6 R-Taste
7 Mikrofon
8 Lautsprechertaste und Indikator
9 Lautstärkeregler für Lautsprecher
10 Löschen/Stummschalten
11 Nachrichtenanzeige
12 Bestätigen
13 Scroll-Tasten
14 Display
Italiano (vedere pagine 34-40)
1 Commutatore a gancio
2 Supporto di aggancio per il
microtelefono
3 Programmazione
4 Pulsante Ripetizione numero
5 Auricolare
6 Pulsante Recall (R)
7 Microfono
8 Pulsante LED e altoparlante
9 Controllo volume altoparlante
10 Pulsante Cancella/ Silenziamento
11 Indicatore di messaggi
12 Confermare
13 Pulsanti di scorrimento
14 Display
Polski (patrz strony 41-48)
1 Miejsce na słuchawkę
2 Wieszak na słuchawkę
3 Programowanie
4 Przycisk ponownego wybierania
5 Głośnik
6 Przycisk Recall (R)
7 Mikrofon
8 Przycisk głośnika/sygnalizatora
LED
9 Sterowanie natężeniem dźwięku
głośnika
10 Przycisk Kasowanie/Wyłączanie
mikrofonu
11 Wskaźnik wiadomości
12 Potwierdzenie
13 Przyciski przewijania
14 Wyświetlacz

English
4 www.doro.com
Installation
Batteries
In order for the Caller ID, memory and other functions to operate, the
telephone requires three good quality AAA 1.5V alkaline batteries to be
installed. If batteries are either not installed or running low, the symbol
will be visible in the display, you will need to change the batteries as soon
as possible.
The battery compartment is located on the underside of the telephone.
1. Ensure the telephone line cord is disconnected from the telephone network
wall socket.
2. Unscrew the retaining screw that holds the battery cover in place and
remove the cover.
3. Install the batteries ensuring the correct battery polarity is observed.
4. Replace the battery cover and ret the retaining screw.
Connection
Once the batteries have been installed:
1. Connect the curly cord to the handset and to the socket marked q on the
underside of the telephone.
2. Connect the telephone line cord to the socket marked T on the underside
of the telephone and then to a telephone network wall socket.
3. A click will be heard when the modular plug is correctly in place.
4. Position the cables in the grooves underneath the telephone.
5. Lift the handset and listen for the dial tone. Your telephone is now
operational.
Wall Mounting
1. Secure two screws, vertically positioned 100 mm apart.
2. The screws should locate into the two ‘keyholes’ on the back of the
telephone.
3. Remove the hanging peg (located by the hook switch) by pushing it upwards.
4. Rotate the hanging peg 180 degrees, and then replace it.
Alternatively this telephone can be mounted onto an existing telephone wall plate (Australia
only).

English
www.doro.com 5
Installation
Setting the Time and Date
1. Press and hold P until Setup is shown.
2. Press P again. Hour will ash.
3. Scroll to the desired setting using v/V.
4. Press 0. Minutes will ash.
5. Scroll to the desired setting using v/V.
6. Press 0. Date will ash.
7. Scroll to the desired setting using v/V.
8. Press 0. Month will ash.
9. Scroll to the desired setting using v/V.
10. Press P twice to save your settings.

English
6 www.doro.com
Operation
Speaker Function
1. Press s. The speaker will be activated and the LED indicator will
illuminate.
2. Dial the required telephone number. Adjust the volume control on the side
of the telephone.
3. Speak towards the microphone on the front edge of the telephone.
4. Press s to terminate the call.
Please note!
During the course of a telephone conversation, you can switch from hands free speaker to
handset mode at any time by picking up the handset. Replace the handset to terminate the call.
Please remember that in hands free speaker mode, only one person at a time can talk. The
switch over between speaker and microphone is automatic and dependant on the sound level on
the incoming line and the microphone respectively. It is therefore essential that no loud noise in
the immediate surroundings of the telephone, as this will disrupt the speaker function.
Hold Button
Press z to place an incoming call on hold.
The call can be resumed by pressing z again.
The display will ash and the handset microphone will be inoperative for as long
as the function is active.
Redial Button
The ve most recently dialled numbers can easily be redialled using r.
1. Press r repeatedly, to scroll through the numbers.
2. Press 0, the selected number will now be dialled.
During the course of a telephone conversation, you can switch from hands free
speaker to handset mode at any time by picking up the handset.

English
www.doro.com 7
Operation
Memory
This telephone has 10 indirect memories.
When a number is stored in a memory location, you need to press only two
buttons to make the call. The memories are stored on the keypad digits 0-9.
Storing Memories
1. Press and hold P until Setup is shown.
2. Enter a memory location 0-9 on the telephone keypad.
3. Enter the desired telephone number (up to 22 digits). Use C to erase or
change an entry.
4. Press 0. The number is now stored.
5. Enter another memory location to continue or press C to return to standby
mode.
Memory Dialling
1. Lift the handset (or press the s button) and wait for a dialling tone.
2. Press P.
3. Select a memory location by pressing the relevant keypad number, 0-9.
Press r. If you want a pause in the telephone number.
In case of a number change, store the new number in the location of the old one following
the procedure above.
Volume Control
The handset volume may be adjusted during a call using the switch located on
the handset.
The hands free speaker volume may be adjusted during a call using the switch
located on the right hand side of the base unit.
Ringer
The Ringer volume can be set to three modes – high, low or off – using the
switch located on the underside of the telephone.

English
8 www.doro.com
Operation
Timer
Approximately 5 seconds after dialling a timer will be shown on the display. The
timer helps you keep track of how long the call lasts.
Optional Network Services
Access to additional network services can be gained by using the recall button
R, * and # keys. Contact your network operator for more information.
Press the recall button R followed by the extension number to transfer calls
when connected to a PBX (TBR only).

English
www.doro.com 9
Caller Identication
Explanation of Caller ID (CID).
Caller ID allows you to see who is calling before you answer a call, and to see
who has called in your absence. If the number received is stored in the phone
book, that corresponding entry is shown as well.
Numbers received are logged and can easily be retrieved for review or dialling.
The call log will store up to 40 telephone numbers.
New calls are indicated by a ashing message indicator light. The display will
also indicate the number of calls both new and total received. The indicator will
stop ashing as soon as the new number(s) are reviewed.
When the log is full, the oldest number will be deleted automatically, as a new
call is logged.
Please note!
In order for numbers to be shown, the Caller ID service must be provided by your network
operator and a current subscription in place. Contact your operator for more information.
Dialling a number from CID.
1. Scroll to the desired telephone number using v/V.
2. Pick up the handset and press 0, the displayed telephone number will now
be dialled.
During the course of a conversation, you can switch from the hands free speaker to handset mode
at any time by picking up the handset.
Messages
Apart from telephone numbers, the display can show:
Unavailable It is an International call or a call from a PBX (no information
received)
Private The call is comes from a blocked number or a PBX.
Repeat Several calls have been received from this particular phone
number.
5 Message indication (sent from your network operator). In
addition, the 5 indicator ashes two times in sequence.
Please note!
The exact text message may differ from those shown above dependent on the text message
supplied by your telephone exchange.
English
10 www.doro.com
Caller Identication
Erasing Individual Numbers from CID
1. Scroll to the telephone number you wish to erase v/V.
2. Press C. The displayed number will begin ashing.
3. Press C again to conrm.
Erasing ALL numbers from CID
1. Scroll to the any telephone number in the CID list v/V.
2. Press and hold C until the display shows -00- CALLS .

English
www.doro.com 11
Least Cost Routing
Using Least Cost Routing (LCR)
This function will automatically select the telephone network operator of choice.
The telephone can be set up to add digits and/or replace certain digits in
telephone numbers.
To choose a certain network operator, you would normally dial a prex code
before the actual telephone number.
If you have chosen a certain LCR operator for international calls, in order to
dial your calls using their service you must dial a prex code before the country
code, for example 9502. You can program the LCR function so whenever you
dial a number beginning with 00, the phone will automatically change this to
950200.
For example: 0046462805000 would automatically be dialled
95020046462805000.
Please note!
In order to place your call with a certain operator you must be a registered subscriber.
Only one LCR setting can be active at a time.
Setting Up LCR
1. Press and hold P until Setup is shown, and then release.
2. Press P twice. The display will show Lcr and on (active) or oFF (off).
3. Scroll to the desired function using v/V.
4. Press 0. The left side of the display will ash.
5. Enter the dialling sequence to be replaced (up to four digits, e. g. 00).
Use C to erase or change an entry.
6. If you have entered less than four digits, press 0 to move on. The right side
of the display will ash.
7. Enter the new dialling sequence (up to eight digits, e. g. 950200).
If there’s already a number entered here, it can be erased using C.
8. Conrm the programmed settings by pressing 0.

English
12 www.doro.com
Least Cost Routing
Automatic network prex using economy routing (LCR)
The LCR function can be used also to insert numbers in front of all phone
numbers.
1. Press and hold P until Setup is shown, and then release.
2. Press P twice. The display will show Lcr and on (active) or oFF (off).
3. Scroll to the desired function using v/V.
4. Press 0. The left side of the display will ash.
5. The left side of the display must be empty.
If there’s already a number entered here, erase it using C.
6. If you have entered less than four digits, press 0 to move on. The right side
of the display will ash.
7. Enter the new dialling sequence (up to eight digits, e. g. 950200).
If there’s already a number entered here, it can be erased using C.
8. Conrm the programmed settings by pressing 0.

English
www.doro.com 13
Other
Troubleshooting
Telephone does not work
- Check that the telephone cord is undamaged and properly plugged in.
- Disconnect any additional equipment that may be connected. If the problem
is resolved, the fault is with the other equipment.
- Test the equipment on a known working line (e. g. at the neighbour’s). If the
product works then the fault is with the line.
No number is shown when a call is received
- In order for this feature to function, you must subscribe to the Caller
Identication service from your network provider.
- If a message shows on the display, the call may be an international call (no
data received), or from a private or blocked number.
- It may not be possible to receive CID information if the phone operates in
a PBX system.
If the telephone still does not work, contact the place of purchase for service.
Don’t forget the receipt or copy of the invoice.
Recall Time
The telephones recall timing is preset to, 100 milliseconds (UK and AU) and
600 milliseconds (NZ).
Guarantee (UK)
This product is guaranteed for a period of 12 months from the date of purchase.
Proof of purchase is required for any service or support required during the
guarantee period.
This guarantee shall not apply to a fault caused by an accident or any similar
incident or damage, liquid ingress, negligence, abnormal usage or any other
circumstances on the purchaser’s part. Furthermore, this guarantee shall not
apply to a fault caused by a thunderstorm or any other voltage uctuations.
This guarantee does not in any way affect your statutory rights. (As a matter of
precaution, we recommend disconnecting the telephone during a thunderstorm.)

English
14 www.doro.com
Other
Guarantee (Australia and New Zealand)
This product is guaranteed for a period of 12 months from the date of purchase.
Should you experience difculties with the product, please contact us for
assistance. If the product is then found to be faulty you will be asked to return it
directly to us with a copy of the purchase receipt.
This guarantee shall not apply to a fault caused by an accident or a similar
incident or damage, liquid ingress negligence, abnormal usage or any other
circumstances on the purchaser’s part. Furthermore, this guarantee shall not
apply to a fault caused by a thunderstorm or lightning, excessive or any other
voltage uctuations or faults on the telephone line. (As a matter of precaution,
we recommend disconnecting the telephone during a thunderstorm).
This guarantee does not affect your statutory rights.
Technical
If you cannot resolve the fault using the faultnder section, technical support is
available on the Premium Rate Number: 0906 302 0114.
Calls cost 50 pence per minute (prices correct at the time of going to
press), and is operational between 9AM - 5PM Monday-Friday excluding Bank
Holidays. Alternatively,
E-mail on: tech@doro-uk.com
You can contact us in writing: Consumer Support Group, Doro UK Ltd.,
22 Walkers Road, North Moons Moat, Redditch, Worcestershire, B98 9HE,
(regarding any Spares or Technical query), or
Telephoning (Spares only): 01527 584377
Web site: www.doro-uk.com
Australia and New Zealand
If you believe this product is malfunctioning, please refer to the relevant section
and/or consult the troubleshooting guide in this manual to ensure that you have
followed the instructions carefully. As an alternative you can visit our web site
for FAQ’s or send an e-mail for a prompt reply.
AUSTRALIA NEW ZEALAND
DORO Australia Pty Ltd Atlas Gentech (NZ) Limited
PO Box 6760 Private Bag 14927
Baulkham Hills BC NSW 2153 Panmure
Australia Auckland
New Zealand

English
www.doro.com 15
Other
Consumer Support Consumer Support
Ph: (02) 8853 8444 Ph: 0900 50-025 (Toll Call)
Fax: (02) 8853-8489 Fax: (09) 574-2722
Email: support@doro.com.au Email: support@atlasgentech.co.nz
Web site: www.doro.com.au
Technical information
REN (RN for New Zealand)
The REN (Ringer Equivalence Number) or (RN) is of signicance only if you
wish to connect more than 1 telephone to your telephone line. A standard
telephone line has a maximum REN capacity of 3 (RN of 5). It is possible
to connect 3 devices with a REN of 1 (RN of 1) with no degradation to the
product’s performance. Exceeding this limit may cause the volume of the ringer
in any phone to decrease or not ring at all.
Notes for operation in New Zealand
ALL PRODUCTS
The grant of a Telepermit for any item of terminal equipment indicates only
that Telecom has accepted that the item complies with the minimum conditions
for connection to its network. It indicates no endorsement of the product by
Telecom, nor does it provide any sort of warranty. Above all, it provides no
assurance that any item will work correctly in all respects with another item of
Telepermitted equipment of a different make or model, nor does it imply that
any product is compatible with all of Telecom’s network services.
This equipment shall not be set to make automatic calls to the Telecom “111“
Emergency Service. This equipment may not provide for the effective hand-over
of a call to another device connected to the same line.
This equipment should not be used under any circumstances that may constitute
a nuisance to other Telecom Customers.
CND PRODUCTS
If a charge for local calls is unacceptable, the “DIAL“ button should NOT be
used for local calls. Only the 7 digits of the local number should be dialled from
your telephone. DO NOT dial the area code digit or the “0“ prex.

Français
16 www.doro.com
Installation
Raccordement
1. Installer les piles. Voir ci-dessous.
2. Reliez le câble téléphonique fourni à la prise de téléphone et à la che au
téléphone marquée T.
3. Reliez le cordon spiralé à la prise du combiné et dans la che du téléphone
marquée q.
4. Placer les câbles dans les rainures situées au dos du téléphone.
5. Prenez le combiné: vous devez entendre la tonalité.
Piles
Pour que la présentation du numéro, la mémoire etc. puissent fonctionner,
l’appareil a besoin de trois piles 1,5V du type AAA. Le symbole
s’allume
lorsque les piles doivent être changées.
Changez les piles le plus tôt possible! Utilisez uniquement des piles de haute
qualité.
1. Débranchez le téléphone.
2. Dévissez la vis qui tient la trappe des piles et enlevez-la.
3. Insérez les piles selon les marques des pôles positif et négatif.
4. Remettez en place la trappe des piles et la vis.
Installation murale
1. Montez deux vis espacées verticalement de 83 mm.
2. Insérez les têtes des vis dans les trous, et faites glissez le téléphone vers le
bas pour le mettre en place.
3. Enlever la languette de support du combiné, située sous la pédale de
raccroché, en la tirant.
4. Tournez la languette de support du combiné d’un demi tour et remettez-la
en place.

Français
www.doro.com 17
Installation
Régler la date et l’heure
1. Appuyez sur P jusqu’à ce que s’afche.
2. Appuyez à nouveau sur P, l’heure clignote.
3. Régler l’heure actuelle par v/V
.
4. Appuyez sur 0.
5. Répétez les étapes 3. et 4. pour régler minutes, jour et mois.
6. Appuyez deux fois sur P pour enregistrer le réglage.

Français
18 www.doro.com
Utilisation
Fonction Mains-libres
1. Appuyez sur s. La fonction mains-libres est enclenchée et le témoin
lumineux en regard de la touche s’allume.
2. Composez le numéro de téléphone souhaité. Réglez éventuellement le
volume à l’aide du curseur de réglage du volume situé sur le côté du
téléphone.
3. Parlez face au micro situé à l’avant du téléphone.
4. Appuyez sur s pour terminer la communication.
Si vous le souhaitez vous pouvez alterner entre la position combiné et la position
mains-libres en cours de communication.
Remarque!
Notez qu’en position mains-libres les deux correspondants ne peuvent pas parler
simultanément, mais uniquement un à la fois. L’alternance entre celui qui parle et celui qui
écoute se fait automatiquement, et elle est gérée par le son de la pièce où est placé le téléphone
(votre discours) et le son de la ligne téléphonique (l’autre correspondant). C’est pourquoi il est
important qu’il n’y ait pas de dérangement de la fonction mains-libres dans l’entourage du
téléphone, comme par exemple de la musique à haut volume.
Touche secret
Le micro peut être coupé en cours de communication en appuyant sur la touche z.
Appuyez à nouveau sur la touche secret pour ré-activer le micro.
L’afchage clignote tant que la fonction est active.
Touche Bis
La touche r permet de rappeler aisément les cinq derniers numéros que vous
avez composés.
1. Appuyez plusieurs fois sur r pour faire déler ces numéros.
2. Appuyez sur 0 pour composer le numéro choisi.
Si vous le souhaitez vous pouvez alterner la position combiné et la position
mains-libres en cours de communication.

Français
www.doro.com 19
Utilisation
Répertoire
Ce téléphone possède 10 numéros enregistrés en mémoire abrégée.
Une fois le numéro de téléphone enregistré sur une de ces plages, vous le
composez en pressant simplement deux touches. Les plages en mémoire abrégée
sont numérotées de 0 à 9.
Mettre un numéro en mémoire abrégée
1. Appuyez sur P jusqu’à ce que s’afche.
2. Choisissez une des plage de mise en mémoire 0-9.
3. Composez le numéro de téléphone (max. 22 chiffres). Utilisez C pour effacer
ou corriger.
4. Appuyez sur 0 pour enregistrer.
5. Enregistrez encore un numéro ou appuyez sur C pour repasser en mode
repos.
Appeler un numéro enregistré en mémoire abrégée
1. Prenez le combiné (ou appuyez sur s) et attendez la tonalité.
2. Appuyez sur P.
3. Choisissez une plage en mémoire abrégée numérotée de 0 à 9.
Insérez une pause en appuyant sur r.
Réglage du volume du combiné
Le volume d’écoute peut être réglé par le curseur situé sur le combiné.
Mélodie de sonnerie
Le téléphone dispose d’un volume de sonnerie réglable - niveaux haut, bas ou
coupure – à régler par le curseur situé au dos du téléphone.

Français
20 www.doro.com
Utilisation
Chronométrage des appels
Lorsque la communication est établie, un chronomètre s’afche. Ce
chronomètre vous permet de vérier la durée de l’appel.
Services réseaux optionnels
Les touches *, # et R vous permettront d’accéder à des services additionnels
proposés par des opérateurs téléphoniques (signal d’appel,…).
Pour toute information, adressez-vous directement au fabricant du PABX ou à
votre opérateur téléphonique.
Table of contents
Languages:
Other Doro Telephone manuals

Doro
Doro X20 User manual

Doro
Doro COMFORT 3000 User manual

Doro
Doro 80 User manual

Doro
Doro PhoneEasy Display 312C User manual

Doro
Doro Kronos User manual

Doro
Doro PHONEEASY RECORD 327CR User manual

Doro
Doro CONGRESS 305 User manual

Doro
Doro 909c User manual

Doro
Doro NEOBIO 10 User manual

Doro
Doro X20 User manual

Doro
Doro 916CR User manual

Doro
Doro PhoneEasy 312ci User manual

Doro
Doro SeePlus 314ci User manual

Doro
Doro PhoneEasy 331ph User manual

Doro
Doro PhoneEasy 331ph User manual

Doro
Doro Primo 215 User manual

Doro
Doro PhoneEasy 311cs User manual

Doro
Doro 912c Installation guide

Doro
Doro AFTI 30 User manual

Doro
Doro 1015CS User manual