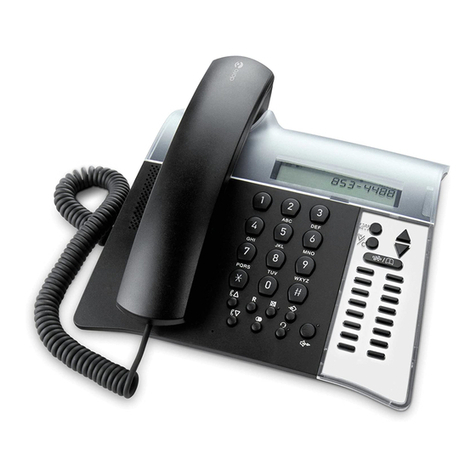
Doro PhoneEasy 331ph User manual

Doro PhoneEasy®
331ph

3
4
6
5
1
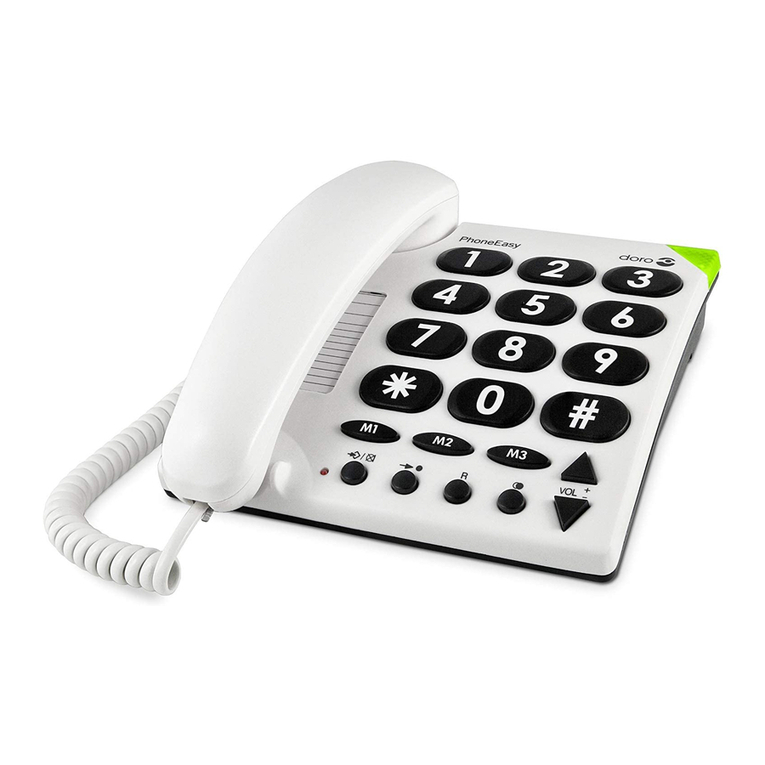
1 Ringer indicator
2 Hanging Hook for Handset
3 Redial function
4 Volume control
5 Flash button/programming
6 Speed dial memories
English
1 Témoin de sonnerie
2 Languette de support
du combiné
3 Touche Bis
4 Curseur de réglage du
volume d’écoute combiné
5 Touche R et de
programmation
6 Touches des
mémoires directes
Français
1 Indicador de llamada
2 Enganche colgador
para montaje mural
3 Rellamada
4 Control de volumen
5 Tecla R/programación
6 Marcación rápida
Español
2

1 Indicatore suoneria
2 Supporto di aggancio
per il microtelefono
3 Richiamata
4 Regolazione del volume
5 Tastoash/programmazione
6 Composizione rapida
Italiano
Ελληνικά
1 Ένδειξηκουδουνισμού
2 Άγκιστροακουστικού
3 Λειτουργίαεπανάκλησης
4 Ρυθμιστικόέντασηςήχου
5 ΠλήκτροFlash/
προγραμματισμού
6 Μνήμεςταχείαςκλήσης
Português
1 Indicador de toque
2 Gancho para pendurar
o auscultador
3 Função de remarcação
4 Controlo do volume
5 Botãodeash/programação
6 Memórias de
marcação rápida
Magyar
1 Csengésjelző
2 Kézibeszélőtartó
falra helyezéshez
3 Újrahívás funkció
4 Hangerő-szabályozó
5 Hívásátadás gomb/
programozás
6 Gyorstárcsázási memória
Česky
1 Indikátorzvonění
2 ČalounyHákdoMikrotelefon
3 Funkceopětovnéhovytočení
4 Ovládání hlasitosti
5 TlačítkoFlash/programování
6 Pamětiprorychlévytáčení
Polski
1 Wskaźnikdzwonka
2 Wieszaknasłuchawkę
3 Ponownewybieranie
4 Regulacjagłośności
5 Przycisk Flash/
Programowanie
6 Przyciski szybkiego
wybierania
1 Beltoonindicator
2 Ophangnok voor hoorn
3 Terugbellen
4 Volumeregeling
5 Flash-toets/programmeren
6 Snelkeuze
Nederlands

1
English
Operation
This device is intended for the analogue telephone network lines in AT,
BE, BG, CH, CY, CZ, DE, DK, EE, ES, FI, FR, GB, GR, HU, IE, IS,
IT, LV, LT, LU, MT, NL, NO, PL, PT, RO, SI, SK, SE.
Making a call
Regular dialling
1. Pick up the handset.
2. Enter the desired number.
Redial function
If a number was engaged or if you wish to redial the most recently
entered number, pick up the handset and press the redial button .
Memories
This telephone has 3 speed dial memories.
Once a number has been saved in a memory location, you only need to
press one button to make the call. A picture or symbol can be placed
under the transparent cover on the speed dial buttons so it is easy to see
who you are calling.
Diallingwithspeeddial
1. Pick up the handset and wait for the dialling tone.
2. Select required speed dial by pressing on the appropriate button.
Volume control
The handset earpiece volume may be adjusted during a call using .
Hearing loop
The handset has a built-in hearing loop for those who wish to use their
hearing aids while using the telephone. Select the T mode on your hearing
aid to enable this feature.

2
English
Settings
Connection
1. Connect the telephone cord to a network wall socket and to the T
socket on the back of the telephone.
2. Connect the curly cord to the handset and to the socket marked q
on the side of the telephone.
3. You will hear a click when the modular plug is correctly in place.
4. Set correct Flash button time to 100 (see Technical Information).
5. Lift the handset and listen for the dial tone.
Ring signal
The ringer volume can be adjusted using .
Memories
Saving speed dial numbers
1. Make sure that the R/Pswitch on the base of the telephone is set to P.
2. Lift the receiver and press P(R) (ignore anything you hear in the
earpiece).
3. Enter the phone number (up to 16 digits) using the keypad. Press P(R).
4. Select memory position by pressing the corresponding button.
5. Replace the handset. The number has now been saved.
Remember to return the R/Pswitch on the base of the telephone to the
Rposition when all the telephone numbers have been saved.
Press if you want a pause in the telephone number.
Wall mounting
The telephone can be wall mounted by using the included wall mount
bracket.
1. Secure two screws, vertically positioned 83 mm apart.
2. The screws should locate into the two keyholes on the back of the
telephone.
3. Remove the hanging peg (located by the hook switch) by pushing it
upwards.
4. Rotate the hanging peg 180 degrees, and then replace it.

3
English
Technical Information
There are several switches on the base of the telephone.
These switches set technical parameters.
Flash button time (100/300/600)
100 is the standard setting for most countries.
300 for France/Portugal.
600 for New Zealand.
Troubleshooting
Check that the telephone cord is undamaged and properly plugged in.
Disconnect any additional equipment, extension cords and other phones.
If the problem is resolved, the fault is with some other equipment.
Test the equipment on a known working line (e.g. at a neighbour’s house).
If the equipment works there the fault is probably with your telephone
line. Please report this to your network operator.
If you are still experiencing difculties, contact the place of purchase.
Guarantee
This product is guaranteed for a period of 12 months from the date of
purchase. If you experience any problems please contact the place of
purchase. Proof of purchase is required for any service or support needed
during the guarantee period.
This guarantee shall not apply to a fault caused by an accident or a similar
incident or damage, liquid ingress, negligence, abnormal usage or any
other circumstances on the purchaser’s part. Furthermore, this guarantee
will not apply to any fault caused by a thunderstorm or any other voltage
uctuations.
As a matter of precaution, we recommend disconnecting the telephone
during a thunderstorm.
Declaration of conformity
Doro hereby declares that the product Doro PhoneEasy 331ph conforms
to the essential requirements and other regulations contained in the
directives 1999/5/EC (R&TTE), 2002/95/EC (ROHS).
A copy of the manufacturer’s declaration is available at
www.doro.com/dofc

1
Français
Utilisation
Cet équipement est conçu pour être utilisé sur le réseau téléphonique
analogique AT, BE, BG, CH, CY, CZ, DE, DK, EE, ES, FI, FR, GB,
GR, HU, IE, IS, IT, LV, LT, LU, MT, NL, NO, PL, PT, RO, SI, SK, SE.
Appeler
1. Prenez le combiné.
2. Composez le numéro désiré.
Touche Bis
Lorsque la ligne de votre correspondant est occupée ou si vous désirez rappeler
le dernier numéro composé, prenez le combiné et appuyez sur la touche .
Mémoires directes
Ce téléphone possède 3 touches de mémoire directe.
Une fois qu’un numéro est enregistré sur l’une d’elles, vous le composez
en pressant simplement la touche correspondante. Vous pouvez placer une
photo ou un symbole sous le couvercle transparent des touches d’appel
direct pour reconnaître facilement le destinataire.
Appeler un numéro en mémoire directe
1. Prenez le combiné et attendez la tonalité.
2. Sélectionnez une plage d’appel direct en appuyant sur la touche
correspondante.
Régler le volume
Utilisez la touche pour ajuster le volume d’écoute du combiné en
cours de conversation.
Appareil auditif
Le combiné intègre une bobine à induction électromagnétique qui assure
directement la compatibilité avec la position T des prothèses auditives
(sans aucun accessoire supplémentaire).
Position murale
1. Installez le support mural en l’insérant sous le téléphone et faites le
glisser vers le haut.
2. Montez deux vis espacées verticalement de 83 mm d’entre-axe.
3. Encastrez les têtes des deux vis dans les trous correspondants et
faites-le glisser le vers le bas pour le mettre en place.
4. Retirez la languette de support du combiné située à côté de la pédale de
raccroché en la tirant vers le haut.
5. Tournez la languette de support du combiné de 180 degrés et
remettez-la en place.

2
Français
Réglages
Raccordement
1. Reliez le câble téléphonique fourni à la prise téléphonique et à la prise
située au dos du téléphone marquée T.
2. Reliez le cordon spiralé au combiné et au connecteur du téléphone
marqué q.
3. Un clic indique que la prise est branchée correctement.
4. Vériez que le curseur de synchronisation de la touche R est bien sur
300 (voir Informations techniques).
5. Prenez le combiné : vous devez entendre la tonalité.
Sonnerie
Le volume de sonnerie peut être réglé sur fort ou faible à l’aide du curseur
.
Touches des mémoires directes
Enregistrer un numéro en mémoire directe
1. Vériez que le curseur R/Pde la base du téléphone est sur P.
2. Prenez le combiné et appuyez sur la touche P(R) (ne tenez pas
compte de la tonalité).
3. Composez normalement le numéro de téléphone (16 chiffres max.).
Appuyez sur P (R).
4. Sélectionnez une plage de mémoire en appuyant sur la touche
correspondante.
5. Raccrochez. Le numéro est enregistré.
Une fois tous les numéros enregistrés, n’oubliez pas de remettre le curseur
R/Pde la base du téléphone sur R.
Insérez une pause en appuyant sur .
Informations techniques
Les différents curseurs situés au dos du téléphone
permettent de congurer l’appareil.
Synchronisation de la touche R (100/300/600)
300 est le réglage pour la France et le Portugal.

3
Français
En cas de problèmes
Vériez que le câble téléphonique soit en bon état et qu’il soit branché
correctement. Débranchez tout autre matériel, rallonges et téléphones.
Si l’appareil fonctionne alors normalement, la panne est causée par le
matériel additionnel.
Testez le matériel sur une ligne en état de marche (chez un voisin par
ex.). Si le matériel fonctionne sur ce raccordement, votre propre ligne
téléphonique est défectueuse. Signalez la panne à votre opérateur.
En cas d’échec de ces solutions, contactez votre revendeur.
Garantie et S.A.V.
Pour la France
Cet appareil est garanti deux ans à partir de sa date d’achat, la facture
faisant foi. En cas de problèmes, contactez votre revendeur. La réparation
dans le cadre de cette garantie sera effectuée gratuitement.
La garantie est valable pour un usage normal de l’appareil tel qu’il est
déni dans la notice d’utilisation. Les fournitures utilisées avec l’appareil
ne sont pas couvertes par la garantie. Sont exclues de cette garantie les
détériorations dues à une cause étrangère à l’appareil.
Par ailleurs, la garantie ne s’appliquera pas si l’appareil a été endommagé
à la suite d’un choc ou d’une chute, d’une fausse manœuvre, d’un
branchement non-conforme aux instructions mentionnées dans la notice,
de l’effet de la foudre, de surtensions électriques ou électrostatiques, d’une
protection insufsante contre l’humidité, la chaleur ou le gel. En tout état
de cause, la garantie légale pour vices cachés s’appliquera conformément
aux articles 1641 et suivants du Code Civil.
(Il est recommandé de débrancher le téléphone en cas d’orage.)
Déclaration de conformité
Doro certie que cet appareil Doro PhoneEasy 331ph est compatible
avec l’essentiel des spécications requises et autres points des directives
1999/5/EC (R&TTE) et 2002/95/EC (ROHS).
La déclaration de conformité peut être consultée à l'adresse suivante :
www.doro.com/dofc

Español
1
Funcionamiento
Este equipo está diseñado para uso únicamente en las redes telefónicas
analógicas de AT, BE, BG, CH, CY, CZ, DE, DK, EE, ES, FI, FR, GB,
GR, HU, IE, IS, IT, LV, LT, LU, MT, NL, NO, PL, PT, RO, SI, SK, SE.
Realización de una llamada
Marcación normal
1. Descuelgue el auricular.
2. Introduzca el número deseado.
Rellamada
Si un número se encontraba ocupado o desea volver a marcar el último
número al que ha llamado, descuelgue el auricular y pulse la tecla de
rellamada .
Memorias
Este teléfono tiene 3 memorias de marcación rápida.
Una vez guardado un número en una ubicación de memoria, tan sólo
tendrá que pulsar una tecla para realizar la llamada. Podrá colocarse una
foto o símbolo debajo de la tapa transparente de las teclas de marcación
rápida para poder ver a quién se está llamando.
Llamada con marcación rápida
1. Descuelgue el auricular y espere el tono de marcación.
2. Seleccione la marcación rápida deseada pulsando la tecla adecuada.
Control de volumen
Durante una llamada, es posible ajustar el nivel de sonido del auricular
con .
Adaptador de audífono
El auricular dispone de un adaptador de audífono incorporado para
aquellas personas que desean utilizar su audífono mientras usan el
teléfono. Seleccione el modo T en su audífono para activar esta función.

Español
2
Ajustes
Conexión
1. Conecte el cable del teléfono a la toma de pared de la red telefónica y al
conector Tde la parte posterior teléfono.
2. Conecte el cable en espiral al conector del auricular y al conector q.
3. Oirá un clic cuando la clavija modular se introduzca correctamente.
4. Establezca el tiempo correcto de la tecla Ren 100 (consulte
Información técnica).
5. Descuelgue el auricular y compruebe si hay tono de marcación.
Señal de llamada
Existe un conmutador de volumen de la señal de llamada en el
lateral del teléfono:
Memorias
Almacenamiento de números de marcación rápida
1. Asegúrese de establecer en Pel conmutador R/Psituado en la
base del teléfono.
2. Descuelgue el auricular y pulse P(R) (ignore cualquier sonido que
oiga por el mismo).
3. Introduzca el número de teléfono (máximo de 16 dígitos) con el
teclado. Pulse P (R).
4. Seleccione una posición de la memoria pulsando la tecla
correspondiente.
5. Cuelgue el auricular. Ahora se habrá guardado el número.
Recuerde volver a poner el conmutador R/Pde la base del teléfono en la
posición Rcuando haya guardado todos los números de teléfono deseados.
Pulse si desea una pausa en el número de teléfono.
Información técnica
En la base del teléfono existen varios conmutadores.
Dichos conmutadores establecen parámetros técnicos.
Temporización de tecla R (100/300/600)
100 es el ajuste estándar para la mayoría de los países.
300 para Francia/Portugal.

Español
3
Solución de problemas
Verique que el cable del teléfono está en perfectas condiciones y
conectado correctamente. Desconecte cualquier equipo adicional, cables
alargadores u otros teléfonos. Si el problema se soluciona, el fallo estará
en otro equipo.
Compruebe el equipo en una línea de cuyo funcionamiento esté seguro
(por ej. en la casa de un vecino). Si el equipo funciona, el fallo se
encontrará probablemente en su línea de teléfono. Informe de ello a su
operador de red.
Si sigue teniendo problemas, póngase en contacto con el establecimiento
en el que adquirió el teléfono.
Garantía
Este producto está cubierto por una garantía de 24 meses a partir de la
fecha de compra. Si tiene cualquier problema, póngase en contacto con el
establecimiento en el que adquirió el teléfono. Para cualquier servicio o
asistencia necesarios durante el período de validez de la garantía se exigirá
una prueba de compra.
Esta garantía no será aplicable en caso de fallos causados por accidentes
o trato brusco, daños, introducción de líquidos, negligencia, uso anormal
o cualquier otra circunstancia por parte del comprador. Esta garantía
tampoco será aplicable en caso de fallos causados por tormentas eléctricas
o uctuaciones de tensión.
A modo de precaución, se recomienda desconectar el teléfono durante las
tormentas eléctricas.
Declaración de conformidad
Doro declara que el producto Doro PhoneEasy 331ph es conforme
a los requisitos esenciales y a otras normativas relevantes contenidas
en las Directivas 1999/5/CE (Radio & Telecommunications Terminal
Equipment (Equipos terminales de radio y telecomunicaciones),
R&TTE) y 2002/95/CE (Restriction of certain Hazardous Substances
(Restricciones para el uso de determinadas sustancias peligrosas), ROHS).
En la dirección www.doro.com/dofc puede encontrarse una copia de la
declaración del fabricante.

Italiano
1
Funzionamento
Questa apparecchiatura è studiata per l’uso sulla rete telefonica analogica
AT, BE, BG, CH, CY, CZ, DE, DK, EE, ES, FI, FR, GB, GR, HU, IE,
IS, IT, LV, LT, LU, MT, NL, NO, PL, PT, RO, SI, SK, SE.
Esecuzione di una chiamata
Composizione normale
1. Sollevare la cornetta.
2. Inserire il numero desiderato.
Richiamata
Se il numero composto è occupato o se si desidera richiamare l’ultimo
numero composto, sollevare la cornetta e premere il pulsante di
ripetizione .
Memorie
Il telefono è dotato di 3 memorie di composizione rapida. Quando un
numero telefonico viene memorizzato in una posizione di memoria, per
eseguire la chiamata è sufciente premere un solo pulsante. È possibile
inserire un’immagine o un simbolo sotto il coperchio trasparente sui tasti
a composizione rapida, per vedere immediatamente chi si sta chiamando.
Composizione di un numero con le memorie di composizione rapida
1. Sollevare la cornetta e attendere il segnale acustico di linea libera.
2. Selezionare la memoria di composizione rapida desiderata premendo il
tasto corrispondente.
Regolazione del volume
Per regolare il volume dell’auricolare del microtelefono durante una
chiamata, premere .
Laccio da collo auricolare
La cornetta dispone di un laccio da collo auricolare integrato, per coloro
che desiderano utilizzare i propri apparecchi acustici al telefono. Selezionare
la modalità T sull’apparecchio acustico per attivare questa funzione.

Italiano
2
Impostazioni
Collegamento
1. Collegare il cavo telefonico alla presa di rete a muro e alla presa T
sul retro del telefono.
2. Collegare il cavo spiralato al microtelefono e alla presa contrassegnata
con qsul lato del telefono.
3. Quando la spina modulare è posizionata correttamente, si sente uno scatto.
4. Impostare il tempo del tasto Flash su 100 (vedere Informazioni tecniche).
5. Sollevare la cornetta e attendere il segnale acustico di linea libera.
Segnale di chiamata
Il volume della suoneria può essere impostato su alto o basso utilizzando
.
Memorie
Memorizzazione dei numeri di composizione rapida
1. Assicurarsi che l’interruttore R/Palla base del telefono sia impostato
su P.
2. Sollevare il ricevitore e premere P(R) (ignorare il segnale acustico
di linea libera).
3. Digitare il numero telefonico (no a 16 cifre) utilizzando la tastiera.
Premere P (R).
4. Selezionare la posizione di memoria premendo il pulsante corrispondente.
5. Riporre la cornetta. A questo punto il numero telefonico è memorizzato.
È necessario riportare l’interruttore R/Palla base del telefono sulla
posizione Runa volta salvati tutti i numeri di telefono.
Premere per inserire una pausa nel numero telefonico.
Informazioni tecniche
Alla base del telefono vi sono diversi interruttori.
Tali interruttori impostano i parametri tecnici.
Tempo del tasto Flash (100/300/600)
100 è l’impostazione standard per la maggior parte dei paesi.
300 per Francia/Portogallo.

Italiano
3
Montaggio a parete
Il telefono può essere montato a parete utilizzando la staffa di ssaggio a
parete fornita.
1. I fori per le due viti devono trovarsi uno a 83 mm di distanza dall’altro,
in verticale.
2. Inserire le viti nei due fori sul retro del telefono.
3. Rimuovere la spina di aggancio (situato sul supporto a gancio)
spingendola verso l’alto.
4. Ruotare il supporto di aggancio di 180 gradi e riposizionarlo.
Ricerca e individuazione guasti
Vericare che il cavo telefonico non sia danneggiato e sia correttamente inserito.
Scollegare tutti gli apparecchi addizionali, le prolunghe e gli altri telefoni. Se il
problema viene risolto, il difetto può essere attribuito all’altro apparecchio.
Provare l'apparecchio con una linea del cui funzionamento si è certi (ad
esempio quella di un vicino). Se il prodotto funziona, il difetto può essere
attribuito alla linea telefonica. Comunicare il problema alla società telefonica.
Qualora si riscontrino ulteriori difcoltà, contattare il punto d'acquisto.
Garanzia
Il presente prodotto è garantito per un periodo di 24 mesi a decorrere
dalla data di acquisto. Qualora si riscontrino difcoltà, contattare il punto
d’acquisto. Per avere diritto a qualsiasi servizio o assistenza durante il periodo
di garanzia, è necessario presentare il relativo documento di acquisto. La
presente garanzia non verrà applicata in caso di eventuali guasti dovuti
a incidenti, infortuni o danni simili, penetrazione di liquidi, negligenza,
uso anomalo o altre circostanze simili imputabili all’acquirente. Inoltre,
la presente garanzia non verrà applicata in caso di eventuali guasti
provocati da temporali o altre cause di sbalzi di tensione. Come misura
precauzionale, si consiglia di scollegare il telefono durante i temporali.
Dichiarazione di conformità
Con la presente, Doro dichiara che il prodotto Doro PhoneEasy
331ph è conforme ai requisiti essenziali e alle altre norme applicabili
contenute nelle Direttive R&TTE 1999/5/EC (Apparecchiature radio
e apparecchiature terminali di comunicazione) e ROHS 2002/95/EC
(Restrizioni d’uso delle sostanze pericolose).
Una copia della dichiarazione del costruttore è disponibile al
sito Internet www.doro.com/dofc

Nederlands
1
Bediening
Dit product is geschikt voor analoge telefoon aansluitingen in AT, BE,
BG, CH, CY, CZ, DE, DK, EE, ES, FI, FR, GB, GR, HU, IE, IS, IT,
LV, LT, LU, MT, NL, NO, PL, PT, RO, SI, SK, SE.
Een oproep plaatsen
Gewoon bellen
1. Neem de hoorn op.
2. Toets het gewenste nummer in.
Terugbellen
Als een nummer in gesprek was of als u het meest recent gekozen nummer
opnieuw wilt bellen, neem dan de hoorn op en druk op de toets .
Geheugens
Deze telefoon beschikt over 3 snelkeuzenummers.
Nadat een nummer op een geheugenplaats is opgeslagen, hoeft u
nog slechts op één toets te drukken om de oproep te doen. Onder de
doorzichtige dekseltjes van de snelkeuzetoetsen kan een afbeelding of
een symbool worden geplaatst, zodat eenvoudig kan worden gezien wie er
wordt gebeld.
Kiezen met snelkeuze
1. Neem de hoorn op en wacht op de kiestoon.
2. Kies de gewenste snelkeuze door op de bijbehorende toets te drukken.
Volumeregeling
Tijdens een gesprek kunt u het geluidsniveau van de hoorn aanpassen met
.
Hoorlus
De hoorn is voorzien van een ingebouwde hoorlus voor degenen die bij
het telefoneren hun gehoorapparaat willen gebruiken. Kies de modus T
op uw gehoorapparaat om deze functie in te schakelen.

Nederlands
2
Instellingen
Aansluiten
1. Sluit de telefoonkabel aan op een wandcontact en op de aansluiting
gemerkt Taan de achterkant van de telefoon.
2. Sluit de spiraalkabel aan op de telefoonhoorn en op de aansluiting q.
3. U hoort een klik als de modulaire stekker goed is aangesloten.
4. Stel de tijd voor de toets Flash in op 100 (zie Technische informatie).
5. Neem de hoorn op en luister of u de kiestoon hoort.
Belsignaal
Aan de zijkant van de telefoon bevindt zich een schakelaar voor het
beltoonvolume .
Geheugens
Snelkeuzenummers opslaan
1. Controleer of de R/P-schakelaar aan de onderkant van de telefoon
op P staat.
2. Neem de hoorn op en druk op P(R) (negeer eventueel geluid uit de
luidspreker).
3. Voer het telefoonnummer (tot 16 cijfers) in met de toetsen. Druk op
P (R).
4. Kies een geheugenplaats door op de bijbehorende toets te drukken.
5. Plaats de hoorn terug op de telefoon. Het nummer is nu opgeslagen.
Vergeet niet om de R/P-schakelaar aan de onderkant van de telefoon
terug te zetten naar de stand Rnadat alle telefoonnummers zijn
opgeslagen.
Druk op om een pauze in een telefoonnummer in te lassen.
Technische informatie
Onder aan de telefoon bevinden zich diverse schakelaars.
Met deze schakelaars worden technische parameters ingesteld.
Tijdvoorash-toets(100/300/600)
100 is de standaardinstelling voor de meeste landen.

Nederlands
3
Wandmontage
1. Bevestig de wandbeugel aan de onderkant van de telefoon, alsmede
twee schroeven die verticaal 83 mm uit elkaar staan.
2. Plaats de telefoon boven de schroeven en schuif de telefoon op zijn plaats.
3. Verwijder de ophangnok (bij de hoornschakelaar) door de nok omhoog
te duwen.
4. Draai de ophangnok 180 graden en plaats de nok terug.
Problemen oplossen
Controleer of het telefoonsnoer onbeschadigd is en op de juiste manier is
aangesloten. Ontkoppel alle aanvullende apparatuur, verlengsnoeren en
andere telefoons. Als het probleem is opgelost, zit het defect in een ander
apparaat.
Test de apparatuur op een lijn waarvan u weet dat deze werkt (bijv. bij
de buren). Als het product werkt, dan zit de fout waarschijnlijk in uw
telefoonlijn. Meld dit aan uw telefoonmaatschappij.
Mocht u daarna nog problemen hebben, neem dan contact op met de
winkel waar u het apparaat hebt gekocht.
Garantie
Dit product wordt gegarandeerd voor een periode van 24 maanden
vanaf de aankoopdatum. Mochten zich problemen voordoen, neem dan
contact op met de winkel waar u het apparaat hebt gekocht. Voor service
of ondersteuning tijdens de garantieperiode moet u een aankoopbewijs
kunnen tonen.
Deze garantie is niet van toepassing op defecten veroorzaakt door
ongelukken of soortgelijke incidenten of door schade, binnendringen
van vloeistoffen, nalatigheid, abnormaal gebruik en alle andere
omstandigheden van de zijde van de gebruiker. Voorts is deze garantie
niet van toepassing op eventuele defecten die worden veroorzaakt door
onweer of andere grote spanningsuctuaties.
Als voorzorgsmaatregel adviseren wij u om tijdens onweer de telefoon los
te koppelen.
Verklaring van Conformiteit
Doro verklaart hierbij dat het product Doro PhoneEasy 331ph voldoet
aan de essentiële vereisten en andere relevante regelgeving vervat in de
Richtlijnen 1999/5/EC (R&TTE) en 2002/95/EC (ROHS).
Een exemplaar van de verklaring van de fabrikant is verkrijgbaar op
www.doro.com/dofc

1
Ελληνικα
Λειτουργία
Ο παρών εξοπλισμός έχει σχεδιαστεί για χρήση μόνο στο αναλογικό
τηλεφωνικό δίκτυο της AT, BE, BG, CH, CY, CZ, DE, DK, EE, ES, FI,
FR, GB, GR, HU, IE, IS, IT, LV, LT, LU, MT, NL, NO, PL, PT, RO, SI,
SK, SE.
Πραγματοποίηση κλήσης
Κανονικήκλήση
1. Σηκώστε το ακουστικό.
2. Εισάγετε τον επιθυμητό αριθμό.
Λειτουργία επανάκλησης
Αν κάποιος αριθμός ήταν κατειλημμένος ή για επανάκληση του τελευταίου
εισαγόμενου αριθμού, σηκώστε το ακουστικό και πιέστε το πλήκτρο
επανάκλησης .
Μνήμες
Αυτό το τηλέφωνο διαθέτει 3 μνήμες ταχείας κλήσης.
Όταν ένας αριθμός αποθηκεύεται σε μια θέση μνήμης χρειάζεται να
πατήσετε μόνο ένα πλήκτρο για την πραγματοποίηση της κλήσης. Κάτω
από το διαφανές κάλυμμα που υπάρχει στα πλήκτρα ταχείας κλήσης
μπορείτε να τοποθετήσετε μια φωτογραφία ή ένα σύμβολο ώστε να βλέπετε
εύκολα σε ποιον καλείτε.
Πραγματοποίησηταχείαςκλήσης
1. Σηκώστε το ακουστικό και ακούστε το τηλεφωνικό σήμα.
2. Επιλέξτε τον επιθυμητό αριθμό ταχείας κλήσης πιέζοντας το κατάλληλο
πλήκτρο.
Ρυθμιστικό έντασης ήχου
Η ένταση ήχου του ακουστικού είναι δυνατό να ρυθμιστεί κατά τη διάρκεια
μιας κλήσης χρησιμοποιώντας το πλήκτρο .
Βρόχος για βοηθήματα ακοής
Το ακουστικό διαθέτει ενσωματωμένο βρόχο για χρήστες ακουστικών
βαρηκοΐας κατά τη χρήση του τηλεφώνου. Για να ενεργοποιηθεί η
συγκεκριμένη λειτουργία, επιλέξτε τη λειτουργία T στο ακουστικό βαρηκοΐας.

2
Ελληνικά
Ρυθμίσεις
Σύνδεση
1. Συνδέστε το τηλεφωνικό καλώδιο στην επιτοίχια υποδοχή τηλεφωνικού
δικτύου και στην υποδοχή με την ένδειξη T που υπάρχει στο πίσω
μέρος του τηλεφώνου.
2. Συνδέστε το σπιράλ καλώδιο στην υποδοχή του ακουστικού και στην
υποδοχή με την ένδειξη q που υπάρχει στο πλευρικό τμήμα του
τηλεφώνου.
3. Θα ακουστεί ένα κλικ όταν το δομοστοιχειωτό βύσμα προσαρμόσει
σωστά στη θέση του.
4. Ρυθμίστε το σωστό χρόνο του πλήκτρου Flash στο 100 (βλέπε
Τεχνικές πληροφορίες).
5. Σηκώστε το ακουστικό και περιμένετε να ακουστεί το τηλεφωνικό σήμα.
Ηχητικό σήμα κουδουνισμού
Ο ήχος έντασης του κουδουνισμού είναι δυνατό να ρυθμιστεί με τα πλήκτρα
.
Μνήμες
Αποθήκευσηαριθμώνταχείαςκλήσης
1. Βεβαιωθείτε ότι ο διακόπτης R/P στη βάση του τηλεφώνου είναι
ρυθμισμένος στοP.
2. Σηκώστε το ακουστικό και πιέστε P(R) (αγνοήστε ο,τιδήποτε ακούτε
στο ακουστικό).
3. Πληκτρολογήστε τον τηλεφωνικό αριθμό (έως 16 ψηφία). Πιέστε P(R).
4. Επιλέξτε θέση μνήμης πιέζοντας το αντίστοιχο πλήκτρο.
5. Επανατοποθετήστε το ακουστικό. Τώρα ο αριθμός έχει αποθηκευτεί.
Όταν αποθηκευτούν όλοι οι τηλεφωνικοί αριθμοί, θυμηθείτε να επαναφέρετε
τον διακόπτη R/P που βρίσκεται στη βάση του τηλεφώνου στη θέση R.
Πιέστε αν θέλετε να εισαχθεί μια παύση στον τηλεφωνικό αριθμό.
Other manuals for PhoneEasy 331ph
4
Table of contents
Languages:
Other Doro Telephone manuals

Doro
Doro MATRA 25 User manual

Doro
Doro 506 User manual

Doro
Doro PhoneEasy 311C User manual

Doro
Doro PhoneEasy 312ci User manual

Doro
Doro Audioline AL505 User manual

Doro
Doro AUB 50 User manual

Doro
Doro 514C User manual

Doro
Doro 516CR User manual

Doro
Doro COMFORT 3000 User manual

Doro
Doro HearPlus 317ci User manual

Doro
Doro MemoryPlus 319i ph User manual

Doro
Doro 915c Syntiro User manual

Doro
Doro PhoneEasy 331ph User manual

Doro
Doro PhoneEasy 337ip User manual

Doro
Doro TEL 2 User manual

Doro
Doro AL503 User manual

Doro
Doro 720 User manual

Doro
Doro AFTI 45 User manual

Doro
Doro CONGRESS 200 User manual

Doro
Doro 6525 User manual