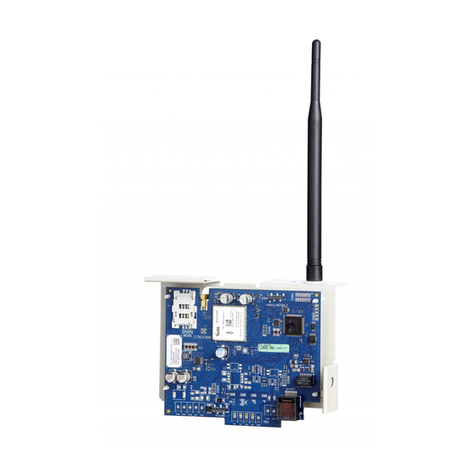
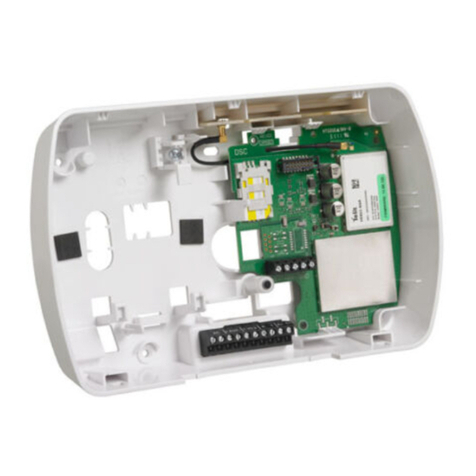
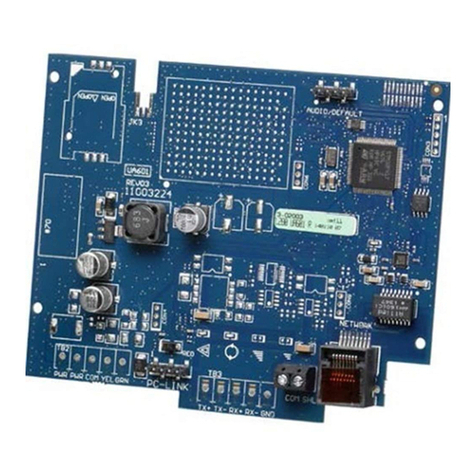
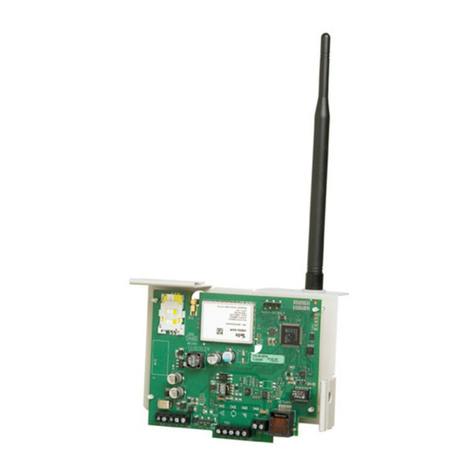
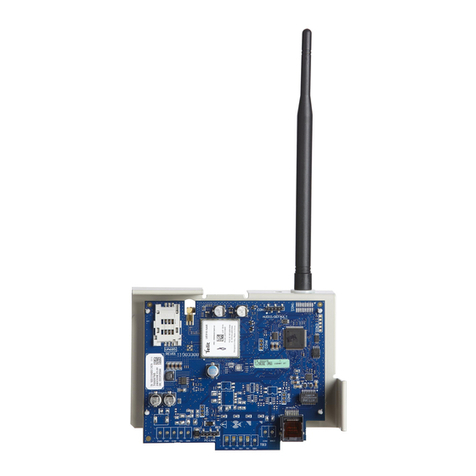
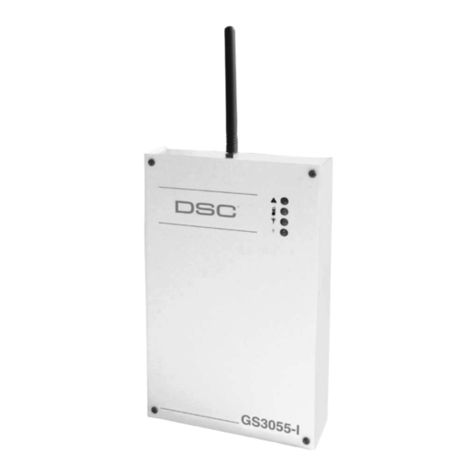
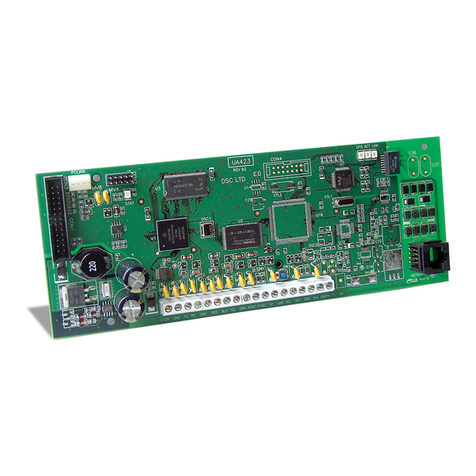
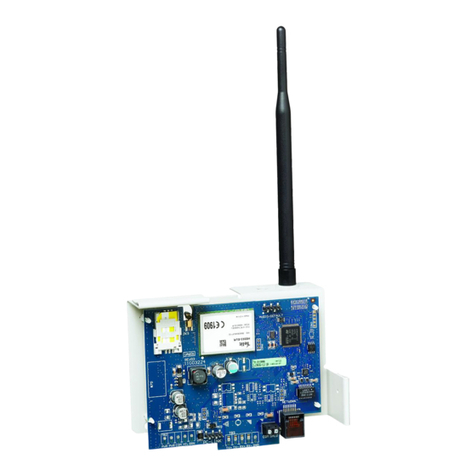
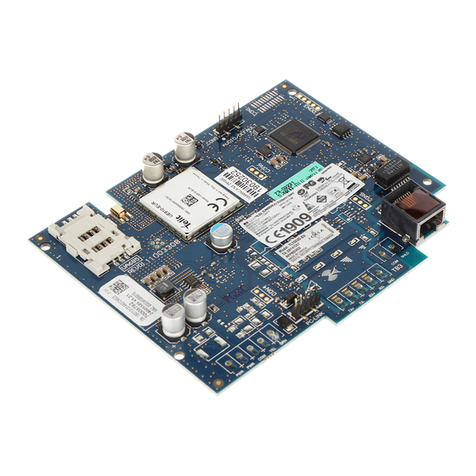
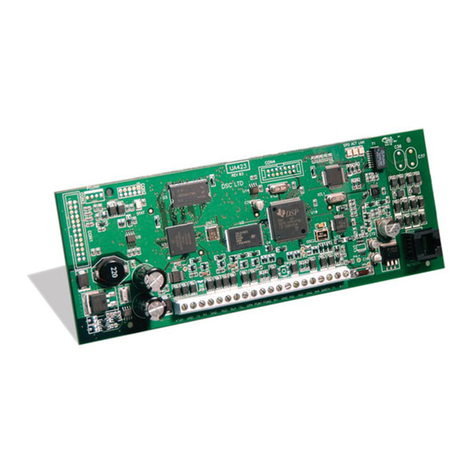
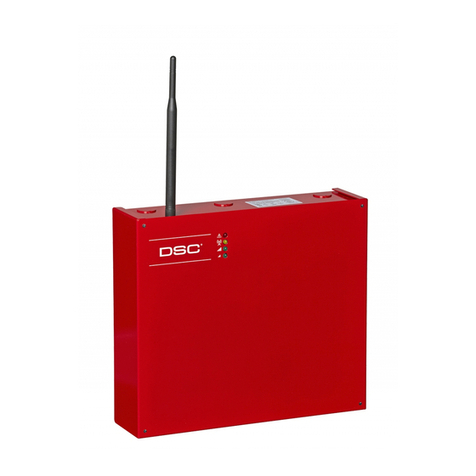
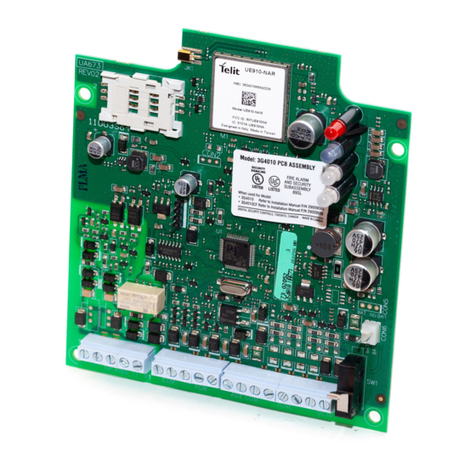
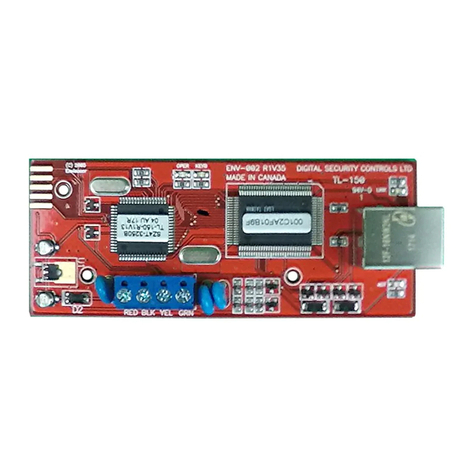
DSC PowerSeries Neo TL280LER User manual

To download the full Installation Manual and register your product, please visit
dsc.com/m/29009553 scan the QR code to the right.
TL280LE(R)
Internet and LTE/HSPA Dual-Path Alarm
Communicator
LE2080(R)
LTE/HSPA Alarm Communicator
3G2080(R)E
HSPA Cellular Alarm Communicator
TL2803G(R)E
Internet and HSPA Dual-Path Alarm Communicator
TL280(R)E
Internet Alarm Communicator
Installation Guide 5.x
Warning: This manual contains information on limitations regarding product use and function and information on the lim-
itations as to the liability of the manufacturer. The entire manual should be carefully read.
Please note that not all models and features listed are available in all markets.

WARNING: Installer please read carefully
Note to Installers
The warningson thispage contain vitalinformation. Asthe onlyindividualin contact
with systemusers,itisthe installer’sresponsibilityto bring each itemin thiswarning to
the attention of allusersof this system.
System Failures
Thissystemhasbeen carefullydesigned to be aseffective aspossible. There are cir-
cumstances, however, involving fire, burglary, or other typesof emergencieswhere
it may not provide protection. Any alarm system of any type may be compromised
deliberatelyor mayfail to operate asexpected fora varietyof reasons. Some, but
not all, of the reasons may be:
Access by Intruders
Intrudersmay enter through an unprotected access point, circumvent a sensing
device, evade detection bymoving through an area of insufficient coverage, dis-
connect a warning device, or interfere with or prevent the proper operation of the
system.
Component Failure
Although every effort hasbeen made to make this systemas reliable as possible,
the systemmayfailto function asintended due to the failure of a component.
Compromise of Radio Frequency (Wireless) Devices
Signals may not reach the receiver under all circumstances which could include
metalobjectsplaced on or near the radio path or deliberate jamming orother inad-
vertent radio signalinterference.
Criminal Knowledge
Thissystemcontainssecurityfeatureswhich were known to be effective at the time
of manufacture. It is possible forpersonswith criminalintent to develop techniques
which reduce the effectiveness of these features. It isimportant that the security
systembe reviewed periodicallyto ensure that itsfeaturesremain effective and that
it isupdated orreplaced if it isfound that it does not provide the protection expec-
ted.
Failure of Replaceable Batteries
Thissystem’swireless transmittershave been designed to provide severalyears of
batterylife under normalconditions. The expected battery life isa function of the
device environment, usage, and type. Ambient conditions such as high humidity,
high orlow temperatures, orlarge temperature fluctuationsmayreduce the expec-
ted batterylife. While each transmitting device hasa low batterymonitorwhich iden-
tifieswhen the batteries need to be replaced, this monitormay fail to operate as
expected. Regular testing and maintenance will keep the system in good oper-
ating condition.
Inadequate Installation
A security system must be installed properly in order to provide adequate pro-
tection. Everyinstallation should be evaluated bya security professionalto ensure
that all accesspoints and areasare covered. Locks and latcheson windows and
doors must be secure and operate as intended. Windows, doors, walls, ceilings
and other building materials must be of sufficient strength and construction to
provide the level of protection expected. Areevaluation mustbe done during and
afteranyconstruction activity. An evaluation bythe fire and/orpolice department is
highlyrecommended if thisservice isavailable.
Inadequate Testing
Most problemsthat would prevent an alarmsystemfromoperating as intended can
be found by regular testing and maintenance. The complete system should be
tested weekly and immediately after a break-in, an attempted break-in, a fire, a
storm, an earthquake, an accident, orany kind of construction activityinside or out-
side the premises. The testing should include all sensing devices, keypads, con-
soles, alarm indicating devices, and any other operational devicesthat are part of
the system.
Insufficient Time
There may be circumstances when the system will operate as intended, yet the
occupantswillnot be protected froman emergencydue to their inability to respond
to the warnings in a timely manner. If the system is remotely monitored, the
response maynot occur in time to protect the occupantsortheir belongings.
Motion Detectors
Motion detectors can only detect motion within the designated areas asshown in
their respective installation instructions. They cannot discriminate between
intruders and intended occupants. Motion detectors do not provide volumetric
area protection. They have multiple beams of detection and motion can only be
detected in unobstructed areas covered by these beams. They cannot detect
motion which occurs behind walls, ceilings, floor, closed doors, glass partitions,
glassdoorsor windows. Anytype of tampering whether intentionalorunintentional
such as masking, painting, or spraying of any material on the lenses, mirrors, win-
dowsorany other part of the detection systemwillimpairitsproper operation.
Passive infrared motion detectors operate by sensing changes in temperature.
However theireffectiveness can be reduced when the ambient temperature rises
nearorabove bodytemperature orifthere are intentionalorunintentional sources
of heat in ornear the detection area. Some of these heat sources could be heat-
ers, radiators, stoves, barbecues, fireplaces, sunlight, steam vents, lighting and so
on.
Power Failure
Controlunits, intrusion detectors,smoke detectorsand manyothersecuritydevices
require anadequatepower supplyforproperoperation. Ifa device operates from
batteries,itis possible for the batteries to fail. Even if the batteries have not failed,
theymust be charged, in good condition and installed correctly. If a device oper-
atesonly by AC power, any interruption, howeverbrief, will render that device inop-
erative while it does not have power. Powerinterruptions of anylength are often
accompanied by voltage fluctuations which may damage electronic equipment
such asa securitysystem.Aftera powerinterruption has occurred, immediatelycon-
duct a complete systemtestto ensure that the systemoperatesasintended.
Security and Insurance
Regardlessof its capabilities, an alarmsystem is not a substitute for propertyor life
insurance. An alarm systemalso is not a substitute for property owners, renters, or
otheroccupants to act prudentlyto prevent or minimize the harmful effects of an
emergencysituation.
Smoke Detectors
Smoke detectorsthat are a part of thissystemmay not properlyalert occupantsof a
fire fora number of reasons, some of which follow. The smoke detectorsmay have
been improperlyinstalled orpositioned. Smoke maynot be able to reach the smoke
detectors, such as when the fire isin a chimney, wallsor roofs, oron the other side
of closed doors. Smoke detectors may not detect smoke fromfireson another level
of the residence orbuilding.
Everyfire is different in the amount of smoke produced and the rate of burning.
Smoke detectorscannot sense all typesof fires equallywell. Smoke detectors may
not provide timelywarning of fires caused bycarelessness orsafety hazards such
assmoking in bed, violent explosions, escaping gas, improper storage of flammable
materials, overloaded electricalcircuits,children playing with matches, orarson.
Even if the smoke detector operates as intended, there may be circumstances
when there isinsufficient warning to allow all occupantsto escape in timeto avoid
injuryordeath.
Telephone Lines
If telephone linesare used to transmit alarms, theymaybe out of service orbusy for
certain periodsof time. Also an intrudermaycut the telephone line ordefeat itsoper-
ation bymore sophisticated meanswhich maybe difficult to detect.
Warning Devices
Warning devices such as sirens, bells, horns, or strobes may not warn people or
waken someone sleeping if there is an intervening wallordoor. If warning devices
are located on a different levelof the residence or premise, then it is lesslikely that
the occupants will be alerted or awakened. Audible warning devices may be
interfered with byother noise sources such as stereos, radios, televisions, air con-
ditioners, other appliances, or passing traffic. Audible warning devices, however
loud,maynotbeheardbyahearing-impairedperson.
2

General
This installation manual shall be used in conjunction with the control panel manual. All the safety instructions specified
within that manual shall be observed. The control panel is referenced as the “panel” throughout this document. This install-
ation guide provides the basic wiring, programming and troubleshooting information.
This alarm communicator is a fixed, wall-mounted unit, and shall be installed in the location specified in these instructions.
The equipment enclosure must be fully assembled and closed, with all the necessary screws/tabs, and secured to a wall
before operation. Internal wiring must be routed in a manner that prevents:
lExcessive strain on wire and on terminal connections,
lInterference between power limited and non power limited wiring,
lLoosening of terminal connections, or
lDamage of conductor insulation.
WARNING: Never install this equipment during a lightning storm!
Safety Information
The installer must instruct the system user on each ofthe following:
lDo not attempt to service this product. Opening or removing covers may expose the user to dangerous voltages or other
risks.
lAny servicing shall be referred to service persons only.
lUse authorized accessories only with this equipment.
lDo not stay close to the equipment during device operation.
lDo not touch the external antenna.
Model Information
This manual covers the following models of alarm communicators:
Models TL2803GRE-EU, TL2803GE-EU, TL280RE-EU, TL280E-EU, 3G2080RE-EU, 3G2080E-EU (900/2100MHz oper-
ation) and 3G2080E-EU are for Europe and cover the following bands: 900 / 2100MHz.
Models TL2803GRE-AU, TL2803GE-AU, TL280RE-AU, TL280E-AU, 3G2080E-AU and 3G2080RE-AU (850/2100MHz
operation) are for Australia, New Zealand,Brazil and cover the following bands:850 / 2100MHz.
NOTE: Only models TL2803GE-AU and 3G2080E-AU are Anatel certified for use in Brazil.
Models TL2803GRE, TL2803GE, TL280RE, TL280E, 3G2080RE and 3G2080E (850/1900MHz operation)are for North
and South America (excluding Brazil) and cover the following bands:850 / 1900MHz.
NOTE: Only models TL2803GE and 3G2080E are CNC certified for use in Argentina.
Models TL280LER,TL280LE,LE2080R,LE2080 are for North America and support LTE bands B2, B4, B5, B12 and B13
and WCDMA bands B2 and B5.
Band Transmit Band (Tx) Receive Band (Rx)
LTE B2 1850 - 1910 MHz 1930 - 1990 MHz
LTE B4 1710 - 1755 MHz 2110 - 2155 MHz
LTE B5 824 - 849 MHz 869 - 894 MHz
LTE B12 698 - 716 MHz 728 - 746 MHz
LTE B13 777 - 787 MHz 746 - 756 MHz
UMTS B2 1850 - 1910 MHz 1930 - 1990 MHz
UMTS B5 824 - 840 MHz 869 - 894 MHz
References to model names TL280(R)E,TL2803G(R)E, 3G2080(R)E,TL280LE(R) and LE2080(R) throughout this
manual apply to all specified models unlessstated differently.Models ending in “R” include a built-in RS-232 interface for
connecting to local third party applications.
The TL280(R)E/TL2803G(R)E/3G2080(R)E/TL280LE(R)/LE2080(R) supports integration over cellular/IP, available with
licensed 3rd party productsolutions. Specific programming for the related programming sections is to be provided by the
3rd party. A current listof compatible 3rd partysolutions can be found at www.dsc.com.
3G2080(R)E: Is a HSPA(3G) cellular alarm communicator that sends alarm communication to Sur-Gard System I-IP, II, III
(SG-DRL3IP), IV (SG-DRL4IP), and 5 (SG-DRL5IP) central station receivers via a HSPA(3G)/GPRS digital cellular net-
3

work. TL2803G(R)E: Isa dual-path HSPA(3G) Ethernet alarm communicator that sends alarm communication to Sur- Gard
System -IPI, II,III, IV, and 5 central station receivers through Ethernet/Internet or a HSPA(3G)/GPRS digital cellular network.
TL280(R)E: Is an Ethernet alarm communicator that sends alarm communication to Sur-Gard System I-IP, II, III (SG-
DRL3IP), IV (SG-DRL4IP), and 5 (SG-DRL5IP) central station receivers via Ethernet/Internet.
LE2080(R): is an LTE (4G) cellular alarm communicator with HSPA(3G) fallback support that sends alarm communications
to Sur-Gard System I-IP, II, III (SG-DRL2IP, IV (SG-DRL4IP) and 5 (SG-DRL5IP) central station receivers via an LTE(4)
/HSPA(3G) digital cellular network.
TL280LER: Is a dual path LTE (4G) Ethernet alarm communicator that sends alarm communications to Sur-Gard System I-
IP, II, III (SG-DRL3IP, IV (SG-DRL4IP) and 5 (SG-DRL5IP) central station receivers via Ethernet/Internet or a LTE(4)/HSPA
(3G) digital cellular network.
The communicator can be used as either a backup or primary communicator. The communicator supports Internet Protocol
(IP) transmission of panel and communicator events over Ethernet/Internet and/or HSPA/GPRS.
The cellular performance of the LE2080(R), TL280LE(R), 3G2080(R)E or TL2803G(R)E communicators depend greatly
on the LTE(4G)/HSPA(3G) network coverage in the local area. The unit should not be mounted in the final location without
first performing the communicator placement test below to determine the best location for radio reception (minimum of one
green LED ON). Optional antenna kits (GS-15ANTQ, GS-25ANTQ, GS- 50ANTQ) are available from DSC to improve sig-
nal strength as required.
NOTE: Prior to installation, confirm with the local service provider that the network is available and active in the area where
the communicator will be installed, and that radio signal strength (CSQ) is adequate.
Panel Mounting
The following communicators are compatible with HS2016, HS2016-4, HS2032, HS2064, and HS2128 panels:
l3G2080(R)E (HSPA(3G)/GPRS only)
lTL2803G(R)E (Ethernet/Internet + HSPA(3G)/GPRS dual-path)
lTL280(R)E (Ethernet/Internet only)
lLE2080(R) (LTE(4G)/HSPA(3G) only)
lTL280LE(R) (Ethernet/Internet + LTE(4G)/HSPA(3G))
Features
l128-bit AES encryption via cellular and Ethernet/Internet
- NIST validation cert number 2645 (for models TL2803G(R)E/3G2080(R)E/TL280(R)E
- NIST validation cert number 4475 (for models TL280LE(R)/LE2080(R))
lBackup or primary cellular alarm communication.
lAutomatically switches to 2G (EDGE/GPRS) if HSPA(3G) service is not available (2G not supported on LTE models).
lAutomatically switches from LTE to HSPA(3G) service if LTE service is not available.
lEthernet LAN/WAN 10/100 BASE-T (TL2803G(R)E, TL280(R)E, TL280LE(R) only).
lFully redundant Ethernet/Internet and cellular dual-path alarm communication (TL2803G(R)E, TL280LE(R) only).
lFull event reporting to central station.
lIndividual Internet and/or cellular periodic test transmission.
lIntegrated call routing.
lVisual Verification (Requires Sur-Gard System 5 Receiver)
lRemote firmware upgrade capability of the communicator and panel firmware via Ethernet and/or cellular.
lPanel remote uploading/downloading supportvia cellular and Ethernet/Internet.
lPC-LINK connection.
lProgrammable labels.
lSIA and Contact ID (CID) formats supported.
lSignal strength and trouble display LEDs.
lSupervision heartbeats sent via cellular and Ethernet/Internet.
lThird party integration over cellular/IP. The product supports third-party application via serial (R-models only), cellular
and, Ethernet. Refer to third-party application documentation for more information.
NOTE: RS-232 connection is for supplementary use only and was not evaluated by UL/ULC.
Technical Specifications
The TL2803G(R)E/TL280LE(R) are also suitable to be used with a compatible control unit listed for dual line security trans-
mission when used in conjunction with a DACT or a Public Switched Data Network (PSDN) transmitter, where the PSDN
provides the line security and is the primary line. In this mode, alarm signals are to be sent simultaneously over both com-
munication methods.
4

EN50131-1 Installation Requirements
For EN50131-1 compliant installations, the following programming options shall be set as described. Supervision Heart-
beat (required for ATS4 and ATS5):
l[851][004] setto 0087h (135s heartbeat).
NOTE: The compatible receiver at ARC location shall have supervision window programmed for 1800s (ATS4) or 180s
(ATS5).
l[851][005] options1, 2 and 3 shall be enabled.
l[851][005] option 8 shall be enabled.
Test transmission (required for ATS3):
l[851] System Test options [026-029] shall be enabled (FF) for the communication paths available.
l[851][124-125] and [224-225] shall be programmed with time of day for test transmission and 1440 minutes (24h) for
test transmission cycle
Configuration of communication paths (all ATS classes)
l[300][001] select option 02 for auto routing (this will allow transmission of the events over all available communication
paths in the system)
l[380] enable option 5 (YES) for parallel transmission over all available communication paths (if redundant con-
figuration is desired)
l[382] enable option 5 (YES) to enable Alternate communicator
l[384] enable the desired back-up configuration (receiver 2 back-up for receiver 1 or receiver 3 back-up for receiver 1).
Ratings Compatibility
Table 1: Communicator Ratings
Model 3G2080(R)E/LE2080(R)
Cellular only
TL280(R)E
Internet only
TL2803G(R)E/TL280LE(R)
Internet and Cellular
Power Supply Ratings
Input Voltage
10.8-12.5 VDC
Power is supplied from the panel’s PC-Link header or a PCL-422 module in
remote cabinet installations. In remote cabinet installations, the PCL-422 module
located with the communicator is powered by either an HSM2204 or an HSM2300.
Refer to the PCL-422 installation instructions for details.
Current Consumption
Standby Current 90mA 100mA 120mA
Alarm (Transmitting)
Current 400mA
Operating Frequency 850MHz, 900MHz, 1800MHz, 1900MHz, 2100MHz
Typical Antenna Gain 2dBi
Environmental Specifications
Operating Temperature -10°C to 55°C (0°C to 49°C for UL/ULC)
Humidity 5% ~ 93% relative humidity, non-condensing
Mechanical Specifications
Board Dimensions (mm) 100 × 150 × 15 100 x 150 x 15 100 × 150 × 15
Weight (grams) with
bracket 310 300 320
5

Table 2: Compatible Receivers and Panels
Communicator Receiver/Panel Description
3G2080(R)E
LE2080(R)
TL2803G(R)E
TL280LE(R)
TL280(R)E
Receiver
lSur-Gard System I-IP Receiver, version 1.13+
lSur-Gard System II Receiver, version 2.10+
lSur-Gard SG-DRL3-IP, version 2.30+ (for Sur-Gard System III Receiver)
lSur-Gard SG-DRL4-IP version 1.20+ (for Sur-Gard System IV Receiver)
lSur-Gard SG-DRL5-IP version 1.00+ (for Sur-Gard System 5 Receiver)
Panel
lHS2016
lHS2016-4
lHS2032
lHS2064
lHS2128
NOTE: Enter [*][8][Installer Code][900] at keypad to view the panel version number.
Pre Installation Configuration
Encryption
The communicator uses 128 Bit AES encryption. Encryption can only be enabled from the monitoring station receiver. Each
receiver (Ethernet 1 and 2, Cellular 1 and 2) can independently have encryption enabled or disabled. When encryption is
enabled, the central station will configure the device to encrypt communications the nexttime the communicator module per-
forms a communication to that receiver.
NOTE: Packets will start being encrypted only after the next event is sent to that receiver, or if the unit is restarted.
Before leaving the installation site, the communicator TL2803(R)E / TL280LE(R) Ethernet line shall be connected via
an APPROVED (acceptable to the local authorities) Network Interface Device (NID). All wiring shall be performed
according to the local electrical codes.
Communicator Installation Configuration
This alarm communicator shall be installed by service persons only (service person is defined as a person having the appro-
priate technical training and experience necessary to be aware ofhazards to which that person may be exposed to in per-
forming a task and can also take measures to minimize the risks to that person or other persons). The Communicator shall
be installed and used within an environment that provides the pollution degree max 2, overvoltages category II, in non- haz-
ardous,indoor locations only. This manual shall be used with the installation manual of the panel which is connected to the
communicator. All instructions specified within the panel manual must be observed.
All the local rules imposed by local electrical codes shall be observed and respected during installation.
Installing the Ethernet Cable (TLXXXX Models Only)
A Category 5 (CAT 5) Ethernet cable must be run from a source with Internet connectivity to the communicator module,
inside the panel. The communicator end of the cable must be terminated with an RJ45 plug, which will connect to the com-
municator’s RJ45 jack after the communicator is installed. All requirements for installation of CAT5 Ethernet cable must be
observed for correct operation of the communicator, including, but notlimited to, the following:
lDo NOT strip off cable sheathing more than required for proper termination.
lDo NOT kink/knot cable.
lDo NOT crush cable with cable ties.
lDo NOT untwist CAT5 pairs more than ½ in. (1.2cm).
lDo NOT splice cable.
lDo NOT bend cable at right angles or make any other sharp bends.
NOTE: CAT5 specification requires that any cable bend musthave a minimum 2 in. (5 cm) bend radius.Maximum length of
CAT 5 cable is 328 ft. (100 m).
6

Inserting and Removing the SIM Card
1. Remove the front cover of the panel to access SIM holder.
2. Remove power from the panel and disconnectthe batteryand telephone line.
3. On the SIM card holder push gently to slide the cover downwards to OPEN. This will unlatch the SIM card holder on
the top edge of the communicator PCB. (See Figure 3).
4. Tilt the top of the SIM card holder downwards to access the SIM card.
NOTE: The SIM can be damaged by bending or scratching contacts. Use caution when handling SIM cards.
5. Insert or remove the SIM card, noting the orientation of the notches on the SIM card and the SIM card holder.
6. When inserting a SIM card, insert the card in the proper orientation and gently push the SIM card holder down and
slide the holder as indicated by the arrow on SIM holder, to LOCK.
7. Reconnectthe backup battery and telephone line,applyAC power to panel,and replace the panel cover.
Running the RS-232 Cable (R models only)
When installing the communicator for use with 3rd party applications an RS-232 cable must be connected between the 3rd
party device and the communicator module.
NOTE: Maximum cable length for RS-232 cable is 8 ft. (2.4 m).
Please refer to the installation manual for the 3rd party device for wiring instructions.
Installing Communicator in Panel
Installing the Communicator with HS20XX Panels
NOTE: Before installing the communicator or inserting/removing SIM, ensure that system power is off and telephone line is
disconnected.
1. To assemble supplied mounting bracket, perform the following: (See Figure 1).
a. Remove the 4 white plastic standoffs from the bag provided with the communicator kit.
b. Insert the 4 standoffs through the back of the mounting bracket, into the holes at each corner. (The antenna
mounting tab should be facing away from you).
c. Place the bracket on a flat, solid surface. Hold the communicator component side up and orient the 4 holes on the
communicator with the 4 standoffs protruding from the bracket. Push the communicator firmly and evenly onto the
standoffs until it is securely attached to the mounting bracket.
d. Remove the panel front cover.
e. Remove and discard the circular knockout located in the top-right section of the panel. (This hole will be used for
connection ofthe supplied radio antenna).
f. Connect the supplied 5” (12.7 cm) antenna cable to the radio, by passing the connector through the hole on back
of the mounting bracket to the communicator board. Push the antenna connector firmly into the socket on the cel-
lular radio. (See Figure 3).
Figure 1: Communicator Mounting Bracket
10
4
1
2
8
3
7
65
11
9
9
8
7

Item Description
1 External Antenna Screw Thread
2 Brass Nut
3 Brass Washer
4 Nylon Washer (flat)
5 Antenna Mounting Tab
6 Nylon Washer with bushing (thicker flat washer)
7 Antenna Cable
8 Mounting Holes
9 Mounting Plate
10 Communicator Board
11 Stand Off
2. Install the Communicator into the panel:
a. Attach one end of the PC-LINK cable to the panel PCLINK_2 header on the panel (red wire goes on the right-
hand pin of the panel PCLINK_2 header (see Figure 3)).
b. Insert the assembled communicator into the panel.
NOTE: Ensure that the threaded antenna connection point is visible through the knockout hole at the top right of
the panel.
c. Place the nylon washer with bushing (thickflat washer) onto the threaded section of the antenna cable. Insert the
threaded section through the antenna mounting knockout hole at top right of panel.
d. Place the second nylon washer (flat), followed by the brass washer and the brass nut, onto the threaded section
of the cable, outside the panel. Tighten the assembly by hand only (finger tight only- do not over tighten the
antenna assembly).
e. Locate the screw hole on the right side wall of the panel. See Figure 2 "screw". Line up the assembled com-
municator with the right side wall of the panel and, using the screw provided, secure the mounting bracket to the
panel.
f. Attach the other end of the PC-LINK cable to the communicator (red wire goes on the right-hand pin ofthe com-
municator PC-LINK header (See Figure 3)).
g. Using light pressure (finger tight only), attach the supplied white quad band whip antenna to the threaded
antenna connection point at top of the panel.
Figure 2: HS2016/2016-4/2032/2064/2128 Control Panel
12
3
Item Description
1 PC-Link Cable Connector
2Quad Band Whip Antenna - Use light pressure to
attach antenna finger tight only
3 Screw
WARNING! - 3G2080(R)E/TL2803G(R)E/LE2080(R)/TL280LE(R) modules are power limited. Do not route any wiring
over the circuit board. Maintain at least 1in. (25.4mm) separation between circuit board and wiring. A minimum of ¼
in. (7mm) separation must be maintained at all points between non-power limited wiring and power limited wiring.
8

3. To electrically connect the communicator to the panel, perform the following steps (See Figure 3):
a. Disconnect both AC power and battery connections from the panel, and disconnect telephone line.
b. Confirm that the SIM card is inserted in the holder and locked.
4. Install Network Cable (TLXXXX models only). Route the CAT 5 Ethernet cable through back of the panel and plug it
into the communicator’s RJ45 jack.
NOTE: Before leaving the premises the Ethernet communication lines must first be connected to an approved (acceptable
to local authorities) type NID. All wiring shall be performed according to the local electrical codes.
Figure 3: Communicator Wiring Diagram
AUDIO/DEFAULT
DSC
UA685
PC-LINK
PCLINK_2
COM
TL2803G(R)E
3G2080(R)E
TL280(R)E
TL280LE(R)
LE2080(R)
AC
AC Z1 COM Z2 Z3 COM Z4 Z5 COM Z6 Z7 COM Z8
AUX+
BELL +
PGM1 PGM3
RING
T-1
HS2016/2032/2064/2128
3G/LTE Radio
UA621
L
o
c
k
1
RJ-45
GRN
YEL
TIP
R-1
BLK
RED
AUX -
BELL -
EGND
TX+
GND
TX-
RX+
RX-
SHLD
SIM
PGM2 PGM4
4
1 2
3
5
6
Item Description
1 To External Antenna
2AUDIO / DEFAULT
Jumper pins 4 and 5 to reset
3 Network Link - Yellow
4From NID use only CAT5 supervised
maximum cable length 100m (328 feet)
5 RS-232 to third party device
6 RED Wire
Input Ratings:
l+10.8V ~ +12.5VDC
l90mA 3G2080(R)E/120mA TL2803G(R)E standby
l90mA 3G2080(R)E/ LE2080(R)
l120mA TL2803G(R)E/TL280LE(R)
l100mA TL280(R)E
l400mA alarm
DSC Panel minimum power requirements:
l16.5 VAC 40 VAtransformer
l12 VDC 7Ah battery
5. Install the RS-232 connections (R models only). If using the communicator with a 3rd party device, wire the con-
nections as per the table below:
9

Table 3: RS-232 Connections
3rd Party Device Communicator
TX (RED)* RX+
Unused RX-
RX (GRN)* TX+
Unused TX-
GND (BLK)* GND
* Wire colors based on the cable provided in the product box.
6. Perform the following steps for initial power on of the panel with communicator installed:
a. Reconnect the AC power, telephone line, and battery + connector to the panel.
(The communicator and panel will power up together).
b. Observe that the communicator’s red and yellow LEDs are flashing together while it initializes. The red and yellow
LEDs will continue to flash until the communicator has successfully communicated to all programmed receivers.
NOTE: During radio reset, the two green LEDs will flash alternately.
NOTE: Initialization may take several minutes to complete. Red and yellow LEDs will flash together during initialization. Do
not continue to next step until the red and yellow LEDs have stopped flashing. (If only the yellow LED is flashing,
there is a communicator trouble and the green LEDs are not valid for communicator placement test).
Correct trouble indicated by flashes on yellow LED before continuing. (See Table 7 for troubleshooting assistance).
7. Perform the communicator placement test below.
8. Mount the panel in final location indicated by placement test.
Communicator Placement Test
Cellular Communicator Models Only
To confirm that the cellular antenna location is suitable for radio operation, perform the placement test asfollows:
NOTE: It might be necessary to relocate the panel or install an optional extension antenna during this procedure, if the
radio signal strength is too low.
1. Confirm that the yellow LED on the communicator is not flashing. A flashing yellow LED indicates trouble on the com-
municator. See Table 7 to troubleshoot and correct the cause of this trouble before continuing to the next step.
2. Confirm that the strength of the radio signal on the yellow LED and the 2 green LEDs on the communicator meet or
exceed the minimum signal level requirement. Minimum signal level: The yellow LED is OFF and the green LED 1
(furthest from the yellow LED) is ON (i.e., not flashing) for the panel location to be acceptable. For interpretation of
receiver strength on LEDs, refer to the table “Radio Signal Strength”.
Cellular Signal Strength Display - LCD Keypad only
The cellular network signal strength can be checked on the keypad LCD screen by entering installer programming section
[850].The LCD will indicate the SIM card activation statusfollowed by up to five bars of signal strength. This display will auto-
matically update every three seconds. For the relationship between signal strength bars, CSQ level, and signal level in
dBm, refer to “Radio Signal Strength”.
Table 4: Signal Strength Display
Description Display
SIM card active and current signal strength
SIM card inactive and current signal strength
Radio not registered
OR AND
NOTE: If the required signal strength is too low with the panel in its current location, the panel must be relocated or an
external antenna is required.
If required, the following cellular extension antenna kits are available to the installer:
lGS-15ANTQ - 4.57m (15’) internal antenna extension kit (suitable for interior mounting).
lGS-25ANTQ - 7.62m (25’) external antenna extension kit (suitable for interior/exterior mounting).
10

lGS-50ANTQ - 15.24m(50’) external antenna extension kit (suitable for interior/exterior mounting).
Specific instructions for the installation of the extension antenna are included with the kit.Observe all the electrical safety
instructions regarding the installation of the antenna. All the wiring of the equipment shall be fully compliant with the local
rules and regulations.
3. If required, install the antenna extension and perform the following steps to determine the best location for placement
ofthe antenna:
a. Disconnect the white whip antenna from the panel.
b. Attach one end ofthe antenna extension cable to the threaded antenna connector on the panel and the other
end to the external antenna.
4. Move the extension antenna to various locations while observing the two green LEDs on the panel.
a. Continue to reposition the extension antenna until it receives an acceptable (minimum one green LED ON solid)
signal strength.
NOTE: Minimum strength is: green LED 1 flashing and yellow LED off. If green LED 1 is flashing, relo-
cation should be considered.
b. Mount the supplied antenna extension bracket at the location that provides the best signal strength.
5. Alternately, reposition the panel to improve signal strength. Dismount the panel and move it to another location to
achieve the required signal strength. If the panel is relocated to improve signal strength, mount it in the new location.
6. When final panel/antenna location is determined, continue at the Initial Panel Programming section.
NOTE: If the SIM card is not activated, placement test will indicate the signal strength of the nearestcellular tower.
NOTE: In between displaying signal strength, the signal strength LEDs will flash alternately if an inactive SIM card is used.
The flashing indicates that the module is attempting to attach to the cellular network and will only lastbriefly.
Initial Panel Programming
Keypad Data Display
lSection-Toggle Options: The number is displayed when toggle is ON and the number is not displayed when toggle is
OFF. (e.g., toggle options displays: [--3--6--]. Options 3 and 6 are ON, all others are OFF). Pressing keys 1 through 8 will
alternately turn the toggle ON and OFF.
lHEX/Decimal Data: Values that are provided with two defaults, separated by a “/” character, use the format: hexa-
decimal followed by decimal equivalent (e.g., default [0BF5/3061]). Hexadecimal numbers are shown, with all leading
zeroes, to the full field length defined for the number.
Entering HEX values at keypad
To enter HEX values at the keypad, press the * key before entering the HEX value. (e.g., to enter “C” at the keypad, press [*]
[3])
Entering ASCII Characters at keypad
1. Press [*] and use scroll buttons [<] [>] to display “ASCII Entry” on the LCD screen.
2. Press [*] to select ASCII entry mode.
3. Use the [<] [>] scroll keys to display the desired character and press [*] to save and exit ASCII.
4. Repeat the steps above to enter another ASCII character.
HS2016/2016-4/2032/2064/2128 Initial Programming
For detailed information, refer to panel manual section ‘Alternate Communicator Set-up’. These sections must be pro-
grammed at the panel keypad. Enter [*] [8][Installer Code][Section Number] . Record any values that are modified from
their default, in the appropriate worksheets for the panel or communicator.
1. In panel section [377] ‘Communication Variables’, subsection [002] ‘Communication Delays’, sub-subsection [1]
‘Communication Delay’, program 060 (seconds).
2. In panel section [382] ‘Communicator Option 3’ set option [5] ON.
NOTE: If this option is OFF, the yellow status LED on the communicator will indicate ‘Panel Supervision Trouble’ (2 flashes)
and the unit can not be programmed via the PC-LINK cable.
Activating the Communicator with C24 Communications
Installation of the 3G2080(R)E / LE2080(R) or TL2803G(R) E / TL280LE(R) in North America requires activation with C24
Communications in order to operate. Please contact the central station (C24 Communications Master Reseller) to confirm
the required steps to activate /program the communicator.
All communicator options must be programmed via C24 Communications, except the following Ethernet options which can
also be programmed using the keypad or DLS:
l[001] Ethernet IP Address
l[002] Ethernet IP Subnet Mask
l[003] Ethernet Gateway IP Address
11

NOTE: The SIM activation with the carrier can take several hours to complete. It is recommended the activation be com-
pleted prior to arrival on the customer site to avoid possible installation delays.
Once the SIM activation is complete,the communicator will automatically connect and download itsprogramming from C24
Communications.
Communicator Status LEDs
The communicator has four on-board LED indicators. These include one yellow trouble LED, one red network connection
status LED and two green signal strength LEDs. The LED meaning is described in this section.
Yellow Trouble LED
This yellow LED will flash to indicate a trouble on the unit. The number of flashes indicates the type of trouble. See the table
below for the coded flashes and the conditions which will activate the trouble status LED.
Table 5: Yellow Trouble Status LED
# of
Flashes Trouble # of
Flashes Trouble
2 Panel Supervision Trouble 7 Receiver Not Available Trouble
4 Not Applicable 8 Receiver Supervision Trouble
5 Cellular Trouble 9 FTC Trouble
6 Ethernet Trouble 12 Module Configuration Trouble
NOTE: Only the highest priority trouble (2 flashes is the highest priority trouble) is indicated. When this trouble is restored,
the next highest trouble will indicate, if present. This will continue until all troubles have been cleared (yellow LED is
not flashing).
The following paragraphs describe the conditions associated with each trouble:
Panel Supervision Trouble (2 Flashes)
This trouble will be indicated when communication between the communicator module and the panel fails. If the module
can not communicate with the panel (e.g.,lossofpower to the panel) the communicator will send the ‘Panel Absent Trouble
Event’ message to the central station receiver. When communication returns, a ‘Panel Absent Restore Event’ is sent by the
communicator to the central station receiver. The reporting codes are ET0001 for trouble and ER0001 for restore. The
panel absent event alwaysuses the primary receiver account code when communicating to the central station.
NOTE: The panel supervision trouble/restore are internally generated events by the communicator. Trouble is generated if
the communicator misses 6 polls. Trouble is restored on receipt of first poll from the panel.
Cellular Trouble (5 Flashes)
This trouble is indicated for any of the following 4 conditions:
1. Radio Failure: Trouble is indicated after 8 failed attempts to communicate with the cellular radio.
2. SIM Failure: Trouble is indicated after 10 failed attempts to communicate with the SIM.
3. Cellular Network Trouble: Trouble is indicated for loss of the registration to the network provider.
4. Insufficient Signal Strength: Trouble is indicated if calculated average signal strength is too low. (Both green LEDs
are OFF). Trouble will clear when the calculated average signal strength is above minimum (i.e., > CSQ 5).
NOTE: If Option [851][005] Bit 8 is Off, CSQ lessthan or equal to 4 will not trigger Cellular Trouble
Ethernet Trouble (6 Flashes)
This trouble is indicated when an Ethernet link between the transmitter and the local switch or router is absent. This trouble
will also be indicated if the unit fails to get Dynamic HostControl Protocol (DHCP) settings from the DHCP server. (Not active
if Ethernet receivers are not programmed).
Receiver Not Available (7 Flashes)
This trouble is indicated if the unit is not able to successfully initialize with any of the programmed receivers. Unprogrammed
receivers are excluded. This trouble is also indicated if the cellular receiver APNs have not been programmed in sections
[205] and [215].
Receiver Supervision Trouble (8 Flashes)
This trouble is indicated when receiver supervision is enabled and communication between the communicator module and
the receiver fails. Trouble is indicated ifEthernet 1 and/or cellular 1 is supervised and does not receive a heartbeat from the
12

receiver or if cellular is supervised and the unit does not receive an acknowledgment to 4 heartbeatssent to the receiver.
FTC Trouble (9 Flashes)
This trouble is indicated when the unit fails to communicate module eventsto the central station. Trouble is displayed after
the unit has exhausted all communications attempts to all programmed receivers for events generated by the com-
municator.
Module Configuration Trouble (12 Flashes)
This trouble is indicated when the system account code or the receiver account have not been programmed. Disabled
receivers are excluded.
Red Network Connection Status LED
TL2803G(R)E / TL280LE(R)
BLINKING: Indicates communications in progress.
lOnce quickly for outgoing Ethernet transmission.
lTwice quickly to indicate incoming Ethernet ACK/NACK.
OFF: This is the normal state of the red network connection status LED. There are no network connection issues present.
ON:There is a problem with the Ethernet or the cellular network connection. LED will be ON if any of the following occur:
Ethernet cable is not connected, DHCP configuration times out,unit fails to get an IP address from the cellular network, or
Cellular connection has been reset.
(Green LED 1) (Green LED 2) and (Yellow LED) Signal Strength
NOTE: If the yellow LED is flashing, signal strength in table below is not valid.
See Table 7 for troubleshooting flashing yellow LED.
13

Table 6: Radio Signal Strength
Signal
Strength
CSQ
Level
Yellow
LED
Green
LED 2
Green
LED 1
Signal
Level dBm Action Required
Radio
Not
Ready
N/A N/A Alternate
Flashing
Alternate
Flashing N/A
If this status persists and the yellow
LED shows 5 flashes, confirm that the
SIM card is active.
Confirm cellular service is active in
area.
Relocate panel or install external
antenna.
No Signal 0 ON OFF OFF -113 or less Check all antenna connections.
1 Bar 1 - 4
Flashing
See
Note
OFF Flashing -111 ~ -105 Relocate panel or install external
antenna if yellow trouble LED shows
five flashes.
2 Bars 5 - 6 OFF OFF Flashing -103 ~ -101
3 Bars 7 - 10 OFF OFF ON -99 ~ -93
Location is OK. Cellular signal strength
is greater than CSQ 7.
4 Bars 11-
13 OFF Flashing ON -91 ~ -87
5 Bars 14 + OFF ON ON -85 and
higher
NOTE: The communicator will indicate cellular trouble (yellow LED = 5 flashes) if the calculated average CSQ Level is 4 or
less.
Network Activity LEDs - Red and Green (TL2803G(R)E/TL280LE(R) only)
lEthernet Activity: Red LED will blink quickly once for transmit, or twice for receive.
lCellular Activity: Green LED 2 will blink quickly once for transmit, or twice for receive
Communicator Reset/Update
Factory Defaults Reset
Restore the programming options for the communicator to the factory settings by installing a hardware jumper.Perform the
following steps to reset the communicator:
NOTE: A jumper is required on AUDIO/DEFAULT pins 4 and 5 to reset the hardware values.
1. Remove panel front cover.
2. Locate the AUDIO/DEFAULT 5 pin connector on the communicator board (see Figure 3).
3. Apply a jumper to short the hardware default pins 4 and 5.
4. Remove AC and DC power from the panel and then reapply power to the panel.
5. Wait until the two green LEDs on the communicator begin flashing rapidly.
6. Remove the jumper from the hardware default pins 4 and 5 (green LEDs will stop flashing).
7. Replace the panel cover.
NOTE: The communicator has now been reset to the factory default values.
Firmware Update
The firmware of the device can be updated over cellular or Ethernet (remote or local updating):
lWhen the firmware update begins, all 4 LEDs are ON.
lDuring the firmware update process, the LEDs will cycle in a chaser pattern.
lDuring the firmware update process, the chaser pattern will briefly pause and resume again. This indicates firmware
verification check has passed, and application update will begin.
lAfter a successful update, the unit will automatically restart.
lShould the update fail, all 4 LEDs will flash ON, then OFF together at 1 second intervals.
NOTE: If the firmware update fails, restart the communicator by cycling power. For persistent update failures, contact tech-
nical support for assistance.
14

Communicator Troubleshooting
NOTE: For additional details:
lRefer to section [983] for troubleshooting the firmware updates
lRefer to section [984] to view the trouble status
lRefer to section [985] for troubleshooting radio initialization
Table 7: Trouble Indications
Trouble
indication
Trouble
Indicator Digit
Possible
Causes Trouble Possible Solution
No
Indication N/A No Power
lCheckthe power connectionsbetween the panel and the
communicator.
lConfirm PC-LINKcable is properly installed between
communicator and panel.
Yellow LED
– ON Solid N/A No Signal
lConfirm that cellular network service is active in the area.
lEnsure the antenna is securely connected to the radio. Check
antenna stub cable is securely connected to the radio.
lIf an external antenna is used, ensure the antenna is securely
screwed on to the antenna cable connector. Check external
antenna for damage or open/short.
Trouble LED
– 2 Flashes 02
Panel
Supervision
Trouble
lCheck section [382] toggle option[5] is ON (Alternate
Communicator Enabled).
lEnsure the PC-LINK cable between the panel and communicator
is connected properly (not reversed) and is securely in place.
Yellow LED
– 5 Flashes 05 Cellular Trouble
lConfirm that cellular service is available and active in the area.
lCheck all antenna connections.
lEnsure average radio signal strength is CSQ 5 or higher. (See
Table 7 ).
lEnsure the SIM card is properly inserted into the SIM card holder.
lEnsure the SIM card has been activated (could take up to 24 hrs
after install).
lIf this trouble persists, relocate the panel (and communicator) or
install an external antenna extension kit.
Yellow LED
– 6 Flashes 06 Ethernet Trouble
lCheck with the ISP to confirm Internet service is active in the area.
lEnsure the Ethernet cable is securely inserted into the RJ45 jack of
the communicator and the hub/router/switch.
lCheck the link light on the hub/router/switch is ON. If link light is
OFF, start the hub/router/switch.
lIf DHCP is used, ensure that the unit has an assigned IP address
from the server. In Section [851] [992] verify a valid IPaddress is
programmed. If not, contact the network administrator.
lIf problem persists, replace the Ethernet cable and RJ45
connector.
Yellow LED
– 7 Flashes 07 Receiver Not
Available
lEnsure that the Ethernet path has Internet connectivity.
lIf using a static IP address, confirm that the gateway and subnet
mask are entered correctly.
lIf the network has a firewall, ensure the network has the
programmed outgoing ports open (defaultUDP port3060 and
port3065).
lEnsure that all the receivers are programmed for DHCP or have
the proper IPaddress and port number.
lEnsure the cellular receiver APNs have been programmed with
the access point name provided by the cellular provider.
lIf Common Mode is used, and only one path is initialized while the
other path is not successful, generate a manual test transmission
over both paths or power cycle the communicator to recover the
‘Receiver Not Available’ trouble.
15

Trouble
indication
Trouble
Indicator Digit
Possible
Causes Trouble Possible Solution
Yellow LED
– 8 Flashes 08
Receiver
Supervision
Trouble
lThis trouble is indicated when supervision is enabled and the unit
is not able to successfully communicate with the receiver.
lIf this trouble persists, contact the central station.
Yellow LED -
9 Flashes 09 FTC Trouble
lThe unit has exhausted all communications attempts to all
programmed receivers for events generated by the communicator.
lRestart the system, if trouble persists, contact the dealer.
Yellow LED
– 12 Flashes 0C
Module
Configuration
Trouble
lThis indication appears when section [021] system account code
or sections [101], [111], [201], and [211] receiver account code
have not been programmed. Ensure that a valid account code has
been entered in these sections.
All LEDs
flashing
together
N/A BootLoader
Failed
lDisconnect power, then reconnect power to the communicator
module.
Red and
Yellow LEDs
flashing
together
N/A Initialization
Sequence
lThe unit is still initializing, please wait while the unit gets its
programming and establishes a connection to all programmed
receivers.
NOTE: This process may take several minutes to complete.
Only Green
LEDs
flashing
N/A Hardware Default
Jumper
lThe hardware default jumper is installed and must be removed.
See Figure 3.
Green LEDs
alternating N/A
Radio Reset or
Radio
Initialization
lIf this status persists and the yellow LED shows 5 flashes, confirm
that the SIM card is active.
16

Limited Warranty
DigitalSecurityControls warrantsthe originalpurchaserthat for a period of twelve
months fromthe date of purchase, the product shallbe free of defectsin materials
and workmanship under normal use. During the warranty period, Digital Security
Controlsshall, at itsoption, repairor replace any defective product upon return of
the product to its factory, at no charge for labour and materials. Any replacement
and/or repaired parts are warranted for the remainder of the original warranty or
ninety(90) days, whicheveris longer. The originalpurchaser must promptly notify
DigitalSecurity Controls in writing that there is defect in material or workmanship,
such written notice to be received in allevents prior to expiration of the warranty
period. There is absolutelyno warranty on software and all software products are
sold asa user license under the terms of the software license agreement included
with the product. The Customerassumes allresponsibilityfor the proper selection,
installation, operation and maintenance of any products purchased from DSC.
Customproductsare onlywarranted to the extent that theydo not function upon
delivery. In such cases, DSC can replace or credit at itsoption.
International Warranty
The warranty for international customers is the same as for any customer within
Canada and the United States, with the exception that Digital Security Controls
shallnot be responsible forany customsfees, taxes, or VATthat may be due.
Warranty Procedure
To obtain service under thiswarranty, please return the item(s) in question to the
point of purchase. Allauthorized distributorsand dealershave a warranty program.
Anyone returning goods to Digital Security Controls must first obtain an author-
ization number. Digital SecurityControls will notaccept any shipment whatsoever
forwhich priorauthorizationhasnotbeen obtained.
Conditions to Void Warranty
Thiswarranty applies onlyto defects in parts and workmanship relating to normal
use. It does not cover:
ldamage incurredinshippingorhandling;
ldamage caused bydisaster such asfire, flood, wind, earthquake orlightning;
ldamage due to causesbeyond the controlof DigitalSecurityControls such as
excessive voltage, mechanicalshockor water damage;
ldamage caused byunauthorized attachment, alterations,modificationsor
foreign objects;
ldamage caused byperipherals (unlesssuch peripheralswere supplied by
DigitalSecurityControls);
ldefectscaused byfailure to provide a suitable installation environment for the
products;
ldamage caused byuse of the productsforpurposes otherthan those for
which it wasdesigned;
ldamage fromimpropermaintenance;
ldamage arisingoutofanyotherabuse,mishandlingorimproperapplication
of the products.
Items Not Covered by Warranty
In addition to the items which void the Warranty, the following items shall not be
covered byWarranty: (i) freight cost to the repair centre; (ii)products which are not
identified with DSC'sproduct labeland lot numberorserialnumber; (iii) products dis-
assembled orrepaired in such a manner asto adverselyaffect performance or pre-
vent adequate inspection or testing to verify any warranty claim. Access cards or
tagsreturned for replacement underwarranty willbe credited orreplaced at DSC's
option. Productsnot covered by thiswarranty, or otherwise out of warranty due to
age, misuse, or damage shall be evaluated, and a repair estimate shall be
provided. No repairwork will be performed untila valid purchase order is received
from the Customer and a Return Merchandise Authorisation number (RMA) is
issued byDSC'sCustomer Service.
DigitalSecurityControls’sliabilityfor failure to repairthe product under this warranty
after a reasonable number of attempts will be limited to a replacement of the
product, as the exclusive remedyfor breach of warranty. Under no circumstances
shallDigital SecurityControls be liable forany special, incidental, or consequential
damagesbased upon breach of warranty, breach of contract, negligence, strict
liability, or any other legal theory. Such damagesinclude, but are not limited to, loss
ofprofits, lossof the product or anyassociated equipment, cost of capital, cost of
substitute or replacement equipment, facilitiesor services, down time, purchaser’s
time, the claimsof third parties,including customers,and injuryto property. The laws
of some jurisdictionslimit or do not allow the disclaimer of consequentialdamages. If
the laws of such a jurisdiction applyto any claimby or againstDSC, the limitations
and disclaimers contained here shall be to the greatest extent permitted by law.
Somestates do not allow the exclusion or limitation of incidental or consequential
damages,so that the above maynot applyto you.
Disclaimer of Warranties
This warranty contains the entire warranty and shall be in lieu of any
and all other warranties, whether expressed or implied (including all
implied warranties of merchantability or fitness for a particular purpose)
And of all other obligations or liabilities on the part of Digital Security
Controls Digital Security Controls neither assumes responsibility for,
nor authorizes any other person purporting to act on its behalf to modify
or to change this warranty, nor to assume for it any other warranty or
liability concerning this product.
This disclaimer of warranties and limited warranty are governed by the
laws of the province of Ontario, Canada.
DigitalSecurity Controls recommendsthat the entire system be completely tested
on a regular basis.However, despite frequent testing, and due to, but not limited
to, criminaltampering or electricaldisruption, it ispossible for thisproduct to failto per-
formasexpected.
Installer’s Lockout
Anyproducts returned to DSC which have the Installer’sLockout option enabled
and exhibitno other problemswillbe subject to a service charge.
Out of Warranty Repairs
DigitalSecurityControls willat itsoption repair orreplace out-of-warranty products
which are returned to its factory according to the following conditions. Anyone
returning goodsto DigitalSecurityControls mustfirstobtain an authorization num-
ber. Digital Security Controls will not accept any shipment whatsoever for which
priorauthorizationhasnotbeen obtained.
Productswhich DigitalSecurityControlsdeterminesto be repairable willbe repaired
and returned. A set fee which Digital Security Controls has predetermined and
which maybe revised fromtime to time, willbe charged for each unit repaired.
Products which Digital Security Controls determines not to be repairable will be
replaced bythe nearest equivalent product available at that time. The current mar-
ket price of the replacement product willbe charged for each replacement unit.
EULA
IMPORTANT - READ CAREFULLY: DSC Software purchased with or without
Products and Components is copyrighted and is purchased under the following
license terms:
ThisEnd-UserLicense Agreement (“EULA”)isa legalagreement between You (the
company, individual or entity who acquired the Software and any related Hard-
ware)and DigitalSecurityControls, a division of Tyco SafetyProductsCanada Ltd.
(“DSC”),the manufacturerof the integrated securitysystems and the developer of
the softwareand anyrelated productsorcomponents (“HARDWARE”)which You
acquired.
If the DSC software product (“SOFTWARE PRODUCT”or “SOFTWARE”) is inten-
ded to be accompanied by HARDWARE, and is NOT accompanied by new
HARDWARE, You may not use, copy or install the SOFTWARE PRODUCT. The
SOFTWAREPRODUCT includescomputer software, and mayinclude associated
media, printed materials, and “online” or electronicdocumentation.
Anysoftware provided along with the SOFTWARE PRODUCT that is associated
with a separate end-user license agreement is licensed to You under the terms of
that license agreement.
By installing, copying, downloading, storing, accessing or otherwise using the
SOFTWAREPRODUCT, You agree unconditionally to be bound by the terms of
this EULA,even ifthisEULAisdeemed to be a modification of anypreviousarrange-
ment orcontract. If You do not agree to the terms of this EULA, DSC is unwilling to
license the SOFTWAREPRODUCTto You, and You have no right to use it.
SOFTWARE PRODUCT LICENSE
The SOFTWAREPRODUCTisprotected bycopyright lawsand international copy-
right treaties, as well as other intellectual property laws and treaties. The
SOFTWAREPRODUCT islicensed, not sold.
1. GRANT OF LICENSE This EULA grants You the following rights:
Software Installation and Use - For each license You acquire, You may have
onlyone copyof the SOFTWAREPRODUCTinstalled.
Storage/Network Use - The SOFTWARE PRODUCT may not be installed,
accessed, displayed, run, shared or used concurrently on or from different com-
puters, including a workstation, terminal or other digitalelectronic device (“Device”).
In otherwords, ifYou have severalworkstations,You willhave to acquire a license
foreach workstation where the SOFTWAREwillbe used.
Backup Copy -You maymake back-up copiesof the SOFTWAREPRODUCT, but
You may only have one copy perlicense installed at any given time. You may use
the back-up copysolely for archivalpurposes. Except as expresslyprovided in this
EULA, You may not otherwise make copies of the SOFTWAREPRODUCT, includ-
ing the printed materialsaccompanying the SOFTWARE.
2. DESCRIPTION OFOTHER RIGHTSAND LIMITATIONS
Limitations on Reverse Engineering, Decompilation and Disassembly -
You may not reverse engineer, decompile, or disassemble the SOFTWARE
PRODUCT, except and onlyto the extent that such activityisexpresslypermitted by
applicable law notwithstanding this limitation. You may not make any changes or
modificationsto the Software, withoutthe written permission of an officerof DSC.
You may not remove any proprietary notices, marks or labels from the Software
Product. You shall institute reasonable measures to ensure compliance with the
terms and conditionsof thisEULA.
Separation of Components - The SOFTWAREPRODUCTis licensed asa single
product. Its component parts may not be separated for use on more than one
HARDWAREunit.
Single INTEGRATED PRODUCT - If You acquired this SOFTWARE with
HARDWARE, then the SOFTWAREPRODUCT is licensed with the HARDWAREas
a single integrated product. In this case, the SOFTWAREPRODUCT mayonly be
used with the HARDWAREasset forth in thisEULA.
17

Rental -You maynot rent, lease orlend the SOFTWAREPRODUCT. You may not
make it available to othersor postit on a server orweb site.
Software Product Transfer -You may transferall of Yourrights underthis EULA
only as part of a permanent sale or transfer of the HARDWARE, provided You
retain no copies,You transfer all of the SOFTWAREPRODUCT (including all com-
ponent parts,the media and printed materials, any upgradesand thisEULA), and
provided the recipient agrees to the terms of this EULA. If the SOFTWARE
PRODUCTis an upgrade, any transfer must also include all prior versions of the
SOFTWAREPRODUCT.
Termination -Without prejudice to any otherrights, DSCmayterminate this EULA
if You fail to comply with the termsand conditions of this EULA. In such event, You
must destroy all copies of the SOFTWARE PRODUCT and all of its component
parts.
Trademarks - This EULA doesnot grant You any rights in connection with any
trademarks or service marks of DSC or its suppliers.
3. COPYRIGHT
Alltitle and intellectual propertyrightsin and to the SOFTWAREPRODUCT (includ-
ing but not limited to any images, photographs, and text incorporated into the
SOFTWAREPRODUCT), the accompanying printed materials, and any copies of
the SOFTWAREPRODUCT, are owned byDSC or itssuppliers. You maynot copy
the printed materialsaccompanying the SOFTWARE PRODUCT. All title and intel-
lectualpropertyrightsin and to the content which maybe accessed through use of
the SOFTWAREPRODUCTare the propertyof the respective content owner and
may be protected by applicable copyright or other intellectual property laws and
treaties. ThisEULAgrantsYou no rightsto use such content. Allrightsnot expressly
granted underthisEULAare reserved byDSC and itssuppliers.
EXPORT RESTRICTIONS - You agree that You will not export or re-export the
SOFTWARE PRODUCT to any country, person, or entity subject to Canadian
export restrictions.
CHOICE OFLAW - This Software License Agreement is governed by the laws of
the Province of Ontario, Canada.
ARBITRATION - All disputes arising in connection with this Agreement shall be
determined by finaland binding arbitration in accordance with the Arbitration Act,
and the partiesagree to be bound by the arbitrator’s decision. The place of arbit-
ration shallbe Toronto, Canada, and the language of the arbitration shallbe Eng-
lish.
LIMITED WARRANTY
NO WARRANTY - DSC PROVIDES THE SOFTWARE “AS IS” WITHOUT
WARRANTY. DSC DOES NOT WARRANT THAT THE SOFTWARE WILL MEET
YOUR REQUIREMENTS OR THAT OPERATION OF THE SOFTWARE WILL BE
UNINTERRUPTED OR ERROR-FREE.
CHANGES IN OPERATING ENVIRONMENT -DSC shall not be responsible for
problemscaused bychanges in the operating characteristics of the HARDWARE,
or for problems in the interaction of the SOFTWARE PRODUCT with non-DSC-
SOFTWAREorHARDWAREPRODUCTS.
LIMITATION OF LIABILITY; WARRANTY REFLECTS ALLOCATION OF RISK
-IN ANYEVENT, IF ANYSTATUTEIMPLIESWARRANTIESOR CONDITIONSNOT
STATED IN THISLICENSE AGREEMENT, DSC’SENTIRELIABILITYUNDER ANY
PROVISION OF THIS LICENSE AGREEMENT SHALL BE LIMITED TO THE
GREATER OF THE AMOUNT ACTUALLY PAID BY YOU TO LICENSE THE
SOFTWAREPRODUCT AND FIVE CANADIAN DOLLARS(CAD$5.00). BECAUSE
SOMEJURISDICTIONS DO NOTALLOW THE EXCLUSION OR LIMITATION OF
LIABILITY FOR CONSEQUENTIAL OR INCIDENTAL DAMAGES, THE ABOVE
LIMITATION MAYNOTAPPLYTO YOU.
DISCLAIMER OF WARRANTIES - THIS WARRANTY CONTAINS THE ENTIRE
WARRANTYAND SHALL BE IN LIEU OF ANY AND ALL OTHER WARRANTIES,
WHETHER EXPRESSED OR IMPLIED (INCLUDING ALL IMPLIED WARRANTIES
OFMERCHANTABILITY OR FITNESSFOR A PARTICULAR PURPOSE) AND OF
ALL OTHER OBLIGATIONSOR LIABILITIESON THEPART OF DSC. DSC MAKES
NO OTHER WARRANTIES. DSC NEITHER ASSUMES NOR AUTHORIZES ANY
OTHERPERSON PURPORTING TO ACT ON ITS BEHALF TO MOD8IFY OR TO
CHANGETHISWARRANTY,NOR TOASSUMEFOR ITANYOTHER WARRANTY
OR LIABILITYCONCERNINGTHISSOFTWAREPRODUCT.
EXCLUSIVE REMEDY AND LIMITATION OF WARRANTY - UNDER NO
CIRCUMSTANCES SHALL DSC BE LIABLE FOR ANY SPECIAL, INCIDENTAL,
CONSEQUENTIAL OR INDIRECT DAMAGES BASED UPON BREACH OF
WARRANTY,BREACH OF CONTRACT, NEGLIGENCE, STRICT LIABILITY, OR
ANY OTHER LEGAL THEORY. SUCH DAMAGES INCLUDE, BUT ARE NOT
LIMITED TO, LOSSOF PROFITS, LOSSOFTHE SOFTWAREPRODUCT OR ANY
ASSOCIATED EQUIPMENT, COST OF CAPITAL, COST OF SUBSTITUTE OR
REPLACEMENT EQUIPMENT, FACILITIES OR SERVICES, DOWN TIME,
PURCHASERS TIME, THE CLAIMS OF THIRD PARTIES, INCLUDING
CUSTOMERS, AND INJURYTO PROPERTY.
DSC recommends that the entire systembe completelytested on a regular basis.
However, despite frequent testing, and due to, but not limited to, criminal tam-
pering orelectrical disruption, it ispossible forthis SOFTWAREPRODUCT to fail to
performasexpected.
Regulatory Information
Modification Statement
Digital Security Controls has not approved any changes or modifications to this
device bythe user. Any changesor modificationscould void the user’sauthority to
operatethe equipment.Digital SecurityControls n’approuve aucune modification
apportée à l’appareilpar l’utilisateur, quelle qu’en soit la nature. Tout changement
ou modification peuvent annulerle droit d’utilisation de l’appareilpar l’utilisateur.
Interference Statement
Thisdevice complieswith Part 15 of the FCC Rules and Industry Canada licence-
exempt RSS standard(s). Operation issubject to the following two conditions: (1)
thisdevice may not cause interference, and (2) this device must accept any inter-
ference, including interference that maycause undesired operation of the device.
Le présent appareil est conforme aux CNR d'Industrie Canada applicables aux
appareils radio exempts de licence. L'exploitation est autorisée aux deux con-
ditionssuivantes: (1) l'appareilne doit pasproduire de brouillage, et (2) l'utilisateur
de l'appareildoit acceptertout brouillage radioélectrique subi,même sile brouillage
est susceptible d'en compromettre le fonctionnement.
Wireless Notice
Thisequipment complies with FCC and IC radiation exposure limitsset forth for an
uncontrolled environment. The antenna should be installed and operated with min-
imumdistance of 20 cmbetween the radiatorand your body. Thistransmitter must
not be co-located or operating in conjunction with any other antenna or trans-
mitter.
Cet appareilest conforme auxlimitesd'exposition aux rayonnements de la IC pour
un environnement non contrôlé. L'antenne doit être installé de façon à garder une
distance minimale de 20 centimètres entre la source de rayonnements et votre
corps. L'émetteur ne doit pas être colocalisé nifonctionner conjointement avec à
autre antenne ou autre émetteur.
Antenna gain mustbe below / Gain de l'antenne doitêtre ci-dessous:
Frequency
Band/Bande de
fréquence
TL2803GRE, TL2803GE,
3G2080RE, 3G2080E
TL280LE, TL280LER,
LE2080, LE2080R
GSM850 / FDD V 2.26 dBi -
PCS1900 / FDD II 2.41 dBi -
LTEB2 - 2.76 dBi
LTEB4 - 2.82 dBi
LTEB5 /B12 / B13 - 2.45 dBi
FCC Class B digital device notice
Thisequipment has been tested and found to comply with the limits fora Class B
digitaldevice, pursuantto part 15 of the FCC Rules.These limitsare designed to
provide reasonable protection againstharmful interference in a residential install-
ation. This equipment generates uses and can radiate radio frequency energy
and, if not installed and used in accordance with the instructions, maycause harm-
fulinterference to radio communications.However, there is no guarantee that inter-
ference will not occur in a particular installation. If this equipment does cause
harmfulinterference to radio or television reception, which can be determined by
turning the equipment off and on, the user isencouraged to tryto correctthe inter-
ference byone ormore of the following measures:
-Reorient orrelocate the receiving antenna.
-Increase the separation between the equipment and receiver.
-Connect the equipment into an outlet on a circuit different fromthat to which the
receiverisconnected.
-Consultthe dealeroran experienced radio/TVtechnician forhelp
CAN ICES-3 (B) / NMB-3 (B)
TL2803G (R) E - EU /3G2080 (R) E-
EU/TL280(R)E LE2080(R)/TL280LE(R)
FCC ID:F5316TL2803GRE FCC ID:F5317TL280LER
IC: 160A-TL2803GRE IC:160A-TL280LER
Notes for EN50131-1:2006/A1:2009 Compliant installations:
ModelsTL2803G(R)E-EU/3G2080 (R)E-EU/TL280(R)E are an SPTType Y - the
module is mounted within CIE or PS housing and it receivespower from the com-
patible CIE orPower Supplysource that are in compliance with EN50131-6:2008
Type A requirements for a Grade 2, Class II application. This product has no
replacement parts and software programmable options are accessible at level 3
(installer mode), section [851].
The TL2803G(R)E-EU/3G2080 (R)E-EU/TL280(R)E connectsto compatible DSC
alarm control panels using the DSC proprietary serial interface and protocol PC-
Link(converted also to RS- 422).The module operatesin pass-through mode and
it does acknowledge the alarm to the compatible control panel after an acknow-
ledgement hasbeen received fromthe compatible alarmreceiver.
1. The TL2803G(R)E-EU/3G2080(R)E-EU/TL280(R)Emodule ismonitored
bythe controlpaneland itisprogrammed via the programming menu (* 8,
section [851] in the controlpanel.The interface isconnected to the PC-
Linkbusasshown in the diagramincluded in thismanual.
18

2. The HSPA3GCellularpath isimmune to conducted and radiated RF fields
with levelsup to 10V/mastested per EN50130- 4 Standard.
3. The TL2803G(R)E-EU/3G2080(R)E-EU/TL280(R)Emodule conforms
with radiated emissionslevelsforClassBequipment asperstandards
EN61000-6-3/EN55022/CISPR22.
4. The TL2803G(R)E-EU/3G2080(R)E-EU/TL280(R)Emodule uses
AES128 encryption and heartbeat supervision forHSPA3GCellularcom-
munication pathsand itmeetssecuritylevelsS2 asper EN50136-2:2013.
It also usesauthentication foreach message exchanged with the com-
patible receiverequipment at ARC and it meetslevelI2 forinformation
security.
5. The 3G2080(R)E-EUmodule hasonlyone communication path:
HSPA3GCellularcommunication path using 900/1800/2100MHzPublic
Cellular Network.The HSPA3GCellularcommunication path that can be
used in a standalone mode in conjunction with a DSC alarmsystem(com-
patibleDSCalarmcontrolpanelmodels:HS2128/064/032/016). Thesup-
ported ATSconfiguration is: customcategoryC.
6. The TL280(R)Emodule hasonlyone communication path: Ethernet com-
munication path using Internet. The communication path that can be used
in a standalone mode in conjunction with a DSC alarmsystem(compatible
DSC alarmcontrolpanelmodels:HS2128/064/032/016). The supported
ATS configuration is: customcategoryC.
7. The TL2803G(R)E-EUmodule hastwo communication paths:HSPA3G
Cellular communication path using 900/1800/2100MHzPublic CellularNet-
workand Ethernet communication path using Internet. The com-
munication pathscan be used in a standalone mode in conjunction with a
DSC alarmsystem(compatible DSC alarmcontrolpanelmodels:
HS2128/064/032/016). The supported ATSconfiguration is: customcat-
egoryC.
8. TL2803G(R)E-EU/3G2080(R)E-EU/TL280(R)Ehasbeen tested forcom-
pliance in conjunction with the following applicable standards: EN50136-
1:2012,EN50136-2:2013,EN50131-10:2014,ATSconfiguration:C.
ForEN50131- 1:2006/A1:2009 compliant installations, the following programming
optionsshallbe set asdescribed.
Supervision Heartbeat: shallbe set to 180 seconds
NOTE:The compatible receiverat ARC location shallhave supervision window pro-
grammed for 180 seconds. TL2803G (R)E-EU/3G2080 (R)E-EU/TL280(R)E has
been certified by TELEFICATION in accordance with EN50131-1:2006/A1:2009,
EN50131-10:2014requirementsforGrade 2,ClassIIandEN50136-2:2013Con-
figuration: C
ATS Custom Category C Level
EN50136-1:2012 AnnexD Table D.1 D3
EN50136-1:2012 AnnexD Table D.2 M3
EN50136-1:2012 AnnexD Table D.3 T4
EN50136-1:2012 AnnexD Table D.4 A4 (Depending on cellularcarrierused)
EN50136-1:2012 AnnexD Table D.5
S2 (use AES- 128 and
authentication/sequentialinformation in
each message transmitted to the SG
receiver)
EN50136-1:2012 AnnexD Table D.6 I2 (use AES-128 encryption)
EN50136-1:2012Table1
Use single communication path for
models 3G2080 (R) E- EU (cellular
network), TL280 (R) E (Ethernet port)
and two communication pathsfor model
TL2803G(R)E-EU (cell/Ethernet).
EN50136-1:2012 Table 4 ATSfailure reported to ARC
EN50136-1:2012Table5
ATS failure reported to AS (DSC
compatible control panel
HS2128/HS2064/HS2032/HS2016)
EN50136-1:2012Table6 There is no recording of availability
failure
EN50136-2:2013 Table 1 No logging function provided
EN50136-2:2013Table2 No memory provided for logging
function
EN50136-2:2013 Table 3 ATSfailure reported to ARC
SIMPLIFIED EU DECLARATION OF CONFORMITY
Hereby, Tyco SafetyProductsCanada Ltd declaresthat the radio equipment type
isin compliance with Directive 2014/53/EU. The full text of the EU declarations of
conformityfor the models mentioned below are available at the following internet
addresses:
TL2803G(R)E-EU - http://dsc.com/pdf/1605003
3G2080(R)E-EU -http://dsc.com/pdf/1605004
Frequency Band Maximum Power
EGSM900 890.0MHz- 914.8MHz Class4 (2W)@ 900MHz,GSM
EGSM900 880.2MHz-889.8MHz Class1(1W) @ 1800MHz, GSM
DCS1800 1710.2MHz-1784.8MHz ClassE2 (0.5W)@ 900MHz,EDGE
WCDMA (Band VIII) 882.4MHz -
912.6MHz ClassE2 (0.4W)@ 1800MHz, EDGE
WCDMA2100 (Band I) 1922.4MHz -
1977.6MHz
Class 3 (0.25W) @ 900/2100MHz,
WCDMA
Onlymodels TL2803GRE-EU, TL2803GE- EU, 3G2080RE-EU, 3G2080E-EU are
CEcompliant.
European single point of contact: Tyco Safety Products, Voltaweg 20, 6101 XK
Echt, Netherlands
UL/ULC Installation Requirements
NOTE:Forequipment used at the protected premises and intended to facilitate IP
communications (hubs, routers, NIDs, Digital Subscriber Line (DSL), cable
modems),24 hourbackup poweris required. Where such cannot be facilitated, a
secondary(back-up)communication channelisrequired.
Domain Name Service (DNS) programming is not permitted in UL1610
listed systems.
Technical Specifications
The input voltage to the Communicatorcan be drawn from the Underwriters Lab-
oratories/UnderwritersLaboratories Canada (UL/ULC) listed controlpanel.
Notes for using Private, Corporate, and High Speed Data Networks:
Networkaccessand domain accesspoliciesshallbe set to restrictunauthorized net-
workaccess, and spoofing or Denial of Service (DoS) attacks. Select an Internet
Service Provider (ISP)that has redundant servers/systems, back-up power, routers
with firewalls enabled, and methods to identify and protect against DoS attacks
(e.g., via spoofing).
Notes for using Public Switched and Cellular Data Networks:
Communication channelsshallbe facilitated such that the communicatorwill restrict
unauthorized access, which could otherwise compromise security. The com-
municatorshallbe located in a secured area.
• For ULC Residential Fire and Burglary applications the TL2803G (R)
E/3G2080(R)E/TL280(R)E/LE2080(R)/TL280LE(R) can be used asprimary com-
munication channelvia either cellularorEthernet oras a back-up in conjunction with
the Digital Alarm Communicator Transmitter (DACT). Test transmission every 24
hoursshallbe enabled oneach channel.
• For ULC Commercial Fire and Burglary applications the TL2803G (R)
E/3G2080(R)E/TL280(R)E/LE2080 (R)/TL280LE(R) can be used as a passive
communication module with the following securitylevels:
lP1(eachchannelcellularorEthernetisindependent)
lP2 (cellular and Ethernet in back-up configuration, panelsection [851][005]
toggle option [5] OFF).
lP3 (cellular and Ethernet in redundant configuration, panelsection [851]
[005] toggle option [5] ON).
The communicator can also be used as an active communication system with the
securitylevelsA1-A4 (each channelcellular or Ethernet independent or together in
a back-up/redundant configuration). For active line security systems AES128 bit
encryption shallbe enabled (at the monitoring station receiver)and the supervision
heartbeatrate shallbe set as90 seconds(panelsection [851][004] = 005A/90).
The supervision window at the SignalReceiverCenter (SRC)'sreceivershallbe pro-
grammed asmaximumof 180 (00B4/180)seconds.
NOTE: For ULC commercial fire passive communication, encryption shall be
enabled,
• For UL Residential Fire and Burglary applications the TL2803G (R)
E/3G2080R/TL280(R)E/LE2080(R)/TL280LE(R)can be used asthe primarycom-
munication channel via either cellular or Ethernet, or asa back-up in conjunction
with the DACT (30 daytest transmission isrequired on each channel).
• For UL Commercial Burglary applications the TL2803G(R)E/ 3G2080R /
TL280(R)E / LE2080(R) / TL280LE(R) can be used asdual signalling line com-
munication system (cellular and Ethernet channels used in redundant con-
figuration),standard line securityand asencrypted line security.
• The supervision heartbeat shall be enabled (panel section [851][005] toggle
option [1] (Ethernet)and/or toggle option [2] (cellular) shallbe ON),toggle option
[3] (supervision type)shallbe ON and the supervision heartbeat rate shallbe selec-
tedas135 (0087/135)seconds.Option [004]= 0087. Thesupervisionwindow at
the supervising station shall be maximum200 (00C8/200)seconds.For encrypted
line security systemsthe encryption AES128 bit shall be enabled at the monitoring
station receiver.
• For UL Commercial Burglary installations, the TL2803G (R)E/3G2080 (R)
E/TL280(R)E/LE2080 (R)/TL280LE(R) is listed asa primary (sole) communication
means(heartbeat must be enabled) or for supplementary (back-up) use in con-
junction with a Plain Old Telephone Service (POTS)line dialer. When the heartbeat
transmission over the Ethernet or cellular networkis enabled, using the TL2803G
(R)E/3G2080 (R)E/TL280 (R) E with a compatible control unit listed for stand-
ard/encrypted line security, it can provide line securityfor the alarmsystemover the
primaryline.
•The TL2803G(R)E/3G2080(R)E/TL280(R)E/LE2080(R)/TL280LE(R)isalso suit-
able to be used with a compatible control unit listed for dual line security trans-
mission when used in conjunction with a DACT ora Public Switched Data Network
(PSDN) transmitter, where the PSDN provides the line security and is the primary
line. In this mode, alarmsignals are required to be sent simultaneously over both
communication methods.
19

© 2018 Tyco Security Products. All Rights Reserved.
Tech Support: 1-800-387-3630 (Canada & U.S.) or 905-760-3000
www.dsc.com
The trademarks, logos, and service marksdisplayed on thisdocument are registered in the United States[orothercountries]. Anymisuse of the trademarksis strictly
prohibited and Tyco will aggressivelyenforce its intellectualpropertyrights to the fullest extent of the law, including pursuitof criminalprosecution wherever neces-
sary. Alltrademarksnot owned byTyco are the property of theirrespective owners,and are used with permission orallowed underapplicable laws.
Product offeringsand specificationsare subject to change without notice. Actualproductsmayvaryfromphotos. Not allproducts include allfeatures. Availability var-
ies byregion; contact yoursalesrepresentative.
This manual suits for next models
4
Table of contents
Languages:
Other DSC Cell Phone manuals