DYNOWARE RT - 224 DYNOS
98200047.03
INSTALL YOUR SOFTWARE
Quick Start Guide
2191 Mendenhall Drive, North Las Vegas, NV 89081 - 800-992-4993 - DYNOJET.COM
© 2014-2019 DYNOJET RESEARCH ALL RIGHTS RESERVED
1. Go to www.dynojet.com. From the top navigation menu, select Support>Downloads.
2. Click the Power Core Software Download banner to download the Power Core Software Suite.
3. Double-click the saved file to begin installation. Follow the on-screen prompts.
4. Double-click the Power Core program icon installed on your desktop or on your start menu. This will
run the Dynojet Application Launcher.
5. Click WinPEP 8 Dyno Control from the Application Launcher.
6. Connect to DynoWare RT Control. See page 2 for more information.
7. Turn on the DynoWare RT main module. Allow several minutes for your computer to
connect to the main module.
Nitti Grotesk Normal 9 pt
step number Bold 9 pt
HobokenHIgh-
SansSerif 30
Trade Gothic LT Std
Bold Condensed No 20, 14pt
PUSH THE LIMIT
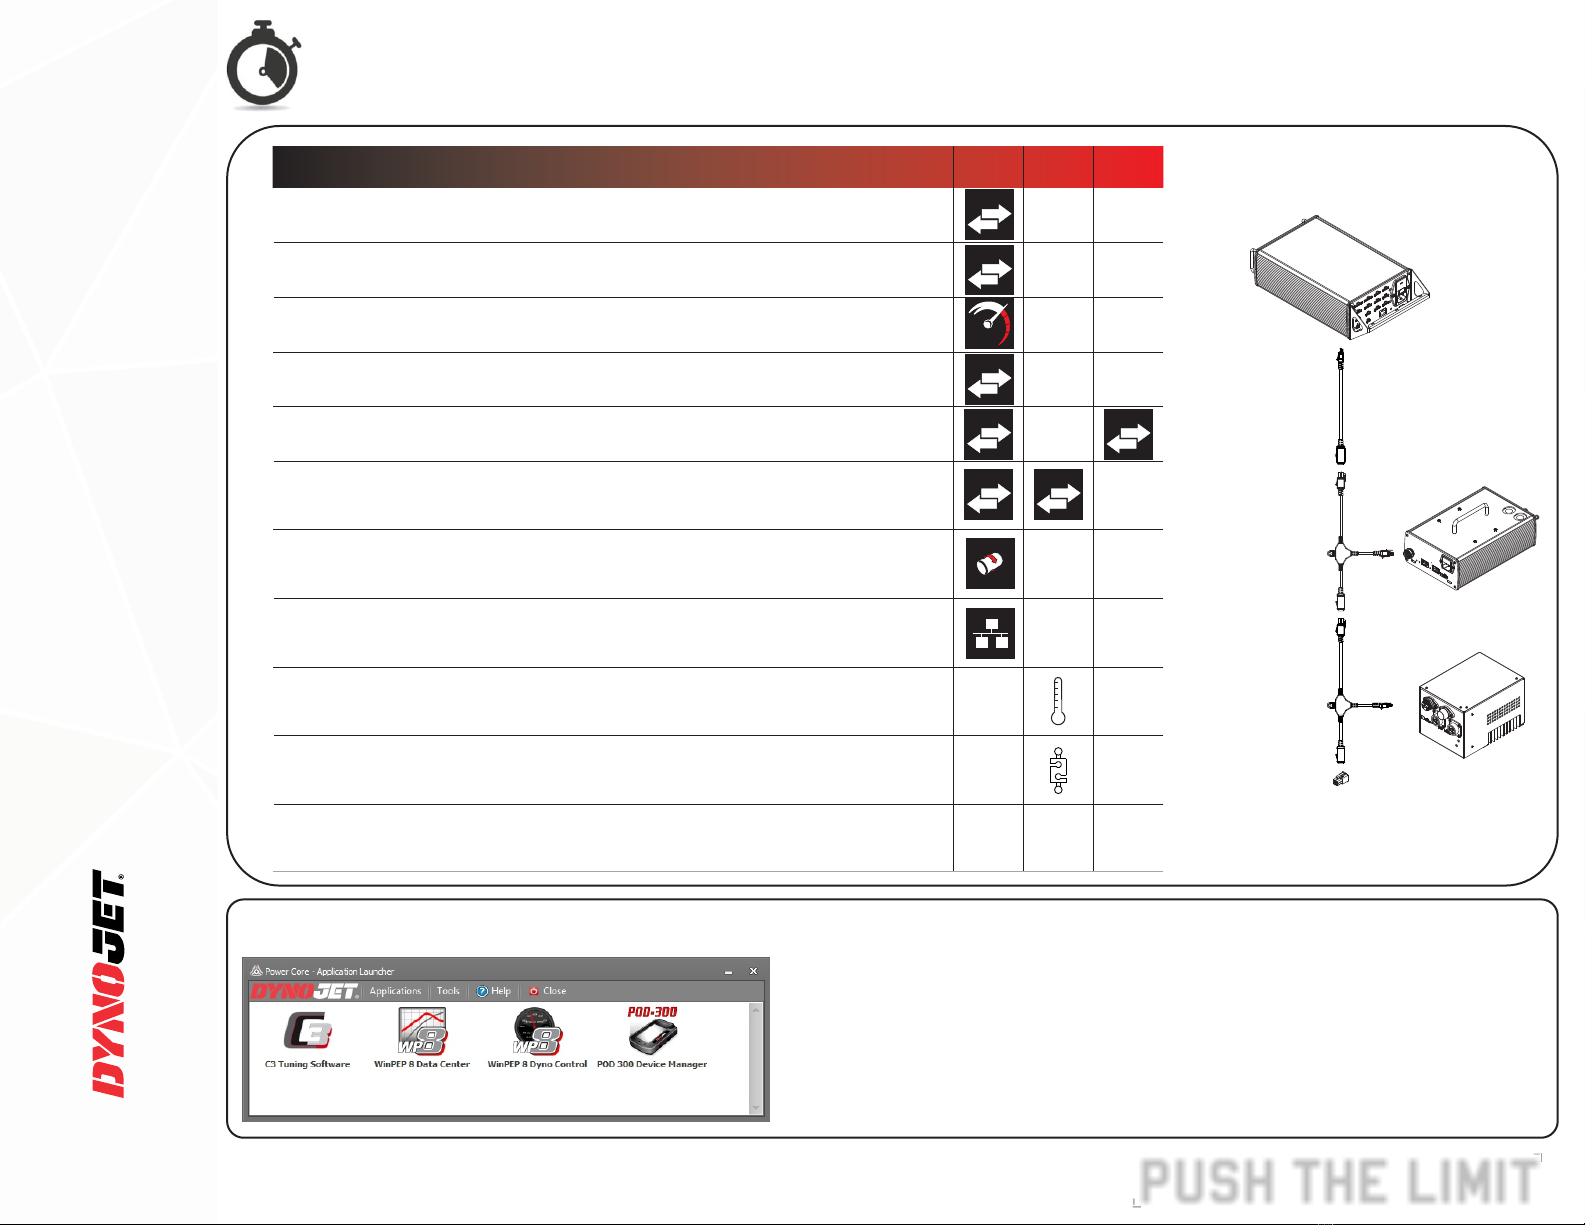
DynoWare RT
main module
Eddy Current
Brake (ECB) driver
Air Fuel Ratio
(AFR) module
CAN adapter cable
P/N 76950807
CAN dyno user cable
P/N 76950798
CAN control cable
P/N 76950791
CAN termination plug
Connect the six-pin speed/brake cable to position 1 on the DynoWare RT module.
Note: For 4WD dynos, connect the speed/brake cable from the stationary dyno to
position 1 and connect the speed/brake cable from the moveable dyno to position 2.
Connect the ethernet cable from the ethernet port on the DynoWare RT module to
your Local Area Network or directly to the network port on your computer. Refer to
your dyno installation guide for more information.
Connect the three-pin temperature sensor cable to the three-pin port on the Eddy Current
Brake driver module.
Note: Make these connections for both Eddy Current Brake driver modules for 4WD dynos.
Connect the five-pin load cell cable to the five-pin port on the Eddy Current Brake driver
module.
Note: Make these connections for both Eddy Current Brake driver modules for 4WD dynos.
Set the ID switch on the Eddy Current Brake driver module to 0 for 2WD dynos.
For 4WD dynos, set the Eddy Current Brake driver module ID switch on the
stationary dyno to 0 and set the ID switch on the moveable dyno to 2.
CABLE ROUTING DWRT ECB AFR
Connect the pendant cable to the DynoWare RT module.
Connect the atmospheric cable to the DynoWare RT module.
Connect a primary RPM pick up cable or a secondary pick up cable to the DynoWare RT
module.
Connect the CAN dyno user cable from the Air Fuel Ratio module to the DynoWare RT
module using the CAN adapter cable or the CAN network cable chain.
Connect the CAN adapter cable to the DynoWare RT module.
Connect the CAN control cable from the Eddy Current Brake driver to the DynoWare RT
module using the CAN adapter cable or the CAN network cable chain.
Note: Make these connections for both Eddy Current Brake driver modules for 4WD dynos.
I.D.
B
B
C
CB
CC


