manuals.online logo
Brands
  1. Home
  2. •
  3. Brands
  4. •
  5. Dynojet
  6. •
  7. Motorcycle Accessories
  8. •
  9. Dynojet Power Comander V User manual

Dynojet Power Comander V User manual

11-008 www.powercommander.com 2010-2012 Arctic Cat 450 H1 - PCV - 1
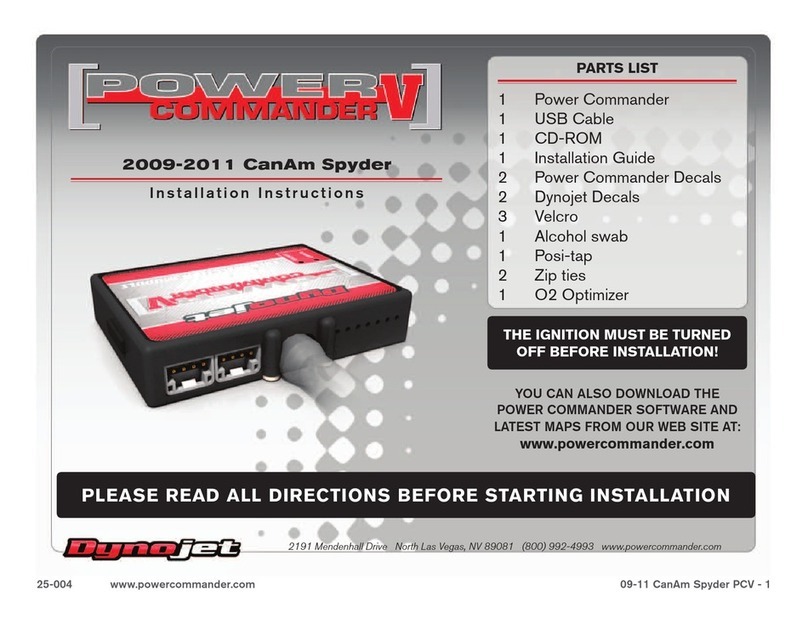
PARTS LIST
1 Power Commander
1 USB Cable
1 Installation Guide
2 Power Commander Decals
2 Dynojet Decals
1 Posi-tap
2 Velcro strips
1 Alcohol swab
THE LATEST POWER COMMANDER
SOFTWARE AND MAP FILES CAN BE
DOWNLOADED FROM OUR WEB SITE AT:
www.powercommander.com
2010-2012 Arctic Cat 450 H1
Installation Instructions
PLEASE READ ALL DIRECTIONS BEFORE STARTING INSTALLATION
THE IGNITION MUST BE TURNED
OFF BEFORE INSTALLATION!
2191 Mendenhall Drive North Las Vegas, NV 89081 (800) 992-4993 www.powercommander.com
11-008 www.powercommander.com 2010-2012 Arctic Cat 450 H1 - PCV - 2
EXPANSION PORTS 1 & 2
Optional Accessories such as
POD-300 unit or Auto-tune kit
IGNITION MODULE V
INPUT ACCESSORY GUIDE
ACCESSORY INPUTS
Wire connections:
To input wires into the PCV first remove the rubber
plug on the backside of the unit and loosen the
screw for the corresponding input. Using a 22-24
gauge wire strip about 10mm from its end. Push the
wire into the hole of the PCV until is stops and then
tighten the screw. Make sure to reinstall the rubber
plug.
NOTE: If you tin the wires with solder it will make
inserting them easier.
USB CONNECTION
Map - (Input 1 or 2) The PCV has the ability to hold
2 different base maps. You can switch on the
fly between these two base maps when you
hook up a switch to the MAP inputs. You can
use any open/close type switch. The polarity
of the wires is not important. When using the
Autotune kit one position will hold a base map
and the other position will let you activate the
learning mode. When the switch is “CLOSED”
Autotune will be activated. (Set to Switch
Input #1 by default.)
Shifter- (Input 1 or 2) These inputs are for use with the
Dynojet quickshifter. Insert the wires from the
Dynojet quickshifter into the SHIFTER inputs.
The polarity of the wires is not important. (Set
to Switch Input #2 by default.)
Speed- If your application has a speed sensor then
you can tap into the signal side of the sensor
and run a wire into this input. This will allow
you to calculate gear position in the Control
Center Software. Once gear position is setup
you can alter your map based on gear position
and setup gear dependent kill times when
using a quickshifter.
Analog- This input is for a 0-5v signal such as
engine temp, boost, etc. Once this input
is established you can alter your fuel curve
based on this input in the control center
software.
Crank- Do NOT connect anything to this port unless
instructed to do so by Dynojet. It is used to
transfer crank trigger data from one module to
another.
ACCESSORY INPUTS
CRANK
ANALOG
SPEED
INPUT 1 (Grnd)
INPUT 1
INPUT 2 (Grnd)
INPUT 2
11-008 www.powercommander.com 2010-2012 Arctic Cat 450 H1 - PCV - 3
1 Remove the seat.
2 Remove the storage cover shown in Figure A.
3 To make the injector more accessible, remove the rubber intake snorkel.
Loosen the clamp for the snorkel through the opening under the storage cover
as shown in Figure B.
4 Using the supplied Velcro, secure the PCV module under the seat at the
location shown in Figure C.
Make sure to clean both surfaces with the alcohol swab before attaching.
5 Route the PCV wiring harness under the seat frame and plastic shroud.
6 Attach the ground wire from the PCV to the negative side of the battery as
shown in Figure C.
FIG.A
FIG.C
FIG.B
Ground wire
Remove
11-008 www.powercommander.com 2010-2012 Arctic Cat 450 H1 - PCV - 4
7 Unplug the stock wiring harness from the fuel injector (Fig. D).
8 Plug the PCV wiring harness in-line of the stock wiring harness and the fuel
injector.
9 Locate the Throttle Position Sensor (TPS) on the
left hand side of the throttle body.
10 Using the supplied posi-tap, attach the GREY wire
from the PCV to the stock GREEN/BLACK wire
from the TPS.
11 Replace the storage cover and seat.
FIG.D
FIG.E
TPS
Posi-tap
Unplug

Other Dynojet Motorcycle Accessories manuals

Dynojet Power commander V User manual

Dynojet

Dynojet Power commander V User manual

Dynojet Power commander V User manual

Dynojet

Dynojet Power commander V User manual

Dynojet Power commander V User manual

Dynojet

Dynojet Power commander V User manual

Dynojet Power Commander 3 User manual

Dynojet

Dynojet Power Commander 3 User manual

Dynojet Power Commander III User manual

Dynojet

Dynojet Power Commander III User manual

Dynojet POWER COMMANDER III User manual

Dynojet

Dynojet POWER COMMANDER III User manual

Dynojet Power commander V User manual

Dynojet

Dynojet Power commander V User manual

Dynojet Power Commander III User manual

Dynojet

Dynojet Power Commander III User manual

Dynojet Power Commander FC User manual

Dynojet

Dynojet Power Commander FC User manual

Dynojet Quickshifter User manual

Dynojet

Dynojet Quickshifter User manual

Dynojet Power Commander V Ex User manual

Dynojet

Dynojet Power Commander V Ex User manual

Dynojet POWER COMMANDER III User manual

Dynojet

Dynojet POWER COMMANDER III User manual

Dynojet Power Commander III USB 109-411 User manual

Dynojet

Dynojet Power Commander III USB 109-411 User manual

Dynojet POWER VISION PV3-22-12 User manual

Dynojet

Dynojet POWER VISION PV3-22-12 User manual

Dynojet Power Commander III User manual

Dynojet

Dynojet Power Commander III User manual

Dynojet 4-126 User manual

Dynojet

Dynojet 4-126 User manual

Dynojet POWER COMMANDER FC User manual

Dynojet

Dynojet POWER COMMANDER FC User manual

Dynojet Power Vision User manual

Dynojet

Dynojet Power Vision User manual

Dynojet Power commander V User manual

Dynojet

Dynojet Power commander V User manual

Dynojet Power commander V User manual

Dynojet

Dynojet Power commander V User manual

Dynojet POWER COMMANDER III User manual

Dynojet

Dynojet POWER COMMANDER III User manual

Dynojet Power commander V User manual

Dynojet

Dynojet Power commander V User manual

Dynojet Power commander V User manual

Dynojet

Dynojet Power commander V User manual

Dynojet Power Commander 3 User manual

Dynojet

Dynojet Power Commander 3 User manual

Popular Motorcycle Accessories manuals by other brands

Sena 50S quick start guide

Sena

Sena 50S quick start guide

kellermann Atto Integral installation manual

kellermann

kellermann Atto Integral installation manual

hepco & becker 6502539 00 01 manual

hepco & becker

hepco & becker 6502539 00 01 manual

SCHUBERTH SRC system 9049100303 quick start guide

SCHUBERTH

SCHUBERTH SRC system 9049100303 quick start guide

hepco & becker 650949 01 01 quick start guide

hepco & becker

hepco & becker 650949 01 01 quick start guide

Two Brothers Racing 005-1200407V installation instructions

Two Brothers Racing

Two Brothers Racing 005-1200407V installation instructions

Sundstrom SR 591 Instructions for use

Sundstrom

Sundstrom SR 591 Instructions for use

rizoma LCJ701 user manual

rizoma

rizoma LCJ701 user manual

Dräger HPS 7000 Basic Instructions for use

Dräger

Dräger HPS 7000 Basic Instructions for use

Sena MOMENTUM INC PRO quick start guide

Sena

Sena MOMENTUM INC PRO quick start guide

Alpinestars Tech-Air 10 System System Operation

Alpinestars

Alpinestars Tech-Air 10 System System Operation

SHERCO 125 ST owner's manual

SHERCO

SHERCO 125 ST owner's manual

hepco & becker SportRack 6706528 00 01 quick start guide

hepco & becker

hepco & becker SportRack 6706528 00 01 quick start guide

Hamron 016574 operating instructions

Hamron

Hamron 016574 operating instructions

SW-Motech ALU-RACK Mounting instruction

SW-Motech

SW-Motech ALU-RACK Mounting instruction

Yoshimura Enduro Series manual

Yoshimura

Yoshimura Enduro Series manual

Crivit 101538 Instructions for use

Crivit

Crivit 101538 Instructions for use

warmer TYD193-137-2D6C Series User instruction

warmer

warmer TYD193-137-2D6C Series User instruction

manuals.online logo
manuals.online logoBrands
  • About & Mission
  • Contact us
  • Privacy Policy
  • Terms and Conditions

Copyright 2025 Manuals.Online. All Rights Reserved.