Emergency On Call Service: Local representative (http://www.eaton.com/moeller/aftersales) or +49 (0) 180 5 223822 (de, en) 1/12
Electric current! Danger to life!
Only skilled or instructed persons may carry out the
following operations.
Switch off the control voltage before fitting/removal!
Lebensgefahr durch elektrischen Strom!
Nur Elektrofachkräfte und elektrotechnisch unterwiesene
Personen dürfen die im Folgenden beschriebenen Arbeiten
ausführen.
Vor Montage/Demontage Steuerspannung abschalten!
Tension électrique dangereuse !
Seules les personnes qualifiées et averties doivent
exécuter les travaux ci-après. Couper la tension de
commande avant le montage/démontage !
¡Corriente eléctrica! ¡Peligro de muerte!
El trabajo a continuación descrito debe ser realizado por
personas cualificadas y advertidas.
¡Antes de montar/desmontar debe desconectarse la
alimentación de mando!
Tensione elettrica: Pericolo di morte!
Solo persone abilitate e qualificate possono eseguire le
operazioni di seguito riportate.
Prima del montaggio/smontaggio, disinserire la tensione
di comando!
Электрический ток! Опасно для жизни!
Только специалисты или проинструктированные
лица могут выполнять следующие операции.
Перед монтажом и демонтажем обязательно
отключить напряжение
de
fr
es
it
ru
Instruction Leaflet
Montageanweisung
Notice d’installation
Instrucciones de montaje
Istruzioni per il montaggio
Инструкция по монтажу
11/10 IL05013003Z
(AWA2528+1251-2355)
EASY223-SWIRE
AMN05006003Z…
(AWB2528+1251-1589…)
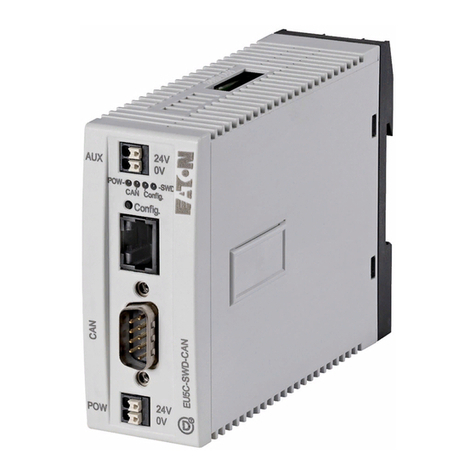
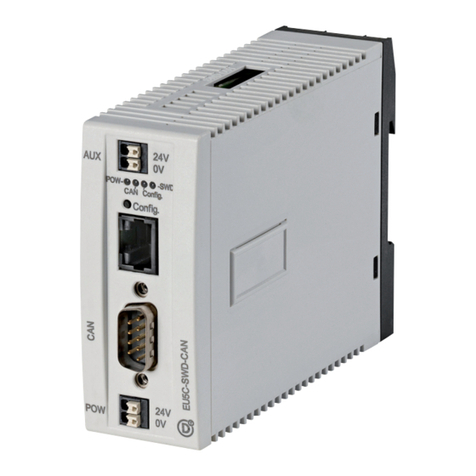
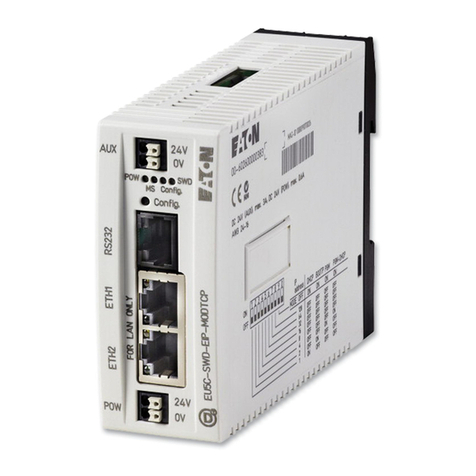
aGateway terminals, 24 V DC for gateway
bAUX terminals, 24 V DC for contactor coils
cOut socket for SmartWire connection cable 6-pole
dDIP switch operating mode and address coding (see table)
eRJ-45 sockets Bus In and Bus Out, for easyNet/CANopen connection
fConfiguration key Config:
Create the SmartWire setpoint configuration via the configuration key.
Press the Config key until the Ready LED starts flashing quickly (approx. 1 sec.).
Then release the Config key.
gStatus LEDs (from left): Ready, U-AUX, Bus, SmartWire
aBornes de conexión del gateway, 24 V DC para el gateway
bBornes de conexión AUX, 24 V DC para bobinas de contactor
cConector hembra Out para cable de conexión SmartWire de 6 polos
dConmutador DIP para modo operativo y codificación de direcciones (véase la tabla)
eConectores hembra RJ-45 Bus In y Bus Out, para conexión easyNet/CANopen
fTecla de configuración Config:
La tecla de configuración le permite crear la configuración de consigna SmartWire.
Pulse la tecla Config hasta que el LED Ready empiece a parpadear rápidamente
(aprox. 1 seg.). A continuación, suelte la tecla Config.
gLEDs de estado (desde la izquierda): Ready, U-AUX, Bus, SmartWire
aAnschlussklemmen Gateway, 24 V DC für das Gateway
bAnschlussklemmen AUX, 24 V DC für die Schützspulen
cBuchse Out für SmartWire-Verbindungskabel 6-polig
dDIP-Schalter Betriebsart und Adresskodierung (siehe Tabelle)
eRJ-45-Buchsen Bus In und Bus Out, für easyNet-/CANopen-Anschluss
fKonfigurationstaste Config:
Mit der Konfigurationstaste erstellen Sie die SmartWire-Sollkonfiguration.
Drücken Sie die Config-Taste bis die Ready-LED schnell zu blinken beginnt
(ca. 1 sec.) Dann können Sie die Config-Taste loslassen.
gStatus LEDs (von links): Ready, U-AUX, Bus, SmartWire
aMorsetti di collegamento gateway, 24 V DC per il gateway
bMorsetti di collegamento AUX, 24 V DC per le bobine del contattore
cPresa out per cavo di collegamento SmartWire a 6 poli
d
Interruttore DIP Modalità di funzionamento e codificazione indirizzo (vedere tabella)
ePresa RJ-45 bus in e bus out, per collegamento easyNet/CANopen
fTasto di configurazione Config:
Con il tasto di configurazione si attiva la configurazione standard SmartWire.
Premere il tasto Config finché il LED Ready inizia a lampeggiare velocemente
(1 sec. ca.). Quindi si può rilasciare il tasto Config.
gLED di stato (da sinistra): Ready, U-AUX, bus, SmartWire
aBornes passerelle, 24 V DC
bBornes AUX, 24 V DC pour les bobines contacteur
cPrise femelle de sortie pour câble de connexion SmartWire 6 pôles
dSélecteur DIP mode de fonctionnement et codage d’adresses (voir tableau)
e
Prises femelle RJ-45 bus d’entrée et bus de sortie, pour connexion easyNet/CANopen
fBouton de configuration Config :
Pour réaliser la configuration de consigne SmartWire. Appuyer sur le bouton
Config jusqu’au clignotement rapide de la DEL Ready (1 sec. env.).
Relâcher ensuite le bouton.
gDEL d’état (de gauche) : Ready, U-AUX, Bus, SmartWire
aТерминалы обмена данными, 24 В постоянного тока для шлюза
bТерминалы AUX, 24 В постоянного тока для обмоток контактора
cВыходной разъем для соединительного кабеля SmartWire, 6-полюсн.
d
DIP-переключатель рабочих режимов и адресного кодирования (см. табл.)
eРазъемы RJ-45 для входной и выходной шины, для быстрого открытого
соединения easyNet/CANopen
fКлавиша конфигурации Config:
Конфигурация заданной величины SmartWire создается с помощью
клавиши конфигурации. Нажмите клавишу Config и удерживайте ее,
пока светодиод Ready не начнет быстро мигать (примерно 1 с).
Затем отпустите клавишу Config.
gСветодиоды состояния (слева направо): Ready (Готов), U-AUX,
Bus (Шина), SmartWire
es
ru
