Description EB-Therm 200 P
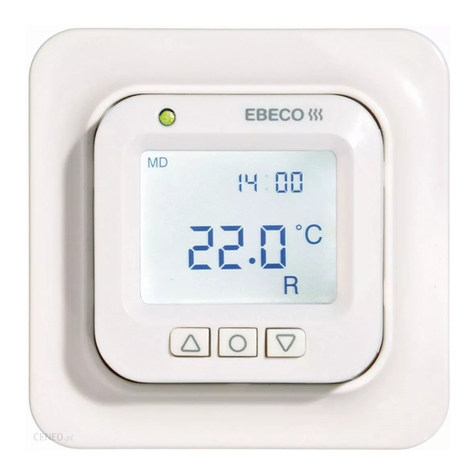
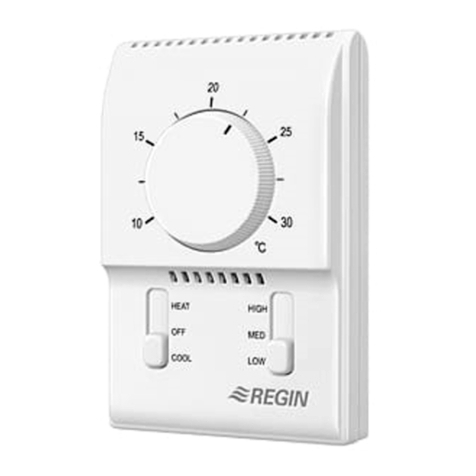
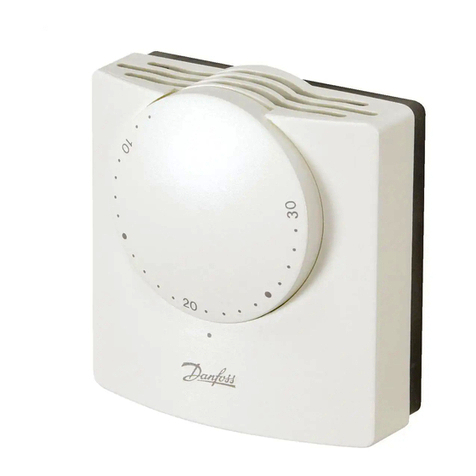
EB-Therm 200 is an electronic thermostat, with built-in energy saving program, developed for optimal regulation of underfloor heating systems. The
thermostat controls the heating in 3ways. You can choose between room thermostat, floor thermostat or room thermostat with overheat protection in the
floor. EB-Therm 200 is supplied with a front cover and frame suitable for the Eljo Trend wall box system. An extra front cover suitable for Elko RS is also
included. EB-Therm is approved for installation in wet rooms, SEMKO-certified and CE-marked. The thermostat is designed for flush or surface mounting.
The front panel is fitted with a double-pole switch (Fig 1a) and a dual-function LED (Fig 1b). The temperature setting can be locked on the underside of the
knob (Fig 1d). EB-Therm 200 also has a programming button (Fig 1c). The thermostat has built-in auto-calibration of temperature sensors and fault
monitoring of floor sensors. If the floor sensor is damaged or goes open-circuit, the thermostat contact opens and the LED starts to flash (twice a second).
The floor sensor can be replaced. If the room sensor becomes faulty, the thermostat must be replaced.
Installation
Flush mounting EB-Therm mounts in a standard 65 mm wall box.The location should be chosen so that the thermostat is protected from direct sunlight
and draughts. The sensor must be installed in a protective tube in the floor. The end of the tube must be sealed. All incoming pipes and ducts must be
sealed so that the temperature sensor is not affected by draughts.
1. Make sure that the wall box is flush with the wall.
2. Remove the setting knob. Loosen the screw.Remove the front cover and the frame.
3. Connect the 230 V AC electric power supply (Fig 2a), the load (Fig 2b) and the sensor cable (Fig 2c). If the sensor cable needs to be extended, heavy-
current cable must be used. The protective earth (PE) (Fig 2d) is connected past the thermostat via a terminal block.
4. Place the thermostat in the wall box and secure it with the screws provided.
5. Refit the frame, front cover and setting knob.
Mounting with extension frame Extension frame E 85 816 68, see Fig 3.
1. Fixthe extension frame to the wall with screws.
2. Install the thermostat as described above.
Wet room installation Use the IP 21 rated gasket E 66 210 06 as shown in Fig 4.
Setting
The EB-Therm 200can provide three distinct functions.
•Room and floor thermostat -The thermostat regulates the room temperature by means of the built-in sensor. We recommend this setting for wood
floors.The external floor sensor operates as a temperature limiter. The setting as shown in Fig 5a of approx. 27°C applies to wooden floors.
•Floor thermostat (preset at the factory) -The thermostat regulates the floor temperature by means of the floor sensor. Setting as shown in Fig
5d (maximal turning to the left).
•Room thermostat -The thermostat regulates the room temperature by means of the built-in sensor. Setting as shown in Fig 5e.(maximal turning to the
right)
In function mode A the external temperature limiter is normally notchanged, but it can be adjusted on the potentiometer, with a small screwdriver. Overheat
protection can be regulated from 15°C (Fig 5b) to 39 °C (Fig 5c). The room temperature is set with the setting knob (Fig 1d). In function modes B and C,
only the temperature setting knob is used to set the floor or room temperature (Fig 1d). Normal setting is between 3 and 4. It may take up to 15 min from
connecting the thermostat until the temperature sensors are calibrated.
After a few days, when the temperature has stabilized, it may be advisable to adjust the thermostat setting. After the final calibration, the room temperature
setting can be locked by moving the two pins under the setting knob.
EB-Therm 200 -programming
EB-Therm 200 has a built-in night setback program which is suitable for the home or office environment. To choose the function, move the jumper as shown
in Figs 5gand 5f. 5g shows the jumper position for the home environment (set at the factory) and 5ffor the office environment.
Temperature setback times for the home (Fig 5g)
Thetemperature is automatically reduced by 5°Cbetween
the following times:
Mon -Fri between 08:30 and 15:00
andMon -Sun between 23:00 and 05:00
Temperature setback times for the office (Fig 5f)
Thetemperature is reduced by 5°C all the time except:
Mon -Fri between 05:00 and 18:00
Setting the clock
Before the temperature setback program can be used, the clock must be set.The time must be set at 17.00 on a Monday.Press and hold the button (Fig 1c)
until the lampstarts to flash (after about three seconds). The time is now set, ie the clock is set to 17.00 on Monday.
Starting / stopping the program
To start the program, press the button once(Fig 1c).The LED starts to flash once a second. This confirms that the program is running. To stop the program,
press the button once(Fig 1c).The LED stops flashing. The running reserve of the thermostat is four hours. This is the time for which the programming is
held in the thermostat in the event of power failure. After a long power outage the LED lights up brightly.This means that the clock must be re-set again and
the program re-activated.
Technical data -EB-Therm 200 EB-Therm 200 with accessories
Voltage 230 V AC±10% 50 Hz
Air temperature range +5 °C to +45 °C
Floor temperature range +5 °C to +45 °C
Temperature limiter +15 °C till +39 °C
Load relay 250 V 12 A 2700 W
Main switch double-pole
Load power factor = 0.3 max
Hysteresis ±0.5 degC
Ambient temperature 0 °C to +60 °C
Housing IP21
Colour Polar white
Indication
230 V supply connected Green LED
Heating cable operating Red LED
Suitable for Eljo Trend, Elko RS, Strömfors and Merten frame systems
EMC certified. Withstands a surge of 2500 V AC.
Art. no. Article Dimensions(mm)
E 85 816 63 EB-Therm 200 81x81x40
E 85 816 68 Extension frame 81x81x18
E 85 816 71 Sensor cable 3 m1)*
66 210 27 Front cover for Eljo Trend*
66 210 30 Front cover for Eljo RS*
66 210 06 IP21 gasket*
66 210 54 Frame for Eljo Trend*
66 210 56 Frame for Strömfors*
14 408 80 Terminal*
1) Max length of sensor cable –50 m, 2x1.5mm2
* Included in the packing


